Beurer BM 85: 4. Preparing for the measurement Press and hold the START/STOP button
4. Preparing for the measurement Press and hold the START/STOP button: Beurer BM 85
Table of contents
- 1. Getting to know your instrument 2. Important notes Signs and symbols
- Notes on use
- Notes on batteries Instructions for repairs and disposal Instructions for storage and maintenance
- 3. Unit description
- Information on the display: USB interface System requirements for the Beurer “HealthManager” PC software.
- 4. Preparing for the measurement Press and hold the START/STOP button
- 5. Measuring blood pressure Attaching the cuff
- Performing the blood pressure measurement Adopting the correct posture
- 6. Evaluating results Cardiac arrhythmia: WHO classification:
- Resting indicator measurement (using HSD diagnostics) GREEN: haemodynamically stable RED: lack of haemodynamic stability
- 7. Displaying and deleting measurements
- Average values Individual measured values Deleting measured values
- 8. Transferring measurements Transfers using the USB interface
- 9. Cleaning and storing the unit 0. Error messages/trouble-shooting 11. Battery
- 12. Technical specifications
- Technical information is subject to change without notification 3. Mains part to allow for updates.
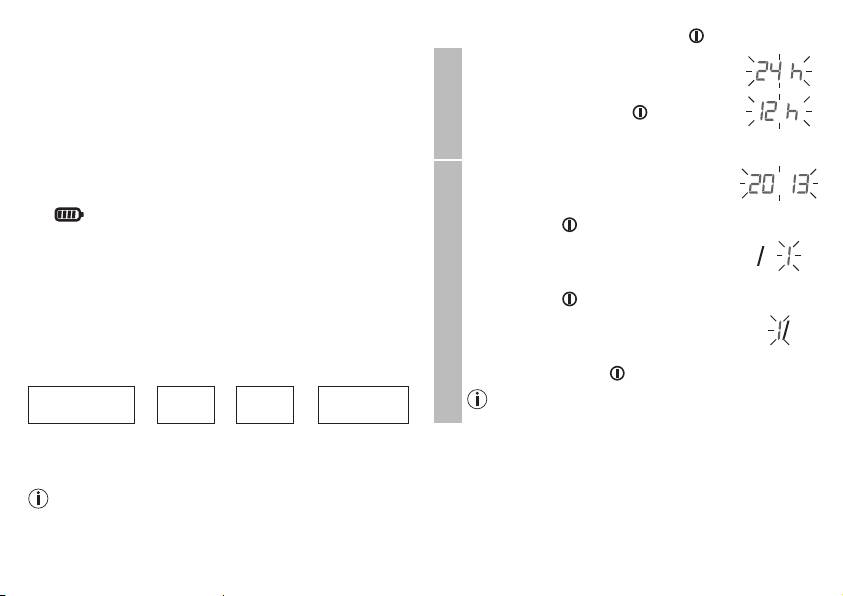
4. Preparing for the measurement
Press and hold the START/STOP button
for 5 seconds.
Completely charge up the blood pressure monitor before ta-
The hour format now flashes on the display.
king your first measurement:
•
Select the desired hour format using the
•
Using a PC:
M1/M2 memory buttons and confirm with
Insert the USB cable into the USB interface on the device
the START/STOP button .
and directly connect it to your PC.
Hour format
•
Using the mains part
Insert the USB cable into the blood pressure monitor and
The year flashes on the display.
connect it to mains supply using the enclosed USB mains
•
Select the year using the M1/M2 memory
part.
buttons and confirm with the START/
The symbol is shown once the device is fully charged.
STOP button
.
Charge the battery if the battery level symbol flashes. If the
The month flashes on the display.
device's battery has been completely drained and you are
•
Select the month using the M1/M2 mem-
unable to switch it on again, you must reset the date, time and
ory buttons and confirm with the START/
®
Bluetooth
settings. In this process, any saved measurements
Date
STOP button .
are retained.
The day flashes on the display.
® settings
Set the hour format, date, time and Bluetooth
•
Select the current day using the M1/M2
The following section describes the functions and settings
memory buttons and confirm with the
available on the blood pressure monitor.
START/STOP button .
®
Bluetooth
If you have set the 12h hour format, the month is
Hour format
➔
Date
➔
Time
➔
settings
displayed before the day.
It is essential to set the correct date and time. Otherwise, you
will not be able to save your measured values correctly with a
date and time and access them again later.
If you press and hold the M1 or M2 memory button, you
can set the values more quickly.
24
