Gorenje tgr65sb6: инструкция
Раздел: Бытовая, кухонная техника, электроника и оборудование
Тип: Накопительный Водонагреватель
Характеристики, спецификации
Инструкция к Накопительному Водонагревателю Gorenje tgr65sb6

FBV™ MkII Series Controller
Advanced User Guide
Using the FBV Shortboard™ MkII or FBV Express™ MkII with
®
Line 6 POD
X3, POD Farm™ 2, GearBox™ & 3rd Party Software

FBV MkII Advanced User Guide - Table of Contents
Table of ConTenTs
Getting Started ........................................................................................1•1
®
FBV MkII with Line 6 Spider
Amplifiers ..................................................................... 1•1
Updating & Registering with Line 6 Monkey ................................................................ 1•1
Line 6 FBV™ Control Application Installation ............................................................ 1•3
®
Connecting FBV MkII to your POD
X3 ....................................................................... 1•5
Connecting FBV MkII to Your Computer ..................................................................... 1•5
FBV Pedal Calibration .................................................................................................... 1•7
Expression Pedal ............................................................................................................. 1•8
®
FBV™ MkII with POD
X3 ....................................................................2•1
Quick Start ..................................................................................................................... 2•1
Calling Up User Presets .................................................................................................. 2•1
Controlling Effects & More ............................................................................................ 2•3
POD X3 System Configuration - Pedal Settings ............................................................ 2•4
Using FBV Pedals with Tone 1 and Tone 2 .................................................................... 2•7
Controlling Dual Tone Presets ....................................................................................... 2•9
The Line 6 FBV Control Application ....................................................3•1
What’s in it for Me? ....................................................................................................... 3•1
Graphical User Interface ................................................................................................ 3•1
Footswitch Control Behaviors ........................................................................................ 3•5
Footswitch LED Behaviors ............................................................................................. 3•6
Pedal Control Behaviors ................................................................................................. 3•7
Opening and Saving FBV Presets ................................................................................... 3•7
Preferences ...................................................................................................................... 3•9
The ‘About Line 6 FBV Control Application’ Dialog ................................................. 3•10
The FBV Shortboard MkII LCD Display ..................................................................... 3•10
FBV™ MkII with Line 6 POD Farm™ 2 .............................................4•1
What is POD Farm 2? ..................................................................................................... 4•1
About USB MIDI Ports & Channels ............................................................................. 4•1
POD Farm 2 Pre-configured MIDI Assignments ............................................................ 4•3

FBV MkII Advanced User Guide - Table of Contents
“POD Farm 2” FBV MkII Control Presets ..................................................................... 4•3
POD Farm 2 Standalone Application - MIDI Input Configuration .............................. 4•7
POD Farm 2 Plug-In - MIDI Input Configuration ......................................................... 4•8
The POD Farm 2 MIDI Assignments View ................................................................. 4•10
MIDI Learn in POD Farm 2 ......................................................................................... 4•10
FBV™ MkII with Line 6 GearBox™ .......................................................5•1
What is GearBox? ........................................................................................................... 5•1
Get Connected ............................................................................................................... 5•1
Customize Your GearBox Control .................................................................................. 5•4
FBV™ MkII with 3rd Party Software .....................................................6•1
About USB MIDI Ports & Channels ............................................................................. 6•1
MIDI Learn Functionality .............................................................................................. 6•3
Manual MIDI Control Assignment ................................................................................ 6•3
®
Ableton Live
- FBV MkII Setup Tutorial ..................................................................... 6•4
®
Apple GarageBand
- FBV MkII Setup Tutorial .......................................................... 6•13
®
Apple Logic
- FBV MkII Setup Tutorial .................................................................... 6•14
Cakewalk SONAR™ - FBV MkII Setup Tutorial ...................................................... 6•18
®
Propellerhead Reason
- FBV MkII Setup Tutorial ..................................................... 6•22
®
Digidesign Pro Tools
LE Transport Control - FBV MkII Setup Tutorial ................... 6•25
®
Steinberg Cubase
- FBV MkII Setup Tutorial ............................................................. 6•28
Reference ..................................................................................................7•1
Questions & Answers ..................................................................................................... 7•1
Troubleshooting .............................................................................................................. 7•2
Online Resources ............................................................................................................ 7•4
FBV, FBV Shortboard, FBV Express, POD, POD Farm, TonePort, POD Studio, Spider, Spider Valve, Line
6 Monkey, GuitarPort and GearBox are trademarks of Line 6, Inc. All other product names, trademarks, and
artists’ names are the property of their respective owners, which are in no way associated or affiliated with Line 6.
Copyright © 2010 Line 6, Inc.

FBV MkII Advanced User Guide: Getting Started
GeTTinG sTarTed
TM
TM
Congratulations if you’ve obtained a new FBV Shortboard
MkII or FBV Express
MkII since
you are now equipped for remote, hands-free access to numerous Line 6 products, as well as 3rd party
MIDI software! This document will walk you through setting up and using your FBV™ MkII Series
®
®
Controller specifically with POD
X3, POD
X3 Pro, Line 6 POD Farm™ 2 & GearBox™ software,
and 3rd party MIDI & DAW software that responds to MIDI control.
To get the most out of POD X3, POD Farm 2, or MIDI/DAW software, and best understand just what
those FBV buttons and pedals are accessing, it is recommended you first read through the very helpful
info in these products’ User Manuals. Another handy resource is the FBV MkII Series Controller
User Manual, which comes in the box with your FBV MkII unit. Or, you can download all current
documentation free from the Line 6 Support site at http://line6.com/support/manuals/.
®
FBV MkII with Line 6 Spider
Amplifiers
Line 6 FBV MkII Series Controllers are designed to work with many Line 6 Amplifiers. In particular,
®
the Line 6 Spider
IV and Spider Valve™ MkII Amplifiers offer remote control of many exciting
features such as Quick Loop, user preset navigation, effects parameter manipulation and more! Using
®
FBV MkII Controllers with these amps is covered in the Spider
IV and Spider Valve™ MkII Advanced
Guides, available for download free from the Line 6 Support site at http://line6.com/support/manuals/.
Updating & Registering with Line 6 Monkey
OK, so maybe you already read about doing this updating & registration stuff for your FBV MkII and
other Line 6 products, but in case you were too excited with your new gear to get to that yet, now is the
time to do it! It’s a simple process really, just run Line 6 Monkey™ on your computer with an Internet
connection. Line 6 Monkey is the intelligent updater software utility that is typically installed with
other Line 6 software titles. If you don’t already have it installed, you can get free from the Line 6 site
at www.line6.com/monkey/.
Once you’ve installed the Line 6 Monkey software, connect your FBV MkII to your computer’s USB
port (and please disconnect any other Line 6 USB devices for now since we only want Line 6 Monkey
to check your FBV). Be sure to exit the Line 6 FBV Control application as well as any MIDI/DAW
applications that might be running. With your computer’s Internet connection active, follow these
steps to launch Line 6 Monkey.
®
• On Mac
, go to Applications > Line 6 > Line 6 Monkey
®
• On Windows
, go to the Start button menu > Programs > Line 6 > Tools > Line 6 Monkey
Login Account
You’ll need to Login so that Line 6 Monkey can communicate with the online Line 6 Server to provide
the specific product updates for your gear. It’s just a few clicks, and it’s free!
1•1

FBV MkII Advanced User Guide: Getting Started
• If you have a Line 6 account, type in your User Name and Password at the top of the Monkey
dialog.
• If you have not yet created an account, click the New User button and you’ll be walked right
through the steps.
Register Your FBV
Registration of your Line 6 gear may be required for some updates and product authorizations. It is also
important because it ensures that you’re dialed in for warranty service and makes it possible for us to
contact you if new software versions or other cool enhancements are offered - cutting edge technology
and such!
If you have not already done so, you’ll be prompted to register your connected FBV MkII device. Just
click that Register button and fill in the blanks on the web page. This page will list all your registered
Line 6 gear in one place.
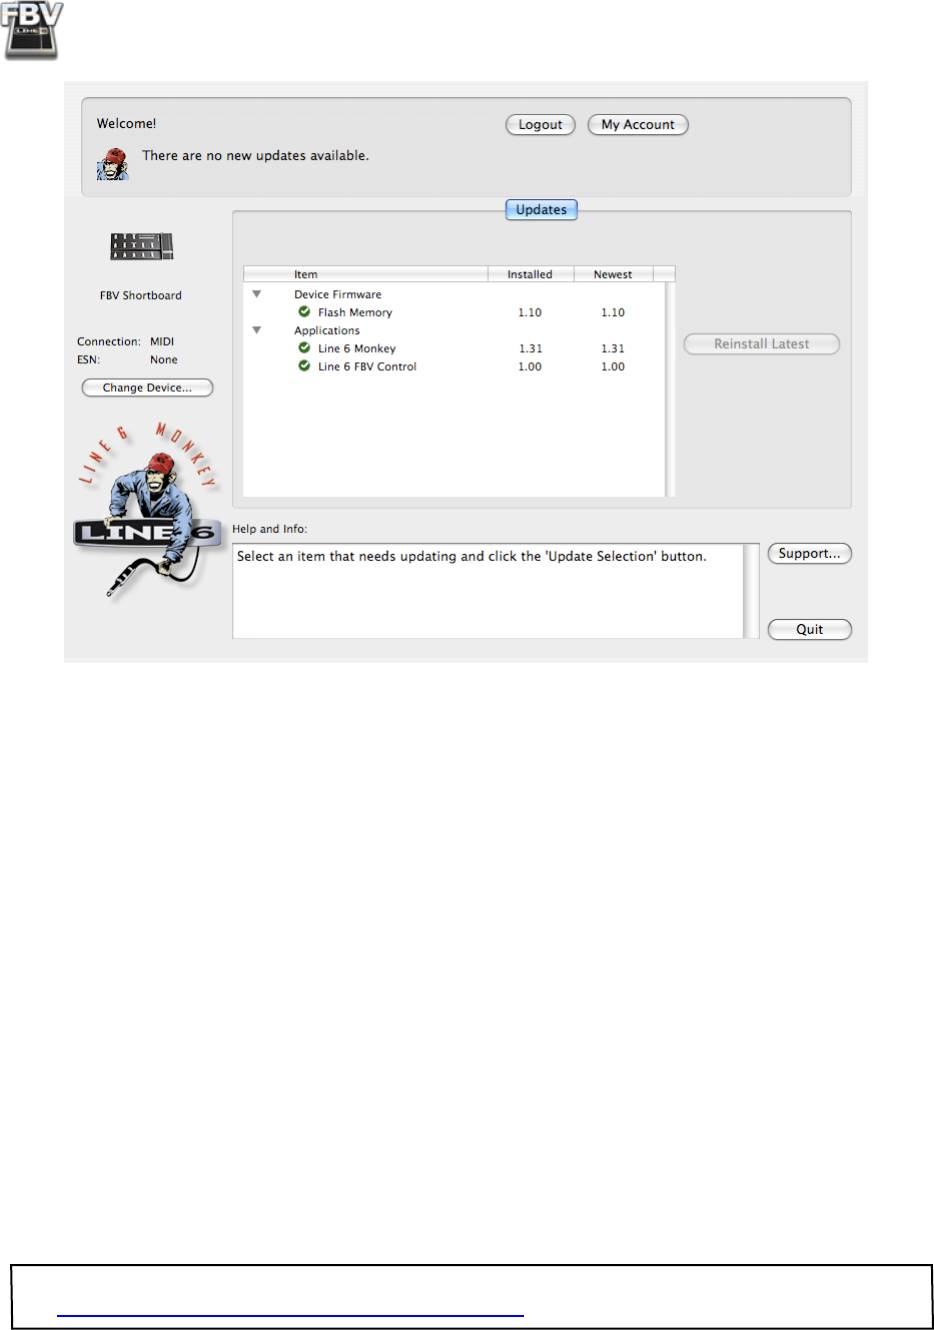
Grab those Updates
Once Line 6 Monkey launches, it will automatically detect your connected FBV MkII device. Within
the Updates screen in Line 6 Monkey, if you see any items indicated with an exclamation symbol
then you should select the item in the list, click on the Update Selection button, and let the little
Monkey fellow walk you through the installation steps. Items in the Updates screen indicated with
a green check , are up-to-date and need no attention. If you plan on connecting your FBV to your
computer, then you’ll definitely want to have Monkey grab the Line 6 FBV Control application for you
here too (more on this application in the next section).
Note that the columns on the right tell you the version numbers for all currently installed items and
available updates. Click on any item in the Updates list and refer to its description in the Help and
Info pane below. Also, at the left you’ll see your connected FBV device shown, along with its unique
ESN (Electronic Serial Number), should you ever need to reference this ID number for registration or
warranty service.
Running Line 6 Monkey is the easiest way to stay current on the latest Line 6 software and hardware
updates!
1•2
FBV MkII Advanced User Guide: Getting Started
Flash Memory Update
If Monkey tells you there is a newer Flash Memory version available for your FBV, then it is important
that you install it for the best performance and product compatibility. Just follow the steps as Monkey
instructs, including these important tasks:
• Exit any Line 6 software or 3rd party MIDI/DAW applications that might be using your FBV
MkII device.
• Be sure not to press the buttons, move the pedal, or change any cable connections on your FBV
device until the update process completes.
• Once Line 6 Monkey tells you the update was successfully completed, exit Line 6 Monkey and
launch it again to see if any additional updates might still be available.
Line 6 FBV™ Control Application Installation
®
®
If you plan on using your FBV MkII to control software on your Mac
or Windows
computer, then
you’ll also want to install the latest Line 6 FBV Control application. This free software provides you
with the ability to create, load, edit and store FBV presets - full sets of customized MIDI controller
configurations - all in an easy-to-use application!
Note: We’ll cover obtaining and installing the Line 6 FBV Control application here in this section. Please
see “The Line 6 FBV Control Application” on page 3•1 for details on using the software!
1•3

FBV MkII Advanced User Guide: Getting Started
System Requirements
We recommend that you read the separate, Line 6 FBV Control Release Notes for the full, detailed
System Requirements, as well as current info on compatibility with other hardware and software. This
document can be found within the Line 6 Support Community, or on the FBV MkII Online Help
page.
Line 6 FBV Control supports the following computer operating systems:
®
• Windows
XP Home or Professional, with Service Pack 3, 32 and 64 bit versions
®
• Windows
Vista
Home, Business or Ultimate Edition, with Service Pack 2, 32 and 64 bit versions
®
• Windows
7 Home, Professional or Ultimate Edition, 32 and 64 bit versions
®
®
• Mac OS
X 10.4 (Tiger
)
®
®
• Mac OS
X 10.5 (Leopard
)
®
®
• Mac OS
X 10.6 (Snow Leopard
)
Note to Windows® 7 & Windows Vista® users: It is not recommended that you exit Windows® using the
“Sleep” mode while you have the Line 6 FBV Control application running, or with your FBV connected
to your USB port. Due to the inherent behavior of the USB Class Compliant driver, some USB devices
(such as FBV) will not properly initialize when resuming from Sleep mode.
If you already have the Line 6 Monkey software utility installed on your computer
®
®
Connect your Line 6 FBV MkII device to your Mac
or Windows
computer’s USB port and launch
Line 6 Monkey. This will scan your system and point you to the latest Line 6 FBV Control installer
available for you (see previous section). Select the Line 6 FBV Control application within Line 6
Monkey and it will walk you through downloading the software and launching the installer. Simply
follow the steps in the installer.
If you do not have the Line 6 Monkey software utility installed on your computer
You can get the latest Line 6 FBV Control application installer for free by going to www.line6.com/
software/. Be sure to choose your specific FBV MkII device from the Product selector, “Line 6 FBV
®
®
Control” from the Software selector, and the specific Mac
or Windows
operating system version
your computer uses from the OS selector. Once downloaded, just run the installer, following the steps
along the way.
The Line 6 FBV Control installer will also install the latest Line 6 Monkey version - it is not necessary
for you to download these items separately. Note that there is no special USB device driver software
®
needed to be installed for your FBV MkII hardware - just connect the USB cable to your Mac
or
®
Windows
computer and your operating system will automatically detect it as a new USB MIDI device.
Line 6 Software Compatibility
POD Farm 2 standalone application and POD Farm 2 Plug-In both offer extensive MIDI control
capabilities, and your FBV MkII is the perfect USB MIDI controller device to use with them (see
“FBV™ MkII with Line 6 POD Farm™ 2” on page 4•1)! The earlier POD Farm™ 1.10 version does not
provide support for external MIDI control. If you want to use your FBV MkII hardware to control the
Line 6 GearBox software, you’ll want to install the GearBox 3.7 version (or later) for best performance
(see “FBV™ MkII with Line 6 GearBox™” on page 5•1). To get the latest GearBox version, connect your
1•4
FBV MkII Advanced User Guide: Getting Started
Line 6 USB audio device you’ll be using with GearBox (TonePort™, POD Studio™ or GuitarPort™
hardware) and launch Line 6 Monkey, or go directly to the Line 6 Software Downloads page and
choose “GearBox” to access the latest installer.
To Uninstall Line 6 FBV Control
Should you ever need to uninstall the application, just follow these steps:
®
• Mac
- Open the Finder and browse to the Applications > Line 6 directory. Just drag the Line 6
FBV Control application to your Trash to remove it.
®
• Windows
- Go to Start > Programs > Line 6 > Tools and select the Line 6 Uninstaller utility.
This handy application walks you through removing several Line 6 applications and device
drivers. You’ll have the option to choose to Line 6 FBV Control in the process.
®
Connecting FBV MkII to your POD
X3
Connecting your FBV Shortboard MkII or FBV Express MkII to a POD X3 or POD X3 Pro device is
accomplished with one simple cable connection.
• First, power OFF your POD X3.
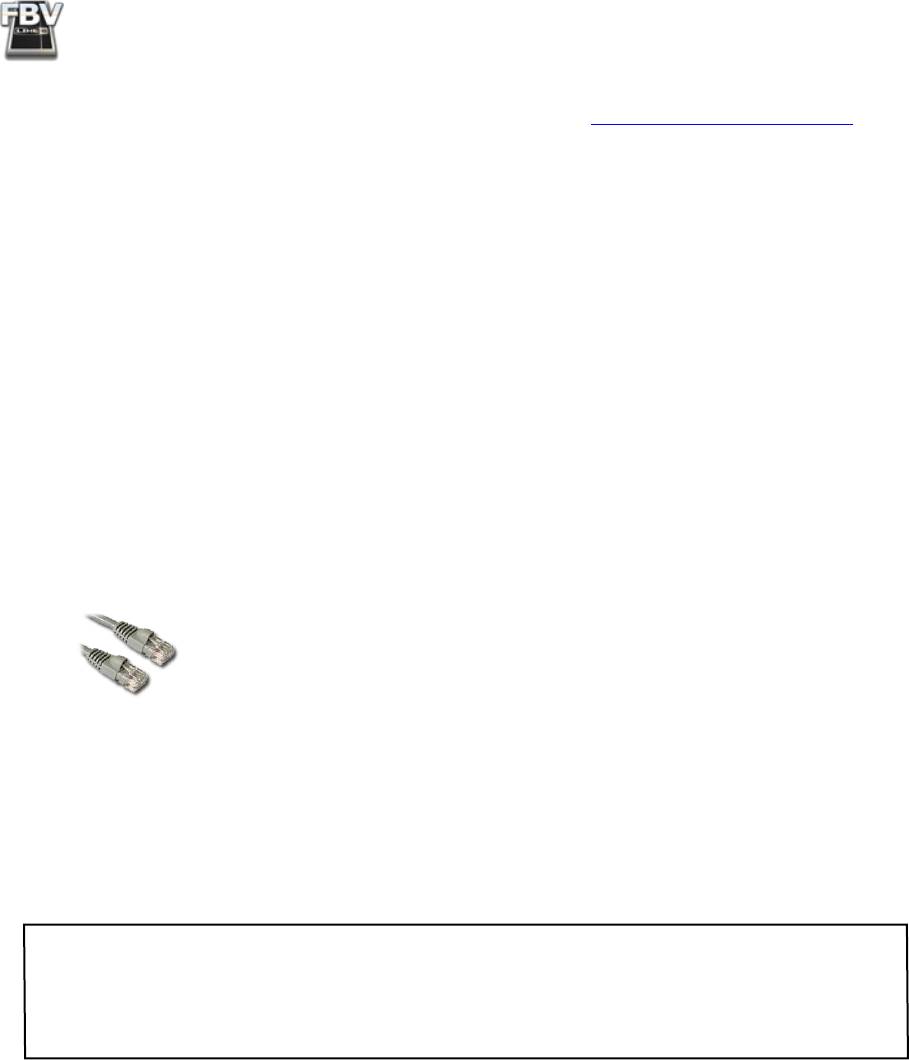
Your FBV unit comes with a long cable that has “RJ-45” connectors on each end.
Note that this cable is indeed a standard “Category 5” computer network cable. So,
in case you lost yours, or your drummer dropped his cymbal on it, you can simply
run down to any electronics or computer store and ask for a cable of this type.
• Plug one end of this cable into the TO AMP jack on the back of the FBV unit, and the other
end into the FBV PEDAL jack on your POD X3.
• Power on your POD X3.
Power is supplied to your FBV MkII unit via this same cable connection. You should now see the FBV
display show a patch name and/or indicator lights illuminated.
Note: You do not want to connect a USB cable to your FBV MkII device when using the RJ-45
cable connection described above, since doing so places FBV in “USB Mode” to communicate with a
computer. You can, however, connect POD X3 to your computer via USB cable (from your POD X3
to your computer’s USB 2.0 port) if you want to use POD X3 as your USB audio device, or with the
Line 6 GearBox software, while simultaneously controlling POD X3 with your FBV!
Connecting FBV MkII to Your Computer
To utilize your FBV Shortboard MkII or FBV Express MkII to control your software, simply connect a
®
standard computer USB cable from the FBV unit’s USB jack to any USB 1.1 or 2.0 port on your Mac
®
or Windows
computer. Power is supplied to your FBV MkII unit via this same USB cable connection.
You should see the FBV’s LCD display or LED lights illuminate to show it is powered up.
The first time you connect your FBV Shortboard/Express MkII device to your computer’s USB port,
®
®
your Mac
or Windows
operating system needs to install a device driver to allow your FBV to work
®
®
®
with other hardware and software on your computer. On a Mac
, Windows
7 or Windows Vista
computer, this process is done automatically, and you can skip to the next section to put your FBV to
use.
1•5
FBV MkII Advanced User Guide: Getting Started
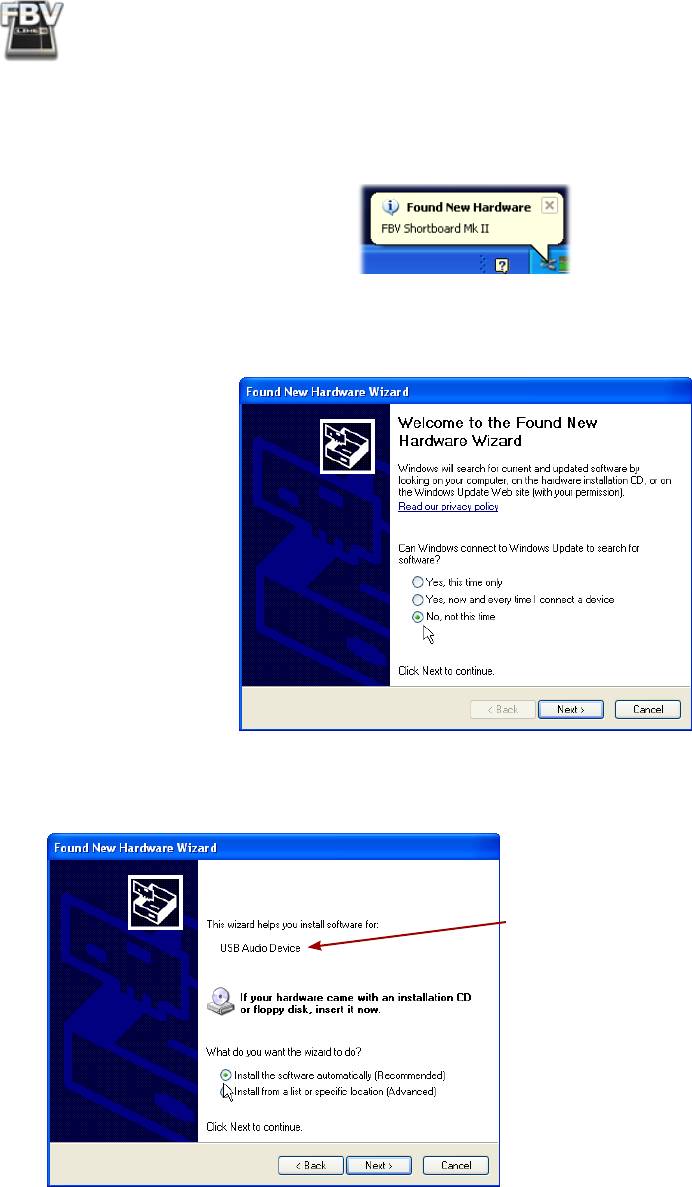
®
On Windows
XP, you may need to click through a few dialogs to install the device driver. Once you
®
connect the USB cable, you should see Windows
XP detect the new device at the bottom right of
your screen:
®
Next, the Windows
Hardware Wizard will launch. Select “No, not this time” then click Next.
In the following screen, select the “Install automatically” option and click Next.
Note that XP recognizes and installs FBV
as a “USB Audio Device”. This is normal
behavior for the Windows® XP USB
Class Compliant Driver.
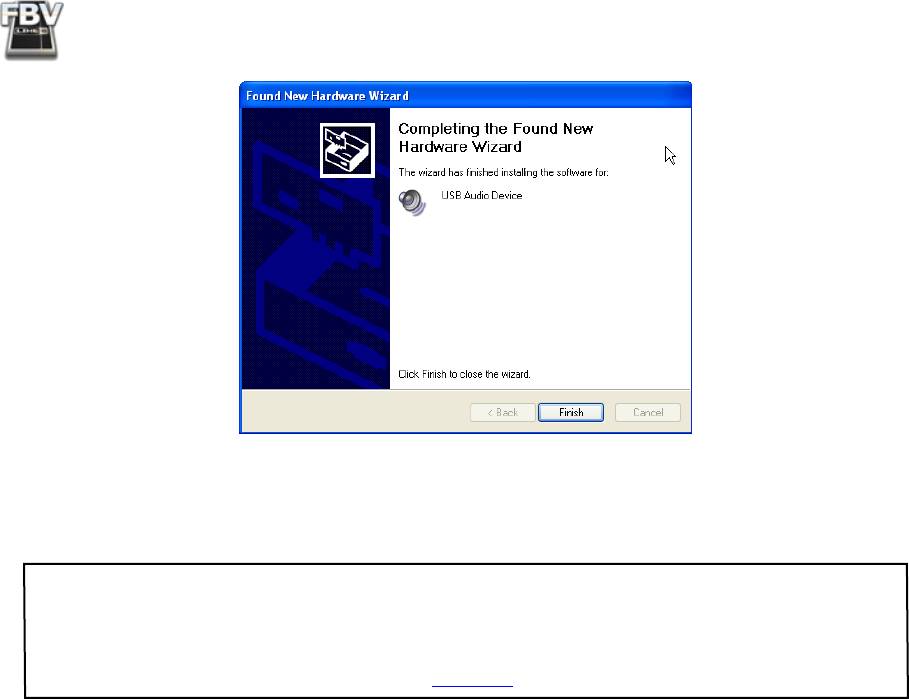
Next you should see the final dialog telling the installation is complete - click Finish. Your FBV is now
ready to rock!
1•6
FBV MkII Advanced User Guide: Getting Started
FBV Pedal Calibration
Note: The following calibration steps are not necessary if your FBV MkII device has the 1.00 Flash
Memory version. However, any Flash Memory update past version 1.00 will require that you calibrate
your FBV pedal for the best performance. To check your FBV MkII current Flash Memory version,
or to download & install any newer Flash Memory version that might be available, please use Line 6
Monkey, following the Update instructions on page 1•2.
For the best performance of the on-board pedal of your FBV Shortboard or Express MkII device, it is
recommended that you perform the following steps to “calibrate” the pedal before putting it to use with
your computer or your Line 6 Amp or POD.
FBV Shortboard MkII Calibration Steps
• Start with your FBV device not connected to any USB port or Line 6 device (and, therefore,
powered “off”).
• Press and hold down the “D” labeled footswitch while you “power on” your FBV (by connecting
to your computer’s USB port or Line 6 device with which you plan on using your FBV). The
LCD will read “CALIBRATE PEDAL” until the D footswitch is released, at which point it will
read “1 PEDAL TOE”.
• Press the on-board pedal forward fully and hold down pedal’s Toe Switch until the LCD changes
to “2 PEDAL MIN”. This should occur instantly.
• Move the pedal to the “heel” (minimum) position. While holding the pedal in the heel position,
press & release the D button. The LCD will change to “3 PEDAL MAX”.
• Move the pedal to the toe (maximum) position, without clicking the Toe Switch. Allow the
pedal to rest in the toe position and press & release the D button. The LCD will change to
“CHECK VALUE 127”.
• Move the internal pedal and verify that the LCD reads “CHECK VALUE 0” in the minimum
position and “CHECK VALUE 127” in the maximum position.
• If you happen to get different values that “0” or “127”, then try repeating these calibration steps.
If your values are correct, then calibration was successful - power off your FBV and power it back
on and you are ready to go!
1•7

FBV MkII Advanced User Guide: Getting Started
FBV Express MkII Calibration Steps
• Start with your FBV device not connected to any USB port or Line 6 device (and, therefore,
powered “off”).
• Press and hold down the “D” labeled footswitch while you “power on” your FBV (by connecting
to your computer’s USB port, or Line 6 device with which you plan on using your FBV). Upon
release of the D footswitch, the FBV Tuner’s numerical display will read “1”.
• Press the on-board pedal forward fully and hold down pedal’s Toe Switch until the Tuner display
changes to “2”. This should occur instantly.
• While holding the pedal in the “heel” (minimum) position, press & release the D footswitch.
The Tuner display will change to “3”.
• Move the pedal to the toe (maximum) position, without clicking the Toe Switch. Allow the
pedal to rest in the toe position (maximum) and press & release the D button. The 7 LEDs above
the Tuner’s numerical display will light.
• Move the pedal and verify that the LEDs above the Tuner’s numerical display sequentially turn
off as the pedal moves to the minimum position, and all sequentially light up when the pedal is
moved to the maximum position.
• If your 7 LEDs do not light up as described, then try repeating these calibration steps. If your
LEDs light up correctly, then calibration was successful - power off your FBV and power it back
on and you are ready to go!
Expression Pedal
FBV Shortboard MkII owners can optionally add a 2nd pedal for even greater control! The Line
6 EX-1 Expression Pedal is designed to work with the FBV Shortboard MkII plugging it into the
Expression Pedal jack on the back of the chassis. The EX-1 can be purchased directly on the Line 6
Online Store, or from most Line 6 dealers.
Note: An Expression pedal does not require any calibration steps.
With the above steps complete you should now be ready to dive into the following chapters with
your Line 6 FBV™ MkII Series Controller! Please see the following chapter that covers the
specific gear you want to control with your FBV.
1•8

