Dell PowerEdge T100: Obtaining Technical Assistance Installation and Configuration Unpack the System Connect the Keyboard, Mouse, and Monitor
Obtaining Technical Assistance Installation and Configuration Unpack the System Connect the Keyboard, Mouse, and Monitor: Dell PowerEdge T100
Table of contents
- Notes, Notices, and Cautions
- System Features
- Supported Operating Systems
- Other Information You May Need
- Obtaining Technical Assistance Installation and Configuration Unpack the System Connect the Keyboard, Mouse, and Monitor
- Connect the System to Power Turn on the System and Monitor
- Complete the 0perating System Setup Technical Specifications Processor Expansion Bus
- Memory (continued) Drives Connectors
- Connectors (continued) Video Power Physical
- Environmental
Obtaining Technical Assistance
If you do not understand a procedure in this guide or if the system does
not perform as expected, see your Hardware Owner’s Manual.
Dell Enterprise Training and Certification is available; see dell.com/training
for more information. This service may not be offered in all locations.
Installation and Configuration
CAUTION: Before you begin this procedure, read and follow the safety
instructions that came with the system.
This section describes the steps to set up your system for the first time.
Unpack the System
Upack your system and identify each item. Keep all shipping materials in case
you need them later.
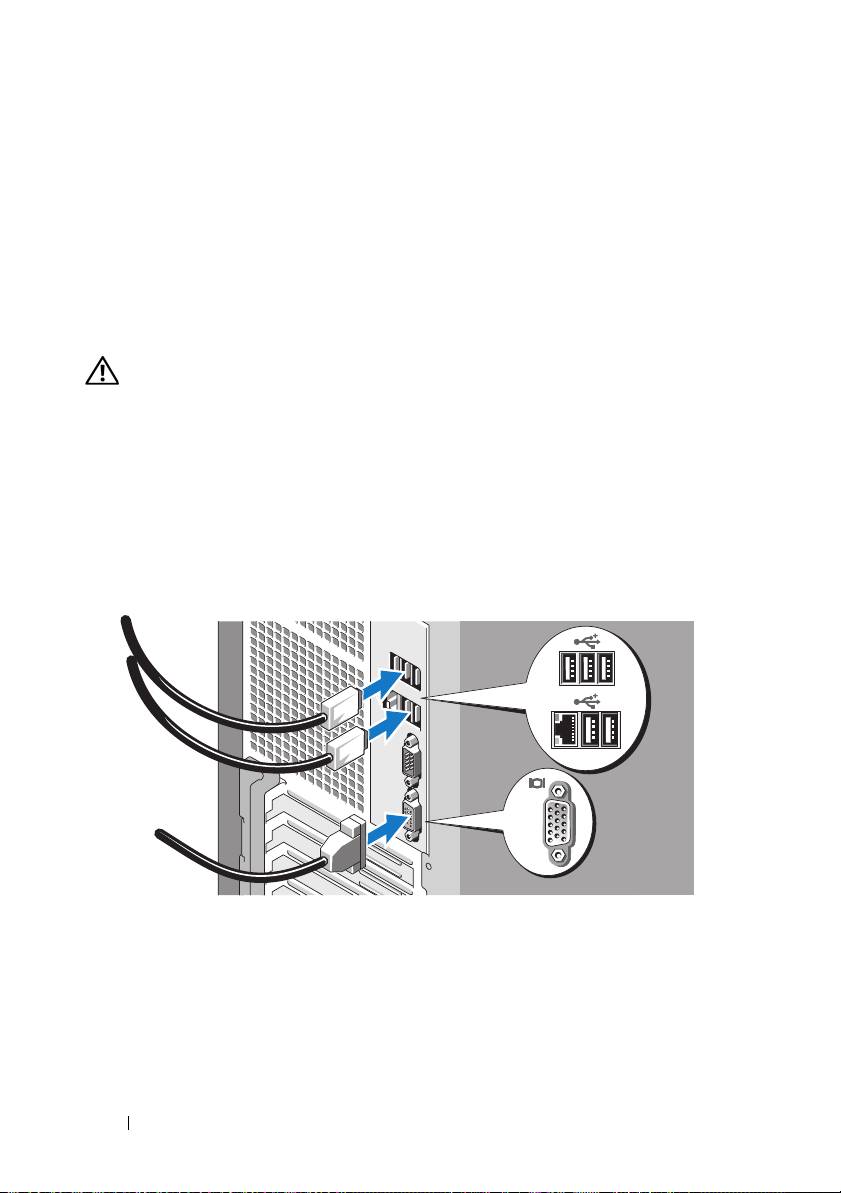
Connect the Keyboard, Mouse, and Monitor
Connect the keyboard, mouse, and monitor (optional).
The connectors on the back of your system have icons indicating which
cable to plug into each connector. Be sure to tighten the screws (if any)
on the monitor's cable connector.
6 Getting Started With Your System
