Dell PowerEdge RAID Controller 6i: Figure 3. Installing the BBU and Battery Cable
Figure 3. Installing the BBU and Battery Cable: Dell PowerEdge RAID Controller 6i
Table of contents
- Notes, Notices, and Cautions
- Removing and Installing the Battery and Battery Cable on PERC Controllers Important Safety Information
- Removing the Transportable Battery Backup Unit (TBBU) from a PERC x/E Adapter Figure 1. PERC x/E Adapter Dirty Cache LED Location
- Figure 2. Removing the BBU
- Installing the New BBU and Battery Cable
- Figure 3. Installing the BBU and Battery Cable
- Installing the TBBU on a PERC x/E Adapter
- Figure 4. Installing a Dual In-line Memory Module
- Removing the DIMM from a PERC x/i Controller
- Disconnecting the BBU from a PERC x/i Controller
- Installing the DIMM and BBU to a PERC x/i controller
3
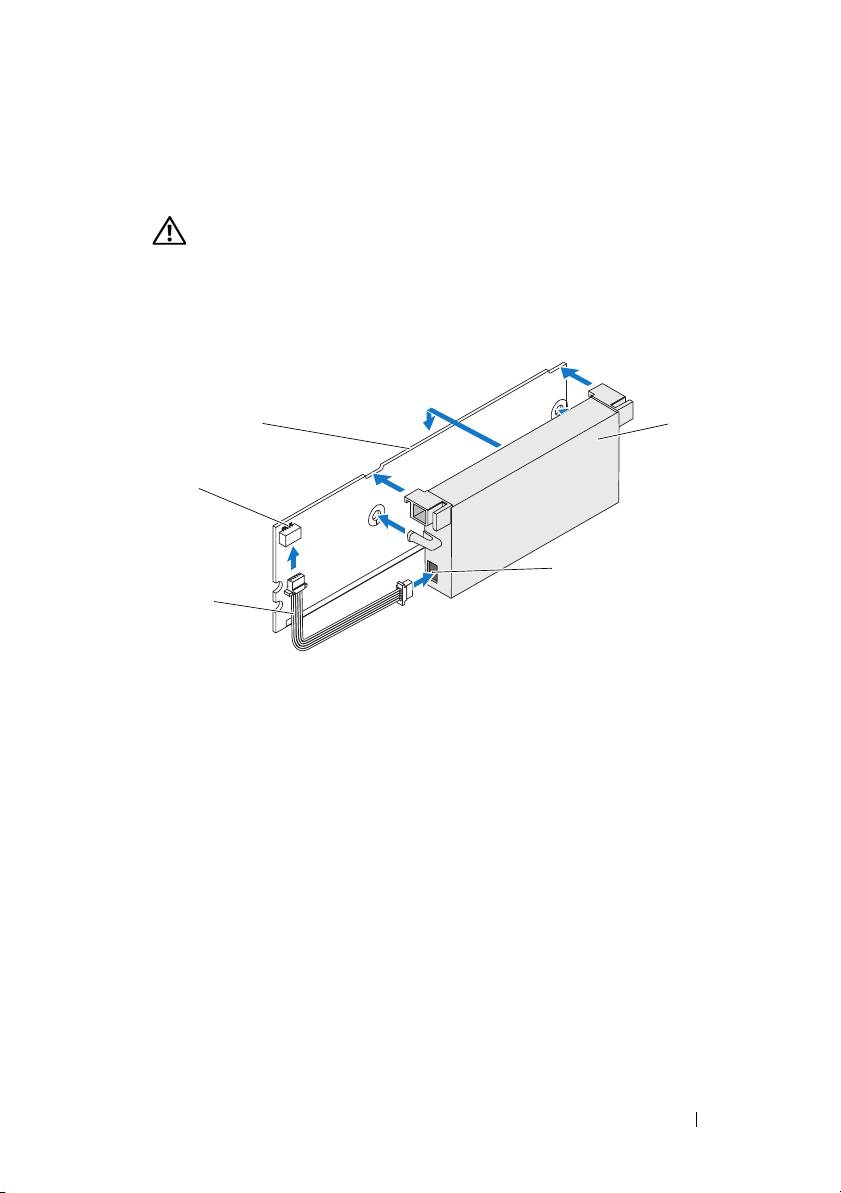
Place the top edge of the battery over the top edge of the memory module
so that the arms on the side of the battery fit into their sockets on the
memory module. See Figure 3.
CAUTION: Electrostatic discharge can damage sensitive components.
Always use proper antistatic protection when handling components.
Touching components without proper grounding can damage the equipment.
Figure 3. Installing the BBU and Battery Cable
1
4
2
5
3
1 memory module 2 connector on the memory module 3 battery cable
4 battery 5 connector on the battery
4
Place the PERC
x
/E Adapter on a flat, clean, and static–free surface.
5
Mount the memory module on the controller memory socket like a
standard DIMM. See the section "Installing the TBBU on a PERC x/E
Adapter" for more information.
The memory module is mounted flush with the board so that the memory
module is parallel to the board when installed.
6
Press the memory module firmly into the memory socket. As you press the
memory module into the socket, the BBU clicks into place, indicating that
the controller is firmly seated in the socket, and the arms on the socket fit
into the notches to hold the memory module securely.
Removing and Installing the Battery and Battery Cable on PERC Controllers 7
