Dell PowerEdge 1900: Connecting the Keyboard, Mouse, and Monitor Connecting the Power
Connecting the Keyboard, Mouse, and Monitor Connecting the Power: Dell PowerEdge 1900
Table of contents
- Notes, Notices, and Cautions
- System Features
- Supported Operating Systems
- Other Information You May Need Obtaining Technical Assistance Installation and Configuration
- Unpacking the System Installing the Stabilizer Feet
- Connecting the Keyboard, Mouse, and Monitor Connecting the Power
- Turning on the System Installing the Bezel
- Complete the 0perating System Setup Technical Specifications Processor Expansion Bus Memory Drives
- Drives (continued) Connectors Video Power
- Physical Environmental
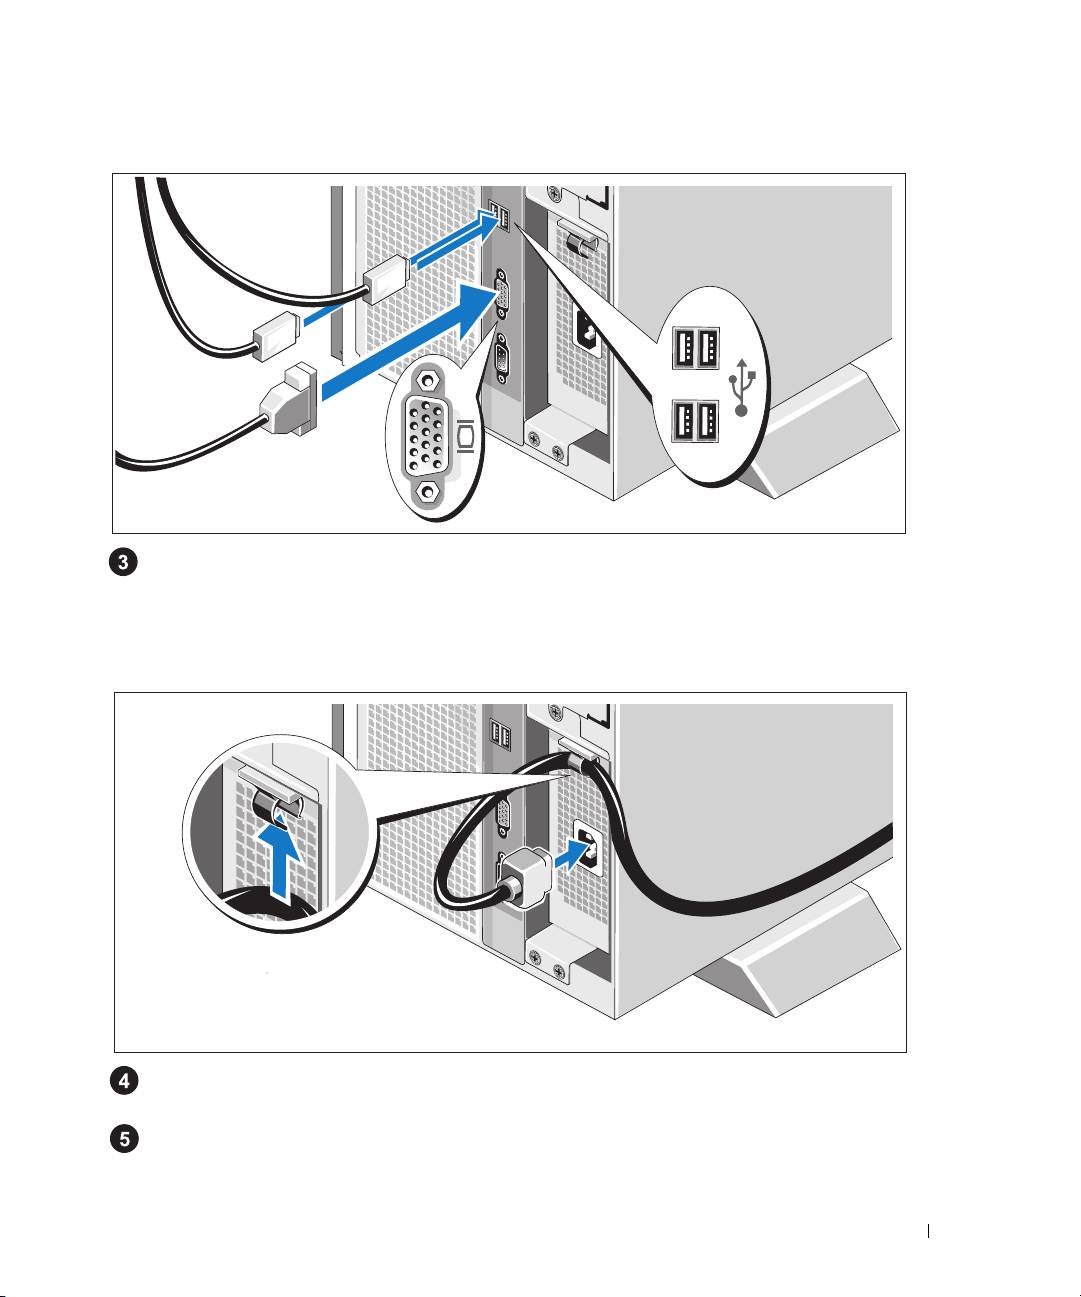
Connecting the Keyboard, Mouse, and Monitor
Connect the keyboard, mouse, and monitor (optional).
The connectors on the back of your system have icons indicating which cable to plug into each
connector. Be sure to tighten the screws (if any) on the monitor's cable connector.
Connecting the Power
Attach the system’s power cable to the cable clasp at the top of the power supply and connect it
to the system.
Plug the other end of the cable into a grounded electrical outlet or a separate power source
such as an uninterrupted power supply (UPS) or a power distribution unit (PDU).
Getting Started With Your System 7
Top 10 manuals
100.00
NZXT HALE90 1000W99.99
Samsung SM-R38099.97
AEG BSB 18C99.97
Dell 2700W99.97
Smeg KSEC70X99.96
Beurer HDE 4099.96
Pyramida KH 50 v.299.96
MSI CSM-H81M-P3299.96
AEG HR 562799.95
Melissa 640-048