Dell PowerEdge C5230: Connecting the Power Cables Figure 1-14. Connecting Power Cables Turning On the System Complete the Operating System Setup
Connecting the Power Cables Figure 1-14. Connecting Power Cables Turning On the System Complete the Operating System Setup: Dell PowerEdge C5230
Table of contents
- Notes, Cautions, and Warnings
- CAUTION: Restricted Access Location Installation and Configuration Unpacking the System Installing the Tool-Less Rail Solution
- Figure 1-1. Unlocking the Rail Latches Figure 1-2. Aligning the Rails on the Rack
- Installing the System Empting the System Chassis Figure 1-3. Unplugging the Power Cable from the Power Supply Unit Figure 1-4. Releasing the Power Supply Unit Handle
- Figure 1-5. Removing the Power Supply Unit Figure 1-6. Removing the Sled
- Figure 1-7. Securing the Chassis on the Rails
- Populating the System Figure 1-8. Installing the Power Supply Unit Figure 1-9. Securing the Power Supply Unit Handle
- Figure 1-10. Connecting the Power Cable to the Power Supply Unit Figure 1-11. Locating the Power Supply Unit Sockets
- Figure 1-12. Installing the Sled Connecting the Keyboard, Mouse, and Monitor Figure 1-13. Connecting Perhipherals
- Connecting the Power Cables Figure 1-14. Connecting Power Cables Turning On the System Complete the Operating System Setup
- Other Information You May Need NOM Information (Mexico Only)
- Technical Specifications Processor (Per System Board) Memory (Per System Board) Drives (Per System Board) Connectors (Per System Board) Video
- Power Heat Dissipation Physical
- Environmental
- Environmental (continued) Acoustics
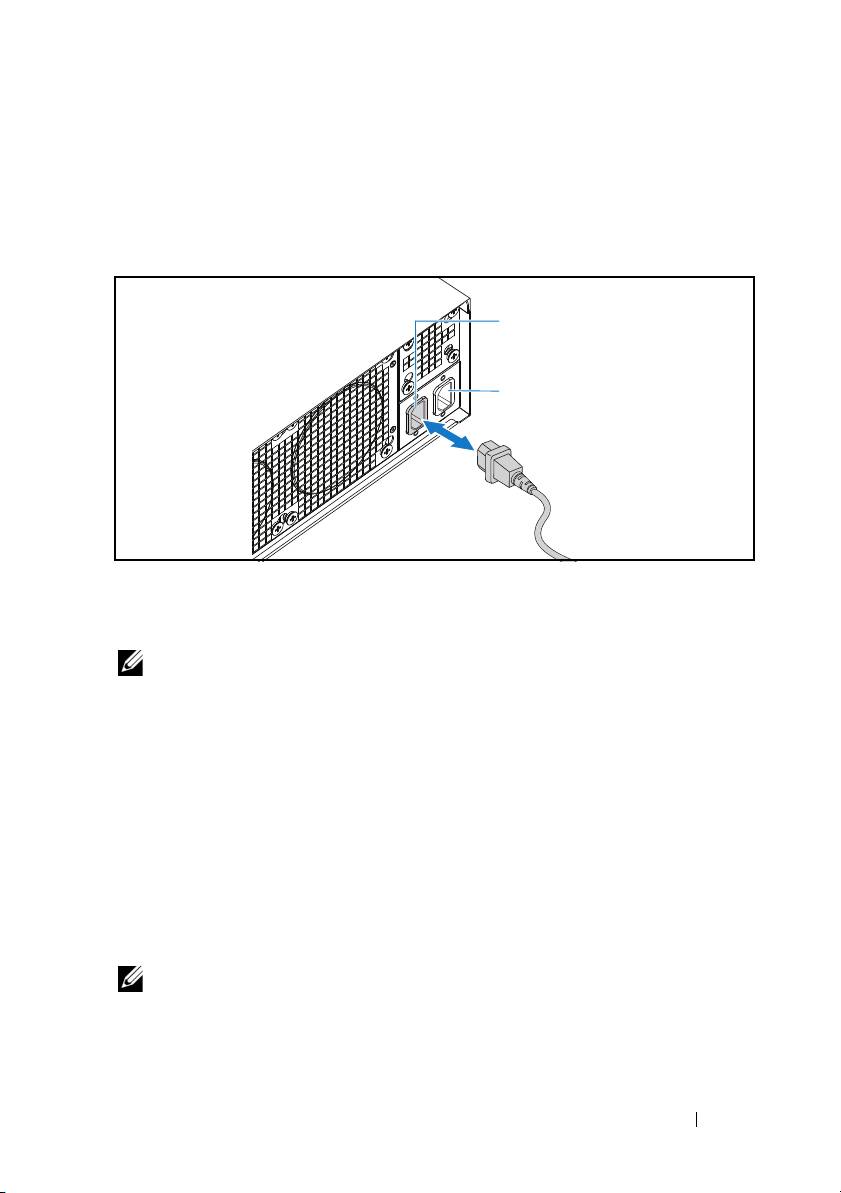
Connecting the Power Cables
1
On the back of the system, connect the main power cable to the system’s
power socket.
Figure 1-14. Connecting Power Cables
2
Plug the other end of the power cable into a grounded electrical outlet or a
separate power source such as an uninterrupted power supply or a power
distribution unit.
NOTE:
AC Port 1 provides power to PSU1, AC Port 2 provides power to PSU2. For
more information, see step 3 of Populating the System.
Turning On the System
When connected to a power source the system automatically powers on.
Complete the Operating System Setup
To install an operating system for the first time, see the installation and
configuration documentation for your operating system. Be sure the
operating system is installed before installing hardware or software not
purchased with the system.
NOTE:
For the latest information on supported operating systems, see
dell.com/ossupport.
Installation and Configuration
11
AC Port 2
AC Port 1
