Beurer FT 70: 4. Initial use 5. Setting the device
4. Initial use 5. Setting the device: Beurer FT 70
Table of contents
- Contents Included in delivery
- 1. Signs and symbols 2. Notes Safety notes Notes on handling batteries
- General notes
- 3. Unit description Overview
- 4. Initial use 5. Setting the device
- 6. What you should know about using this thermometer
- 7. Measuring
- 8. Changing the batteries
- 9. Storage and maintenance
- 10. Disposal 11. Technical data
- 12. Trouble-shooting
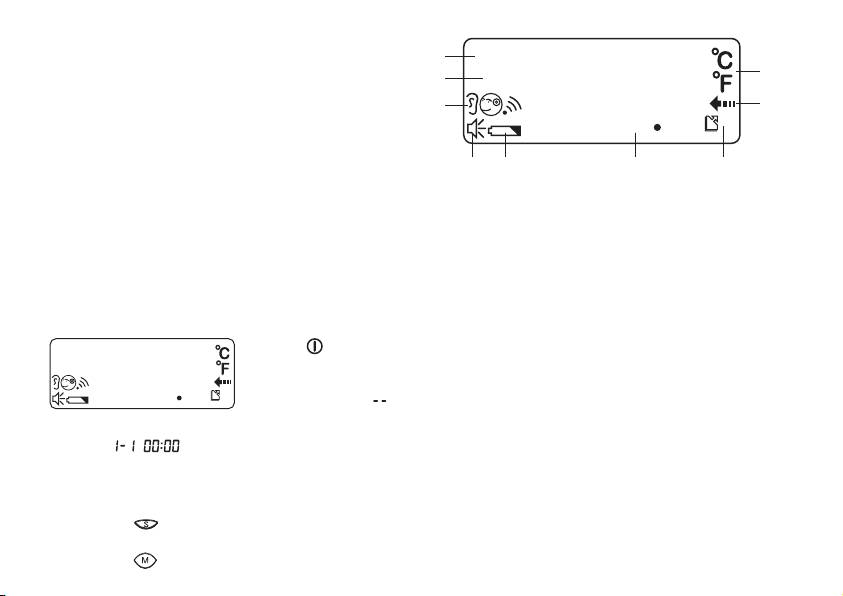
12 Date
13 Time
12
20
14 Measurement mode (“Ear”, “Forehead”, “Object”)
13
15 Speaker symbol
14
19
16 Battery warning symbol
17 Measurement display
18 “Memory” symbol and storage space number
19 “Measurement in progress” symbol
18171615
20 Unit of measurement (°C or °F)
4. Initial use
The batteries are already inserted in all new devices. Before fi rst use, remove the protruding plastic insulating strip from the
battery compartment. The thermometer will then switch on automatically.
5. Setting the device
Set the language, volume, the unit in which the temperature will be displayed, the date and the time
Press the button for 1 second to switch the thermometer on. The device performs a
brief self test: all elements of the display are shown for approx. 1 second. Following a
successful self test, the device emits two short beeps. In Standby mode, the date and
time are shown and “ ” is displayed.
When the thermometer is used for the fi rst time and each time the batteries are changed, the date and time are displayed in
the format during the basic set-up (after the self test). Set each of the following settings in turn: language, volume,
unit in which the temperature will be displayed, date and time. To set the device, proceed in stages: Language (L01 – Ger-
man, L02 – English, L03 – French, L04 – Italian, L05 – Russian, L06 – Turkish), Volume (U01 – lowest setting, U06 – highest
setting), Unit – year – month – day – hours – minutes (there is no voice output when setting date and time).
•
Press the button for approx. three seconds in order to reach Set mode.
The setting to be changed will fl ash each time.
•
Press the button again to save the setting or
21
