Asus P5QL: 2.4 Ai Tweaker menu
2.4 Ai Tweaker menu: Asus P5QL
Hard Disk Write Protect [Disabled]
Disables or enables device write protection. This will be effective only if device is accessed
through BIOS. Conguration option: [Disabled] [Enabled]
IDE Detect Time Out (Sec) [35]
Selects the time out value for detecting ATA/ATAPI devices.
Conguration options: [0] [5] [10] [15] [20] [25] [30] [35]
2.3.6 System Information
This menu gives you an overview of the general system specications. The BIOS
automatically detects the items in this menu.
Bios Information
Displays the auto-detected BIOS information.
Processor
Displays the auto-detected CPU specication.
System Memory
Displays the auto-detected system memory.
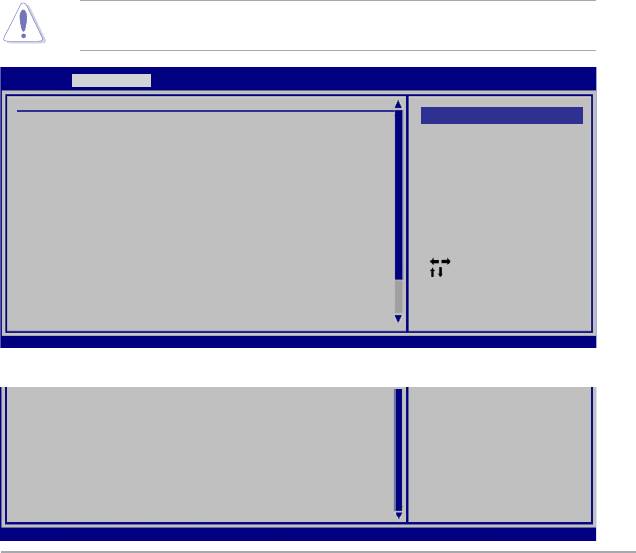
2.4 Ai Tweaker menu
The Ai Tweaker menu items allow you to congure system performance settings. Select an
item then press <Enter> to display the conguration options.
Take caution when changing the settings of the Ai Tweaker menu items. Incorrect eld
values can cause the system to malfunction.
BIOS SETUP UTILITY
Main Ai Tweaker Advanced Power Boot Tools Exit
Congure System Performance Settings
Options
Ai Overclock Tuner [Auto]
FSB Strap to North Bridge [Auto]
DRAM Frequency [Auto]
Manual
DRAM Timing Control [Auto]
Auto
1st Information: 5-5-5-15-3-36-5-3
2nd Information: 8-3-5-4-6-4-6
3rd Information: 13-5-1-5-5
DRAM Static Read Control [Auto]
DRAM Read Training [Auto]
MEM. OC Charger [Auto]
Ai Clock Twister [Auto]
Ai Transaction Booster [Auto]
C/P: A1 A2 A3 A4
Select Screen
LVL: 09 09 09 09
Select Item
********Please Key in numbers directly!********
+- Change Field
F1 General Help
CPU Voltage [Auto]
F10 Save and Exit
FSB Termination Voltage [Auto]
ESC Exit
v02.61 (C)Copyright 1985-2008, American Megatrends, Inc.
Scroll down to display the following items:
Memory Voltage [Auto]
North Bridge Voltage [Auto]
South Bridge Voltage [Auto]
**************************************************
CPU GTL Reference [Auto]
CPU Spread Spectrum [Auto]
PCIE Spread Spectrum [Auto]
CPU Clock Skew [Auto]
NB Clock Skew [Auto]
CPU Margin Enhancement [Optimized]
v02.61 (C)Copyright 1985-2008, American Megatrends, Inc.
ASUS P5QL 2-11
Ai Overclock Tuner [Auto]
Allows selection of CPU overclocking options to achieve desired CPU internal frequency.
Select either one of the preset overclocking conguration options:
Manual - allows you to manually set overclocking parameters.
Auto - loads the optimal settings for the system.
The follow items appear only when you set the [Ai Overclock Tuner] item to [Manual].
FSB Frequency [xxx]
Displays the frequency sent by the clock generator to the system bus and PCI bus.
Use the <+> and <-> keys to adjust the FSB frequency. You can also type the desired
FSB frequency using the numeric keypad. The values range from 200 to 600. Refer to
the table below for the correct Front Side Bus and CPU External Frequency settings.
FSB / CPU External Frequency Synchronization
Front Side Bus CPU External Frequency
FSB 1600 400 MHz
FSB 1333 333 MHz
FSB 1066 266 MHz
FSB 800 200 MHz
FSB 533 133 MHz
PCIE Frequency [Auto]
Use the <+> and <-> keys to adjust the PCIE frequency. You can also type the desired
PCIE frequency using the numeric keypad. The values range from 100 to 160.
FSB Strap to North Bridge [Auto]
Allows you to adjust the FSB strap. Conguration options: [Auto] [200MHz] [266MHz]
[333MHz] [400MHz]
DRAM Frequency [Auto]
Allows you to set the DDR2 operating frequency. Conguration options: [Auto]
[DDR2-533MHz] [DDR2-639MHz] [DDR2-667MHz] [DDR2-709MHz] [DDR2-800MHz]
[DDR2-852MHz] [DDR2-887MHZ] [DDR2-1066MHz]
Setting a very high DRAM frequency may cause the system to become unstable. If this
happens, revert to the default settings.
DRAM Timing Control [Auto]
Allows selection of the DRAM timing conguration. Conguration options: [Auto] [Manual]
• The following items appear only when you set the [DRAM Timing Control] item to
[Manual].
• The conguration options for some of the following items vary depending on the DIMMs
you install on the motherboard.
2-12 Chapter 2: BIOS information

1st Information: 5-5-5-15-3-36-5-3
CAS# Latency [5 DRAM Clocks]
Conguration options: [3 DRAM Clocks] ~ [11 DRAM Clocks]
DRAM RAS# to CAS# Delay [5 DRAM Clocks]
Conguration options: [3 DRAM Clocks] ~ [18 DRAM Clocks]
DRAM RAS# Precharge [5 DRAM Clocks]
Conguration options: [3 DRAM Clocks] ~ [18 DRAM Clocks]
RAS# Activate to Precharge [15 DRAM Clocks]
Conguration options: [3 DRAM Clocks] ~ [34 DRAM Clocks]
RAS# to RAS# Delay [Auto]
Conguration options: [Auto] [1 DRAM Clocks] ~ [15 DRAM Clocks]
Row Refresh Cycle Time [Auto]
Conguration options: [Auto] [20 DRAM Clocks] [25 DRAM Clocks]
[30 DRAM Clocks] [35 DRAM Clocks] [40 DRAM Clocks] [45 DRAM Clocks] [50 DRAM
Clocks] [55 DRAM Clocks] [60 DRAM Clocks] [65 DRAM Clocks] [70 DRAM Clocks]
[80 DRAM Clocks] [85 DRAM Clocks] [105 DRAM Clocks] [132 DRAM Clocks]
Write Recovery Time [Auto]
Conguration options: [Auto] [1 DRAM Clocks] ~ [15 DRAM Clocks]
Read to Precharge Time [Auto]
Conguration options: [Auto] [1 DRAM Clocks] ~ [15 DRAM Clocks]
2nd Information: 8-3-5-4-6-4-6
READ to WRITE Delay (S/D) [Auto]
Conguration options: [Auto] [1 DRAM Clocks] ~ [15 DRAM Clocks]
WRITE to READ Delay (S) [Auto]
Conguration options: [Auto] [1 DRAM Clocks] ~ [15 DRAM Clocks]
WRITE to READ Delay (D) [Auto]
Conguration options: [Auto] [1 DRAM Clocks] ~ [15 DRAM Clocks]
READ to READ Delay (S) [Auto]
Conguration options: [Auto] [1 DRAM Clocks] ~ [15 DRAM Clocks]
READ to READ Delay (D) [Auto]
Conguration options: [Auto] [1 DRAM Clocks] ~ [15 DRAM Clocks]
WRITE to WRITE Delay (S) [Auto]
Conguration options: [Auto] [1 DRAM Clocks] ~ [15 DRAM Clocks]
WRITE to WRITE Delay (D) [Auto]
Conguration options: [Auto] [1 DRAM Clocks] ~ [15 DRAM Clocks]
3rd Information: 13-5-1-5-5
WRITE to PRE Delay [Auto]
Conguration options: [Auto] [1 DRAM Clocks] ~ [31 DRAM Clocks]
READ to PRE Delay [Auto]
Conguration options: [Auto] [1 DRAM Clocks] ~ [15 DRAM Clocks]
PRE to PRE Delay [Auto]
Conguration options: [Auto] [1 DRAM Clocks] ~ [3 DRAM Clocks]
ALL PRE to ACT Delay [Auto]
Conguration options: [Auto] [1 DRAM Clocks] ~ [15 DRAM Clocks]
ALL PRE to REF Delay [Auto]
Conguration options: [Auto] [1 DRAM Clocks] ~ [15 DRAM Clocks]
ASUS P5QL 2-13
DRAM Static Read Control [Auto]
Adjusting this item might enhance DRAM overclocking ability.
Conguration options: [Auto] [Disabled] [Enabled]
DRAM Read Training [Auto]
Adjusting this item might enhance DRAM overclocking ability.
Conguration options: [Auto] [Disabled] [Enabled]
MEM. OC Charger [Auto]
Adjusting this item might enhance DRAM overclocking ability.
Conguration options: [Auto] [Disabled] [Enabled]
Ai Clock Twister [Auto]
Allows you to set the DRAM performance. Set this item to [Light] or [Lighter] to enhance
DRAM compatibility, or [Strong] or [Stronger] to accelerate DRAM performance.
Conguration options: [Auto] [Lighter] [Light] [Moderate] [Strong] [Stronger]
Ai Transaction Booster [Auto]
Allows you to set the system performance. Conguration options: [Auto] [Manual]
The following items appear only when you set the Ai Transaction Booster item to
[Manual].
C/P: A1 A2 A3 A4
LVL: 09 09 09 09
Common Performance Level [05]
Set this item to a higher level for better compatibility or a lower level for better
performance. Use the <+> and <-> keys to adjust the value.
Pull-In of CHA/B PH1/2/3/4 [Disabled]
Set this item to [Enabled] to apply enhancement on DRAM Channel A and B, Phase
1 to 4. The number of phases is determined by DRAM frequency and FSB strap.
Conguration options: [Disabled] [Enabled]
CPU Voltage [Auto]
Allows you to set the CPU VCore voltage. The values range from 0.8500V to 1.7500V with a
0.00625V interval. Conguration options: [Auto]
Refer to the CPU documentation before setting the CPU Vcore voltage. Setting a high
VCore voltage may damage the CPU permanently, and setting a low VCore voltage may
make the system unstable.
FSB Termination Voltage [Auto]
Allows you to set the front side bus termination voltage. The values range from 1.20V to
1.50V with a 0.10V interval.
The minimum value becomes 1.10V and the maximum value becomes 1.40V when a 45nm
CPU is detected.
2-14 Chapter 2: BIOS information

Memory Voltage [Auto]
Allows you to set the memory voltage manually or Auto. Use the <+> and <-> keys to adjust
the value. The value ranges from 1.80V to 2.20V with a 0.10V interval.
North Bridge Voltage [Auto]
Allows you to set the NB voltage manually or Auto. Use the <+> and <-> keys to adjust the
value. The value ranges from 1.10V to 1.40V with a 0.10V interval.
Setting a very high voltage may damage the component permanently, and setting a very
low voltage may cause the system to become unstable.
South Bridge Voltage [Auto]
Allows you to set the SB voltage. The value ranges from 1.50V to 1.70V with a 0.20V interval.
CPU GTL Reference [Auto]
Allows you to set the CPU GTL voltage reference. Conguration options: [Auto] [0.667x]
[0.65x] [0.63x] [0.615x]
CPU Spread Spectrum [Auto]
Allows you to set the CPU spread spectrum. Conguration options: [Auto] [Disabled]
PCIE Spread Spectrum [Auto]
Allows you to set the PCIE spread spectrum. Conguration options: [Auto] [Disabled]
CPU Clock Skew [Auto]
Allows you to set the CPU clock skew. Conguration options: [Auto] [Normal] [Delay 75ps]
[Delay 150ps] [Delay 225ps] [Delay 300ps] [Delay 375ps] [Delay 450ps] [Delay 525ps]
[Delay 600ps] [Delay 675ps] [Delay 750ps] [Delay 825ps] [Delay 900ps] [Delay 975ps]
[Delay 1050ps] [Delay 1100ps]
NB Clock Skew [Auto]
Allows you to set the NB clock skew. Conguration options: [Auto] [Normal] [Delay 75ps]
[Delay 150ps] [Delay 225ps] [Delay 300ps] [Delay 375ps] [Delay 450ps] [Delay 525ps]
[Delay 600ps] [Delay 675ps] [Delay 750ps] [Delay 825ps] [Delay 900ps] [Delay 975ps]
[Delay 1050ps] [Delay 1100ps]
CPU Margin Enhancement [Optimized]
Conguration options: [Optimized] [Compatible]
ASUS P5QL 2-15
Оглавление
- Contents
- Contents
- Contents
- Notices
- Safety information
- P5QL specications summary
- 1.1 Welcome!
- 1.4 Before you proceed
- 1.5 Motherboard overview
- 1.6 Central Processing Unit (CPU)
- 1.7 System memory
- 1.8 Expansion slots
- 1.9 Jumpers
- 1.10 Connectors
- 1.11 Software support
- 2.1 Managing and updating your BIOS
- 2.2 BIOS setup program
- 2.3 Main menu
- 2.4 Ai Tweaker menu
- 2.5 Advanced menu
- 2.6 Power menu
- 2.7 Boot menu
- 2.8 Tools menu
- 2.9 Exit menu
