Dell Precision M2300 (Late 2007) – page 2
Manual for Dell Precision M2300 (Late 2007)
Table of contents
- Notes, Notices, and Cautions
- Contents
- Finding Information What Are You Looking For? Find It Here
- What Are You Looking For? Find It Here
- What Are You Looking For? Find It Here
- What Are You Looking For? Find It Here
- What Are You Looking For? Find It Here
- Setting Up Your Computer
- About Your Computer Front View
- Left Side View Right Side View
- Back View Bottom View
- Using a Battery Battery Performance
- Operating time is significantly reduced when you perform operations including, but not limited to, the following: Checking the Battery Charge
- Dell™ QuickSet Battery Meter Microsoft Windows XP Power Meter Charge Gauge Check the Battery Charge Check the Battery Health
- Low-Battery Warning Charging the Battery
- Removing the Battery To remove the battery:
- Storing a Battery Troubleshooting Lockups and Software Problems The computer does not start up The computer stops responding
- A program is designed for an earlier Microsoft Windows operating system Windows XP Windows Vista A solid blue screen appears Other software problems BACK UP YOUR FILES IMMEDIATELY. U SE A VIRUS-SCANNING PROGRAM TO CHECK THE HARD DRIVE, FLOPPY DISKS, OR CD S .
- SAVE AND CLOSE ANY OPEN FILES OR PROGRAMS AND SHUT DOWN YOUR COMPUTER THROUGH THE START MENU. Dell Diagnostics When to Use the Dell Diagnostics
- Starting the Dell Diagnostics From Your Hard Drive
- Starting the Dell Diagnostics From the Drivers and Utilities Media Dell Diagnostics Main Menu Option Function
- Option Function Tab Function
- 4 5

SAVE AND CLOSE ANY OPEN FILES OR PROGRAMS AND SHUT DOWN YOUR
COMPUTER THROUGH THE START MENU.
S
CAN THE COMPUTER FOR SPYWARE — If you are experiencing slow computer
performance, you frequently receive pop-up advertisements, or you are having
problems connecting to the Internet, your computer might be infected with
spyware. Use an anti-virus program that includes anti-spyware protection
(your program may require an upgrade) to scan the computer and remove
spyware. For more information, go to support.dell.com and search for the
keyword spyware.
RUN THE DELL DIAGNOSTICS — See "Dell Diagnostics" on page 21. If all tests
run successfully, the error condition is related to a software problem.
Dell Diagnostics
CAUTION: Before you begin any of the procedures in this section, follow the
safety instructions in the Product Information Guide.
When to Use the Dell Diagnostics
If you experience a problem with your computer, perform the checks in
"Lockups and Software Problems" on page 19 and run the Dell Diagnostics
before you contact Dell for technical assistance.
It is recommended that you print these procedures before you begin.
NOTICE: The Dell Diagnostics works only on Dell™ computers.
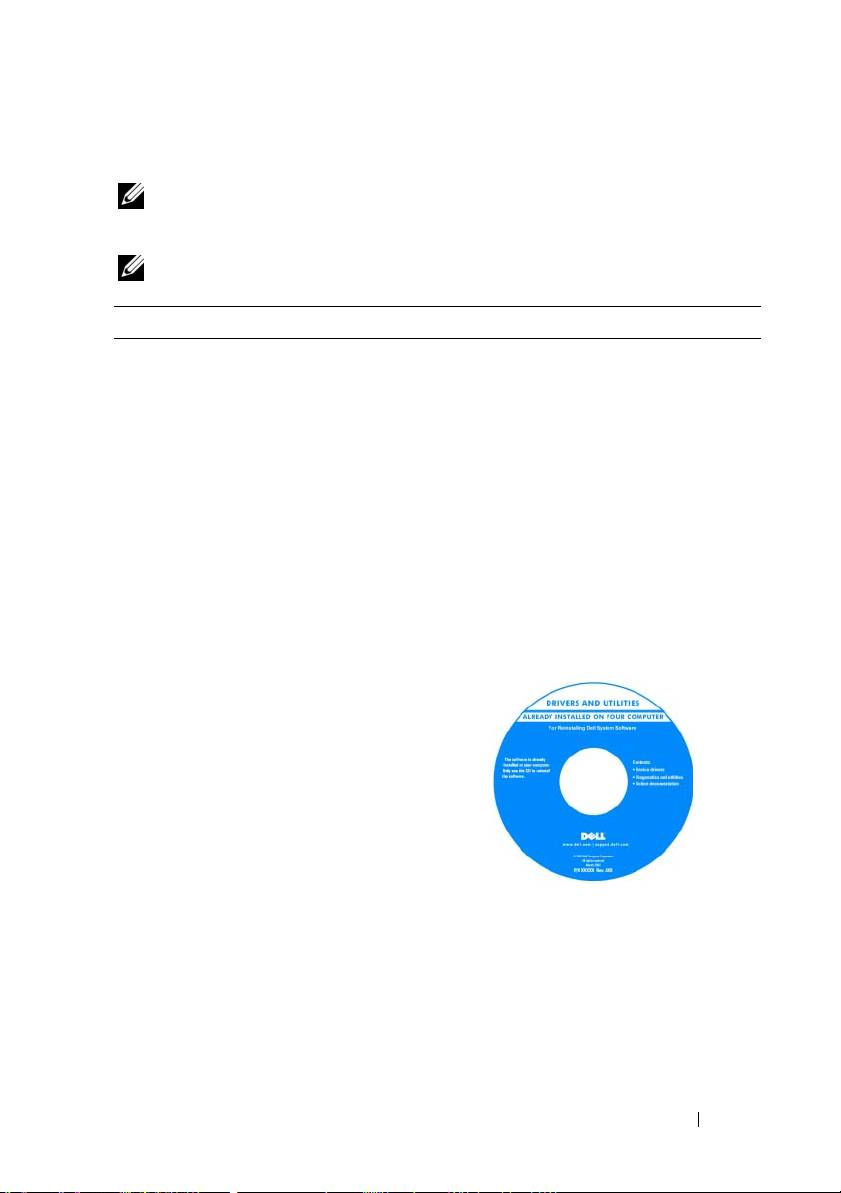
NOTE: The Drivers and Utilities media is optional and may not ship with your
computer.
Enter system setup (see "System Setup Program" in your User’s Guide),
review your computer’s configuration information, and ensure that the device
you want to test displays in system setup and is active.
Start the Dell Diagnostics from either your hard drive or from the Drivers and
Utilities media.
Quick Reference Guide 21

Starting the Dell Diagnostics From Your Hard Drive
The Dell Diagnostics is located on a hidden diagnostic utility partition on
your hard drive.
NOTE: If your computer cannot display a screen image, contact Dell (see
"Contacting Dell" in your User’s Guide).
1
Shut down the computer.
2
If the computer is connected to a docking device (docked), undock it. See
the documentation that came with your docking device for instructions.
3
Connect the computer to an electrical outlet.
4
Diagnostics can be invoked in one of two ways:
a
Turn on the computer. When the DELL™ logo appears, press <F12>
immediately. Select Diagnostics from the boot menu and press
<Enter>.
NOTE: If you wait too long and the operating system logo appears, continue to
®
®
wait until you see the Microsoft
Windows
desktop. Then shut down your
computer and try again.
b
Press and hold the <Fn> key while powering the computer on.
NOTE: If you see a message stating that no diagnostics utility partition has
been found, run the Dell Diagnostics from the Drivers and Utilities media.
The computer runs the Pre-boot System Assessment, a series of initial
tests of your system board, keyboard, hard drive, and display.
• During the assessment, answer any questions that appear.
• If a failure is detected, the computer stops and beeps. To stop the
assessment and restart the computer, press <Esc>; to continue to the
next test, press <y>; to retest the component that failed, press <r>.
• If failures are detected during the Pre-boot System Assessment, write
down the error code(s) and contact Dell (see "Contacting Dell" in
your
User’s Guide
).
If the Pre-boot System Assessment completes successfully, you receive the
message
Booting Dell Diagnostic Utility Partition
.
Press any key to continue
.
5
Press any key to start the Dell Diagnostics from the diagnostics utility
partition on your hard drive.
22 Quick Reference Guide

Starting the Dell Diagnostics From the Drivers and Utilities Media
1
Insert the
Drivers and Utilities
media.
2
Shut down and restart the computer.
When the DELL logo appears, press <F12> immediately.
If you wait too long and the Windows logo appears, continue to wait until
you see the Windows desktop. Then shut down your computer and try
again.
NOTE: The next steps change the boot sequence for one time only. On the
next start-up, the computer boots according to the devices specified in the
system setup program.
3
When the boot device list appears, highlight
CD/DVD/CD-RW Drive
and press <Enter>.
4
Select the
Boot from CD-ROM
option from the menu that appears and
press <Enter>.
5
Ty p e
1
to start the menu and press <Enter> to proceed.
6
Select
Run the 32 Bit Dell Diagnostics
from the numbered list. If
multiple versions are listed, select the version appropriate for your
computer.
7
When the Dell Diagnostics
Main Menu
appears, select the test you want
to run.
Dell Diagnostics Main Menu
1
After the Dell Diagnostics loads and the
Main
Menu
screen appears, click
the button for the option you want.
Option Function
Express Test Performs a quick test of devices. This test typically takes 10 to
20 minutes and requires no interaction on your part. Run
Express Test first to increase the possibility of tracing the
problem quickly.
Extended Test Performs a thorough check of devices. This test typically
takes 1 hour or more and requires you to answer questions
periodically.
Quick Reference Guide 23

Option Function
Custom Test Tests a specific device. You can customize the tests you want
to run.
Symptom Tree Lists the most common symptoms encountered and allows
you to select a test based on the symptom of the problem you
are having.
2
If a problem is encountered during a test, a message appears with an error
code and a description of the problem. Write down the error code and
problem description, and follow the instructions on the screen.
If you cannot resolve the error condition, contact Dell (see "Contacting
Dell" in your
User’s Guide
).
NOTE: The Service Tag for your computer is located at the top of each test
screen. If you contact Dell, the technical support representative will ask you
for your Service Tag.
3
If you run a test from the
Custom Test
or
Symptom Tree
option, click the
applicable tab described in the following table for more information.
Tab Function
Results Displays the results of the test and any error conditions
encountered.
Errors Displays error conditions encountered, error codes, and the
problem description.
Help Describes the test and may indicate requirements for running
the test.
Configuration Displays your hardware configuration for the selected device.
The Dell Diagnostics obtains configuration information for
all devices from the system setup program, memory, and
various internal tests, and it displays the information in the
device list in the left pane of the screen. The device list may
not display the names of all the components installed on your
computer or all devices attached to your computer.
Parameters Allows you to customize the test by changing the test
settings.
24 Quick Reference Guide

4
When the tests are completed, if you are running the Dell Diagnostics
from the
Drivers and Utilities
media
,
remove the media.
5
When the tests are complete, close the test screen to return to the
Main
Menu
screen. To exit the Dell Diagnostics and restart the computer, close
the
Main
Menu
screen.
Quick Reference Guide 25

26 Quick Reference Guide

Index
A
Dell Diagnostics (continued)
starting from the hard drive, 22
anti-virus software, 20
using, 21
Dell support site, 7
B
diagnostics
Dell, 21
battery
charge gauge, 16
documentation
charging, 17
End User License Agreement, 6
checking the charge, 15
ergonomics, 6
performance, 14
online, 7
power meter, 16
Product Information Guide, 6
removing, 18
regulatory, 6
storing, 19
safety, 6
warranty, 6
Drivers and Utilities CD, 5
C
Drivers and Utilities media
CDs
Dell Diagnostics, 21
operating system, 9
computer
crashes, 19-20
E
slow performance, 21
End User License Agreement, 6
stops responding, 19
ergonomics information, 6
D
H
Dell Diagnostics
hardware
about, 21
Dell Diagnostics, 21
starting from the Drivers and
Utilities media, 23
Help and Support Center, 8
Index 27

help file
Q
Windows Help and Support
QuickSet Help, 8
Center, 8
R
L
regulatory information, 6
labels
Microsoft Windows, 6
Service Tag, 6
S
safety instructions, 6
O
Service Tag, 6
operating system
software
reinstalling, 9
problems, 20
Operating System CD, 9
spyware, 21
support website, 7
system views
P
back, 13
problems
bottom, 13
blue screen, 20
front, 11
computer crashes, 19-20
left side, 12
computer does not start up, 19
right side, 12
computer stops responding, 19
Dell Diagnostics, 21
lockups, 19
T
program crashes, 19
troubleshooting
program stops responding, 19
Dell Diagnostics, 21
programs and Windows
Help and Support Center, 8
compatibility, 20
lockups and software
slow computer performance, 21
problems, 19
software, 19-20
spyware, 21
Product Information Guide, 6
28 Index

W
warranty information, 6
Windows XP
Help and Support Center, 8
Program Compatibility
Wizard, 20
reinstalling, 9
wizards
Program Compatibility
Wizard, 20
Index 29

30 Index

Dell Precision™ M2300
Brzi referentni priručnik
Model PP18L
www.dell.com | support.dell.com

Napomene, obavijesti i oprezi
NAPOMENA:
OBAVIJESTI označava važne informacije koje vam pomažu pri
boljem korištenju računala.
OBAVIJEST:
OBAVIJEST označava moguće oštećenje hardvera ili gubitak
podataka i informira vas kako taj problem možete izbjeći.
OPREZ:
OPREZ označava moguću opasnost od kvarova, fizičkih ozljeda ili
smrtnih slučajeva.
Ako ste kupili Dell™ računalo iz serije n, za vas ne vrijede reference
®
®
operativnih sustava Microsoft
Windows
u ovom dokumentu.
____________________
Informacije u ovom dokumentu podložne su promjeni bez prethodne najave.
© 2007 Dell Inc. Sva prava pridržana.
Trgovački znakovi koji se koriste u ovom tekstu: Dell, ExpressCharge, DELL logotip i Dell Precision
su zaštitni znakovi tvrtke Dell Inc.; Core, Active Management Technology, Centrino i Intel su
registrirani zaštitni znakovi tvrtke Intel Corporation; Microsoft, Outlook, Windows, Windows Vista su
registrirani zaštitni znakovi ili zaštitni znakovi tvrtke Microsoft Corporation u SAD-u i/ili drugim
zemljama; Bluetooth je zaštitni znak u vlasništvu tvrtke Bluetooth SIG, Inc. te ga tvrtka Dell prema
licenci; TouchStrip je zaštitni znak tvrtke UPEK, Inc.; EMC je registrirani zaštitni znak tvrtke EMC
Corporation; ENERGY STAR je registrirani zaštitni znak Američke agencije za zaštitu okoliša. Kao
ENERGY STAR partner, tvrtka Dell Inc. je odlučila da je ovaj proizvod sukladan ENERGY STAR
smjernici o učinkovitom korištenju energije.
U dokumentu se možda koriste i drugi trgovački znakovi i zaštićeni nazivi koji označavaju ili entitete
koji su vlasnici tih znakova ili njihove proizvode. Dell Inc. odriče se bilo kakvih vlasničkih interesa
za navedene trgovačke znakove i zaštićene nazive, osim vlastitih.
Model PP18L
Rujan 2007. Br./dijela YU151 Izm. izdanje A00

Sadržaj
Traženje informacija
. . . . . . . . . . . . . . . . . .
35
Postavljanje računala
. . . . . . . . . . . . . . . . .
40
O vašem računalu
. . . . . . . . . . . . . . . . . . .
41
Prikaz sprijeda
. . . . . . . . . . . . . . . . . . .
41
Prikaz slijeva
. . . . . . . . . . . . . . . . . . . .
42
Prikaz zdesna
. . . . . . . . . . . . . . . . . . . .
42
Prikaz straga
. . . . . . . . . . . . . . . . . . . .
43
Prikaz dna
. . . . . . . . . . . . . . . . . . . . .
43
Korištenje baterije
. . . . . . . . . . . . . . . . . . .
44
Izvedba baterije
. . . . . . . . . . . . . . . . . . .
44
Provjera napunjenosti baterije
. . . . . . . . . . .
45
Punjenje baterije
. . . . . . . . . . . . . . . . . .
47
Vađenje baterije
. . . . . . . . . . . . . . . . . .
48
Pohrana baterije
. . . . . . . . . . . . . . . . . .
49
Rješavanje problema
. . . . . . . . . . . . . . . . . .
49
Zaključavanje i problemi s programima
. . . . . .
49
Dell Diagnostics
. . . . . . . . . . . . . . . . . . .
51
Indeks
. . . . . . . . . . . . . . . . . . . . . . . . . . . . . .
57
Sadržaj
33

34
Sadržaj
Traženje informacija
NAPOMENA:
Neke značajke ili mediji možda nisu obavezni i možda se neće
isporučivati s vašim računalom. Neke značajke ili mediji možda nisu dostupni
uodređenim zemljama.
NAPOMENA:
S vašim se računalom mogu isporučiti dodatne informacije.
Što tražite? Pronađite to ovdje
•
Dijagnostički program za moje računalo
Medij Drivers and Utilities (Upravljački i
uslužni programi)
•
Upravljački programi za moje računalo
NAPOMENA:
Medij
Drivers and Utilities
•
Dokumentacija za moje računalo
(Upravljački i uslužni programi) nije
•
Softver za sustav prijenosnog računala
obavezan i možda ga nećete dobiti prilikom
(NSS)
kupnje računala.
Dokumentacija i uslužni programi su već
instalirani na vašem računalu. Medij
možete koristiti za ponovnu instalaciju
upravljačkih programa (pogledajte
“Ponovna instalacija upravljačkih i
uslužnih programa” u svom Korisničkom
priručniku) ili za pokretanje programa Dell
Diagnostics (pogledajte “Dell Diagnostics”
na stranici 51).
Na mediju se možda nalaze i datoteke
Readme koje vam pružaju najnovije
informacije o tehničkim promjenama
računala ili napredni referentni materijal za
tehničare i iskusnije korisnike.
NAPOMENA:
Najnovija ažuriranja
upravljačkih programa i dokumentacije
možete pronaći na
support.dell.com
Brzi Referentni priručnik
35

Što tražite? Pronađite to ovdje
•
Kako postaviti računalo
Pogledajte u ovom dokumentu
•
Osnovne informacije za rješavanje
NAPOMENA:
Ovaj je dokument dostupan
problema
u PDF formatu na
support.dell.com
•
Kako pokrenuti program Dell™
Diagnostics
•
Kako otvoriti računalo
•
Informacije o jamstvu
Dell Priručnik s informacijama o
proizvodu
•
Uvjeti i pravila korištenja (samo za SAD)
•
Sigurnosne upute
•
Regulatorne informacije
•
Informacije o ergonomiji
•
Licenčni sporazum s krajnjim korisnikom
•
Service Tag (Servisna oznaka) i Express
Servisna oznaka i Microsoft Windows
Service Code (Šifra za ekspresnu uslugu)
licenca
®
®
•
Oznaku licence Microsoft
Windows
Te se naljepnice nalaze na računalu:
•
Servisnu oznaku koristite za identifikaciju
računala prilikom korištenja web-mjesta
support.dell.com
ili za kontakt službe za
podršku.
•
Šifru za ekspresnu uslugu unesite za
usmjeravanje poziva prilikom
kontaktiranja službi za podršku.
36
Brzi Referentni priručnik

Što tražite? Pronađite to ovdje
•
Solutions (Rješenja) — Savjeti za
Web-mjesto za Dellovu podršku —
rješavanje problema, članci tehničara
support.dell.com
itečajevi na mreži, često postavljana
NAPOMENA:
Odaberite odjeljak za
pitanja
područja ili poduzeća za prikaz
•
Community (Zajednica) — rasprava na
odgovarajuće stranice podrške.
mreži s ostalim Dell korisnicima
•
Upgrades (Ažuriranja) — Informacije za
nadogradnju komponenata, poput memorije,
tvrdog diska te operativnog sustava
•
Customer Care (Briga o korisnicima) —
Kontakt informacije, servisni pozivi
i stanje narudžbe, jamstva te informacije o
popravcima
•
Service and support (USluge i podrška) —
Status poziva za servis i prethodne
pružene podrške, servisni ugovor,
rasprave na mreži s tehničkom podrškom
•
Dell Technical Update Service (Dell
tehnička služba za ažuriranja) —
Proaktivna obavijest e-poštom o
ažuriranjima hardvera i softvera za vaše
računalo
•
Reference — Dokumentacija računala,
pojedinosti o konfiguraciji računala,
specifikacije proizvoda i bijeli papiri
•
Downloads (Preuzimanja) — Certificirani
Za preuzimanje Notebook System Software
upravljački programi, zakrpe te ažuriranja
(Softver za sustav prijenosnog računala):
softvera
1
Idite na
support.dell.com
, odaberite
•
Notebook System Software (Softver za
svoju regiju ili poslovni segment i unesite
sustav prijenosnog računala - NSS) —
svoju servisnu oznaku.
Ako ponovno instalirate operativni sustav
na svoje računalo, trebali biste instalirati i
2
Odaberite
Drivers & Downloads
NSS upravljački program. NSS osigurava
(Upravljački programi i preuzimanja)
kritična ažuriranja za operativni sustav i
i pritisnite
Go
(Idi).
podršku za procesore, optičke pogone,
3
Pritisnite svoj operativni sustav i potražite
USB uređaje i slično. NSS je neophodan
ključnu riječ
Notebook System Software
za ispravan rad vašeg Dell računala.
(Softver za sustav prijenosnog računala).
Softver automatski prepoznaje vaše
NAPOMENA:
Korisničko sučelje
računalo i operativni sustav i instalira
support.dell.com
može se razlikovati
ažuriranja koja odgovaraju vašoj
ovisno o vašim odabirima.
konfiguraciji.
Brzi Referentni priručnik
37
Što tražite? Pronađite to ovdje
•
Software upgrades and troubleshooting
Dell Support Utility (Uslužni program za
hints (Nadogradnje sustava i savjeti za
podršku)
rješavanje problema) — Često
Dell Support Utility (Uslužni program za
postavljana pitanja, vruće teme i općenito
podršku) je automatizirani sustav
zdravlje vaše računalne okoline
nadogradnje i obavješćivanja instaliran na
vaše računalo. Ova podrška osigurava
skeniranje zdravlja vaše računalne okoline
u stvarnom vremenu, ažuriranja softvera
i relevantne informacije za samostalnu
podršku. Funkciji Dell Support Utility
(Dellov uslužni program za podršku)
možete pristupiti pritiskom
ikone na
alatnoj traci.
•
Kako koristiti Windows XP
Windows Help and Support Center
(Windows centar za pomoć i podršku)
•
Kako koristiti programe i datoteke
1
Pritisnite
Start
→
Help and Support
•
Kako prilagoditi radnu površinu
(Pomoć i podrška).
2
Utipkajte riječ ili frazu koja opisuje vaš
problem i pritisnite ikonu sa strelicom.
3
Pritisnite temu koja opisuje vaš problem.
4
Slijedite upute na ekranu.
•
Informacije o mrežnoj aktivnosti, Power
Dell QuickSet Help (QuickSet pomoć)
Management Wizard (Čarobnjak za
Za pregled aplikacije
Dell QuickSet Help
upravljanje napajanjem), hotkey i druge
(Dell QuickSet pomoć),
desnom tipkom
stavke koje kontrolira Dell QuickSet.
miša pritisnite ikonu QuickSet na traci sa
zadacima Microsoft Windows.
Više informacija o Dell QuickSetu potražite
u odjeljku “Dell QuickSet” u svom
Korisničkom priručniku.
38
Brzi Referentni priručnik
Što tražite? Pronađite to ovdje
•
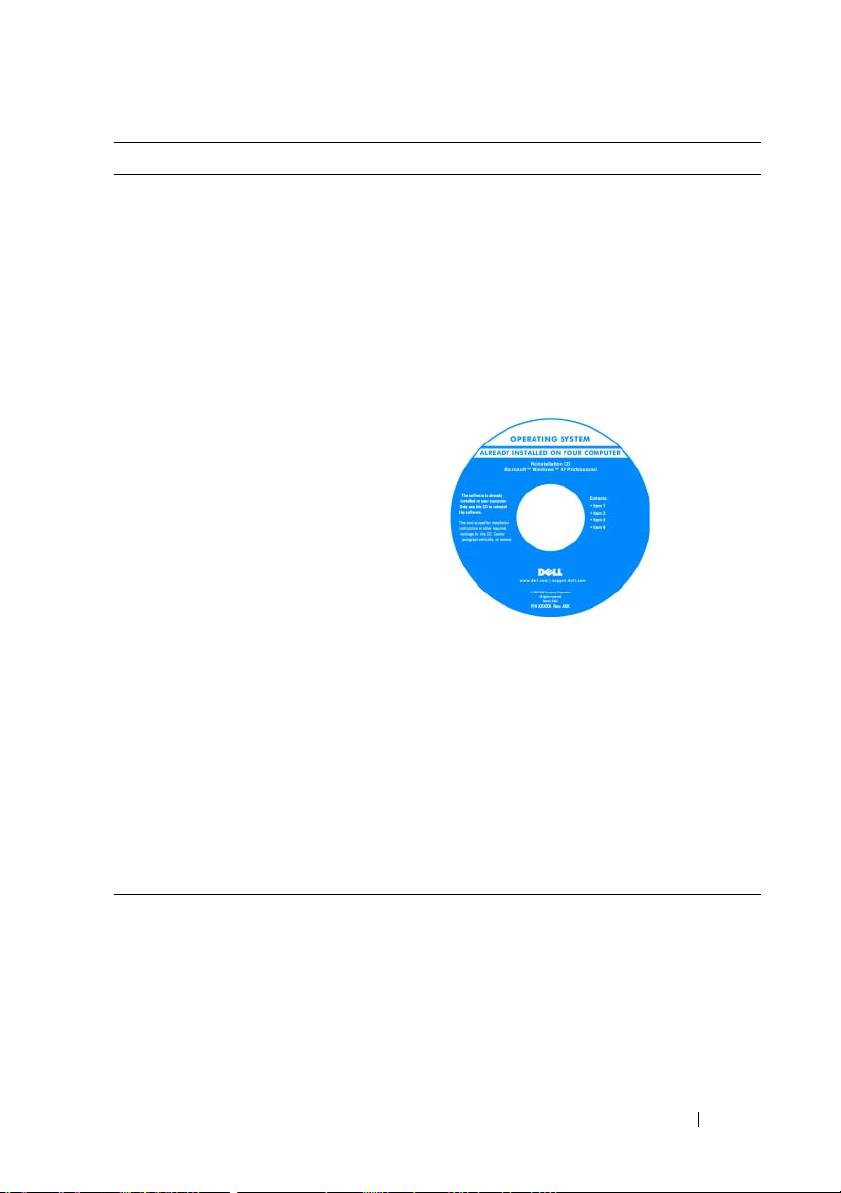
Kako ponovno instalirati operativni
Medij s operativnim sustavom
sustav
NAPOMENA:
Medij
Operating System
(Operativni sustav) možda nije obavezan te
se možda ne isporučuje uz računalo.
Operativni sustav je već instaliran na vašem
računalu. Za ponovno instaliranje
operativnog sustava koristite medij
Operating System (pogledajte “Ponovna
instalacija OS Windows” u svom
Korisničkom priručniku).
Nakon ponovnog instaliranja operativnog
sustava upotrijebite dodatni medij Drivers
and Utilities (Upravljački i uslužni
programi) kako biste ponovno instalirali
upravljačke programe za uređaje koji su
isporučeni uz računalo.
Oznaka sa šifrom proizvoda za vaš
operativni sustav nalazi se na računalu.
NAPOMENA:
Boja medija razlikuje se
ovisno o operativnom sustavu koji ste
naručili.
Brzi Referentni priručnik
39
Postavljanje računala
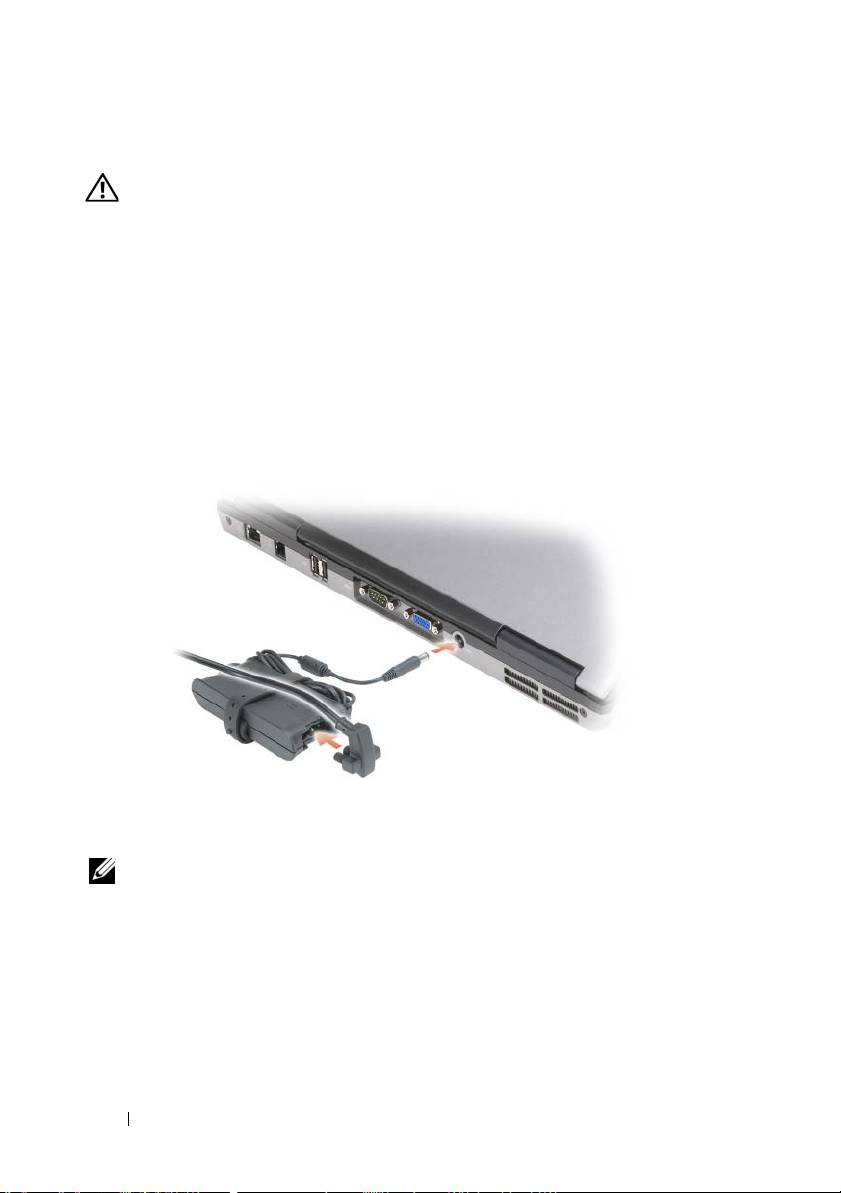
OPREZ:
Prije nego započnete bilo koji postupak u ovom odjeljku, slijedite
sigurnosne upute u
Priru
č
nik s informacijama o proizvodu
.
1
Raspakirajte kutiju s dodatnom opremom.
2
Sa strane ostavite sadržaj kutije s dodatnom opremom koji će vam trebati za
dovršavanje postavljanja računala.
U kutiji s dodatnom opremom nalazi se i dokumentacija za korisnika i sve
programe i dodatni hardver (npr. PC kartice, upravljački pogoni ili baterije)
koje ste naručili.
3
Spojite AC adapter na priključak za AC adapter na računalu i na električnu
utičnicu.
4
Otvorite zaslon računala i pritisnite gumb za uključivanje/isključivanje kako
biste uključili računalo (pogledajte “Prikaz sprijeda” na stranici 41).
NAPOMENA:
Preporučujemo da uključite i isključite računalo najmanje jednom
prije nego što instalirate bilo koju karticu ili spojite računalo na uređaj za spajanje ili
drugi vanjski uređaj, poput pisača.
40
Brzi Referentni priručnik
