Dell PowerEdge RAID Controller H700: Figure 1-1. Removing and Installing the PERC Adapter Replacing the BBU on a PERC 5/i, PERC 6/i, PERC H700, or PERC H800
Figure 1-1. Removing and Installing the PERC Adapter Replacing the BBU on a PERC 5/i, PERC 6/i, PERC H700, or PERC H800: Dell PowerEdge RAID Controller H700
Table of contents
- Deploying the Dell™ PERC Adapter Removing the PERC Adapter Installing the PERC Adapter
- Figure 1-1. Removing and Installing the PERC Adapter Replacing the BBU on a PERC 5/i, PERC 6/i, PERC H700, or PERC H800
- Replacing the TBBU on a PERC 5/E, PERC 6/E, PERC H700, or PERC H800 Figure 1-2. Removing and Installing the Battery and Battery Cable on the DIMM
- Managing Preserved Cache
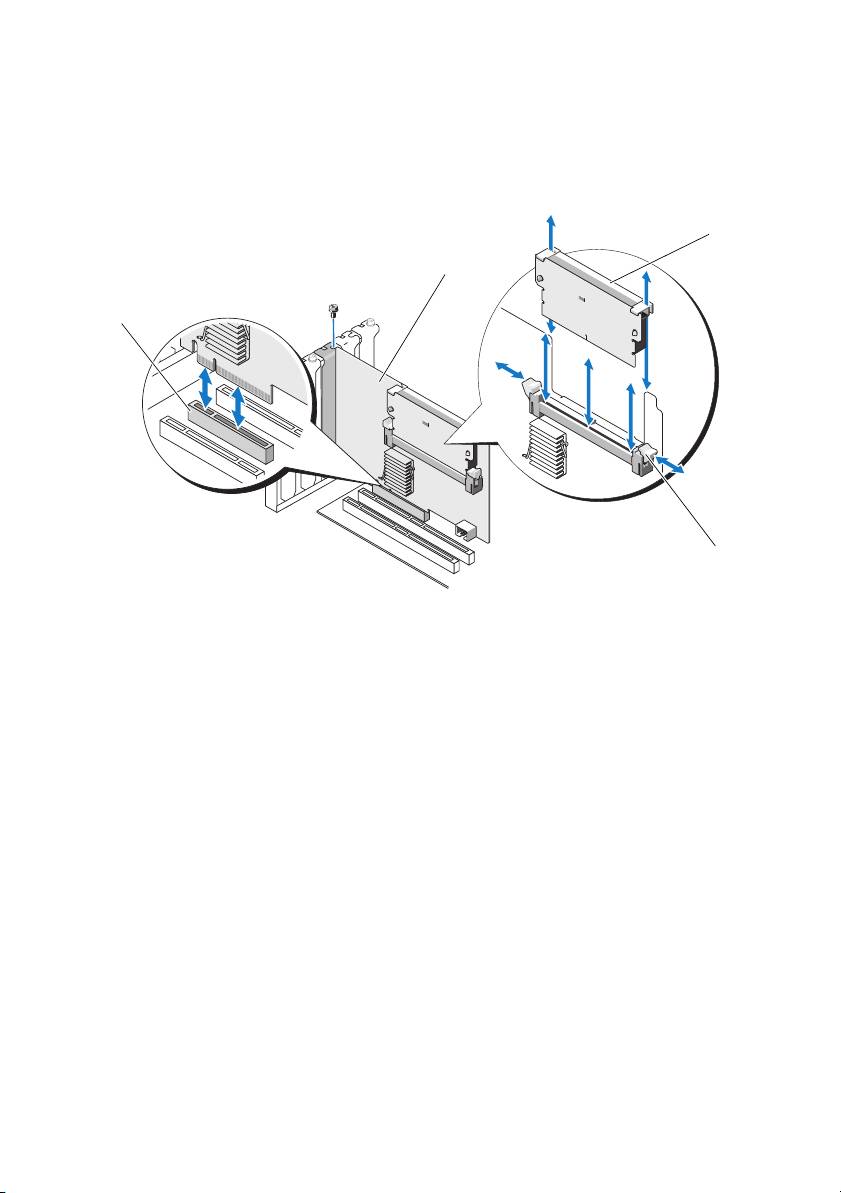
Figure 1-1. Removing and Installing the PERC Adapter
3
2
1
4
1 PCI-E slot 2 PERC adapter
3 DIMM 4 tabs (2)
Replacing the BBU on a PERC 5/i, PERC 6/i, PERC H700, or PERC H800
1
Ensure that there is no preserved cache on the PERC adapter. See "Managing
Preserved Cache" on page 4.
2
Perform a controlled shutdown of the system and attached peripherals.
3
Disconnect the system from the electrical outlet and remove the system cover.
4
Remove the Battery Backup Unit (BBU) from the plastic mounting shroud
in your system and disconnect the battery cable.
5
Re-connect the BBU to the controller by inserting the end of the battery cable
into the connector on the controller.
Top 10 manuals
100.00
NZXT HALE90 1000W99.99
Samsung SM-R38099.97
AEG BSB 18C99.97
Dell 2700W99.97
Smeg KSEC70X99.96
Beurer HDE 4099.96
Pyramida KH 50 v.299.96
MSI CSM-H81M-P3299.96
AEG HR 562799.95
Melissa 640-048