Dell PowerEdge 6950: Connecting the System and Monitor Power Cables Turning on the System and Monitor
Connecting the System and Monitor Power Cables Turning on the System and Monitor: Dell PowerEdge 6950
Table of contents
- Notes, Notices, and Cautions
- System Features
- Supported Operating Systems Other Information You May Need Obtaining Technical Assistance
- Installation and Configuration Unpacking the System
- Installing the System in a Rack Connecting the Keyboard, Mouse, and Monitor
- Connecting the System and Monitor Power Cables Turning on the System and Monitor
- Complete the 0perating System Setup Technical Specifications Processor Expansion Bus Memory Drives
- Connectors Video Power
- Physical Environmental
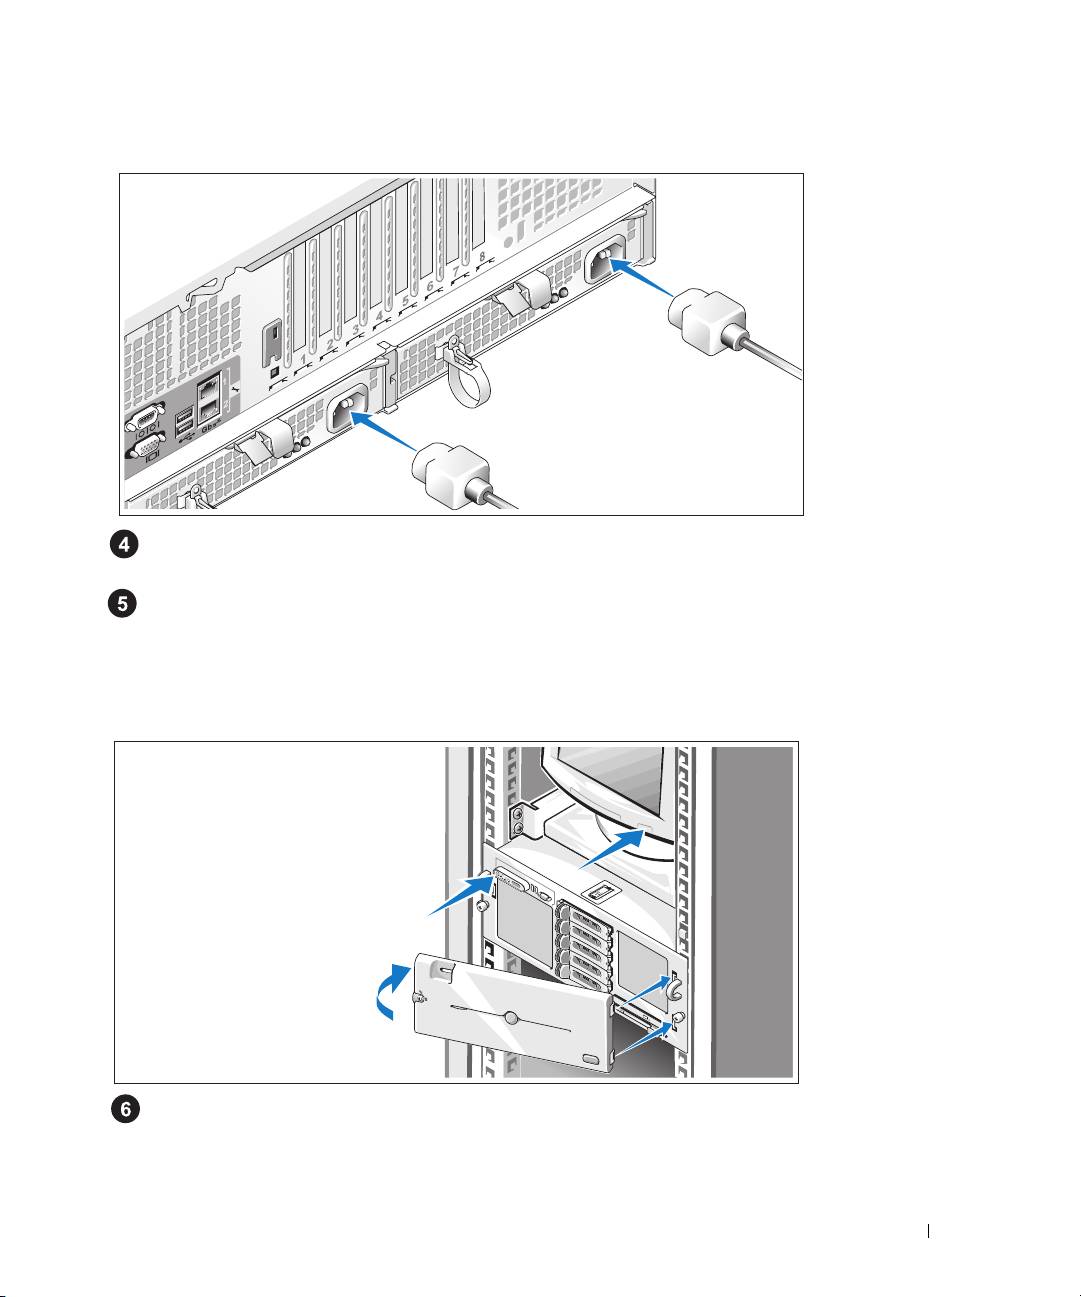
Connecting the System and Monitor Power Cables
Connect the monitor's power cable to the monitor (optional). Connect the system’s power cables
to the system.
Plug the other end of the power cables into a grounded electrical outlet or a separate power source
such as an uninterrupted power supply (UPS) or a power distribution unit (PDU). If possible, connect
the power supplies to two different 110V power sources or two different 220V power sources,
depending on the power supplies used.
Turning on the System and Monitor
Press the power button on the system and the monitor (optional). The power indicators should light.
Adjust the monitor's controls until the displayed image is satisfactory.
If you have purchased the optional system bezel, install it after turning on the system.
Getting Started With Your System 7
