Dell H928N: Removing the Battery Tray
Removing the Battery Tray: Dell H928N
Table of contents
- Notes and Warnings
- System Features
- Finding Information
- Installation and Startup Unpacking the System
- Lifting the Cabinet
- Identifying the UPS Figure 1. The Dell Line-Interactive Rack UPS Front Panel Figure 2. UPS Rear Panel (1920W/120V, 1500W/120V Shown) Setting Up the UPS
- Rackmount Setup Opening the Battery Cover
- Removing the Battery Tray
- Installing the Rails
- Installing the Cabinet
- Securing the Cabinet Installing the Battery Tray
- Installing the UPS Front Cover
- Tower Setup (2700W UPS models only) Removing the Mounting Brackets and Rear Hold-Down Brackets Connecting the Internal Battery Connector
- Rotating the UPS Control Panel Orientation
- Installing the UPS Front Cover Installing the Pedestals
- Connecting the Equipment
- Connecting the Power Cord
- Starting the UPS Completing the Startup
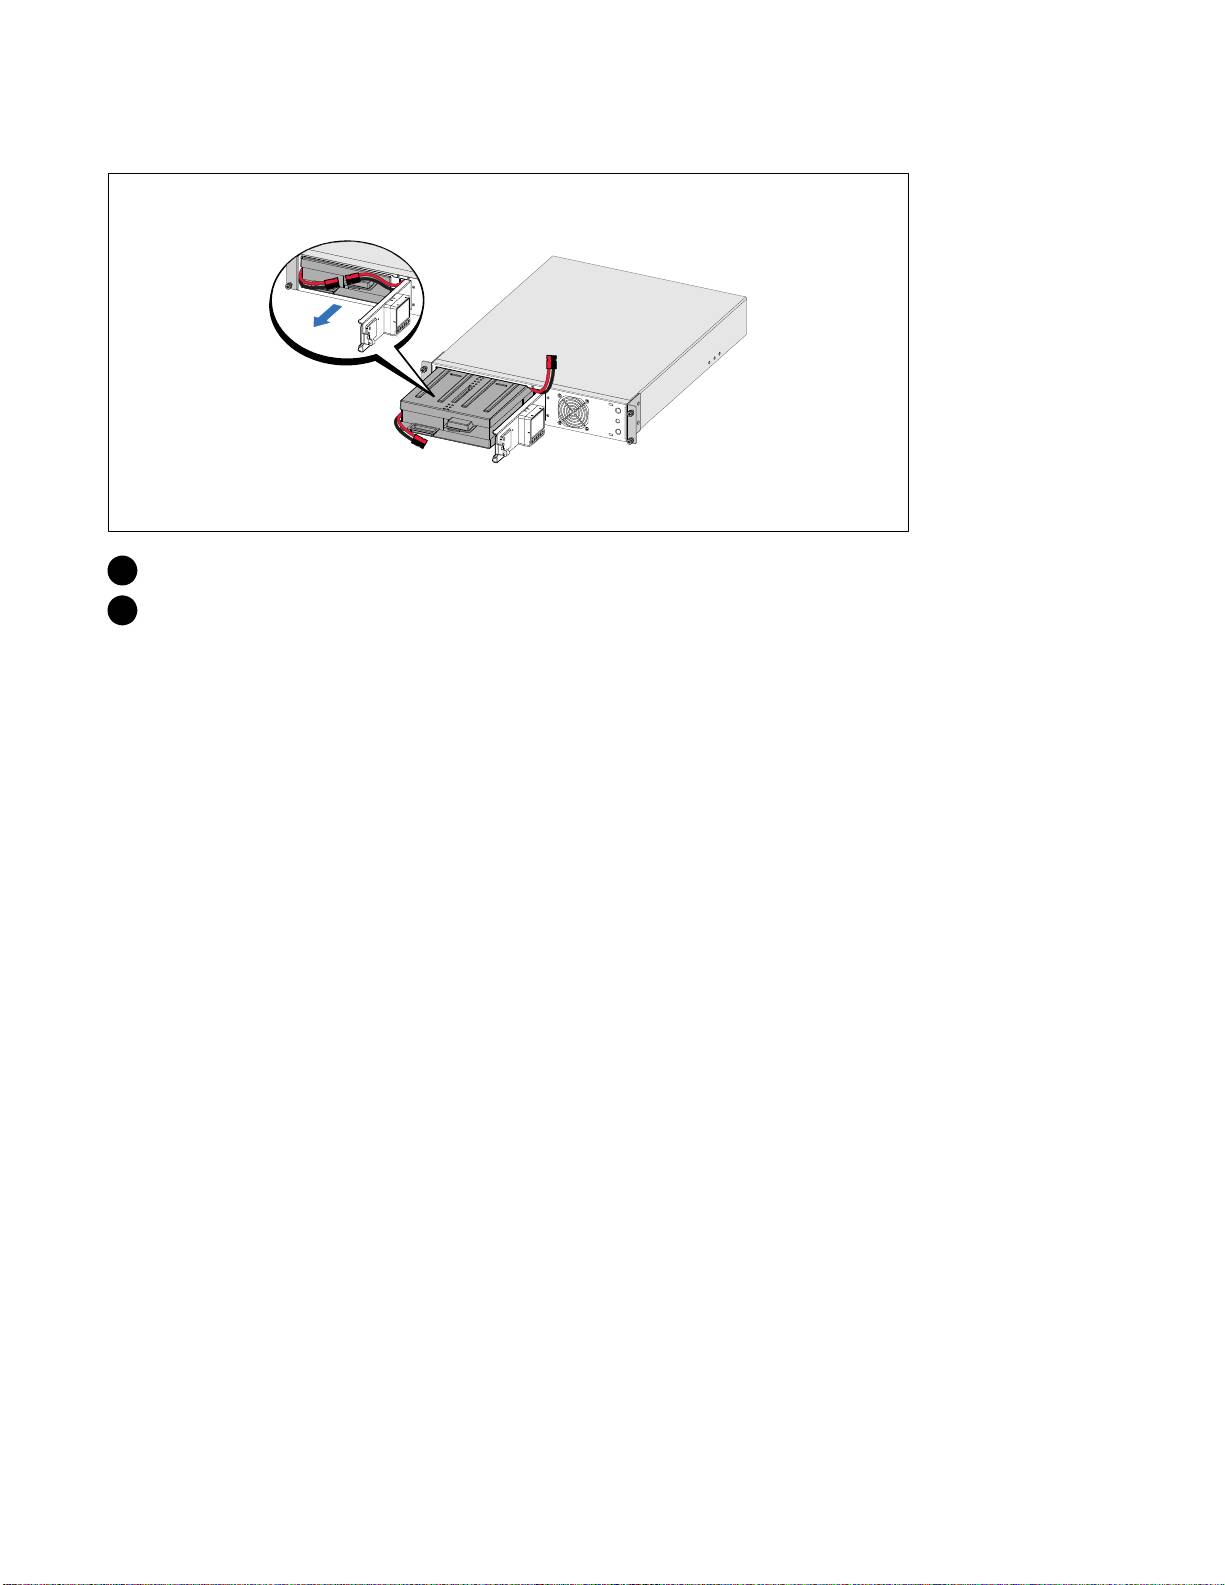
Removing the Battery Tray
2 Unclip the right battery connector and move the connector out of the way.
3 Pull the battery tray out using the plastic tabs and remove the battery tray.
Getting Started With Your System
|
7
Top 10 manuals
100.00
NZXT HALE90 1000W99.99
Samsung SM-R38099.97
AEG BSB 18C99.97
Dell 2700W99.97
Smeg KSEC70X99.96
Beurer HDE 4099.96
Pyramida KH 50 v.299.96
MSI CSM-H81M-P3299.96
AEG HR 562799.95
Melissa 640-048