Dell H928N: Installing the UPS Front Cover
Installing the UPS Front Cover: Dell H928N
Table of contents
- Notes and Warnings
- System Features
- Finding Information
- Installation and Startup Unpacking the System
- Lifting the Cabinet
- Identifying the UPS Figure 1. The Dell Line-Interactive Rack UPS Front Panel Figure 2. UPS Rear Panel (1920W/120V, 1500W/120V Shown) Setting Up the UPS
- Rackmount Setup Opening the Battery Cover
- Removing the Battery Tray
- Installing the Rails
- Installing the Cabinet
- Securing the Cabinet Installing the Battery Tray
- Installing the UPS Front Cover
- Tower Setup (2700W UPS models only) Removing the Mounting Brackets and Rear Hold-Down Brackets Connecting the Internal Battery Connector
- Rotating the UPS Control Panel Orientation
- Installing the UPS Front Cover Installing the Pedestals
- Connecting the Equipment
- Connecting the Power Cord
- Starting the UPS Completing the Startup
10 Close the metal battery cover.
Adjust the battery connector so that the door closes properly. Push the door slightly to the right
and then to left.
11 Tighten the thumbscrew.
Torque the screw to 0.7 Nm (6.2 lb in).
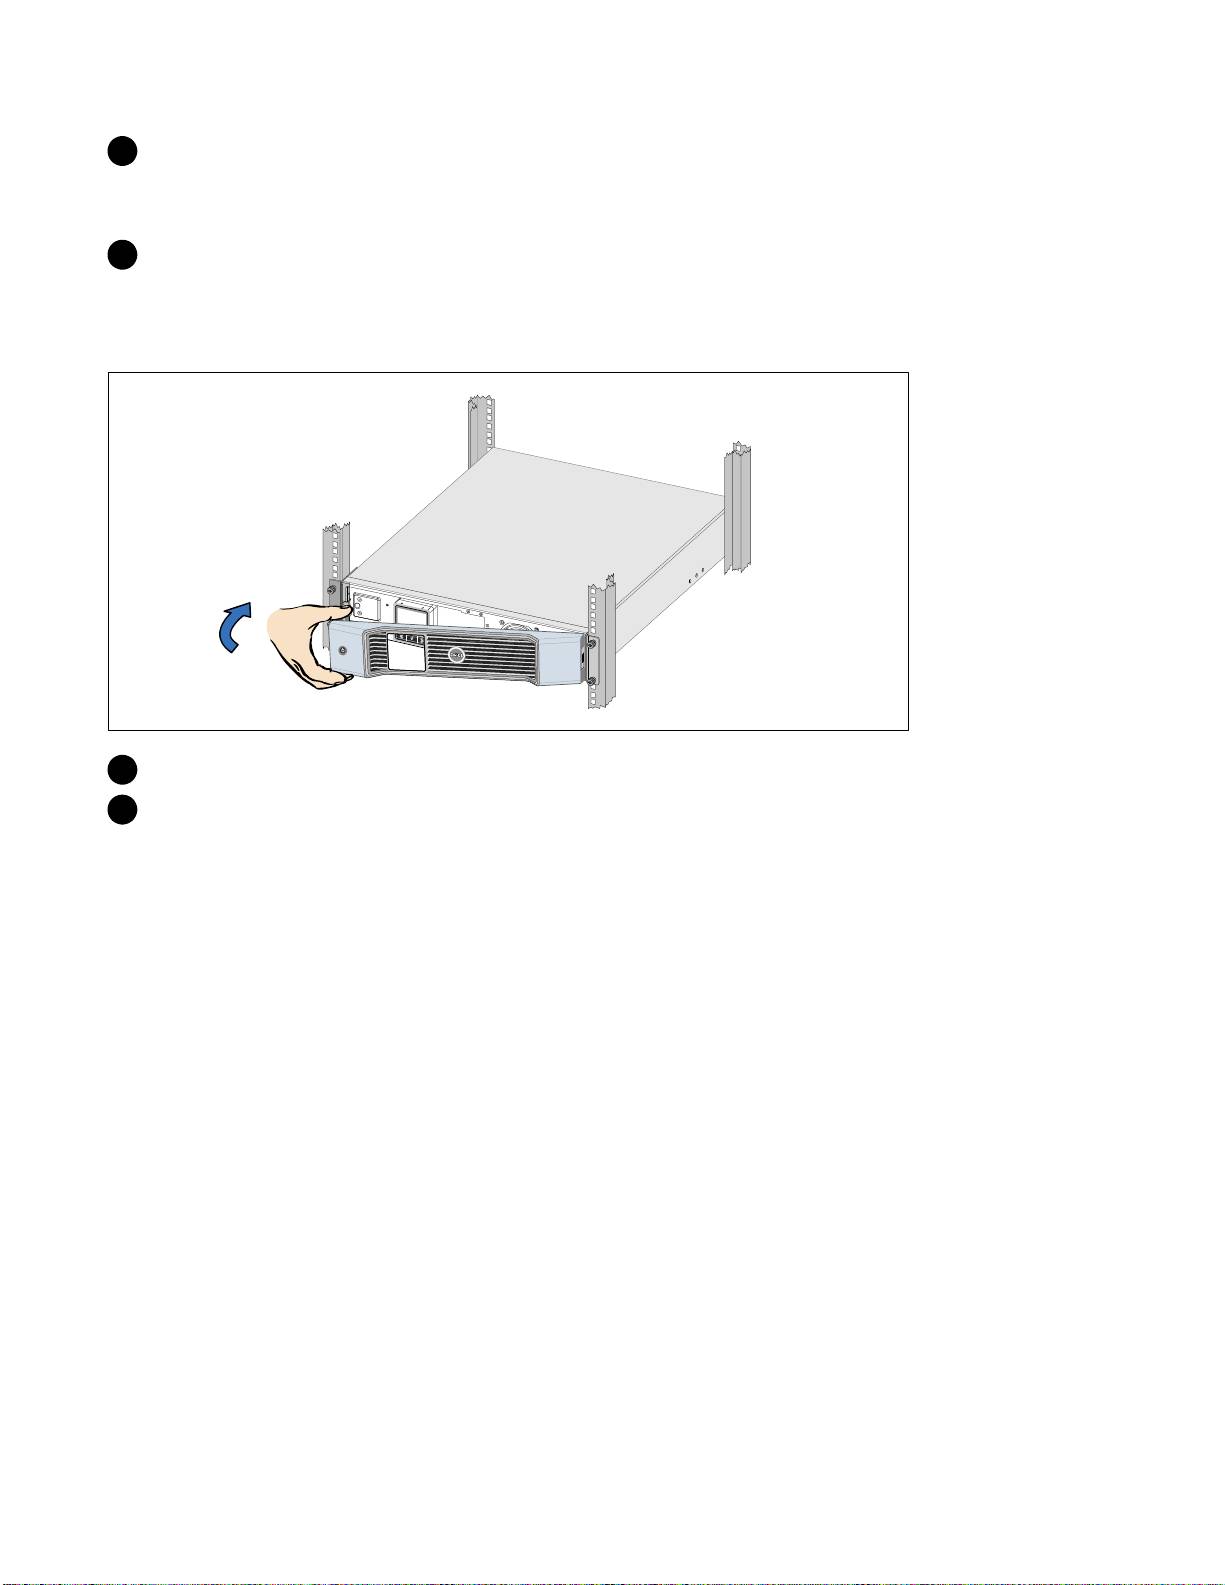
Installing the UPS Front Cover
12 Install the UPS front cover.
13 Continue to “Connecting the Equipment” on page 15.
Getting Started With Your System
|
11
Top 10 manuals
100.00
NZXT HALE90 1000W99.99
Samsung SM-R38099.97
AEG BSB 18C99.97
Dell 2700W99.97
Smeg KSEC70X99.96
Beurer HDE 4099.96
Pyramida KH 50 v.299.96
MSI CSM-H81M-P3299.96
AEG HR 562799.95
Melissa 640-048