Beurer BM 60: Icons in the display: 3. Unit description 4. Getting started
Icons in the display: 3. Unit description 4. Getting started: Beurer BM 60
Table of contents
- 2. Important information Signs and symbols 1. Getting to know your instrument
- Advice on use
- Notes on handling batteries Storage and Care Repair and disposal
- Icons in the display: 3. Unit description 4. Getting started
- Operation with the mains part Setting date and time
- 5. Measuring blood pressure 5.1 Positioning cuff 5.2 Correct posture 5.3 Measuring blood pressure
- WHO classification: 5.4 Evaluating results Cardiac arrhythmia:
- Range of blood pressure values : haemodynamic stability : lack of haemodynamic stability
- Deleting saved values 6. Calling up stored values 7. Cleaning and storing the instrument
- 8. Rectifying faults 9. Specifications
- 10. Mains part
•
For environmental reasons, do not dispose of the
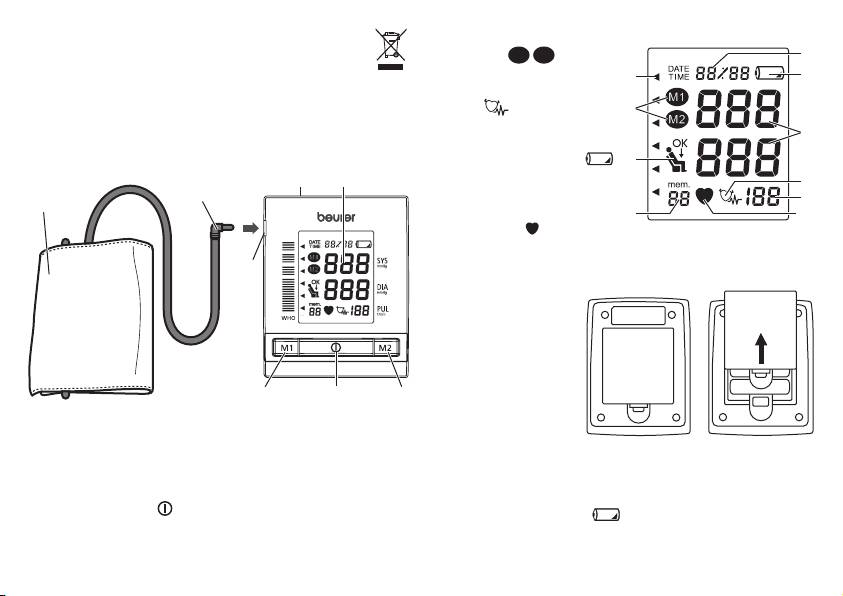
Icons in the display:
device in the household waste at the end of its useful
1 Memory
M1
M2
5
life. Dispose of the unit at a suitable local collection or
2 WHO classification
2
6
recycling point. Dispose of the device in accordance with EC
3 Cardiac arrhythmia
Directive – WEEE (Waste Electrical and Electronic Equip-
icon
1
ment). If you have any questions, please contact the local
4 Resting indicator
8
authorities responsible for waste disposal.
5 Date and time
6 Low battery indicator
4
3. Unit description
D
E
7 Pulse
3
B
8 Systole/diastole
7
A
9 Storage space
9
10
10 Pulse Mark
4. Getting started
C
Inserting battery
•
Remove the battery
cover from the back
of the monitor.
•
Insert four AA 1.5 V
alkaline batteries.
making absolutely
G F H
sure that you insert
A Cuff
them with the correct
B Cuff connector
polarity as marked.
C Cuff connector port
Do not use rechargeable batteries.
D Mains part port (rear of device)
•
Replace the battery cover carefully. Now you can set the
E Display
date and time.
F Start/stop button
If the low battery indicator
is flashing, then the batteries
G Memory button M1
are very low. It is still possible to take a measurement, but the
H Memory button M2
batteries should be replaced soon.
17
