Dell J730N: Rackmount Setup Removing the Battery Retaining Bracket
Rackmount Setup Removing the Battery Retaining Bracket: Dell J730N
Table of contents
- Getting Started With Your System
- Notes and Warnings
- System Features
- Finding Information
- Installation and Startup Unpacking the System
- Lifting the Cabinet
- Identifying the UPS Figure 1. The Dell Online Rack UPS Front Panel Figure 2. 3750W, 208V Rear Panel
- Figure 3. 3750W, 230V Rear Panel Figure 4. 4200W, 208V Rear Panel
- Figure 5. 4200W, 230V Rear Panel
- Rackmount Setup Removing the Battery Retaining Bracket
- Removing the Battery Trays
- Installing the Rails
- Installing the Cabinet
- Securing the Cabinet Installing the Battery Tray
- Replacing the Battery Retaining Bracket and Connecting the Internal Battery Connectors
- Installing the UPS Front Cover Connecting the Equipment
- Connecting the Power Cord (3750W/208V Models Only)
- Hardwiring the UPS Input Figure 6. Circuit Breaker Diagram
- Removing the Terminal Block Cover
- Installing the Input and Ground Wires
- Starting the UPS
- Completing the Startup
Rackmount Setup
CAUTION: The cabinet is heavy (66 kg/145.5 lb): 1) Dell strongly recommends to remove the battery tray from
the UPS before lifting. 2) Lifting the cabinets into the rack requires a minimum of two people.
CAUTION: Removing the batteries should be performed or supervised by personnel knowledgeable about
batteries and the required precautions. Keep unauthorized personnel away from batteries.
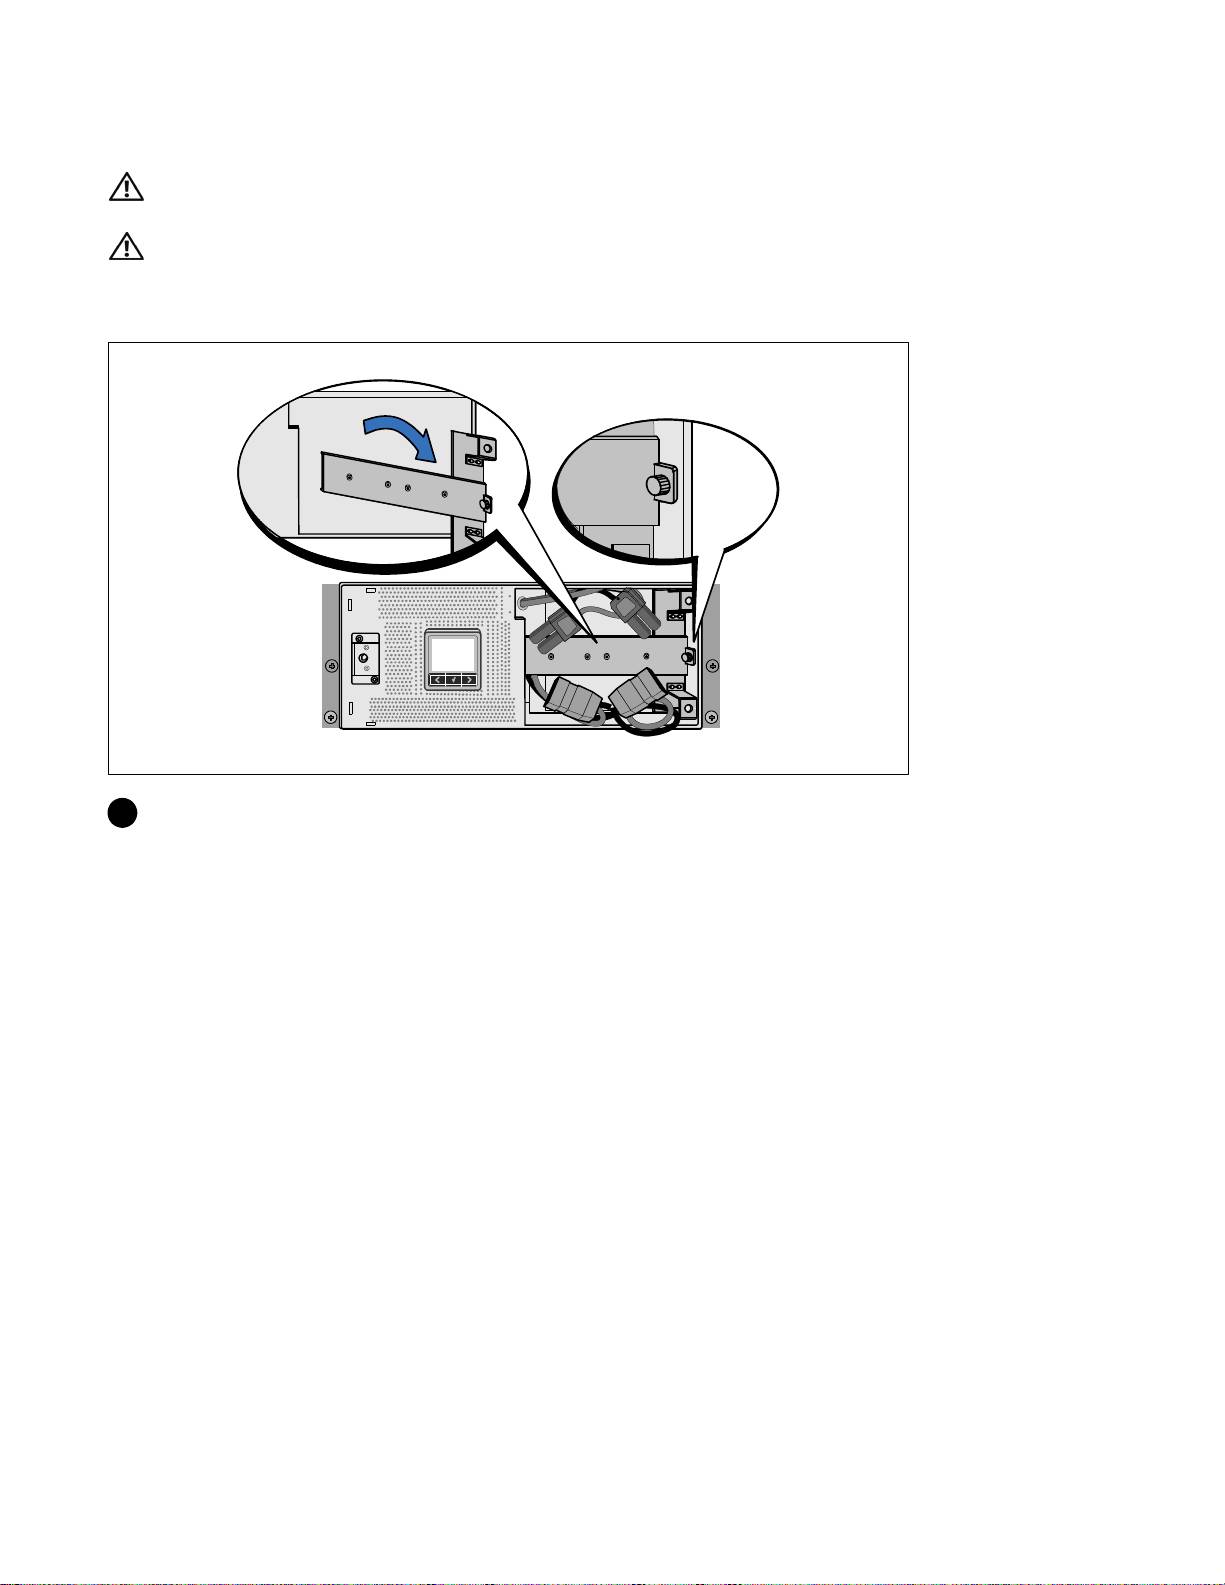
Removing the Battery Retaining Bracket
1 Loosen the thumbscrew on the battery retaining bracket and remove.
10
|
Installation and Startup
Top 10 manuals
100.00
NZXT HALE90 1000W99.99
Samsung SM-R38099.97
AEG BSB 18C99.97
Dell 2700W99.97
Smeg KSEC70X99.96
Beurer HDE 4099.96
Pyramida KH 50 v.299.96
MSI CSM-H81M-P3299.96
AEG HR 562799.95
Melissa 640-048