Dell H919N: Connecting the Power Cord
Connecting the Power Cord: Dell H919N
Table of contents
- Notes and Warnings
- System Features
- Finding Information
- Installation and Startup Unpacking the System
- Lifting the Cabinet
- Identifying the UPS Figure 1. The Dell Line-Interactive Rack UPS Front Panel Figure 2. UPS Rear Panel (1920W/120V, 1500W/120V Shown) Setting Up the UPS
- Rackmount Setup Opening the Battery Cover
- Removing the Battery Tray
- Installing the Rails
- Installing the Cabinet
- Securing the Cabinet Installing the Battery Tray
- Installing the UPS Front Cover
- Tower Setup (2700W UPS models only) Removing the Mounting Brackets and Rear Hold-Down Brackets Connecting the Internal Battery Connector
- Rotating the UPS Control Panel Orientation
- Installing the UPS Front Cover
- Connecting the Equipment
- Connecting the Power Cord
- Starting the UPS Completing the Startup
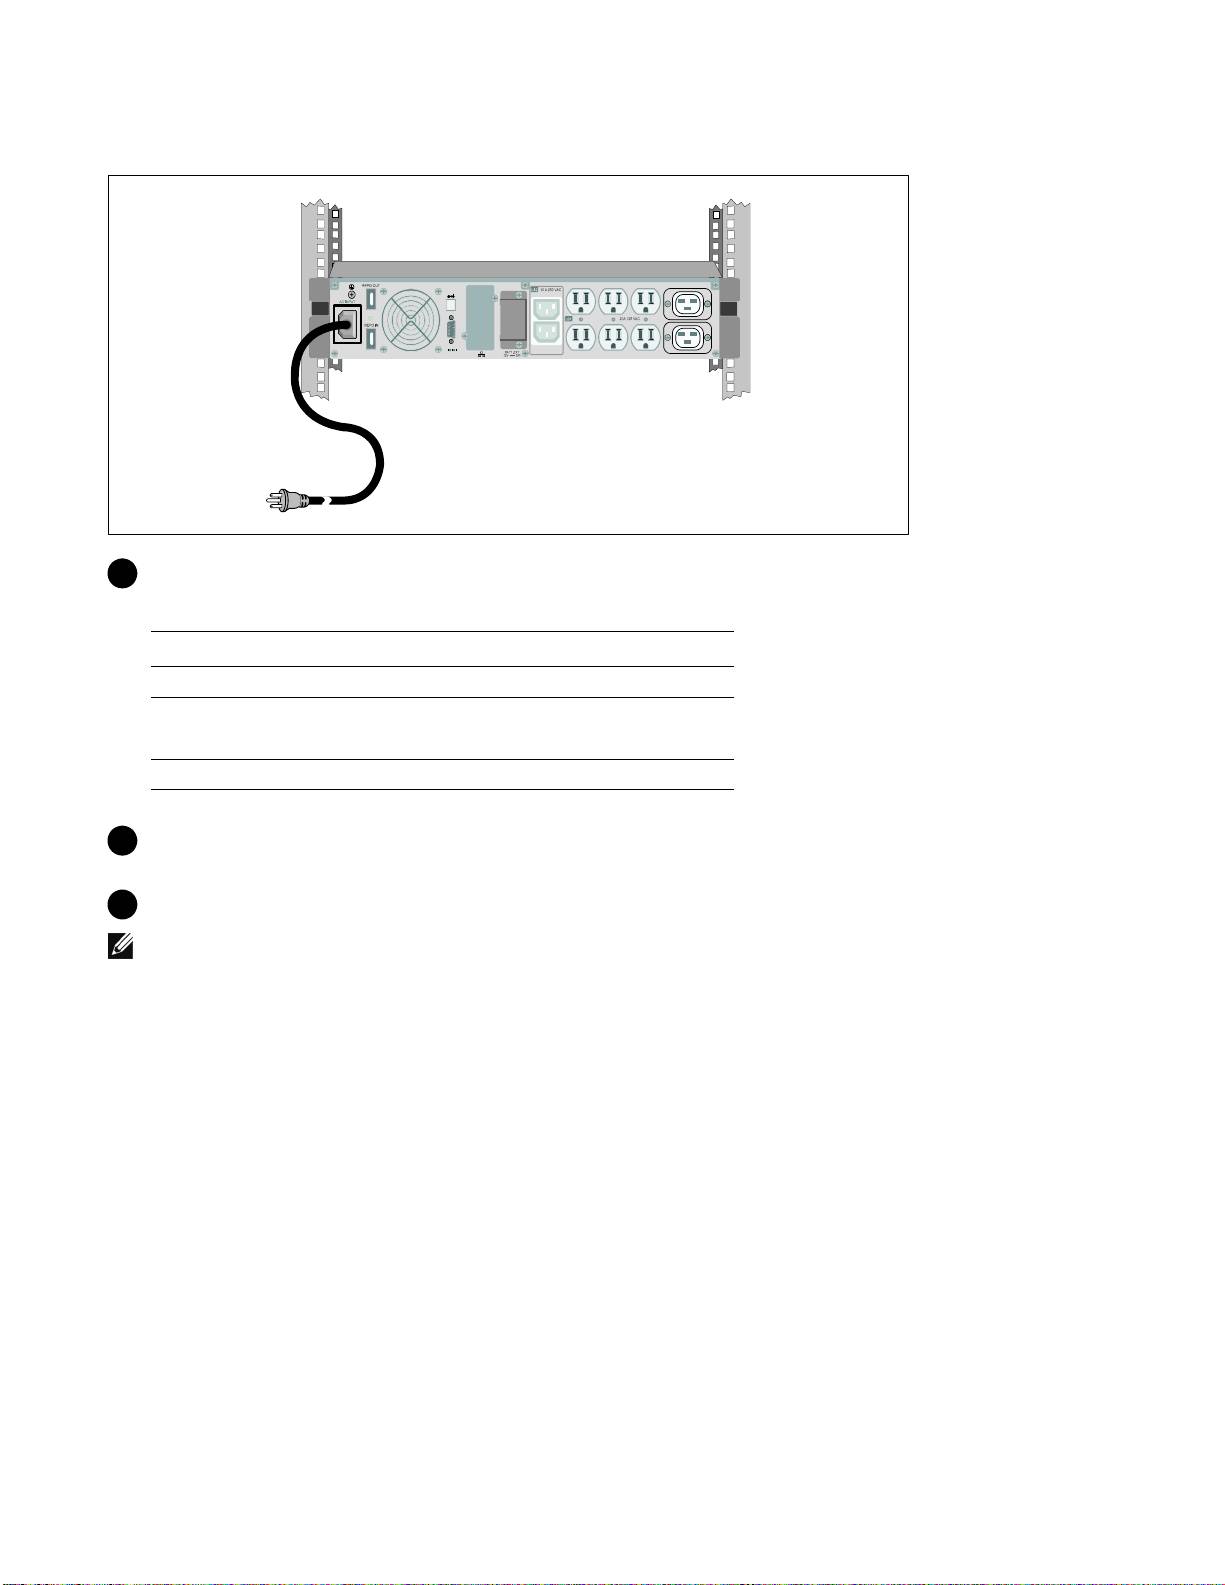
Connecting the Power Cord
5 Verify that the power input to the UPS has adequate upstream overcurrent protection:
Table 1. Minimum Upstream Circuit Breaker Rating
UPS Output Power
120V 208V 230V
1000W 15A — 15A
1500W (at 100V)
20A — 15A
1920W
2700W 30A 20A 16A
6 For models with a detachable power cord. Plug the detachable UPS power cord into the input
connector on the UPS rear panel.
7 Plug the UPS power cord into a power outlet.
NOTE:
For 1920/1500W models. There are two power cords in the box, one with BSMI and PSE certified
markings that can be used in Taiwan and Japan, another cord is for regions other than Taiwan and Japan.
16
|
Getting Started With Your System
Top 10 manuals
100.00
NZXT HALE90 1000W99.99
Samsung SM-R38099.97
AEG BSB 18C99.97
Dell 2700W99.97
Smeg KSEC70X99.96
Beurer HDE 4099.96
Pyramida KH 50 v.299.96
MSI CSM-H81M-P3299.96
AEG HR 562799.95
Melissa 640-048