Dell 4200W: Installing the UPS Front Cover Connecting the Equipment
Installing the UPS Front Cover Connecting the Equipment: Dell 4200W
Table of contents
- Notes and Warnings
- System Features
- Finding Information
- Installation and Startup Unpacking the System
- Lifting the Cabinet
- Identifying the UPS Figure 1. The Dell Online Rack UPS Front Panel Figure 2. 3750W, 208V Rear Panel
- Figure 3. 3750W, 230V Rear Panel Figure 4. 4200W, 208V Rear Panel
- Figure 5. 4200W, 230V Rear Panel
- Rackmount Setup Removing the Battery Retaining Bracket
- Removing the Battery Trays
- Installing the Rails
- Installing the Cabinet
- Securing the Cabinet Installing the Battery Tray
- Replacing the Battery Retaining Bracket and Connecting the Internal Battery Connectors
- Installing the UPS Front Cover Connecting the Equipment
- Connecting the Power Cord (3750W/208V Models Only)
- Hardwiring the UPS Input Figure 6. Circuit Breaker Diagram
- Removing the Terminal Block Cover
- Installing the Input and Ground Wires
- Starting the UPS
- Completing the Startup
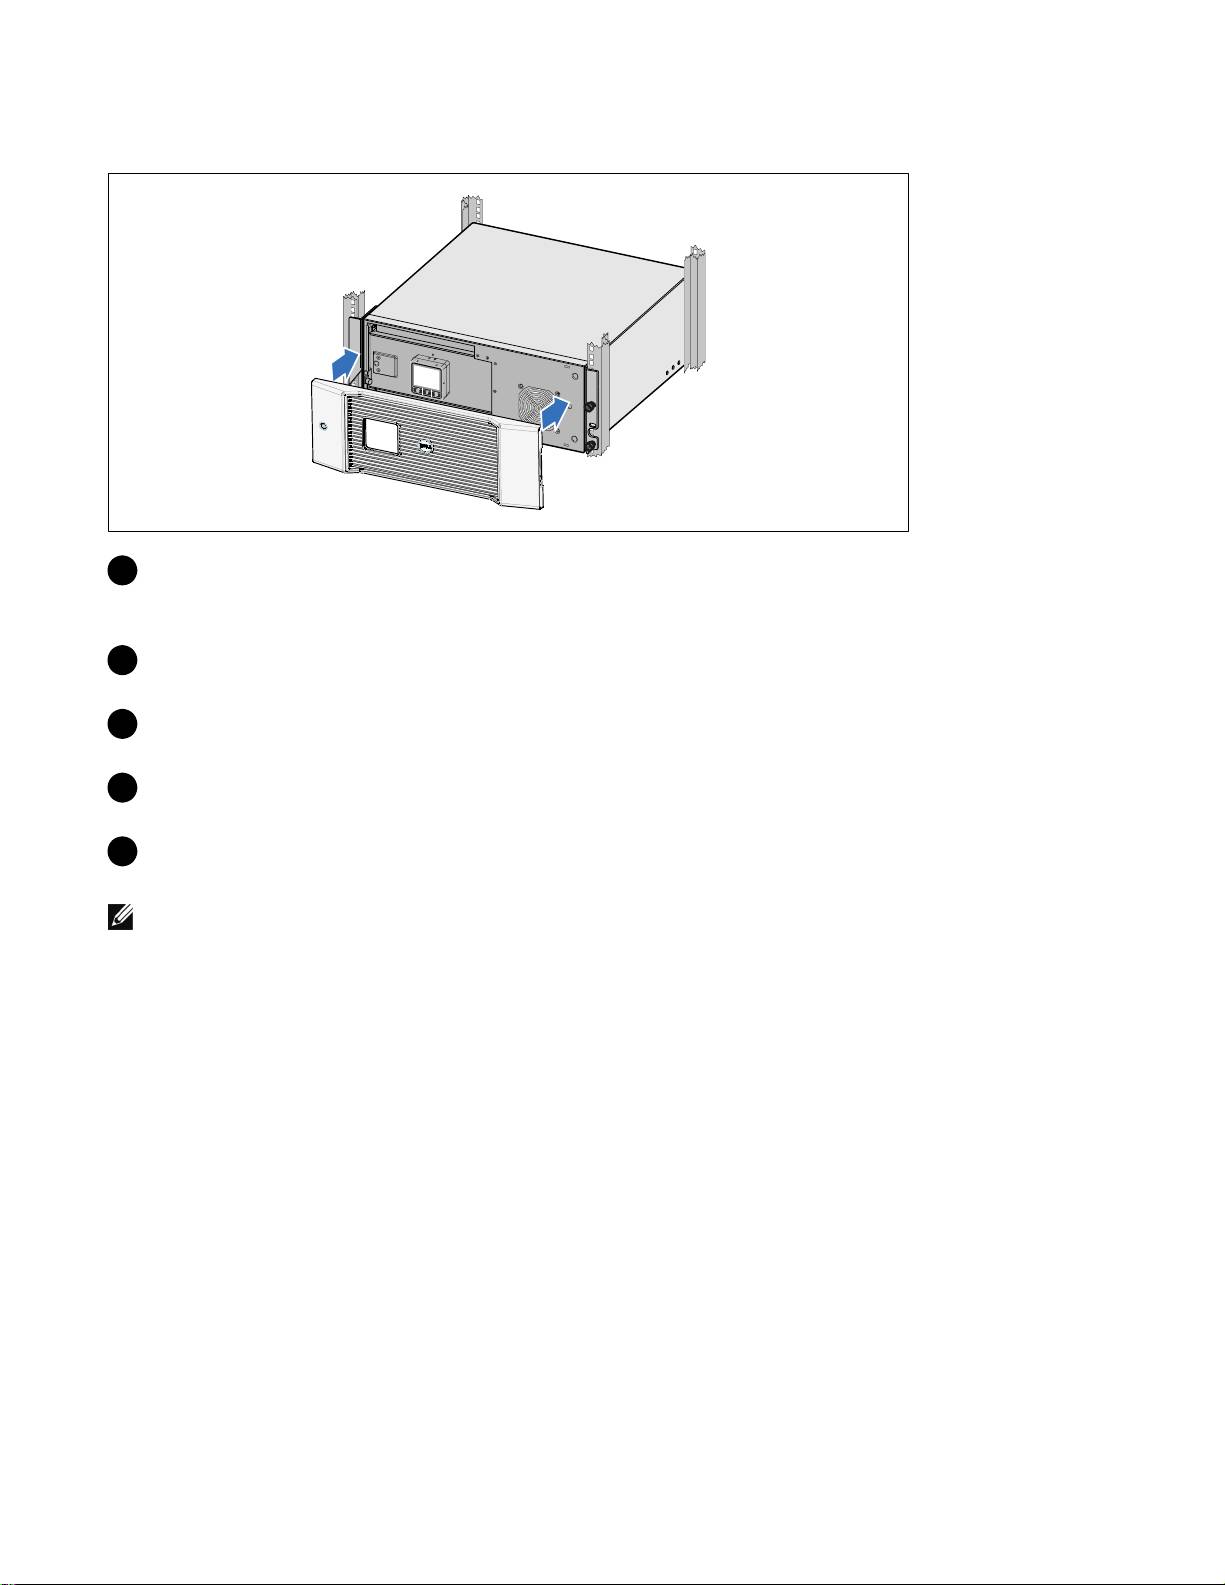
Installing the UPS Front Cover
12 Install the UPS front cover.
Connecting the Equipment
13
If you plan to use Dell UPS Management Software, connect your computer to the USB port using
the supplied cable.
14 If your rack has conductors for grounding or bonding of ungrounded metal parts, connect the
ground cable (not supplied) to the ground bonding screw.
15 If an emergency power-off (disconnect) switch is required by local codes, see “Installing Remote
Emergency Power-off” (REPO) in the Dell Online Rack UPS 3750W and 4200W User's Guide.
16 Plug the equipment to be protected into the UPS output receptacles, but do not turn on the
protected equipment.
NOTE:
Verify that the total equipment ratings do not exceed the UPS capacity to prevent an overload alarm.
16
|
Installation and Startup
