Beurer TL 40: Repairs 4. Unit description 5. Initial use 6. Operation
Repairs 4. Unit description 5. Initial use 6. Operation: Beurer TL 40
Table of contents
- 1. About the daylight lamp Why use a daylight lamp? 2. Signs and symbols
- 3. Notes Safety notes General notes Important
- Repairs 4. Unit description 5. Initial use 6. Operation
- 2 Enjoying the light 3 Important instructions 4 Enjoying light over longer periods 5 Switching off the lamp 7. Cleaning and care of the unit 8. Replacing the fluorescent tube 9. Storage
- 10. Disposal 11. What if there are problems? 12. Technical specifications
Repairs
Important
• Pleasedonotattempttorepairtheunityourself.Thiscouldresultinseriousinjuries.Failuretoobserve
this regulation shall void the warranty.
• Ifyouneedtohavetheunitrepaired,contactcustomerserviceoranauthoriseddealer.
1
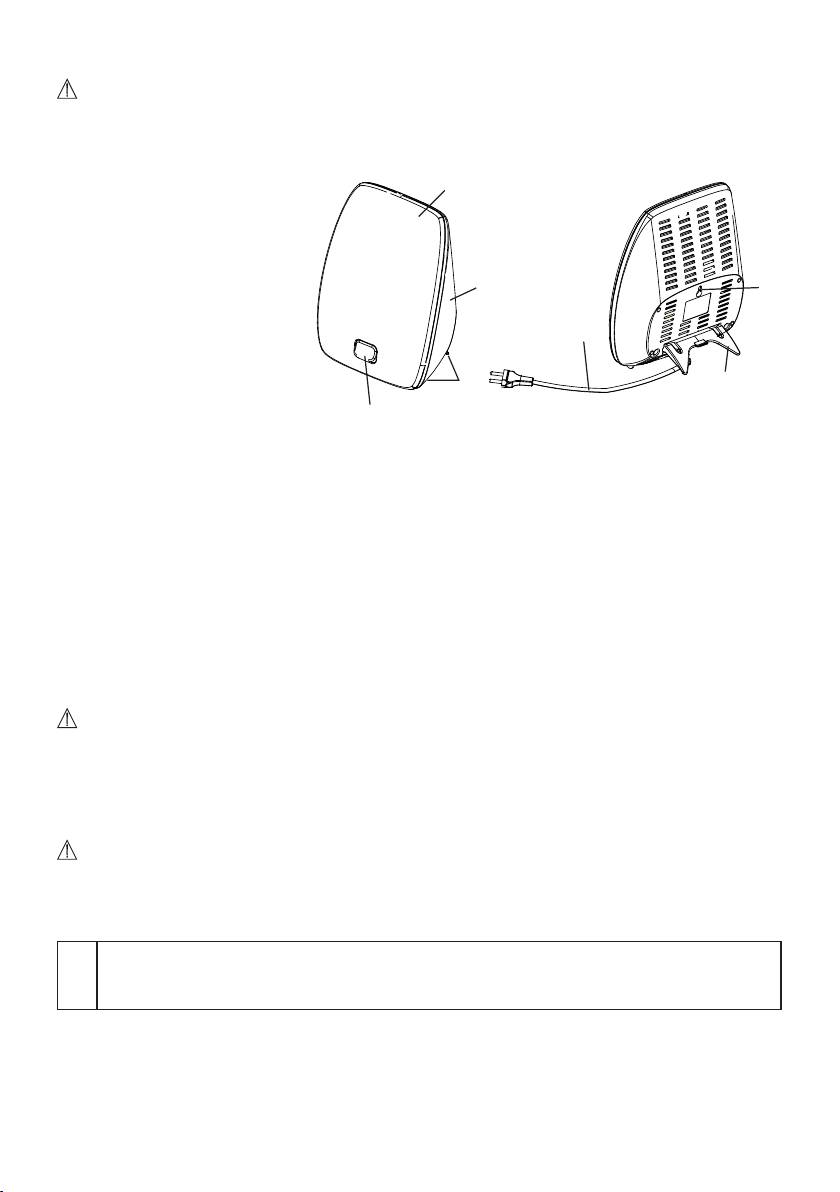
4. Unit description
Overview
1. Fluorescent screen
2.Rearofthedevicehousing
3. Support feet
2
7
4.On/offbutton
5. Mains cable with plug
5
6. Stand
7. Hole for wall-mounting fixture
6
3
4
5. Initial use
Afteropeningthepackagingchecktoensureitcontainsallthepartstobeincludedindelivery.
Take the device out of the plastic wrapping. Check the device for damage or faults. If you notice any damage or
faults on the device, do not use it and contact customer services or your supplier.
Positioning the device
Place the device on an even surface. The position should be chosen to ensure a distance of between 20cm and
40cm between the user and the device. The lamp is most effective at this distance.
Mounting the device on the wall
Alternatively,youcanalsomountthedeviceonthewall.Thisrequiresasolidwallwithastablesuspensionde-
vice(forconcretewallse.g.a25mmlongM4stainlesssteelself-tappingscrewandwallplug).Onlymountthe
deviceonthesuspensiondeviceatthehole(locatedcentrallyontherearofthedevice).Self-tappingscrewand
wall plug are not included in delivery.
Important:
If the area around the hole in the rear of the device is cracked or damaged, do not mount the device on the
wall!Forhelp,pleasecontactcustomerservicesoryourretailer.
Mains connection
Connect the unit only to the mains voltage listed on the type plate. Push the plug completely into the mains
socket.
Note:
•Ensurethatthereisasocketneartheplacewherethelampwillstand.
•Laythemainscableinsuchawaythatnoonecantripoverit.
6. Operation
1 Switching on the lamp
PresstheOn/Offbutton.Thetubesturnon.
The tubes develop their full luminosity after a couple of minutes.
10
