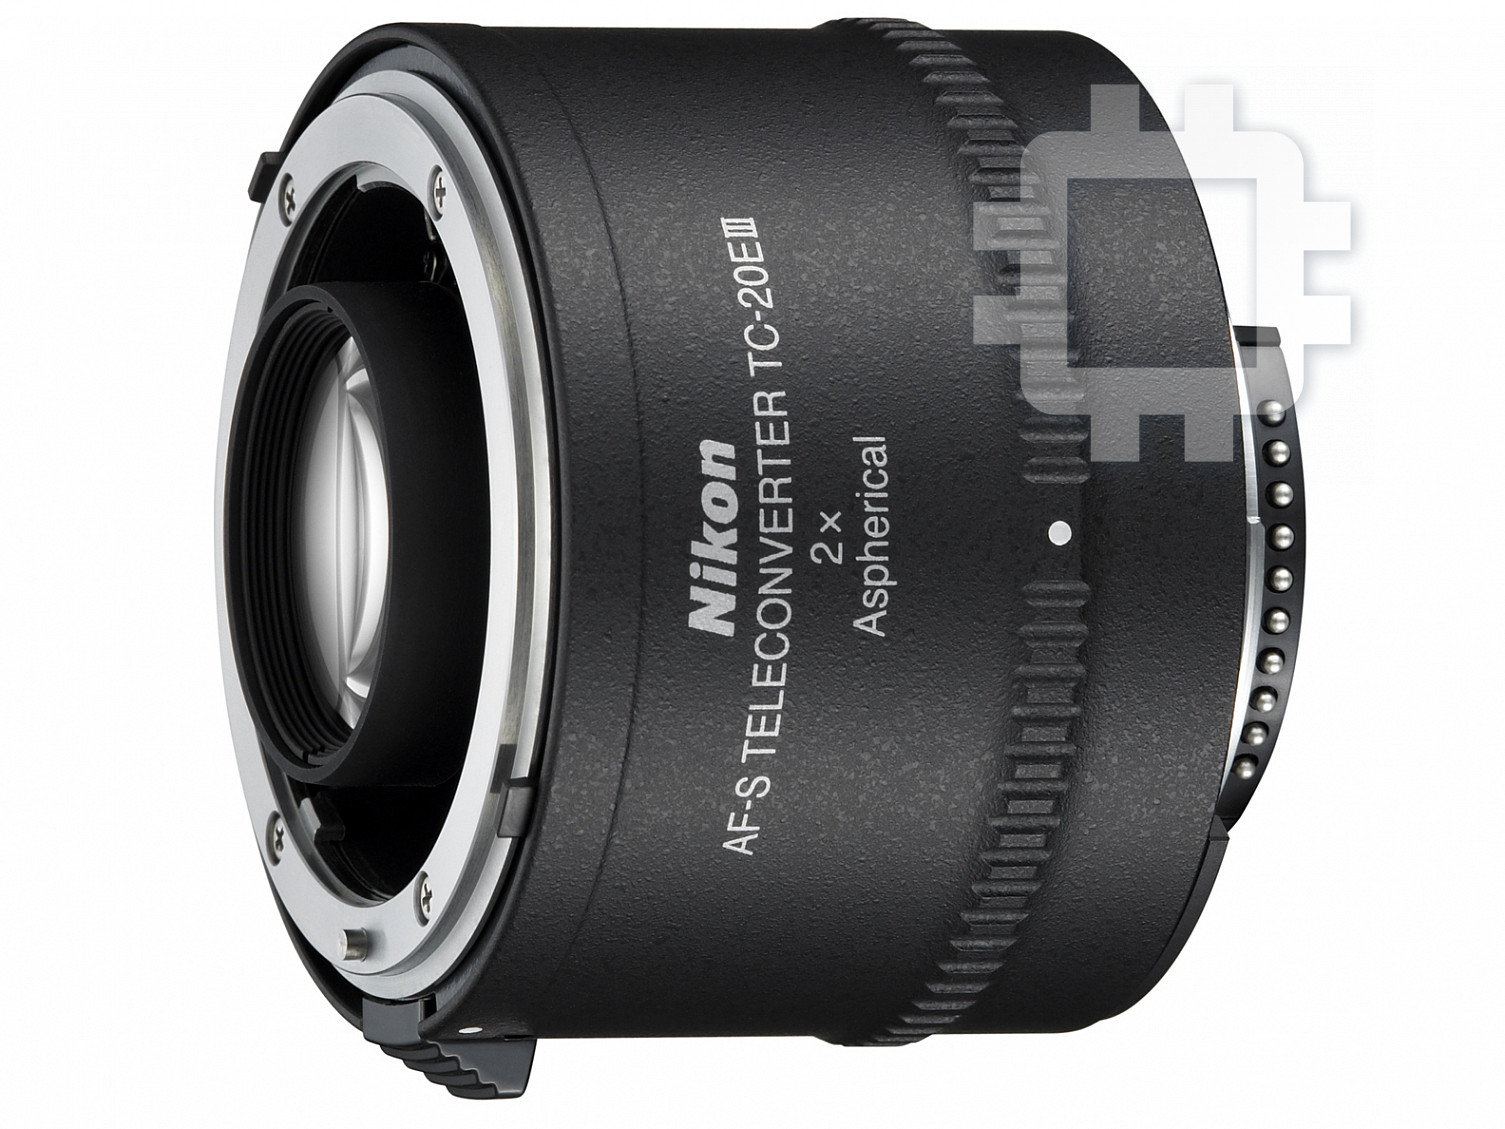
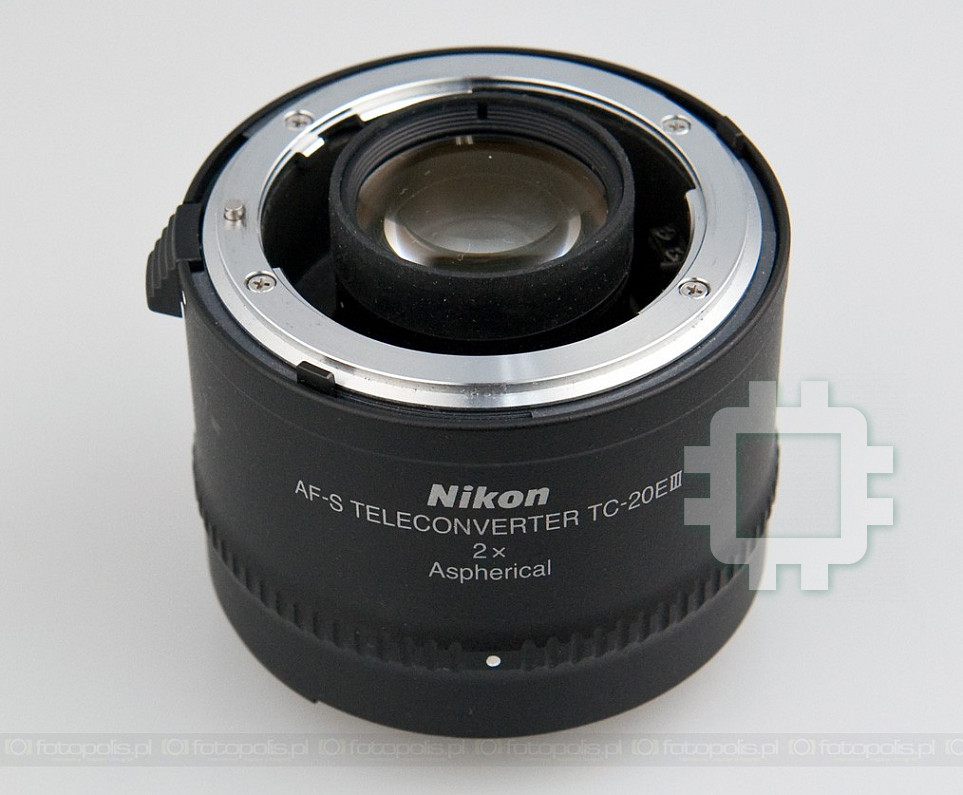
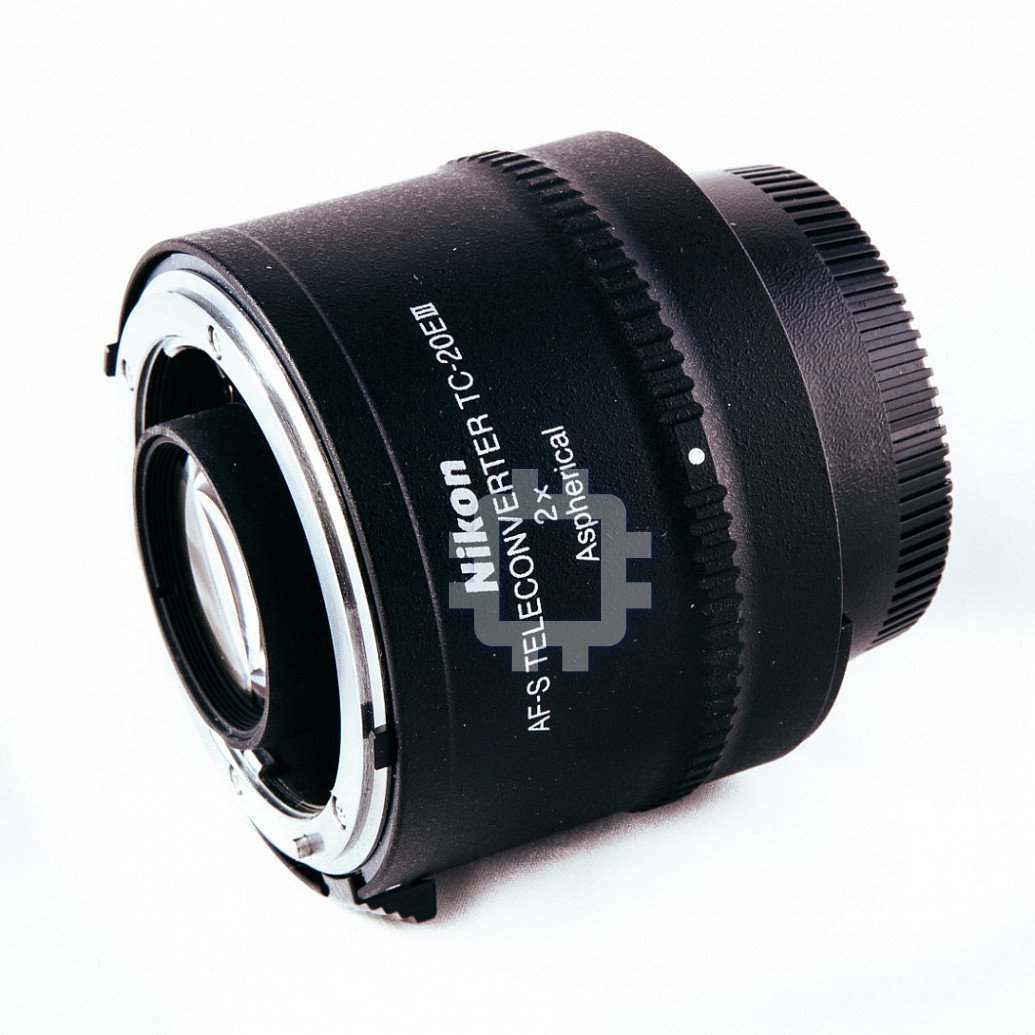
Nikon TC-20E III: инструкция
Раздел: Аксессуары для фото- и видеотехники
Тип: Объектив
Характеристики, спецификации
Инструкция к Объективу Nikon TC-20E III
Оглавление
- Меры безопасности
- ■ Обозначения к иллюстрации
- ■ Основные характеристики
- ■ Список используемых объективов
- ■ Рекомендуемые фокусировочные экраны Соединение телеконвертера с объективом
- ■ Соединение телеконвертера с ■ Определение экспозиции камерой
- ■ Фокусировка
- ■ Уход за телеконвертером ■ Стандартные принадлежности
- ■ Технические характеристики

P. 2
P.72
P.12
P.82
S.22
STR.92
P.32
STR.102
P.42
使用说明书
P.112
S.52
P.124
Printed in Japan
KL0A02(E3)
CTP.62
P.134
2010
7MAA62E3-02 G01
安全上のご注意
Jp
ご使用の前に「安全上のご注意」をよくお読みのうえ、正しくお使いください。この「安全上のご注意」は製品を
安全に正しく使用していただき、あなたや他の人々への危害や財産への損害を未然に防止するために、重要な内容
を記載しています。お読みになった後は、お使いになる方がいつでも見られる所に必ず保管してください。
表示について
表示と意味は次のようになっています。
この表示を無視して、誤った取り扱いをすると、人が死亡または重傷を負う可能性が想定され
警告
る内容を示しています。
この表示を無視して、誤った取り扱いをすると、人が傷害を負う可能性が想定される内容およ
注意
び物的損害の発生が想定される内容を示しています。
お守りいただく内容の種類を、次の絵表示で区分し、説明しています。
絵表示の例
記号は、注意(警告を含む)を促す内容を告げるものです。図の中や近くに具体的な注意内容
(左図の場合は感電注意)が描かれています。
記号は、禁止の行為(してはいけないこと)を告げるものです。図の中や近くに具体的な禁止内容
(左図の場合は分解禁止)が描かれています。
●記号は、行為を強制すること(必ずすること)を告げるものです。図の中や近くに具体的な強制内容
(左図の場合は電池を取り出す)が描かれています。
2
警 告
注 意
Jp
分解したり、修理や改造をしないこと
ぬれた手でさわらないこと
感電したり、異常動作をしてケガの原因となります。
感電注意
感電の原因になることがあります。
分解禁止
製品は、幼児の手の届かないところに置く
落下などによって破損し、内部が露出した
こと
接触禁止
ときは、露出部に手を触れないこと
放置禁止
ケガの原因になることがあります。
感電したり、破損部でケガをする原因となります。
カメラの電池を抜いて、販売店またはニコンサー
逆光撮影では、太陽を画角から充分にずら
すぐに
ビス機関に修理を依頼してください。
すこと
修理依頼を
太陽光がカメラ内部で焦点を結び、火災の原因に
使用注意
熱くなる、煙が出る、こげ臭いなどの異常時は、
なることがあります。画角から太陽をわずかに外
速やかにカメラの電池を取り出すこと
しても火災の原因になることがあります。
電池を取る
そのまま使用すると火災、やけどの原因となりま
使用しないときは、レンズにキャップをつけ
す。電池を取り出す際、やけどに充分注意してく
るか太陽光のあたらない所に保管すること
ださい。電池を抜いて、販売店またはニコンサー
すぐに
保管注意
太陽光が焦点を結び、火災の原因になることがあ
修理依頼を
ビス機関に修理を依頼してください。
ります。
水につけたり、水をかけたり、雨にぬらし
三脚にカメラやレンズを取り付けたまま移動
たりしないこと
水かけ禁止
しないこと
発火したり感電の原因となります。
転倒したりぶつけたりしてケガの原因になること
移動注意
引火、爆発のおそれのある場所では使用し
があります。
ないこと
窓を閉め切った自動車の中や直射日光が当
プロパンガス・ガソリンなど引火性ガスや粉塵の
使用禁止
たる場所など、異常に温度が高くなる場所
発生する場所で使用すると、爆発や火災の原因と
に放置しないこと
なります。
放置禁止
内部の部品に悪い影響を与え、火災の原因となる
レンズまたはカメラで直接太陽や強い光を
ことがあります。
見ないこと
見ないこと
失明や視力障害の原因となります。
3
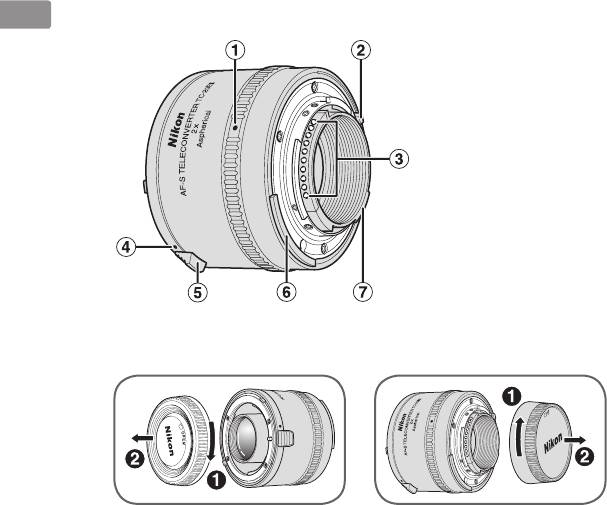
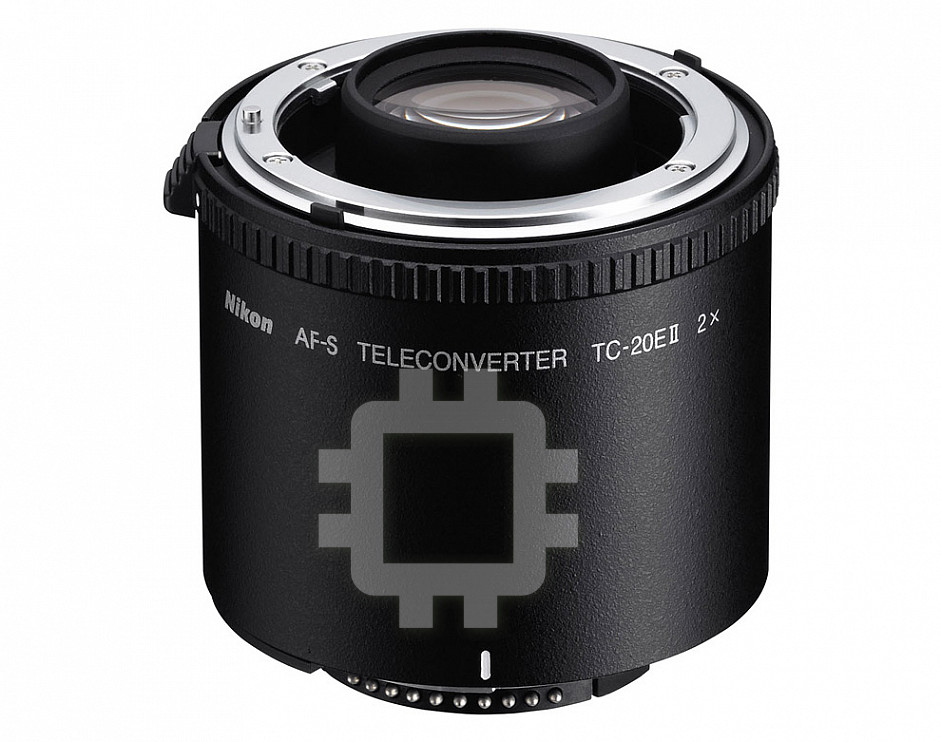
■ 各部の名称
Jp
1
カメラ取り付け指標(P.8)
2
最小絞り信号ガイド[EE 連動ガイド]
3
CPU 信号接点(P.10)
4
レンズ取り付け指標(P.7)
5
レンズ取り外しレバー(P.7)
6
露出計連動ガイド
7
開放 F 値連動ガイド
( ):参照頁
4

このたびはニコンテレコンバーターをお買い上げくださいまして、誠にありがとうございます。ご使
Jp
用の前に、この使用説明書をよくお読みの上、正しくお使いください。また、カメラおよびレンズの
使用説明書もご覧ください。
■ 主な特長
●
AF-S または AF-I ニッコールレンズとカメラとの間に装着して、主レンズの焦点距離を 2 倍に拡大するアタッチメントレ
ンズです。
●
CPU 信号接点、自動絞り機構、露出計連動機構および最小絞り信号連動機構を内蔵していますので主レンズの機能を充分
に活かすことができます。
●
非球面レンズの採用により、主レンズの光学性能への影響を最小限に抑えます。
ご注意
●
AF-S または AF-I ニッコールレンズ専用です(P.6)。この他のレンズには装着できません。
●
主レンズの使用可能な機能につきましては、使用するカメラにより異なります。詳細は主レンズの使用説明書をご覧くだ
さい。
●
AF(オートフォーカス)撮影およびフォーカスエイドに関しては、テレコンバーターの性格上多少の制約がありますので、
「ピント合わせの方法(P.9)」をご覧ください。
5

Jp
■ 使用可能なレンズについて
使用可能な AF-S および AF-I ニッコールレンズは次の通りです。
※
※
AF-S VR Micro-Nikkor ED 105mm f/2.8G IF
AF-S NIKKOR 500mm f/4G ED VR
※
AF-S VR Nikkor ED 200mm f/2G IF
AF-S Nikkor ED 500mm f/4D IF
※
AF-S NIKKOR 300mm f/2.8G ED VR
AF-S Nikkor ED 500mm f/4D IF
※
AF-S VR Nikkor ED 300mm f/2.8G IF
AF-I Nikkor ED 500mm f/4D IF
※
AF-S Nikkor ED 300mm f/2.8D
IF
AF-S NIKKOR 600mm f/4G ED VR
※
AF-S Nikkor ED 300mm f/2.8D IF
AF-S Nikkor ED 600mm f/4D IF
※
AF-I Nikkor ED 300mm f/2.8D IF
AF-S Nikkor ED 600mm f/4D IF
※
※
AF-S Nikkor ED 300mm f/4D IF
AF-I Nikkor ED 600mm f/4D IF
AF-S NIKKOR 400mm f/2.8G ED VR
AF-S NIKKOR 70-200mm f/2.8G ED VR
AF-S Nikkor ED 400mm f/2.8D
IF
AF-S VR Zoom-Nikkor ED 70-200mm f/2.8G IF
AF-S Nikkor ED 400mm f/2.8D IF
AF-S Zoom-Nikkor ED 80-200mm f/2.8D IF
※
AF-I Nikkor ED 400mm f/2.8D IF
AF-S VR Zoom-Nikkor ED 200-400mm f/4G IF
※ AF(オートフォーカス)撮影はできません。
●
上記以外のレンズには使用できません。レンズ後部がテレコンバーターに接触し、破損する恐れがありますので、取り付
けないでください。
●
VR(手ブレ補正)機能を持ったレンズは、VR 機能が使用可能です(VR 機能使用可能カメラ : FX フォーマット /DX フォー
マットのニコンデジタル一眼レフカメラ、F6、F5、F100、F80 シリーズ、ニコン U2、ニコン U)。
6

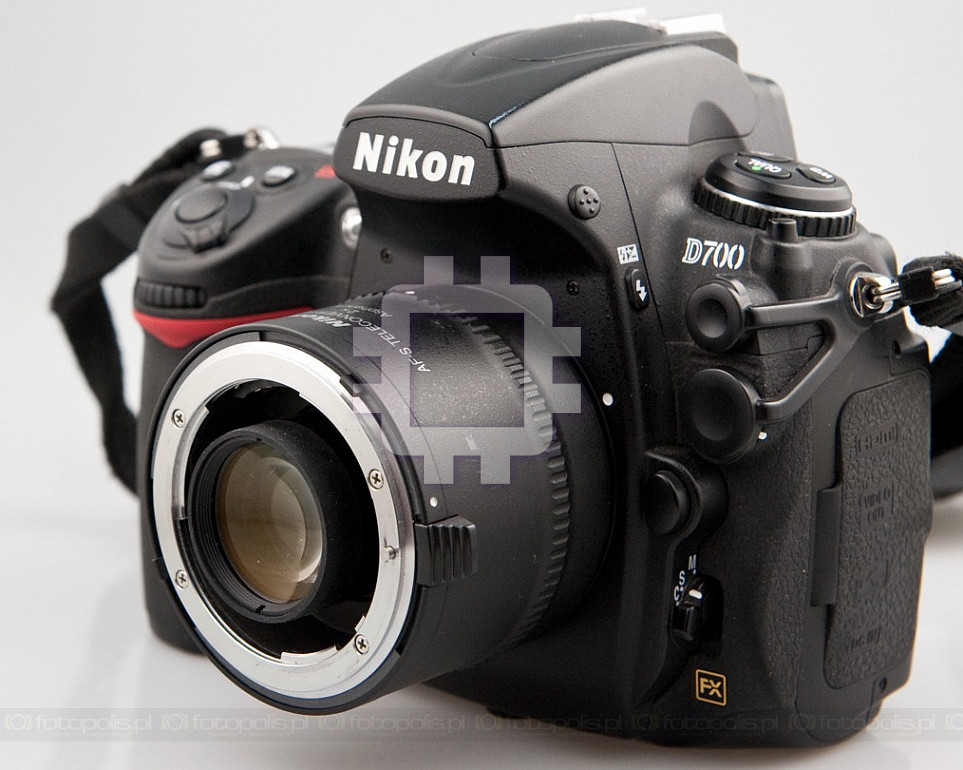
■ レンズおよびファインダースクリーンと
■ レンズの取り付け、取り外し
Jp
の組み合わせ
取り付け方
レンズのレンズ着脱指標をテレコンバーターのレンズ取
ニコン F6、F5 には多種類のファインダースクリーン
り付け指標に合わせて差し込み、テレコンバーターをレ
があり、レンズやファインダースクリーンのタイプや
ンズ後方からみて反時計方向へ止まるまで回します。
撮影条件に合わせて最適のものを選ぶことができます。
●
適したファインダースクリーンにつきましては組み合
テレコンバーターを取り付けるためにレンズをカメラか
ら取り外す際は、カメラの電源を OFF にして、直射日光
わせ表(P.144)をご覧ください。
を避けて行ってください。
●
ご使用に際しては、必ずファインダースクリーン、各カ
●
テレコンバーターをレンズに取り付ける際は、テレコン
メラおよび各レンズの使用説明書を併せてご覧ください。
バーターのレンズ取り外しレバーを押さないようご注意
●
表中の記号および数値については次の通りです。
ください。
構図の決定やピント合わせの目的には
取り外し方
T: 好適です。
テレコンバーターのレンズ取り外しレバーを押しなが
R: 視野の一部が多少見にくくなりますが、撮影結果には
全く影響がありません。
ら、テレコンバーターをレンズ後方からみて時計方向
Y: スプリットプリズム部、マイクロプリズム部および十
に、テレコンバーターのレンズ取り付け指標とレンズ
字線部では、ピント合わせができません。周囲のマッ
のレンズ着脱指標が合うまで回転させて取り外します。
ト面でピントを合わせます。
[: [ 内の数値は、中央部重点測光時に必要な露出補正値
です。測光値の補正方法については、各カメラの使用
説明書をご覧ください。
: 露出は決められませんが、ピント合わせには使えます。
空欄: 使用不適当です。ただし、M スクリーンの場合、撮
影倍率 1/1 倍以上の近接撮影に用いるため、この限
りではありません。
7

Jp
■ カメラの取り付け、取り外し
■ 露出の決めかた
取り付け方
テレコンバーターをレンズに装着すると、レンズの明
テレコンバーターのカメラ取り付け指標をカメラのレ
るさが 2 段相当低下します。
ンズ着脱指標に合わせて差し込み、カメラをカメラ後
●
CPU・AI 方式および AI 方式のカメラとの組み合わせで
方からみて反時計方向に止まるまで回します。
は TTL 露出方式と連動して開放測光が行えます(ただし、
●
AI 方式カメラと G タイプレンズとの組み合わせでは測光
テレコンバーター単体またはレンズ / テレコンバーターを
は行えません)。
カメラに取り付ける際は、カメラの電源を OFF にして、
●
直射日光を避けて行ってください。また、このときカメラ
AI 方式以前の非 AI 方式カメラとの組み合わせでは、絞り
のレンズ取り外しボタンを押さないようご注意ください。
込み測光となります(ただし、非 AI 方式カメラと G タイ
●
プレンズとの組み合わせでは測光は行えません)。
AI 方式のカメラに取り付ける場合、露出計連動レバーが
●
ハネ上げ式のカメラでは、レバーが正しい位置にあるこ
テレコンバーター使用時に可能な露出モードおよび測光
とを確認してから取り付けてください(詳細は各カメラ
モードについては、各カメラの使用説明書をご覧ください。
の使用説明書をご覧ください)。
取り外し方
カメラのレンズ取り外しボタンを押しながら、カメラ
をカメラ後方からみて時計方向に、カメラのレンズ着
脱指標とテレコンバーターのカメラ取り付け指標が合
うまで回転させて取り外します。
8

■ ピント合わせの方法
Jp
ご使用のカメラや撮影目的によって、下表のようなピント合わせが選択できます。
カメラの
レンズのフォーカスモード
カメラ
フォーカスモード
M/A、A/M M
FX フォーマット /DX フォーマットの
※1
マニュアル優先オートフォーカス
、
マニュアルフォーカス
二コンデジタル一眼レフカメラ、
AF(C/S)
※1
※1
オート優先オートフォーカス
(フォーカスエイド可
)
F6、F5、F4 シリーズ、F100、
F90X シリーズ、F90 シリーズ、
F80 シリーズ、ニコン U2、F70D、
※1
MF マニュアルフォーカス(フォーカスエイド可
)
ニコン U、プロネア 600i、プロネア S
上記以外の AF(オートフォーカス)
AF(C/S)
※3
※2
マニュアルフォーカス(フォーカスエイド可
)
カメラ(F3AF
を除く)
MF
AF 以外のカメラ マニュアルフォーカスのみ
※ 1: レンズの開放絞り値が F2.8(合成絞り値で F5.6)以上明るい AF-S/AF-I レンズで AF(オートフォーカス)およびフォー
カスエイドによるピント合わせが可能です。
※ 2: F3AF カメラでは使用できません。
※ 3: レンズの開放絞り値が F2.8(合成絞り値で F5.6)以上、F-501 に装着時は F2(合成絞り値で F4)以上明るい
AF-S/AF-I レンズでフォーカスエイドによるピント合わせが可能です。
●
AF-S VR Micro-Nikkor ED 105mm f/2.8G IF は、撮影倍率が上がるにしたがい撮像素子(フィルム面)上での像の明
るさは減少し、有効 F 値(実効 F 値)が大きく(暗く)なります。
9

Jp
■ テレコンバーター
のお手入れと取り扱い
■ 付属アクセサリー
●
テレコンバーターキャップ BF-3A
上のご注意
●
裏ぶた LF-1
●
CPU 信号接点は汚さないようにご注意ください。
●
ソフトケース CL-0715
●
テレコンバーターの
レンズ面の清掃は、ホコリを拭う程度
にしてください。指紋がついたときは、柔らかい清潔な木綿
■ 仕 様
の布に無水アルコール(エタノール)または市販のレンズク
レンズ構成: 5 群 7 枚(非球面レンズ 1 枚)
リーナーを少量湿らせ、レンズの中心から外周へ渦巻状に、
絞り方式: 自動絞り連動
拭きムラ、拭き残りのないように注意して拭いてください。
測光方式: 開放測光連動
●
シンナーやベンジンなどの有機溶剤は絶対に使用しない
マウント: AF-S/AF-I レンズ専用マウント(前側)、
でください。
ニコンFマウント(後側)
●
テレコンバーターをケースに入れるときは、必ずテレコ
寸法: 約 66 mm(最大径)× 48 mm
ンバーターキャップと裏ぶたを取り付けてください。
(バヨネットマウント基準面の間隔)、
●
テレコンバーターを長期間使用しないときは、カビやサ
全長約 60 mm
ビを防ぐために、高温多湿のところを避けて風通しのよ
質量: 約 330 g
い場所に保管してください。また、直射日光のあたると
ころ、ナフタリンや樟脳のあるところも避けてください。
主レンズと組み合わせた場合、次の通りです。
●
テレコンバーターを水に濡らすと、部品がサビつくなど
焦点距離:
主レンズの 2 倍
して故障の原因となりますのでご注意ください。
絞り連動範囲: f/2 ~ f/32(有効F値では f/4 ~ f/64)
●
ストーブの前など、高温になるところに置かないでくださ
撮影倍率: 主レンズの 2 倍
い。極端に温度が高くなると、外観の一部に使用している
被写界深度: 主レンズの 1/2 倍
強化プラスチックが変形することがあります。
最短撮影距離: 主レンズと同一
※
仕様、外観の一部を、改善のため予告なく変更すること
があります。
10

Jp
11

Notes on Safety Operations
CAUTION
En
Do not disassemble
Do not look at the sun through the lens or
Touching the internal parts of the camera or lens could result
viewfinder
in injury. Repairs should be performed only by qualified
Viewing the sun or other strong light sources through the lens
technicians. Should the camera or lens break open as the
or viewfinder could cause permanent visual impairment.
result of a fall or other accident, take the product to a Nikon-
Keep out of reach of children
authorized service representative for inspection after
Particular care should be taken to prevent infants from putting
unplugging the product and/or removing the battery.
the batteries or other small parts into their mouths.
Turn off immediately in the event of
Observe the following precautions when
malfunction
handling the camera and lens
Should you notice smoke or an unusual smell coming from
• Keepthecameraandlensunitdry.Failuretodosocould
the camera or lens, remove the battery immediately, taking
result in fire or electric shock.
care to avoid burns. Continued operation could result in injury.
• Donothandleortouchthecameraorlensunitwithwet
After removing or disconnecting the power source, take the
hands.Failuretodosocouldresultinelectricshock.
product to a Nikon-authorized service representative for
• Whenshootingwithback-lighting,donotpointthelensat
inspection.
the sun or allow sunlight to pass directly down the lens as
this may cause the camera to overheat and possibly cause a
Do not use the camera or lens in the presence
fire.
of flammable gas
• Whenthelenswillnotbeusedforanextendedperiodof
Operating electronic equipment in the presence of flammable
time, attach both front and rear lens caps and store the lens
gas could result in an explosion or fire.
awayfromdirectsunlight.Failuretodosocouldresultina
fire, as the lens may focus sunlight onto a flammable object.
12
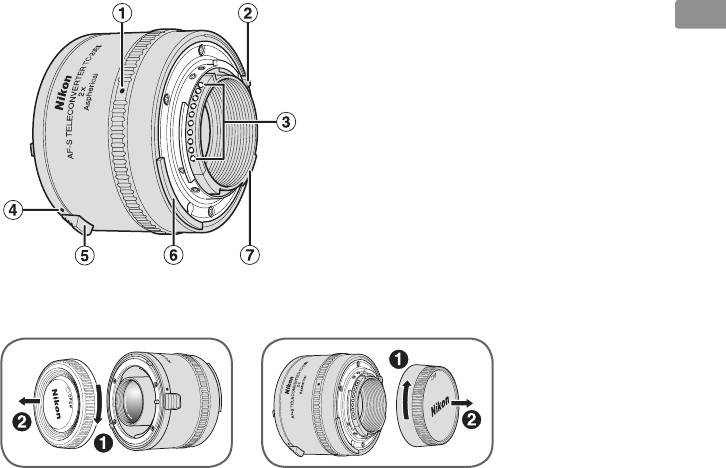
■ Nomenclature
1 Teleconverter-camera index
(p. 17)
En
2 Minimum aperture signal post
(EE servo coupling post)
3 CPU contacts (p. 19)
4 Lens mounting index (p. 16)
5 Lens release lever (p. 16)
6 Meter coupling lever
7 Maximum aperture coupling ridge
( ): reference page
13

Thank you for purchasing theAF-S Teleconverter. Before using this teleconverter, please read these
instructions and refer to your lens' and camera's User's Manual.
En
■ Major features
• This teleconverter doubles the prime lens' focal length with a two-stop loss in effective aperture.
• BecauseyourAF-STeleconverterhasCPUcontacts,andfeaturesautofocus,metercouplingandminimum
aperture coupling, you can fully take advantage of prime lens' features.
• This teleconverter employs aspherical lens, which minimizes optical interference of the prime lens.
Important
• ThisteleconverterisexclusivelyfortheAF-SorAF-INIKKORlens(p.15);otherlensescannotbeused.
• Thefunctionsofthelensattacheddependonthecamerainuse.Fordetails,refertothelens'User's Manual.
• RefertotheFocusing (p. 18) for available autofocus and focus assist.
14

■ Usable lenses
ThefollowingAF-SandAF-INIKKORlensescanbeusedwiththeTC-20E :
En
*
*
AF-SVRMicro-Nikkor105mmf/2.8GIF-ED
AF-SNIKKOR500mmf/4GEDVR
*
AF-SVRNikkor200mmf/2GIF-ED
AF-SNikkor500mmf/4DIF-ED
*
AF-SNIKKOR300mmf/2.8GEDVR
AF-SNikkor500mmf/4DIF-ED
*
AF-SVRNikkor300mmf/2.8GIF-ED
AF-INikkor500mmf/4DIF-ED
*
AF-SNikkor300mmf/2.8DIF-ED
AF-SNIKKOR600mmf/4GEDVR
*
AF-SNikkor300mmf/2.8DIF-ED
AF-SNikkor600mmf/4DIF-ED
*
AF-INikkor300mmf/2.8DIF-ED
AF-SNikkor600mmf/4DIF-ED
*
*
AF-SNikkor300mmf/4DIF-ED
AF-INikkor600mmf/4DIF-ED
AF-SNIKKOR400mmf/2.8GEDVR
AF-SNIKKOR70-200mmf/2.8GEDVR
AF-SNikkor400mmf/2.8DIF-ED
AF-SVRZoom-Nikkor70-200mmf/2.8GIF-ED
AF-SNikkor400mmf/2.8DIF-ED
AF-SZoom-Nikkor80-200mmf/2.8DIF-ED
*
AF-INikkor400mmf/2.8DIF-ED
AF-SVRZoom-Nikkor200-400mmf/4GIF-ED
* Autofocus cannot be used.
• Otherlensescannotbeused.Donotattachotherlensessincetherearelementsofthelenswilltouchandmay
damage the elements in the teleconverter.
• VibrationreductionfunctioncanbeusedwiththeVR(VibrationReduction)lensusedwithNikondigitalSLR
(NikonFX/DXformat)cameras,F6,F5,F100,F80-series/N80-series**,F75-series/N75-series**andF65-series/N65-
series** camera body.
** The Nikon N80-series, N75-series and N65-series are sold exclusively in the U.S.A.
15

■ Recommended focusing screens
■ Attaching to the lens
Nikon offers a variety of interchangeable focusing
When removing the lens from the camera body to attach
En
screensforNikonF6orF5cameras,tosuitanytypeof
the teleconverter, make sure that the camera's power is
lens or picture-taking situation. Those recommended
turned off and avoid direct sunlight.
for your teleconverter/lens combination are listed on
To attach
pages144–145.
Attach the teleconverter to the lens so that the
T= Excellent focusing
teleconverter's lens mounting index is aligned with
R= Acceptable focusing
the aperture index on the lens. Taking care not to
Slight vignetting or moire phenomenon affects
press the lens release lever, turn the teleconverter
screen image, but film image shows no traces of
counterclockwise (with the lens facing away from
this.
you) until it clicks into place.
Y= Acceptable focusing
To remove
Split-image rangefinder, microprism or cross-hair
Slide back the teleconverter's lens release lever and
areaisdim;focusonthesurroundingmattearea.
turn the teleconverter clockwise (with the lens facing
[=Indicatesdegreeofexposurecompensation
away from you) until the teleconverter's lens
requiredinCenter-Weightedmetering.SeeUser's
mounting index is aligned with the lens' mounting
Manual of the camera body for more details.
index.
fF=Exposuremeasurementnotpossible;
teleconverter/screen combination permits only
focusing operation.
Blank box means not applicable. Since type M screen
can be used for both macro photography at a 1:1
magnification ratio or higher and for
photomicrography, it has different applications than
other screens.
16

■ Attaching teleconverter to camera
■ Determining exposure
body
Using this teleconverter with a lens decreases the
En
effective aperture by two stops.
Make sure that the camera's power is turned off and
• WithAI-typecameraswith/withoutCPUcontacts:
avoid direct sunlight.
Determineexposureinthesamemannerasusing
To attach
the prime lens only. (However, exposure cannot be
Attach the camera to the lens/teleconverter assembly
determinedwiththeG-typelens.)
so that the camera's mounting index is aligned with
• Withnon-AI-typecameras:Performstop-down
the teleconverter-camera index on the teleconverter.
method. (However, exposure cannot be determined
Taking care not to press the camera's lens release
withtheG-typelens.)
button, turn the camera body counterclockwise (with
• SeeyourcameraUser's Manual for available
the camera body facing away from you) until it clicks
exposure modes and metering systems.
into place.
• Ifyourcamerahasalift-upmetercouplinglever,
make sure that the meter coupling lever is correctly
positioned.(Fordetails,seeyourcameraUser's
Manual.)
To remove
Whilepressingthelensreleasebuttononthecamera
body, turn the camera body clockwise (with the
camera body facing away from you) until the
teleconverter-camera index is aligned with the
camera's lens mounting index.
17

■ Focusing
En
Lens' focus mode
Camera's focus
Camera
mode
M/A, A/M M
Nikon digital SLR (Nikon FX/DX format) cameras, F6, F5,
2
Autofocus with manual priority*
,
Manual focus
1
1
AF(C/S)
F4-series, F100, F90X/N90s*
, F90-series/N90*
, F80-
2
2
Autofocus with auto priority*
(Focus assist is available*
)
1
1
series/N80-series*
, F75-series/N75-series*
, F70-series/
1
1
1
N70*
, F65-series/N65-series*
, PRONEA 600i/6i*
and
2
PRONEA S
MF
Manual focus only (Focus assist is available*
)
AF(C/S)
3
4
Other AF (autofocus ) cameras (except for F3AF*
)
Manual focus only (Focus assist is available*
)
MF
Non-AF Nikon cameras Manual focus only
*1 The Nikon N90s, N90, N80-series, N75-series, N70, N65-series and PRONEA 6i are sold exclusively in the U.S.A.
*2 Both autofocus and manual focus using electronic rangefinder are possible with an AF-S/AF-I NIKKOR lens having maximum aperture
of f/2.8 (effective aperture of f/5.6) or faster.
*3 The Nikon F3AF camera cannot be used.
*4 Manual focus using electronic rangefinder is possible with an AF-S/AF-I NIKKOR lens having maximum aperture of f/2.8 (effective aperture of
5
f/5.6) or faster, or maximum aperture of f/2 (effective aperture of f/4) with F-501/N2020*
attached.
*5 The Nikon N2020 is sold exclusively in the U.S.A. and Canadian markets.
• WiththeAF-SVRMicro-Nikkor105mmf/2.8GIF-ED,thebrightnessoftheimageattheimagesensor(orfilmplane)
decreases as the reproduction ratio increases, and the effective aperture becomes larger (brightness diminishes).
18

■ Teleconverter care
■ Standard accessories
•
Be careful not to allow the CPU contacts to become
• TeleconverterCapBF-3A
En
dirty or damaged.
• RearLensCapLF-1
•
Clean teleconverter's lens surfaces with a blower
• FlexibleLensPouchCL-0715
brush. To remove dirt and smudges, use a soft, clean
cotton cloth or lens tissue moistened with ethanol
(alcohol)orlenscleaner.Wipeinacircularmotionfrom
the center to outer edge, taking care not to leave
traces or touch other parts of the lens.
• Neveruseorganicsolventsuchasthinneror
benzene to clean the
teleconverter's
lens.
• Whenstoringtheteleconverter,attachboththe
front and rear teleconverter caps.
• Whenthelenswillnotbeusedforanextended
period of time, store it in a cool, dry place to
prevent mold and rust. Be sure to store the
teleconverter away from direct sunlight or
chemicals such as camphor or naphthalene.
• Donotgetwateronthelensordropitinwateras
this will cause it to rust and malfunction.
• Reinforcedplasticisusedforcertainpartsofthe
lens. To avoid damage, never leave the lens in an
excessively hot place.
19

■ Specifications
Lens construction: 7 elements in 5 groups (1 aspherical lens)
With a prime lens
En
Diaphragm: Fully automatic
Focal length: Double that of a prime lens
Exposure
Aperture
measurement: Via full-aperture method with AI cameras or
coupling range: f/2 - f/32
cameras having a CPU; via stop-down method
(effective aperture f/4 - f/64)
for other cameras
Reproduction
Mount: Front: Special mount for AF-S/AF-I NIKKOR lens
ratio: Double that of a prime lens
Rear: Nikon bayonet mount
Depth of field: 1/2 that of a prime lens
Dimensions: Approx. 66 mm (2.6 in.) dia. × 48 mm (1.9 in.)
Minimum
extension from camera's lens mounting flange;
focusing distance: Same as that of a prime lens
overall length is approx. 60 mm (2.4 in.)
Weight: Approx. 330 g (11.6 oz.)
Specifications and designs are subject to change without
notice or obligation on the part of the manufacturer.
20


