Hotpoint-Ariston KIC 640 Z IT: Start-up and use
Start-up and use: Hotpoint-Ariston KIC 640 Z IT
9
GB
Start-up and use
!
The glue applied on the gaskets leaves traces of grease on
the glass. Before using the appliance, we recommend you
remove these with a special non-abrasive cleaning product.
During the first few hours of use there may be a smell of
rubber which will disappear very quickly.
!
A few seconds after the hob is connected to the electricity
supply, a buzzer will sound. The hob may now be switched
on.
!
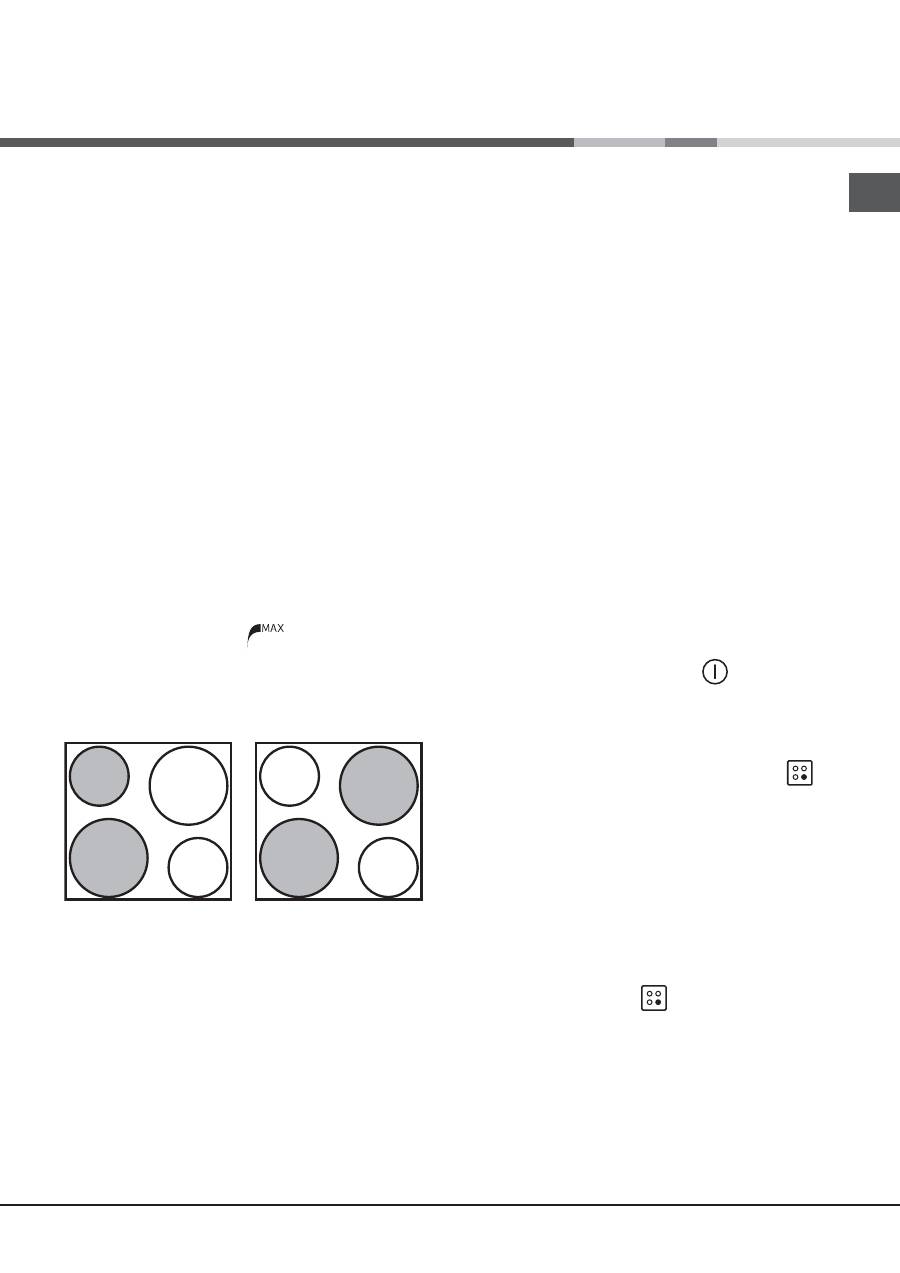
The software running the hob adjusts the maximum power
absorbed by all cooking zones as necessary, so that the
maximum total power output may be utilised in a flexible and
independent manner. Two operating examples are illustrated
in the pictures below.
In picture A, the front left-hand cooking zone is operating
at maximum power (level 9) and, as a result, the rear left-
hand cooking zone cannot be set any higher than level 7;
the corresponding Max indicator light is illuminated. As soon
as the power of the front cooking zone has decreased, the
corresponding Max indicator light will switch off and the rear
cooking zone may be set to a higher power level.
Picture B illustrates a similar example, but with cooking zones
positioned diagonally. If the front left-hand cooking zone is
set to maximum (level 9), the rear right-hand cooking zone
cannot be set any higher than level 4.
Information relating to the amount of energy consumed is
provided by the indicator lights
which are illuminated
when each corresponding plate has reached its maximum
power output. When all the indicator lights corresponding to
the active hotplates are illuminated, if you wish to increase
the power level of one of the hotplates you will have to
reduce the power level of another of the active hotplates first.
5-7
5-7
8-9
8-9
1-4
1-4
8-9
8-9
A
B
Types of noise during normal hob operation:
• Buzz: due to the vibration of the metallic parts that make
up the induction element and the pot; it is generated
by the electromagnetic field required for heating
and increases as the power of the induction element
increases.
• Soft whistle: heard when the pot placed on the heating
zone is empty; the noise disappears once food or water is
placed into the pot.
• Crackle: produced by the vibration of materials on the
bottom of the pot due to the flow of parasitic currents
caused by electromagnetic fields (induction); can be more
or less intense depending on the material making up the
bottom of the pot, and decreases as the pot dimensions
increase.
• Loud whistle: heard when two induction elements of the
same group function simultaneously at maximum power
and/or when the booster function is set on the larger
element while the other is auto-adjusted. Noise is reduced
by decreasing the power level of the auto-adjusted
induction element; pot bottom layers made of different
kinds of materials are among the main causes of this
noise.
• Fan noise: a fan is necessary to ensure the hob functions
correctly and to safeguard the electronic unit from
possible overheating. The fan functions at maximum
power when the large induction element is at maximum
power or when the booster function is on; in all other
cases, it works at average power depending on the
temperature detected. Furthermore, the fan may continue
to work even after switching the hob off, if the temperature
detected is high.
The types of noise listed above are due to induction
technology and are not necessarily operational faults.
!
If the
-
or
+
button is pressed for an extended period of
time, the display scrolls quickly though the power levels and
timer minutes.
Switching on the hob
To switch the hob on, press and hold the
button for
approximately one second.
Switching on the cooking zones
Each cooking zone is controlled using a selector button
and a power adjustment device consisting of a double
-
and
+
button.
• To begin operating a cooking zone, press the
corresponding control button and set the desired power
level (between 0 and 9) using the buttons
-
and
+
.
Switching off the cooking zones
To switch off a cooking zone, select it using the
corresponding selector button
and:
• Press the
-
button: the power of the cooking zone will
progressively decrease until it is switched off.
Programming the cooking duration
!
All the cooking zones may be programmed simultaneously,
for a duration between 1 and 99 minutes.
*
Only available in certain models.
10
GB
1. Select the cooking zone using the corresponding selector
button.
2. Adjust the power level.
3. Press the
programming button. The indicator
light corresponding to the selected zone will start
flashing.
4. Set the cooking duration using the
-
and
+
buttons.
5. Confirm by pressing the
button or automatic
selection occurs after 10 seconds.
The timer begins counting down immediately. A buzzer
sounds for approximately 1 minute and the cooking zone
switches off when the set programme has finished.
Repeat the above procedure for each hotplate you wish to
programme.
Using multiple programmes and the display
If one or more hotplates are programmed, the display will
show the data for the hotplate with the least time remaining,
and the light corresponding to the position of the hotplate
will flash. The lights corresponding to the other hotplates
programmed will be switched on.
To visualise the time remaining for the other
programmed hotplates, press the
button
repeatedly: the time remaining for each hotplate will be
shown sequentially in clockwise order, starting from the
front left hotplate.
Changing the programme
1. Press the
button repeatedly until the
duration you wish to change is shown.
2. Use the
-
and
+
buttons to set the new duration.
3. Confirm by pressing the
button.
To cancel a programme, follow the above instructions.
At step 2, press the
-
button: the duration decreases
progressively until it reaches 0 and switches off. The
programme resets and the display exits programming mode.
Timer
The hob must be switched on.
The timer can be used to set a duration up to 99 minutes.
1. Press the
programming button until the timer indicator
light is illuminated
.
2. Set the desired duration using the
-
and
+
buttons.
3. Confirm by pressing the
button.
The timer begins counting down immediately. When the time
has elapsed, a buzzer will sound (for one minute).
Control panel lock
When the hob is switched on, it is possible to lock the oven
controls in order to avoid accidental changes being made
to the settings (by children, during cleaning, etc.). Press
the
button to lock the control panel: the indicator light
above the button will switch on.
To use any of the controls (e.g. to stop cooking), you must
switch off this function. Press the
button for a few
moments, the indicator light will switch off and the lock
function will be removed.
Switching off the hob
Press the
button to switch the appliance off.
If the control panel lock has been activated, the controls
will continue to be locked even after the hob is switched on
again. In order to switch the hob on again, you must first
remove the lock function.
“Demo” mode
It is possible to set the hob to a demonstration mode where
all the controls work normally but the heating elements do
not switch on. To activate the “demo” mode the hob must be
switched on, with all the hotplates switched off.
• Press and hold the
+
and
-
buttons simultaneously for
6 seconds. When the 6 seconds have elapsed, the ON/
OFF and CONTROLS LOCKED indicator lights will flash
for one second. Release the
+
and
-
buttons and press
the
button;
• The display will show the text DE and MO and the hob will
be switched off.
• When the hob is switched on again it will be set to the
“demo” mode.
To exit this mode, follow the procedure described above.
The display will show the text DE and OF and the hob will
be switched off. When it is next switched on, the hob will
function normally.
Practical advice on using the appliance
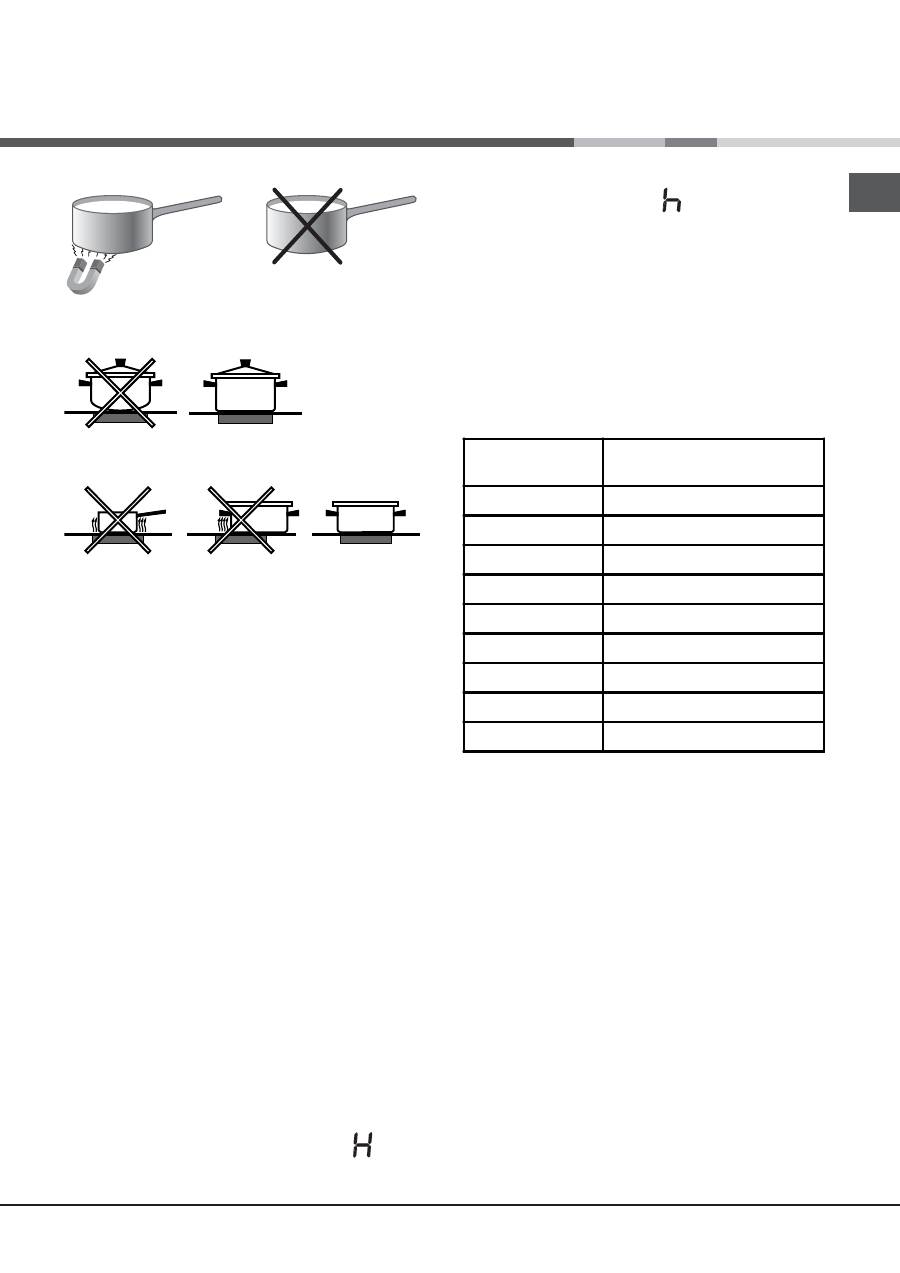
!
Use cookware made from materials which are compatible
with the induction principle (ferromagnetic material). We
especially recommend pans made from: cast iron, coated
steel or special stainless steel adapted for induction. Use a
magnet to test the compatibility of the cookware.
11
GB
*
SUITABLE
UNSUITABLE
Cast iron
Enamelled steel
Special stainless steel
Copper,
Aluminium, Glass, Earthenware,
Ceramic, non magnetic Stainless steel
In addition, to obtain the best results from your hob:
• Use pans with a thick, flat base in order to fully utilise the
cooking zone.
• Always use pans with a diameter which is large enough
to cover the hotplate fully, in order to use all the available
heat.
• Make sure that the base of the cookware is always clean
and dry, in order to fully utilise and extend the life of both
the cooking zones and the cookware.
• Avoid using the same cookware which has been used
on gas burners: the heat concentration on gas burners
may distort the base of the pan, causing it not to adhere
correctly.
Safety devices
Pan sensor
Each cooking zone is equipped with a pan sensor device.
The hotplate only emits heat when a pan with suitable
measurements for the cooking zone is placed on it. If the
indicator light is flashing, it may indicate:
• An incompatible pan
• A pan whose diameter is too small
• The pan has been removed from the hotplate.
Overheating protection
If the electronic elements overheat, the hob switches off
automatically and
F
appears on the display, followed by
a flashing number. When the temperature has reached a
suitable level, this message disappears and the hob may be
used again.
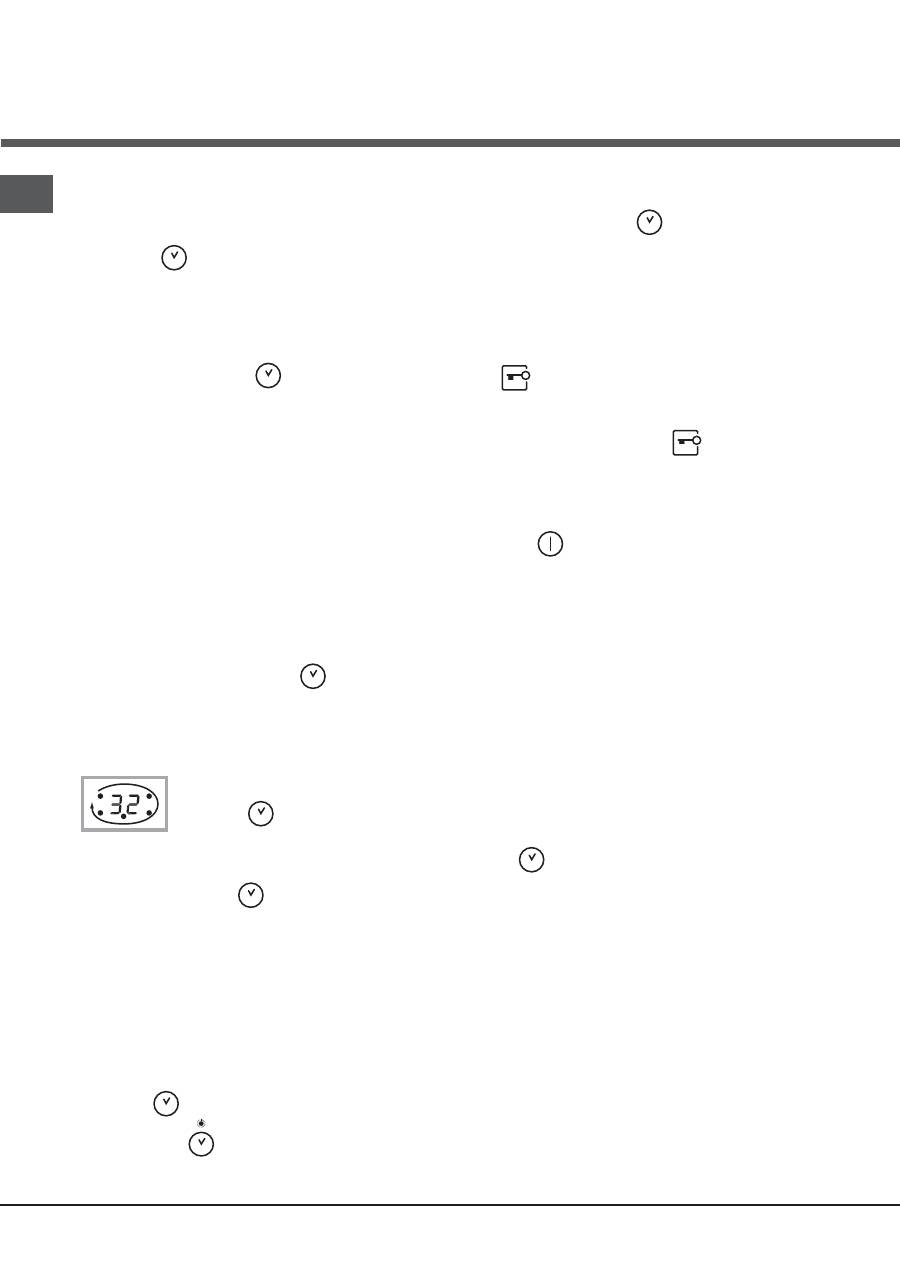
Residual heat indicators
Each cooking zone is equipped with a residual heat
indicator. This indicator signals which cooking zones are still
at a high temperature. If the power display shows
, the
cooking zone is still hot. It is possible, for example, to keep a
dish warm or melt butter or chocolate. As the cooking zone
cools, the power display will show
. The display switches
off when the cooking zone has cooled sufficiently.
Safety switch
The appliance has a safety switch which automatically
switches the cooking zones off after they have been in
operation for a certain amount of time at a particular power
level. When the safety switch has been triggered, the display
shows “0”.
For example: the right rear hotplate is set to 5 and will switch
off after 5 hours of continuous operation, while the front left
hotplate is set to 2 and will switch off after 8 hours.
Buzzer
This can also indicate several irregularities:
• An object (a pan, cutlery, etc.) has been placed on the
control panel for more than 10 seconds.
• Something has been spilt on the control panel.
• A button has been pressed for too long. All of the above
situations may cause the buzzer to sound. Remove the
cause of the malfunction to stop the buzzer. If the cause of
the problem is not removed, the buzzer will keep sounding
and the hob will switch off.
Power level
Maximum operating
time in hours
1
9
2
8
3
7
4
6
5
5
6
4
7
3
8
2
9
1
12
GB
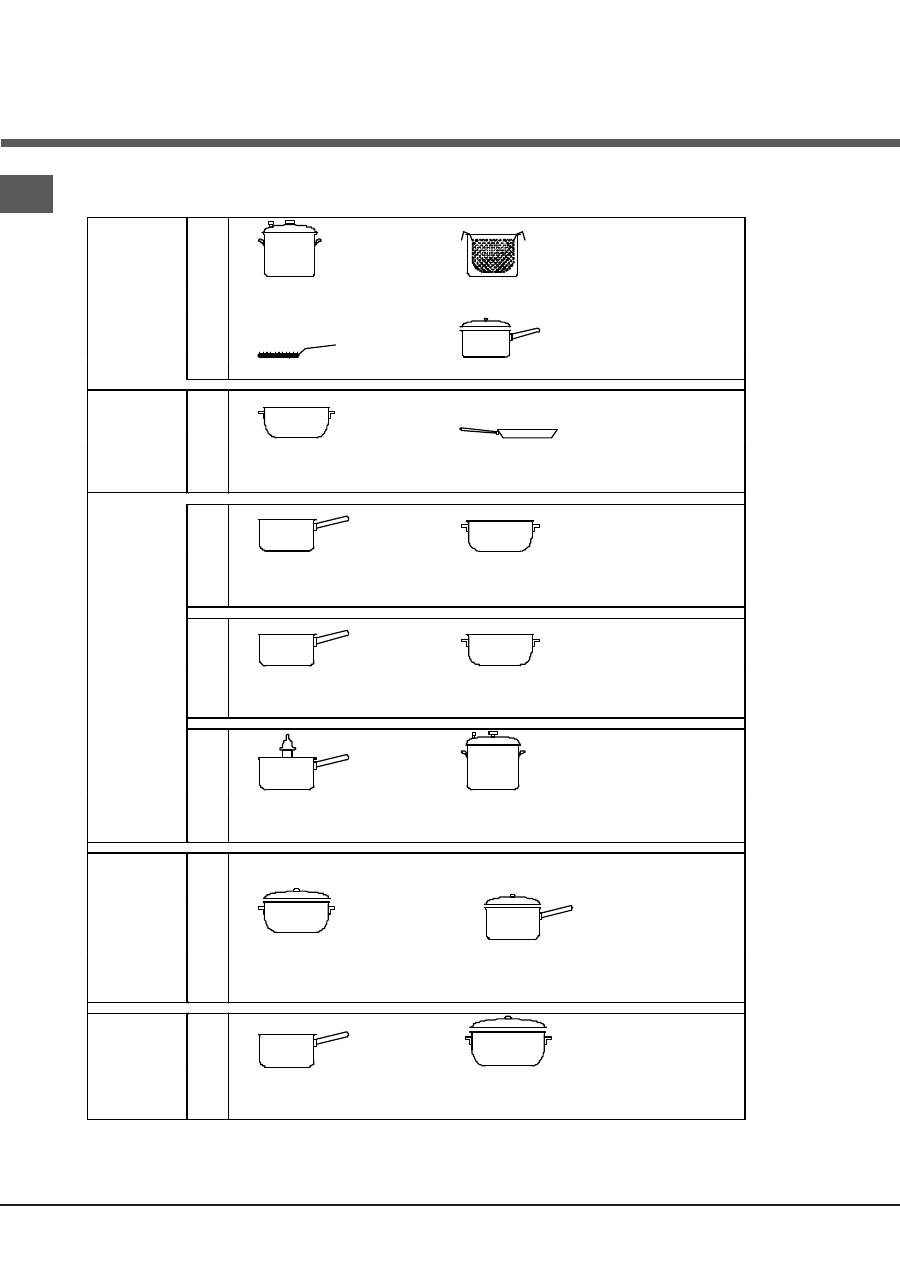
Practical cooking advice
V
er
y h
ig
h
-f
la
m
e
co
ok
in
g
ª
Pressure cooking
Pressure cooker
Frying
•
Grilling Boiling
H
ig
h
-f
lam
e
co
ok
in
g
• ¶
Crêpes
Cooking on a high flame and browning
(roasts, steaks, escalopes, fish fillets,
fried eggs)
M
ed
ium
-f
la
m
e c
o
o
ki
n
g
¶ §
Fast thickening (liquid juices)
Boiling water (pasta, rice, vegetables)
Milk
§ S
Slow thickening (dense juices)
S ¢
Bain-marie cooking
Pressure cooking after whistle
L
ow
-fl
am
e
co
ok
in
g
¢
Low-flame cooking
(stews)
-{}-
Reheating dishes
£ ™
Ver
y l
ow
-
fl
am
e
co
o
ki
n
g
™ ¡
Chocolate sauce
Keeping food hot
Оглавление
- Installation
- Start-up and use
- Precautions and tips
- Care and maintenance
- Installation
- Mise en marche et utilisation
- Précautions et conseils
- Nettoyage et entretien
- Instalación
- Puesta en funcionamiento y uso
- Precauciones y consejos
- Mantenimiento y cuidados
- Instalação
- Início e utilização
- Precauções e conselhos
- Manutenção e cuidados
- Installation
- Inbetriebsetzung und Gebrauch
- Vorsichtsmaßregeln und Hinweise
- Reinigung und Pflege
- Installazione
- Avvio e utilizzo
- Precauzioni e consigli
- Manutenzione e cura
- Installatie
- Starten en gebruik
- Voorzorgsmaatregelen en advies
- Onderhoud en verzorging
- Instalacja
- Uruchomienie i u ż ytkowanie
- Zalecenia i ś rodki ostro ż no ś ci
- Konserwacja i utrzymanie
- Монтаж
- Включение и эксплуатация
- Предосторожности и рекомендации
- Техническоеобслуживани и уход
