Hotpoint-Ariston C 34S N1 R: C a r e an d m ain t enan c e
C a r e an d m ain t enan c e: Hotpoint-Ariston C 34S N1 R
23
GB
S
w
it
ch
i
n
g
t
he
a
pp
l
ia
n
ce
o
ff
Disconnect
y
our appliance from the electricit
y
suppl
y
before carr
y
ing out an
y
work on it.
Cl
e
a
n
i
n
g
t
he
a
pp
l
ia
n
ce
Do not use abrasive or corrosive detergents such
as stain removers, anti-rust products, powder
detergents or sponges with abrasive surfaces: these
ma
y
scratch the surface be
y
ond repair.
Never use steam cleaners or pressure cleaners on
the appliance.
It is usuall
y
sufficient simpl
y
to wash the hob
using a damp sponge and dr
y
it with absorbent
kitchen roll.
The stainless steel or enamel-coated e
x
ternal
parts and the rubber seals ma
y
be cleaned using
a sponge that has been soaked in lukewarm water
and neutral soap. Use specialised products for
the removal of stubborn stains. After cleaning,
rinse well and dr
y
thoroughl
y
. Do not use abrasive
powders or corrosive substances.
The hob grids, burner caps, flame spreader rings
and burners ma
y
be removed to make cleaning
easier; wash them in hot water and non-abrasive
detergent, making sure all burnt-on residue is
removed before dr
y
ing them thoroughl
y
.
For hobs with electronic ignition, the terminal part
of the electronic lighting devices should be
cleaned frequentl
y
and the gas outlet holes
should be checked for blockages.
The inside of the oven should ideall
y
be cleaned
after each use, while it is still lukewarm. Use hot
water and detergent, then rinse well and dr
y
with
a soft cloth. Do not use abrasive products.
Clean the glass part of the oven door using a
sponge and a non-abrasive cleaning product, then
dr
y
thoroughl
y
with a soft cloth. Do not use rough
abrasive material or sharp metal scrapers as these
could scratch the surface and cause the glass to
crack.
The accessories can be washed like ever
y
da
y
crocker
y
, and are even dishwasher safe.
Stainless steel can be marked b
y
hard water that
has been left on the surface for a long time, or b
y
aggressive detergents containing phosphorus.
After cleaning, rinse well and dr
y
thoroughl
y
. An
y
remaining drops of water should also be dried.
Do not close the cover when the burners are alight
or when the
y
are still hot.
I
nsp
ec
t
i
n
g
t
he
o
ve
n
s
e
a
ls
Check the door seals around the oven regularl
y
. If
the seals are damaged, please contact
y
our nearest
Authorised After-sales Service Centre. We
recommend that the oven is not used until the seals
have been replaced.
G
a
s
ta
p m
ai
n
t
e
n
a
n
ce
Over time, the taps ma
y
become jammed or difficult
to turn. If this occurs, the tap must be replaced.
Th
i
s
p
r
o
ce
du
re
m
us
t
b
e
p
er
f
o
rme
d
by
a
q
u
a
l
i
f
i
e
d
t
ech
n
i
c
ia
n
a
u
t
h
o
r
i
s
e
d
by
t
he
m
a
nu
f
a
c
t
u
rer
.
Re
pl
a
c
i
n
g
t
he
o
ve
n
l
i
gh
t
b
ul
b
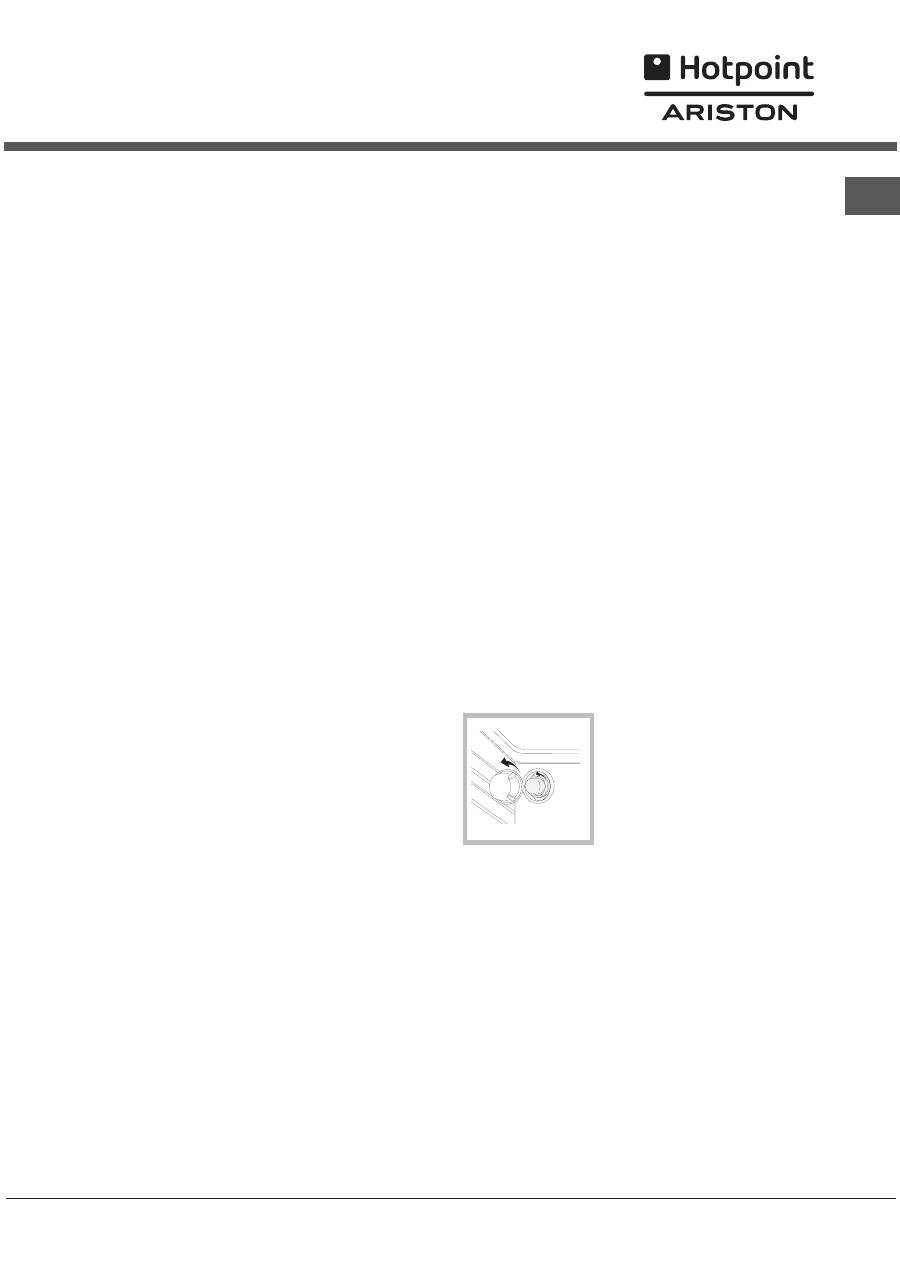
1. After disconnecting the
oven from the electricit
y
mains, remove the glass lid
covering the lamp socket (
see
figure
).
2. Remove the light bulb and
replace it with a similar one:
voltage 230 V, wattage 25 W,
cap E 14.
3. Replace the lid and reconnect the oven to the
electricit
y
suppl
y
.
A
ss
i
s
ta
n
ce
P
l
e
a
se h
a
ve
t
he
f
o
ll
o
w
i
n
g
i
n
f
o
rm
ati
on
t
o
h
a
n
d
:
The appliance model (Mod.).
The serial number (S/N).
This information can be found on the data plate
located on the appliance and/or on the packaging.
C a r e an d m ain t enan c e
Оглавление
- Inst allazione
- De scr izione d ell a pp a r e cc h io
- A vv io e ut ilizzo
- Prec a uz i on i e c on s i g l i
- Man ut enzione e cur a
- Ass i st enza
- O p e r a t in g In struct ion s
- In st alla t ion
- Descr i p t i on o f t he a ppl ia nce
- St a rt - u p an d us e
- P rec autions and tips
- C a r e an d m ain t enan c e
- Ð óêîâîäñòâî ïî ýêñïëóàòàöèè
- Ó ñ òà íîâêà
- Î ïè ñ àí è å èçäåëèÿ
- Â ê ëþ ÷ åíèå è ýê ñ ïëóà ò à ö èÿ
- Ïðåä î ñ ò î ð î æ í î ñ ò è è ðå êî ì åíäà ö èè
- Ò å õ íè ÷ å ñ êî å î á ñ ëó æ èâàíèå è ó õ î ä
