Festool CTM 48 E-LE-AC CLEANTEX: 1 Safety instructions
1 Safety instructions: Festool CTM 48 E-LE-AC CLEANTEX
CTM
13
GB
Original operating manual
1 Safety instructions
Warning! Read and observe all information and safety instructions.
Ignoring warn-
ing notes and instructions may lead to electric shocks, fires and/or cause serious injury.
Keep all safety information and other instructions in a safe place for future reference.
– This machine can be operated by
children
over 8 years of age and persons with re-
duced physical, sensory or mental capabilities or a lack of practical experience and
knowledge, provided they are supervised or have been instructed to use the machine
safely and understand the dangers of machine operation.
Children
must not play with
the machine.
Cleaning and user maintenance
may not be performed by
children
with-
out supervision.
–
Warning:
machine may contain hazardous dust. Only authorised qualified specialists
with suitable protective equipment may perform maintenance, empty the container
and change the filter.
– Always operate with the filter system installed!
– Always use suitable protective equipment!
– If intact following a visual inspection, work in a dry environment according to instruc-
tions!
When extracting large quantities of oak or beech wood dust or dust that exceeds
the permitted limit values, only extract from a single machine (electric or air tool).
–
Risk of explosion and fire hazard: do not extract
sparks or hot dust, flammable or ex-
plosive dust (e.g. magnesium, aluminium, petrol, thinner, with the exception of wood),
aggressive fluids/solids (e.g. acid, leach, solvent).
– Observe all national safety regulations as well as the material manufacturer's speci-
fications!
– Always use the socket on the machine for the purpose specified!
– Check the plug and the cable regularly and should either become damaged, in order
to avoid a hazard, have them replaced by an authorised after-sales service workshop.
– Do not lift or transport using a crane hook or lifting gear!
–
Only for AS/NZS:
The tool shall always be supplied via residual current device with
a rated residual current of 30 mA or less.
2
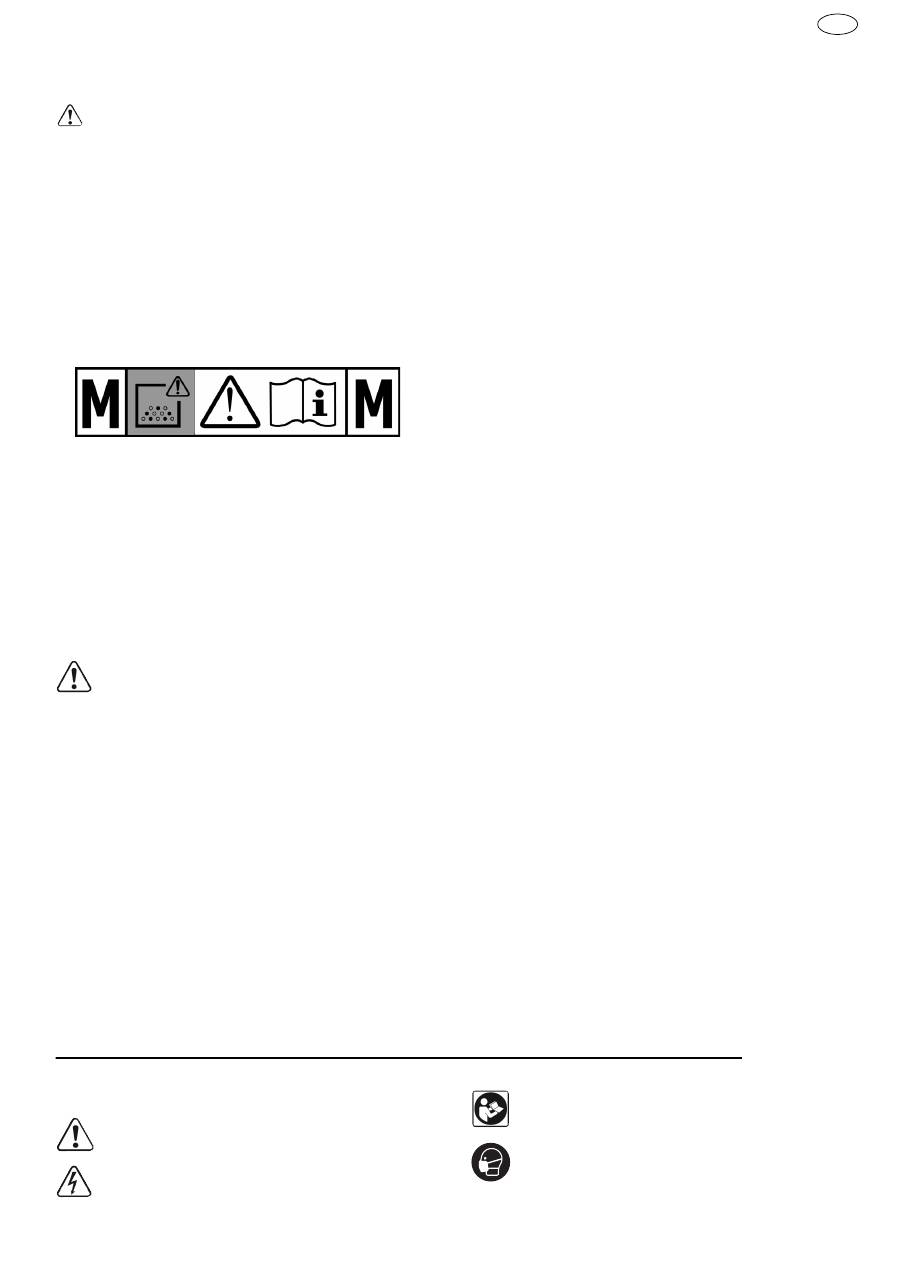
Symbols
Warning of general danger
Risk of electric shock
Read the Operating Instructions/Notes!
Wear a dust mask.

14
CTM
GB
3
Machine features
The specified illustrations appear at the beginning of
the Operating Instructions.
4
Technical data
Warning!
The machine may contain hazard-
ous dust!
Do not throw in the household waste.
[1-1]
Sealing plug
[1-2]
Intake opening
[1-3]
Module slot (compressed air module for
CTM 36 E LE, CTM 36 E LE AC, CTM 48 E
LE, CTM 48 E LE AC)
[1-4]
Appliance socket
[1-5]
Hose store
[1-6]
Handle
[1-7]
SysDoc
[1-8]
Automatic cleaning (only versions with
AutoClean)
[1-9]
Hose diameter setting
[1-10]
Suction power adjuster
[1-11]
Switch
[1-12]
Locking clip
[1-13]
Dust container
[1-15]
Brake
Mobile dust extractors
Power consumption
350 - 1200 W
Maximum appliance socket con-
nected load
EU
CH, DK
GB 240 V/ 110 V
2400 W
1100 W
1800 W/ 500 W
Max. suction capacity (air), turbine
234 m³/h (3900 l/min)
Max. vacuum, turbine
24000 Pa
Filter surface area
6318 cm²
Suction hose
D 27 mm x 3,5 m-AS
Length of the net cable
7,5 m
Sound pressure level as per EN 60704-2-1 / Uncertainty K
71 dB(A) / 3 dB
Protection category
IP X4
Container capacity
CTM 26 E, CTM 26 E AC
26 l
CTM 36 E, CTM 36 E LE, CTM 36 E AC, CTM 36 E LE AC, CTM 36 E AC-LHS
36 l
CTM 48 E, CTM 48 E LE, CTM 48 E AC, CTM 48 E LE AC
48 l
Dimensions L x W x H
CTM 26 E, CTM 26 E AC
630 x 365 x 540 mm
CTM 36 E, CTM 36 E LE, CTM 36 E AC, CTM 36 E LE AC, CTM 36 E AC-LHS
630 x 365 x 596 mm
CTM 48 E, CTM 48 E LE, CTM 48 E AC, CTM 48 E LE AC
740 x 406 x 1005 mm
Weight
CTM 26 E
13,9 kg
CTM 26 E AC
14,7 kg
CTM 36 E, CTM 36 E LE
14,4 kg
CTM 36 E AC, CTM 36 E LE AC, CTM 36 E
AC-LHS
15,2 kg
CTM 48 E, CTM 48 E LE
18,8 kg
CTM 48 E AC, CTM 48 E LE AC
19,6 kg
CTM
15
GB
5
Intended use
Mobile dust extractor suitable for
– Extracting dust up to 0,1 mg/m³ according to dust
class 'M', including wood and paint dust,
– Extracting water,
– Increased loads during commercial use,
according to IEC/EN 60335-2-69.
The user is liable for improper or non-intend-
ed use.
6
Operation
6.1
Initial operation
Open the locking clips
[2-2]
and remove the top
section of the machine
[2-1]
.
Remove the accessories from the dust container
[2-3]
and the packaging!
Insert a filter or disposal bag in the dirt trap (see
chapter 7.7 and 7.8).
Replace the top section
[2-1]
and close the lock-
ing clips
[2-2]
.
Attach the cable holder to the rear of the mobile
dust extractor (see Fig.
[3]
).
Connect the suction hose to the machine.
6.2
Switch on/off
Insert the plug into an earthed socket.
The switch
[1-11]
serves as an on/off switch.
Switch position "0"
Appliance socket
[1-4]
is disconnected from the
power, mobile dust extractor is switched off.
"MAN" switch position
Appliance socket
[1-4]
is connected to the power, the
mobile dust extractor starts.
"Auto" switch position
Appliance socket
[1-4]
is connected to the power, the
mobile dust extractor starts when the connected tool
is switched on.
7
Settings
7.1
Adjusting the hose diameter
Adjust the hose diameter adjuster
[1-9]
to match
the diameter of the connected hose.
The monitoring devices will measure the air
speed in the extractor hose correctly as a result
(see chapter 7.9).
7.2
Connecting electric power tools
Connect the electric power tool to the appliance
socket
[1-4]
.
7.3
Connecting pneumatic tools
Automatic on/off switch for air tools (CTM 36 E LE,
CTM 36 E LE AC, CTM 48 E LE, CTM 48 E LE AC or
accessories)
with compressed air module in module slot
[1-3]
Recommendation:
– Attachment of service unit VE (495886): com-
pressed air filtered and lubricated
– Use of IAS system with IAS connector (454757) for
Festool air tools
Requirement:
tool with operating pressure of 6 bar!
7.4
Adjusting the suction power
Use the rotary knob
[1-10]
.
7.5
Applying the brake
Folding out the black brake lever
[1-15]
prevents
the mobile dust extractor from rolling. To achieve
this, lift the front end of the mobile dust extractor
slightly and push the black brake lever downwards
until it latches into place. Push the green lever
[1-
14]
again to release.
WARNING
Unauthorised voltage or frequency!
Risk of accidents
Observe the specifications on the machine’s
name plate.
Observe country-specific regulations.
WARNING
Risk of injury from tools starting up unexpectedly
Before setting the switch to the "AUTO" or
"MAN" position, make sure that the connected
tool is switched off.
WARNING
Risk of injury
Observe the maximum appliance socket con-
nected load (see chapter "Technical data")
Switch off the electric power tool.
WARNING
Risk of injury
Switch off the air tool.
16
CTM
GB
7.6
Temperature cut-out
A temperature cut-out switches the mobile dust ex-
tractor off when it reaches a critical temperature to
prevent overheating.
Switch off the mobile dust extractor, allow to cool
for about 5 minutes then switch on again.
Not possible to switch on: contact Festool service
workshop.
7.7
Changing the filter bag
(SC FIS-CT 26/36/
48)
Removing the filter bag [4]
Open the locking clips
[2-2]
and remove the top
section of the machine
[2-1]
.
Remove the filter bag.
Dispose of the used filter bag in accordance with
statutory regulations.
Clean the dust container
[2-3]
.
Inserting the filter bag [5]
Insert a new filter bag (SC FIS-CT 26/36/48) in the
inlet port of the dust container and interlock it.
Important:
be aware that the locking engages.
Replace the top section
[2-1]
and close the lock-
ing clips
[2-2]
.
Make sure that the filter bag is not pinched be-
tween the top and bottom sections.
7.8
Changing the disposal bag
Removing the disposal bag [6]
Close off the extractor opening
[1-2]
using the
sealing plug
[1-1]
.
Open the locking clips
[2-2]
and remove the top
section of the machine
[2-1]
.
Close the disposal bag.
Remove the disposal bag.
Dispose of the used disposal bag in accordance
with statutory regulations.
Clean the dust container
[2-3]
.
Inserting the disposal bag [7]
Insert a new disposal bag (ENS-CT26/36/48) on
the inlet nozzle of the container and lock in posi-
tion.
Important:
The lateral openings on the disposal
bag must be positioned inside the container.
Make sure that the bolt engages.
Place the disposal bag over the edge of the con-
tainer.
Make sure that the contacts
[10-2]
are free.
Replace the top section
[2-1]
and close the lock-
ing clips
[2-2]
.
7.9
Volumetric flow monitoring
An acoustic warning signal sounds if the air speed in the suction hose falls below 20 m/s.
8
Working
8.1
Handling
Hose store:
after finishing work, you can feed the
suction hose through the recess
[8-3]
and place it in
the hose store. You can do the same with the mains
cable through the other recess
[8-2]
.
SysDoc Systainer attachment system:
a Systainer
can be attached to the storage area via the two slides
[8-1]
.
8.2
AUTO
Clean
- Cleaning the main filter
(only
versions with AutoClean)
Only in conjunction with disposal bag
(com-
pliance with dust class ’M’). Not suitable for
wet extraction!
Automatic cleaning
Adjust the frequency using the rotary knob
[1-8]
.
Possible causes
Solution
Value set on the suction power adjuster
[1-10]
is
too low.
Set the suction power adjuster to a higher value (see
Chapter 7.4).
Rotary knob
[1-9]
not set to the correct hose
diameter.
Set the knob to the correct hose diameter (see Chap-
ter 7.1).
Suction hose blocked or kinked.
Remove blockage or kink.
Filter bag full.
Insert a new filter bag (see Chapter 7.7).
Filter element clogged.
Change the filter element (see Chapter 9.1).
Only AUTO
Clean
:
Clean filter element (see chapter 8.2).
Monitoring electronics malfunction.
Send to a Festool service workshop for repair.
Wet extraction.
Functional reliability not affected, no actions required.
CTM
17
GB
Manual cleaning
Turn the switch
[1-11]
to the
AC
symbol.
Full manual cleaning
Cover the end of the nozzle or suction hose with
your hand or closing slide CT-VS (497926) for 2
seconds.
Turn the switch
[1-11]
to the
AC
symbol.
8.3
Special features of the CTM 36 E AC- LHS
To use the mobile dust extractor in combination with
the
PLANEX
:
Use kink-resistant suction hose D 36 mm x 3.5 m-
AS.
Use a special suction sleeve for connecting the
PLANEX
.
Use closing slide CT-VS between the intake open-
ing
[1-2]
and suction hose.
Attach the tool holder.
Always use with a disposal bag!
8.4
Extracting dry materials
Observe the following
when extracting dust generat-
ed by operating electric power tools:
If the exhaust air is discharged back into the room,
the
air renewal rate L
within the room must be suf-
ficient. The volume of air discharged back into the
room must not exceed 50% of the fresh air volume
flow (room volume V
R
x air renewal rate L
W
). Observe
all the relevant regional regulations.
Remember:
A moist main filter clogs more quickly
when extracting dry materials. Therefore, dry the
main filter before extracting dust or replace the
damp filter with a dry one.
8.5
Extracting wet materials/liquids
Remove the filter or disposal bag!
Recommendation:
use special wet filter (NF-
CT).
The dust extractor stops automatically when the
maximum level is reached.
After wet extraction, allow the main filter to dry!
8.6
After finishing work
Only versions with AutoClean:
Clean the main fil-
ter automatically or manually (see chapter 8.2).
Switch off the mobile dust extractor and pull out
the mains plug.
Wind up the mains power cable.
Empty the dirt trap.
Close off the extractor opening
[1-2]
using the
sealing plug
[1-1]
.
The machine shall be stored indoors only.
Place the mobile dust extractor in a dry room in-
accessible to unauthorised users.
9
Service and maintenance
Customer service and repair
only
through manufacturer or service work-
shops: Please find the nearest address
at:
www.festool.com/Service
CAUTION
Hazardous dust
Damage to the respiratory passage
Use a filter or disposal bag when extracting haz-
ardous materials!
Do not use the machine if the volumetric flow
monitoring function is inactive.
CAUTION
Escaping foam and fluids
Switch off and empty the machine immediately.
WARNING
Hazardous dust
Damage to the respiratory passage
Wipe down the mobile dust extractor and clean
all accessories thoroughly using the extractor
(inside and out) before removing from the work-
ing area.
Parts that you were not able to clean thoroughly
must be sealed in an airtight plastic bag prior to
transportation.
Wear a dust mask!
WARNING
Risk of injury, electric shock
Always disconnect the mains plug from the
socket before performing maintenance work on
the machine!
All maintenance and repair work which requires
the motor housing to be opened must only be
carried out by an authorised service workshop.
18
CTM
GB
Use only original Festool spare parts!
Order No. at:
www.festool.com/Service
Damaged safety devices and compo-
nents must be repaired or replaced in a
recognised specialist workshop, unless otherwise in-
dicated in the operating manual.
Observe the following instructions:
– The manufacturer or an instructed person must
perform a dust test at least once a year to deter-
mine whether the filter is damaged, the machine is
sealed properly and the monitoring features are
functioning correctly.
– Anything that cannot be cleaned must be discarded
in impermeable bags. Observe applicable disposal
regulations!
– For user servicing, the machine must be disman-
tled, cleaned and serviced, as far as is reasonably
practicable, without causing risk to the mainte-
nance staff and others. Suitable precautions in-
clude, decontamination before dismantling,
provision from local filtered exhaust ventilation
where the machine is dismantled, cleaning of the
maintenance area and suitable personal protec-
tion.
9.1
Changing the filter element
Open the locking clips
[2-2]
and remove the top
section of the machine
[2-1]
.
Turn the top section of the machine so that the
main filter is facing upwards (Fig.
[9]
).
Fold over the lever
[9-3]
and remove the retainer.
[9-2]
Remove the used main filter and replace
[9-1]
with a new one.
Dispose of the used filter in accordance with stat-
utory regulations.
Insert the retainer
[9-2]
and fold over the lever
[9-3]
until it engages.
Replace the top section
[2-1]
and close the lock-
ing clips
[2-2]
.
9.2
Emptying the dust container
The dust container
[2-3]
can be emptied once the top
section has been removed.
After extracting fluids, clean the fill level sensors
[10-1]
regularly with a soft cloth and inspect for
damage.
10
Accessories
The order numbers for the accessories and filters
can be found in the Festool catalogue or on the Inter-
net at "www.festool.com".
10.1
Modules
The following modules for upgrading the mobile dust
extractor are available in the accessories pro-
gramme. Modules must be fitted to the module slot
[1-3]
by an authorised service workshop:
– Compressed air module,
– Socket module with permanent power supply,
– Socket module with automatic switch-on unit (not
suitable for GB 110 V version),
– Energy box module (EAA) for using the automatic
switch-on unit on the EAA.
You can find more detailed information on the mod-
ules at "www.festool.com".
11
Environment
Do not dispose of the device in house-
hold waste!
Recycle devices, accesso-
ries and packaging. Observe applicable
country-specific regulations.
EU only:
European Directive 2002/96/EC
stipulates that used electric power tools must be col-
lected separately and disposed of at an environmen-
tally responsible recycling centre.
Information on REACh:
www.festool.com/reach
12
EU Declaration of Conformity
NOTE
Motor damage
Never operate the extractor without a filter ele-
ment fitted as the motor may become damaged.
EKAT
1
2
3
5
4
Mobile dust extractor
Serial no.
CTM 26 E
495865, 495866, 495870,
496948
CTM 26 E AC
496313, 496544, 496545,
496550, 497990, 497991,
497992
CTM 36 E
495867, 495868, 495871,
496949
CTM 36 E AC, CTM 36 E
AC-LHS
496546, 496547, 496548,
496551, 497069, 497073,
497072, 497076, 497070
CTM 36 E LE
495869, 496947, 496950
CTM 36 E LE AC
496549
CTM 48 E
498006, 498007
CTM 48 E LE
498008
CTM 48 E AC
498021, 498022

CTM
19
GB
We declare under sole responsibility that this product
complies with all the relevant requirements in the
following Directives, standards and normative docu-
ments:
2006/42/EC, 2004/108/EC, 2011/65/EU, EN 60335-1,
EN 60335-2-69, EN 55014-1, EN 55014-2, EN 61000-
3-2, EN 61000-3-3.
Festool Group GmbH & Co. KG
Wertstr. 20, D-73240 Wendlingen, Germany
Dr. Martin Zimmer
Head of Research, Development and Technical Docu-
mentation
2012-12-19
CTM 48 E LE AC
498023
Year of CE mark:
CTM 26 E, CTM 36 E,
CTM 36 E LE
2009
CTM 26 E AC, CTM 36 E
AC, CTM 36 E LE AC,
CTM 36 E AC-LHS
2010
CTM 48 E, CTM 48 E LE,
CTM 48 E AC, CTM 48 E
LE AC
2011
Mobile dust extractor
Serial no.
Оглавление
- 1
- 2
- 1 Sicherheitshinweise
- 1 Safety instructions
- 1 Consignes de sécurité
- 1 Indicaciones de seguridad
- 1 Avvertenze per la sicurezza
- 1 Veiligheidsvoorschriften
- 1 Säkerhetsanvisningar
- 1 Turvaohjeet
- 1 Sikkerhedsanvisninger
- 1 Sikkerhetsregler
- 1 Indicações de segurança
- 1 Указания по технике безопасности
- 1 Bezpečnostní pokyny
- 1 Wskazówki dotyczące bezpieczeństwa
