Brother Innov-is 4750D: инструкция
Раздел: Швейное Оборудование
Тип: Швейная Машина
Инструкция к Швейной Машиной Brother Innov-is 4750D
ENGLISH
FRANÇAIS
ESPAÑOL
Bobbin Work
Instruction Manual
Manuel d'instructions pour
le travail à la canette
Manual de instrucciones para
efectos decorativos con bobinas
Р
YCCK
ИЙ
Руководство
пользователя
по
объемному
вышиванию
DEUTSCH
Anleitung für Bobbin Work
NEDERLANDS
Werken met de spoel
Gebruiksaanwijzing
ITALIANO
Manuale d'istruzioni del
ricamo con spolina


1
EN
GL
IS
H
CONTENTS
About Bobbin Work................................................................................................................... 2
Required Materials ................................................................................................................ 3
Upper Threading ................................................................................................................... 4
Preparing the Bobbin Thread................................................................................................. 4
Creating Bobbin Work ............................................................................................................... 8
Positioning the Fabric and Sewing......................................................................................... 8
Finishing the Thread Ends.................................................................................................... 10
Bobbin Work Free-Motion Sewing ...................................................................................... 10
Adjusting the Thread Tension .............................................................................................. 11
Troubleshooting .................................................................................................................. 12

2
About Bobbin Work
You can create designs, which gives a three-dimensional appearance to the surface of the fabric, by winding the
bobbin with heavy weight thread or ribbon too thick to be fed through the sewing machine needle and sewing on
the wrong side of the fabric.
Bobbin work is sewn using the special bobbin case (gray) and bobbin cover with tabs included with this kit.
Utility stitches
Decorative stitches
(For models with built-in
decorative stitches)
Free-motion sewing
3
EN
GL
IS
H
Required Materials
■
Bobbin Case and Bobbin Cover
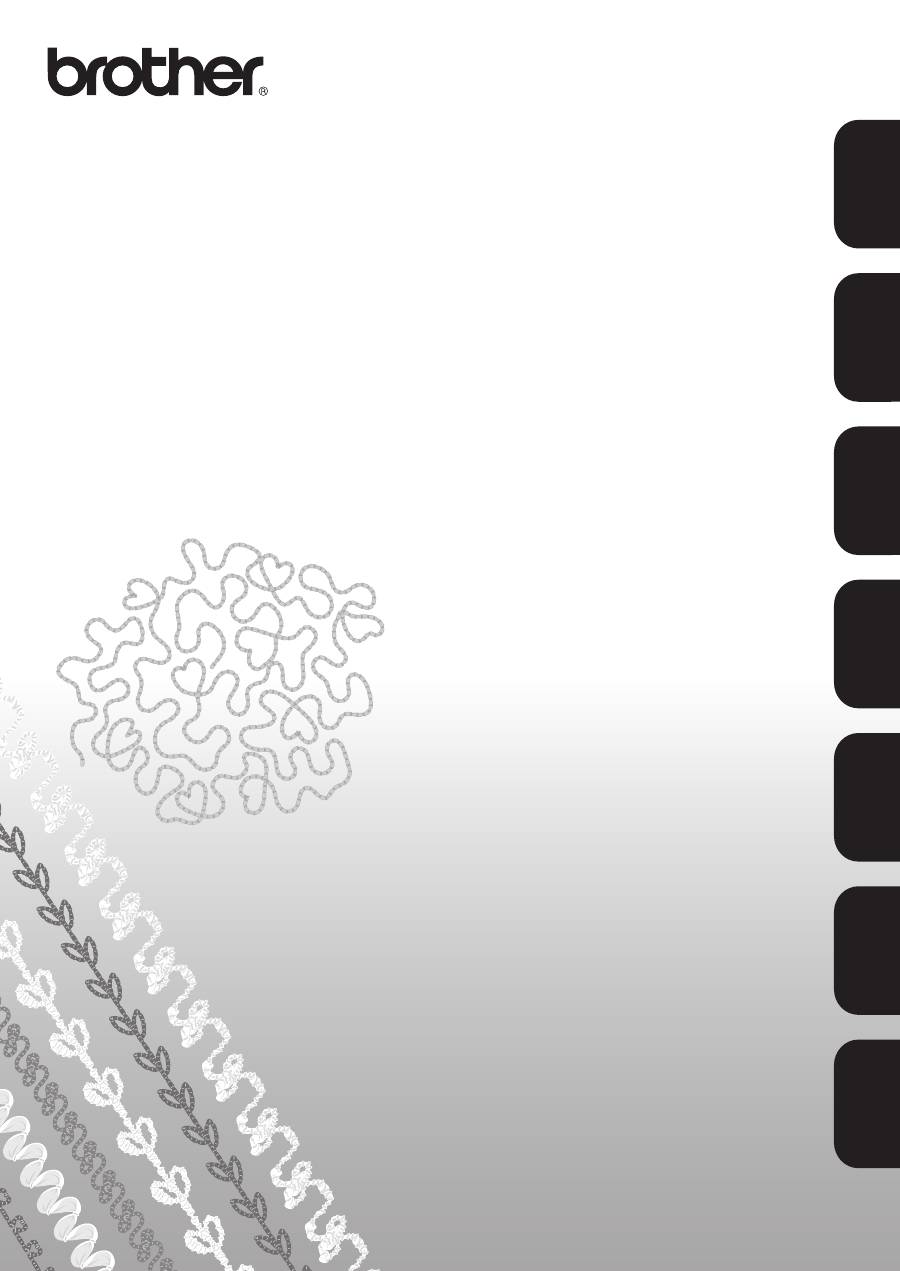
a
Bobbin case (gray)
This bobbin case is only for bobbin work. The bobbin
case will allow you to sew with thick thread or narrow
ribbon that cannot be inserted through the eye of the
needle. There is a notch at the location indicated by the
letter “A”.
b
Bobbin cover
There are ribs “B” on the back of the bobbin cover.
The ribs press down on the bobbin so it is not lifted out
when thick thread is being fed from it.
■
Lower Thread
We recommend the following types of threads for
bobbin work.
* If ribbon is to be used, we recommend that tension not be
applied. Refer to page 6 for more detailed instructions.
■
Upper Thread
Sewing machine embroidery thread (polyester thread)
or monofilament (transparent nylon) thread.
If you do not wish for the upper thread to be visible, we
recommend using transparent nylon monofilament
thread or polyester light weight thread (50wt. or above)
that is the same color as the lower thread.
■
Needle
Use a needle appropriate for the upper thread and
fabric being used. For details, refer to your machine’s
Operation Manual.
■
Presser Foot
Utility stitches or decorative stitches: Monogramming
foot “N”
Free-motion sewing: Use the free-motion quilting foot
provided with your machine. If you do not have a free-
motion quilting foot, contact your nearest authorized
dealer to purchase one.
No.5 or finer hand embroidery
thread or decorative thread
Flexible woven ribbon
(approx. 2mm (approx. 5/64 inch)
recommended)
Fine embroidery ribbon (silk or
silk-like material) (3.5 mm (approx.
1/8 inch) or less, recommended)
Note
• Do not use thread heavier than No.5 hand
embroidery thread.
• Some threads may not be appropriate for bobbin
work. Be sure to sew trial stitches before sewing on
your project.
Note
• If monogramming foot “N” was not provided with
your machine, use zigzag foot “J”.
• When sewing a pattern described in the machine’s
Operation Manual and the monogramming foot “N”
is recommended, be sure to use this foot, otherwise
the desired results may not be achieved.
Free-motion quilting foot
Free-motion open toe
quilting foot “O”

4
■
Fabric
Be sure to sew trial stitches on a piece of scrap fabric,
which includes the same threads and fabric as what is
being used in your project.
Upper Threading
a
Install a needle appropriate for the upper
thread and fabric to be used.
For details on installing the needle, refer to the
machine’s Operation Manual.
b
Attach the presser foot.
For the presser foot to be used, refer to see
“Required Materials” on page 3.
For details on attaching the presser foot, refer to
the machine’s Operation Manual.
c
Thread the machine with the upper thread.
For details on threading the machine, refer to the
machine’s Operation Manual.
Preparing the Bobbin Thread
In order to create bobbin work, the bobbin case must
be replaced with the one for bobbin work.
Before creating bobbin work, clean the bobbin case
and the race.
a
Raise the needle and presser foot, and then
turn off the machine.
b
Remove the flat bed attachment.
c
Remove the needle plate cover.
For details on removing the needle plate
cover, refer to the machine’s Operation
Manual.
a
Needle plate cover
d
Remove the bobbin case.
a
Bobbin case
e
Use the cleaning brush included with the
machine or a vacuum cleaner to remove any
lint and dust from the race and its
surrounding area.
a
Cleaning brush
b
Race
f
Wipe the bobbin case (gray) with a soft lint
free cloth to clean it.
g
Insert the bobbin case (gray) so that the
mark aligns with the
●
mark as shown below.
a
mark
b
●
mark
Note
• The sewing results may be affected by the type of
fabric used. Before sewing your project, be sure to
sew trial stitches on a piece of scrap fabric that is
the same as the fabric used in the project.
5
EN
GL
IS
H
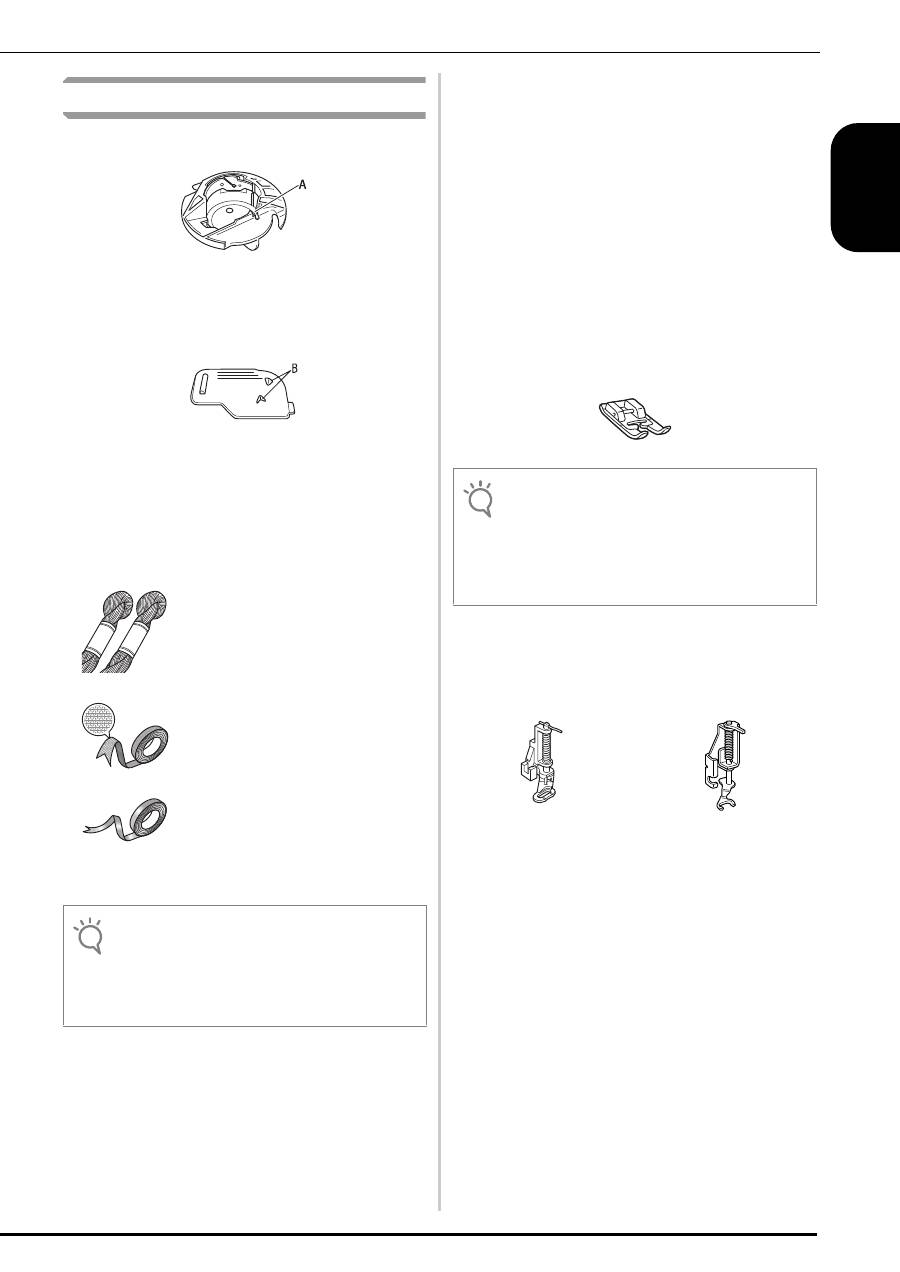
h
Wind a decorative thread around the bobbin
by hand. After winding the bobbin so it is
filled as shown below (about 80%), cut the
thread.
i
Using scissors carefully trim the thread tail as
close to the bobbin as possible.
a
Beginning of wound thread
j
Install the bobbin wound with thread.
Whether or not tension should be applied to the
bobbin thread depends on the type of thread
being used.
Note
• The bobbin case (gray) cannot be used for sewing in
any way other than bobbin work. After sewing
bobbin work, refer back to the steps in “Preparing
the Bobbin Thread” for removing and cleaning the
bobbin case (gray), and then reinstall the standard
bobbin case (black).
CAUTION
• Be sure to use the bobbin case (gray) when creating
bobbin work. Using any other bobbin case may
result in the thread becoming tangled or damage to
the machine.
• Make sure that the bobbin case is correctly
installed. If the bobbin case is incorrectly installed,
the thread may become tangled or the machine may
be damaged.
CAUTION
• Be sure to use the machine’s included bobbin or one
designed specifically for this machine. Using any
other bobbin may result in damage or injuries.
Actual size
11.5 mm
(approx.
7/16 inch)
This model
Other models
Note
• Slowly and evenly wind the thread around the
bobbin.
• For best results, wind the bobbin so the thread is
snug and not twisted.
CAUTION
• If thread extends beyond the top of the bobbin too
much, the thread may become tangled or the
needle may break.
6
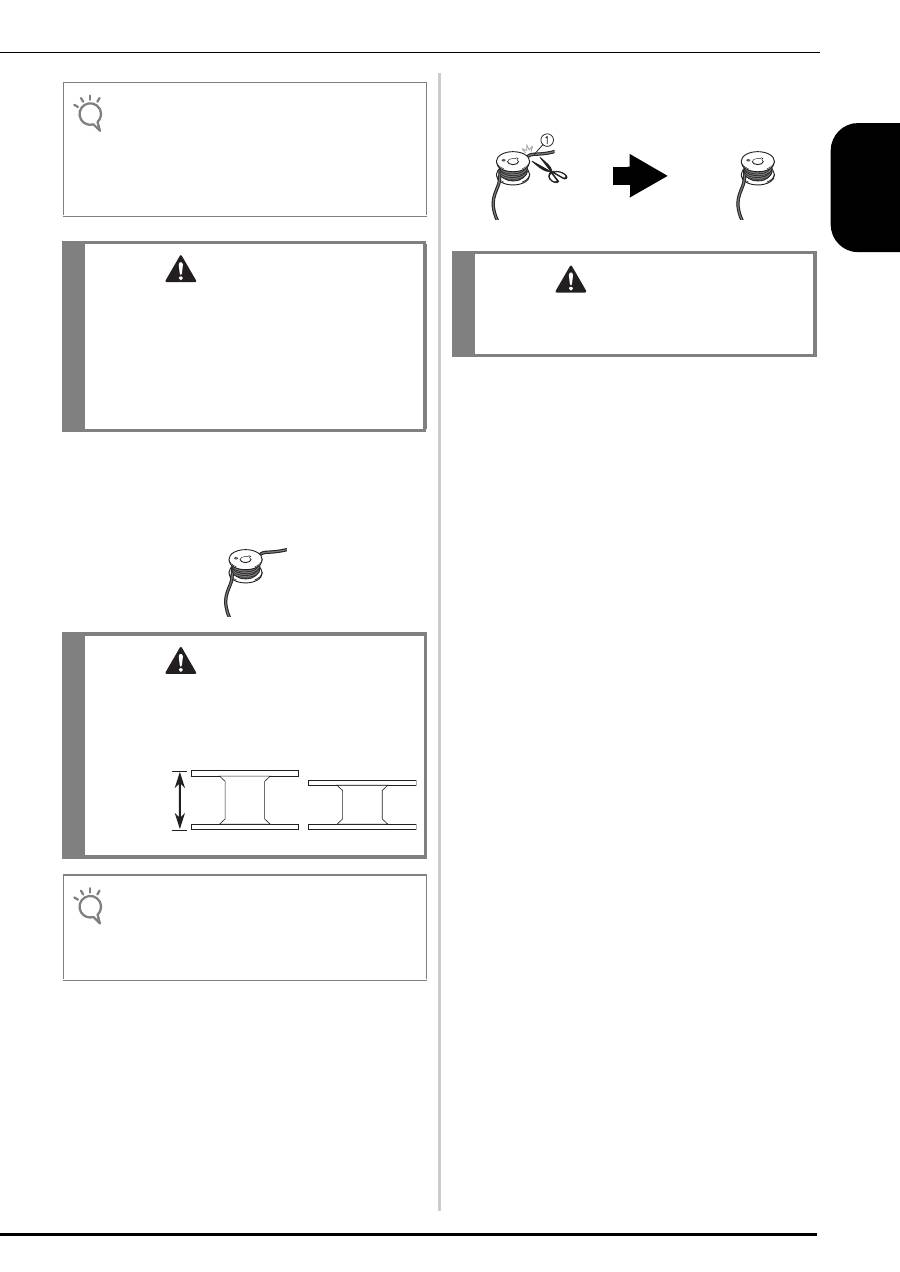
■
When Tension is Applied to the Bobbin
Thread
Insert bobbin into bobbin case so the thread unwinds
from the left side.
Then correctly pass the thread through the tension
spring as shown below.
a
Tension spring
■
When Tension is Not Applied to the Bobbin
Thread
If the bobbin thread in the trial stitching is too tight and
adjusting the bobbin case tension does not help (*As
described in see “Adjusting the Tension of the Bobbin
Thread” on page 11), do not pass the thread through the
tension spring.
Hold the bobbin with your left hand so the thread
unwinds from the right side and hold the end of the
thread with your right hand.
k
Pull out about 8 cm (approx. 3 inches) of
bobbin thread.
l
Lightly hold the end of the upper thread while
turning the handwheel toward you
(counterclockwise) until the mark on the
handwheel aligns with the center top of
machine.
CAUTION
• When winding the bobbin, make sure the thread is
not frayed. Sewing with frayed thread may result in
the thread catching on the tension spring of the
bobbin case, the thread becoming tangled or
damage to the machine.
• Do not guide the bobbin thread through the groove
in the needle plate cover, otherwise the lower
threading cannot be done correctly.
7
EN
GL
IS
H
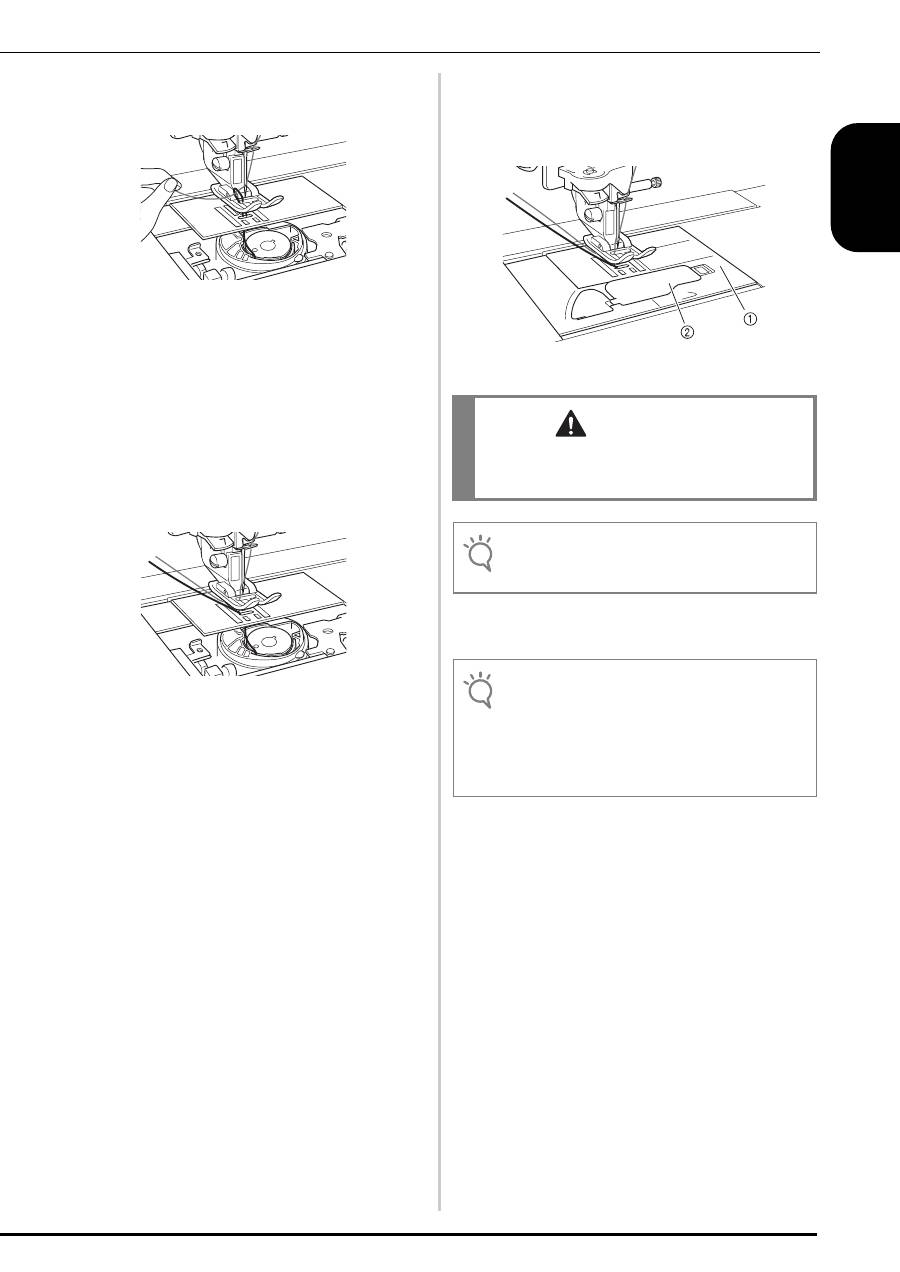
m
Gently pull the upper thread to bring the
bobbin thread up through the needle plate.
A loop of the bobbin thread comes out through the
hole in the needle plate.
n
Insert tweezers through bobbin thread loop
and pull bobbin thread above the needle
plate.
o
Align the upper thread and bobbin thread,
and then pull out about 10 cm (approx.
4 inches) of the threads and pass them under
the presser foot toward the rear of the
machine.
p
Install the needle plate cover and bobbin
cover.
For details on installing the needle plate cover,
refer to the machine’s Operation Manual.
a
Needle plate cover
b
Bobbin cover
q
Install the flat bed attachment.
This completes the upper and lower threading.
CAUTION
• When creating bobbin work, use the bobbin cover
with tabs, otherwise the thread may become
tangled or the needle may break.
Note
• When installing the needle plate cover, do not allow
it to pinch the thread.
Note
• When installing the flat bed attachment, do not allow
it to pinch the thread.
• When the bobbin thread is replaced with a new one,
be sure to repeat the procedure from
a
on
“Preparing the Bobbin Thread”, otherwise the lower
threading will not be done correctly.
Оглавление
- CONTENTS
- About Bobbin Work
- Creating Bobbin Work
- INHALT
- Über Bobbin Work
- Kreieren von Bobbin Work
- TABLE DES MATIÈRES
- À propos du travail à la canette
- Création d’un travail à la canette
- INHOUDSOPGAVE
- Info over werken met de spoel
- Werken met de spoel
- SOMMARIO
- Informazioni sul ricamo con spolina
- Creazione del ricamo con spolina
- CONTENIDO
- Acerca de los efectos decorativos con bobinas
- Creación de efectos decorativos con bobinas
- СОДЕРЖАНИЕ
- Общие сведения об объемном вышивании
- Создание объемной вышивки
