Brother PR-650: инструкция
Раздел: Швейное Оборудование
Тип: Швейная Машина
Инструкция к Швейной Машиной Brother PR-650
ENGLISH
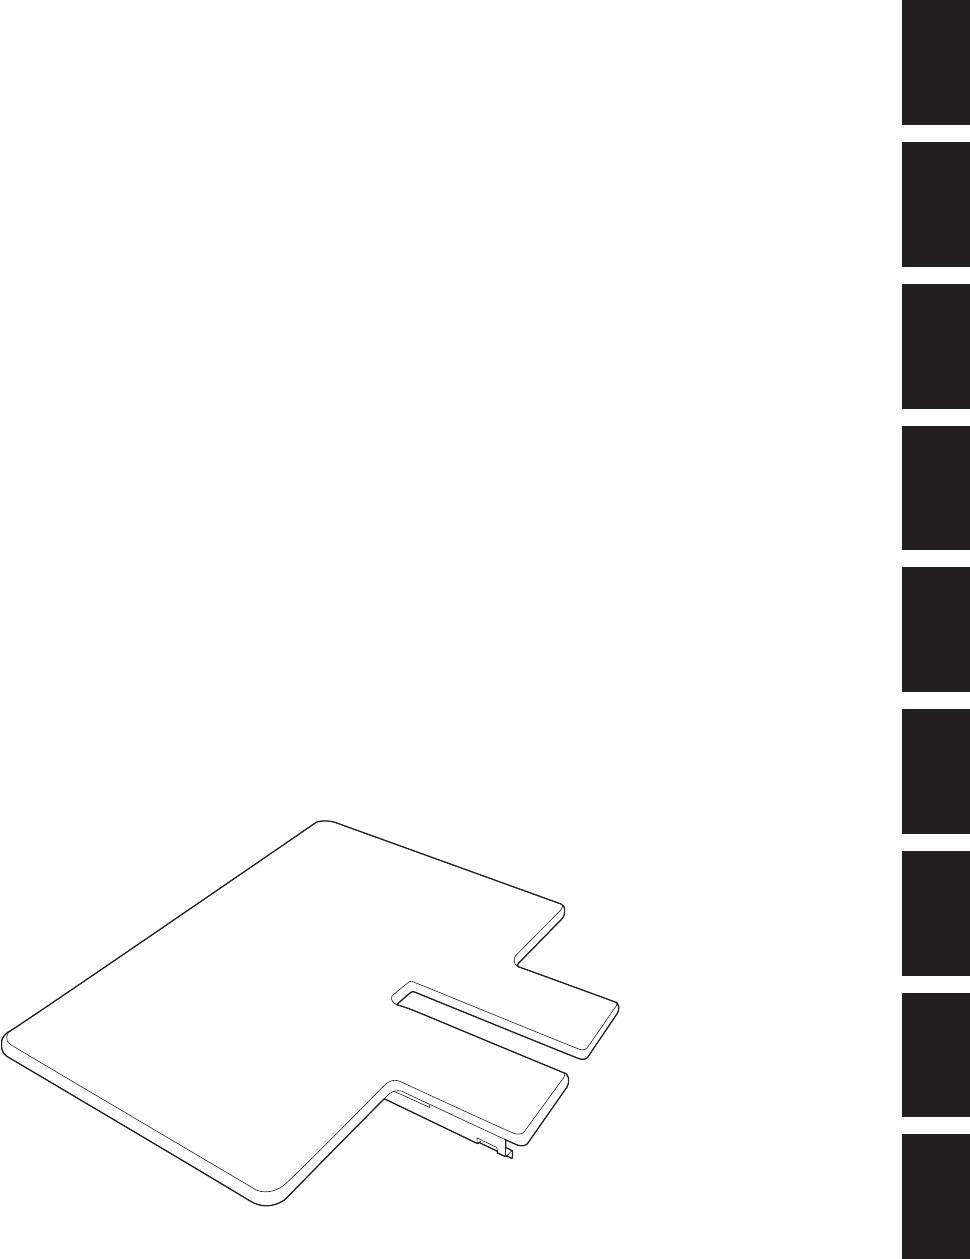
Table Set Installation Manual
Tischset-Installationsanleitung
DEUTSCH
Manuel d'installation de l'ensemble de table
Installatiehandleiding tafelset
FRANÇAIS
Manuale di installazione del tavolo prolunga
Manual de instalación de la tabla
NEDERLANDS
Manual de Instalação do Conjunto de Mesa
Инструкции по установке комплекта столика
ITALIANO
ΞȜήσΓΛΠ৾ե୰ྶ
ESPAÑOL
PORTUGUÊS
РУССКИЙ
ུࢊ
—————————————————————————————————————————————————————————————————————————————————
——
Table Set Installation Manual
When using the border, quilt, flat or jumbo frame, it is recommended that the table be used for additional
support.
1/4
Note
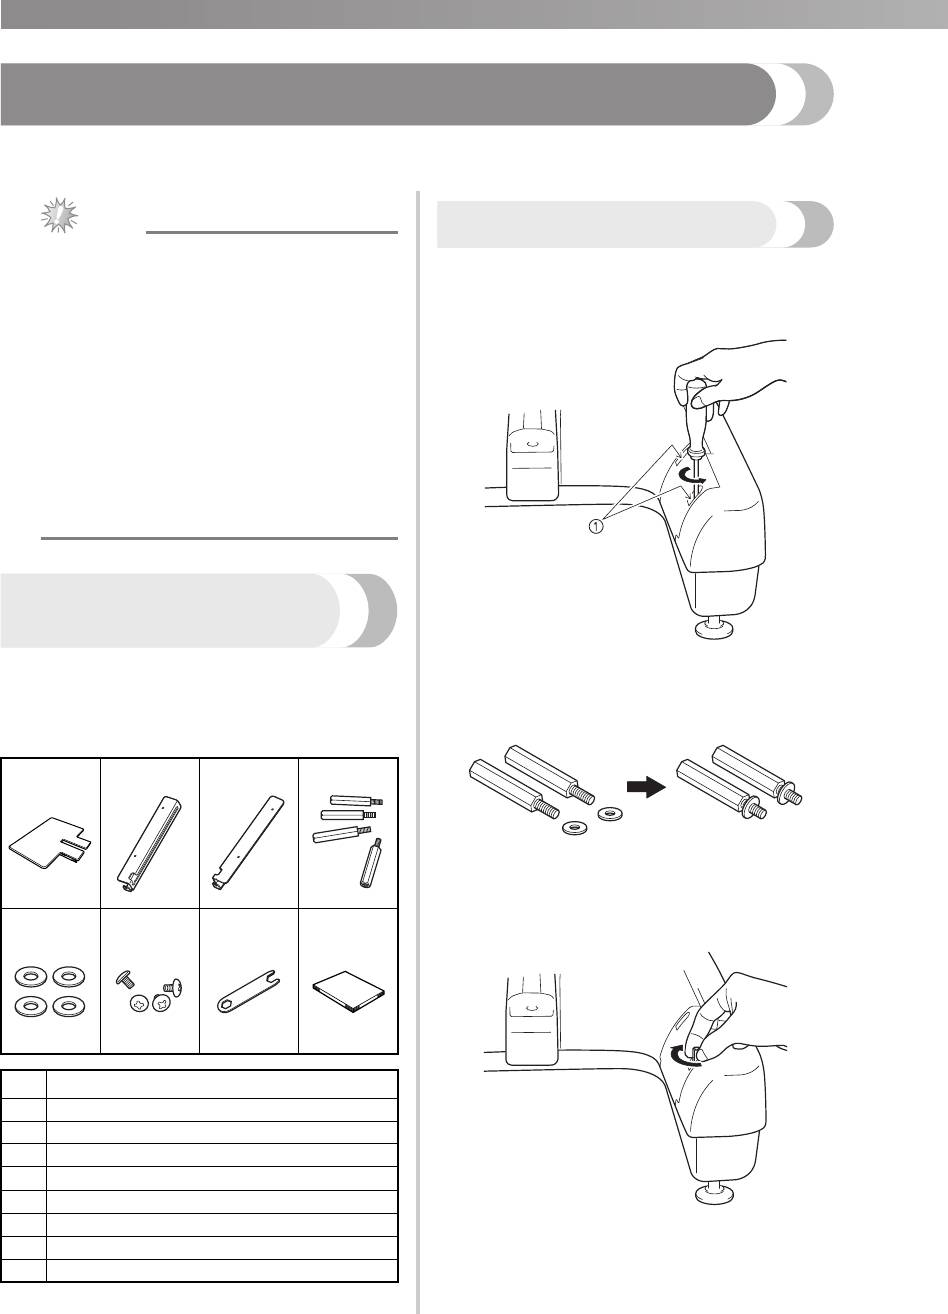
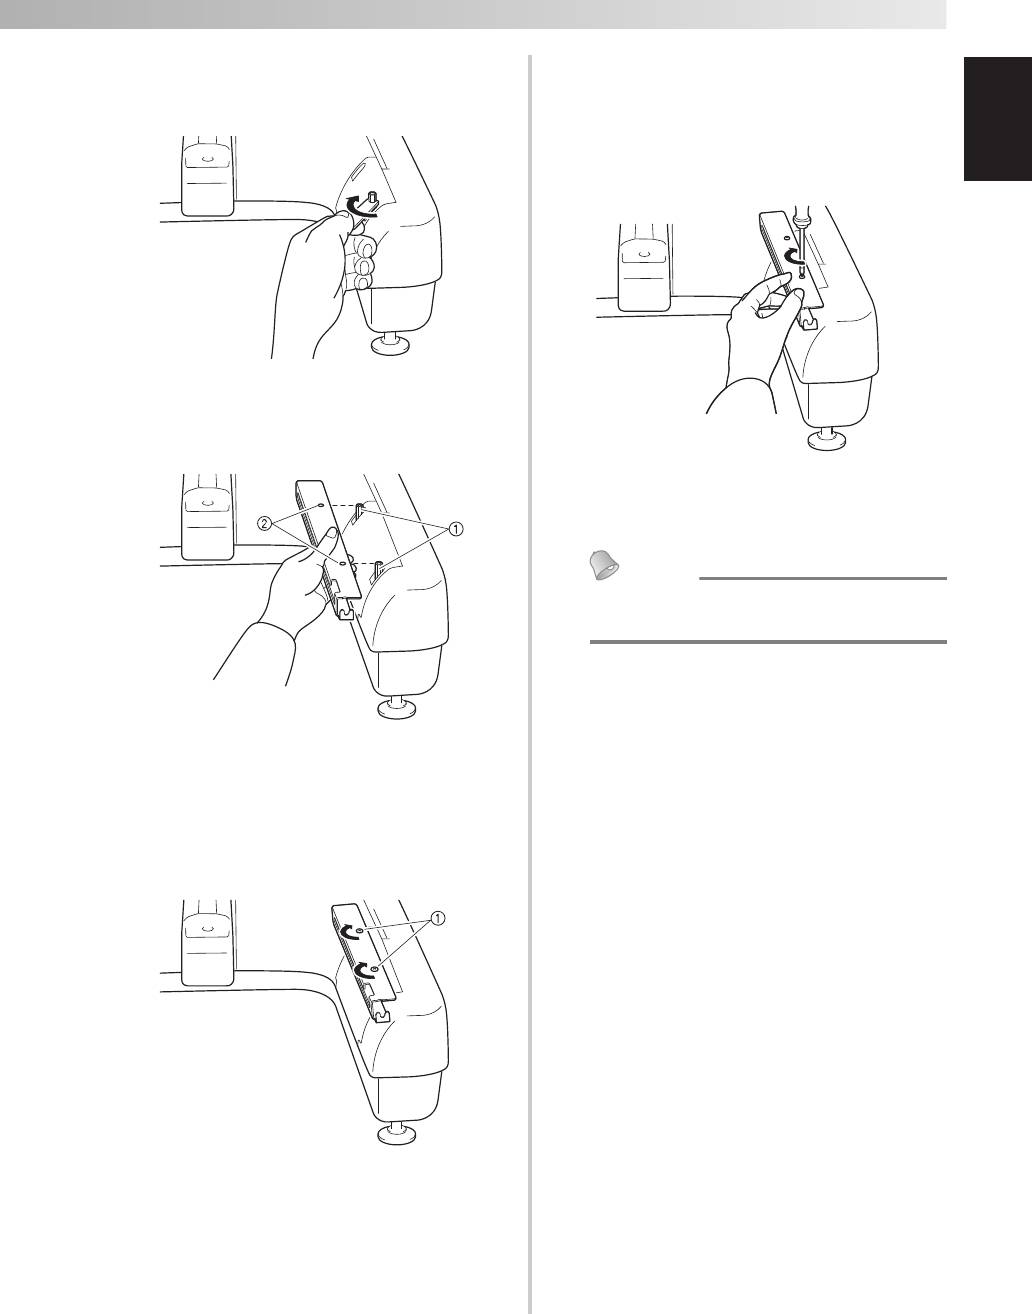
Preparing for installation
● When carrying the table, be sure to hold it
Remove the two screws on each machine
with both hands.
1
arm using the Phillips screwdriver included
● Attach the table to the machine before
with your machine or one of your own.
installing the embroidery frame.
● Do not place heavy objects on top of the
installed table or press down on it.
● Remove the table from the machine while
using embroidery frame that do no need to
be used with the table or while
embroidering tubular items, bags or caps.
The embroidery frames for these types of
objects cannot be installed while the table
is attached to the machine.
Verifying the package
contents
Check that the following parts are included. If any
1 Screws on machine arm
item is missing or damaged, contact your
Place a washer onto each of the four
authorized sales representative.
2
hexagonal support screws.
■ Included parts
1. 2. 3. 4.
Insert the hexagonal support screws with
3
washers (two on each side).
5. 6. 7. 8.
Hand-tighten each hexagonal support screw.
No. Part Name
1
Table
2
Left table bracket
3
Right table bracket
4
Hexagonal support screws (4)
5
Washers (4)
6
Screws (4)
7
Wrench
8
Installation manual
ENGLISH
2/4
——
———————————————————————————————————————————————————————————————————————————————————
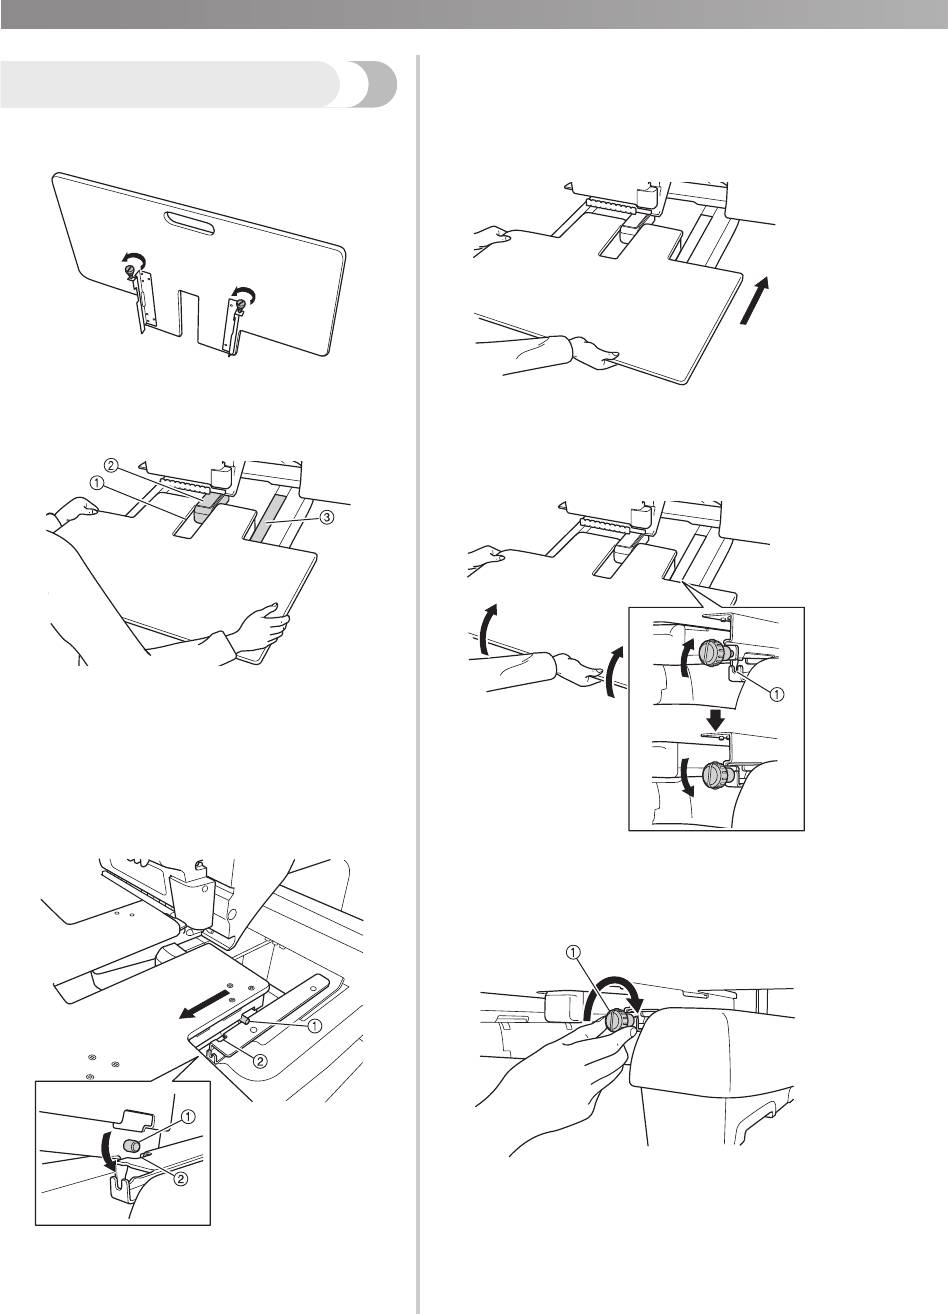
Using the included wrench, firmly tighten
Attach the left table bracket following steps
4
7
each hexagonal support screw (two on each
5 and 6 for the left side.
side).
Using the Phillips screwdriver included with
8
your machine or one of your own, firmly
tighten all screws.
Align the holes in the right table bracket
5
with the hexagonal support screws on the
right side of the machine.
X The right and left table brackets are
installed on the machine.
1 Hexagonal support screws
2 Holes in right table bracket
Align the right table bracket with the holes
6
in the two hexagonal supports, insert the
screws and lightly tighten to hold the
bracket in place.
1 Screws
Memo
● Even if you sew without using the table,
you can leave the brackets attached.
—————————————————————————————————————————————————————————————————————————————————
——
Slide in the table while supporting it so that
4
Installing the table
it remains level. Push the table in until it
lightly touches the machine.
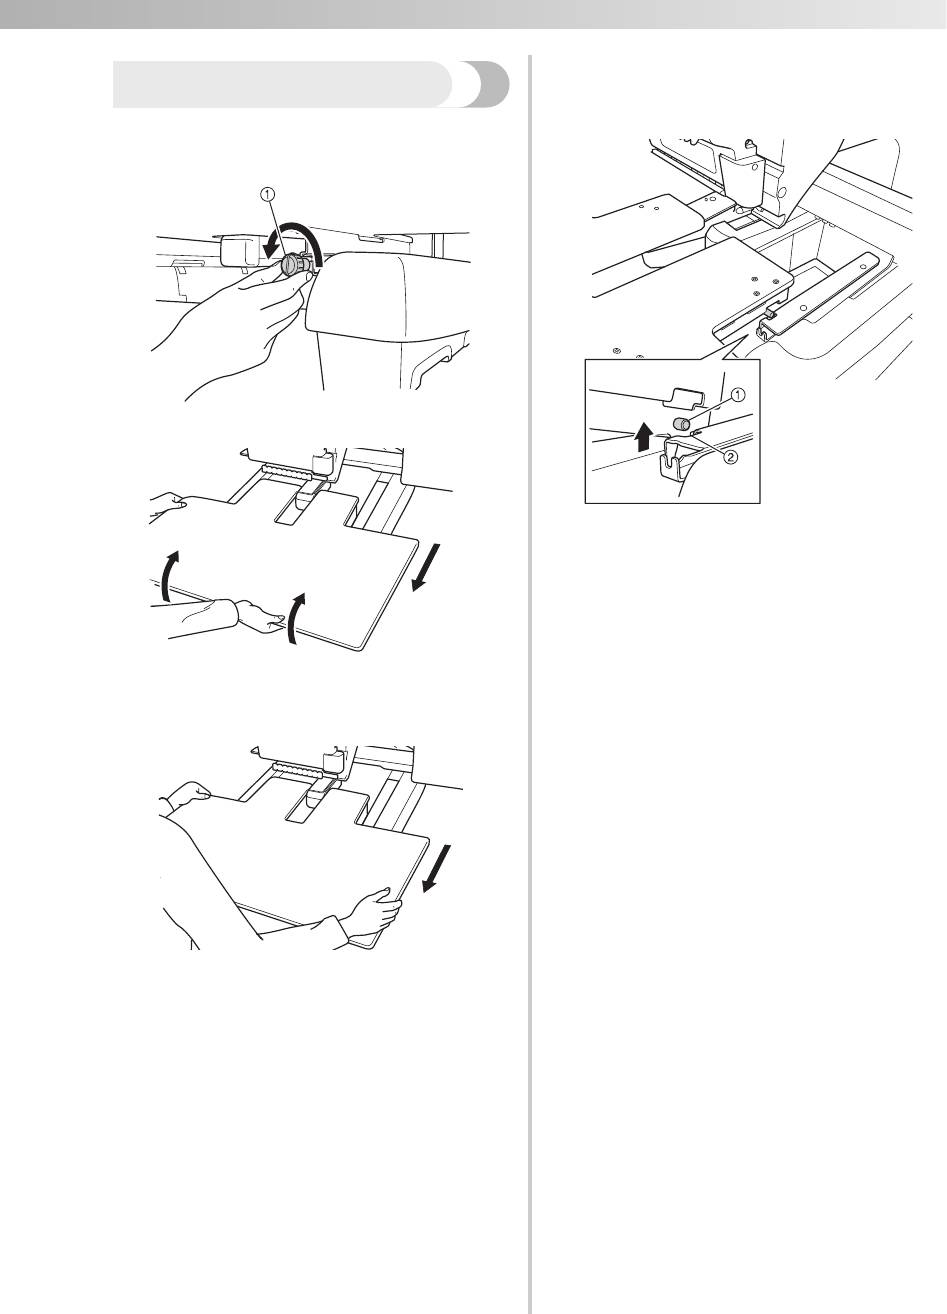
Loosen the two thumb screws 5 to 6 turns.
• If the table does not move smoothly,
1
slightly lift it up, and then slide it in.
Position the table so that the notch at the
2
center aligns with the machine bed, and then
place the table flat on the guide plates.
While looking below the table, lightly lift it
5
up, and then lower it so that the screw fits
into the notch at the front of the guide plate.
1 Notch in table
2 Machine bed
3 Guide plate
Pull the table toward you slowly, until the
3
pins on the mounting brackets (attached on
each side to the bottom of the table) fit into
the notches in the guide plates.
1 Notch at front
Tighten the two thumb screws so that the
6
table is secured.
1 Thumb screw
1 Pin
2 Notch
3/4
4/4
——
———————————————————————————————————————————————————————————————————————————————————
After the pins on each side reach the notches
3
Removing the table
in the guide plates, raise the table to lift the
pins up through the notches.
Loosen the two thumb screws, lift up the
1
table, and then pull it off toward you.
1 Thumb screw
1 Pin
2 Notch
X Remove the table from the machine.
Slightly tighten the thumb screws on the
4
table to prevent loss.
Carefully pull out the table so that it does
2
not hit the machine.
Оглавление
- Table Set Installation Manual
- Tischset-Installationsanleitung
- Manuel d’installation de l’ensemble de table
- Installatiehandleiding tafelset
- Manuale di installazione del tavolo prolunga
- Manual de instalación de la tabla
- Manual de Instalação do Conjunto de Mesa
- Инструкции по установке комплекта столика
- 取り付け前の準備
- テーブルを取り付ける
- テーブルを取り外す


