Vitek VT-4060 SR: ANGLE MARK: OSD LANG: CLOSED CAPTIONS: SCREEN SAVER: LAST MEMORY: CONNECTING ANTENNA AUDIO SETUP PAGE ANALOG AUDIO SETUP: DOWNMIX: LT/RT: MENU OPERATION: STEREO: 3D SURROUND: OFF: GENERAL SETUP PAGE FRONT, CENTER, REAR and SUBWOOFER SPEAKER: (No this DIALOG:
ANGLE MARK: OSD LANG: CLOSED CAPTIONS: SCREEN SAVER: LAST MEMORY: CONNECTING ANTENNA AUDIO SETUP PAGE ANALOG AUDIO SETUP: DOWNMIX: LT/RT: MENU OPERATION: STEREO: 3D SURROUND: OFF: GENERAL SETUP PAGE FRONT, CENTER, REAR and SUBWOOFER SPEAKER: (No this DIALOG:: Vitek VT-4060 SR
Table of contents
- DVD 5.1 HOME THEATRE SYSTEM IMPORTANT NOTICES:
- ABOUT YOUR DVD PLAYER BEST LOCATION TO OBTAIN A CLEAR PICTURE PLAYABLE DISCS DIGITAL AUDIO OUTPUT ANALOG AUDIO OUTPUT LASERHEAD OVERCURRENT PROTECTION SYSTEM DISCS USE OF DISC Handling Cleaning
- Storing Handing and Caring for Discs Step: FRONT PANEL REAR PANEL Remote control OPERATING THE REMOTE CONTROL Battery installation: Using the Remote Control
- BATTERIES Connection Stereo Audio Coaxial Digital Audio Speaker Output
- SPEAKERS Composite Video SVideo ARRANGEMENT OF SPEAKERS Component Video (YUV) VGA SCART CONNECTING SPEAKERS
- ANGLE MARK: OSD LANG: CLOSED CAPTIONS: SCREEN SAVER: LAST MEMORY: CONNECTING ANTENNA AUDIO SETUP PAGE ANALOG AUDIO SETUP: DOWNMIX: LT/RT: MENU OPERATION: STEREO: 3D SURROUND: OFF: GENERAL SETUP PAGE FRONT, CENTER, REAR and SUBWOOFER SPEAKER: (No this DIALOG:
- DIGITAL AUDIO SETUP PAGE 3D PROCESSING: DIGITAL OUTPUT: SPDIF OFF: HDCD SETUP: ALL: KARAOKE PCM ONLY: LPCM OUT: DOLBY DIGITAL SETUP VIDEO SETUP PAGE DUAL MONO: DYNAMIC: COMPONENT V IDEO: CHANNEL DELAY PAGE: EQUALIZER: COLOR SETTING SETUP:
- PREFERENCES PLAYING THE RADIO AUDIO, SUBTITLE and DISC MENU LANGUAGE PAGE: PARENTAL: BASIC DVD OPERATION PASSWORD PAGE:
- PREV/NEXT playback MENU: MENU/PBC FUNCTIONS LOCATING A TITLE
- JPEG FILES
- Troubleshooting Symptom Cause Solution Specification DVD receiver
ENGLISH
Use this item when the unit is connected with the wide screen TV set.
WideSqueeze:
Use this item when the unit is connected to the widescreen TV set.
ANGLE MARK:
It will show the ANGLE mark when playing DVD disc with multiangle view
if selection is ON.
OSD LANG:
Select onscreen display language.
CLOSED CAPTIONS:
This function doesn’t work when the disc is without captions. If the
caption is OFF, press [SUBTITLE] key on the remote controller to turn the
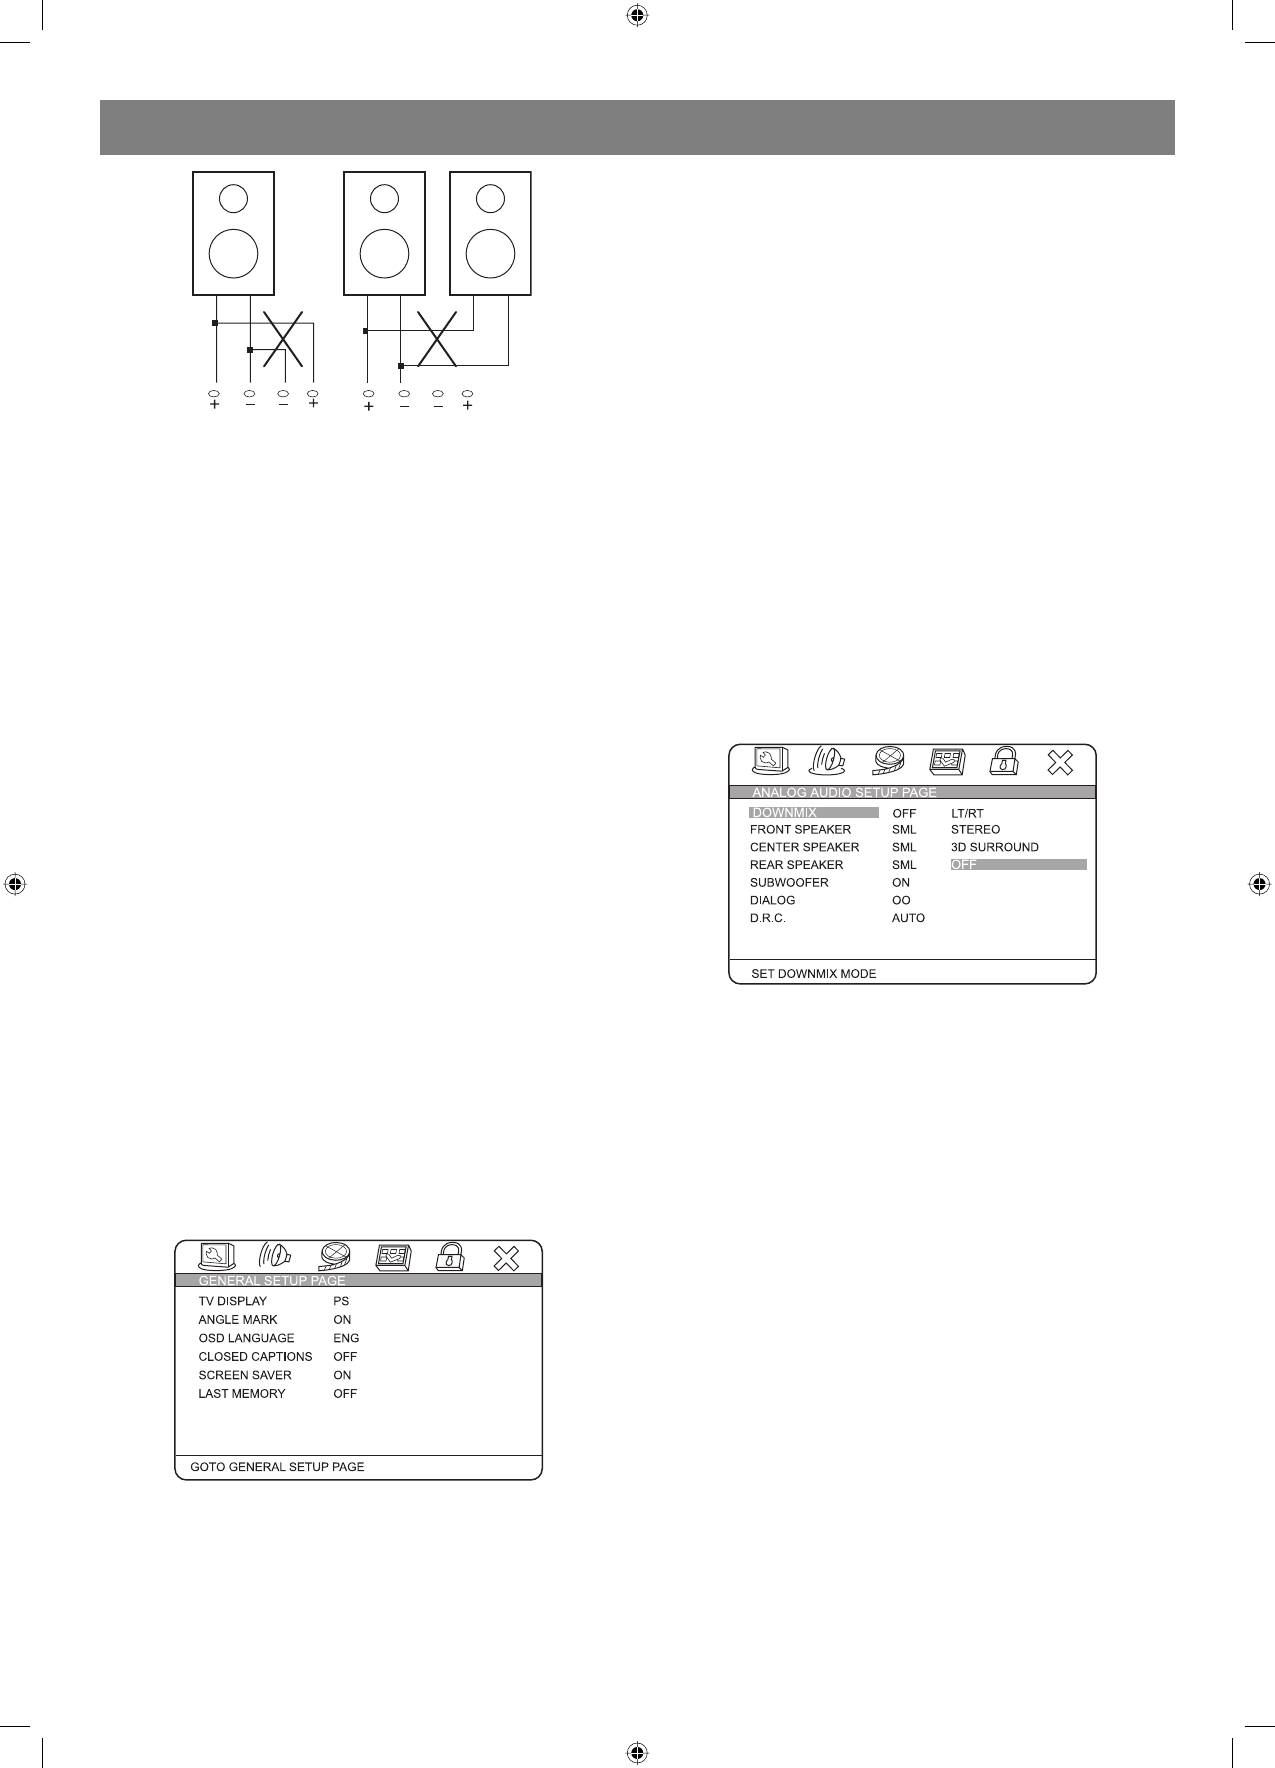
Connecting speaker cables
captions on.
1. Peel off approximately 1/2 of cable insulation
2. Tighten the wire end (#2 below)
SCREEN SAVER:
3. Open cable terminal by pressing back on tab
If the SCREEN SAVER is set ON and the unit is switched on without a
4. Insert wire end into terminal
disc playing for several minutes, a moving picture appears on the screen
5. Release tab; make sure wire is in terminal securely
and the unit will go to standby mode after 20 minutes. You can press the
Note: To prevent damage to the circuit, care should be taken
[STANDBY] key on the remote controller to activate.
to prevent short circuiting from occurring at the positive and
negative poles of the speaker cord.
LAST MEMORY:
When this function is ON, the unit can memorize the time elapsed from
CONNECTING ANTENNA
the last time you played the disc. When playing next time, it will resume
Radio signals may be difficult to receive in some buildings and under
playing from D.R.C: The D.R.C can control data record. You can chose
certain conditions. The provided antennas will help in their reception.
AUTO, ON and OFF in this mode.
They are intended for indoor use only.
AUDIO SETUP PAGE
AM Loop Antenna
ANALOG AUDIO SETUP:
The placement of the AM loop antenna should be in a direction that
provides the clearest reception. Keep as far as possible from DVD
receiver, TV set, and speaker and power cords. If reception remains
poor, an outdoor antenna may be necessary.
To connect the AM loop antenna:
Hold down handle, then insert wire end into hole. Search the handle
position for best reception.
FM Indoor Antenna
The FM antenna should be fully extended and in a direction that provides
the clearest signal. Secure the antenna ends in a location where
distortion is a minimum. If reception remains poor, an outdoor antenna
may be necessary.
System setup
DOWNMIX:
LT/RT:
MENU OPERATION:
The audio out is Left and Right channel formatting even if the original
Press [SETUP] key for the screen to show the setup page. In setup
sound is 5.1CH format.
mode, press [SETUP] key again to quit the setup page. Press direction
key to the desired item, and press [ENTER] to confirm.
STEREO:
(1) Some setup items are concerning the present modes. The items in
The audio out format is stereo even if the original sound is 5.1CH format.
gray can’t be set up.
3D SURROUND:
(2) The setup is memorized and will be kept after the power has been
The audio out is virtual surround sounds (only for 5.1CH player).
turned off.
OFF:
System Setup
Turn off DOWNMIX function. If playing 5.1CH discs or the unit is
GENERAL SETUP PAGE
connected with 5.1 channel amplifier, this item should be selected (only
for 5.1CH player).
FRONT, CENTER, REAR and SUBWOOFER SPEAKER: (No this
item in 2CH player)
If your speaker system includes the above speakers, you can set these
items according the real speaker status.
DIALOG:
The DIALOG mode is available, and you can press up and down direction
key to adjust it. (In the DOWNMIX mode, LT/RT or STEREO is selected).
D.R.C:
The D.R.C can control data record. You can chose AUTO, ON and OFF in
this mode.
TV Display:
4:3 PANSCAN:
When the unit connects to the normal TV set, the widescreen image
shows on the full screen, but some part is cut off.
4:3 LETTERBOX:
When the unit connects to the normal TV set, the widescreen image
shows and black bars appear on the top and bottom of screen.
16:9:
7
4060.indd 74060.indd 7 23.10.2006 9:25:1223.10.2006 9:25:12


