Vitek VT-1763: instruction
Class: Climatic equipment
Type: Humidifier
Manual for Vitek VT-1763
Table of contents
- DESCRIPTION Display indications (7) (pic. 1) Remote control (19) (pic. 2) SAFETY MEASURES
- FOR HOUSEHOLD USAGE ONLY USING THE HUMIDIFIER
- REMOTE CONTROL (17) Correspondence of the remote control buttons to the buttons on the control panel of the unit: Cleaning the filter CLEANING AND CARE Replacement of the filter-cartridge (13) Storage Weekly care
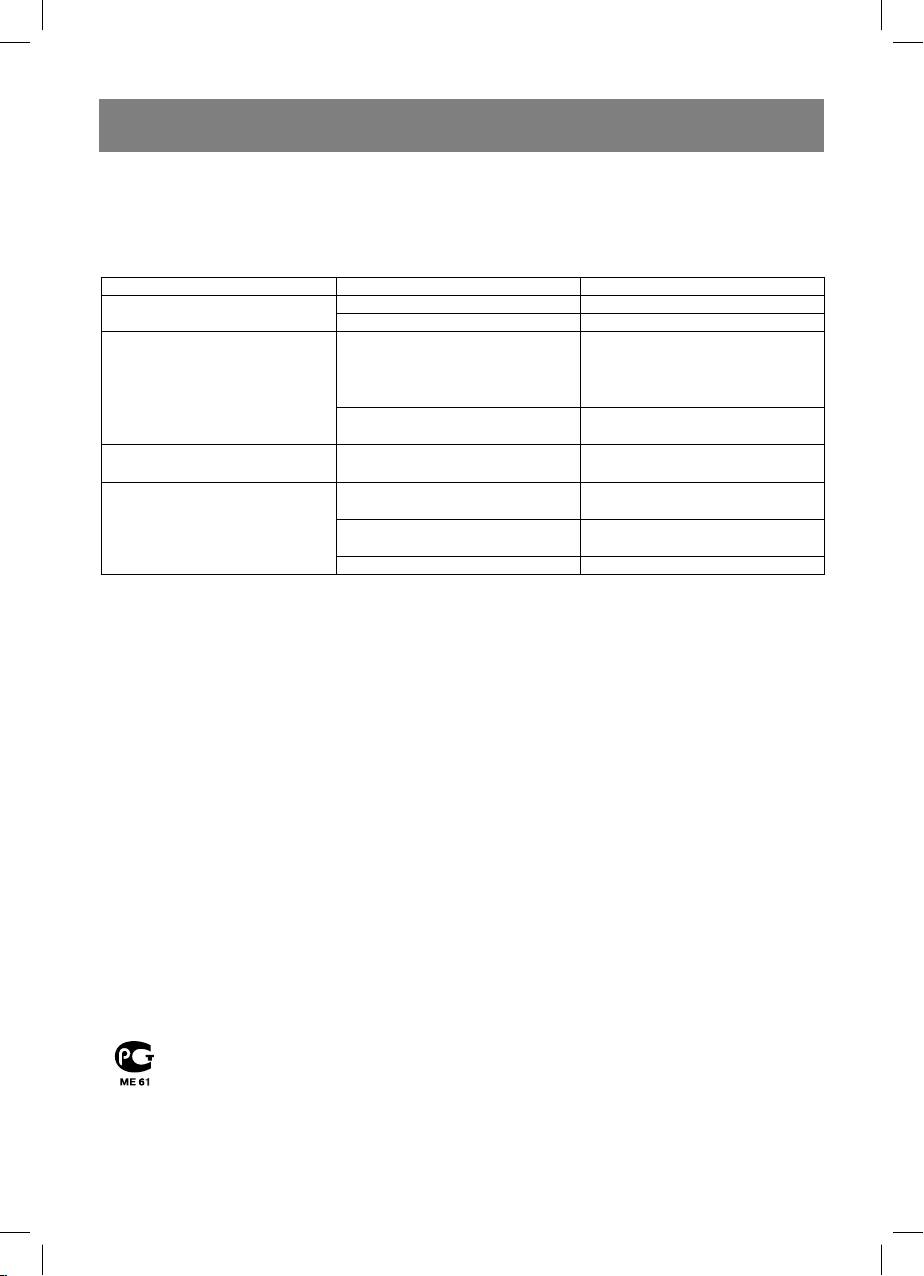
- TROUBLESHOOTING GUIDE Problem Possible cause Solution SPECIFICATIONS GUARANTEE
1763.indd 11763.indd 1 10.06.2010 14:12:4510.06.2010 14:12:45
2
1763.indd 21763.indd 2 10.06.2010 14:12:4810.06.2010 14:12:48

ENGLISH
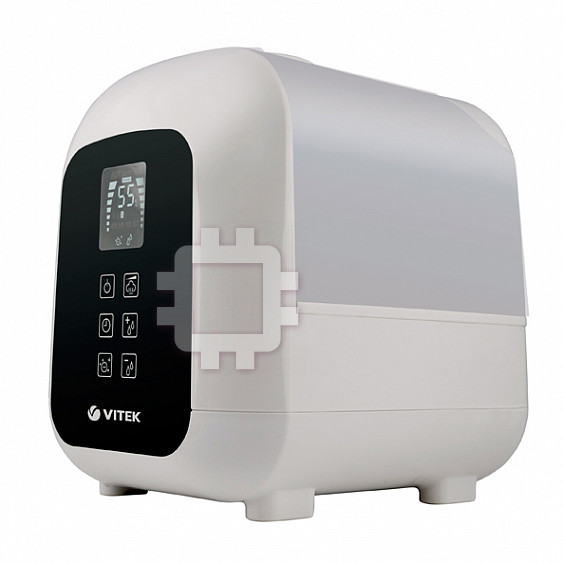
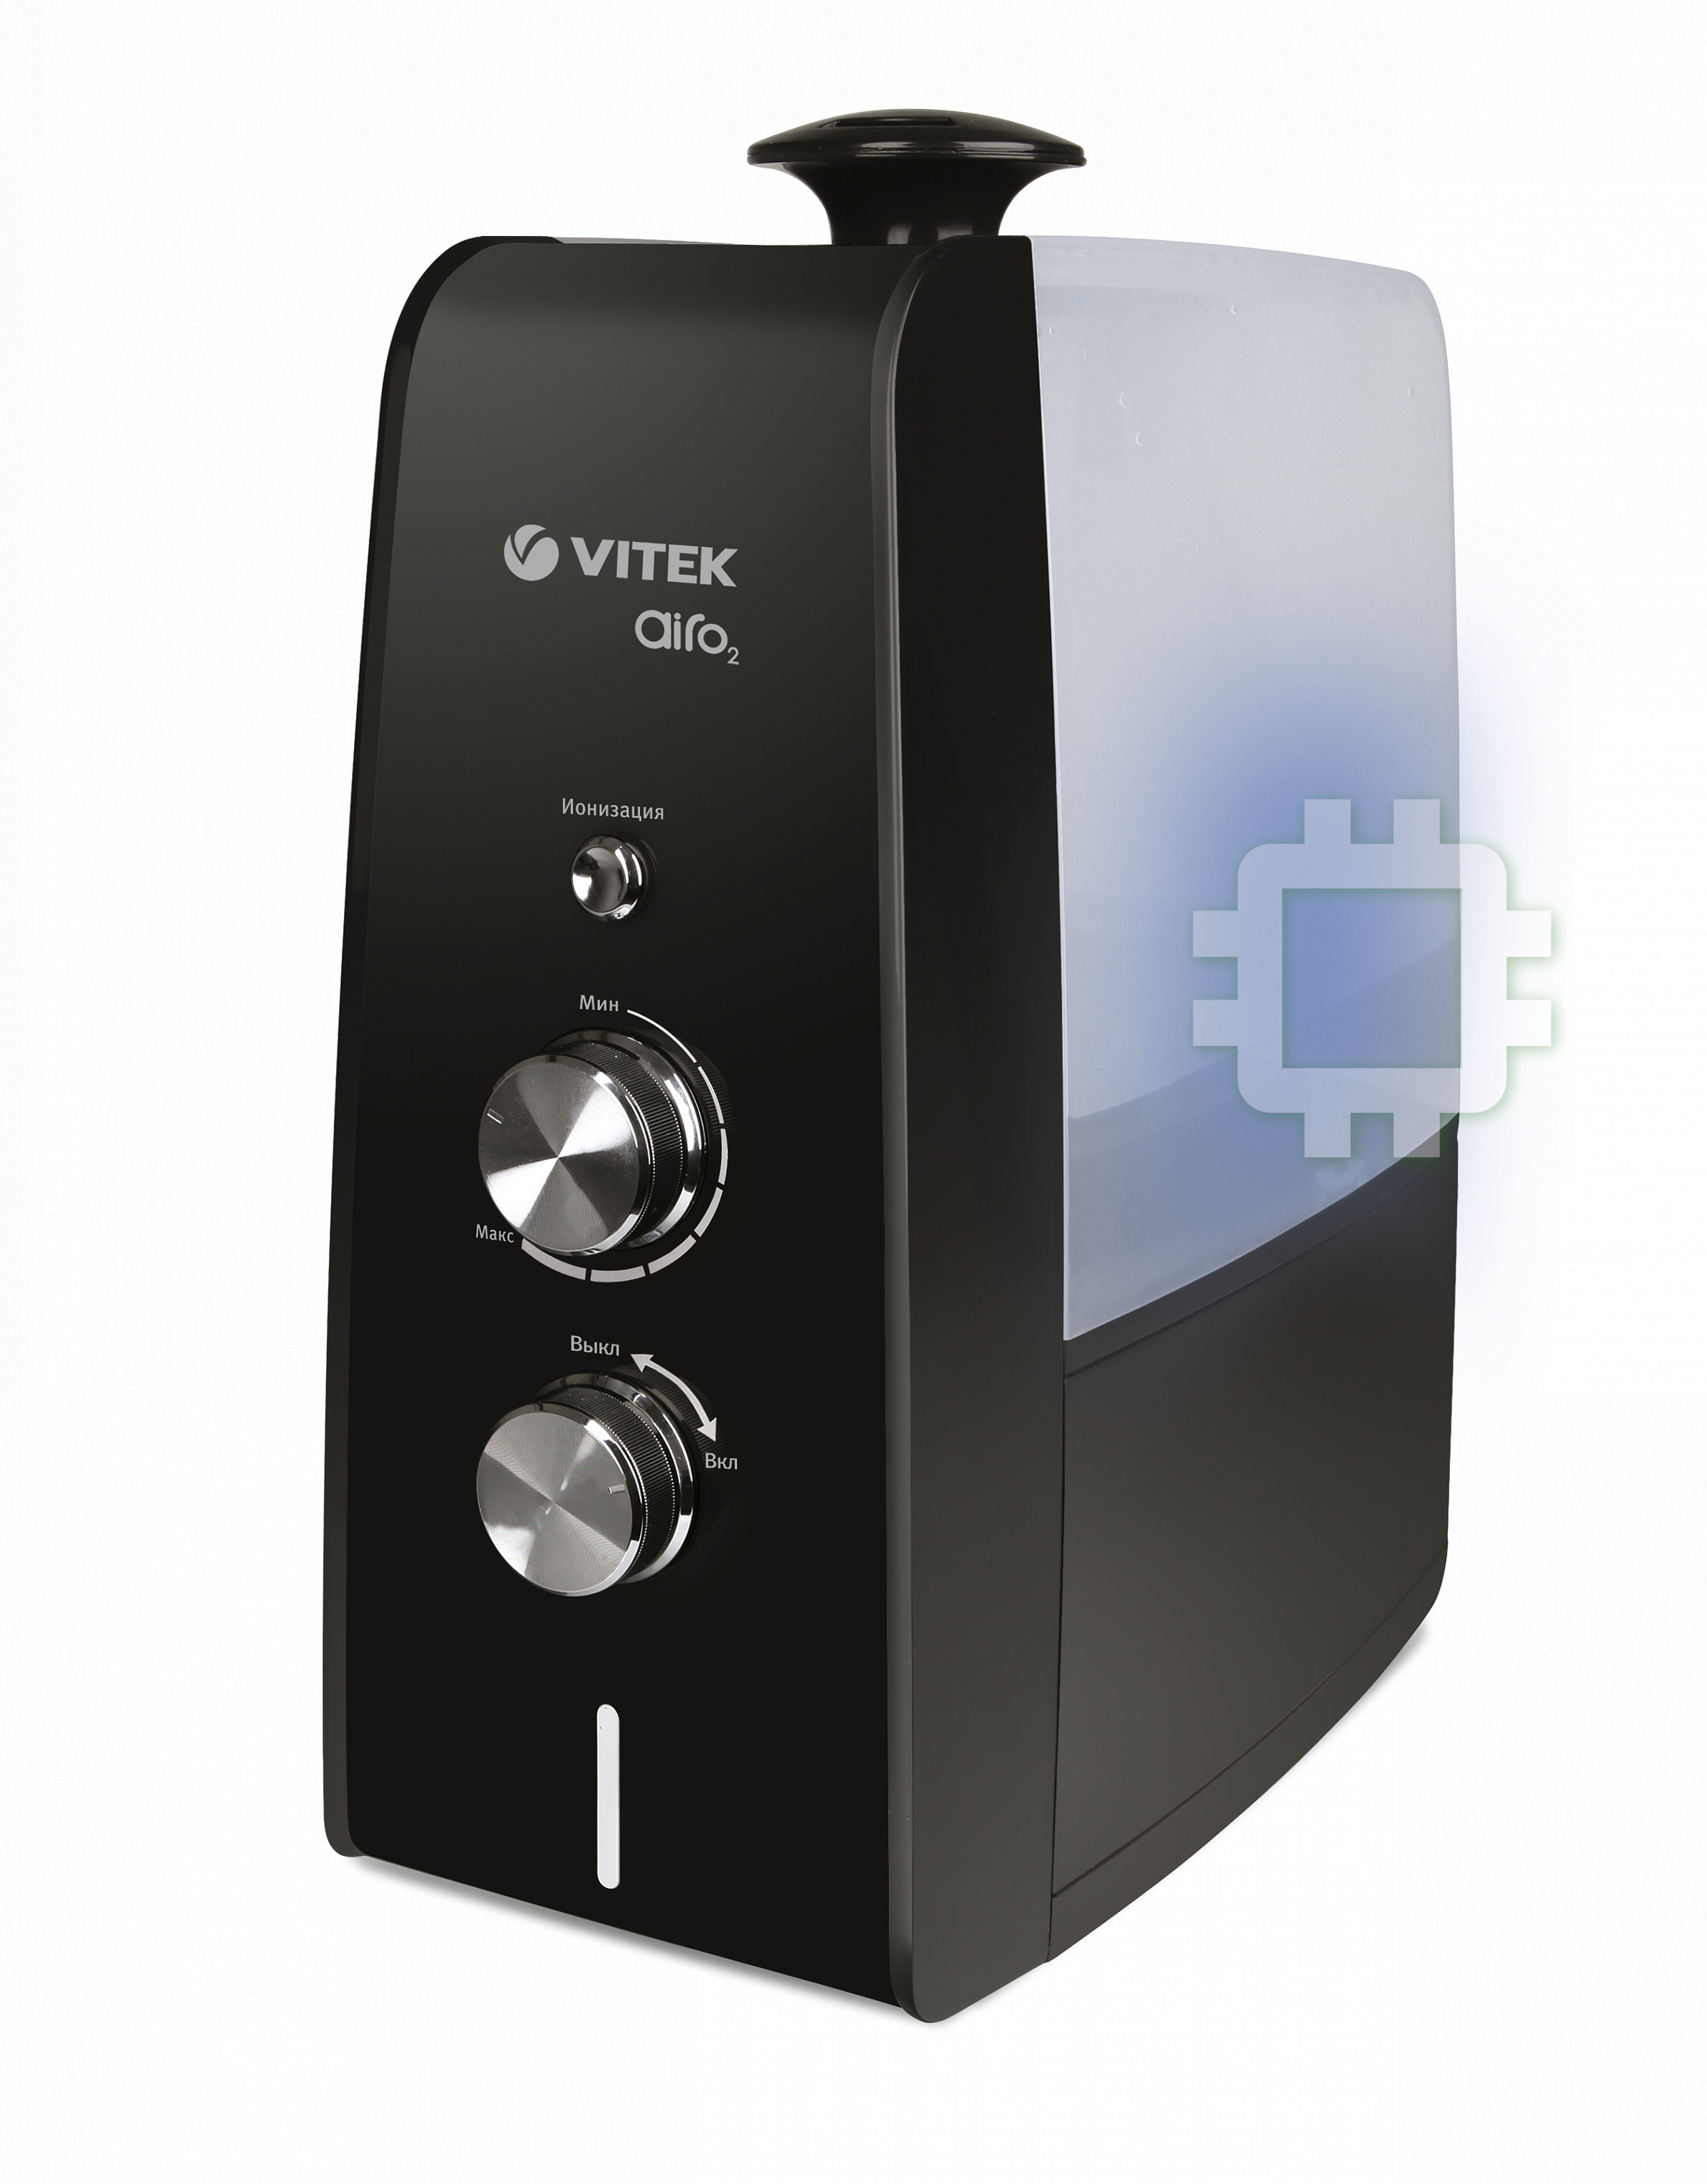
AIR HUMIDIFIER
• Place the unit on a flat, humidity-resistant
surface. Distance from the walls should be
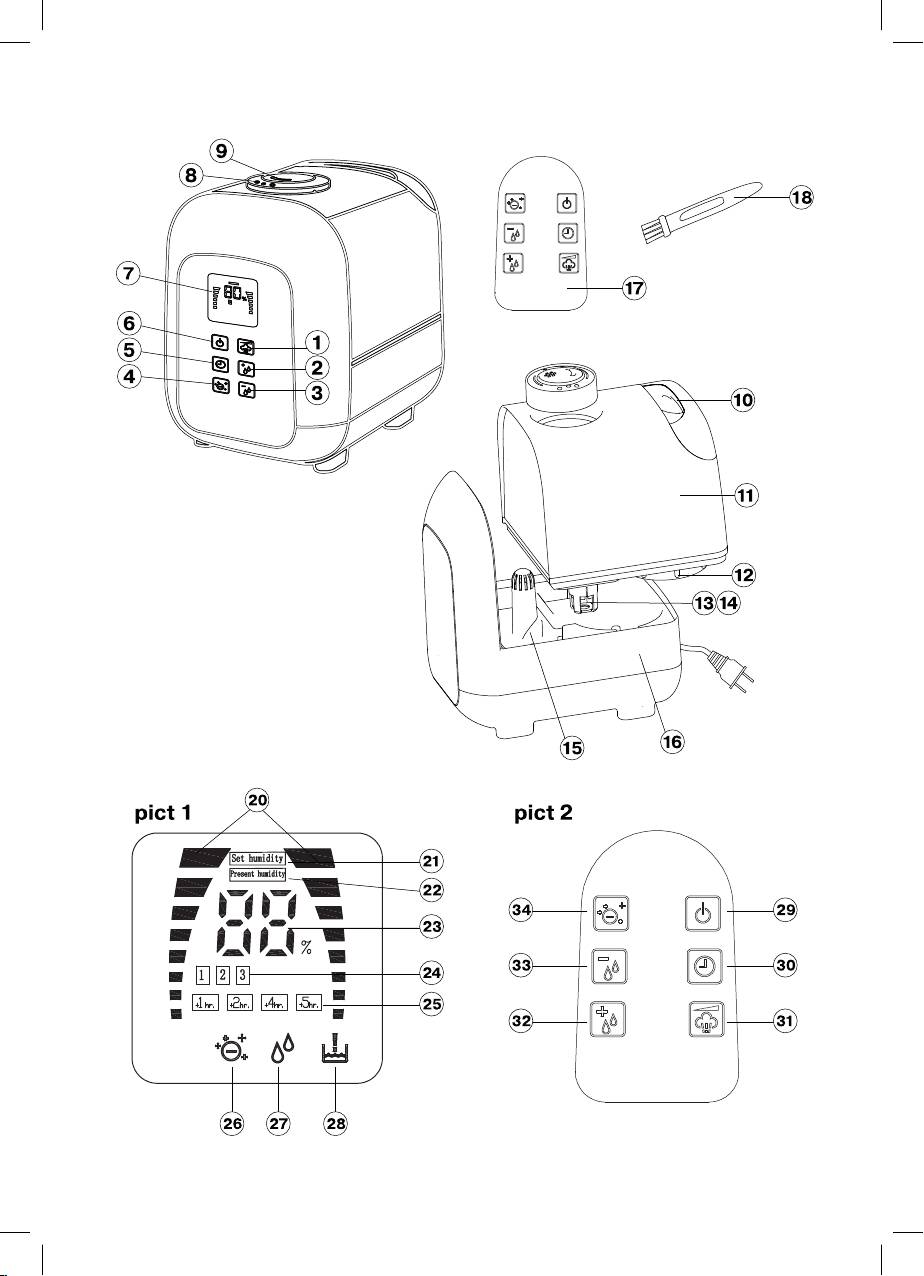
DESCRIPTION
not less than 15 cm.
1. Steam-out intensity button
• Do not direct the nozzle of the unit at
2, 3. Indoor humidity setting buttons
wooden furniture, electrical appliances,
4. Ionization on/off button
books and objects, which can be dam-
5. Timer setting button
aged by humidity.
6. Power on/off button
• Do not place the humidifier in places sub-
7. Display (pic. 1)
ject to direct sunlight, high temperatures,
8. Cover with steam outlets
near computers or other sensitive elec-
9. Steam outlets
tronic appliances.
10. Tank handle
• Do not leave the unit unattended in closed
11. Water tank
rooms otherwise condensation can ap-
12. Opening for filling water
pear on furniture and the walls, that is why
13. Filter-cartridge
we recommend keeping the door of the
14. Water tank lid
room, where the humidifier is used, half-
15. “Nebulizier”
opened.
16. Body of the unit
• Never use the unit outdoors.
17. Remote control (pic. 2)
• Use only the removable parts which are
18. Brush for cleaning the “nebulizer”
supplied with the unit.
• Never allow children to use the unit as a toy.
Display indications (7) (pic. 1)
• Close supervision is necessary when chil-
20. humidity level indication
dren or disabled persons use the unit.
21. humidity setting mode indication
• This unit is not intended to be used by chil-
22. current indoor humidity indication
dren or disabled persons unless they have
23. indoor humidity/ set humidity/ period of
been given all the necessary instructions
timer indication
on safety measures and information about
24. steam-out level indication
danger, which can be caused by improper
25. time before the switch off indication
usage of the unit.
26. ionization mode indication
• Do not operate the unit without water.
27. humidifying intensity indication
Disconnect the unit from the power supply
28. empty water tank indication
when the water tank becomes empty.
• Do not use soda water or any perfume ad-
Remote control (19) (pic. 2)
ditives.
29. On/off button
• Unplug the unit before removing the water
30. Timer setting button
tank.
31. Steam-out intensity setting button
• Do not cover the ventilation openings and
32, 33. Indoor relative humidity setting but-
avoid foreign objects getting inside them.
tons
• Do not immerse the unit into water or other
34. Ionization mode on/off button
liquids.
• Do not move or tilt the unit during its op-
SAFETY MEASURES
eration.
Before using the unit, read these instruc-
• Always unplug the unit and pour out the
tions carefully and keep them for future ref-
water from the water tank when cleaning
erence.
the unit or when you do not use it. Unplug
• Make sure that your home electricity sup-
the unit before moving it to another place.
ply corresponds to the voltage specified
• Do not touch the power plug with wet
on the body of the unit.
hands.
3
3
1763.indd 31763.indd 3 10.06.2010 14:12:4810.06.2010 14:12:48

ENGLISH
• Before using the unit, closely examine the
5. Switch on the humidifier, by pressing the
power cord and make sure that it is not
(6) “Power” on/off button, the intensity
damaged. Do not use the unit, if its power
indication (22), steam-out level indication
cord is damaged.
(20, 24) and relative indoor humidity indi-
• Do not disassemble the unit yourself, if
cation (23) will light up.
any malfunction is detected, apply to the
nearest authorized service center.
Note:
• Regularly clean the unit; be careful not to
- irrespective of the operation mode the
make any scratches on the nebulizer.
display lightning (7) switches off in 8
• Store the unit out of reach of children.
seconds, in order to see the current
mode press any button on the control
FOR HOUSEHOLD USAGE ONLY
panel or remote control.
- minimal possible indication of indoor
USING THE HUMIDIFIER
relative humidity is 40%.
Unpack the unit and remove the packing
materials. Examine the unit for damages. Do
6. Establish steam-out intensity with steam-
not switch on the unit if there are any dam-
out intensity button (1), that will be showed
ages in it.
on the display (7) by changing indication
(20) and (24).
Note:
7. You can set a necessary indoor humidity
- if the unit was subjected to negative
level (from 40% to 80%, setting step 5%)
temperatures, before switching it on
with the help of buttons (2,3), the display
for the first time, keep it at room tem-
(7) will show indication (21) and blinking
perature for 30 minutes.
indications of the set humidity (23). In 5
- use the unit at temperatures from +5 to
seconds on the display (7) indications
+40°С, and relative humidity less than
(22, 27) will lighten up and relative indoor
80%.
humidity indication (23) will lighten up.
- water temperature should not exceed
To switch off the automatic indoor humid-
+40°С.
ity maintenance mode, press button (2)
or (3) until symbols « - - » appear on dis-
Before switching on the unit, make sure that
play (7).
you home electricity supply corresponds
8. To switch on the ionization mode, press
to the voltage specified on the body of the
button (4), indication (26) will appear on
unit.
the display (7). To switch off the ionization
mode, press button (4) once again, the
1. Take the handle (10) and remove the wa-
indication (26) will disappear.
ter tank (11) from the body (16).
9. You can set up operation time of the unit
2. Turn over the tank (11); unscrew the lid
using the (5) Timer button. Press button
(14), by turning it counterclockwise. Fill
(5) to set the required operation time of
the water tank (11) with necessary quan-
the unit from 1 to 12 hours, it will be re-
tity of water and screw the lid on (14) turn-
flected on the display (7) by indications
ing it clockwise.
(25) or digital indication (23).
3. Set the filled tank (11) on the body of the
10.When the water tank becomes empty
unit (16). Wait for some time, which is
(11), on the display (7) indication (28) will
necessary to fill the operating chamber
light up, you will hear sound signals and
with water.
the humidifier will switch off.
4. Plug in the humidifier, you will hear a
11.After the end of the work switch off the
sound signal.
unit pressing button (6).
4
4
1763.indd 41763.indd 4 10.06.2010 14:12:4810.06.2010 14:12:48

ENGLISH
REMOTE CONTROL (17)
lution. After that, carefully rinse them with
For convenient control of the unit, use the
water.
remote control.
• Add 5-10 drops of the cleaning agent on
If there is an isolation insert in the battery
the “nebulizer” (15); wait about 2-5 min-
compartment, remove it, if the battery is
utes. Use the brush (18) to remove the
supplied separately, remove the holder of the
deposit from the surface of the “nebulizer”
battery, by preliminary pressing the clamp,
(15).
insert the battery in the holder, strictly fol-
lowing the polarity, insert the battery holder
Note: As a cleaning agent for the “neb-
into the remote control. The distance from
ulizer” you can use substances for
the remote control to the humidifier shall not
scale removal in kettles.
exceed 5 meters and the angle of 30°.
• Do not immerse the unit into water or other
Correspondence of the remote control
liquids.
buttons to the buttons on the control
panel of the unit:
Cleaning the filter
29. Power on/off button - (6).
• Clean the filter (13) when there are first
30. Timer setting button – (5).
signs of a “film” on the furniture items.
31. Steam-out intensity button - (1).
• Take the handle (10) and remove the water
32, 33 Indoor humidity setting buttons - (2),
tank (10) from the body of the unit (16).
(3).
• Turn over the water tank (11), unscrew the
34. Ionization mode on/off button - (4).
lid (14) by turning it counterclockwise and
remove the filter-cartridge (13), by turning
CLEANING AND CARE
it counterclockwise.
Warning: Always switch off and unplug
• Wash the filter-cartridge (13) with running
the unit before cleaning it.
water and put it for 50-60 minutes into the
bowl with salt solution (2-3 table spoons
Hard water causes the appearance of scale
for 0,5 liter of water), put off the cartridge
on the “nebulizer”, on the inner parts of the
and wash it with running water.
body and on the water tank; it leads to im-
• Place the filter-cartridge (13) back on the
proper operation of the unit and appearance
lid (14), by turning it clockwise.
of white deposit on the interior. In order to
avoid it, it is necessary to clean the nebulizer
Replacement of the filter-cartridge (13)
every day and replace water as often as pos-
Replace the filter-cartridge (13) when nec-
sible, as well as to perform cleaning of the
essary.
filter-cartridge (13).
If you are not going to use the unit for a long
Storage
time: - pour out water from the tank and the
- If you are not going to use the unit for a
operating chamber of the “nebulizer”, wash
long time, make sure that all its parts are
the water tank, wash and clean the operating
dry, including the operating chamber of
chamber of the “nebulizer” and the “neb-
the “nebulizer”.
ulizer” itself, dry the unit and put it away for
- Do not store the device with water in the
storage.
operating chamber.
- Before you put the filter-cartridge away for
Weekly care
storage, clean and dry it, keep the filter-
• Once a week carefully wash the water tank
cartridge in a cool dark place.
(11) and the operating chamber under the
Store the humidifier in a dry cool place out
tank(11) with a neutral washing liquid so-
of reach of children.
5
1763.indd 51763.indd 5 10.06.2010 14:12:4810.06.2010 14:12:48
ENGLISH
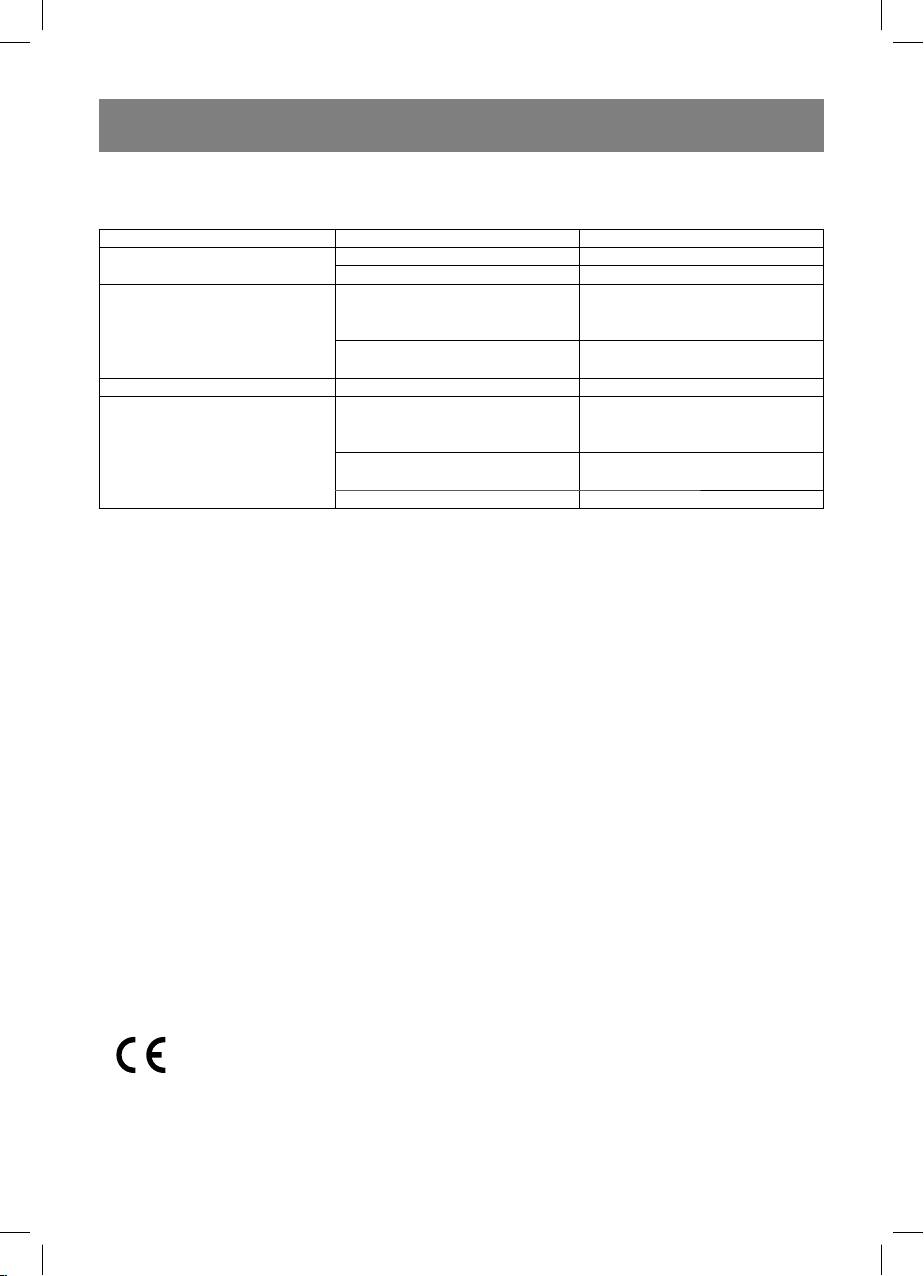
TROUBLESHOOTING GUIDE
Before applying to the service center read about the following problems:
Problem Possible cause Solution
The humidifier does not oper-
The unit is not plugged in Plug the unit
ate
The water tank is empty Fill the water tank with water
Unscrew the lid of the water tank
New device – it is normal
and leave the unit for several
Steam has an unpleasant smell
hours in a cool dark place
Clean the water tank
Polluted water in the water tank
and fill it with pure water
Small intensity of steam output
Polluted nebulizer Clean the nebulizer
Obstacle between the remote
Remove the obstacle for proper
control and the sensor on the
operation of the remote control
The remote control does not
unit
operate
Large distance between the re-
Use the remote control in the op-
mote control and the unit
erating zone
Battery is discharged Replace the battery
NOTE
Non-observance of rules for cleaning the unit parts from mineral deposits caused by
hard water may affect the overall performance of the unit.
In this case clean the unit and use filtered or distilled water in the future.
SPECIFICATIONS
Power supply: 220-230 V ~ 50 Hz
Power: 30 W
Water tank: 4,5 l
Water flow: >= 400 ml/h
2
Humidifying area up to 35 m
Timer for 12 hours
2
Ions output: 3.000.000 ion /cm
Ozone output: <= 0,05 PPM
Specifications subject to change without prior notice.
Service life of appliance - 3 years
GUARANTEE
Details regarding guarantee conditions can be obtained from the dealer from whom the
appliance was purchased. The bill of sale or receipt must be produced when making any
claim under the terms of this guarantee.
This product conforms to the EMC-Requirements as laid down by the Council
Directive 89/336/EEC and to the Law Voltage Regulation (73/23 EEC)
6
1763.indd 61763.indd 6 10.06.2010 14:12:4810.06.2010 14:12:48

DEUTSCH
LUFTBEFEUCHTER
32, 33. Tasten für Einstellung der relativen
Luftfeuchtigkeit im Raum
BESCHREIBUNG
34. EIN/AUSTaste für die Ionisierung
1. Taste für die Intensitätseinstellung des
„Dampf“Austritts
SICHERHEITSMASSNAHMEN
2, 3. Tasten für die Einstellung der relativen
Bevor das Gerät in Betrieb genommen wird,
Feuchtigkeit im Raum
lesen Sie diese Betriebsanleitung aufmerk-
4. EIN/AUSTaste für die Ionisierung
sam durch und heben Sie diese auf, um spä-
5. „Timer“Taste für die
terhin bei Bedarf darin nachlesen zu kön-
ZeitschalterEinstellung
nen.
6. EIN/AUSTaste
• Vergewissern Sie sich, dass die
7. Display (Abb. 1)
Betriebsspannung des Geräts mit der
8. Lochdeckel für den Dampfaustritt
Netzspannung übereinstimmt.
9. Löcher für Dampfaustritt
• Stellen Sie das Gerät auf einer ebenen,
10. Griff zur Entnahme des Tanks aus dem
feuchtigkeitsbeständigen Oberfl äche auf.
Gehäuse
Der Abstand bis zu den Wänden soll min-
11. Wassertank
destens 15 cm betragen.
12. Wassereinfüllöffnung
• Richten Sie die Düse des Luftbefeuchters
13. CartridgeFilter
nicht auf Holzmöbel, elektrische Geräte,
14. Deckel des Wasserbehälters
Bücher und andere Sachen, die durch
15. „Zerstäuber“
Feuchte Schaden nehmen können.
16. Gehäuse
• Vermeiden Sie die Platzierung des
17. Fernbedienungspult (Abb. 2)
Luftbefeuchters dort, wo er der di-
18. Bürste zur Reinigung des „Zerstäubers“
rekten Sonneneinstrahlung, den ho-
hen Temperaturen ausgesetzt wird; der
Anzeigeelemente am Display (7) (Abb. 1)
Luftbefeuchter darf außerdem in der Nähe
20. Anzeige der Intensitätsstufe der
der Computer bzw. empfi ndlichen elektro-
Befeuchtung
nischen Geräte nicht untergebracht wer-
21. Bildsymbol für den Modus Feuchtigkeits
den.
Einstellung
• Lassen Sie das Gerät im geschlossenen
22. Bildsymbol zur Anzeige der aktuellen
Raum nicht ohne Aufsicht, sonst können
Feuchtigkeit im Raum
die Möbel und Wände mit Kondenswasser
23. Anzeige der Feuchtigkeit im Raum / der
beschlagen werden; daher empfi ehlt
SollFeuchte / der TimerLaufzeit
es sich, die Tür zum Raum, wo der
24. Anzeige der DampfaustrittStufen
Luftbefeuchter gerade läuft, einen Spalt
25. Anzeige der restlichen Zeit bis zum Ende
offen zu halten.
des Luftbefeuchterbetriebs
• Es ist untersagt, das Gerät draußen zu be-
26. Anzeige des Ionisierungsbetriebs
nutzen.
27. Bildsymbol für den Modus der
• Verwenden Sie nur die mitgelieferten ab-
SollFeuchteEinhaltung
nehmbaren Teile.
28. Bildsymbol „Wassertank leer“
• Lassen Sie die Kinder mit dem Gerät nicht
spielen.
Fernbedienungspult (19) (Abb. 2)
• Besondere Vorsicht ist geboten, wenn das
29. EIN/AUSTaste
Gerät von Kindern oder Behinderten be-
30. Taste für die ZeitschalterEinstellung
nutzt wird.
(TimerLaufzeit)
• Dieses Gerät ist nicht für die Benutzung
31. Taste zur Einstellung der Intensität des
durch Kinder bzw. Behinderte bestimmt,
„Dampf“Austritts
es sei denn, sie würden von einer für ihre
7
7
1763.indd 71763.indd 7 10.06.2010 14:12:4810.06.2010 14:12:48

DEUTSCH
Sicherheit zuständigen Person über den
BENUTZUNG DES LUFTSBEFEUCHTERS
sicheren Umgang mit dem Luftbefeuchter
Packen Sie das Gerät aus und entfernen Sie
sowie über die eventuellen Gefahren
das Verpackungsmaterial. Untersuchen Sie
aufgrund seiner unsachgemäßen
das Gerät auf Beschädigungen. Sollten Sie
Verwendung sachgerecht und verständ-
Beschädigungen entdeckt haben, darf das
lich unterrichtet.
Gerät nicht eingeschaltet werden.
• Schalten Sie das Gerät ohne Wasser nicht
ein und schalten Sie es aus, sobald im
Hinweise:
Tank kein Wasser mehr ist.
wenn das Gerät den negativen
• Verwenden Sie kein kohlensäurehaltiges
Temperaturen ausgesetzt wurde, so
Wasser und keine Parfümzusatzstoffe.
empfi ehlt es sich, es ca. 30 Minuten bei
• Zur Entnahme des Wassertanks muss das
Raumtemperatur stehen zu lassen, bevor
Gerät vom Netz getrennt werden.
es das erste Mal eingeschaltet wird;
• Decken Sie die Löcher für den
betreiben Sie den Luftbefeuchter bei der
„Dampf“Austritt nicht zu und vermeiden
Raumtemperatur zwischen +5 und +40°C
Sie, dass Fremdkörper dorthin gelangen.
und bei der relativen Luftfeuchtigkeit von
• Tauchen Sie das Gehäuse des Geräts nicht
mindestens 80%.
ins Wasser oder in welch auch immer an-
die Temperatur des Mediums (Wasser)
dere Flüssigkeiten.
darf nicht über +40°C liegen.
• Es ist nicht gestattet, das laufende Gerät
zu versetzen bzw. zu neigen.
Bevor das Gerät an das Netz angeschlos-
• Zum Reinigen oder wenn Sie den
sen wird, stellen Sie sicher, dass die
Luftbefeuchter einige Zeit lang nicht ein-
Netzspannung mit der Betriebsspannung
setzen wollen muss das Gerät vom Netz
des Geräts übereinstimmt.
getrennt und der Wassertank entleert wer-
den. Wenn Sie das Gerät an einem ande-
1. Fassen Sie den Griff (10) und entneh-
ren Platz aufstellen möchten, muss das
men Sie den Wassertank (11) aus dem
Gerät zuvor vom Netz getrennt werden.
Gehäuse (16).
• Berühren Sie den Netzschnurstecker auf
2. Kippen Sie den Wassertank (11), schrau-
keinen Fall mit nassen Händen.
ben Sie den Deckel (14) ab, indem Sie ihn
• Vor dem Gebrauch des Geräts untersu-
gegen Uhrzeigersinn drehen. Füllen Sie
chen Sie aufmerksam die Netzschnur, um
in den Wassertank (11) die erforderliche
sicherzustellen, dass sie nicht beschädigt
Wassermenge ein und schrauben Sie den
ist. Sollte die Netzschnur beschädigt sein,
Deckel (14) wieder auf, indem Sie ihn im
darf das Gerät nicht betrieben werden.
Uhrzeigersinn drehen.
• Unterlassen Sie es, den Luftbefeuchter
3. Bauen Sie den nunmehr mit Wasser
selbstständig auseinanderzunehmen.
gefüllten Tank (11) ins Gehäuse des
Sollten Sie eine Beschädigung entdeckt
Luftbefeuchters (16) ein. Warten Sie eine
haben, wenden Sie sich bitte an ein autori-
Weile ab, bis sich die Betriebssektion mit
siertes ServiceZentrum in Ihrer Nähe.
Wasser gefüllt hat.
• Reinigen Sie das Gerät regelmäßig, lassen
4. Schließen Sie den Luftbefeuchter an Netz
Sie nicht zu, dass am Zerstäuber Kratzer
an, dabei werden Sie ein akustisches
entstehen.
Signal hören.
• Bewahren Sie das Gerät für Kinder uner-
5. Schalten Sie durch Betätigung der EIN/
reichbar.
AUSTaste (6) den Luftbefeuchter ein,
dabei erleuchten auf dem Display die
NUR FÜR DEN HAUSHALTSGEBRAUCH
folgenden Bildsymbole: Bildsymbol(22),
Intensität des Dampfaustritts (20, 24),
8
1763.indd 81763.indd 8 10.06.2010 14:12:4810.06.2010 14:12:48

DEUTSCH
und es wird die relative Luftfeuchtigkeit
werden auf dem Display (7) mit den
im Raum (23) angezeigt.
Bildsymbolen (25) oder mit digitaler
Anzeige (23) angezeigt.
Hinweise:
10.Wenn im Wassertank (11) kein Wasser
unabhängig von der Betriebsart er-
mehr ist, erleuchtet auf dem Display (7)
lischt die Displaybeleuchtung (7) nach 8
das Bildsymbol (28), es ertönt ein aku-
Sekunden; um sich die aktuelle Betriebsart
stisches Signal und der Luftbefeuchter
anzeigen zu lassen, müssen Sie eine be-
schaltet ab.
liebige Taste auf dem Bedienfeld bzw. auf
11.Nach dem Gebrauch muss der
dem Fernbedienungspult betätigen;
Luftbefeuchter durch Betätigung der
der kleinste anzeigbare Wert der relativen
Taste (6) ausgeschaltet werden.
Luftfeuchtigkeit im liegt bei 40%.
FERNBEDIENUNGSPULT (17)
6. Mit der Taste zur Einstellung von Intensität
Zur bequemeren Handhabung des
des „Dampf“Austritts (1) können Sie die
Luftbefeuchters steht Ihnen der
gewünschte Intensität einstellen, diese
Fernbedienungspult zur Verfügung.
wird auf dem Display (7) mit (20) und (24)
Wenn in der Batteriesektion eine isolieren-
abwechselnd angezeigt.
de Einlage vorhanden ist, muss diese ent-
7. Sie können den gewünschten Sollwert für
fernt werden. Wenn die Batterie separat
die Luftfeuchtigkeit im Raum (zwischen 40
geliefert wird, so nehmen Sie die Halterung
und 80%, Regelungsschritt 5%) mit den
für das Einspeiseelement heraus, setzen
Tasten (2, 3) auswählen, dabei erleuch-
Sie die Batterie in die Halterung ein (bit-
tet auf dem Display (7) das Bildsymbol
te die Polarität strikt beachten!) und bauen
(21) und der eingestellte Feuchtewert
Sie die Halterung mit der Batterie in den
(23) wird blinkend eingeblendet. Nach 5
Fernbedienungspult wieder ein.
Sekunden erleuchten auf dem Display (7)
Die Entfernung zwischen dem
die Bildsymbole (22, 27) und der einge-
Fernbedienungspult und dem
stellte Feuchtewert (23) wird leuchten.
Luftbefeuchter darf 5 Meter und der Winkel
Zur Deaktivierung des Modus der auto-
darf 30° nicht überschreiten.
matischen Einhaltung der eingestellten
Feuchtigkeit im Raum muss die Taste (2)
Zuordnung der Tasten auf dem
oder (3) so lange betätigt werden, bis auf
Fernbedienungspult den Tasten auf dem
dem Display (7) die Zeichen „ “ ein-
Bedienfeld des Luftbefeuchters:
geblendet werden.
29. EIN/AUSTaste (6).
8. Zur Aktivierung der Ionisierung muss
30. „Timer“Taste für die
Taste (4) betätigt werden, dabei erleuch-
ZeitschalterEinstellung (zur Einstellung
tet auf dem Display (7) das Bildsymbol
der LuftbefeuchterLaufzeit) (5).
(26). Zur Deaktivierung der Ionisierung
31. Taste für die Intensitätseinstellung des
muss die Taste (4) noch ein Mal gedrückt
„Dampf“Austritts (1).
werden, dabei wird das Bildsymbol (26)
32, 33. Tasten für die Einstellung der rela-
erlöschen.
tiven Feuchtigkeit im Raum (2), (3).
9. Sie können die Laufzeit des
34. EIN/AUSTaste für die Ionisierung (4).
Luftbefeuchters mit „Timer“Taste für
die ZeitschalterEinstellung (5) einstel-
WARTUNG UND REINIGUNG
len. Durch Betätigung der TimerTaste
Warnung! Vor der Reinigung muss das Gerät
(5) kann die gewünschte Laufzeit des
unbedingt ausgeschaltet und vom Netz ge-
Luftbefeuchters zwischen 1 und 12
trennt werden!
Stunden gewählt werden; Ihre Eingaben
9
1763.indd 91763.indd 9 10.06.2010 14:12:4810.06.2010 14:12:48

DEUTSCH
Das Hartwasser verursacht Bildung der
Beschlag“ an den Möbelstücken bemerk-
weißen Mineralablagerungen an dem
bar macht.
„Zerstäuber“, innerhalb des Gehäuses und am
• Fassen Sie den Griff (10) und entnehmen
Wassertank. Dadurch wird das Funktionieren
Sie den Wassertank (11) aus dem Gehäuse
des Luftbefeuchters beeinträchtigt und als
(16).
Folge wird die Innenausstattung weiß be-
• Kippen Sie den Wassertank (11), schrau-
schlagen. Um dies zu vermeiden, muss der
ben Sie den Deckel (14) ab, indem Sie ihn
Zerstäuber wöchentlich gereinigt werden
gegen Uhrzeigersinn drehen. Schrauben
und das Wasser möglichst oft gewechselt
Sie den CartridgeFilter (Filtereinsatz) (13)
werden, außerdem muss der CartridgeFilter
aus, indem Sie ihn gegen Uhrzeigersinn
(Filtereinsatz) (13) gereinigt werden.
drehen.
Falls Sie den Luftbefeuchter eine längere Zeit
• Spülen Sie den CartridgeFilter (13) unter
nicht gebrauchen wollen, gehen Sie wie folgt
dem Wasserstrahl aus und legen Sie diesen
vor: entleeren Sie den Wassertank und las-
für 5060 Minuten in einen Behälter mit der
sen Sie das Wasser aus der Betriebssektion
Kochsalzlösung (23 Esslöffel auf 0,5 Liter
des „Zerstäubers“ ab, spülen Sie den
Wasser), holen Sie den CartridgeFilter
Wassertank, spülen Sie und reinigen Sie die
(13) aus der Salzlösung heraus und spülen
Betriebssektion des „Zerstäubers“ und den
Sie diesen unter fl ießendem Wasser.
eigentlichen „Zerstäuber“, lassen Sie alle
• Bauen Sie den CartridgeFilter (13) wieder
Teile des Luftbefeuchters gut austrocknen
in den Deckel (14) ein, indem Sie ihn im
und lagern Sie das Gerät ein.
Uhrzeigersinn drehen.
Wöchentliche Wartung
Wechsel des CartridgeFilters (13)
• Einmal pro Woche muss der Wassertank
Der CartridgeFilter (13) ist je nach Bedarf
(11) und die Betriebssektion unter dem
zu wechseln.
Wassertank (
11 ) mit Lösung eines neu-
tralen Spülmittels gründlich gespült wer-
Aufbewahrung
den. Anschließend müssen der Tank und
Falls Sie den Luftbefeuchter eine längere
die Betriebssektion mit reichlich Wasser
Zeit nicht gebrauchen und diesen wegräu-
nachgespült werden.
men wollen, stellen Sie sicher, dass alle
• Geben Sie auf den „Zerstäuber“ (15) 510
Teile, einschließlich der Betriebssektion
Tropfen Reinigungsmittel, warten Sie 25
des „Zerstäubers“ trocken sind.
Minuten ab. Danach entfernen Sie mit der
Der Luftbefeuchter darf nicht mit Wasser
Bürste (18) den Belag (die Verkalkung) von
im Wassertank bzw. in der Betriebssektion
der Oberfl äche des „Zerstäubers“ (15).
des „Zerstäubers“ nicht gelagert werden.
Bevor der CartridgeFilter eingelagert
Hinweis:
wird, muss er einer Reinigung unter-
als Reinigungsmittel für den „Zerstäuber“
zogen und ausgetrocknet werden. Der
eignet sich das Entkalkungsmittel für
CartridgeFilter ist kühl und dunkel zu la-
Teekessel.
gern.
Bewahren Sie den Luftbefeuchter an einer
• Tauchen Sie das Gehäuse des Geräts nicht
trockenen und für Kinder unzugänglichen
ins Wasser und auch nicht in jedwede an-
Stelle.
dere Flüssigkeiten.
STÖRUNGEN UND DEREN BESEITIGUNG
Filterreinigung
Bevor Sie sich an das ServiceZentrum wen-
• Der Filter (13) muss einer Reinigung un-
den, machen Sie sich mit den folgenden
terzogen werden, sobald sich der „weiße
Störungen vertraut:
10
1763.indd 101763.indd 10 10.06.2010 14:12:4810.06.2010 14:12:48
DEUTSCH
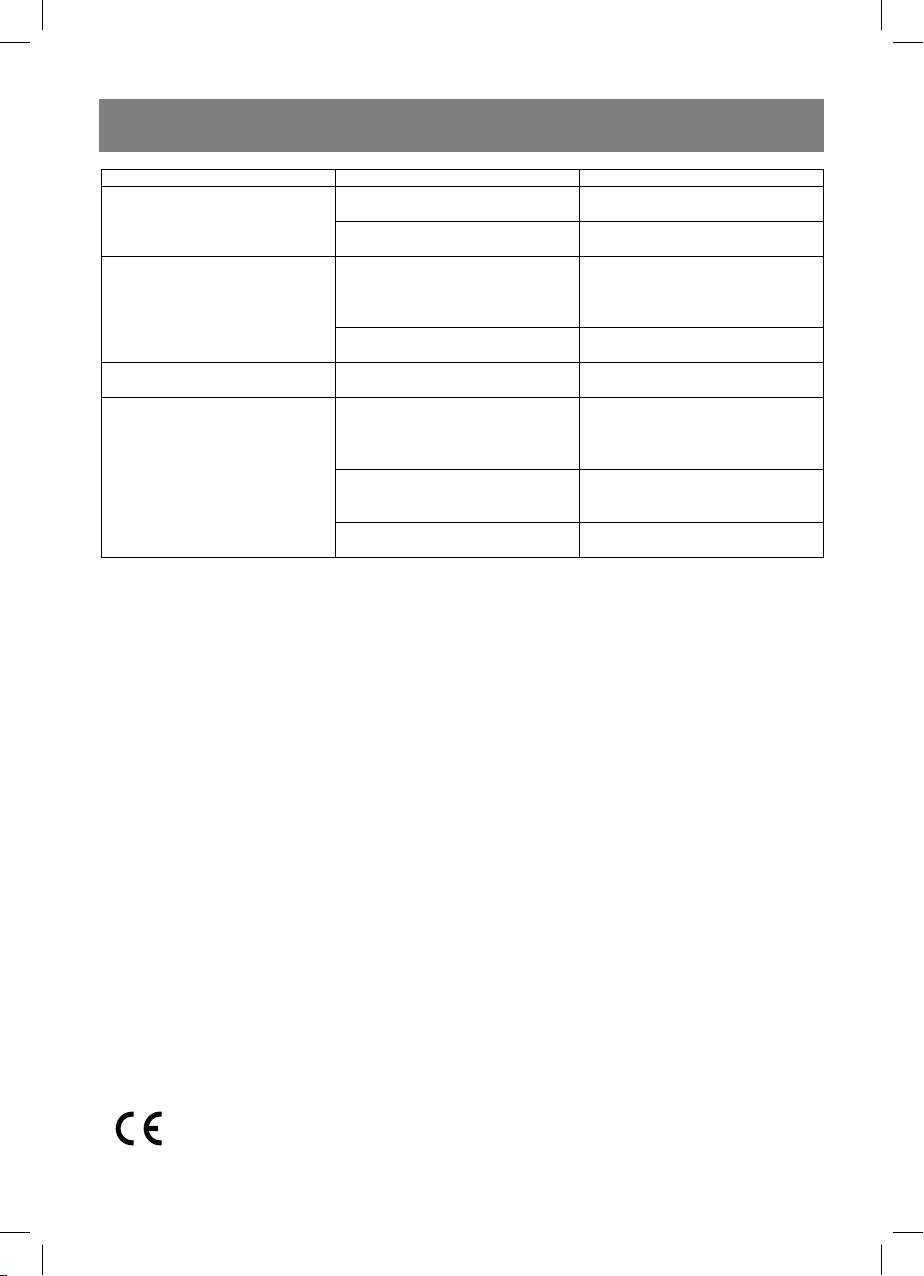
Störung Mögliche Ursache Beseitigung
Das Gerät ist ans Stromnetz nicht
Schließen Sie das Gerät ans
Der Luftbefeuchter funktioniert
angeschlossen
Stromnetz an
nicht
Füllen Sie Wasser in den
Wassertank leer
Wassertank ein
Schrauben Sie den Deckel des
Wassertanks ab und lassen Sie
Für ein neues Gerät ist dies normal
Der „Dampf“ hat einen peinlichen
diesen für einige Stunden an einer
Geruch
dunklen und kühlen Stelle
Das Wasser im Wassertank ist
Reinigen Sie den Wassertank und
verschmutzt
füllen Sie darin reines Wasser ein
Kleine Intensität des
Reinigen Sie das Element des
Der „Zerstäuber“ ist verschmutzt
„Dampf“Austritts
„Zerstäubers“
Beseitigen Sie das Hindernis, um
Ein Hindernis zwischen dem
eine störungsfreie Funktion des
Fernbedienungspult und dem
Fernbedienungspults zu ermög-
Sensor am Luftbefeuchter
lichen
Der Fernbedienungspult funktio-
Eine große Entfernung zwischen
Benutzen Sie den
niert nicht
dem Fernbedienungspult und dem
Fernbedienungspult innerhalb
Luftbefeuchter
seines Prozessortes
Einspeiseelement ist entladen
Ersetzen Sie das Einspeiseelement
(Batterie leer)
ANMERKUNG: Wenn die Regeln für die Reinigung der Teile des Gerätes von den durch die
Verwendung des Hartwassers verursachten Mineralablagerungen nicht befolgt werden,
kann sich die Funktionseffi zienz des Gerätes vermindern. In diesem Fall reinigen Sie das
Gerät und verwenden Sie fernerhin gefi ltertes oder destilliertes Wasser.
TECHNISCHE DATEN
Stromversorgung: 220230 V ~ 50 Hz
Leistung: 30 W
Tankvolumen: 4,5 l
Befeuchtungsleistung (Nebelmenge): >= 400 ml/h
Befeuchtungsfl äche: bis 35 qm
Zeitschalter für 12 Stunden
2
Ionenausbeute: 3.000.000 Ion /cm
Ozonausbeute: <= 0,05 PPM
Der Hersteller behält sich das Recht vor die Charakteristiken des Gerätes ohne Vorbescheid
zu ändern.
Betriebslebensdauer des Geräts – 3 Jahre
Gewährleistung
Ausführliche Bedingungen der Gewährleistung kann man beim Dealer, der diese Geräte ver-
kauft hat, bekommen. Bei beliebiger Anspruchserhebung soll man während der Laufzeit der
vorliegenden Gewährleistung den Check oder die Quittung über den Ankauf vorzulegen.
Das vorliegende Produkt entspricht den Forderungen der elektromagnetischen
Verträglichkeit, die in 89/336/EWG -Richtlinie des Rates und den Vorschriften
73/23/EWG über die Niederspannungsgeräte vorgesehen sind.
11
1763.indd 111763.indd 11 10.06.2010 14:12:4810.06.2010 14:12:48

РУССКИЙ
УВЛАЖНИТЕЛЬ ВОЗДУХА
Пульт дистанционного управления
(19) (рис. 2)
ОПИСАНИЕ
29. кнопка включения/выключения
1. Кнопка установки интенсивности вы-
30. кнопка установки времени работы
хода «пара»
таймера
2, 3. Кнопки установки относительной
31. кнопка установки интенсивности вы-
влажности в помещении
хода «пара»
4. Кнопка вкл./выкл. режима иониза-
32, 33. кнопки установки относительной
ции
влажности в помещении
5. Кнопка установки времени работы
34. кнопка вкл./выкл. режима иониза-
таймера
ции
6. Кнопка включения/выключения
7. Дисплей (рис. 1)
МЕРЫ БЕЗОПАСНОСТИ
8. Крышка с отверстиями для выхода
Перед началом эксплуатации прибора
пара
внимательно прочитайте настоящую
9. Отверстия выхода пара
инструкцию и сохраните ее, используй-
10. Ручка для снятия резервуара с кор-
те ее в дальнейшем в качестве справоч-
пуса
ного материала.
11. Резервуар для воды
• Убедитесь, что рабочее напряжение
12. Отверстие для заливки воды
прибора соответствует напряжению
13. Фильтр-картридж
сети.
14. Крышка резервуара для воды
• Устанавливайте прибор на ровной, вла-
15. «Распылитель»
гостойкой поверхности. Расстояние
16. Корпус
до стен должно быть не менее 15 см.
17. Пульт дистанционного управления
• Не направляйте сопло увлажнителя на
(рис. 2)
деревянную мебель, электроприборы,
18. Щеточка для чистки «распылителя»
книги и на предметы, которые могут
быть повреждены влагой.
Обозначения на дисплее (7) (рис. 1)
• Не располагайте увлажнитель в мес-
20. индикация уровня интенсивности ув-
тах, подверженных воздействию пря-
лажнения
мых солнечных лучей, высоких темпе-
21. пиктограмма режима установки
ратур, вблизи компьютеров или чувс-
влажности
твительной электронной техники.
22. пиктограмма отображения текущей
• Не оставляйте прибор без присмотра
влажности в помещении
в закрытом помещении, в противном
23. индикация влажности в помещении/
случае на мебели и стенах может об-
заданной влажности/времени рабо-
разоваться конденсат, поэтому дверь
ты таймера
в помещение, где работает увлажни-
24. индикация уровней выхода пара
тель, рекомендуется держать приотк-
25. индикация времени до окончания ра-
рытой.
боты увлажнителя
• Запрещается использовать прибор
26. пиктограмма режима ионизации
вне помещений.
27. пиктограмма режима заданной влаж-
• Используйте только съемные детали,
ности
входящие в комплект поставки.
28. пиктограмма отсутствия воды в ре-
• Не разрешайте детям использовать
зервуаре
прибор в качестве игрушки.
12
1763.indd 121763.indd 12 10.06.2010 14:12:4810.06.2010 14:12:48

РУССКИЙ
• Будьте особенно внимательными,
не допускайте появления царапин на
если прибор используется детьми или
распылителе.
людьми с ограниченными возможнос-
• Храните прибор в недоступных для де-
тями.
тей местах.
• Данное устройство не предназначено
для использования детьми и людьми с
ТОЛЬКО ДЛЯ ДОМАШНЕГО
ограниченными возможностями, если
ИСПОЛЬЗОВАНИЯ
только лицом, отвечающим за их бе-
зопасность, им не даны соответству-
ИСПОЛЬЗОВАНИЕ УВЛАЖНИТЕЛЯ
ющие и понятные им инструкции о бе-
Распакуйте прибор и удалите упако-
зопасном пользовании устройством и
вочные материалы. Осмотрите прибор
тех опасностях, которые могут возни-
на предмет повреждений. При наличии
кать при его неправильном пользова-
повреждений не включайте прибор.
нии.
• Не включайте прибор без воды и от-
Примечание:
ключите его, как только в резервуаре
- если увлажнитель был подвержен
закончится вода.
отрицательным температурам, то
• Не используйте газированную воду и
перед первым включением реко-
парфюмерные добавки.
мендуется выдержать его в тече-
• Отключайте прибор от сети перед сня-
ние 30 минут при комнатной темпе-
тием резервуара для воды.
ратуре.
• Не закрывайте отверстия выхода
- используйте увлажнитель при тем-
«пара» и не допускайте попадания в
пературе в помещении от +5 до
них посторонних предметов.
+40°С и относительной влажности
• Не погружайте корпус прибора в воду
менее 80%.
или другие жидкости.
- температура используемой воды
• Не перемещайте и не наклоняйте при-
не должна быть выше +40°С.
бор во время работы.
• Всегда отключайте прибор от сети и
Перед включением в сеть убедитесь, что
выливайте воду из резервуара во вре-
напряжение электрической сети соот-
мя чистки, или если вы не пользуетесь
ветствует рабочему напряжению прибо-
увлажнителем. Если вы хотите пере-
ра.
нести прибор в другое место, сначала
1. Возьмитесь за ручку (10) и снимите
отключите его от сети.
резервуар для воды (11) с корпуса
• Не прикасайтесь к вилке сетевого
(16).
шнура мокрыми руками.
2. Переверните резервуар (11), открути-
• Перед использованием прибора вни-
те крышку (14), поворачивая ее про-
мательно осмотрите сетевой шнур и
тив часовой стрелки. Наполните ре-
убедитесь, что он не поврежден. Не
зервуар (11) необходимым количес-
используйте прибор при поврежден-
твом воды и закрутите крышку (14),
ном сетевом шнуре.
поворачивая ее по часовой стрелке.
• Не разбирайте прибор самостоятель-
3. Установите наполненный резер-
но, в случае обнаружения неисправ-
вуар (11) на корпус прибора (16).
ности обратитесь в ближайший авто-
Подождите некоторое время, необ-
ризованный сервисный центр.
ходимое для заполнения рабочего
• Регулярно проводите чистку прибора,
отсека водой.
13
1763.indd 131763.indd 13 10.06.2010 14:12:4810.06.2010 14:12:48

РУССКИЙ
4. Подключите увлажнитель к сети, при
кнопку (4) еще раз, при этом пиктог-
этом вы услышите звуковой сигнал.
рамма (26) погаснет.
5. Включите увлажнитель, нажав кнопку
9. Вы можете установить время рабо-
включения/выключения (6), при этом
ты увлажнителя с помощью кнопки
загорится пиктограмма (22), интен-
включения таймера (5). Нажимая на
сивность выхода пара (20, 24), а так-
кнопку (5) установите необходимое
же величина относительной влажнос-
время работы увлажнителя от 1 до 12
ти в помещении (23).
часов, что отображается на дисплее
(7) пиктограммами (25) или цифро-
Примечание:
вой индикацией (23).
- независимо от режима работы
10.При окончании воды в резервуаре
подсветка дисплея (7) отключает-
(11) на дисплее (7) загорится пиктог-
ся через 8 секунд; для отображе-
рамма (28), прозвучит звуковой сиг-
ния показаний текущего режима
нал и увлажнитель выключится.
работы нажмите любую кнопку на
11.По окончании работы выключите при-
панели управления или на пульте
бор, нажав на кнопку (6).
ДУ.
- минимальное возможное отобра-
ПУЛЬТ ДИСТАНЦИОННОГО
жение относительной влажности в
УПРАВЛЕНИЯ (17)
помещении 40%.
Для удобства управления увлажнителем
используйте пульт ДУ.
6. Кнопкой установки интенсивности
При наличии изоляционной прокладки в
выхода «пара» (1) вы можете устано-
батарейном отсеке удалите ее, если эле-
вить необходимую интенсивность,
мент питания поставляется отдельно, то
что отображается на дисплее (7) из-
выньте держатель элемента питания,
меняющейся индикацией (20) и (24).
вставьте элемент питания в держатель,
7. Вы можете задать необходимое зна-
строго соблюдая полярность, вставьте
чение влажности в помещении (от 40
держатель элемента питания в пульт ДУ.
до 80%, шаг установки 5%) при помо-
Расстояние от пульта дистанционного
щи кнопок (2, 3), при этом на дисп-
управления до увлажнителя не должно
лее (7) загорится пиктограмма (21) и
превышать 5 метров, а угол – 30°.
мигающие показания установленной
влажности (23). Через 5 секунд на
Соответствие кнопок на пульте ДУ
дисплее (7) загорятся пиктограммы
кнопкам на панели управления ув-
(22, 27) и загорится показание отно-
лажнителя:
сительной влажности в помещении
29. Кнопка включения/выключения - (6).
(23).
30. Кнопка установки времени работы
Для выключения режима автомати-
таймера - (5).
ческого поддержания заданной влаж-
31. Кнопка установки интенсивности вы-
ности в помещении нажимайте кноп-
хода «пара» - (1).
ку (2) или (3) до появления на дисплее
32, 33. Кнопки установки относительной
(7) символов « - - ».
влажности в помещении - (2), (3).
8. Для включения режима ионизации
34. Кнопка вкл./выкл. режима ионизации
нажмите кнопку (4), при этом на дис-
- (4).
плее (7) загорится пиктограмма (26).
Для выключения ионизации нажмите
14
1763.indd 141763.indd 14 10.06.2010 14:12:4810.06.2010 14:12:48

РУССКИЙ
УХОД И ЧИСТКА
Чистка фильтра
Предупреждение! Всегда выключай-
• Проводите чистку фильтра (13) при
те и отсоединяйте прибор от сети пе-
первых признаках появления «белого
ред чисткой.
налета» на предметах мебели.
• Возьмитесь за ручку (10) и снимите ре-
Жесткая вода вызывает появление ми-
зервуар для воды (10) с корпуса (16).
неральных отложений на «распылителе»,
• Переверните резервуар (11), открути-
внутренних частях корпуса и резервуаре
те крышку (14), поворачивая ее против
для воды, что приводит к ухудшению ра-
часовой стрелки, открутите фильтр-
боты увлажнителя и появлению белого
картридж (13), поворачивая его про-
налета на предметах интерьера. Во из-
тив часовой стрелки.
бежание этого необходимо еженедель-
• Промойте фильтр-картридж (13) под
но очищать распылитель и как можно
струей воды и поместите его на 50-60
чаще менять воду, а также производить
минут в емкость с раствором поварен-
чистку фильтра-картриджа (13).
ной соли (2-3 столовые ложки на 0,5
В случае если вы не собираетесь исполь-
литра воды), выньте фильтр-картридж
зовать увлажнитель в течение длитель-
(13) и промойте его под проточной во-
ного времени: слейте воду из резервуа-
дой.
ра и из рабочего отсека «распылителя»,
• Установите фильтр-картридж (13) об-
промойте резервуар, промойте и очис-
ратно на крышку (14), поворачивая его
тите рабочий отсек «распылителя» и сам
по часовой стрелке.
«распылитель», тщательно просушите и
уберите прибор на хранение.
Замена фильтра-картриджа (13)
Производите замену фильтра-картрид-
Еженедельный уход
жа (13) по мере необходимости.
• Раз в неделю тщательно промывай-
те резервуар для воды (11) и рабочий
Хранение
отсек под резервуаром (11) раство-
- Если вы не собираетесь пользоваться
ром нейтрального моющего средства.
прибором длительное время и хотите
После этого тщательно сполосните их
его убрать, убедитесь, что все его час-
водой.
ти сухие, включая рабочий отсек «рас-
• Капните 5-10 капель очищающего
пылителя».
средства на «распылитель» (15), по-
- Не храните прибор с водой в резерву-
дождите около 2-5 минут. Используя
аре и в рабочем отсеке «распылите-
щеточку (18), удалите налет с поверх-
ля».
ности «распылителя» (15).
- Перед тем как убрать на хранение
фильтр-картридж, проведите его чис-
Примечание:
тку и высушите, храните фильтр-кар-
- в качестве очищающего средства
тридж, в прохладном, затемненном
для «распылителя» можно исполь-
месте.
зовать средство для удаления на-
Храните увлажнитель в сухом, про-
кипи в чайниках.
хладном месте, недоступном для де-
тей.
• Не погружайте корпус прибора в воду
или любые другие жидкости.
15
1763.indd 151763.indd 15 10.06.2010 14:12:4810.06.2010 14:12:48
РУССКИЙ
НЕИСПРАВНОСТИ И ИХ УСТРАНЕНИЕ
Перед обращением в сервисный центр ознакомьтесь со следующими неисправнос-
тями:
Неисправность Возможная причина Устранение
Прибор не включен в сеть Включите прибор в сеть
Увлажнитель не работает
Нет воды в резервуаре Наполните резервуар водой
Открутите крышку резервуа-
Новый прибор - это нормаль-
ра для воды и оставьте его в
«Пар» имеет неприятный за-
ное явление
темном прохладном месте на
пах
несколько часов
В резервуаре загрязненная
Очистите резервуар и напол-
вода
ните его чистой водой
Малая интенсивность выхода
Очистите элемент распылите-
Загрязнен «распылитель»
«пара»
ля
Препятствие между пультом
Устраните препятствие для
ДУ и датчиком на увлажнителе
нормальной работы пульта ДУ
Не работает пульт ДУ
Большое расстояние между
Используйте пульт ДУ в преде-
пультом ДУ и увлажнителем
лах рабочей зоны
Разряжен элемент питания Замените элемент питания
ПРИМЕЧАНИЕ:
Если не соблюдаются правила очистки частей прибора от минеральных от-
ложений, вызванных использованием жесткой воды, эффективность работы
прибора может снизиться. В этом случае произведите очистку прибора и в
дальнейшем используйте фильтрованную или дистиллированную воду.
ТЕХНИЧЕСКИЕ ХАРАКТЕРИСТИКИ
Электропитание: 220-230 В ~ 50 Гц
Мощность: 30 Вт
Емкость для воды: 4,5 л
Расход воды: >= 400 мл/ч
2
Площадь увлажнения: до 35 м
Таймер на 12 часов
2
Выход ионов: 3.000.000 ион /см
Выход озона: <= 0,05 PPM
Производитель сохраняет за собой право изменять дизайн и технические характе-
ристики прибора без предварительного уведомления.
Срок службы прибора - 3 года
Данное изделие соответствует всем требуемым европейским и российс-
ким стандартам безопасности и гигиены.
АН-ДЕР ПРОДАКТС ГмбХ, Австрия
Нойбаугюртель 38/7А, 1070 Вена, Австрия
16
1763.indd 161763.indd 16 10.06.2010 14:12:4810.06.2010 14:12:48

ҚАЗАҚ
АУА ЫЛҒАЛДАНДЫРҒЫШ
Қашықтан басқару пульті (19) (2-сурет)
29. қосу/сөндіру тетігі
СУРЕТТЕМЕ
30. таймер жұмысының уақытын орнату
1. «Будың» шығу қарқындылығын
тетігі
орнату тетігі
31. «будың» шығу қарқындылығын
2, 3. Бөлмедегі қатысты ылғалдықты
орнату тетігі
орнату тетігі
32, 33. бөлмедегі қатысты ылғалдықты
4. Иондау режимін қосу/сөнд. тетігі
орнату тетігі
5. Таймер жұмысының уақытын орнату
34. иондау режимін қосу/сөнд. тетігі
тетігі
6. Қосу/сөндіру тетігі
ҚАУІПСІЗДІК ШАРАЛАРЫ
7. Дисплей (1-сурет)
Приборды пайдаланбас бұрын, осы
8. Будың шығуына арналған саңылауы
нұсқаулықты мұқият оқып шығыңыз
бар қақпақ
жəне оны сақтап қойыңыз, оны əрі
9. Бу шығатын саңылау
қарай анықтамалық материал ретінде
10. Резервуарды корпустан шешіп алу
пайдаланыңыз.
тұтқасы
• Құрылғының жұмыс кернеуі желі
11. Су резервуары
кернеуіне сəйкес келетінін тексеріп
12. Су құюға арналған саңылау
алыңыз.
13. Сүзгі-картридж
• Приборды тегіс, ылғалға төзімді бетке
14. Суға арналған резервуар қақпағы
орналастырыңыз. Қабырғаға дейінгі
15. «Шашыратқыш»
қашықтық кемінде 15 см болуы керек.
16. Корпус
• Ылғалдандырғыштың соплосын
17. Қашықтан басқару пульті (2-сурет)
ағаш жиһазға, электр приборларына,
18. «Шашыратқышты» тазалауға
кітаптарға жəне ылғалдың əсерінен
арналған щетка
бүлінуі мүмкін заттарға қарай
бағыттамаңыз.
Дисплейдегі белгілеулер (7) (1-сурет)
• Ылғалдандырғышты тікелей күн
20. ылғалдандыру қарқындылығының
сəулесіне, жоғары температураға,
деңгейін көрсеткіші
ұшырайтын жерлерде,
21. ылғалдықты орнату күйінің
компьютерлердің жəне сезімтал
пиктограммасы
электрондық техниканың жанында
22. бөлмедегі ағымдық ылғалдықты
орналастырмаңыз.
көрсететін пиктограмма
• Приборды жабық бөлмеде қараусыз
23. бөлмедегі ылғалдықтың/белгіленген
қалдырмаңыз, өйткені жиһаздар мен
ылғалдықтың/таймердің жұмыс
қабырғаларда конденсат пайда болуы
күнінің көрсеткіші
мүмкін, сондықтан ылғалдандырғыш
24. будың шығу деңгейінің көрсеткіші
жұмыс істеп тұрған бөлмедегі есікті сəл
25. ылғалдандырғыштың жұмысының
ашып қойған жөн.
аяқталуына дейінгі уақыт көрсеткіші
• Приборды бөлмеден тыс жерде
26. иондау режимінің пиктограммасы
пайдалануға тыйым салынады.
27. белгіленген ылғалдық күйінің
• Тек жеткізу жинағына кіретін алынбалы
пиктограммасы
бөлшектерді ғана пайдаланыңыз.
28. резервуарда судың жоқ болуыныңы
• Құрылғыны балаларға ойыншық
пиктограммасы
ретінде пайдалануға бермеңіз.
• Құрылғыны балалар немесе
17
1763.indd 171763.indd 17 10.06.2010 14:12:4810.06.2010 14:12:48

ҚАЗАҚ
мүмкіншілігі шектеулі жандар
• Прибордың үнемі тазалап отырыңыз,
пайдаланған кезде өте мұқият
шашыратқышта сырықтардың пайда
болыңыз.
болуына жол бермеңіз.
• Бұл құрылғы балалар мен
• Құрылғыны балалардың қолдары
мүмкіндіктері шектеулі адамдардың
жетпейтін жерде сақтаңыз.
пайдалануына арналмаған, ол
тек, олардың қауіпсіздігіне жауап
ТЕК ҮЙДЕ ПАЙДАЛАНУҒА АРНАЛҒАН
беретін адаммен, оларға қауіпсіз
пайдалану туралы тиісті жəне түсінікті
ЫЛҒАЛДАНДЫРҒЫШТЫ ПАЙДАЛАНУ
нұсқаулықтар мен құрылғыны дұрыс
Приборды қаптамадан шығарыңыз
пайдаланбаған жағдайда пайда болуы
да, қаптамалық материалдарды
мүмкін қауіптер туралы түсінік берілген
алып тастаңыз. Прибордың бүлінген
жағдайда ғана мүмкін.
жерлерінің бар-жоқтығын тексеріңіз.
• Приборды сусыз қоспаңыз, жəне
Бүлінген жерлер бар болған жағдайда
резервуарда су таусыла салысымен
приборды қоспаңыз.
оны ажыратыңыз.
• Газдалған суды жəне парфюмерлік
Ескертпе:
қоспаларды пайдаланбаңыз.
- егер ылғалдандырғыш төменгі
• Су резервуарын шешіп алмас бұрын
температураларға ұшырасқан
приборды желіден ажыратыңыз.
болса, онда оны бірінші рет қоспас
• «Бу» шығатын саңылауды жаппаңыз
бұрын 30 минут бойы бөлме
жəне оның ішіне басқа заттардың үсіп
температурасында ұстаған жөн.
кетуіне жол бермеңіз.
- ылғалдандырғышты бөлмеде +5-тен
• Прибордың корпусын суға немесе
+40°С-ге дейінгі температурада жəне
басқа да сұйықтыққа батырмаңыз.
80%-дан кем қатысты ылғалдықта
• Прибор жұмыс істеп тұрған кезде оны
пайдаланыңыз.
жылжытпаңыз жəне еңкейтпеңіз.
- қолданылып жатқан судың
• Приборды тазалау кезінде немесе сіз
температурасы +40°С-ден жоғары
ылғалдандырғышты пайдаланбайтын
болмауы керек.
болсаңыз үнемі желіден ажыратып
отырыңыз жəне резервуардағы суды
Желіге қосар алдында, электр желісінің
төгіп тастап отырыңыз. Егер сіз
кернеуі прибордың жұмыс кереуіне
приборды басқа орынға жылжытқыңыз
сəйкес келетіндігін тексеріп алыңыз.
келсе, онда алдымен оны желіден
ажыратып алыңыз.
1. Тұтқадан (10) ұстаңыз да, су
• Желі шнурының ашасын су
резервуарын (11) корпустан (16)
қолыңызбен ұстамаңыз.
шешіп алыңыз.
• Приборды пайдаланбас бұрын желі
2. Резервуарды (11) аударып, қақпақты
шнурын мұқият тексеріп шығыңыз жəне
(14) сағат тіліне қарсы бағытта бұрай
оның бүлінбегеніне көз жеткізбеңіз.
отырып, қақпақты бұрап шешіп
Желі шнуры бүлінген приборды
алыңыз. Резервуарға (11) қажетті
пайдаланбаңыз.
көлемдегі суды құйыңыз да, қақпақты
• Приборды өз бетіңізше бөлшектемеңіз,
(14) сағат тілінің бағытымен бұрай
ақаулықты байқаған жағдайда
отырып, бекітіңіз.
жақын арадағы сервистік орталыққа
3. Толған резервуарды (11) прибордың
жолығыңыз.
корпусына (16) орнатыңыз. Жұмыс
18
1763.indd 181763.indd 18 10.06.2010 14:12:4810.06.2010 14:12:48

ҚАЗАҚ
бөлігіне су толтыруға қажетті біраз
пиктограмма (26) жанады. Иондауды
уақыт күтіңіз.
өшіру үшін тетікті (4) тағы бір рет
4. Ылғалдандырғышты желіге қосыңыз,
басыңыз, осы кезде пиктограмма (26)
осы кезде сіз дыбыстық белгіні
сөнеді.
естисіз.
9. Сіз ылғалдандырғыштың жұмыс
5. Қосу/сөндіру тетігін (6) басыпп
істеу уақытын таймерді қосу тетігі (5)
ылғалдандырғышты қосыңыз, осы
арқылы орната аласыз. Тетікті (5)
кезде пиктограмма (22), будың шығу
баса отырып ылғалдандырғыштың
қарқындылығы (20, 24), сондай-ақ
1-ден 12-ге дейінгі қажетті жұмыс
бөлмедегі қатысты ылғалдық шамасы
уақытын орнатыңыз, бұл дисплейде
(23) жанады.
(7) пиктограммалармен (25) немесе
сандық көрсеткішпен (23) көрсетіледі.
Ескертпе:
10.Резервуарда (11) су таусылған кезде
- жұмыс күйіне байланыссыз,
дисплейде (7) пиктограмма (28)
дисплейдегі жарық (7) 8 секундтан
жанады, дыбыстық белгі беріледі де,
кейін өшіп қалады, ағымдағы жұмыс
ылғалдандырғыш сөніп қалады.
күйінің көрсетілімдерін көрсету
11.Жұмыс аяқталған соң тетікті (6) басып
үшін басқару панеліндегі немесе
приборды сөндіріңіз.
ҚБ пультіндегі кез келген тетікті
басыңыз.
ҚАШЫҚТАН БАСҚАРУ ПУЛЬТІ (17)
- бөлмедегі қатысты ылғалдықты
Ылғалдандырғышты бақсару ыңғайлы
минимальді көрсетуі 40%.
болуы үшін ҚБ пультін қолданыңыз.
Батарея бөлігінде оқшаулағыш
6. «Будың» шығу қарқындылығын
төсеме бар болған кезде, оны алып
орнату тетігі (1) арқылы сіз қажетті
тастаңыз, егер қуат қорегінің элементі
ылғалдықты орната аласыз, бұл
жеке жеткізілсе, онда қуат қорегінің
дисплейде (7) өзгермелі көрсеткішпен
элементінің ұстап тұрғышып суырып
(20 жəне (24) көрсетіледі.
алыңыз да, қуат қорегінің элементін
7. Сіз тетіктер (2, 3) арқылы бөлмедегі
ұстап тұрғышқа, олардың өрістілігін қатаң
ылғалдықтың қажетті мəнін
сақтай отырып, салыңыз, қуат қорегінің
белгілей аласыз (40-тан 80%-ға
элементін ұстап тұрғышты ҚБ пультіне
дейін, орнату қадамы 5%), бұл
салыңыз. Қашықтан басқару пультінен
кезде дисплейде (7) пиктограмма
ылғалдандырғышқа дейінгі қашықтық 5
(21) мен орнатылған ылғалдықтың
метрден аспауы керек, ал бұрышы 30°
жыпылықтайтын көрсеткіштері
болуы керек.
(23) жанады. 5 секундтан кейін
дисплейде (7) пиктограммалар (22,
ҚБ пультіндегі тетіктердің
27) мен бөлмедегі қатысты ылғалдық
ылғалдандырғыштың басқару
көрсетілімі (23) жанады.
панеліндегі тетіктерге сəйкестігі:
Бөлмедегі белгіленген ылғалдықты
29. Қосу/сөндіру тетігі – (6)
өздігінен ұстап тұру режимін сөндіру
30. Таймер жұмысының уақытын орнату
үшін (2) немесе (3) тетігін дисплейде
тетігі – (5).
(7) «--» таңбалары пайда болғанша
31. «Будың» шығу қарқындылығын
басып тұрыңыз.
орнату тетігі - (1).
8. Иондау күйін қосу үшін тетікті (4)
32, 33. Бөлмедегі қатысты ылғалдықты
басыңыз, осы кезде дисплейде (7)
орнату тетігі – (2), (3).
19
1763.indd 191763.indd 19 10.06.2010 14:12:4810.06.2010 14:12:48

ҚАЗАҚ
34. Иондау режимін қосу/сөнд. Тетігі – (4).
• Прибордың корпусын суға немесе басқа
да кез келген сұйықтыққа батырмаңыз.
ТАЗАЛАУ ЖƏНЕ КҮТУ
Ескерту! Приборды тазаламас бұрын
Сүзгіні тазалау
үнемі сөндіріп, желіден ажыратып
Сүзгіні (13) тазалауды жиһаз заттарында
отырыңыз.
«ақ қабаттардың» алғашқы белгілері
Ащы су «шашыратқышта», корпустың
пайда болған сəттен бастап жүргізіңіз
ішкі бөліктерінде жəне су резервуарында
• Тұтқадан (10) ұстаңыз да, су
минералдық шөгінділердің пайда болуын
резервуарын (10) корпустан (16) шешіп
тудырады, бұл ылғалдандырғыштың
алыңыз.
жұмысының нашарлауына жəне
• Резервуарды (11) аударыңыз, қақпақты
интерьердің бөлшектерінде ақ
(14) сағат тіліне қарсы бағытта бұрай
жегінің пайда болуына əкеп соғады.
отырып ашыңыз, сүзгі-картриджді
Мұны болдырмас үшін апта сайын
(13) сағат тіліне қарсы бұрап шешіп
шашыратқышты тазалап отыру керек
алыңыз.
жəне мүмкіндігінше суды жиірек тазалап
• Сүзгі-картриджді (13) су ағынының
отыру керек, сондай-ақ сүзгі-картриджін
астында жуыңыз да она 50-60 минутқа
тазалау қажет.
еріген тұзы бар ерітінділі (0,5 суға 2-3
Сіз ылғалдандырғышты ұзақ уақыт
үлкен қасық) ыдысқа салып қойыңыз,
бойы пайдаланбайтын болсаңыз: -
сүзгі-картриджді (13) шығарып алыңыз
резервуардан жəне «шашыратқыштың»
да, оны ағып тұрған судың астында
жқмыс бөлігінен суды төгіп
жуып жіберіңіз.
тастаңыз, резервуарды жуыңыз,
• Сүзгі-картриджді (13) қайтадан
«шашыратқыштың» жұмыс бөлігін жəне
қақпаққа (14) сағат тілінің бойымен
«шашыратқыштың» өзін тазалап жуып
бұрай отырып орнатыңыз.
жіберіңіз, приборды əбден құрғатыңыз да
оны сақтауға алып қойыңыз.
Сүзгі-картриджді ауыстыру (13)
Сүзгі-картриджді (13) қажеттілігіне қарай
Апта сайынғы күтім
ауыстырыңыз.
• Аптасына бір рет су резервуарын (11)
жəне резервуардың (11) астындағы
Сақтау
жұмыс бөлігін бейтарап жуғыш құралы
- Егер сіз приборды ұзақ уақыт
бар ерітіндімен əбден жуыңыз. Осыдан
пайдаланбайтын болсаңыз
кейін оларды сумен əбден шайыңыз.
жəне оны алып қойғыңыз келсе,
• «Шашыратқышқа» (15) тазатқыш
“шашыратқыштың” жұмыс бөлігімен
құралдың 5-10 тамшысын тамызып
бірге барлық бөлігінің құрғақ екеніне көз
жіберіңіз де, 2-5 минуттай күтіңіз.
жеткізіңіз.
Щетканы (18) пайдалана отырып,
- Резервуарда жəне «шашыратқыштың»
«шашыратқыштың» (15) бетіндегі жегіні
жұмыс бөлігінде суы бар приборды
кетіріп тастаңыз.
сақтамаңыз.
- Сүзгі-картриджді сақтауға алып қоймас
Ескертпе:
бұрын, оны тазалаңыз да, құрғатыңыз,
- «шашыратқыш» үшін тазартқыш
сүзгі-картриджді салқын, көлеңкелі
құрал ретінде шəйнектегі қақтарды
жерде сақтаңыз. Ылғалдандырғышты
кетіруге арналған құралды пайдалануға
құрғақ, салқын, балалардың қолдары
болады.
жетпейтін жерде сақтаңыз.
20
1763.indd 201763.indd 20 10.06.2010 14:12:4810.06.2010 14:12:48


