Philips LX3900SA: Connections
Connections: Philips LX3900SA

Connections
Step 1: Placing the speakers
Step 2: Connecting speakers
and subwoofer
and subwoofer
English
2
2
Front Speaker
Front Speaker
(Left)
(Right)
1
1
3
4
3
Rear speaker
Subwoofer
Rear speaker
(Left)
(Right)
For best possible surround sound, all the
speakers (except subwoofer) should be
placed at the same distance from the
listening position.
1 Place the front left and right speakers at
equal distances from the TV and at an
angle of approximately 45 degrees from
the listening position.
2 Place the centre speaker above the TV or
the DVD system so that the centre
channel’s sound is localised.
3 Place the surround speakers at normal
listening ear level facing each other or
hang on the wall.
4 Place the subwoofer on the floor near
the TV.
Helpful Hints:
–To avoid magnetic interference, do not
position the front speakers too close to your
TV.
– Allow adequate ventilation around the
DVD system.
9
3139 115 22871
L
L
R
R
Front Right
Front Left
DVD System Centre speaker
Centre
Rear Right
Rear Left
Subwoofer
Connect the supplied speaker systems
using the fixed speaker cables by
matching the colours of the jacks and
speaker cables.
For LX3950W wireless system
connection, please refer to the
separate ‘Quick Use Guide’.
The wireless transmitter and receiver
give you the option for wireless speaker
connection.
Helpful Hints:
– Ensure that the speaker cables are
correctly connected. Improper connections
may damage the system due to short-circuit.
–To prevent unwanted noise, do not place
the wireless transmitter and receiver too
close to the DVD system, AC power adaptor,
TV or other radiation sources.
001-041-LX39-22-Eng1 12/12/2003, 10:20 AM9
Connections
English
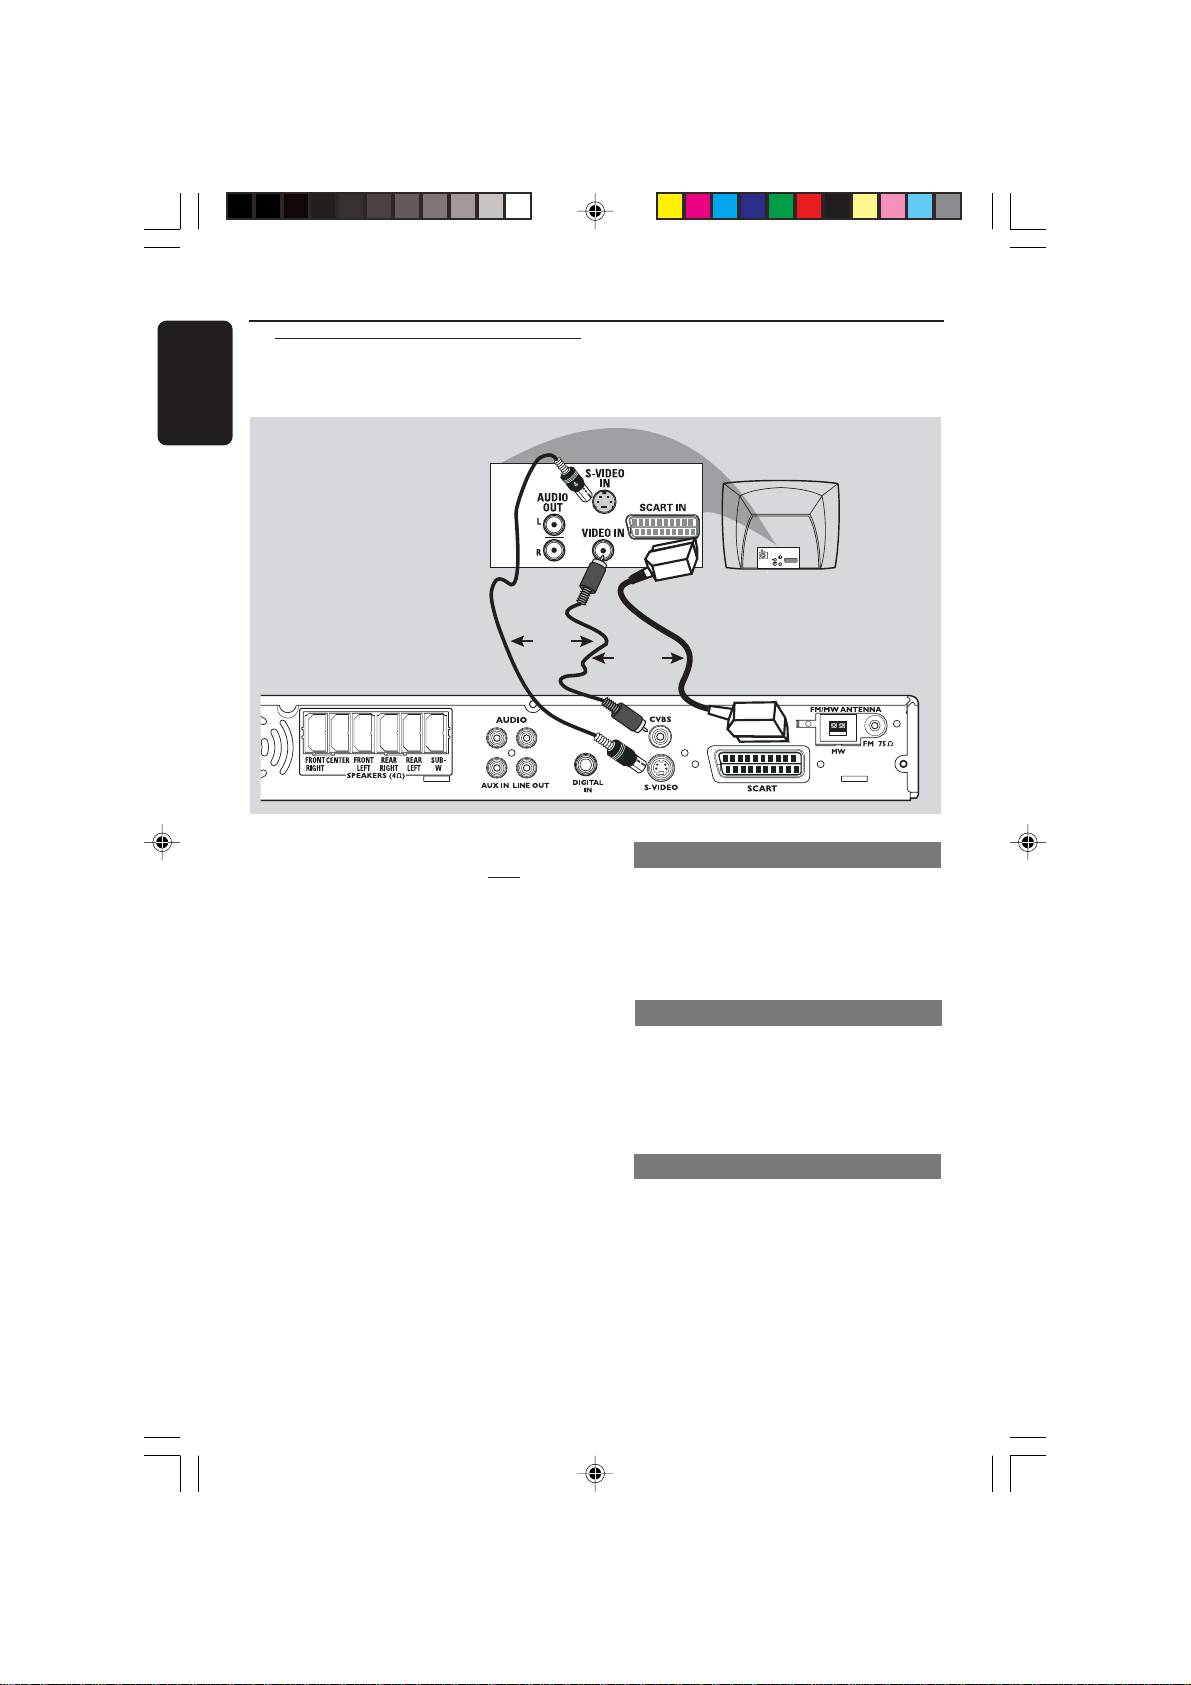
Step 3: Connecting TV
AUDIO
OUT
S-VIDEO
IN
VIDEO IN
SCART IN
OR
OR
L
L
R
R
IMPORTANT!
Using Scart jack
–You only need to make
one video
connection from the following
● Use the supplied scart video cable (black)
options, depending on the
to connect the DVD system’s SCART
capabilities of your TV.
jack to the corresponding Scart input
– Connect the DVD system directly
jacks on the TV.
to the TV.
OR
– Scart (RGB) Video provides better
picture quality than S-Video. These
Using S-Video jack
options must be available on your
● Use an S-video cable (not supplied) to
TV.
connect the DVD system’s S-VIDEO
– If both S-Video and Scart video
OUT jack to the S-Video input jack (or
are used to connect to your TV, the
TV signal will detect automatically
labelled as Y/C or S-VHS) on the TV.
to SCART when you power up the
OR
DVD system.
Using Composite Video jack (CVBS)
● Use a composite video cable (yellow -
not supplied) to connect the DVD
system’s CVBS jack to the video input
jack (or labelled as A/V In, Video In,
Composite or Baseband) on the TV.
10
3139 115 22871
001-041-LX39-22-Eng1 12/12/2003, 10:20 AM10
English
➠
1
2
FM/MW ANTENNA
CVBS
FM 75
MW
S-VIDEO
SCART
11
3139 115 22871
L
Connections
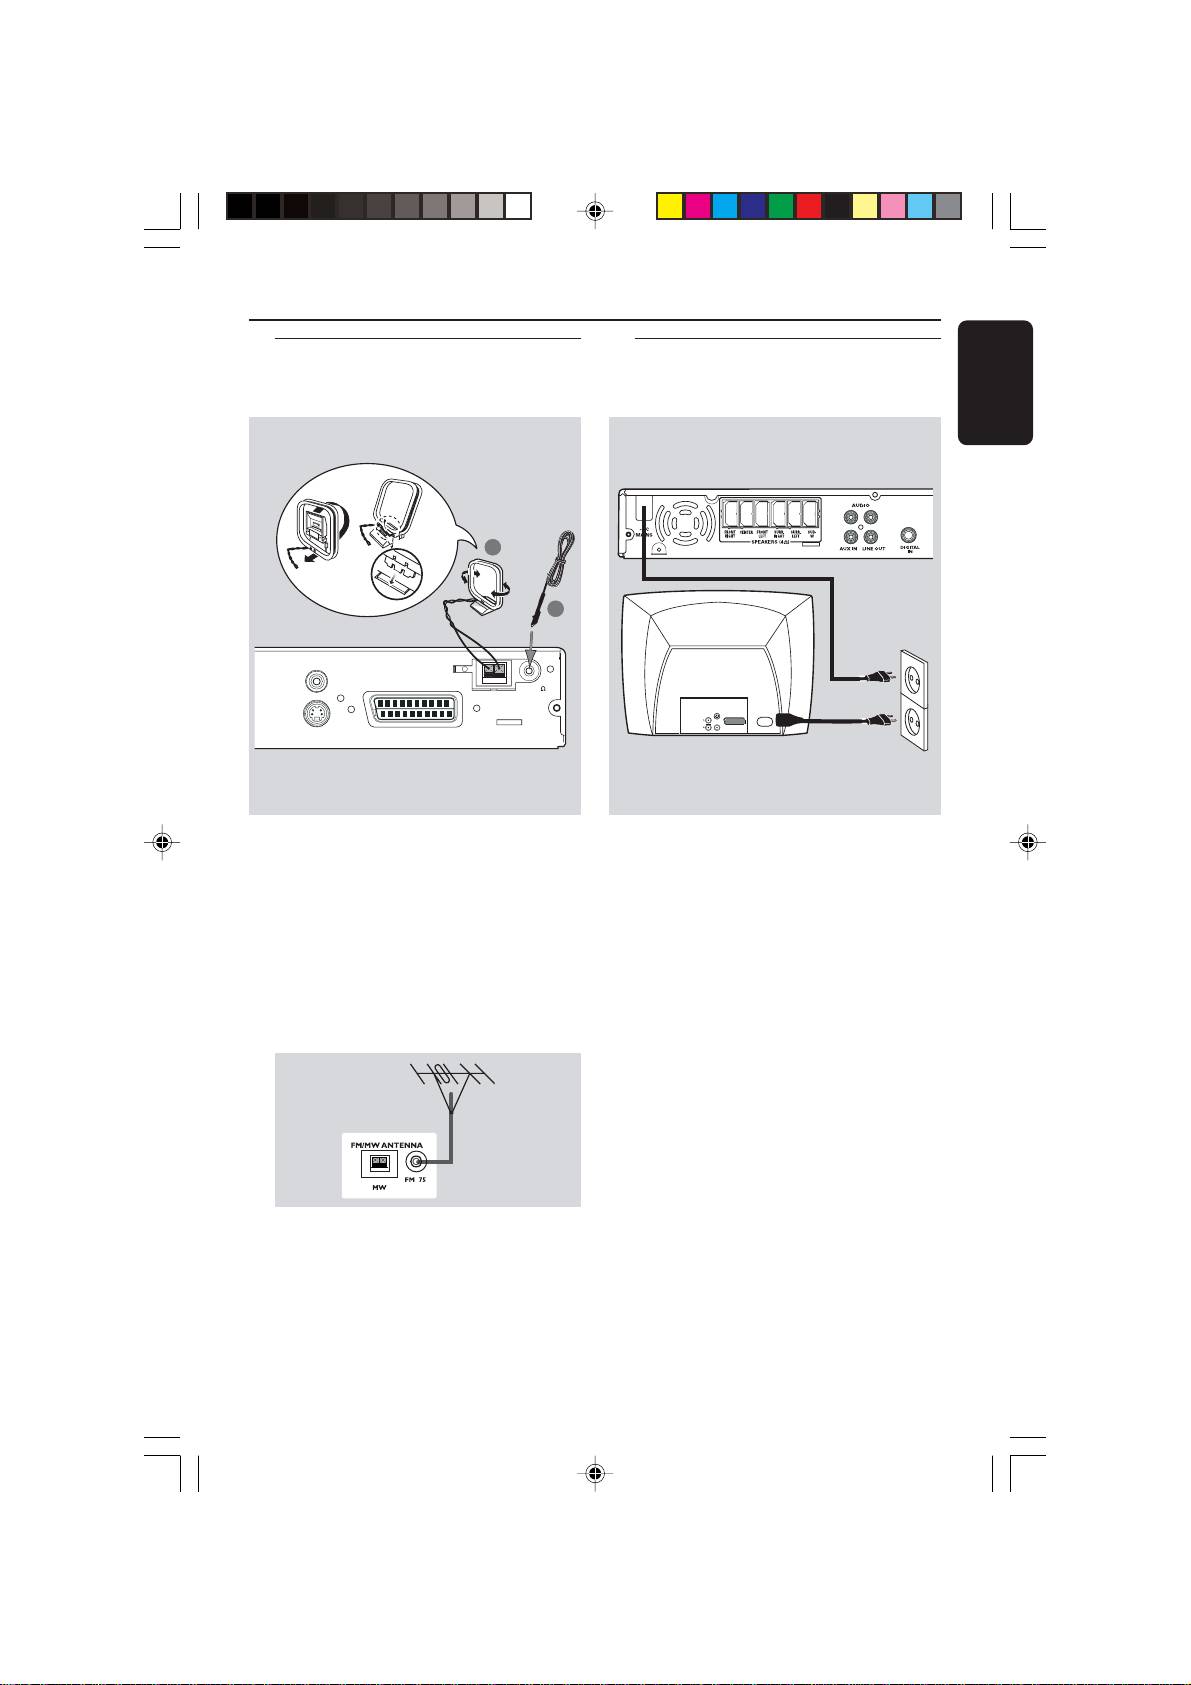
Step 5: Connecting the
power cord
MW
antenna
fix the claw
into the
slot
L
L
R
R
AUDIO
S-VIDEO
OUT
IN
SCART IN
~ AC MAINS
VIDEO IN
Step 4: Connecting FM/MW
antennas
FM
antenna
1
Connect the supplied MW loop antenna
After everything is connected
to the MW jack. Place the MW loop
properly, plug the AC power cord
antenna on a shelf or attach it to a stand
into the power outlet.
or wall.
Never make or change any connections
with the power switched on.
2 Connect the supplied FM antenna to the
FM jack. Extend the FM antenna and fix
Helpful Hint:
its ends to the wall.
– Refer to the type plate on the rear or
For better FM stereo reception, connect
bottom of the system for identification and
an external FM antenna (not supplied).
supply ratings.
Helpful Hints:
– Adjust the position of the antennas for
optimal reception.
–Position the antennas as far as possible
from your TV, VCR or other radiation source
to prevent unwanted interference.
001-041-LX39-22-Eng1 12/12/2003, 10:20 AM11
