Philips Téléviseur: instruction
Class: Video Equipment
Type:
Manual for Philips Téléviseur

LCD TV
2
3

Information for users in the UK
(Not applicable outside the UK)
Positioning the TV
For the best results, choose a position where light does not fall directly on the screen, and at some
distance away from radiators or other sources of heat. Leave a space of at least 5 cm all around
the TV for ventilation, making sure that curtains, cupboards etc. cannot obstruct the air flow
through the ventilation apertures.
The TV is intended for use in a domestic environment only and should never be operated or
stored in excessively hot or humid atmospheres.
General Points
Please take note of the section 'Tips' at the end of this booklet.
Interference
The Department of Trade and Industry operates a Radio Interference Investigation Service to help
TV license holders improve reception of BBC and IBA programmes where they are being spoilt by
interference.
If your dealer cannot help, ask at a main Post Office for the booklet "How to improve Television
and Radio Reception".
Mains connection
Before connecting the TV to the mains, check that the mains supply voltage corresponds to the
voltage printed on the type plate on the rear panel of the TV. If the mains voltage is different,
consult your dealer.
Important
This apparatus is fitted with an approved moulded 13 Amp plug.
To change a fuse in this type of plug proceed as follows :
1. Remove fuse cover and fuse.
2. Fit new fuse which should be a BS1362 5A,A.S.T.A. or BSI approved type.
3. Refit the fuse cover.
In order to maintain conformity to the EMC directive, the mains plug on this product must not be
removed.
Connecting the aerial
The aerial should be connected to the socket marked x at the back of the set. An inferior aerial is
likely to result in a poor, perhaps unstable picture with ghost images and lack of contrast. Make-
shift or set-top aerials are unlikely to give adequate results.
Your dealer will know from experience the most suitable type for your locality.
Should you wish to use the set in conjunction with other equipment, which connects to the aerial
socket such as TV games, or a video camera, it is recommended that you consult your dealer on
the best method of connection.
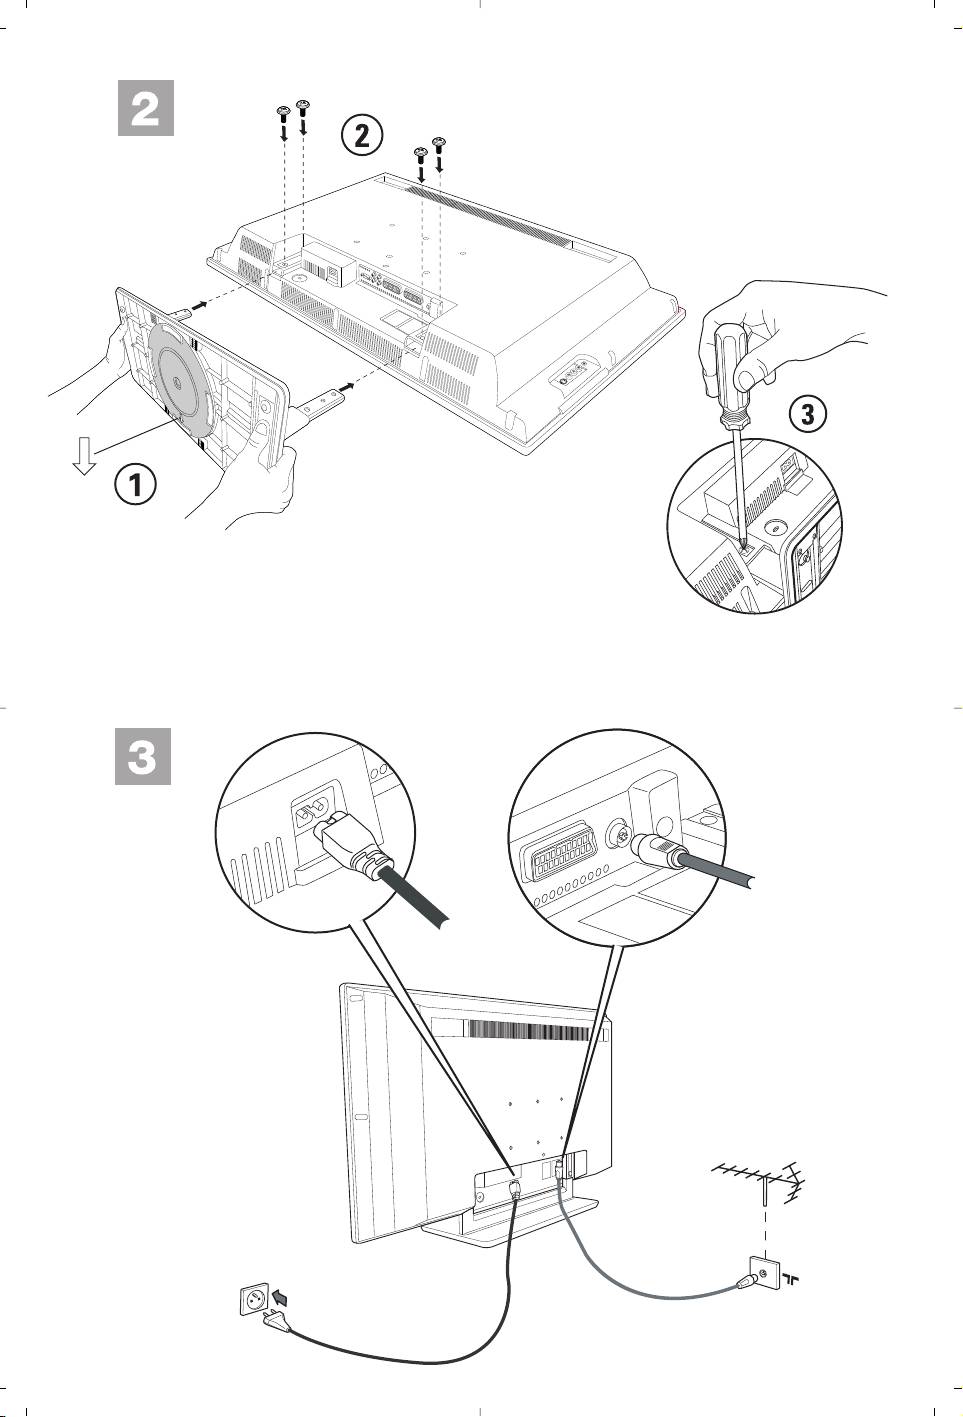
Stand (if provided)
Use only the stand provided with the set, making sure that the fixings are properly tightened.A
diagram showing how to assemble the stand is packed with the stand. Never use a make-shift
stand, or legs fixed with woodscrews.
Help?
If this instruction manual does not give an answer or if ‘Tips’ do not solve your TV problem, you can call your
Local Philips Customer or Service Centre. See the supplied World-wide guarantee booklet.
Please, have the Model and Product number which you can find at the back of your television set or on the
packaging, ready, before calling the Philips helpline.
GB
Model: Product No:
FR
Care of the screen
Do not touch, push or rub or strike the screen with anything hard as this may scratch, mar or damage the
screen permanently. Do not rub with dust clothes with chemical treatment. Do not touch the surface with bare
NL
hands or greasy cloth (some cosmetics are detrimental to the screen). Unplug the TV before cleaning the
screen.When the surface becomes dusty, please wipe gently with absorbent cotton or other soft materials like
chamois soaks. Do not use acetone, toluene and alcohol because they cause chemical damage.
DE
Do not use liquid cleaners or aerosol cleaners.Wipe off saliva or water drops as soon as possible.Their long
time contact with the screen causes deformations and colour fading.
IT
DK
Preparation
& Wall mounting instructions/Table stand
To prevent damaging the power (AC) cord
NO
According to the type of TV you’ve purchased
which could cause a fire or electric shock, do
a wall mount bracket and/or stand may be
not place the TV on the cord.
supplied. How to mount the supplied stand
SU
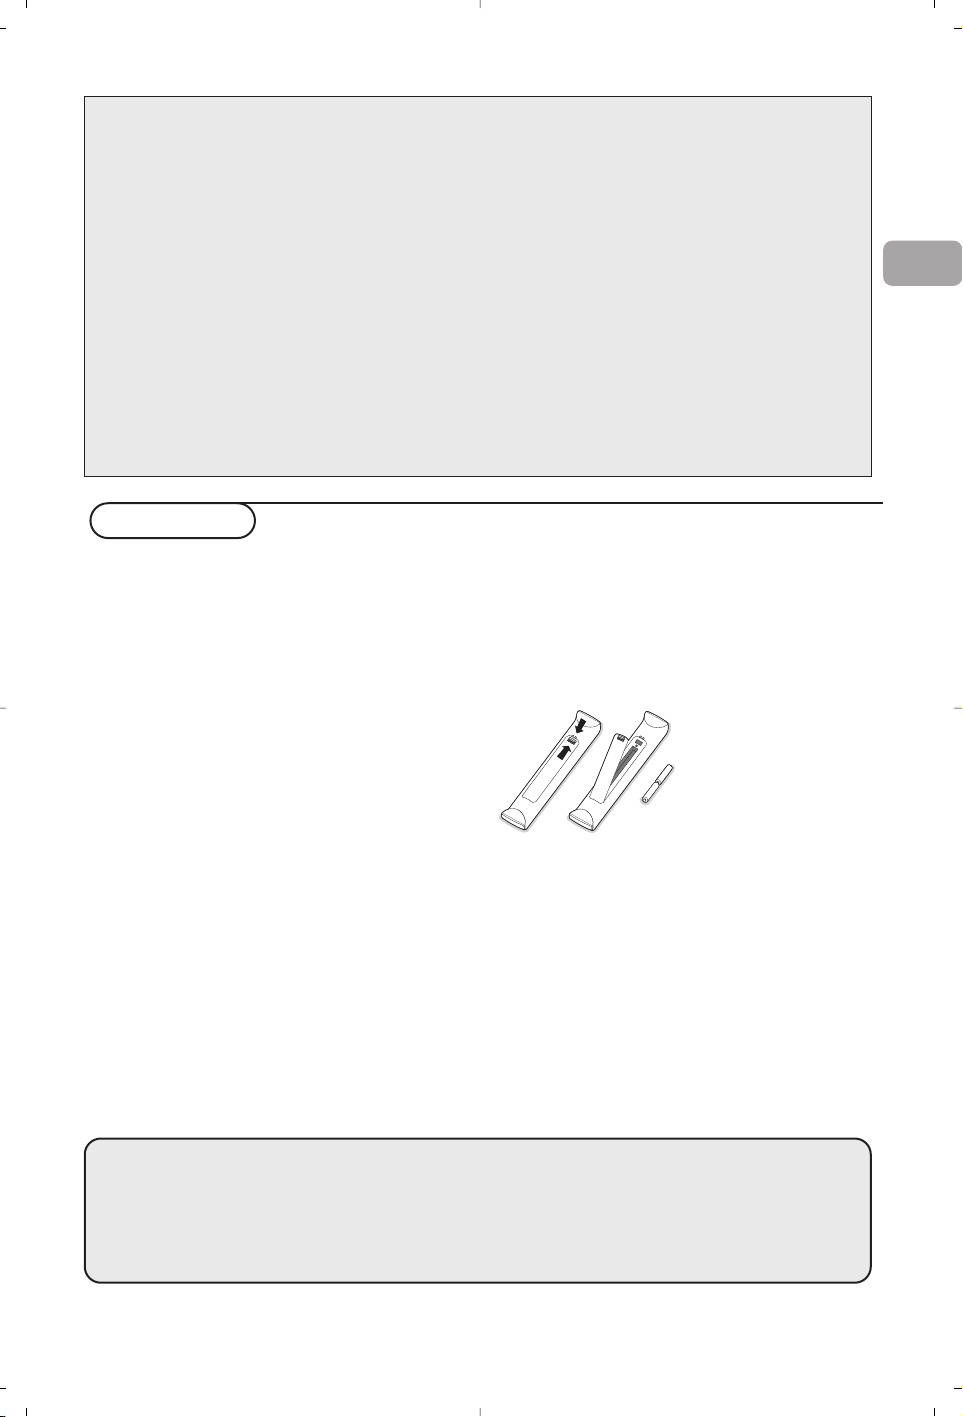
( Remote control: Insert the 2 batteries
and/or wall mount bracket, see the supplied
supplied (Type R6-1,5V).
separate leaflet. Make sure that the wall mount
The batteries supplied do
SF
is being fixed securely enough so that it meets
not contain the heavy
safety standards.
metals mercury and
é Make sure that air can circulate freely through
cadmium. Please check
RU
the ventilation slots.
on how to dispose of
To prevent any unsafe situations, no naked
exhausted batteries
flame sources, such as lighted candles, should
according to local
ES
be placed on or in the vicinity.Avoid heat,
regulations.
direct sunlight and exposure to rain or water.
§ Switch the TV on :Press the power
The equipment shall not be exposed to
PT
switch B at the right side of the TV.
dripping or splashing and no objects filled with
An indicator on the front of the TV lights up
liquids, such as vases, shall be placed on it.
and the screen comes on. If the TV is in
GR
standby mode (red indicator), press the
-P+
“ Insert the aerial plug firmly into the aerial
keys or the B key on the remote control.
socket x at the bottom of the TV.
‘ Insert the mains cord supplied into the mains
HU
at the bottom of the TV and in the wall socket
having a mains voltage of 198-264V.
PL
CZ
SK
Recycling
The materials used in your set are either reusable or can be recycled.
To minimise environmental waste, specialist companies collect used appliances
°
and dismantle them after retrieving any materials that can be used again (ask your
dealer for further details).
1
To use the menus
& Press the MENU key on the remote control to
“ Use the cursor in the right direction to select
summon the main menu.At any moment you
the menu item.
can exit the menu by pressing the
MENU key
‘ Use the cursor up/down again to select the
again.
control you want to select or to adjust.
é Use the cursor up/down to select Picture,
Note: Items temporary not available or not relevant are
Sound, Features, Install or Mode.
displayed in a light grey colour and cannot be selected.
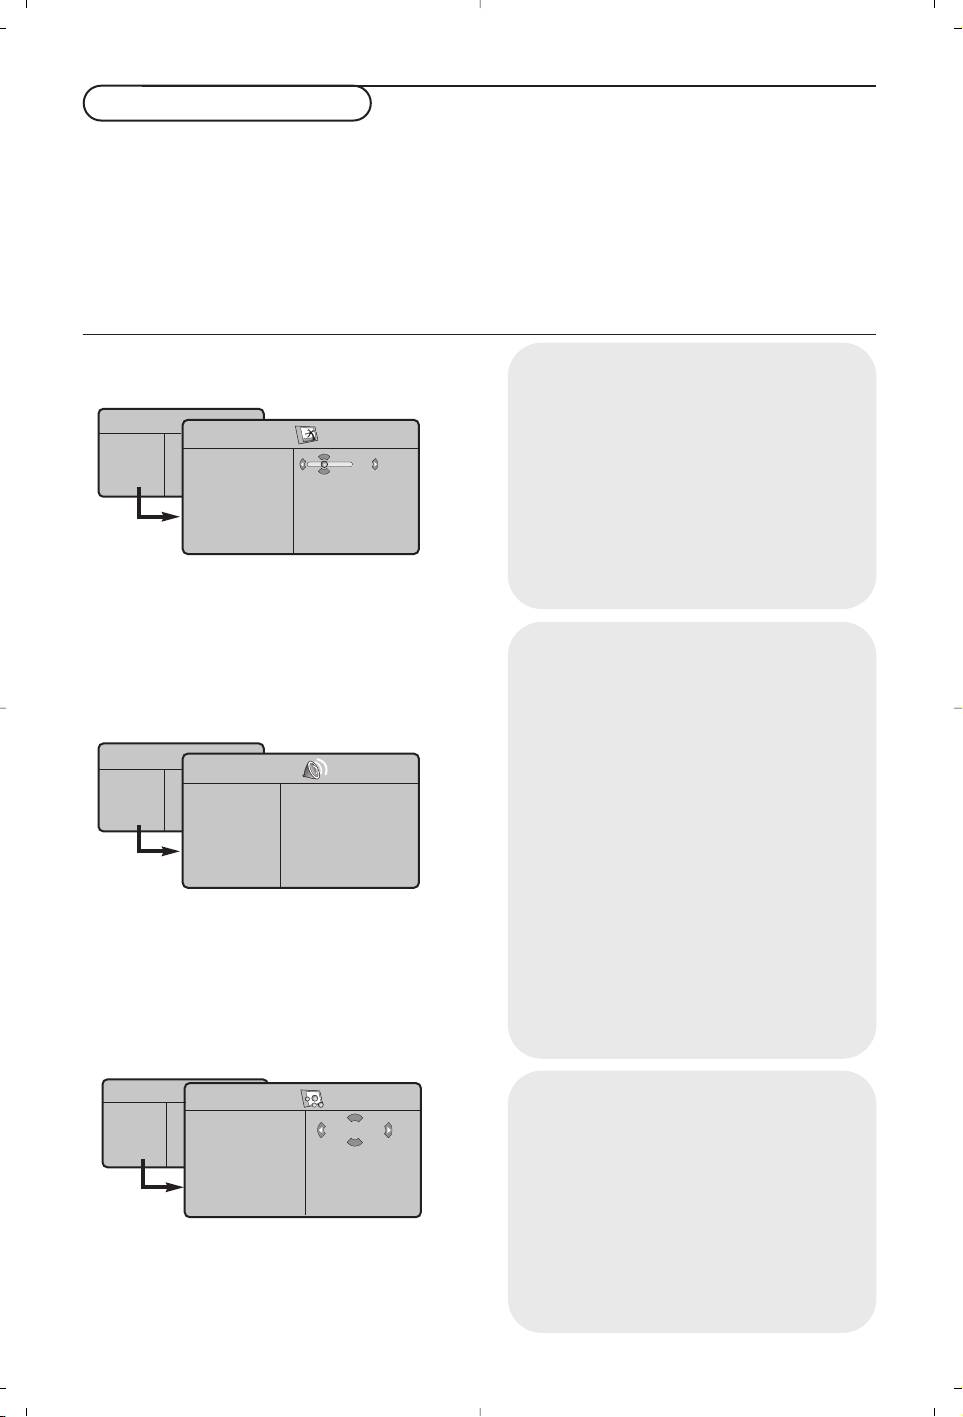
TV menu
Picture menu:
•
Brightness: this changes picture brilliance.
TV Menu
Picture
•
Colour: this changes the intensity of the
Picture
colour.
Sound
Brightness
39
Features
•
Contrast: this changes the difference between
Colour
Install
Mode
Contrast
the light and dark tones.
Sharpness
•
Sharpness: this changes the picture definition.
Colour Temp.
•
Colour Temp: this changes the colour
Store
rendering:
Cool (more blue), Normal
(balanced) or Warm (more red).
•
Store: to store the picture adjustments and
settings (as well as the settings for
Contrast+
and NR in the Features menu).
Sound menu:
•Equalizer: to adjust the sound tone (from
bass 120 Hz to treble 10 kHz).
TV Menu
Sound
•
Balance: this balances the sound on the left
Picture
Sound
Equalizer Æ •
120 Hz
and right speakers.
Features
Install
Balance Æ •
500 Hz
•
Delta Volume: this is used to compensate any
Mode
Delta Volume Æ •
1500 Hz
volume discrepancies between the different
AVL Æ •
5 KHz
Dolby Virtual Æ •
10 KHz
programmes or externals.
Store Æ •
This setting is available for programmes 0 to
40 and the
EXT
connections.
•
AVL
(Automatic Volume Leveller): this is used
to limit increases in sound, especially on
programme change or advertising slots.
•
Virtual Dolby
: simulates the surround sound
experience from 2 speakers using Dolby Pro
Logic* providing the listener with the
sensation of being surrounded by additional
speakers.
•
Store: this is used to store the sound settings.
Features menu:
•Contrast+: automatic adjustment of the
TV Menu
Features
picture contrast which permanently sets the
Picture
Sound
Contrast +
darkest part of the picture to black.
Features
On
NR
Install
•
NR: attenuates picture noise (snow) in difficult
Mode
Sleep
reception conditions.
Caution: to store the
Contrast+ and NR settings,
use the
Store choice in the Picture menu.
•
Sleep: to select an automatic standby period.
Install menu:
see p. 7
2
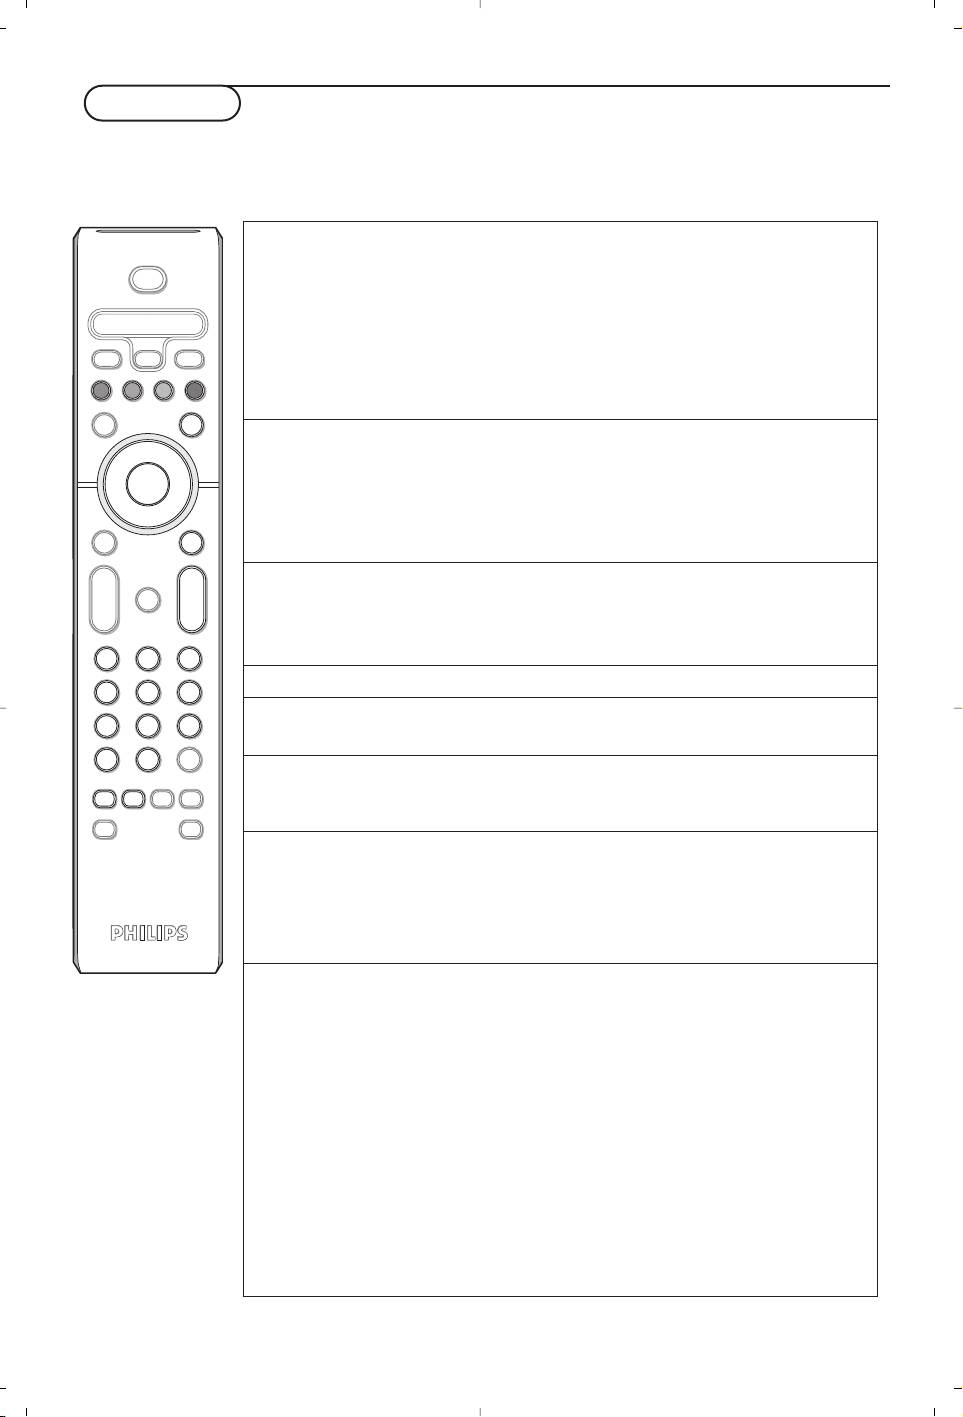
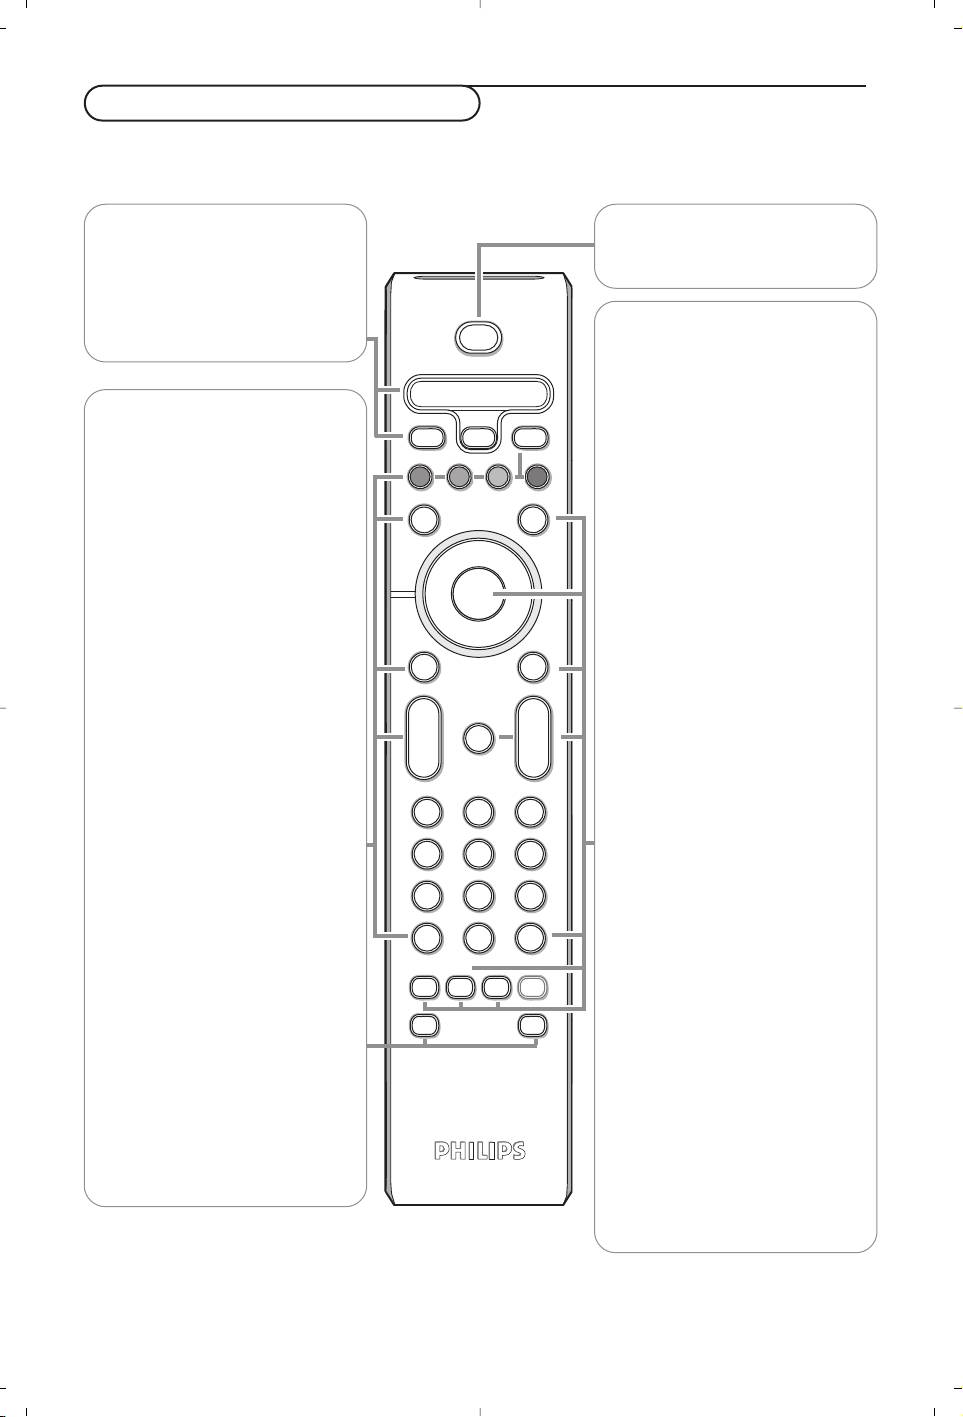
Use of the remote control
Note: For most keys pressing a key once will activate the function. Pressing a second time will de-activate it.
Remark: in VGA mode only some keys are valid.
VCR DVD TV SAT AMP
B Standby
See ‘Audio- and Video equipment
Press to switch the TV on or off.
keys’, p. 10.
v Select your peripherals
b Teletext On/Mix/Off, see p. 9.
See p. 6.
Colour keys, see Teletext.
OK Press this key to display the
programme list.
†®Ò‡πº
Audio and Video equipment keys.
MENU Main menu on/off
TV / PC
¬ Interrupt the sound or restore it.
Press one of these keys to
switch the television between TV
PProgramme selection
or PC mode.
To m ov e up or down a
programme.The number and the
SURR
Surround sound
sound modes are displayed for a
To activate/deactivate the
few seconds.
surround sound effect. In stereo,
For some TV programmes the title of
this gives the impression that the
the programme appears at the
speakers are further apart. For
bottom of the screen.
models equipped with Virtual
0/9 Digit keys
Dolby Surround, you can obtain
Dolby Surround Pro Logic*
To select a TV channel.
sound quality. In mono, a stereo
For a two digit programme
spatial effect is simulated.
number, enter the second digit
Note:You can make the same
before the dash disappears.To
selection in the Sound menu,Virtual
switch immediately to a selected
Dolby.
one digit TV channel, keep the
digit key pressed a bit longer.
V To adjust the volume.
0 Previous TV channel
i On Screen information
Press to display the previously
To display/remove the
selected TV channel.
programme number, the time, the
sound mode and the time
:g Teletext keys. See p. 9.
remaining on the timer.
Hold down for 5 seconds to
X Sound mode
permanently display the
To s witch from Stereo or
programme number on the
Nicam Stereo to Mono, or to
screen.
choose between Dual
Y or
Dual
Z in case of bilingual
Ma Smart keys
transmission.
To select predefined picture and
When the sound mode is Mono,
sound settings.
the indication is displayed in red.
Personal refers to the personal
preference settings selected in
h Active control on/off/on
the sound and picture menu.
with sensor
Optimizes the quality of the
picture according to the quality
or reception.
* Dolby’‘Pro Logic’ and the double-D G symbol are trademarks of
Dolby Laboratories Licensing Corporation. Manufactured under license
from Dolby Laboratories Licensing Corporation.
3
B
VCR DVD TV SAT AMP
v
SELECT
†
®
Ò
‡π
TV PC
º
b
®
®
®
OK
®
MENUSURR
+
+
V
¬
P
-
-
123
456
789
i
0
0
:
g
X
h
q
SMART SMART
M
a
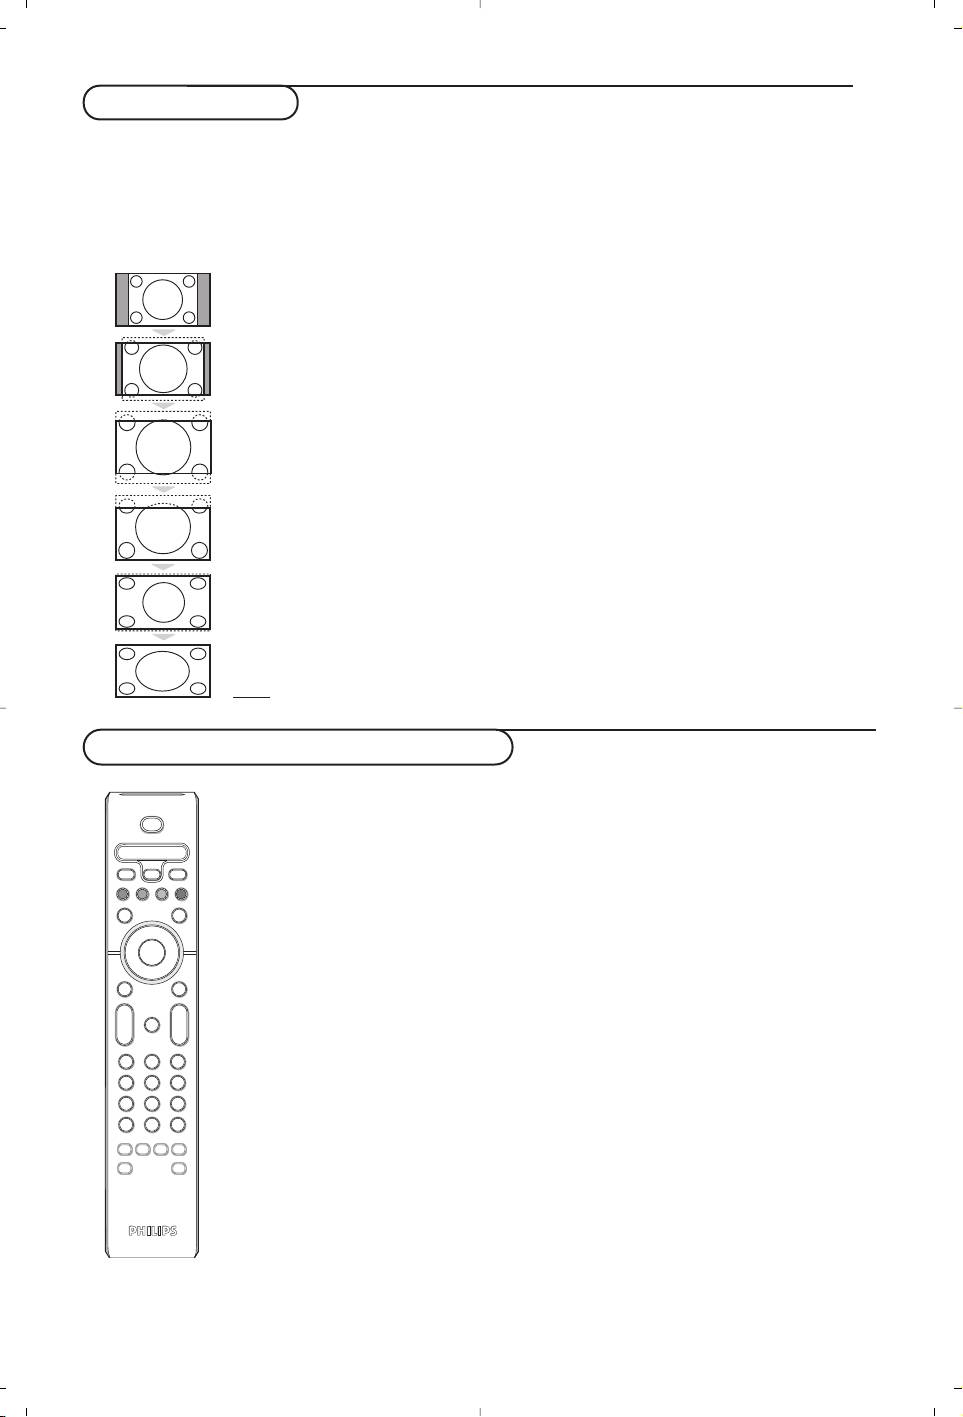
Screen Formats
The pictures you receive may be transmitted in 16:9 format (wide screen) or 4:3 format
(conventional screen). 4:3 pictures sometimes have a black band at the top and bottom of the screen
(letterbox format).This function allows you to optimise the picture display on screen.
Press the
ë
key (or ≤≥) to select the different modes:
This TV set is also equipped with automatic switching which will select the correct-screen
format, provided the specific signals are transmitted with the programmes.
4:3
The picture is reproduced in 4:3 format and a black band is displayed on either side
of the picture.
Movie Expand 14:9
The picture is enlarged to 14:9 format, a thin black band remains on both sides of
the picture.
Movie Expand 16:9
The picture is enlarged to 16:9 format.This mode is recommended when displaying
pictures which have black bands at the top and bottom (letterbox format).
Subtitle Zoom
This mode is used to display 4:3 pictures using the full surface of the screen leaving
the sub-titles visible.
Super Wide
This mode is used to display 4:3 pictures using the full surface of the screen by
enlarging the sides of the picture.
Widescreen
This mode restores the correct proportions of images transmitted in 16:9.
Note:
If you display a 4:3 picture in thid mode, it will be enlarged horizontally.
Audio- and video equipment keys
Press the Select key to select the required mode : VCR, DVD, SAT, AMP or CD.The
remote control indicator lights up to display the selected mode. It switches off
automatically after 60 seconds if left idle.
The remote control automatically returns to TV mode.
The following keys are operational, depending on the equipment :
4
B
VCR DVD TV SAT AMP
v
SELECT
†
®
Ò
‡π
TV PC
º
b
®
®
OK
®
®
MENUSURR
+
+
V
¬
P
-
-
123
456
789
i
0
0
:
g
X
h
q
SMART SMART
M
a
B to switch to standby
MENU to switch the menu on or off
º for pause (
VCR, DVD, CD)
- P + for chapter, channel, track
RDS news/TA (AMP);
selection
to shuffle play (
CD/R)
0 to 9 digit entry
® for record
0 tape index (
VCR),
Ò for rewind (
VCR, CD);
select a DVD title/chapter,
search down (
DVD, AMP)
select a frequency (
AMP)
‡ for stop
cursor up/down
π for play
to select the next or the
† for fast forward (
VCR, CD);
previous disc (
CD)
search up (DVD, AMP)
cursor left/right
b RDS display (
AMP);
to select the previous or
to select your choice of subtitle
following track (
CD)
language (
DVD);
search up/down (
AMP)
i display information
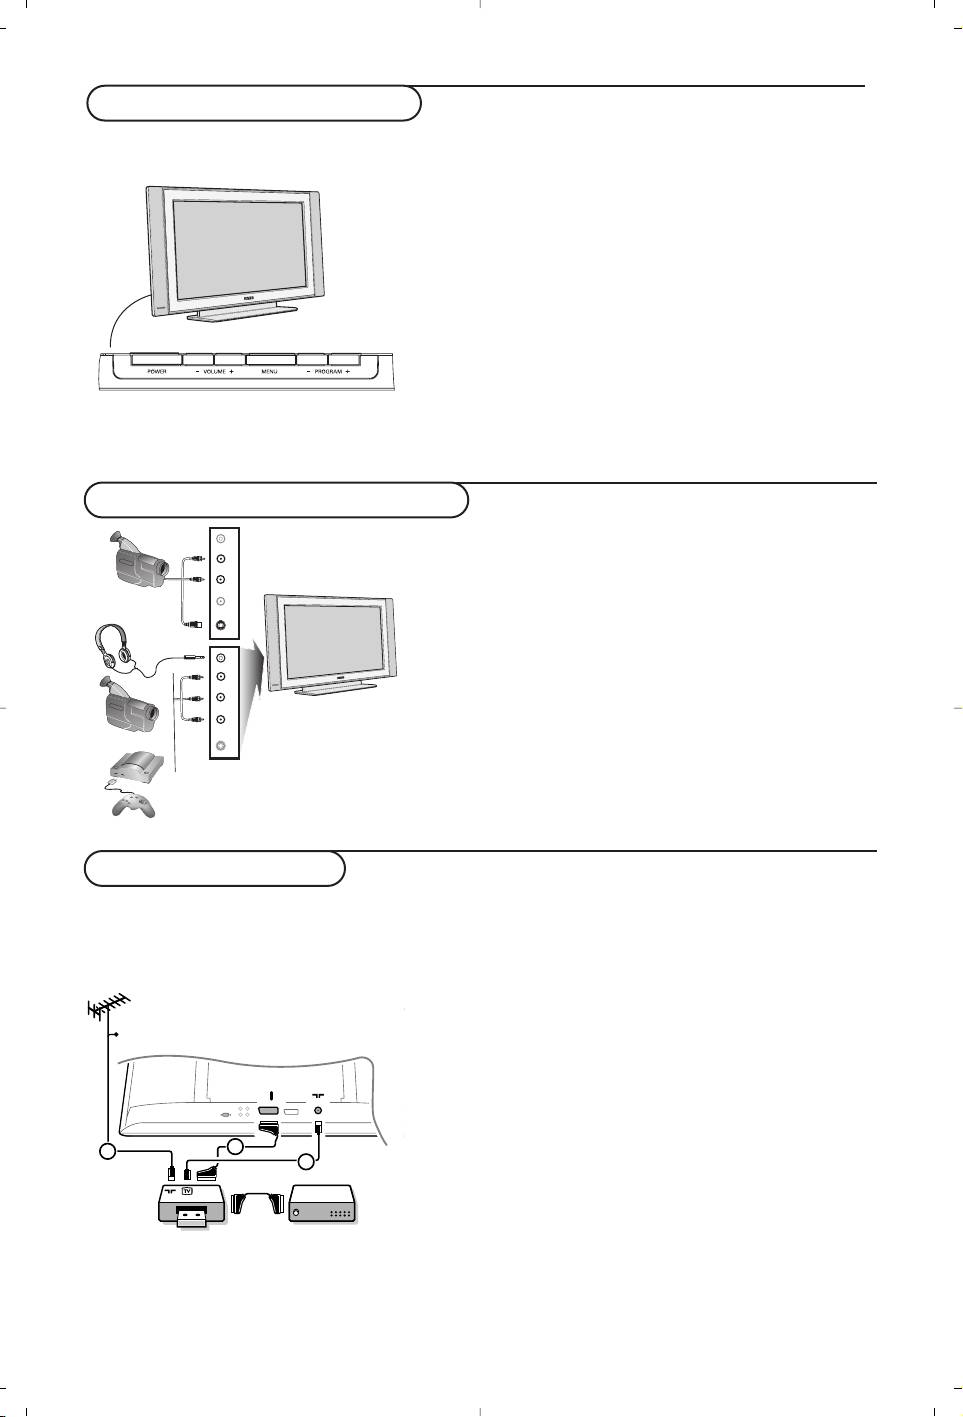
The keys on the TV set
Should your remote be lost or broken you can still change
some of the basic settings with the keys on the side of your
TV.
Press:
• the
- VOLUME + key to adjust the volume;
• the - PROGRAM + key to select the TV channels or sources.
Press the MENU key to summon the main menu without the
remote control.
Use:
• the
VOLUME + key and the - PROGRAM + key to select
menu items in the directions as shown;
• the
MENU key to remove the menu.
Camcorder, video games, headphone
Camcorder,Video games
The
AV and S-VIDEO connections are located at the right
side of the TV or, for large screen sizes at the bottom;
Make the connections as shown opposite.
With the v key, select
AV.
For a monophonic device, connect the audio signal to the
AUDIO
L
input.The sound automatically comes out of the left and right
speakers of the set.
Headphone
The - V
+ keys are used to adjust the volume level.
The headphone impedance must be between 32 and 600 ohms.
5
*
R Audio L
Video
S-VHS, Hi-8
S-VHS
*
R Audio L
Video
S-VHS
VHS, 8 mm
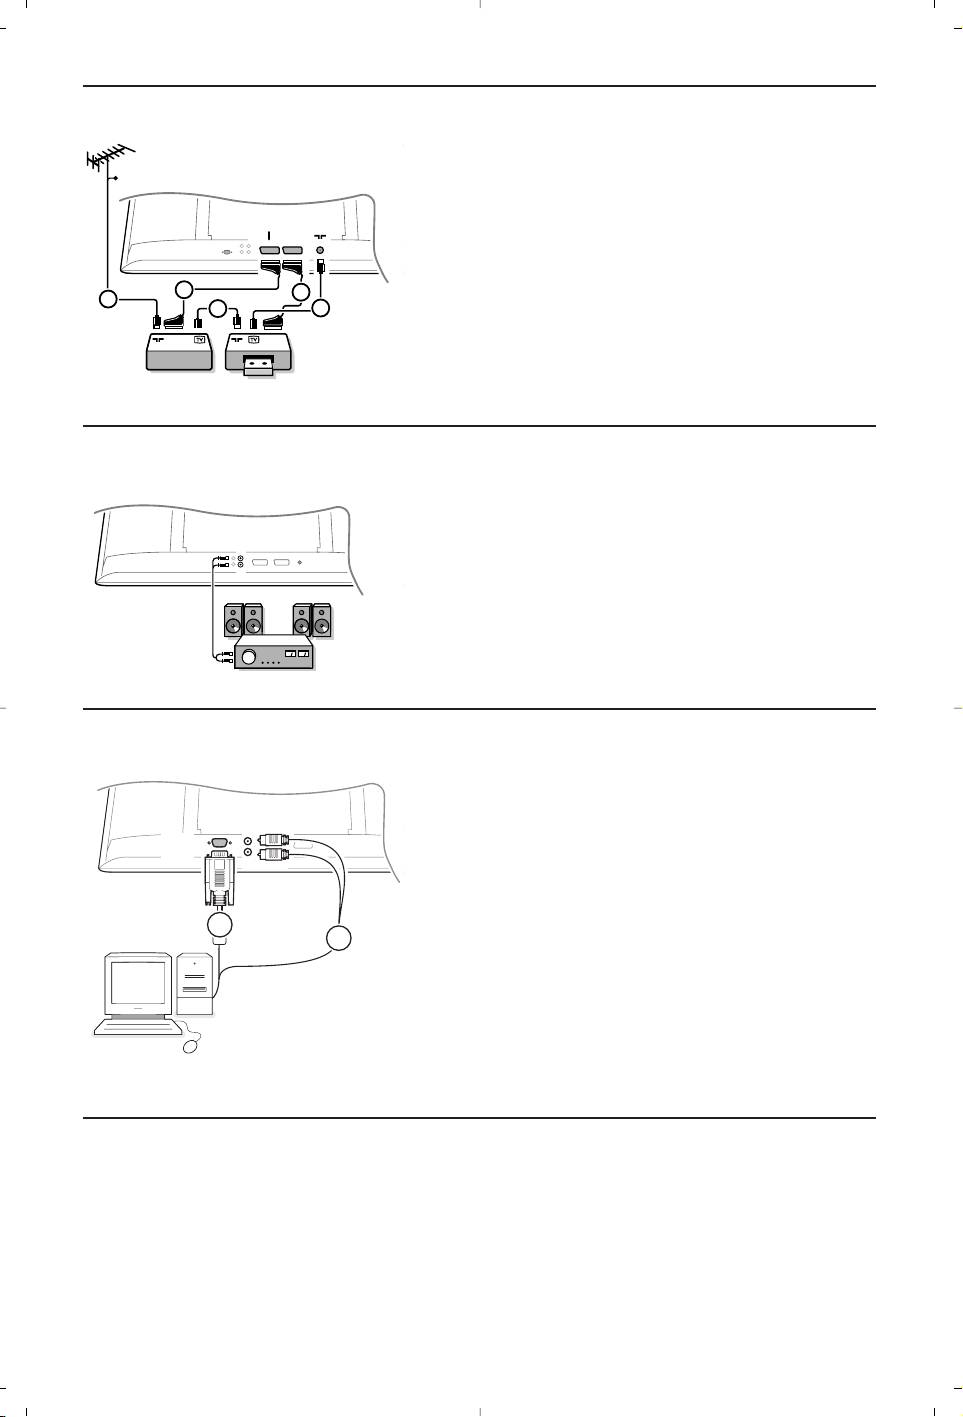
Rear connections
Recorder (VCR-
DVD+RW)
Note: Do not place your recorder too close to the screen as some recorders may be susceptible to signals from the
display. Keep a minimum distance of 0,5 m from the screen.
CABLE
EXT 1
3
1
2
RECORDER DECODER
Connect the aerial cables 1, 2 and, to obtain the
optimum picture quality, eurocable 3 as shown.
If your recorder does not have a euroconnector, the only
possible connection is via the aerial cable.
You will therefore need to tune in your recorder’s test
signal and assign it programme number 0 or store the test
signal under a programme number between 90 and 99, see
Manual store, p. 7.
See the handbook of your recorder.
Decoder and Recorder
Connect a eurocable 4 to your decoder and to the special
euroconnector of your recorder. See also the recorder
handbook. You can also connect your decoder directly to
EXT1 or 2 with a eurocable.

Connect your computer
6
CABLE
EXT2
EXT1
4
5
1
2
3
RECORDER
Other equipment
(satellite receiver, decoder, DVD, games, etc.)
Connect the aerial cables 1, 2 and 3 as shown
(only if your peripheral has TV aerial in-/output).
Connect your equipment with a eurocable 4 or 5 to
one of the euroconnectors
EXT1 or 2 to obtain a
better picture quality.
Connect the equipment which produces the RGB signals
(digital decoder, games, etc.) to
EXT1, and the
equipment which produces the S-VHS signals (S-VHS
and Hi-8 video recorders, certain DVD drives) to
EXT2
and all other equipment to either EXT1 or EXT2.
AUDIO
OUT
L
R
Amplifier
To connect to a hi-fi system, use an audio connection
cable and connect the L and R AUDIO outputs on the
TV set on the
AUDIO IN L and R input on your hi-fi
amplifier.
AUDIO
L
VGA
IN
R
1
2
& Connect one end of a VGA cable 1 to the video card
of the computer and the other end to the
VGA IN
connector at the bottom of the TV.
Fix the connectors firmly with the screws on the plug.
é In case of a Multimedia computer, connect the audio
cable 2 to the audio outputs of your Multimedia
computer and to the
AUDIO R (right) and L (left)
inputs.
The
VGA connector allows the following TV and
monitor display modes:
640 x 480, 60 Hz
800 x 600, 56 Hz
1024 x 768, 60 Hz
640 x 480, 67 Hz
800 x 600, 60 Hz
1024 x 768, 70 Hz
640 x 480, 72 Hz
800 x 600, 72 Hz
1024 x 768, 75 Hz
640 x 480, 75 Hz
800 x 600, 75 Hz
720 x 400, 70 Hz
832 x 624, 75 Hz
To select connected equipment
Press the v key on the remote control repeatedly to select EXT1, EXT2 (S-VHS signals from the EXT2
connector) or AV according to where you connected your equipment.
Remark : Most equipment (decoder, recorder) carries out the switching itself, when it is switched on.
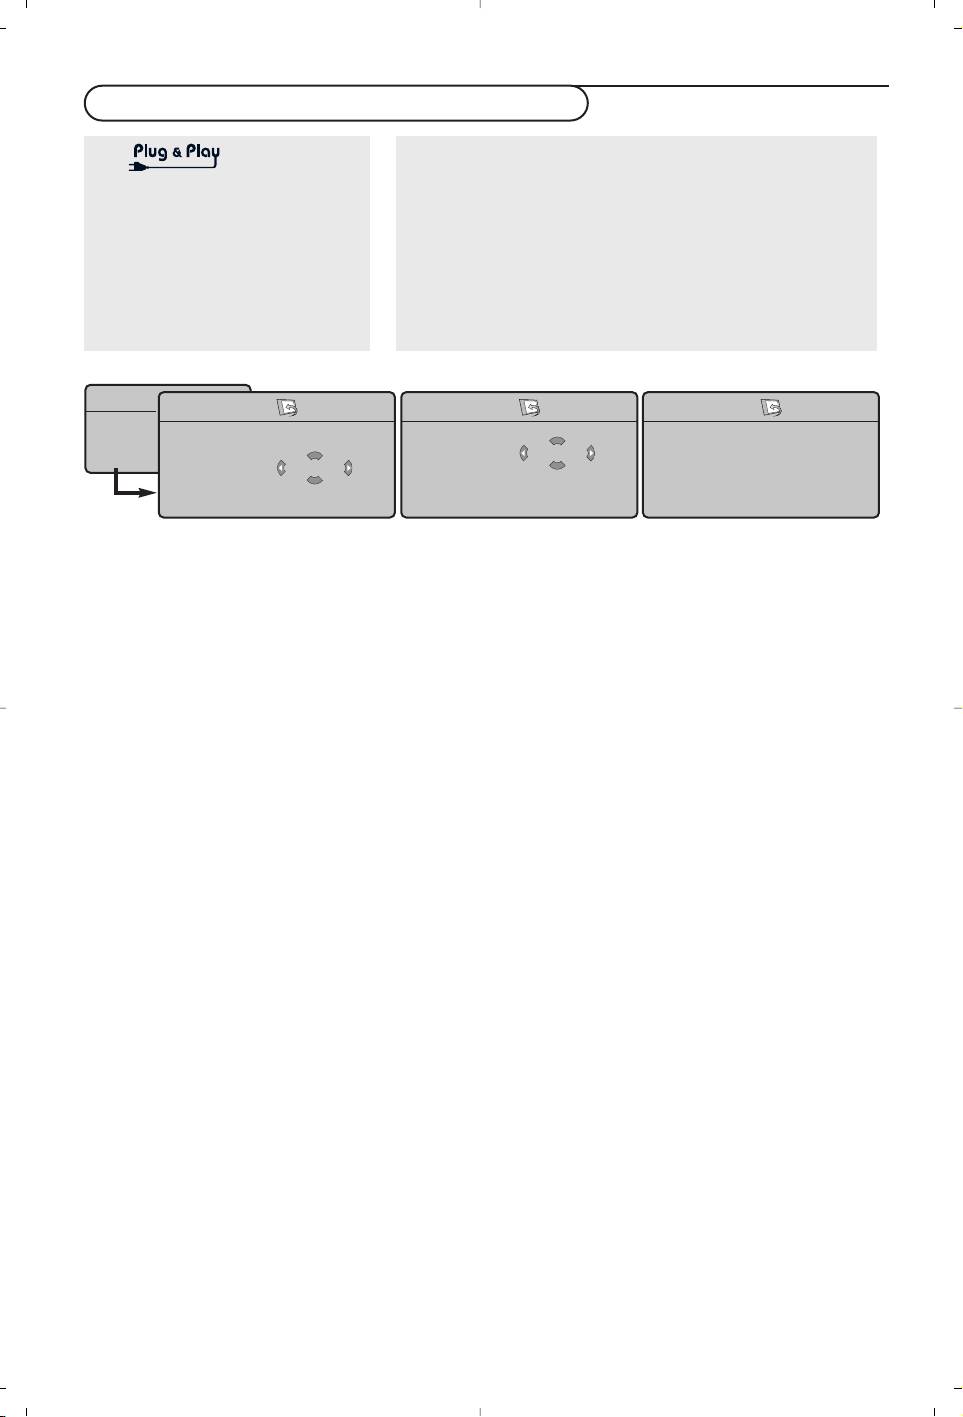
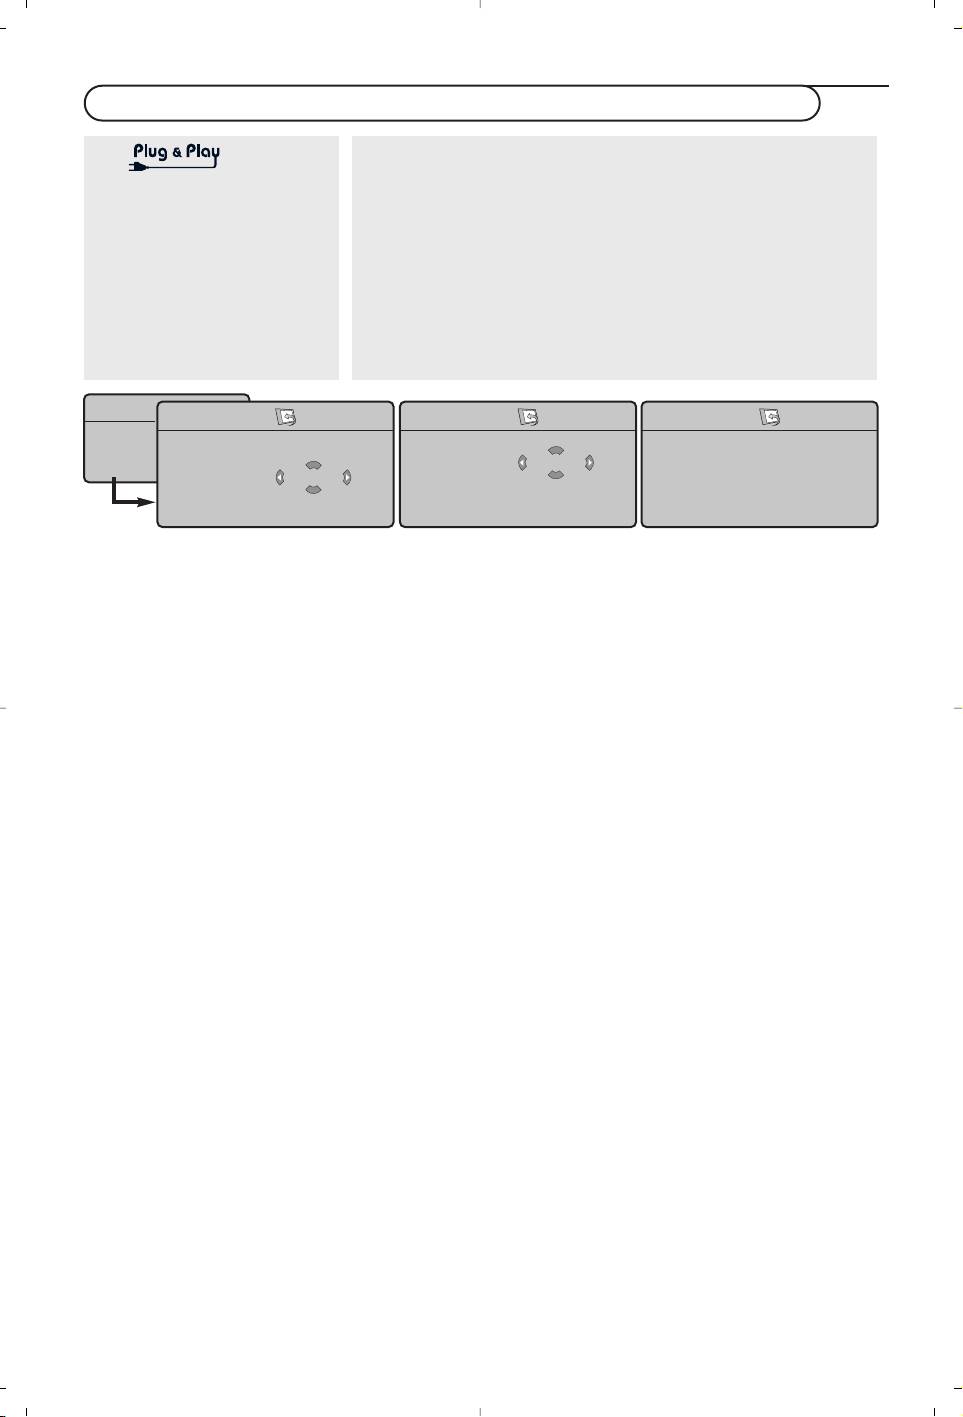
How to search for and store TV channels
Via
Via the TV menu:
& Press the MENU key on the remote control.
Keep the
MENU/OK key on top of
é Use the cursor up/down to select Install.
the TV pressed for 5 seconds to
“ Press the cursor right to enter the Install menu.
start the Plug & Play installation.
Select your country and language.
‘ Use the cursor left/right to select your language.
Tuning starts automatically.
( Press the cursor down to select Country.
§ Use the cursor left/right to select your country.
Note: Select
“.....” when none of the countries applies.
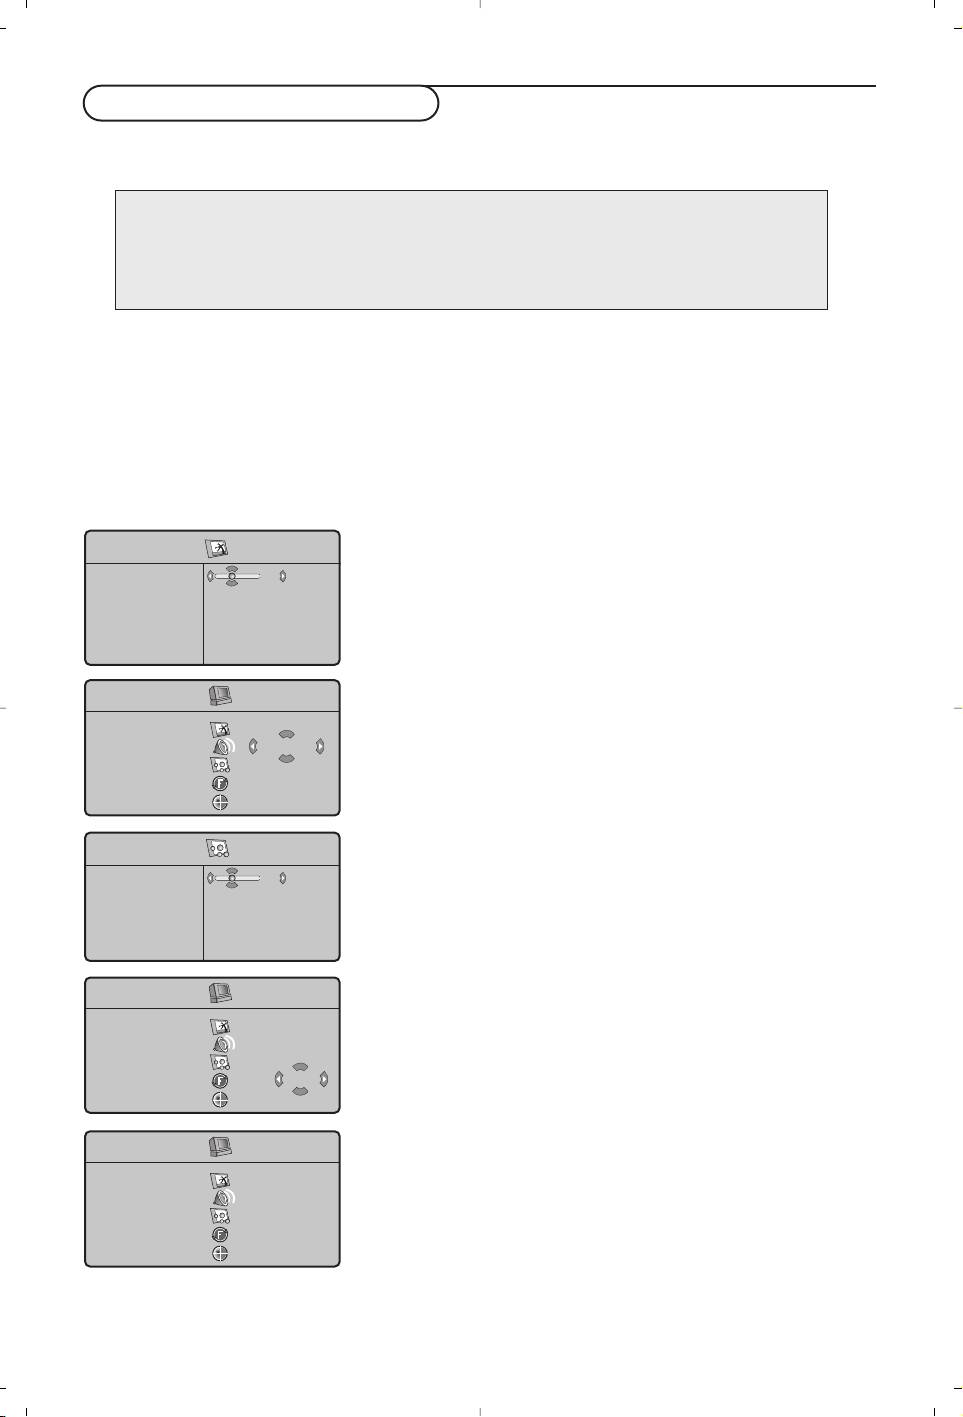
TV Menu
Install
Install
Install
Picture
Sound
Features
Language Æ •
Language Æ •
Language Æ •
System
Install
Country Æ •
Country Æ •
GB
Country Æ •
Search
Mode
Auto Store Æ •
Start
Auto Store Æ •
Auto Store Æ •
Program No
Manual Store Æ •
Manual Store Æ •
Manual Store Æ •
Fine Tune
Sort Æ •
Sort Æ •
Sort Æ •
Store
Name Æ •
Name Æ •
Name Æ •
Auto store
Manual store
& Select Auto Store in the Install menu.
Searching for and storing TV channels is done
The autostore option label
Start appears.
channel by channel.You must go through every step
of the Manual Installation menu.
é Press the cursor right.
“ The progress of autoprogramming is displayed.
& Select Manual Store in the Install menu and
press the cursor right to enter.
If the transmitter or cable network sends the
é Select the TV system:
automatic sort signal, the programs will be
Select the country or part of the world from
numbered correctly. In this case, the installation
where you want to receive the TV channel. If
is complete. If this is not the case, you need to
you are connected to a cable system, select
use the Sort menu to number the programs
your country or part of the world where you
correctly.
are now located.
It is possible that the cable company or the TV
Note: for automatic detection select Europe (except
for France).
channel displays a broadcast selection menu. Layout
and items are defined by the cable company or the
“ Search for a TV channel:
TV channel.
Press the cursor down to select
Search and
press the cursor right to start searching.
Sorting TV channels
Direct selection of a TV channel:
If you know the frequency, enter it directly with the
& Select Sort in the Install menu and press the
digit keys 0 to 9.Ask for a list from your cable
cursor right
company or dealer, alternatively consult the Table of
é Select the TV channel you want to move using
frequencies on the inside backcover of this
the cursor up/down and press cursor right.
handbook.
“ Select the new number and validate with the
‘ Press the cursor down and enter the
cursor left.
programme number with the digit keys.
‘ Repeat steps é and “ for each TV channel
( Fine tune:
you wish to renumber.
In case of poor reception, you can improve the
( To exit the menus, press the MENU key
reception by adjusting the frequency with the
repeatedly.
cursor left/right.
§ To store your TV channel, select Store and
press the cursor right. Repeat steps
“ to (
to store another TV channel.
è To exit from the menu press the MENU key on
the remote control.
7
Using in PC monitor mode
Your TV can be used as a computer monitor.
You must first of all connect the computer and adjust the resolution (see p. 6).
Note:
When using the LCD TV as a PC monitor, slight diagonal interference lines may be observed when it is
operated under electromagnetic interference environment but will not affect the performance of this
product.
For better performance, good quality VGA cable with good noise isolation filter is recommended.
Choosing PC mode
Press the PC key on the remote control to switch the TV to PC mode. Press the TV key to return to
TV mode. If there is no PC signal for more than five seconds, the TV automatically goes into standby
mode.
Using the PC menus
Press the MENU key to access the specific settings of the PC monitor mode. Use the cursor keys to
adjust them (the settings are automatically saved).
Picture
Picture
•
Brightness/Contrast: to adjust the brightness and
Brightness
39
contrast.
Colour
Contrast
•
Horizontal/Vertical Position: to adjust the horizontal
Sharpness
and vertical placing of the image.
Colour Temp.
•
Colour Temperature: to adjust the colours (cool,
Store
normal or warm).
PC Menu
Picture
Audio selection
Audio selection
TV
To choose the sound reproduced on the TV
Features
(
PC or TV).
Reset to Factory
Mode
Features
Features
Phase
33
•
Phase/Clock: eliminates the horizontal (Phase) and
Clock
vertical (
Clock) interfering lines.
Format
•
Format: to choose between large screen (Full screen)
Auto Adjust
or the original (Native) format of the PC screens.
•
Auto adjust: position is set automatically.
PC Menu
Picture
Audio selection
Reset to Factory
Features
Reset to Factory
Reset YES
To r eturn to the factory settings
Mode
PC Menu
Mode
Picture
• TV Æ
Audio selection
• PC
To come back to TV mode.
Features
Reset to Factory
Mode
8
Teletext
Teletext is an information system broadcast by certain channels which can be consulted like a
newspaper. It also offers access to subtitles for viewers with hearing problems or who are not familiar
with the transmission language (cable networks, satellite channels, etc.).
9
B
VCR DVD TV SAT AMP
v
SELECT
†
®
Ò
‡π
TV PC
º
b
®
®
®
OK
®
MENUSURR
+
+
V
¬
P
-
-
123
456
789
i
0
0
:
g
X
h
q
SMART SMART
aM
Press: You will obtain:
b Teletext This is used to call teletext, change to transparent mode
On/Mix/Off and then exit.The summary appears with a list of items
that can be accessed. Each item has a corresponding 3
digit page number.
If the channel selected does not broadcast teletext, the indication
100 will be displayed and the screen will remain blank (in this
case, exit teletext and select another channel).
0/9 Selecting Enter the number of the page required using the 0 to 9
-P+ a page or -P+ keys. Example: page 120, enter 1 2 0.
The number is displayed top left, the counter turns and
then the page is displayed. Repeat this operation to view
another page.
If the counter continues to search, this means that the page is not
transmitted. Select another number.
OOOO Direct Coloured areas are displayed at the bottom of the screen.
access to The 4 coloured keys are used to access the items or
the items corresponding pages.
The coloured areas flash when the item or the page is not yet
available.
i Contents This returns you to the contents page (usually page 100).
cursor Enlarge This allows you to display the top or bottom part of the
up/down a page page and then return to normal size.
g Hold subpage Certain pages contain subpages which are automatically
displayed successively.This key is used to hold or resume
subpage acquisition.The indication
_ appears top left.
: Double page To activate or deactivate the double page teletext display
teletext mode.The active page is displayed on the left and the
X following page is displayed on the right. Press g if you
want to hold a page (i.e. the contents page).The active page
is then displayed on the right.To return to normal mode,
press
X.
MENU Favourite Instead of the standard coloured areas displayed at the
pages bottom of the screen, you can store 4 favourite pages on
OOOO the first 40 channels which can then be accessed using the
coloured keys (red, green, yellow, blue). Once set, these
i favourite pages will become the default every time teletext
is selected.
& Press the MENU key to change the favourite pages
mode.
é Display the teletext page that you want to store.
“ Press the coloured key of your choice for 5 seconds.
The page is stored.
‘ Repeat steps é to “ for the other coloured keys.
( Now when you consult teletext, your favourite pages
will appear in colour at the bottom of the screen; to
temporally retrieve the standard items, press menu.
To clear everything and return to the standard items as the
default, press
i for 5 seconds.

Tips
Tips
Poor Picture •Have you selected the correct TV system in the manual installation menu?
• Is your TV or house aerial located too close to loudspeakers, non-earthed audio
equipment or neon lights, etc.?
• Mountains or high buildings can cause double pictures or ghost images.
Sometimes you can improve the picture quality by changing the direction of the
aerial.
• Is the picture or teletext unrecognisable? Check if you have entered the correct
frequency. See Store TV channels, Manual store,p. 7.
No Picture •Are the supplied cables connected properly ? (The aerial cable to the TV, the
other aerial to your recorder, the VGA cables to the display, the power cables.)
• Is your PC switched on ?
• Do you see a black screen and the indicator in front of the TV lights up green,
this means that the display mode is not supported. Switch your VGA-source to a
correct mode.
• In case of weak or bad signal, consult your dealer.
Digital distortion The low quality of some digital picture material may be the cause of digital image
distortion. In this case select the Soft setting using the Smart picture key ≈ on
the remote control.
No sound • No sound on any channel? Check the volume isn’t at minimum.
• Is the sound interrupted with the mute key ¬?
No solution found Switch your TV off and then on again once. Never attempt to repair a defective
for your picture or TV yourself. Check with your dealer or call a TV technician.
sound problem ?
Menu
Have you selected the wrong menu? Press the MENU key again to exit from the
menu.
Remote control • Check if the remote control is in the correct mode.
• If your TV no longer responds to the remote control, the batteries may be dead.
Standby Your TV consumes energy in the standby mode. Energy consumption contributes
to air and water pollution. Power consumption: <3 W.
S-VHS color If S-VHS is disconnected, picture color will become faint.To restore picture color,
becomes faint press the P+ button on the remote control to do a channel up followed by
pressing the P– button to do a channel down.
10
Aide?
Si dans le mode d'emploi vous n'avez pas la réponse à votre question ou si les ‘Conseils’ donnés ne vous ont
pas aidé à résoudre votre problème de TV, vous devez téléphoner au service consommateur de votre pays, voir
le document 'World-wide guarantee'. Avant de téléphoner au Service Consommateurs de Philips, notez le
modèle et le numéro de série complet de votre TV, lesquels sont inscrits sur une étiquette collée au dos de
l'appareil, ou bien vous trouverez ces informations sur une étiquette collée sur 2 cotés au bas de l'emballage.
Modèle: N° de série:
FR
Entretien de l’écran
Ne pas toucher, frapper, frotter l’écran avec quoi que ce soit de dur, ce qui pourrait rayer et abîmer l’écran de
façon permanente. Ne pas frotter l’écran avec un tissus poussiéreux contenant un produit chimique. Ne pas
toucher l’écran à mains nues ou avec un tissus gras (certains cosmétiques sont dangereux pour l’écran).
Débrancher le TV avant tout nettoyage. Lorsque la surface devient poussiéreuse, essuyer légèrement avec du
coton absorbant ou un autre matériaux doux. Ne pas utiliser d’acétone, toluene ou alcool sous peine de
dommages chimiques. Ne pas utiliser de nettoyant liquide ou en aérosol. Essuyer toutes gouttes (eau...)
éventuellement projetées sur l’écran aussi vite que possible. Un contact prolongé peut provoquer des
déformations et des taches.
Préparation
& Instructions de montage mural/support
secteur 198-264 V.
table
Afin d’éviter tout dommage du cordon
Selon le type de téléviseur que vous avez
d’alimentation (AC) qui pourrait entraîner des
acheté, un support de montage mural et/ou
risques d’incendie ou (et) d’électrocution, ne
support table peut être fourni. Les instructions
jamais placer le téléviseur sur le câble.
de montage du support table et/ou du support
( Télécommande: Introduisez les deux piles
mural fourni se trouvent dans la notice
fournies (Type R6-1,5V).
séparée.Veillez à ce que le support mural soit
Les piles livrées avec la
fixé assez solidement pour satisfaire aux
télécommande ne
normes de sécurité.
contiennent pas de métaux
lourds tels que le mercure
é Veillez à ce que l’air puisse circuler librement à
ou le cadmium. Informez-
travers les fentes de ventilation.
vous pour connaître les
Afin d’éviter tout danger, écartez toute flamme
dispositions en vigueur dans
nue (bougies…) de l’appareil. Evitez également
votre pays.
de le mettre directement en contact avec de la
§ Mise en service du téléviseur :Appuyez sur la
pluie ou de l’eau.Veillez à préserver
touche B situé sur le côté droit du téléviseur.
l’équipement de tout égouttement ou de toute
Un voyant s’allume en face avant du téléviseur
éclaboussure.
et l’écran s’illumine. Si le téléviseur est en
Par ailleurs, ne placez pas d’objets contenant
position veille, voyant rouge allumé, appuyez sur
des liquides, tels que des vases, sur l’appareil.
la touche
-P+ ou sur la touche B sur la
“ Introduisez la fiche d'antenne dans l'entrée
télécommande.
d'antenne x au bas du téléviseur.
‘ Insérer le cordon d’alimentation fourni dans la
prise située au bas du TV et dans une prise
Directive pour le recyclage
Votre téléviseur utilise des matériaux réutilisables ou qui peuvent être recyclés.
Pour minimiser les déchets dans l'environnement, des entreprises spécialisées
°
récupèrent les appareils usagés pour les démonter et concentrer les matières
réutilisables (renseignez-vous auprès de votre revendeur).
1
Utilisation des menus
& Appuyez sur la touche MENU de la
“ Sélectionnez l’élément de menu à l’aide du
télécommande pour faire apparaître le menu
curseur gauche/droite.
principal. À tout moment, vous pouvez sortir
‘ A l’aide du curseur haut/bas, choisissez la
du menu en appuyant à nouveau sur la touche
commande que vous souhaitez sélectionner ou
MENU.
ajuster.
é Utilisez le curseur de direction haut/bas pour
Remarque: les éléments temporairement non
sélectionner le menu
Image, Son, Options,
disponibles ou non pertinents sont affichés en gris
Installation ou Mode.
clair et ne peuvent être sélectionnés.
Menu Image:
Menu TV
•
Lumière
: agit sur la luminosité de l’image.
•
Couleur
: agit sur l’intensité de la couleur.
Menu TV
•
Contraste
: agit sur la différence entre les tons
Image
Image
Son
clairs et les tons foncés.
Options
Installation
Lumière
39
•
Définition
: agit sur la netteté de l’image.
Mode
Couleur
•
Temp. Couleur
: agit sur le rendu des
Contraste
Définition
couleurs:
Froide
(plus bleue),
Normale
Temp. Couleur
(équilibrée) ou
Chaude
(plus rouge).
Mémoriser
•
Mémoriser
: pour mémoriser les réglages de
l’image (ainsi que les réglages
Contraste+
et
Réduct. Bruit
situés dans le menu Options).
Menu Son:
•
Égaliseur
: pour régler la tonalité du son (de
grave: 120 Hz à aigus: 10 kHz).
•
Balance
: pour équilibrer le son sur les haut-
parleurs gauche et droit.
•
Delta Volume
: permet de compenser les
Menu TV
écarts de volume qui existent entre les
Son
Image
différents programmes ou les prises
EXT
.
Son
Options
Egaliseur Æ •
120 Hz
Installation
Ce réglage est opérationnel pour les
Mode
BalanceÆ •
500 Hz
programmes 0 à 40 et les prises
EXT
.
Delta VolumeÆ •
1500 Hz
AVLÆ •
5 KHz
•
AVL
(Automatic Volume Leveler): contrôle
Dolby VirtualÆ •
10 KHz
automatique du volume qui permet de limiter
MémoriserÆ •
les augmentations du son, en particulier lors
des changements de programmes ou des
publicités.
•
Virtual Dolby
: simule un son surround issu de
2 haut-parleurs en utilisant Dolby Pro Logic*
en donnant à l'auditeur l'impression d'être
entouré de haut-parleurs supplémentaires.
•
Mémoriser
: pour mémoriser les réglages du
son.
Menu TV
Menu Options:
Options
Image
• Contraste +: réglage automatique du
Son
Options
Contrast +
Marche
contraste de l’image qui ramène en
Installation
Mode
Réduct.bruit
permanence la partie la plus sombre de
Minuterie
l’image au noir.
• Réduct. Bruit: atténue le bruit de l’image (la
neige), en cas de réception difficile.
Attention: pour mémoriser les réglages
Contraste+ et Réduct. Bruit, il faut utiliser le
Menu installation:
voir p. 7
choix Mémoriser du menu Image.
• Minuterie: pour sélectionner une durée de
mise en veille automatique.
2
B
VCR DVD TV SAT AMP
v
SELECT
†
®
Ò
‡π
TV PC
º
b
®
®
®
OK
®
MENUSURR
+
+
V
¬
P
-
-
123
456
789
i
0
0
:
g
X
h
q
SMART SMART
M
a
Utilisation de la télécommande
Remarque: Pour la plupart des touches, vous activerez la fonction en appuyant une fois sur la touche. Si vous
appuyez une seconde fois, la fonction sera désactivée.
Remarque: seules quelques touches peuvent être utilisées en mode VGA.
B Position veille
VCR DVD TV SAT AMP
Appuyez pour mettre en ou hors
Touches pour les appareils A/V,
service le téléviseur.
p. 10.
v Sélection des périphériques
b Télétexte Marche/Mix/Arrêt,
Voir p. 6.
voir p. 9.
Touches colorées,
voir Télétexte.
†®Ò‡πº
OK Appuyez sur cette touche pour
Touches pour les appareils A/V.
afficher la liste des programmes.
TV / PC
MENU Menu principal M/A
Appuyez sur une de ces touches
pour commuter le téléviseur en
¬ Pour supprimer/rétablir le son.
mode TV ou PC.
P Sélection des chaînes
SURR Son Surround
Pour accéder au programme
Pour activer/désactiver l’effet
inférieur ou supérieur. Le numéro
d’élargissement du son. En
et le mode son s’affichent
stéréo, les haut-parleurs
quelques instants.
paraissent plus espacés. Pour les
Pour certains programmes le titre de
versions équipés du Virtual Dolby
l’émission apparaît en bas de
Surround, vous obtenez les effets
l’écran.
sonores arrières du Dolby
Surround Pro Logic*. En mono,
0/9 Touches chiffrées
on obtient un effet spatial
Choix direct d’une chaîne de
pseudo stéréo.
télévision. Si le numéro de chaîne
Remarque:Vous pouvez faire la
est à deux chiffres, introduisez le
même sélection dans le menu son,
second chiffre avant que le trait
Virtual Dolby.
ne disparaisse. Pour appeler une
chaîne de 0 à 9 appuyez sur la
V Pour régler le volume.
touche chiffrée un peu plus
longtemps.
i Affichage d’information à
l’écran
0 Chaîne TV précédente
Pour afficher/supprimer le
Appuyez pour afficher la chaîne
numéro de programme, l'heure,
TV précédente.
le mode son et le temps qui
reste sur le timer. Maintenez la
:g Touches télétexte.Voir p. 9.
touche enfoncée pendant 5
secondes pour un affichage
X Mode son
permanent du numéro de
Permet de forcer les émissions
programme à l'écran.
Stéréo et Nicam Stéréo en
Mono ou pour les émissions
Ma Touches Smart
bilingues de choisir entre Dual
Y
Pour sélectionner des
ou Dual Z.
paramètres définis de l’image et
L’indication Mono est rouge lorsqu’il
du son.
s’agit d’une position forcée.
Préférent.renvoie aux réglages
personnels de l’image et du son
h Active control
sélectionnés dans le menu image
marche/arrêt/Activé Avec
et son.
Capteur
Optimise la qualité de l’image en
fonction du signal reçu.
‘Dolby’‘Pro Logic’" et le symbole double-D G sont des marques de
commerce de Dolby Laboratories. Oeuvres confidentielles non publiées.
© 1992-1997 Dolby Laboratories, Inc.
3

Formats 16:9
Les images que vous recevez peuvent être transmises au format 16:9 (écran large) ou 4:3 (écran
traditionnel). Les images 4:3 ont parfois une bande noire en haut et en bas (format cinémascope).
Cette fonction permet d’éliminer les bandes noires et d’optimiser l’affichage des images sur l’écran.
Appuyez sur la touche
ë (ou ≤≥) pour sélectionner les différents modes :
Le téléviseur est équipé d’une commutation automatique qui décode le signal spécifique
émis par certains programmes et sélectionne automatiquement le bon format d’écran.
4:3
L’image est reproduite au format 4:3, une bande noire apparaît de chaque côté de
l’image.
Zoom 14:9
L’image est agrandie au format 14:9, une petite bande noire subsiste de chaque côté
de l’image.
Zoom 16:9
L’image est agrandie au format 16:9. Ce mode est recommandé pour visualiser les
images avec bande noire en haut et en bas (format cinémascope).
16:9 Sous-titres
Ce mode permet de visualiser les images 4:3 sur toute la surface de l’écran en
laissant visibles les sous-titres.
Super 4:3
Ce mode permet de visualiser les images 4:3 sur toute la surface de l’écran en
élargissant les côtés de l’image.
16:9
Ce mode permet de restituer les bonnes proportions des images transmises en 16:9.
Si vous visualisez une image 4:3 comme représentée ici, elle sera élargie sur le plan horizontal.
Touches pour les appareils A/V
Appuyez sur la touche Select pour sélectionner le mode désiré : VCR
(magnétoscope), DVD, SAT (satellite), AMP (amplificateur) ou CD.
Le voyant de la télécommande s’allume pour montrer le mode sélectionné. Il s’éteint
automatiquement après 60 secondes sans action (retour au mode TV). En fonction de
l’équipement, les touches suivantes sont opérationnelles :
4
B
VCR DVD TV SAT AMP
v
SELECT
†
®
Ò
‡π
TV PC
º
b
®
®
OK
®
®
MENUSURR
+
+
V
¬
P
-
-
123
456
789
i
0
0
:
g
X
h
q
SMART SMART
M
a
B pour passer en position de
i info à l'écran
veille
MENU pour activer/désactiver le menu
º pause (
VCR, DVD, CD)
- P + pour sélectionner un chapitre,
actualités RDS /TA (AMP);
une chaîne, une bande
mélanger (
CD/R)
0 à 9 entrée d’un chiffre
® pour enregistrer
0 contenu de la cassette (
VCR),
Ò pour rebobiner (
VCR, CD);
choisir un chapitre DVD,
recherche arrière (
DVD, AMP)
choisir une fréquence (
AMP)
‡ pour arrêter
curseur haut/bas
π pour le mode lecture
pour choisir le disque suivant
† avance rapide (
VCR, CD);
ou précédent (
CD)
recherche avant (DVD, AMP)
curseur gauche/droit
b afficher RDS (
AMP);
pour choisir la bande
pour choisir la langue des sous-
précédente ou suivante (
CD)
titres (
DVD);
recherche avant/arrière (AMP)
Les touches du téléviseur
Si votre télécommande est perdue ou cassée, vous pouvez
toujours modifier quelques réglages de base avec les touches
situées sur le côté du téléviseur.
Appuyez sur:
• les touches
VOLUME - ou + pour régler le volume;
• les touches
- PROGRAM+ pour sélectionner les chaînes TV
ou les sources.
La touche
MENU est utilisée pour appeler le menu principal
sans utiliser la télécommande.
Utilisez:
• la touche + (Menu Gauche)
VOLUME et les touches
PROGRAM- et PROGRAM+ (Menu Haut/Bas) pour
sélectionner des éléments du menu dans les directions
indiquées;
• la touche
MENU pour supprimer le menu.
Camescope, jeux video, casque
Camescope, jeux video
Les connexions
AV et S-VIDEO se trouvent sur la droite du
téléviseur ou en bas pour les écrans grand format.
Etablissez les connexions comme il est expliqué en face.
Avec la touche v, sélectionner
AV.
Pour un appareil monophonique, connectez le signal son sur
l’entrée
AUDIO L. Le son est reproduit automatiquement sur les
haut-parleurs gauche et droit du téléviseur.
Casque
Les touches
- V+ permettent de régler le volume.
L'impédance du casque doit être comprise entre 32 et
600 ohms.
5
*
R Audio L
Video
S-VHS, Hi-8
S-VHS
*
R Audio L
Video
S-VHS
VHS, 8 mm
Connexions arrière
Enregistreur (VCR
-DVD+RW)
Éviter de placer votre enregistreur trop près de l’écran étant donné que certains enregistreurs sont sensibles aux
signaux de l’image. Gardez une distance minimale de 0,5 m avec l’écran.
CABLE
EXT 1
3
1
2
RECORDER DECODER
Branchez les câbles d’antenne 1, 2, pour obtenir une
meilleure qualité d’image, le câble péritel 3 tel qu’indiqué.
Si votre magnétoscope ne dispose pas d’une prise péritel, la
seule connexion possible se fait via le câble d’antenne. Pour
cela, vous devrez régler votre magnétoscope sur le signal
test, et lui donner le numéro de programme 0 ou
enregistrer le signal test sous un numéro de programme
compris entre 90 et 99, voir Installation Manuelle, p. 7.
Consultez le manuel de votre enregistreur.
Décodeur et Enregistreur
Branchez un câble péritel 4 sur la prise péritel de votre
décodeur et sur la prise péritel spéciale de votre
enregistreur. Consultez également le manuel de votre
enregistreur. Vous pouvez également brancher votre
décodeur directement à
EXT1 ou 2 avec un câble péritel.
Raccordez votre ordinateur
6
CABLE
EXT2
EXT1
4
5
1
2
3
RECORDER
Autres appareils périphériques
(récepteur satellite, décodeur, DVD, jeux, etc.)
Branchez les câbles d'antenne 1, 2 et 3 tel
qu'indiqué (uniquement si votre périphérique dispose
d’une entrée/sortie pour antennes TV).
Branchez votre équipement avec un câble péritel 4 ou
5 à l’une des prises péritel
EXT1 ou 2 afin d’obtenir
une meilleure qualité d’image.
Branchez les périphériques qui produisent les signaux
RGB (décodeur numérique, jeux, etc.) sur
EXT1, et les
périphériques qui produisent les signaux S-VHS
(magnétoscopes S-VHS et Hi-8, certains lecteurs DVD)
sur
EXT2 et tous les autres périphériques sur EXT1 ou
EXT2.
AUDIO
OUT
L
R
Amplificateur
Pour le raccordement à une chaîne Hi-fi, utilisez un
cordon de liaison audio et connectez les sorties L et R
du téléviseur à une entrée AUDIO IN L et R de la
chaîne Hi-fi.
AUDIO
L
VGA
IN
R
1
2
& Connectez par un câble VGA 1 la carte vidéo de votre
ordinateur avec la prise VGA IN du bas du TV.
Serrez les vis de fixation de chaque prise.
é Dans le cas d’un ordinateur multimédia, connectez le
câble audio 2 entre la sortie audio de votre PC et les
entrées
AUDIO R (droite) et AUDIO L (gauche) du
côté du TV.
L’entrée
VGA du TV permet l’affichage des modes
suivants:
640 x 480, 60 Hz
800 x 600, 56 Hz
1024 x 768, 60 Hz
640 x 480, 67 Hz
800 x 600, 60 Hz
1024 x 768, 70 Hz
640 x 480, 72 Hz
800 x 600, 72 Hz
1024 x 768, 75 Hz
640 x 480, 75 Hz
800 x 600, 75 Hz
720 x 400, 70 Hz
832 x 624, 75 Hz
Pour sélectionner les périphériques
Appuyez sur la touche v afin de sélectionner EXT1, EXT2 (signaux S-VHS du connecteur EXT2) ou AV
l’entrée sur laquelle vous avez branché votre appareil.
Remarque: la plupart des périphériques (décodeur, enregistreur) gèrent d’eux-mêmes la commutation.
Comment rechercher et mémoriser les chaînes de télévision
Par le menu TV
Par
& Appuyez sur la touche MENU de la télécommande.
é Utilisez le curseur haut/bas pour sélectionner Installation.
Appuyez sur la touche
MENU/OK
du dessus du TV
“ Utilisez le curseur de direction droite pour entrer dans le menu
durant 5 secondes pour lancer
Installation.
l’installation Plug & Play.
‘ Utilisez le curseur de direction gauche/droite pour sélectionner
Sélectionner le pays et la
votre langue.
langue. La recherche démarre
( Enfoncez le curseur vers le bas pour sélectionner Pays et utilisez
automatiquement
le curseur de direction gauche/droite pour sélectionner votre
pays.
Remarque: Sélectionnez “.....” si votre pays ne figure pas dans la liste.
Menu TV
Installation
Installation
Installation
Image •
Son •
Options •
Langage Æ •
Langage Æ •
Langage Æ •
Système
Installation •
Pays Æ •
Pays Æ •
F
Pays Æ •
Recherche
Mode •
Mémo. Auto. Æ •
Marche
Mémo. Auto. Æ •
Mémo. Auto. Æ •
No. De Prog.
Mémo Manuel. Æ
•
Mémo Manuel. Æ
•
Mémo Manuel. Æ
•
Ajust. Fin
Classement Æ •
Classement Æ •
Classement Æ •
Mémoriser
Nom du Prog. •
Nom du Prog. •
Nom du Prog. •
Vous devez passer par toutes les étapes du menu
Mémorisation auto
Installation manuelle
& Sélectionnez Mémo Auto. dans le menu
& Sélectionnez Mémo Manuel. dans le menu
Installation.
Installation et appuyez sur le curseur de
L'option
Marche apparaît.
direction droite pour entrer.
é Appuyez sur le curseur de direction droite.
é Sélectionnez le système de télévision:
“ La progression de la programmation
Sélectionnez le pays ou la partie du monde pour
automatique est affichée.
lequel vous voulez sélectionner l'émetteur. Si
vous êtes raccordé à la télévision par câble,
Si l’émetteur ou le réseau câblé transmet le
sélectionnez le pays ou la partie du monde où
signal de classement automatique, les
vous vous trouvez en ce moment.
programmes seront correctement numérotés.
Remarque: pour la détection automatique
L’installation est alors terminée. Si ce n’est pas le
sélectionnez Europe (sauf pour la France).
cas, vous devez utiliser le menu
Classement
" Recherchez une chaîne de télévision:
pour les renuméroter.
Enfoncez le curseur vers le bas pour
Il est possible que le réseau câblé ou la chaîne de
sélectionner
Recherche et appuyez sur le
curseur droite pour commencer la recherche.
télévision affiche ses propres paramètres. Ces
Introduire vous-même une fréquence
paramètres sont alors définis par le réseau ou la
Si vous connaissez la fréquence, entrez-la
chaîne de télévision concernée.
directement au moyen des touches chiffrées 0 à 9.
Demandez une liste des fréquences à votre société
Classement des chaînes
de télédistribution ou à votre revendeur ou consultez
& Sélectionnez Classement dans le menu
le tableau de fréquences à l'intérieur de la
Installation et appuyez sur le curseur droite.
couverture arrière de ce mode d'emploi.
é Sélectionnez la chaîne de télévision que vous
' Enfoncez le curseur vers le bas et introduisez le
souhaitez déplacer en utilisant le curseur
numéro de programme à l'aide des touches
haut/bas et appuyez sur le curseur droite.
chiffrées.
“ Sélectionnez le nouveau numéro et validez-le
( Ajust. Fin
avec le curseur de direction gauche.
Si la réception est mauvaise, vous pouvez
‘ Répétez les étapes é et “ pour chaque
améliorer la réception en réglant la fréquence
chaîne que vous souhaitez renuméroter.
avec le curseur gauche/droite.
( Pour quitter les menus, appuyez à plusieurs
§ Pour mémoriser votre chaîne, sélectionnez
reprises sur la touche
MENU.
Mémorisation et appuyez sur le curseur de
direction droite. Répétez les étapes
“ à (
pour mémoriser une autre chaîne
Installation manuelle
è Appuyez sur la touche MENU de la
télécommande pour quitter le menu.
La recherche et la mise en mémoire des chaînes de
télévision est exécutée chaîne par chaîne.
7
