Hotpoint-Ariston lsff 7m09 c: Loading the racks
Loading the racks: Hotpoint-Ariston lsff 7m09 c
Loading the racks
Tips
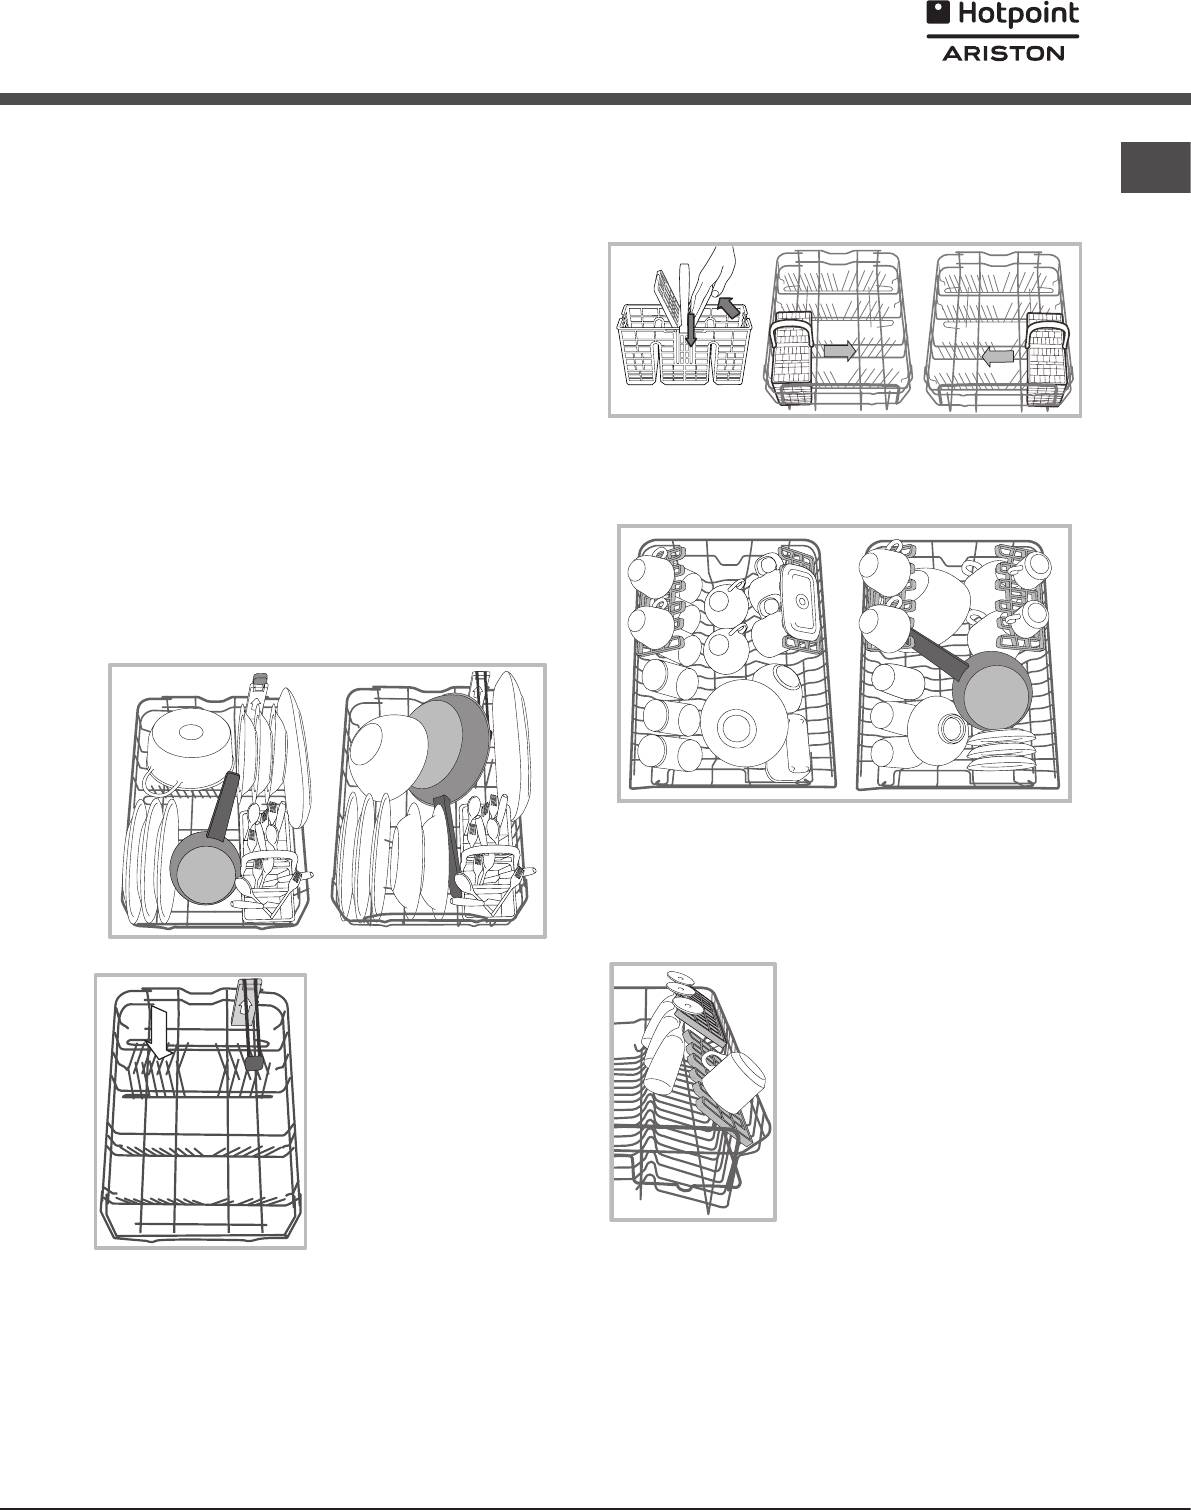
Cutlery basket
EN
Before loading the racks, remove all food residues from the
The basket is equipped with top grilles for improved cutlery
crockery and empty liquids from glasses and containers. No
arrangement. The cutlery basket should be positioned only at
preventive rinsing is needed under running water.
the front of the lower rack.
Arrange the crockery so that it is held in place firmly and does
not tip over; and arrange the containers with the openings facing
downwards and the concave/convex parts placed obliquely,
thus allowing the water to reach every surface and flow freely.
Make sure that the lids, handles, trays and frying pans do not
prevent the spray arms from rotating. Place any small items in
the cutlery basket.
Since plastic dishes and non-stick frying pans usually retain more
water drops, their drying will be not so good as that of ceramic
or stainless-steel dishes.
Upper rack
Lightweight items such as plastic containers should be placed
Load this rack with delicate and lightweight crockery such as
in the upper rack and arranged so that they cannot move.
glasses, cups, saucers and shallow salad bowls.
After loading the appliance, make sure that the spray arms can
rotate freely.
Lower rack
The lower rack can hold pans, lids, dishes, salad bowls, cutlery
etc. Large plates and lids should ideally be placed at the sides.
Adjustable position tip-up compartments*
The side tip-up compartments can be positioned at three
different heights to optimize the arrangement of the crockery
inside the rack.
Several dishwasher models are
Wine glasses can be placed safely in
fitted with tip-up sectors*.
the tip-up compartments by inserting
They can be used in a vertical
the stem of each glass into the
position when arranging dishes or
corresponding slot.
in a horizontal position (lower) to
For optimum drying results incline
load pans and salad bowls easily.
the tip-up compartments more. To
change the inclination, pull up the tip-
Some models are equipped with
up compartment, slide it slightly and
Vertical Zone, special pull-out
position it as you wish.
supports*in the rear of the rack
that can be used to support frying
pans and baking pans in a more
vertical position, thus taking up
less space.
In order to use it, just get hold of the coloured grip and pull it
upwards while rotating it forward. The supports can slide right
and left to fit the size of the crockery.
Very soiled dishes and pans should be placed in the lower rack
because in this sector the water sprays are stronger and allow
a higher washing performance.
*Only available in selected models with different numbers and
positions.
11
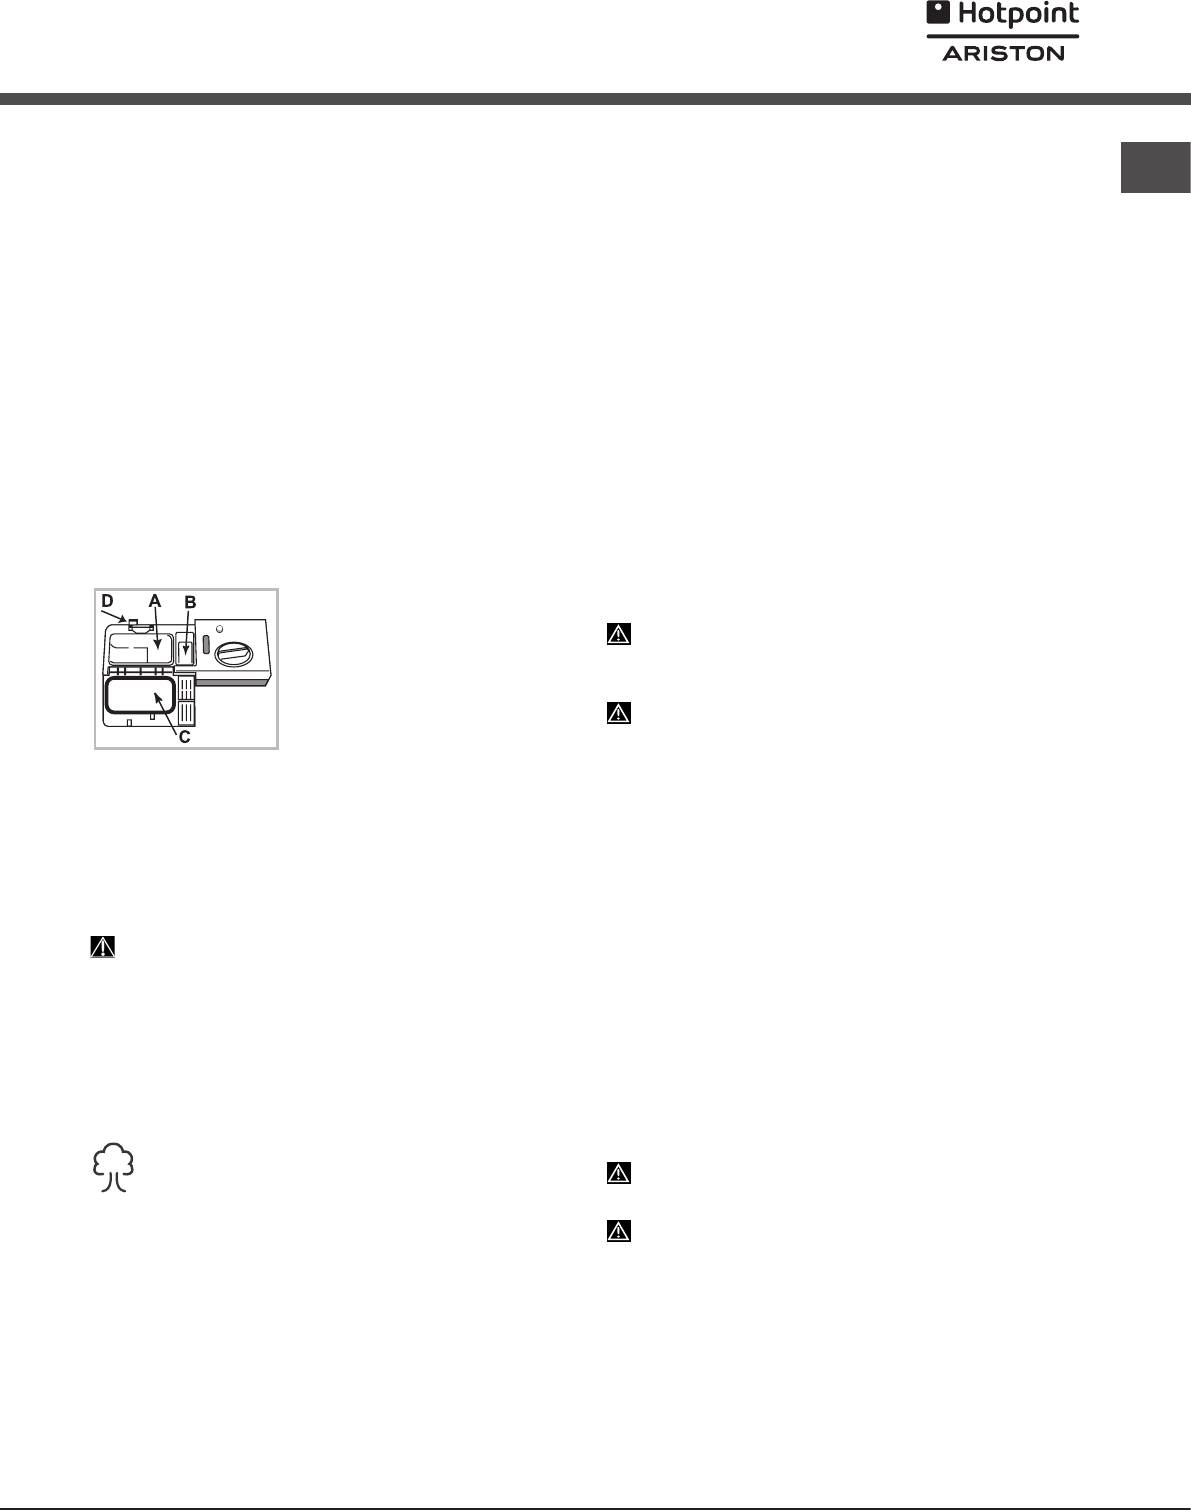
Adjusting the height of the upper rack
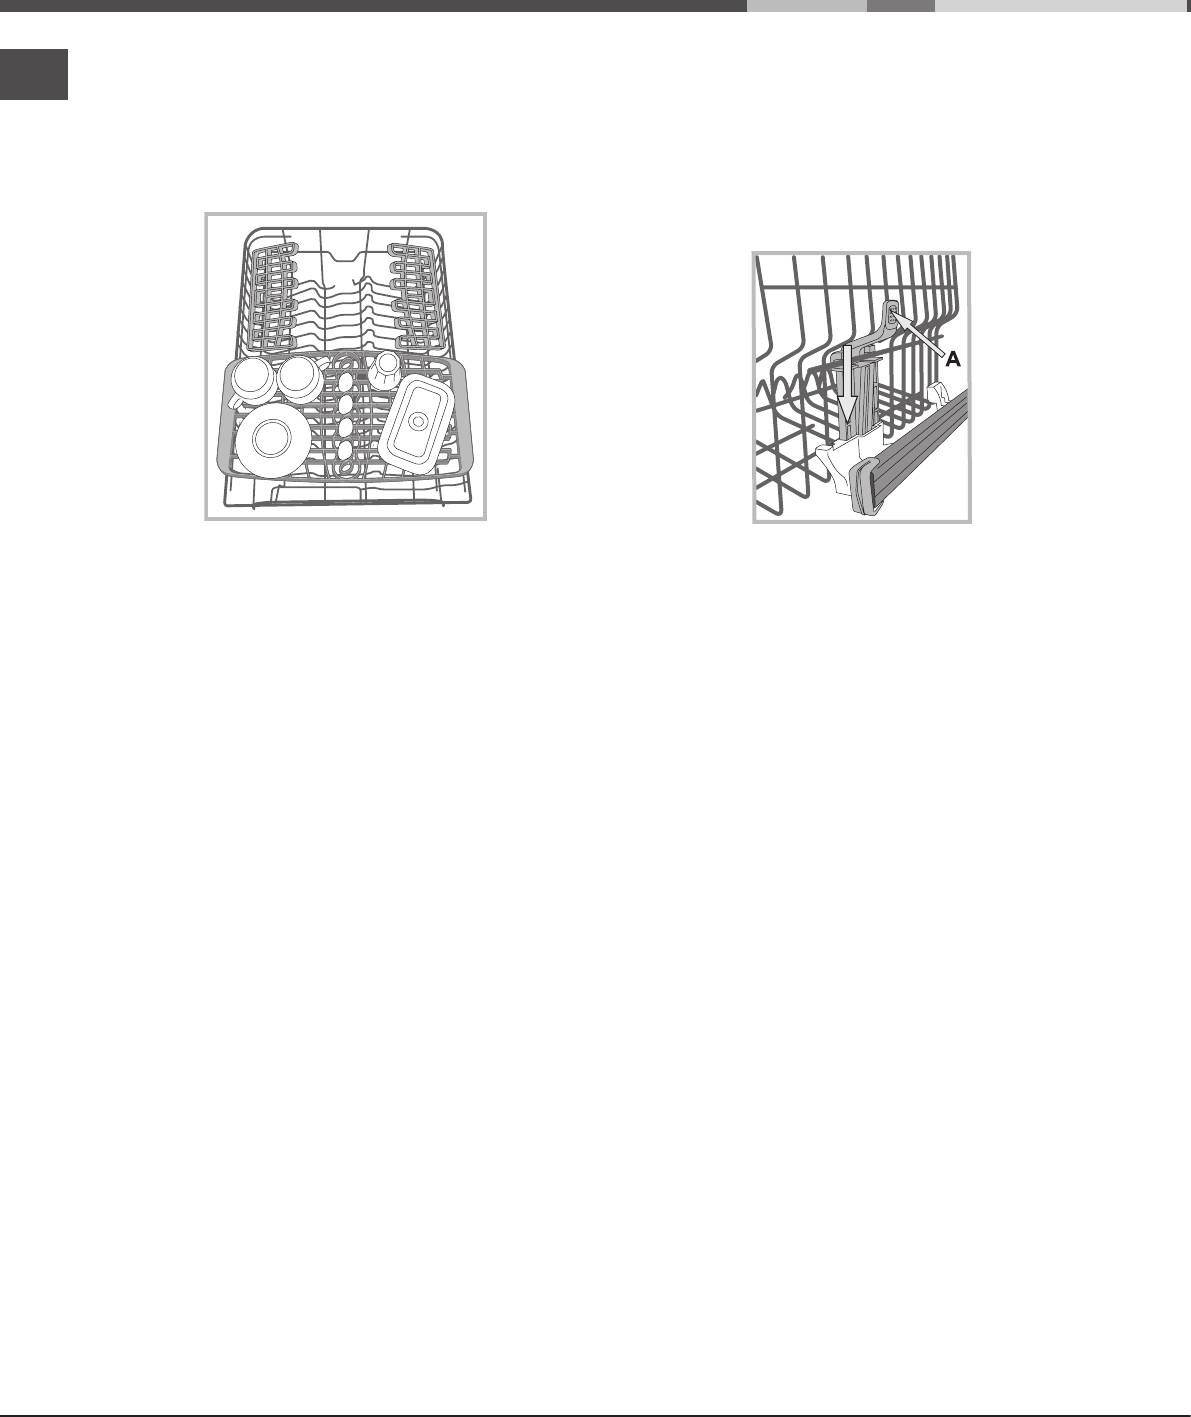
Tray*
EN
The height of the upper rack can be adjusted: high position
Some dishwasher models are fitted with a sliding tray which
to place bulky crockery in the lower rack and low position to
can be used to hold small crockery and cutlery.
make the most of the tip-up compartments by creating more
For optimum washing performance, avoid positioning bulky
space upwards.
crockery directly below the tray. The cutlery tray can be
removed.
(see Figure.)
The height of the upper rack should be adjusted WHEN THE
RACK IS EMPTY.
NEVER raise or lower the rack on one side only.
If the rack is equipped with a Lift-Up device*
(see figure)
, lift
it up by holding its sides. To restore the lower position, press
the levers (A) at the sides of the rack and follow the rack down.
Unsuitable crockery
• Wooden crockery and cutlery.
• Delicate decorated glasses, artistic handicraft and antique
crockery. Their decorations are not resistant.
• Parts in synthetic material which do not withstand high
temperatures.
• Copper and tin crockery.
• Crockery soiled with ash, wax, lubricating grease or ink.
The colours of glass decorations and aluminium/silver pieces can
change and fade during the washing process. Some types of
glass (e.g. crystal objects) can become opaque after a number
of wash cycles too.
Damage to glass and crockery
Caused by:
• Type of glass and glass production process.
• Chemical composition of detergent.
• Water temperature of rinse cycle.
Tips:
• Only use glasses and porcelain guaranteed by the
manufacturer as dishwasher safe.
• Use a delicate detergent suitable for crockery.
• Collect glasses and cutlery from the dishwasher as soon as
the wash cycle is over.
* Only available in selected models.
12
Detergent and
dishwasher use
Measuring out the detergent
Starting the dishwasher
EN
Good washing results also depend on the correct amount of
1. Turn the water tap on.
detergent being used. Exceeding the stated amount does not
2. Press the ON/OFF button.
result in a more effective wash and increases environmental
3. Open the door and pour in a suitable amount of detergent
pollution.
(see Measuring out the detergent.)
4. Load the racks
(see Loading the racks)
and close the door.
The amount can be adjusted to the soil level.
5. Select the wash cycle in accordance with the type of
In the case of normally soiled items, use approximately either
crockery and its soil level
(see Table of wash cycles)
by
25g (powder detergent) or 25ml (liquid detergent). If tablets
pressing the P button.
are used, one tablet will be enough.
6. Select the wash options*
(see Options).
If the crockery is only lightly soiled or if it has been rinsed
7. Press the Start/Pause button to start the cycle (fixed light):
with water before being placed in the dishwasher, reduce
a long beep signals the start of the wash cycle, the cycle
the amount of detergent used accordingly.
indicator lights up and the display shows the cycle number
For good washing results also follow the instructions shown
and the time remaining until the end of the cycle.
on the detergent box.
8. Two short beeps and one long beep indicate the end of the
wash cycle, the Start/Pause button switches off and the word END
For further questions please ask the detergent producers.
appears on the display. Switch off the appliance by pressing
Open the detergent dispenser using button D and measure out
the ON/OFF button.
the detergent according to the Table of wash cycles:
9. Wait for a few minutes before removing the crockery - to
• powder or liquid: compartments
avoid burns. Unload the racks, beginning with the lower level.
A (wash detergent) and B (pre-
wash detergent)
The machine will switch off automatically during long
• tablets: when the cycle requires
periods of inactivity in order to minimise electricity
1 tablet, place it in compartment A
consumption.
and close cover C; when it requires
AUTO WASH CYCLES*: some models of dishwasher are
2 tablets, place the second tablet
equipped with a special sensor which can be used to assess
on the bottom of the appliance.
the level of soiling and automatically select the most efficient and
Remove detergent residues from
economic wash cycle accordingly. The duration of the auto wash
the edges of the compartment and close cover C until it clicks.
cycles may vary due to the operation of the sensor.
The detergent dispenser automatically opens up at the right time
according to the wash cycle.
Changing a wash cycle in progress
If all-in-one detergents are used, we recommend using the TABS
If a mistake was made in the wash-cycle selection process, it is
option, because it adjusts the cycle so that the best washing and
possible to change the cycle provided that it has only just begun:
drying results are always achieved.
Once the wash cycle has started, in order to change the wash
Only use detergent which has been specifically designed
cycle switch off the machine by pressing and holding the ON/
OFF/Reset button. Switch it back on using the same button and
for dishwashers.
select the desired wash cycle and options.
DO NOT USE washing up liquid.
Using excessive detergent may result in foam residues
Adding extra crockery
remaining in the machine after the cycle has ended.
Press the Start/Pause button and open the door, taking care to
avoid the escaping steam. Then place the crockery inside the
To achieve the best washing and drying results, the combined
dishwasher. Press the Start/Pause button: The cycle will start
use of detergent, rinse aid liquid and refined salt is required.
again after a long beep has been emitted.
We recommend using detergents that do not contain
phosphates or chlorine, as these products are harmful
If the delayed start has been set, at the end of the countdown
to the environment.
the wash cycle will not start. It will stay in Pause mode.
Press the Start/Pause button to pause the machine; the wash
cycle is stopped.
At this stage the wash cycle cannot be changed.
Accidental interruptions
If the door is opened during the wash cycle or there is a power
cut, the cycle stops. It starts again from the point at which it
was interrupted once the door has been shut or the electricity
supply restored.
* Only available in selected models.
13
Оглавление
- Installation
- Description of the appliance
- Loading the racks
- Wash cycles
- Special wash cycles and Options
- Care and maintenance
- Troubleshooting
- Установка
- Описание изделия
- Регенерирующая соль и Ополаскиватель
- Загрузите корзины
- Моющее средство и использование посудомоечной машины
- Программы
- Специальные программы и Допольнительные функции
- Техническое обслуживание и уход
- Неисправности и методы их устранения
- Сервисное обслуживание
- Орнату
- Құрылғы сипаттамасы
- Тазаланған тұз және шаюға көмекші зат
- Тартпаларды жүктеу
- Жуғыш зат пен ыдыс жуу машинасын қолдану
- Жуу циклдары
- Арнайы жуу циклдары мен опциялары
- Күтім көрсету және техникалық қызмет көрсету
- Ақаулықтарды жою


