Vitek VT-3539: Step 2: Receiver settings SYNCHRONIZING THE OUTDOOR TEMPERATURE READING Auto-detect function: Manual learning function (Search for remote sensor signals):
Step 2: Receiver settings SYNCHRONIZING THE OUTDOOR TEMPERATURE READING Auto-detect function: Manual learning function (Search for remote sensor signals):: Vitek VT-3539
Table of contents
- WEATHER STATION USER INSTRUCTIONS Features: Block with main display:
- Remote sensors: OPERATING CONTROLS
- READ BEFORE USING For best results: GETTING STARTED Step 1: Setting up the remote sensor:
- Step 2: Receiver settings SYNCHRONIZING THE OUTDOOR TEMPERATURE READING Auto-detect function: Manual learning function (Search for remote sensor signals):
- SETTING THE TIME AND ALARM Setting the time:
- WEATHER CONDITIONS DISPLAY
- Hi and Lo symbols on the display Temperature trend indicator The temperature trend indicator shows the temperature trend registered by a separate sensor over the past half-hour. TEMPERATURE CONDITIONS REPORT Temperature conditions reporting symbols Black ice warning
- TEMPERATURE ALARM SETTINGS High temperature alarm Low temperature alarm When the alarm will be heard
- BACKLIGHT USING AN EXTERNAL WIRED SENSOR LOW BATTERY INDICATOR Receiver:
- Remote sensor:
- RESOLVING MALFUNCTIONS Problem Resolution
- TECHNICAL CHARACTERISTICS Meteorological station receiver Meteorological station remote sensor MINIMUM SERVICE LIFE - 3 YEARS
ENGLISH
6. The temperature and humidity readings will appear on the display.
7. Switch from °F to °C by pressing the C/F button.
After these remote sensor settings have been completed, it will begin to transmit
weather data once per minute.
• If your meteorological station registers signals from neighboring sources, choose a
different house code.
• Factory default settings: house code = 01, channel = 01
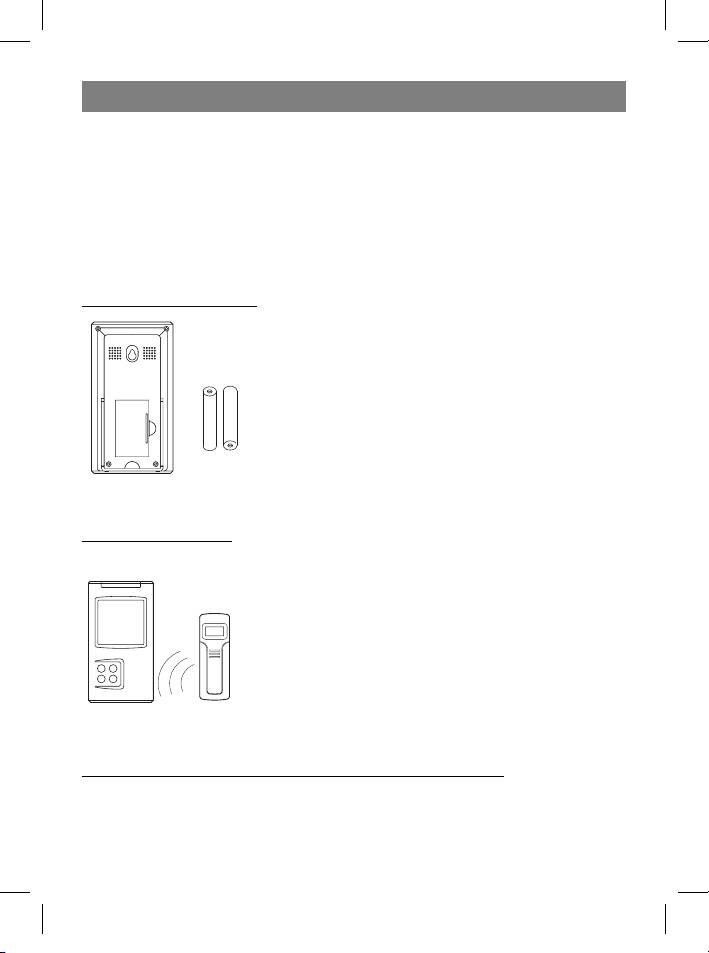
Step 2: Receiver settings
8. Remove the lid from the battery compartment and, ac-
cording to correct polarity, install two AA batteries. Close
the battery compartment lid.
SYNCHRONIZING THE OUTDOOR TEMPERATURE READING
Auto-detect function:
1. After installing batteries in the receiver, activate the auto-
detect function, which should take about 3 minutes.
2. During these 3 minutes, the receiver will emit an audible
signals and display it once received the data from sensors.
• If no signal is received during the 3 minutes, the outdoor
temperature will be displayed as “- - -”. If this happens,
try installing all of the units closer together, or in different
places; run the auto-detect function again – remove the
batteries from the receiver and then insert them again.
Manual learning function (Search for remote sensor signals):
If a new sensor is added or if the signal is lost from an existing sensor (the outdoor tem-
perature on the display will blink), the detection function must be completed again.
5
35391.indd 535391.indd 5 23.05.2006 17:08:5123.05.2006 17:08:51


