Zelmer 616 – страница 7
Инструкция к Пылесосу Zelmer 616
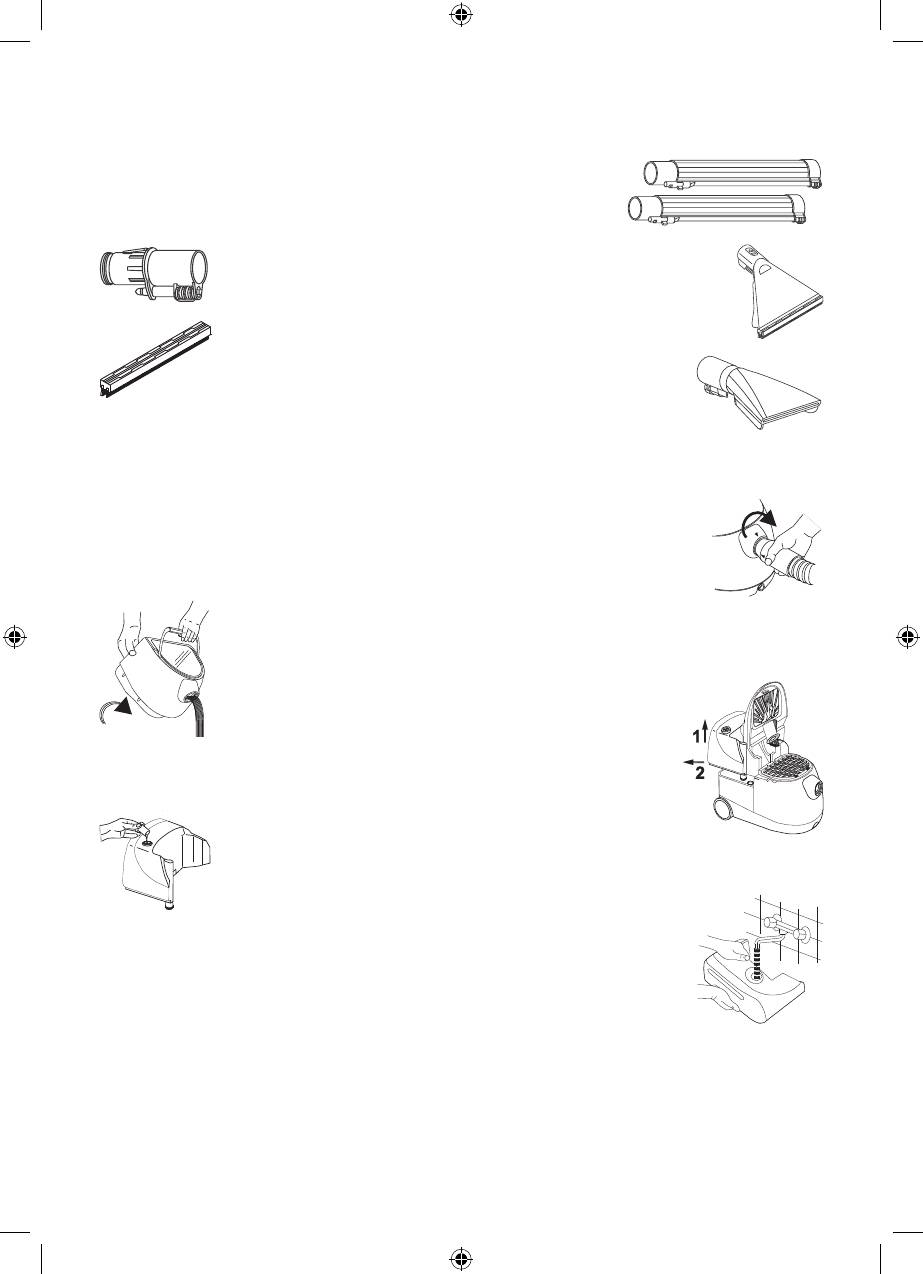
3. Slide – used to adjust the suction by uncovering or covering the hole under the slide.
ATTENTION!!! While collecting liquids, wet or steam cleaning the slide should cover the hole
completely.
Extension tubes (detergent/steam) connect the hose (detergent/steam)
with a proper nozzle through (or without) a connector. Depending on the
particular application and the height of the user one or two extension tubes
can be used.
Connector – is used to connect the tube (detergent/steam) only with
a big or small spray nozzle.
Big spray nozzle – shall be used to
collect water or for wet cleaning.
Cleaning insert – is installed in the big spray nozzle.It is used to
collect water from hard backgrounds, e.g.parquet fl oors, linoleum,
ceramic tiles, etc.and to perform wet cleaning.
Small spray nozzle – shall be used wet cleaning the upholstery, e.g.on chairs,
armchairs, beds, car seats, etc.
Preparation of the vacuum cleaner to wet cleaning
Prior to wet cleaning thoroughly vacuum the area and prepare the vacuum cleaner.To do this:
Switch the vacuum cleaner off by pressing the main switch and remove the plug –
from the socket.
Turn the hose until the ▼ symbols on the hose and the container are located –
opposite to each other.Remove the hose from the slot.
Open the upper cover and remove the front container. –
Take the water fi lter out of the container. –
Remove the dust collected in the fi ltration chamber or remove a paper bag. –
Remove the dirty water from the container and rinse the container. –
Insert the water fi lter to the container without a paper bag and a fi ltering insert. –
Place the container on the base and close the upper cover. –
Then, follow the instructions given in the p.“Collecting liquids” –
on how to install the hose, extension tubes, connector, spray
nozzles and the stub.
Then:
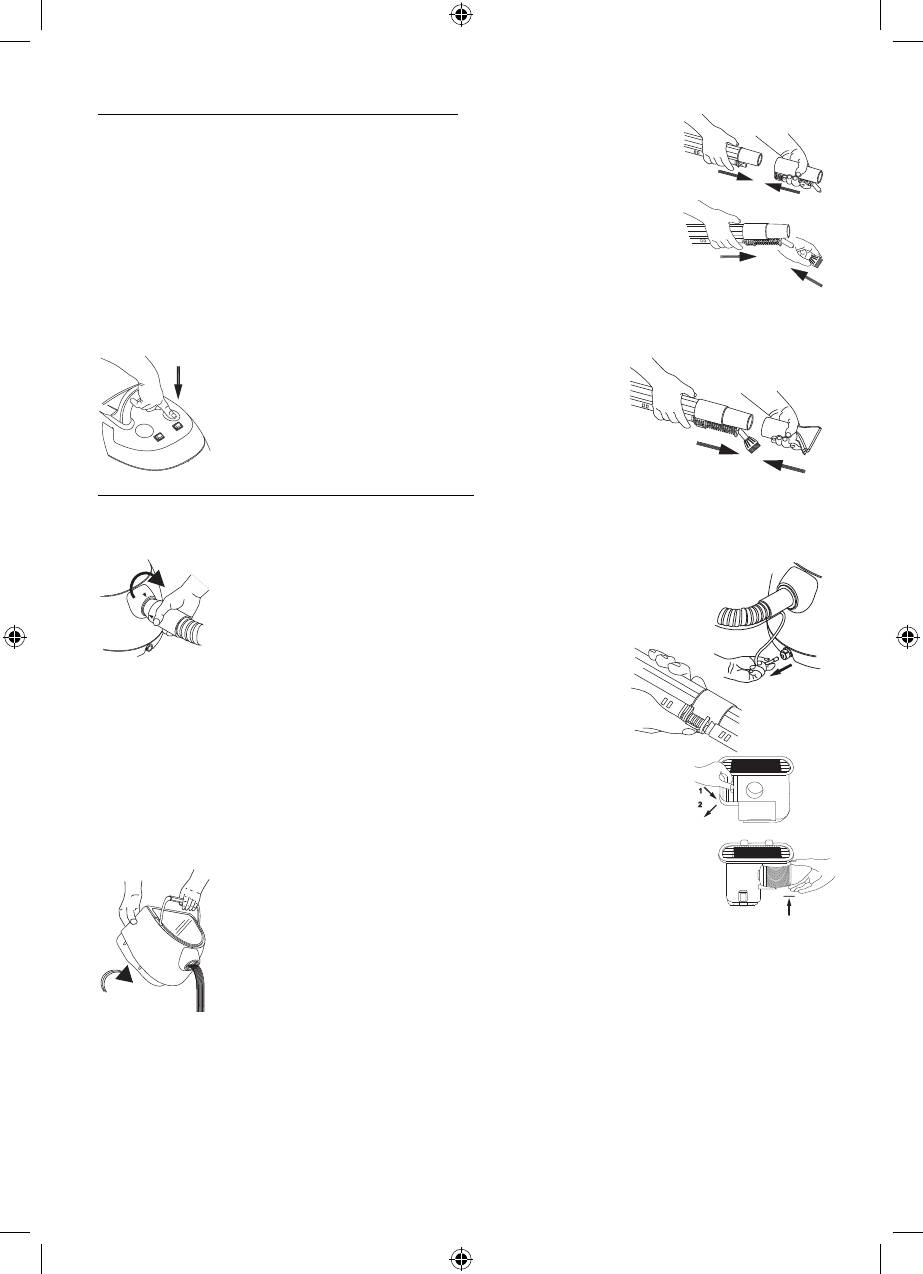
Uninstall the rear container: –
open the upper cover and set it vertically ( – 1),
lift the container and then move it backwards ( – 2).
Remove the inlet cap and pour a cleaning agent (powder or fl uid) into the container. –
The amount of the agent is given on the label:
Powder – preparation of the cleaning solution: in a separate –
container dissolve the contents of the bag in 2.5 – 3l of water
(temp.of up to 45°C).
Fluid: pour a measured amount of the fl uid into the rear –
container.1 bottle cap of the liquid per 3.5l of water.
Depending on the cleaning agent chosen, fi ll up the rear container with the –
solution or warm water (up to 45°C).
Put the inlet cap in place. –
ATTENTION!!! The vacuum cleaner is equipped with only one type of the cleaning agent.
121
instrukcja 616-010.indb 121instrukcja 616-010.indb 121 2008-09-18 16:03:192008-09-18 16:03:19

ZELMER S.A. guarantee a good cleaning effect and a proper operation of the vacuum cleaner only if the
cleaning agents approved by ZELMER S.A. are used in a proper amount
as indicated on the label:
“DYWANOPUC” powder manufactured by OKTIMA, Poland. –
“CARPEX” fl uid manufactured by ASTRA POLLEN , Poland. –
“FOUNTAINHEAD” fl uid manufactured by Butcher’s, USA. –
Set the container in place and pres it to ensure it is properly fi xed to the –
vacuum cleaner.
Close the upper cover. –
DEEP CLEANING THE CARPETS
Prior to cleaning the carpet check the colour fastness.
Put a small amount of the cleaning agent (powder solution or fl uid) on a white cloth and clean the carpet
in a place, which is not well visible.If the cloth turns coloured, it means that the colour fastness is very low
and the carpet cannot be cleaned in this way.
To avoid foaming use n antifoaming agent recommended by ZELMER S.A. Follow the instructions given
on the label:
“G 478 Entschäumer D” manufactured by BUZIL, Germany. –
”FOAM-FRE” provided by Butcher’s, USA. –
ATTENTION !!! The vacuum cleaner is equipped with only one type of an antifoaming agent.
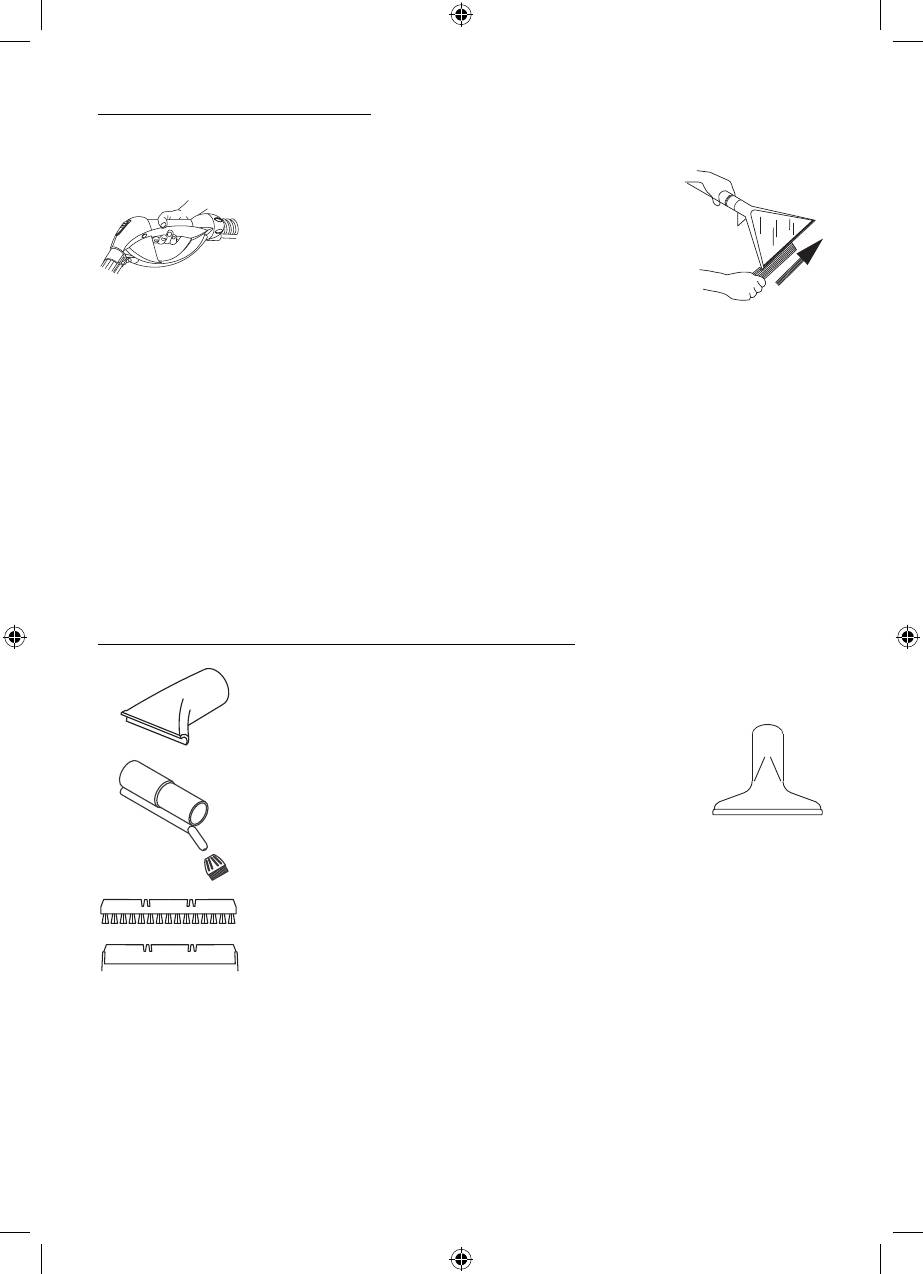
Remove the collecting insert from the nozzle. –
Find the direction of the nozzle manoeuvres, which –
ensures least resistance.
Set the three-position switch ( – 1) to “2” – the pump in
the rear container takes water with detergent, which is
signalled by the indicator (5).
Start the vacuum cleaner by pressing the main switch ( – 2).
ATTENTION!!! The pump can be started only if there is
water in the rear container. Otherwise
the pump will generate noise.
Press the button on the hose grip to adjust the water –
infl ow to the nozzle.
Move the nozzle on the carpet back and forth. –
ATTENTION!!! If you fi nd that despite the pump is running the nozzle does not spray any water,
check if the rear container is fi xed properly (press it, if necessary) and the hose
stub sits fi rmly in the valve in the base. If you have diffi culties, wet the rear
container slot and the stub gasket.
Clean the carpet in such a way that during cleaning and once you have completed cleaning you do not –
step on the area you have just cleaned.
ATTENTION!!! Do not spray the cleaning agent in the same place for too long time as you can get
the carpet soaked through.
Upon cleaning a part of the carpet, stop spraying and let it dry with back-and-forth moves of the nozzle. –
Repeat until the whole carpet area dries up.
Once you have completed spraying turn off the pump (set the three-position switch ( – 1) from “2” to “0”)
and press the button on the hose grip to adjust the water fl ow to the nozzle to “release the pressure”.
In case of aggravated or hardly removable dirt apply a washing agent recommended by ZELMER
S.A. until foam appears. Leave it for a few minutes and remove it with the vacuum cleaner.
ATTENTION!!! Do not allow the carpet to get soaked through. This may result in a permanent
deformation (corrugation).
122
instrukcja 616-010.indb 122instrukcja 616-010.indb 122 2008-09-18 16:03:202008-09-18 16:03:20
CLEANING SMOOTH FLOORS
Place the collecting insert in the nozzle. –
Set the three-position switch ( – 1) to “2” and turn the vacuum cleaner on (as in
case of deep cleaning the carpets).
Press the button on the hose grip to adjust the water –
infl ow to the nozzle.
ATTENTION!!! In case of the spray nozzle gets
clogged disconnect the nozzle from
the extension tube and clean (blow
through) the duct or replace the
nozzle jet. A complete set of spare
jets is provided.
Replacement of jets
1. Remove the jet with a ø 5.6x1 rubber ring from the big spray nozzle, press the jet downwards with your
thumb as indicated on the nozzle.
2. Wet a new jet and a rubber ring and press it into the slot in the nozzle until you hear a click.
Move the nozzle on the cleaned area back and forth. –
Upon cleaning a part of the fl oor, stop spraying (set the three-position switch ( – 1) from “2” to “0”) and
suck the liquid in through moving the nozzle slowly towards you until the cleaning solution is removed
from the fl oor.
Repeat this operation until the entire fl oor is cleaned and dries up. –
Once you have completed spraying turn off the pump (set the three-position switch ( – 1) from “2” to “0”)
and press the button on the hose grip to adjust the water fl ow to the nozzle to “release the pressure”.
ATTENTION !!! If you performed a wet cleaning (removing wet contamination), just before
fi nishing your work suck in about 1-2 litres of pure water to rinse the hose and the
extensions tubes and then suck in the air to dry them.
STEAM CLEANING – Accessories for steam cleaning
In case of steam cleaning use only the equipment listed below:the detergent/
steam hose, the detergent/steam extension pipes, a big spray nozzle,
a suction nozzle, a brush and a connector.
The suction nozzle – is used to collect water from fl oor
coverings, carpets and fl oors.
The brush – together with the connector and the suction
nozzle, facilitates cleaning tile joints, crevices, upholstery on
armchairs and seats, etc.
The steam spray nozzle – is used to wash carpets, to clean smooth areas, walls,
tiles and to collect water from them.
The cleaning insert – is fi xed to the steam spray nozzle.It facilitates cleaning and
scrubbing smooth surfaces, walls and coverings.
The collecting insert – is fi xed to the steam spray nozzle.It facilitates cleaning
windows, smooth surfaces, walls, tiles in bathrooms and to collect water from
fl oors.
Work in a steam cleaning mode
Prior to steam cleaning check (in a place which is not visible well) if the material to be cleaned is resistant
to temperature, e.g.:
leather or lacquered wood may fade out, –
unprotected wood may swell, –
protective wax layers may peel off, –
plastics may suffer from deformation, –
plastic cloths, velvet, acryl may be damaged. –
123
instrukcja 616-010.indb 123instrukcja 616-010.indb 123 2008-09-18 16:03:202008-09-18 16:03:20

Preparation of the vacuum cleaner for steam cleaning
To prepare a saline solution use 3.5l of demineralized (distilled) water with 5g of table salt (1/2 level
teaspoon) or 5 ml of physiological salt (available in drugstores). Do not use salt every time. Use salt to
every third-fi fth water tank.
Do not add salt to tap water.
ATTENTION!!! It is much better to use pure (distilled) water to prevent build-up of scale in the
steam generator.
Put the inlet cap into the slot on the rear container. –
Set the container in place and press it to fi x it fi rmly to the body. –
close the upper cover. –
ATTENTION!!! DO NOT LEAVE THE APPLIANCE READY TO CLEAN (THE STEAM GENERATOR IS
ON) FOR MORE THAN 30 MINUTES.
STEAM CLEANING SMOOTH SURFACES
To use the vacuum cleaner for steam cleaning the glaze, windows, mirrors and other glass surfaces you
should:
attach the steam spray nozzle on the detergent/steam –
extension pipe and lock this joint by turning the blockade,
depending on the amount of dirt fi x the proper insert –
(collecting or cleaning) to the nozzle.
Set the three-position ( – 1) switch to“1”.
Wait until the steam cleaning indicator ( – 4) is on and turn
on the steam exhaust switch (3) for 5 seconds, which will
then light up.The pressure inside the steam generator
will be released.
After this time turn the switch off. –
Wait until the steam cleaning indicator ( – 4) lights up again (indicating that the appliance is ready to
work) and turn on the steam exhaust switch (3).
ATTENTION!!! To avoid cracks on windows, mirrors and other glass surfaces located in cold
(non-heated) rooms and resulting from too big difference of temperature, fi rst heat
these surfaces with a small amount of steam and then begin standard cleaning.
Press the button on the hose grip to adjust the water infl ow to the nozzle. –
The presence of water at the end of the nozzle while starting the stem
cleaning mode is typical.
Move the nozzle on the cleaned area back and forth. The time and intensity of –
cleaning depends on the amount of dirt and the type of the background.
The amount of water in the rear container may be not enough to clean the entire area. Therefore, when –
all water in the container is used up, refi ll the container, switch on the wet cleaning (detergent) mode
and switch it back to the steam cleaning mode when water appears on the nozzle outlet.
Upon cleaning a part of the fl oor, stop spraying, turn the vacuum cleaner on and suck in the liquid –
created by condensing steam. To do this move the nozzle slowly towards you until the liquid is removed
from the fl oor. Repeat this operation until the entire surface is cleaned and dries up.
If the three-position switch (1) is set to "1” (steam cleaning) and you want to change it to the “wet
cleaning” mode (“2”), you have to move the switch to the neutral “0” fi rst and then to “2”. Never
switch the three-position switch from “1” to “2” directly.
ATTENTION!!! Never switch the three-position switch from „1” to „2” directly with the omission
of the neutral “0”.
Once you have completed spraying turn off the pump (set the three-position switch ( – 1) to “0” – the
picture on p.3) and press the button on the hose grip to adjust the water fl ow to the nozzle to “release
the pressure”.
124
instrukcja 616-010.indb 124instrukcja 616-010.indb 124 2008-09-18 16:03:202008-09-18 16:03:20
STEAM CLEANING VERY DIRTY AREAS
Prior to any replacement of the accessories wait until all the components cool
down.
The following mode is recommended to clean joints between tiles, oven windows,
cookers and hoods. It can be also applied to clean kitchen sinks, wash-basins and
sanitary equipment.
The time and intensity of cleaning depends on the amount of dirt.
In order to do this:
attach the connector and the steam spray nozzle on the detergent/steam –
extension pipe and lock this joint by turning the blockade,
if you have problems with removing dirt install the brush at the nozzle tip. –
ATTENTION!!! The brush is hard bristle and may scratch soft surfaces when subject to a direct
contact
set the three-position switch ( – 1) to “1”,
proceed as in case of steam cleaning the smooth –
surfaces except for that upon spraying is stopped
and before the liquid is sucked in you should attach
the suction nozzle to the connector.
WHEN YOU HAVE FINISHED VACUUMING
Switch the vacuum cleaner off by pressing the main switch and remove the plug from the socket. –
ATTENTION!!! Wait until the hose, the nozzles, the tubes and the nozzle jets cool down. Then,
disconnect them.
Turn the hose until the ▼ symbols on the hose and the –
container are located opposite to each other. Remove the
hose from the slot.
Press the red button in vacuum cleaner base and remove the –
hose stub.
Unlock the blockade and disconnect the extension pipes.similarly, –
disconnect the hose and the nozzle.
Take the water fi lter out of the container. –
Remove the foam fi lter from the water fi lter and rinse it with running –
water with the water stream moving from the inner side of the foam.
ATTENTION!!! Do not wash the fi ltering inserts manually (squeezing) or with
a washing machine.Avoid folding, pulling and deformations.
Having cleaned the foam let it dry either unwrapped or
hanged.
Never dry the foam on heaters, radiators, ovens, etc.
Remove the dirty water from the container through the slot. –
Wash the container and the water fi lter thoroughly, repeat this –
operation a number of times using fresh water each time.
Then, thoroughly wash all vacuum cleaner components used (hose, tubes, –
accessories).
ATTENTION!!! Failure to wash these components thoroughly may affect the
fi ltering capacity of the inserts and foam and may contribute to
proliferation of bacteria and saprophytes.
Dry all the components. –
ATTENTION!!! Never assemble the vacuum cleaner before all components dry.
IInert the water fi lter, set the container in place and close the upper cover. –
125
instrukcja 616-010.indb 125instrukcja 616-010.indb 125 2008-09-18 16:03:212008-09-18 16:03:21
FILTER REPLACEMENT
In the course of the operation the inlet and exhaust air fi lters get dirty. To ensure proper operation of the
vacuum cleaner it is recommended to rinse the inlet fi lter frequently. A very dirty or damaged inlet fi lter has
to be replaced with a new one.
Inlet fi lter
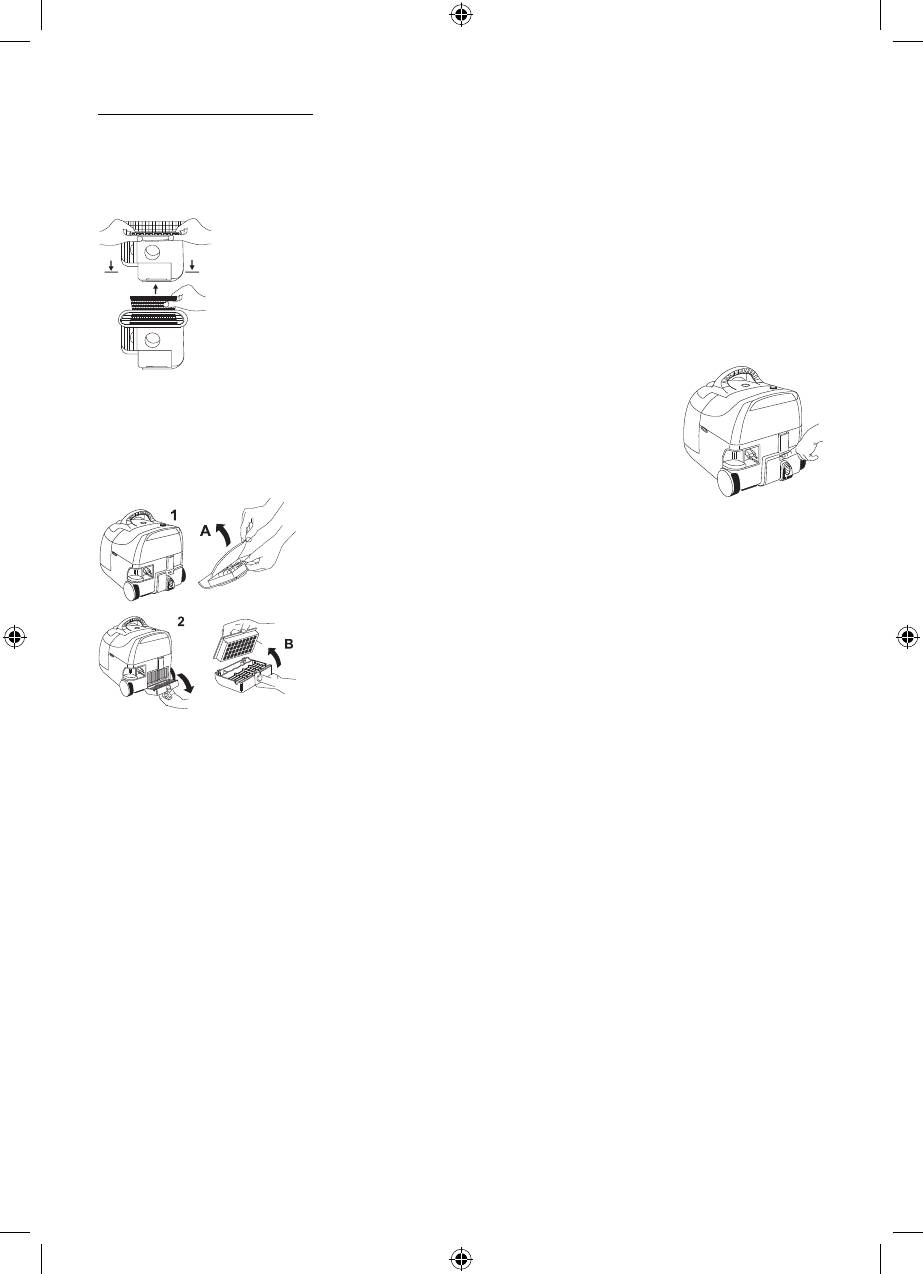
Open the upper cover and set it to a vertical position. –
Seize the top edge of the fi lter with your fi ngers and pull it slightly towards you until –
it pulls out from the clamps.
Rotate the frame, take the fi lter out, rinse it with running water wringing it out slightly, –
dry it and set in place (or replace with a new one).
Position the new fi lter thoroughly so that the frame edges stick tightly to the rim of –
the fi lter.
Close the cover. –
Exhaust air fi lter
The exhaust air fi lter should be replaced upon about 30 hours of operation
(6 months) or earlier in case it gets very dirty.
Press the blockade and open the exhaust cover. –
Replace the fi lter – (1 and 2):
Model: 616.*E – Fig.A – Electrofi lter
Position the new fi lter thoroughly so that the frame edges stick tightly to
the rim of the fi lter.
Model: 616.*S – Fig.B – HEPA Filter cartridge
Upon going though the turbines this foam condenses then on the exhaust fi lter. To avoid this you
should add an anti-foam agent recommended by ZELMER S.A. to the front container and to turn on
the vacuum cleaner (without the front container) for a few minutes to let the suction system dry.
The exhaust air fi lter shall always be replaced with a genuine brand-new one.
126
instrukcja 616-010.indb 126instrukcja 616-010.indb 126 2008-09-18 16:03:212008-09-18 16:03:21
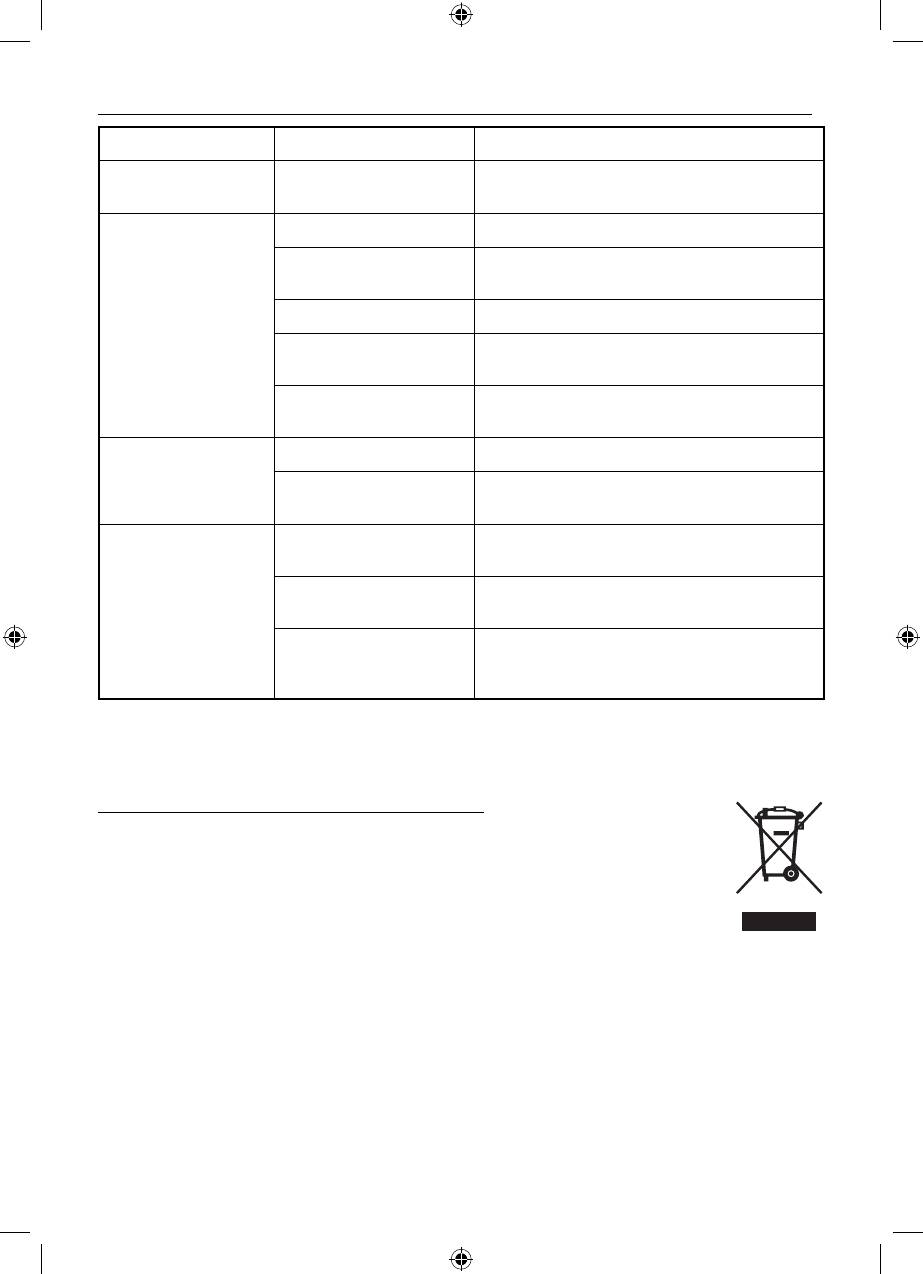
PROBLEMS, WHICH MAY OCCUR WHILE OPERATING THE VACUUM CLEANER
Problem Possible cause Solution
1. The vacuum cleaner
No power supply. Check the mains cable and the slot.
does not work.
The steam generator is off. Check if the three-position switch (1) is set to 1.
The rear container is
Fill the rear container with water.
empty.
2. Steam is not
Steam is not ready yet. Wait until the steam cleaning lamp (4) is on.
generated (1)
The rear container
Make sure that the rear container sits fi rmly in
assembled improperly.
the base.Press it down, if necessary.
No isotonic saline solution
Dissolve 5g of table salt (1/2 teaspoon) or 5ml of
or table salt in water.
isotonic saline solution in water (rear container).
Steam is not ready yet. Wait until the steam cleaning lamp (4) is on.
3. Water appears
instead of steam
No isotonic saline solution
Dissolve 5g of table salt (1/2 teaspoon) or 5ml of
or table salt in water.
isotonic saline solution in water (rear container).
No water in the rear
Fill the rear container with water.
container.
4. The pump works
The rear container
Make sure that the rear container sits fi rmly in
very loudly and
assembled improperly.
the base.Press it down, if necessary.
continuously
Set the three-position switch 1 to 2 and wait until
Air pocket in the pump.
water comes out of the nozzle jet.Then, set the
three-position switch 1 back to 1.
( – 1) Check when the steam exhaust switch is on.
ATTENTION!!! All other failures detected, such as leakage of water or steam from the vacuum
cleaner, should be repaired by an authorized service centers only.
ECOLOGY – ENVIRONMENT PROTECTION
Each user can protect the natural environment. It is neither diffi cult nor expensive.
In order to do it: put the cardboard packing into recycling paper container; put the
polyethylene (PE) bags into container for plastic.
When worn out, dispose the appliance to particular disposal centre, because of the
dangerous elements of this appliance, which can be hazardous for natural environment.
Do not dispose into the domestic waste disposal!!!
127
instrukcja 616-010.indb 127instrukcja 616-010.indb 127 2008-09-18 16:03:212008-09-18 16:03:21

616-010
instrukcja 616-010.indb 128instrukcja 616-010.indb 128 2008-09-18 16:03:212008-09-18 16:03:21


