Hotpoint-Ariston C 34S N1 R/HA: St a rt - u p an d us e
St a rt - u p an d us e: Hotpoint-Ariston C 34S N1 R/HA
1
9
G
B
U
s
i
n
g
t
he h
o
b
Li
gh
ti
n
g
t
he
b
ur
n
ers
For each BURNER knob there is a complete ring
showing the strength of the flame for the relevant
burner.
To light one of the burners on the hob:
1. Bring a flame or gas lighter close to the burner.
2. Press the BURNER knob and turn it in an
anticlockwise direction so that it is pointing to the
ma
x
imum flame setting
-
.
3. Adjust the intensit
y
of the flame to the desired
level b
y
turning the BURNER knob in an
anticlockwise direction. This ma
y
be the minimum
setting
+
, the ma
x
imum setting
-
or an
y
position in
between the two.
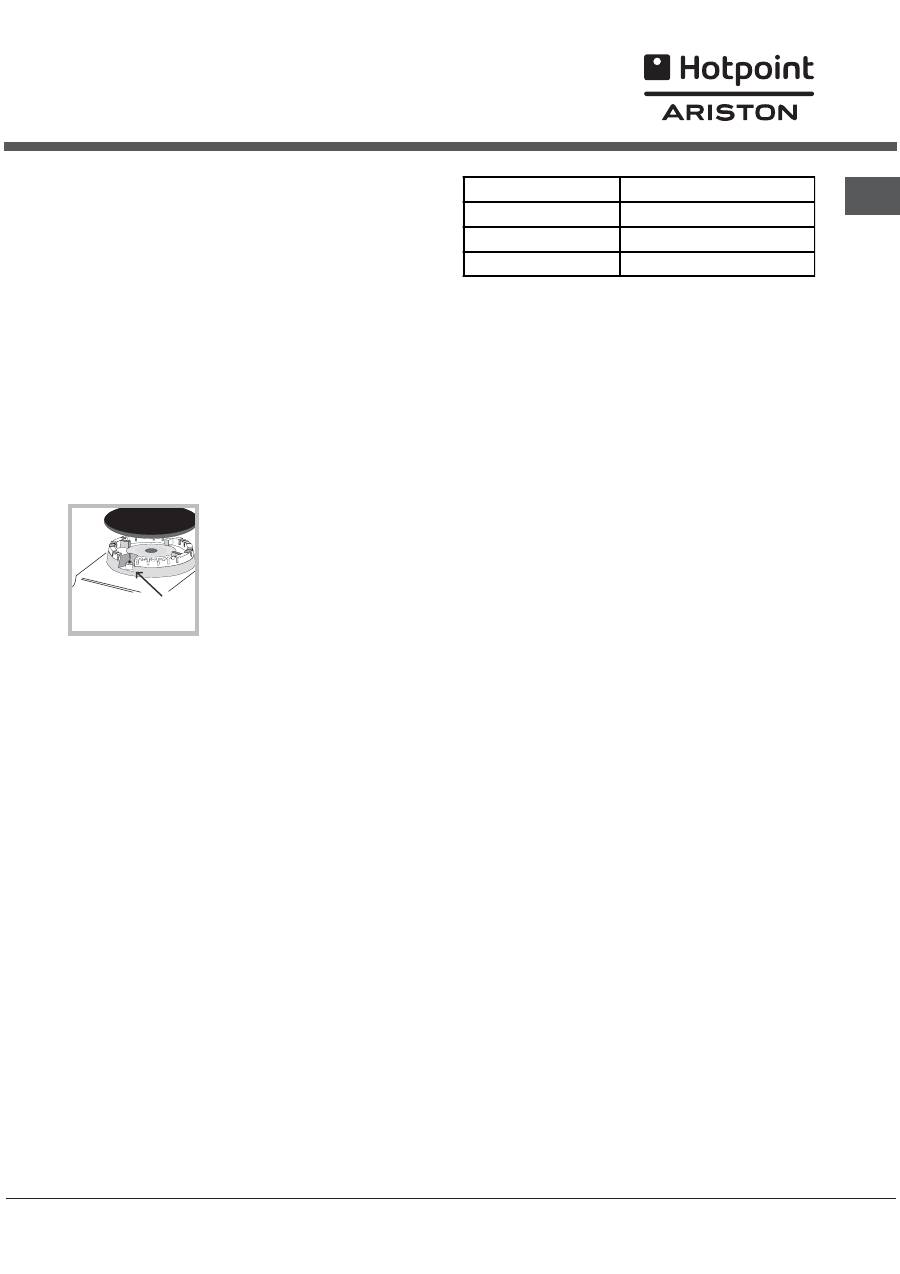
If the appliance is fitted with
an electronic lighting device*
(
see figure
), press the ignition
button, marked with the
s
y
mbol XXX, then hold the
BURNER knob down and turn
it in an anticlockwise direction,
towards the ma
x
imum flame
setting, until the burner is lit. The burner ma
y
be
e
x
tinguished when the knob is released. If this
occurs, repeat the operation, holding the knob down
for a longer period of time.
If the flame is accidentall
y
e
x
tinguished, switch off
the burner and wait for at least 1 minute before
attempting to relight it.
If the appliance is equipped with a flame failure
safet
y
device*, press and hold the BURNER knob for
appro
x
imatel
y
2-3 seconds to keep the flame alight
and to activate the device.
To switch the burner off, turn the knob until it reaches
the stop position .
Pr
a
c
t
i
c
a
l
a
dv
i
ce
on
us
i
ng
t
he
b
urners
For the burners to work in the most efficient wa
y
possible and to save on the amount of gas
consumed, it is recommended that onl
y
pans that
have a lid and a flat base are used. The
y
should also
be suited to the size of the burner.
To identif
y
the t
y
pe of burner, please refer to the
diagrams contained in the Burner and nozzle
specifications.
St a rt - u p an d us e
U
s
in
g
t
h
e
o
v
en
The first time
y
ou use
y
our appliance, heat the
empt
y
oven with its door closed at its ma
x
imum
temperature for at least half an hour. Ensure that the
room is well ventilated before switching the oven off
and opening the oven door. The appliance ma
y
emit
a slightl
y
unpleasant odour caused b
y
protective
substances used during the manufacturing process
burning awa
y
.
Before operating the product, remove all plastic film
from the sides of the appliance.
1. Select the desired cooking mode b
y
turning the
SELECTOR knob.
2. Select the recommended temperature for the
cooking mode or the desired temperature b
y
turning
the T
H
ERMOSTAT knob.
A list detailing cooking modes and suggested
cooking temperatures can be found in the relevant
table (
see Oven cooking advice table
).
During cooking it is alwa
y
s possible to:
Change the cooking mode b
y
turning the
SELECTOR knob.
Change the temperature b
y
turning the
T
H
ERMOSTAT knob.
Set the total cooking time and the cooking end
time (
see below
).
Stop cooking b
y
turning the SELECTOR knob to
the 0 position.
Never put objects directl
y
on the bottom of the
oven; this will avoid the enamel coating being
damaged. Onl
y
use position 1 in the oven when
cooking with the rotisserie spit.
Alwa
y
s place cookware on the rack(s) provided.
*
Onl
y
available in certain models.
Burner
ø Cookware diameter (cm)
Fast (R)
24 - 26
Semi Fast (S)
16 - 20
Auxiliary (A)
10 - 14
2
0
G
B
TH
E
RM
O
STAT
i
nd
i
c
a
t
or
l
i
gh
t
When this is illuminated, the oven is generating
heat. It switches off when the inside of the oven
reaches the selected temperature. At this point the
light illuminates and switches off alternatel
y
,
indicating that the thermostat is working and is
maintaining the temperature at a constant level.
O
ven
l
i
gh
t
This is switched on b
y
turning the SELECTOR knob
to an
y
position other than 0. It remains lit as long
as the oven is operating. B
y
selecting
&
with the
knob, the light is switched on without an
y
of the
heating elements being activated.
C
oo
ki
n
g m
o
des
A temperature value can be set for all cooking
modes between 50°C and MAX, e
x
cept for the
GRILL programme, for which onl
y
the MAX power
level is recommended.
=
STATIC
OVE
N
mode
Both the top and bottom heating elements will come
on. When using this traditional cooking mode, it is
best to use one cooking rack onl
y
. if more than one
rack is used, the heat will be distributed unevenl
y
.
O
O
VE
N
B
O
TT
OM
mode
The lower heating element is activated. This position
is recommended for perfecting the cooking of
dishes (in baking tra
y
s) which are alread
y
cooked on
the surface but require further cooking in the centre,
or for desserts with a covering of fruit or jam, which
onl
y
require moderate colouring on the surface. It
should be noted that this function does not allow the
ma
x
imum temperature to be reached inside the oven
(250°C) and it is therefore not recommended that
foods are cooked using onl
y
this setting, unless
y
ou
are baking cakes (which should be baked at a
temperature of 180°C or lower).
?
GRI
LL
mode
The top heating element is activated. The e
x
tremel
y
high and direct temperature of the grill makes it
possible to brown the surface of meats and roasts
while locking in the juices to keep them tender.
D
O
U
B
LE
GRI
LL
mode
The top heating element and the rotisserie spit will
be activated. The grill is also highl
y
recommended
for dishes that require a high surface temperature:
beef steaks, veal, rib steak, fillets, hamburgers
etc...
The GRILL and DOUBLE GRILL cooking modes must
be performed with the oven door shut.
T
i
mer
*
To activate the Timer proceed as follows:
1. Turn the TIMER knob in a clockwise direction
"
for almost one complete revolution to set the buzzer.
2. Turn the TIMER knob in an anticlockwise direction
#
to set the desired length of time.
Ro
t
i
sser
i
e
To operate the rotisserie (
see diagram
) proceed as
follows:
1. Place the dripping
pan in position 1.
2. Place the rotisserie
support in position 4
and insert the spit in
the hole provided on
the back panel of the
oven.
3. Activate the
rotisserie b
y
selecting
with the SELECTOR
knob.
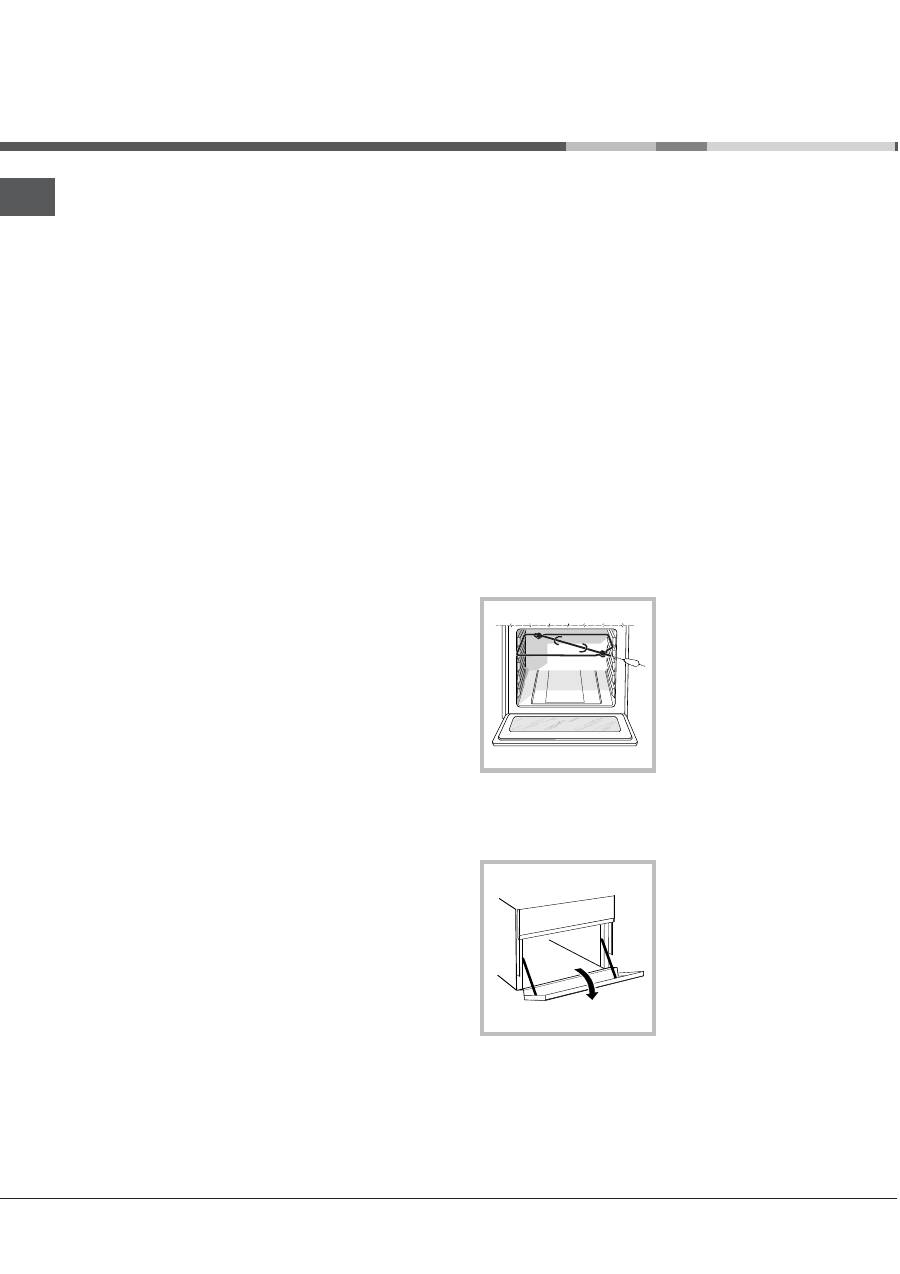
L
o
w
er
comp
a
r
t
men
t
*
There is a compartment
underneath the oven
that ma
y
be used to
store oven accessories
or deep dishes. To open
the door pull it
downwards (
see
figure
).
The internal surfaces of the compartment (where
present) ma
y
become hot.
Do not place flammable materials in the lower oven
compartment.
2
1
G
B
O
ve
n
c
oo
ki
n
g
a
dv
i
ce
tab
l
e
Pr
a
c
ti
c
a
l
c
oo
ki
n
g
a
dv
i
ce
In the GRILL cooking mode, place the dripping
pan in position 1 to collect cooking residues (fat
and/or grease).
GRILL
Insert the rack in position 3 or 4. Place the food in
the centre of the rack.
We recommend that the power level is set to
ma
x
imum. The top heating element is regulated
b
y
a thermostat and ma
y
not alwa
y
s operate
constantl
y
.
PIZZA
Use a light aluminium pizza pan. Place it on the
rack provided.
For a crisp
y
crust, do not use the dripping pan as
it prevents the crust from forming b
y
e
x
tending
the total cooking time.
If the pizza has a lot of toppings, we recommend
adding the mozzarella cheese on top of the pizza
halfwa
y
through the cooking process.
Cooking
modes
Foods
Weight
(in kg)
Rack
position
Preheating time
(min)
Recommended
Temperature
(°C)
Cooking
time
(minutes)
Static
Lasagne
Cannelloni
Baked pasta
Veal
Chicken
Duck
Rabbit
Pork
Lamb
Mackerel
Mackerel
Trout baked in foil
Neapolitan-style pizza
Biscuits and small cakes
Sweet unleavened flans and desserts
Savoury pies
Leavened cakes
Fruit cakes
2.5
2.5
2.0
1.7
1.5
1.8
2
2.1
1.8
1.1
1.5
1
1
0.5
1.1
1
0.5
1
2
3
3
2
3
3
3
3
3
2
2
2
2
3
3
3
3
3
5
5
5
10
10
10
10
10
10
5
5
5
15
10
10
10
10
10
200
200
200
180
200
180
180
180
180
180
180
180
220
180
180
180
160
170
45-50
30-35
30-35
60-70
80-90
90-100
70-80
70-80
70-80
30-40
30-35
25-30
15-20
10-15
25-30
30-35
25-30
25-30
Oven bottom
Perfecting cooking
Grill
Sole and cuttlefish
Squid and prawn kebabs
Cod fillet
Grilled vegetables
1
1
1
1
4
4
4
3/4
5
5
5
5
Max
Max
Max
Max
8
4
10
8-10
Veal steak
Chops
Hamburgers
Mackerel
Toast
1
1.5
1
1
4 pcs
4
4
3
4
4
5
5
5
5
5
Max
Max
Max
Max
Max
15-20
20
7
15-20
5
Double Grill
With the rotisserie spit
Spit-roast veal
Spit-roast chicken
1.0
2.0
-
-
5
5
Max
Max
70-80
70-80
Оглавление
- Inst allazione
- De scr izione d ell a pp a r e cc h io
- A vv io e ut ilizzo
- Prec a uz i on i e c on s i g l i
- Man ut enzione e cur a
- Ass i st enza
- O p e r a t in g In struct ion s
- In st alla t ion
- Descr i p t i on o f t he a ppl ia nce
- St a rt - u p an d us e
- P rec autions and tips
- C a r e an d m ain t enan c e
- Ð óêîâîäñòâî ïî ýêñïëóàòàöèè
- Ó ñ òà íîâêà
- Î ïè ñ àí è å èçäåëèÿ
- Â ê ëþ ÷ åíèå è ýê ñ ïëóà ò à ö èÿ
- Ïðåä î ñ ò î ð î æ í î ñ ò è è ðå êî ì åíäà ö èè
- Ò å õ íè ÷ å ñ êî å î á ñ ëó æ èâàíèå è ó õ î ä


")
