Nokia 5630: 1. Get started
1. Get started: Nokia 5630
1. Get started
■ Insert a (U)SIM card and battery
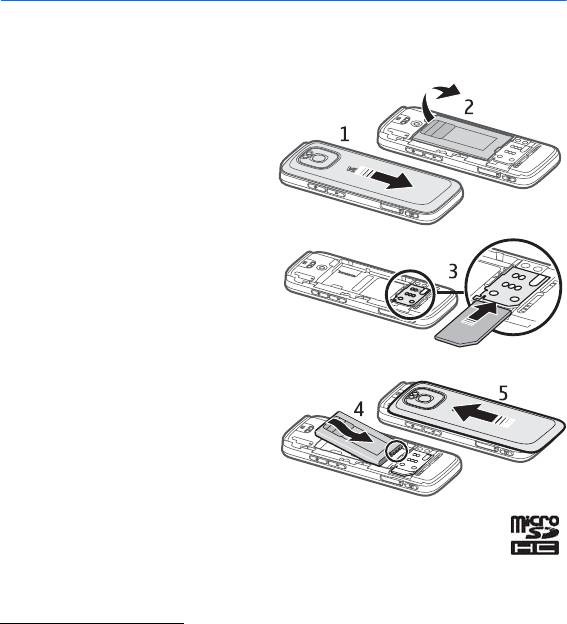
This device uses BL-4CT batteries.
1. To open the back cover of the
device, with the back of the device
facing you slide the cover toward
the bottom of the device (1), and
remove it. To remove the battery,
lift it from the end (2).
2. Slide the (U)SIM card in the SIM
card holder (3).
Make sure that the gold-coloured
contact area on the card is facing
downward on the device, and the
bevelled corner is facing downwards.
3. Replace the battery (4). Replace the
back cover (5).
■ Memory card
Use only compatible microSD and microSDHC cards approved by Nokia for use
with this device. Nokia uses approved industry standards for memory cards, but
some brands may not be fully compatible with this device. Incompatible cards
may damage the card and the device and corrupt data stored on the card.
Insert a
memory card
The memory card may be supplied with the device, and may already be inserted.
Get started
9
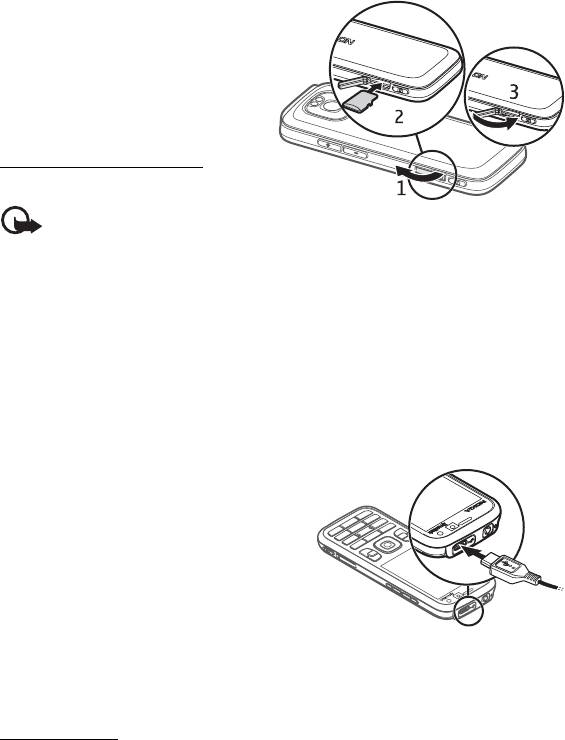
1. Open the memory card slot door (1).
2. Place the memory card in the slot
with the gold-coloured area facing
down (2).
3. Push the card gently to lock it into
place. Close tight the slot door (3).
Remove a
memory card
Important: Do not remove the
memory card in the middle of an operation when the card is being accessed.
Removing the card in the middle of an operation may damage the memory card as
well as the device, and data stored on the card may be corrupted.
1. Press briefly the power key.
2. Scroll to Remove memory card, and select
OK > Yes.
3. Open the memory card slot door.
4. Push the card gently to release it.
5. Pull the card out, and select
OK.
6. Close the slot door.
■ Charge the battery
1. Connect the charger to the wall socket.
2. Connect the charger plug to the USB port
in the device.
If the battery is completely discharged, it
may take a few minutes before the charging
indicator appears on the display or before
any calls can be made. The charging indicator blinks until it is possible to make
calls, and after that it is continuously on until the battery is fully charged.
The charging time depends on the charger and the battery used.
USB charging
You can use USB charging when a wall socket is not available. With USB charging,
you can also transfer data while charging the device. USB charging may be slower
than charging through a wall socket. Charging may not work if you use a USB hub.
USB hubs may be incompatible for charging a USB device.
10
Get started
1. Connect a compatible USB cable between a compatible USB device and your
device. Depending on the type of device that is used for charging, it may take a
while for charging to start.
2. If the device is switched on, you can select from the USB mode options on the
display of the device.
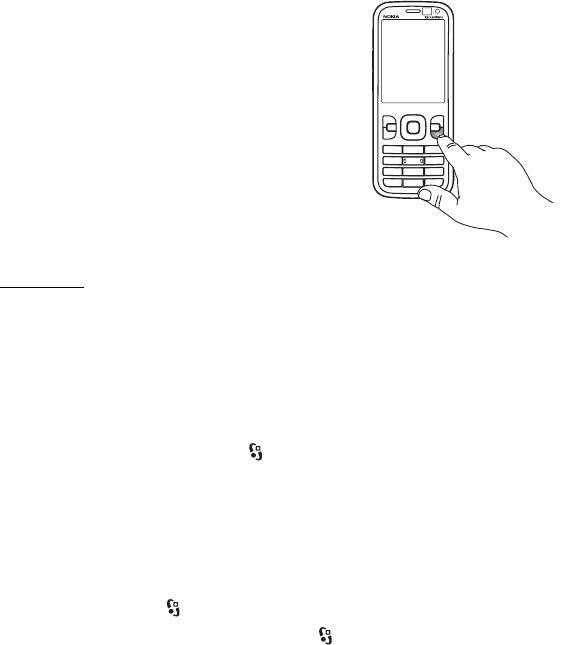
■ Switch the device on and off
Press and hold the power key.
If the device asks for a PIN code, enter the PIN code,
and select
OK.
If the device asks for the lock code, enter the lock
code, and select
OK. The factory setting for the lock
code is 12345.
For more information about access codes, see ‘Access
codes,’ p. 17.
To set the time zone, time, and date, select the
country you are presently in, then enter the local
time and date. See also ‘Clock,’ p. 56.
My Nokia
My Nokia is a free service that sends you tips, tricks, and support for your Nokia
device regularly as text messages. If My Nokia is available in your country and
supported by your service provider, your device invites you to join the My Nokia
service after you have set the time and the date.
Select the language for the service. If you change the language, the device
restarts. To sign-up to My Nokia , select
Accept, and follow the instructions.
To sign-up to My Nokia later, select >
Applications > My Nokia.
After the invitation to join My Nokia, the Welcome application opens. With the
Welcome application, you can access the following applications:
Sett. wizard — Configure connection settings. See ‘Settings wizard,’ p. 12.
Switch — Copy or synchronise data from other compatible devices.
Tutorial — Learn about the features of your device and how to use them. To start
the tutorial later, select >
Help > Tutorial and a tutorial item.
To open the Welcome application later, select >
Help > Welcome.
Get started
11
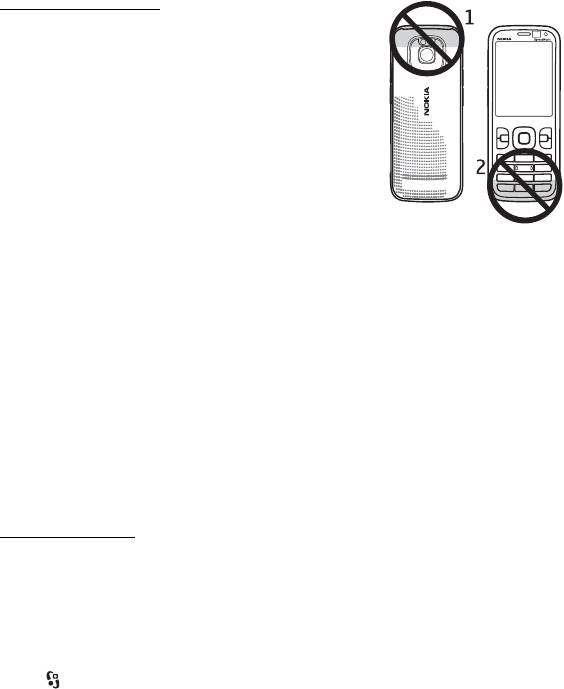
Antenna locations
Bluetooth antenna (1)
Cellular antenna (2)
Your device may have internal and external antennas. As with
any radio transmitting device, avoid touching the antenna
area unnecessarily while the antenna is transmitting or
receiving. Contact with such an antenna affects the
communication quality and may cause the device to operate
at a higher power level than otherwise needed and may
reduce the battery life.
■ Configuration settings
Before you can use multimedia messaging, e-mail, synchronisation, streaming,
and the browser, you must have the proper configuration settings on your device.
Your device may automatically configure browser, multimedia messaging, access
point, and streaming settings based on the SIM card used. If not, you can use the
Settings wizard application to configure the settings. You may receive the settings
directly as a configuration message, which you can save to your device. For
availability, contact your service provider or nearest authorised Nokia dealer.
When you receive a configuration message, and the settings are not automatically
saved and activated,
1 new message is displayed. To save the settings, select
Show > Options > Save. You may need to enter a PIN code provided by the service
provider.
Settings wizard
The Settings wizard application configures your device for operator and e-mail
settings based on your service provider. Configuring other settings may also be
possible.
To use these services, you may have to contact your service provider to activate a
data connection or other services.
Select >
Settings > Sett. wizard.
■ Transfer data
To transfer information, such as contacts, from your old device, see ‘Data transfer,’
p. 65.
12
Get started
Оглавление
- Contents
- SAFETY
- Support
- 1. Get started
- 2. Your device
- 3. Call functions
- 4. Music
- 5. Games
- 7. Write text
- 8. Messaging
- 9. Contacts
- 10. Gallery
- 11. Home media
- 12. Camera
- 13. Media
- 14. Internet
- 15. Personalisation
- 16. Time management
- 18. Settings
- 19. Data management
- 20. Connectivity
- 21. Enhancements
- 22. Battery and charger information
- Care and maintenance
- Additional safety information
- Index


