Nikon COOLSHOT: /
/: Nikon COOLSHOT
Оглавление
-
-
-
- /
-
-
-
-
- /P
- /
/
Jp
Jp
En
En
Es
Es
Fr
Fr
De
● .
De
Português brasileiro
●
It
It
.
Se
●
Se
CONTEÚDO
(, ).
Nl
Nl
Cuidados antes do uso ................................... 166-169
Ru
Ru
.......................................... 170
Pt
, ,
Pt
.
................................... 171
Pl
Pl
Visor interno ................................................................. 172
Fi
.
Fi
.............................. 173
No
No
Dk
Dk
.. 174
Cz
Cz
Troca da pilha ............................................................... 175
Ro
Ro
................................................................ 176-177
Hu
Hu
..................................................... 178-179
Outros ............................................................................. 180
...................... 181-182
164 165
Cuidados antes do uso
Jp
Obrigado por comprar o Telêmetro a Laser COOLSHOT AS da Nikon.
Por favor, siga rigorosamente as
PRECAUÇÕES DE SEGURANÇA
Jp
orientações a seguir, para que
Nikon guardado fora do alcance de
En
(Laser)
En
possa usar o equipamento de
crianças.
O Telêmetro a Laser Nikon emite um
Es
O uso de controles e ajustes ou a execução de procedimentos que não aqueles
Es
forma adequada e evitar
raio laser invisível. Certique-se de que
especificados nestas instruções podem resultar em exposição a radiações perigosas.
Fr
Nikon for danificado ou se este
problemas potencialmente
observa o que segue:
Fr
emitir um som estranho devido à
De
perigosos. Antes de usar este
Advertência
De
〇
queda ou por outra causa, retire
produto, leia atentamente os
It
imediatamente a pilha e pare de
It
sobre o uso correto, que acompanham o produto.
"Cuidados antes do uso" e as
enquanto estiver olhando
Se
usá-lo.
para dentro da óptica do lado da
Se
〇
instruções sobre o uso correto,
objetiva. A falha em fazer isto é poder
Nl
que acompanham o produto.
Nl
〇
afetar negativamente ou danificar os
Mantenha este manual à mão
Ru
em um problema sério.
Ru
olhos.
para fácil consulta.
Pt
Pt
Pl
Pl
ADVERTÊNCIA
●
Fi
Fi
efeito um outro instrumento óptico,
●
No
de que qualquer uso inadequado,
como lentes ou binóculos, e nem
No
ignorando o conteúdo descrito neste
com o olho desprotegido. Isso pode
Dk
Dk
● A NIKON VISION CO., LTD. se reserve o direito de alterar o conteúdo descrito nesses manuais em
documento, pode potencialmente
Cz
qualquer altura e sem aviso prévio.
ha os
Cz
Ro
CUIDADO
Ro
Hu
Hu
acidental do raio laser.
de que qualquer uso inadequado,
ignorando o conteúdo descrito neste
documento, pode potencialmente
período prolongado, retire a pilha do
corpo.
materiais.
o Telêmetro a Laser Nikon. O laser
emitido pode ser prejudicial à
sua saúde. Um produto que foi
fabricante.
166 167
Cuidados antes do uso
Jp
PRECAUÇÕES DE SEGURANÇA
PRECAUÇÕES DE SEGURANÇA
PRECAUÇÕES DE SEGURANÇA
CUIDADOS E MANUTENÇÃO
Armazenagem
Jp
para embalar este produto ou
En
(Monóculo)
(Pilha de lítio)
Cuidados
Lentes
En
outras peças pequenas fora do
ou bolor na superfície da lente
Es
O Telêmetro a Laser Nikon usa um
Se manuseada incorretamente,
alcance de crianças.
Es
superfície da lente, use uma
monóculo no seu sistema óptico de
a pilha pode romper-se e vazar,
Fr
projetado para uso submerso.
escova macia isenta de óleo.
guarde o Telêmetro a Laser Nikon
Fr
modo a mirar o alvo. Certique-se
corroendo o equipamento e
a viseira de borracha ou peças
em local fresco e seco.
De
de que observa o que segue:
manchando roupas.
De
pequenas, etc. na boca. Se uma
removidas da superfície do corpo
Após o uso em um dia chuvoso ou à
Advertência
Certifique-se de que observa o que
It
criança engolir estas peças, consulte
do telêmetro assim que possível,
superfície das lentes, limpe as
noite, limpe-o cuidadosamente à
It
segue:
imediatamente um médico.
Se
usando-se um pano macio, limpo.
lentes suavemente com um pano
temperatura ambiente e guarde-o
Se
diretamente para o sol ou para o
em local fresco e seco.
Nl
raio laser, ao usar o telęmetro a
Nl
usadas por um longo período de
Nikon no carro em um dia quente
papel de boa qualidade e isento
Laser Nikon.
Ru
tempo, algumas pessoas podem
Ru
ou ensolarado, ou perto de
de óleo para limpar lentes. Use
vazia ou durante longos períodos
Cuidados
Pt
equipamento gerador de calor.
uma pequena quantidade de
Pt
ocorrer qualquer sintoma, consulte
Isto pode danificá-lo ou afetá-lo de
Pl
Pl
imediatamente um médico.
forma negativa.
terminal do compartimento da pilha.
Fi
.
Fi
junto com chaves ou
Nikon, guarde-o no estojo macio.
No
exposto à luz solar direta. Os raios
tecido comum, pois podem
moedas em um bolso ou bolsa, pois
No
caminhar. A falha em observar
ultravioleta e o calor excessivo
arranhar a superfície das lentes.
Dk
pode curto-circuitar ou provocar
Dk
podem afetá-lo negativamente ou
Se o pano tiver sido usado para
superaquecimento.
Cz
funcionamento como resultado
interrompa imediatamente o seu
até mesmo danificar a unidade.
Cz
de bater em algo, acertar outras
uso e consulte o seu distribuidor
usado novamente para a
Ro
chamas. Nunca desmonte a pilha.
Ro
pessoas, cair ou outros acidentes.
exposto a mudanças bruscas
superfície da lente.
Hu
Hu
de temperatura, pode ocorrer
Corpo principal
fazer com que acerte outras
entrar em contato com o vestuário
ou a pele, enxágue imediatamente
com um pano macio e limpo,
com muita água. Se o líquido de
depois de soprar ligeiramente a
local instável. A falha em observar
pilhas danificadas entrar nos olhos,
isto pode resultar em que ele caia
enxágue imediatamente com água
use benzeno, solvente ou outros
limpa e, em seguida, consulte um
agentes de limpeza que
ou mau funcionamento.
médico.
contenham solventes orgânicos.
* Um soprador é um equipamento
regulamentos da sua área local.
de limpeza de borracha que
sopra ar por um bocal.
168 169

Principais características Nomenclatura/Composição
Jp
As seguintes condições facilitam a medição:
Jp
1
En
4
En
Es
Es
revestimento multi-camada
3
2
Fr
Fr
3
De
De
(distância horizontal ± altura), o que ajuda muito na prática
aprox. 90 graus
4
It
do golf
It
5Óculo monocular 6x
A medição pode resultar em inexatidão ou falha nos
1
Se
Se
seguintes casos:
6
Nl
Nl
7 Índice de dioptria
Ru
alvo, podendo ser selecionado conforme o alvo
2
5
8 Olhal da alça
Ru
Pt
9 Tampa do compartimento da pilha
Pt
Pl
espelho, etc.)
6
!p
Pl
aproximadamente 8 seg. sem uso)
Fi
Fechar") do compartimento da pilha
Fi
7
No
!q
No
com chuva (NÃO projetado para uso submerso)
!w
Dk
Dk
8
Cz
Cz
Ro
O Telêmetro a Laser Nikon emite um raio laser invisível
9
Ro
para medição. Mede o tempo que o raio laser demora a
Hu
Hu
percorrer a distância do telêmetro ao alvo e o inverso. Os
!p
resultados da refletividade e da medição podem variar
!q
de acordo com as condições climáticas e ambientais, bem
!w
como a cor, o acabamento da superfície, o tamanho, forma
e outras características do alvo.
Composição
................................... x1
................ x1
.....................x1
...........x1
170 171
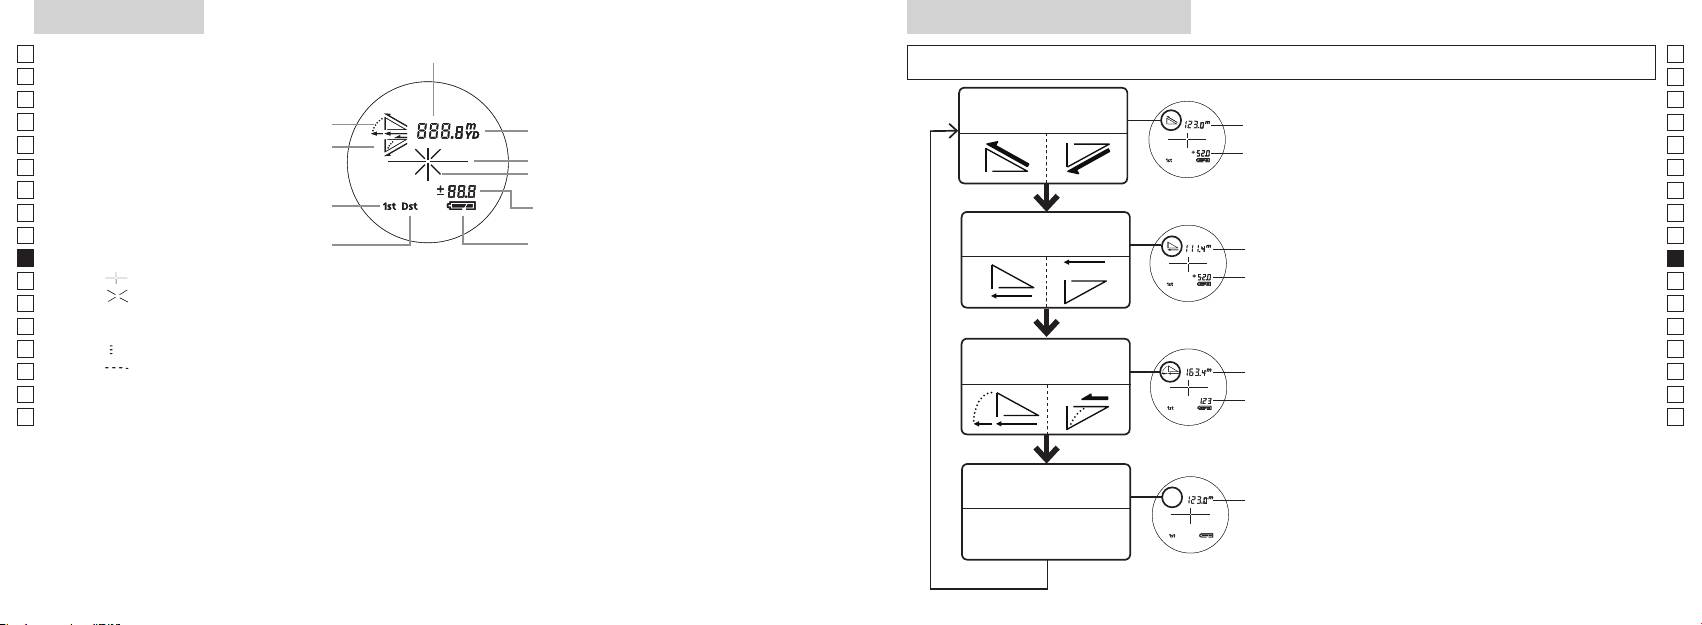
Visor interno
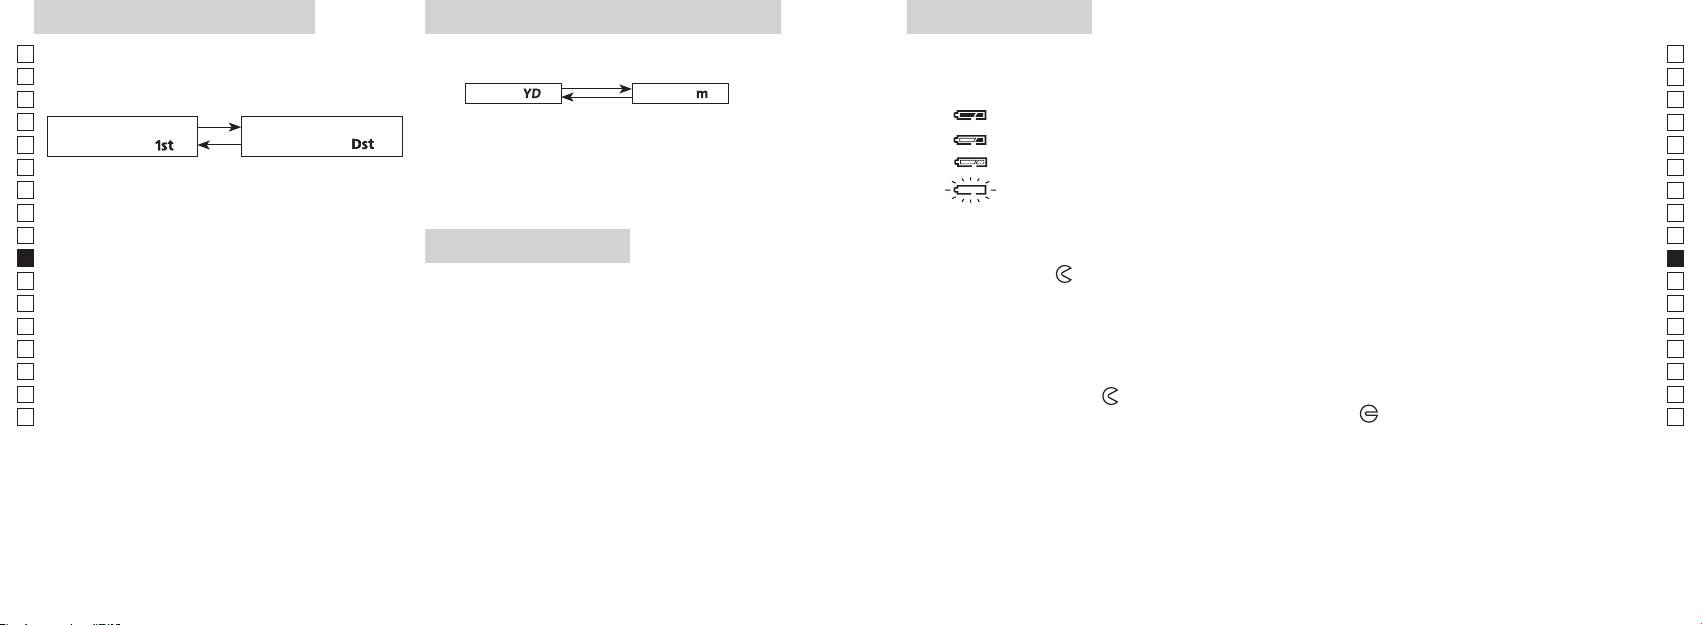
Modo de exibição da medição
Jp
Distância
Jp
de 2 segundos) para comutar o modo na ordem indicada em baixo.
En
En
Es
Es
Distância real e
1. Ligue a energia (confirme se o visor interno
Distância
Fr
Inclinar para cima
modo de altura
Fr
está ligado).
real
De
Inclinar para baixo
De
Marca do alvo
Altura
imediatamente a seguir (em menos que 0,5
It
It
segundo
Se
Se
Altura
Modo de prioridade de primeiro alvo
Nl
(Distância real no ajuste Modo golf)
Nl
Distância horizontal
Ru
Distância
Ru
Modo de prioridade de alvo distante
e modo de altura
horizontal
Pt
Pt
4. Repita os passos 2 e 3 até que o seu modo
Pl
『 』
Altura
Pl
desejado seja exibido.
『 』
Fi
Fi
*
No
Distância
No
Dk
ajustada
『
』 - Medindo agora
*
Dk
Modo golf
pelo
『
converte os resultados para o novo modo.
Cz
』
Cz
declive:
*
Depois que o modo estiver ajustado, as
Ro
Ro
Distância
Hu
real
Hu
mais avançada tecnologia, é impossível eliminar completamente o pó. Como resultado, pode ser
Modo de distância
Distância
real
real
172 173
Modo de prioridade de alvo
Unidades de visualização de distância
Troca da pilha
Jp
Jp
Tipo de pilha:
(O ajuste default de fábrica é jardas.)
En
Indicadores de carga remanescente da pilha
En
distante (O ajuste default de fábrica é o Modo prioridade
[ ]
Metro [ ]
Es
* A marca de estado da pilha no visor interno avisa quando a pilha tem de ser trocada.
Es
de primeiro alvo).
1. Ligue a energia (confirme se o visor interno está ligado).
Fr
Fr
Modo de prioridade de
Modo de prioridade de
De
primeiro alvo「
」
alvo distante
「
」
De
It
1. Ligue a energia (confirme se o visor interno está
: Carga da pilha está baixa. A pilha deve ser substituída por uma nova.
It
ligado).
Se
Se
convertidos e exibidos na unidade de medida que você
Nl
Nl
selecionou.
Ru
dentro de 0,5 segundos.
Ru
1. Abra a tampa do compartimento da pilha
Pt
LED de iluminação
Usando a ponta do polegar, etc na parte rebaixada do compartimento da pilha, gire a tampa seguindo
Pt
(mais de 2 segundos) até que sejam comutados os
o indicador
Pl
1. Ligue a energia (confirme se o visor interno está ligado).
Pl
2. Substitua a pilha velha por uma nova
Fi
de Alvo Distante.
Fi
No
No
ligado ou desligado (ON e OFF).
*
Dk
*
Dk
funciona.
escuras para ver o painel LCD.
Cz
*
Cz
3. Feche a tampa do compartimento da pilha
*
Ro
[
Alinhe o indicador
com o indicador
●
e insira a tampa do compartimento da pilha. Usando a
Ro
Distante]
Hu
estará desligada quando o telêmetro a laser for
ponta do polegar, etc., gire a tampa seguindo o indicador
Hu
novamente ligado.
está firmemente fechada.
Vida da pilha
distância do objeto mais afastado.
Operação contínua: Aprox. 13.000 vezes (a aprox. 20°C)
etc. do alvo. Use somente como referência.
descarga elétrica natural, a vida desta pilha provavelmente será mais curta do que a apontada acima.
a seguir.
174 175
Jp
Jp
En
En
Es
Es
Fr
Fr
De
De
It
It
Se
Se
Nl
Nl
Ru
Ru
Pt
Pt
Pl
Pl
Fi
Fi
No
No
Dk
Dk
Cz
Cz
Ro
Ro
Hu
Hu
176 177
Measurement
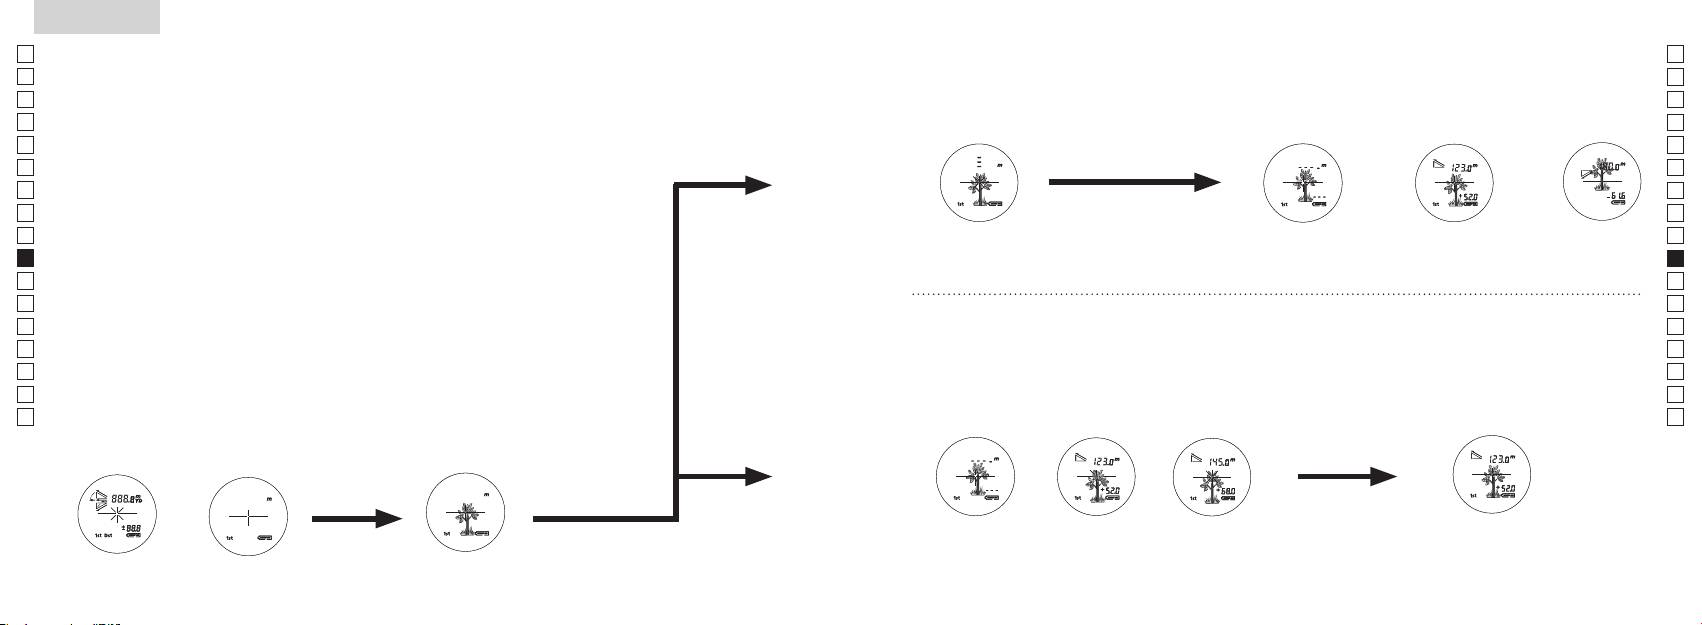
1. Press the POWER button for power-on.
(Power turns off 8 seconds after the last
operation.)
Immediately after power-on.
3. Press POWER button once to start single measurement.
4. After measurement, “distance” or “fail to measure” indicator are displayed for 8 seconds, then power turns off. If you press the POWER
button during power-on (while the internal display is lit), another single measurement starts.
unable to measure distance.
3. Keep pressing POWER button to start continuous measurement up to 20 seconds. The internal display shows “distance” and
“fail to measure” indicator alternately.
Note: Laser irradiaton mark is blinking during the measurement.
Note: If you stop pressing the button, the continuous measuremen stops
2. Aim at the target
Positionthetargetatthecenterofthereticle
[Single measurement]
Failure to measure or
unable to measure distance.
[Continuous measurement]
4. After continuous measurement, the measure results are displayed for 8 seconds, then power turns off. If you press the POWER
button during power-on (while the internal display is lit), another measrement starts.
Failure to measure or
Target focusing.
Measuring.
(Initializing)
.
Upward measurement. Downward measurement.
Displays the measured
figure. (Target 1)
Displays the measured figure.
Stand-by.
Displays the measured
figure. (Target 2)
Measurement
1. Press the POWER button for power-on.
(Power turns off 8 seconds after the last
operation.)
Immediately after power-on.
(Initializing)
3. Press POWER button once to start single measurement.
Measuring.
4. After measurement, “distance” or “fail to measure” indicator are displayed for 8 seconds, then power turns off. If you press the POWER
button during power-on (while the internal display is lit), another single measurement starts.
Failure to measure or
unable to measure distance.
Displays the measured
figure. (Target 1)
3. Keep pressing POWER button to start continuous measurement up to 20 seconds. The internal display shows “distance” and
“fail to measure” indicator alternately.
Note: Laser irradiaton mark is blinking during the measurement.
Note: If you stop pressing the button, the continuous measuremen stops
Target focusing.
2. Aim at the target
.
Positionthetargetatthecenterofthereticle
[Single measurement]
Failure to measure or
unable to measure distance.
Upward measurement. Downward measurement.
Displays the measured figure.
[Continuous measurement]
4. After continuous measurement, the measure results are displayed for 8 seconds, then power turns off. If you press the POWER
button during power-on (while the internal display is lit), another measrement starts.
Stand-by.
Displays the measured
figure. (Target 2)
Measurement
1. Press the POWER button for power-on.
(Power turns off 8 seconds after the last
operation.)
Immediately after power-on.
Stand-by.
(Initializing)
2. Aim at the target
.
Positionthetargetatthecenterofthereticle
3. Press POWER button once to start single measurement.
4. After measurement, “distance” or “fail to measure” indicator are displayed for 8 seconds, then power turns off. If you press the POWER
button during power-on (while the internal display is lit), another single measurement starts.
unable to measure distance.
3. Keep pressing POWER button to start continuous measurement up to 20 seconds. The internal display shows “distance” and
“fail to measure” indicator alternately.
Note: Laser irradiaton mark is blinking during the measurement.
Note: If you stop pressing the button, the continuous measuremen stops
[Single measurement]
Failure to measure or
unable to measure distance.
[Continuous measurement]
4. After continuous measurement, the measure results are displayed for 8 seconds, then power turns off. If you press the POWER
button during power-on (while the internal display is lit), another measrement starts.
Failure to measure or
Target focusing.
Measuring.
Upward measurement. Downward measurement.
Displays the measured
figure. (Target 1)
Displays the measured figure.
Displays the measured
figure. (Target 2)
Medição
Cuidado — O uso de controles e ajustes ou a execução de procedimentos que não
【
Medição simples
】
aqueles especificados nestas instruções podem resultar em exposição a radiações perigosas.
1. Preparação
2. Viseira de borracha
óculos.
3. Ajuste da dioptria
Ajuste a dioptria para obter uma imagem nítida LCD no telêmetro.
aparelho (confirme se o visor interno está ligado). Olhando pela lente ocular, gire o anel de
ajuste de dioptrias no sentido horário até que o LCD fique focado.
seguir.
【
Função de medição contínua
】
mirar corretamente no seu objeto.
4. Medição
*
1. Ligue a energia (confirme se
2. Mire no alvo.
o visor interno está ligado).
(Desligamento automático após
retículo.
aproximadamente 8 seg. sem uso.)
Imediatamente após ligar
Mira do alvo
Measurement
1. Press the POWER button for power-on.
(Power turns off 8 seconds after the last
operation.)
Immediately after power-on.
Stand-by.
(Initializing)
2. Aim at the target
.
Positionthetargetatthecenterofthereticle
Target focusing.
[Single measurement]
3. Press POWER button once to start single measurement.
Measuring.
4. After measurement, “distance” or “fail to measure” indicator are displayed for 8 seconds, then power turns off. If you press the POWER
button during power-on (while the internal display is lit), another single measurement starts.
Failure to measure or
Upward measurement. Downward measurement.
unable to measure distance.
Displays the measured figure.
[Continuous measurement]
3. Keep pressing POWER button to start continuous measurement up to 20 seconds. The internal display shows “distance” and
“fail to measure” indicator alternately.
Note: Laser irradiaton mark is blinking during the measurement.
Note: If you stop pressing the button, the continuous measuremen stops
Failure to measure or
unable to measure distance.
4. After continuous measurement, the measure results are displayed for 8 seconds, then power turns off. If you press the POWER
button during power-on (while the internal display is lit), another measrement starts.
Displays the measured
figure. (Target 1)
Displays the measured
figure. (Target 2)
Measurement
1. Press the POWER button for power-on.
(Power turns off 8 seconds after the last
operation.)
Immediately after power-on.
Stand-by.
(Initializing)
2. Aim at the target
.
Positionthetargetatthecenterofthereticle
Target focusing.
[Single measurement]
3. Press POWER button once to start single measurement.
Measuring.
4. After measurement, “distance” or “fail to measure” indicator are displayed for 8 seconds, then power turns off. If you press the POWER
button during power-on (while the internal display is lit), another single measurement starts.
Failure to measure or
Upward measurement. Downward measurement.
unable to measure distance.
Displays the measured figure.
[Continuous measurement]
3. Keep pressing POWER button to start continuous measurement up to 20 seconds. The internal display shows “distance” and
“fail to measure” indicator alternately.
Note: Laser irradiaton mark is blinking during the measurement.
Note: If you stop pressing the button, the continuous measuremen stops
Failure to measure or
unable to measure distance.
Displays the measured
figure. (Target 1)
4. After continuous measurement, the measure results are displayed for 8 seconds, then power turns off. If you press the POWER
button during power-on (while the internal display is lit), another measrement starts.
Displays the measured
figure. (Target 2)
Measurement
1. Press the POWER button for power-on.
(Power turns off 8 seconds after the last
operation.)
Immediately after power-on.
Stand-by.
(Initializing)
2. Aim at the target
.
Positionthetargetatthecenterofthereticle
Target focusing.
[Single measurement]
3. Press POWER button once to start single measurement.
Measuring.
4. After measurement, “distance” or “fail to measure” indicator are displayed for 8 seconds, then power turns off. If you press the POWER
button during power-on (while the internal display is lit), another single measurement starts.
Failure to measure or
unable to measure distance.
3. Keep pressing POWER button to start continuous measurement up to 20 seconds. The internal display shows “distance” and
“fail to measure” indicator alternately.
Note: Laser irradiaton mark is blinking during the measurement.
Note: If you stop pressing the button, the continuous measuremen stops
Failure to measure or
unable to measure distance.
[Continuous measurement]
4. After continuous measurement, the measure results are displayed for 8 seconds, then power turns off. If you press the POWER
button during power-on (while the internal display is lit), another measrement starts.
Upward measurement. Downward measurement.
Displays the measured
figure. (Target 1)
Displays the measured figure.
Displays the measured
figure. (Target 2)
Measurement
1. Press the POWER button for power-on.
(Power turns off 8 seconds after the last
operation.)
Immediately after power-on.
Stand-by.
(Initializing)
2. Aim at the target
.
Positionthetargetatthecenterofthereticle
Target focusing.
[Single measurement]
3. Press POWER button once to start single measurement.
Measuring.
4. After measurement, “distance” or “fail to measure” indicator are displayed for 8 seconds, then power turns off. If you press the POWER
button during power-on (while the internal display is lit), another single measurement starts.
unable to measure distance.
3. Keep pressing POWER button to start continuous measurement up to 20 seconds. The internal display shows “distance” and
“fail to measure” indicator alternately.
Note: Laser irradiaton mark is blinking during the measurement.
Note: If you stop pressing the button, the continuous measuremen stops
unable to measure distance.
4. After continuous measurement, the measure results are displayed for 8 seconds, then power turns off. If you press the POWER
button during power-on (while the internal display is lit), another measrement starts.
[Continuous measurement]
Failure to measure or
Failure to measure or
Upward measurement. Downward measurement.
Displays the measured
figure. (Target 1)
Displays the measured figure.
Displays the measured
figure. (Target 2)
Measurement
1. Press the POWER button for power-on.
(Power turns off 8 seconds after the last
operation.)
Immediately after power-on.
Stand-by.
(Initializing)
2. Aim at the target
.
Positionthetargetatthecenterofthereticle
Target focusing.
[Single measurement]
3. Press POWER button once to start single measurement.
4. After measurement, “distance” or “fail to measure” indicator are displayed for 8 seconds, then power turns off. If you press the POWER
button during power-on (while the internal display is lit), another single measurement starts.
unable to measure distance.
3. Keep pressing POWER button to start continuous measurement up to 20 seconds. The internal display shows “distance” and
“fail to measure” indicator alternately.
Note: Laser irradiaton mark is blinking during the measurement.
Note: If you stop pressing the button, the continuous measuremen stops
unable to measure distance.
4. After continuous measurement, the measure results are displayed for 8 seconds, then power turns off. If you press the POWER
button during power-on (while the internal display is lit), another measrement starts.
[Continuous measurement]
Failure to measure or
Failure to measure or
Measuring.
Upward measurement. Downward measurement.
Displays the measured
figure. (Target 1)
Displays the measured figure.
Displays the measured
figure. (Target 2)
Measurement
1. Press the POWER button for power-on.
(Power turns off 8 seconds after the last
operation.)
Immediately after power-on.
Stand-by.
(Initializing)
2. Aim at the target
.
Positionthetargetatthecenterofthereticle
Target focusing.
[Single measurement]
3. Press POWER button once to start single measurement.
Measuring.
4. After measurement, “distance” or “fail to measure” indicator are displayed for 8 seconds, then power turns off. If you press the POWER
button during power-on (while the internal display is lit), another single measurement starts.
unable to measure distance.
3. Keep pressing POWER button to start continuous measurement up to 20 seconds. The internal display shows “distance” and
“fail to measure” indicator alternately.
Note: Laser irradiaton mark is blinking during the measurement.
Note: If you stop pressing the button, the continuous measuremen stops
unable to measure distance.
4. After continuous measurement, the measure results are displayed for 8 seconds, then power turns off. If you press the POWER
button during power-on (while the internal display is lit), another measrement starts.
[Continuous measurement]
Failure to measure or
Failure to measure or
Upward measurement. Downward measurement.
Displays the measured
figure. (Target 1)
Displays the measured figure.
Displays the measured
figure. (Target 2)
Measurement
1. Press the POWER button for power-on.
(Power turns off 8 seconds after the last
operation.)
Immediately after power-on.
Stand-by.
(Initializing)
2. Aim at the target
.
Positionthetargetatthecenterofthereticle
Target focusing.
[Single measurement]
3. Press POWER button once to start single measurement.
Measuring.
4. After measurement, “distance” or “fail to measure” indicator are displayed for 8 seconds, then power turns off. If you press the POWER
button during power-on (while the internal display is lit), another single measurement starts.
Failure to measure or
unable to measure distance.
Displays the measured
figure. (Target 1)
3. Keep pressing POWER button to start continuous measurement up to 20 seconds. The internal display shows “distance” and
“fail to measure” indicator alternately.
Note: Laser irradiaton mark is blinking during the measurement.
Note: If you stop pressing the button, the continuous measuremen stops
Failure to measure or
unable to measure distance.
Upward measurement. Downward measurement.
Displays the measured figure.
[Continuous measurement]
4. After continuous measurement, the measure results are displayed for 8 seconds, then power turns off. If you press the POWER
button during power-on (while the internal display is lit), another measrement starts.
Displays the measured
figure. (Target 2)
Measurement
1. Press the POWER button for power-on.
(Power turns off 8 seconds after the last
operation.)
Immediately after power-on.
Stand-by.
(Initializing)
2. Aim at the target
.
Positionthetargetatthecenterofthereticle
Target focusing.
[Single measurement]
3. Press POWER button once to start single measurement.
Measuring.
4. After measurement, “distance” or “fail to measure” indicator are displayed for 8 seconds, then power turns off. If you press the POWER
button during power-on (while the internal display is lit), another single measurement starts.
Failure to measure or
unable to measure distance.
3. Keep pressing POWER button to start continuous measurement up to 20 seconds. The internal display shows “distance” and
“fail to measure” indicator alternately.
Note: Laser irradiaton mark is blinking during the measurement.
Note: If you stop pressing the button, the continuous measuremen stops
Failure to measure or
unable to measure distance.
[Continuous measurement]
4. After continuous measurement, the measure results are displayed for 8 seconds, then power turns off. If you press the POWER
button during power-on (while the internal display is lit), another measrement starts.
Upward measurement. Downward measurement.
Displays the measured
figure. (Target 1)
Displays the measured figure.
Displays the measured
figure. (Target 2)
ou
"measured distance" (distância medida) é exibido durante 8 segundos, e
quando a energia estiver ligada (enquanto o visor interno estiver
iluminado),
"incapaz de medir" a
cima
baixo
distância.
medida) é exibido durante 8 segundos, e depois o equipamento
interno exibe o indicador "fail to
desliga-se.
alternadamente com o indicador "measured distance" (distância
quando
medida).
a energia estiver ligada (enquanto o visor interno estiver
*
pisca durante a m
*
Ao medir uma bandeira em um campo de golfe, por exemplo,
ou "incapaz de medir"
medido (Alvo 1)
medido (Alvo 2)
a distância.
entre você e a bandeira, o menor número é a distância até a sua
bandeira alvo.
Especificações
Jp
Corpo: à prova d'água (profundidade máxima de 1 metro, por até 10 minutos)*
Jp
(Compartimento da pilha: resistente à água**)
En
En
Es
L
Es
Segurança
L
Fr
Distância real (3 dígitos inferiores):
Fr
De
De
Ambiente
It
It
Laser
Se
Se
Sistema óptico
Classe
Nl
Nl
6
Comprimento de onda (nm) 905
Ru
Ru
Diâmetro efetivo da objetiva (mm) ø21
12
Pt
Pt
7,5
15
Pl
Pl
Alívio dos olhos (mm) 18,3
Divergência de feixe (mrad)
Fi
Fi
ø3,5
80 ou inferior (se
No
No
-
1
Ajuste da dioptria ±4m
Dk
Dk
* Modelos à prova d'água
Outros
Cz
Cz
˚C) -10 —
de 1 metro por até 10 minutos.
Ro
Ro
O Telêmetro a laser Nikon oferece as seguintes vantagens:
Hu
Hu
Fonte de energia
Desligamento automático da energia (após aproximadamente 8 seg. sem uso)
113 x 70 x 39
Observe o seguinte ao usar o Telêmetro a laser Nikon.
Aprox. 175 (sem pilha)
em água. Se entrar água no compartimento da pilha, seque qualquer umidade e aguarde até que o compartimento seque.
178 179
Outros
Problemas e Soluções/Reparo
Jp
Se o seu Telêmetro a laser Nikon precisar de ser reparado, por favor contate o seu distribuidor local quanto a detalhes sobre e para
Jp
En
En
Es
Es
Sintoma Pontos a verificar
Fr
Fr
indesejada.
De
●
De
● Verifique se está colocada uma pilha.
It
It
● Substitua a pilha velha por uma nova.
Se
Se
●
Nl
Nl
Ru
Ru
●
Pt
do lado da lente objectiva estejam limpas. Limpe-os, se necessário.
Pt
●
Pl
Pl
podem ser comprovadas ao desligar e ligar o equipamento, recomenda-se que o usuário tente corrigir a interferência
refletir o raio laser.
Fi
por meio de uma ou mais das medidas a seguir:
● Substitua a pilha velha por uma nova.
Fi
No
No
● Certifique-se de segurar a unidade enquanto mede.
Dk
●
Dk
(Incapaz de medir)
Cz
Cz
Ro
Alvos posicionados mais perto do
Ro
● Certifique-se de que nada, como por exemplo, folhas ou grama, está entre o
que o valor mínimo da faixa de
Hu
Telêmetro a laser Nikon e o alvo.
Hu
Um alvo além de uma determinada
● Certifique-se de que nada, como por exemplo, folhas ou grama, está entre o
Telêmetro a laser Nikon e o alvo.
● Substitua a pilha velha por uma nova.
●
refletir o raio laser.
● Certifique-se de segurar a unidade enquanto mede.
● Certifique-se de que nada, como por exemplo, folhas ou grama, está entre o
Telêmetro a laser Nikon e o alvo.
180 181
Problemas e Soluções/Reparo
Jp
Jp
En
En
Es
Es
Sintoma Pontos a Verificar
Fr
Fr
De
● Substitua a pilha velha por uma nova
De
Polski
●
It
It
O resultado incorreto é exibido
o raio laser.
Se
● Certifique-se de que nada, como por exemplo, folhas ou grama, está entre o
Se
SPIS TREŚCI
Telêmetro a Laser Nikon e o alvo.
Nl
Nl
Uwagi przed rozpoczęciem
Ru
Ru
użytkowania ....................................................... 184-187
Pt
uma vez que pode ter ocorrido uma falha no equipamento. Nunca deixe qualquer
Pt
Kluczowe funkcje ....................................................... 188
Pl
Pl
awartość opakowania .............. 189
Fi
Fi
....................................... 190
No
No
yświetlania ................................ 191
Dk
Dk
ednostki
Cz
Cz
... 192
Ro
Ro
......................................................... 193
Hu
Hu
.................................................................. 194-195
Dane techniczne ............................................... 196-197
Inne ................................................................................. 198
...... 199-200
182 183
Uwagi przed rozpoczęciem użytkowania
Jp
Dziękujemy za zakup produktu Nikon Laser Rangefinder COOLSHOT AS.
W celu właściwego korzystania z
PRZESTROGI DOTYCZĄCE
Jp
urządzenia i uniknięcia zagrożeń
rozmontowywać, modyfikować lub
En
BEZPIECZEŃSTWA (Laser)
En
należy ściśle przestrzegać
naprawiać laserowego dalmierza
Dalmierz laserowy firmy Nikon emituje
Es
Korzystanie z elementów sterowania lub regulacji, czy też wykonywanie procedur w
Es
wymienionych niżej wytycznych.
niewidzialną wiązkę promieni
sposób inny, niż określony w niniejszym podręczniku, może spowodować narażenie na
Fr
Przed rozpoczęciem korzystania
laserowych. Należy stosować się do
być szkodliwy dla zdrowia.
Fr
niebezpieczne promieniowanie.
poniższych wytycznych:
Rozmontowany, zmodyfikowany
De
z tego produktu zapoznaj się
De
lub naprawiony produkt nie jest
dokładnie z działem „Uwagi
Ostrzeżenie
It
It
objęty gwarancją producenta.
〇
przed rozpoczęciem
Se
Se
przed rozpoczęciem użytkowania” oraz z instrukcjami na temat poprawnego użytkowania,
użytkowania” oraz z instrukcjami
pomiar) podczas spoglądania
należy przechowywać w miejscu
Nl
na temat poprawnego
dołączonymi do produktu.
Nl
w optykę od strony obiektywu.
niedostępnym dla dzieci.
użytkowania, dołączonymi do
Ru
〇
Nieprzestrzeganie tej zasady może
Ru
produktu. Przechowuj ten
Pt
sięgnąć.
negatywnie wpłynąć na wzrok lub
obudowy dalmierza laserowego
Pt
podręcznik w łatwo dostępnym
spowodować uszkodzenie oczu.
firmy Nikon lub gdy emitowane
Pl
〇 Nie należy samodzielnie rozmontowywać lub dokonywać napraw tego produktu, gdyż może to
miejscu, aby móc w razie
Pl
są dziwne dźwięki, w wyniku
spowodować wystąpienie poważnych problemów.
potrzeby do niego sięgnąć.
Fi
ieruj wiązki lasera na ludzi.
upuszczenia bądź z innego
Fi
Rozmontowany lub naprawiony produkt nie jest objęty gwarancją producenta.
powodu, należy natychmiast wyjąć
No
No
inny instrument optyczny, na
baterię i zaprzestać użytkowania.
OSTRZEŻENIE
Dk
Dk
● Specyfikacje ikonstrukcja mogą ulec zmianie bez powiadomienia.
przykład soczewkę lub lornetkę,
Cz
ani okiem nieuzbrojonym. Może to
Cz
●
przypomnieniu, iż nieprawidłowe
Ro
korzystanie będące wynikiem
spowodować uszkodzenie wzroku.
wartykułach lubrecenzjach) bez pisemnego upoważnienia od firmy NIKON VISION CO., LTD. jest
Ro
zignorowania niniejszych treści może
Hu
zabronione.
Hu
spowodować poważne obrażenia lub
umieść palce z dala od przycisku
● Firma NIKON VISION CO., LTD. zastrzega sobie prawo do zmiany zawartości niniejszego
śmierć.
podręcznika w dowolnym czasie, bez wcześniejszego powiadomienia.
UWAGA
przypadkowej emisji wiązki laserowej.
przypomnieniu, iż nieprawidłowe
użytkowany przez dłuższy okres
korzystanie będące wynikiem
czasu, wyjmij baterię z korpusu.
zignorowania niniejszych treści może
spowodować poważne obrażenia lub
straty materialne.
184 185
Uwagi przed rozpoczęciem użytkowania
Jp
PRZESTROGI DOTYCZĄCE
obrażeń.
PRZESTROGI DOTYCZĄCE
wodą, a następnie skonsultować się
soczewek może dojść do skroplenia
* Dmuchawa to gumowy przyrząd do
Jp
z lekarzem.
pary wodnej. Nie należy skorzystać
czyszczenia, wydmuchujący
En
BEZPIECZEŃSTWA (Luneta)
BEZPIECZEŃSTWA
En
w niestabilnym miejscu.
z produktu dopóki kondensacja się
powietrze po ściśnięciu.
(Bateria litowa)
Es
Dalmierz laserowy firmy Nikon
Nieprzestrzeganie tej zasady
obowiązującymi przepisami.
utrzymuje.
Es
Przechowywanie
umożliwia ustawianie na cel z
może spowodować upuszczenie
Fr
Fr
wykorzystaniem w systemie
urządzenia i jego uszkodzenie lub
może dojść do rozszczelnienia baterii
PRZESTROGI DOTYCZĄCE
KONSERWACJA
pojawienie się pleśni na powierzchni
De
optycznym lunety. Należy stosować
obrażenia.
i wycieku jej zawartości, co może
BEZPIECZEŃSTWA
Soczewki
De
soczewki może być spowodowane
się do poniższych wytycznych:
spowodować korozję urządzenia i
It
Uwagi
It
Ostrzeżenie
pakowania produktu i inne drobne
poplamić odzież.
powierzchni soczewki należy
tego powodu dalmierz laserowy firmy
Se
Se
przedmioty należy przechowywać
Należy stosować się do poniższych
firmy Nikon jest wodoodporne,
korzystać z miękkiej, nieoleistej
Nikon należy przechowywać w
Nl
w miejscu niedostępnym dla dzieci.
Nikon Rangefinder nie należy
wytycznych:
nie jest on przeznaczony do
szczotki.
Nl
chłodnym i suchym miejscu.
spoglądać bezpośrednio na
Baterię należy wkładać z
użytkowania pod wodą.
Ru
Ru
wkładały sobie do ust gumowe
słońce, źródło intensywnego
uwzględnieniem poprawnego
takich jak odciski palców, z
nocy należy dokładnie osuszyć
Pt
muszle oczne lub inne niewielkie
światła lub promień lasera.
wody, piasku lub błota z
powierzchni soczewki, przetrzyj
Pt
urządzenie w temperaturze
Baterię należy wyjąć, gdy wyczerpie
powierzchnią obudowy dalmierza,
delikatnie soczewki miękką, czystą
Pl
Uwagi
pokojowej, a następnie przechowywać
Pl
taką część, należy natychmiast
się ich ładunek lub w przypadku
należy ją jak najszybciej przetrzeć
szmatką bawełnianą lub wysokiej
w chłodnym i suchym miejscu.
dalmierza
Fi
skonsultować się z lekarzem.
dłuższego okresu niekorzystania z
miękką, czystą i suchą szmatką.
jakości nieoleistą szmatką do
Fi
laserowego Nikon, nie
urządzenia.
soczewek. Użyj niewielkiej ilości
No
No
naciskaj przycisku
gumowej muszli ocznej przez
laserowego firmy Nikon w
czystego alkoholu (nie stosować
Dk
dłuższy czas, może dojść do
złącz gniazda baterii.
denaturatu), aby wytrzeć trwałe
Dk
samochodzie w gorący lub
.
w
smugi. Nie należy korzystać z
Cz
słoneczny dzień, a także w pobliżu
Cz
wystąpienia jakichkolwiek objawów
kieszeni lub w torbie, w której
aksamitnych szmatek lub zwykłych
Ro
podczas przemieszczania się
należy natychmiast skonsultować
znajdują się klucze lub monety,
chusteczek, ponieważ mogą one
Ro
przeciwnym razie może dojść do
pieszo. Nieprzestrzeganie tej
się z lekarzem.
Hu
ponieważ może spowodować to
uszkodzenia urządzenia.
zarysować powierzchnię soczewki.
Hu
zasady może spowodować
przegrzanie urządzenia.
obrażenia w wyniku potrącenia
dalmierza laserowego Nikon, należy
laserowego firmy Nikon na
czyszczenia obudowy, nie powinna
innych osób, upadku lub innych
przechowywać je w miękkim futerale.
bezpośrednie działanie promieni
być ponownie używana do
wypadków.
nie należy demontować baterii.
czyszczenia soczewki.
nie działa poprawnie, przerwij
i wysoka temperatura mogą
Korpus
trzymając ją za pasek. Może to
natychmiast korzystanie i skonsultuj
negatywnie wpłynąć na urządzenie
Korpus należy przetrzeć miękką, czystą i
spowodować uderzenie innej
się z lokalnym sprzedawcą, aby
dotknie odzieży lub skóry, należy
lub doprowadzić do jego uszkodzenia.
suchą szmatką po delikatnym
osoby i doprowadzić do jej
uzyskać informacje, gdzie należy
natychmiast spłukać go dużą ilością
zdmuchnięciu kurzu za pomocą
wysłać urządzenie celem naprawy.
laserowego Nikon w otoczeniu,
dmuchawy*. Nie należy korzystać z
baterii przedostanie się do oczu,
gdzie dochodzi do nagłych zmian
benzenu, rozpuszczalnika lub innych
należy natychmiast przemyć oczy
temperatury, na powierzchni
czyszczących środków organicznych.
186 187
Kluczowe funkcje Nazewnictwo/Zawartość opakowania
Jp
Następujące warunki ułatwiają dokonanie pomiaru:
1
Jp
En
4
En
Es
2 Detektor promienia laserowego
Es
3
Fr
3
Fr
wzniesienia (odległości w poziomie ± wysokości), która jest
4
De
De
przydatna podczas gry w golfa
90stopni
It
It
które można łatwo przełączyć
Pomiar może okazać się niedokładny lub błędny w
1
Se
Se
następujących sytuacjach:
5Okular lunety z 6-krotnym
Nl
stosownie do celu
Nl
powiększeniem
Ru
2
5
Ru
6 ierścień regulacji
Pt
Pt
ciągłego pomiaru
dioptrii
Pl
6
Pl
7 Indeks dioptrażu
nieużytkowania)
Fi
Fi
8 Ucho na pasek
7
No
9
No
Dk
!p amknięciu
Dk
8
Cz
pokrywy komory baterii
Cz
Ro
!q tykieta z
9
Ro
Dalmierz laserowy firmy Nikon emituje niewidzialną wiązkę
objaśnieniami
Hu
Hu
promieni laserowych. Mierzony jest czas, jaki zajmuje
!p
!w Informacje FDA
wiązce przebycie odległości od dalmierza do celu i z
!q
powrotem. Odbicie promienia laserowego i wyniki pomiaru
!w
mogą się różnić w zależności od warunków klimatycznych
i środowiskowych, koloru i wykończenia powierzchni,
rozmiaru, kształtu i innych właściwości celu.
Zawartość opakowania
................................. x1
...................x1
....................x1
........x1
188 189
Wyświetlacz wewnętrzny
Tryby pomiaru/Wyświetlania
Jp
Odległość
Jp
En
En
Es
Tryb odległości
Es
Rzeczywista
Fr
rzeczywistej i wysokości
Fr
wewnętrzny ekran jest włączony).
odległość
De
De
Oznaczenie celu
(Tryb), a następnie od razu (w ciągu 0,5
It
It
Oznaczenie promienia lasera
Se
Se
Tryb priorytetu pierwszego planu
Nl
pomiar) przez ok. 2 sekundy.
Nl
trybie gry w golfa)
Tryb odległości w
Ru
3
Odległość w
Ru
Tryb priorytetu drugiego planu
poziomie i wysokości
poziomie
Pt
Pt
『 』 - Skieruj na cel, na którym chcesz dokonać pomiaru. Ustaw cel na środku krzyża nitek.
pomiar), aby zmienić tryb wyświetlania
Pl
Pl
『 』
Fi
ki 2 i 3 do momentu
Fi
No
Nie spoglądaj w soczewkę obiektywu, gdy wyświetlony jest ten znak.
wybrania żądanego trybu.
No
Dk
『
』 - Trwa dokonywanie pomiaru
Odległość z
*
Dk
『
』
Tryb gry w golfa
uwzględnieniem
w odpowiedniej kolejności, tryb nie
Cz
Cz
wzniesienia
zostanie przełączony.
Ro
Ro
Rzeczywista
*
Hu
odległość
spowoduje przekonwertowanie
Hu
wyników na nowy tryb.
zastosowania podczas produkcji ekranu LCD najbardziej zaawansowanych technologii kompletna
*
dokonywane są w nowym trybie.
wpływu na precyzję pomiaru lub bezpieczeństwo podczas korzystania.
Tryb odległości
Rzeczywista
rzeczywistej
odległość
190 191
Tryb priorytetu pierwszego planu
Jednostki wyświetlania odległości
Wymiana baterii
Jp
Jp
Rodzaj baterii: Bateria litowa CR2, 3 V x1
(Domyślnym ustawieniem fabrycznym są jardy).
En
Wskaźnik pozostałego ładunku baterii
En
ustawieniem fabrycznym jest tryb priorytetu pierwszego
Es
[ ]
* Oznaczenie stanu baterii w wewnętrznym wyświetlaczu ostrzega o konieczności wymiany baterii.
planu).
Metry [ ]
Es
: Bateria jest naładowana w dostatecznym stopniu.
Fr
Fr
Tryb priorytetu
Tryb priorytetu drugiego
włączony).
De
pierwszego planu「
」
planu
「
」
De
It
It
jest włączony).
zostanie zmieniona, puść przycisk.
Se
Se
Nl
iwyświetlone w wybranej jednostce miary.
Nl
Ru
Ru
1. Otwórz pokrywę komory baterii
0,5 sekundy.
Pt
Naciskaj i przytrzymuj obydwa przyciski (dłużej
Korzystając z kciuka otwórz pokrywę komory baterii, obracając ją w kierunku oznaczenia
Pt
Podświetlenie LED
Pl
niż 2sekundy) do momentu przełączenia trybu
na gumowe uszczelnienia wodoodporne otwarcie pokrywy może być utrudnione.
Pl
1
priorytetu pierwszego planu na tryb priorytetu
2. Wymień zużytą baterię na nową
Fi
włączony).
Fi
drugiego planu.
No
No
*
Dk
poprawnie, dalmierz laserowy nie będzie działał.
kolejności, tryb nie zostanie przełączony.
*
Dk
zbyt słabe, aby panel LCD był widoczny.
3. Zamknij pokrywę komory baterii
Cz
*
Cz
w punkcie 2.
*
ze wskaźnikiem
●
i włóż pokrywę komory baterii. Korzystając z kciuka obróć
Ro
Ro
pokrywę w kierunku oznaczenia
[]
podświetlenie będzie wyłączone po kolejnym włączeniu
Hu
uszczelnienia wodoodporne, należy jednak ją obrócić do momentu zatrzymania. Upewnij się, że
Hu
zasilania dalmierza laserowego.
komora jest bezpiecznie zamknięta.
priorytetu pierwszego planu podawana jest odległość
do najbliższego obiektu, natomiast w trybie priorytetu
Czas pracy baterii
drugiego planu — do najbardziej oddalonego.
Ciągła praca: Około 13.000 cyklów (przy temperaturze ok. 20°C)
celu, kolor itp. Korzystaj z niej wyłącznie w celach orientacyjnych.
ładunku, czas pracy tej baterii prawdopodobnie będzie krótszy niż powyższa wartość.
192 193
Jp
Jp
En
En
Es
Es
Fr
Fr
De
De
It
It
Se
Se
Nl
Nl
Ru
Ru
Pt
Pt
Pl
Pl
Fi
Fi
No
No
Dk
Dk
Cz
Cz
Ro
Ro
Hu
Hu
194 195
Measurement
1. Press the POWER button for power-on.
(Power turns off 8 seconds after the last
operation.)
Immediately after power-on.
3. Press POWER button once to start single measurement.
4. After measurement, “distance” or “fail to measure” indicator are displayed for 8 seconds, then power turns off. If you press the POWER
button during power-on (while the internal display is lit), another single measurement starts.
unable to measure distance.
3. Keep pressing POWER button to start continuous measurement up to 20 seconds. The internal display shows “distance” and
“fail to measure” indicator alternately.
Note: Laser irradiaton mark is blinking during the measurement.
Note: If you stop pressing the button, the continuous measuremen stops
2. Aim at the target
Positionthetargetatthecenterofthereticle
[Single measurement]
Failure to measure or
unable to measure distance.
[Continuous measurement]
4. After continuous measurement, the measure results are displayed for 8 seconds, then power turns off. If you press the POWER
button during power-on (while the internal display is lit), another measrement starts.
Failure to measure or
Target focusing.
Measuring.
(Initializing)
.
Upward measurement. Downward measurement.
Displays the measured
figure. (Target 1)
Displays the measured figure.
Stand-by.
Displays the measured
figure. (Target 2)
Measurement
1. Press the POWER button for power-on.
(Power turns off 8 seconds after the last
operation.)
Immediately after power-on.
(Initializing)
3. Press POWER button once to start single measurement.
Measuring.
4. After measurement, “distance” or “fail to measure” indicator are displayed for 8 seconds, then power turns off. If you press the POWER
button during power-on (while the internal display is lit), another single measurement starts.
Failure to measure or
unable to measure distance.
Displays the measured
figure. (Target 1)
3. Keep pressing POWER button to start continuous measurement up to 20 seconds. The internal display shows “distance” and
“fail to measure” indicator alternately.
Note: Laser irradiaton mark is blinking during the measurement.
Note: If you stop pressing the button, the continuous measuremen stops
Target focusing.
2. Aim at the target
.
Positionthetargetatthecenterofthereticle
[Single measurement]
Failure to measure or
unable to measure distance.
Upward measurement. Downward measurement.
Displays the measured figure.
[Continuous measurement]
4. After continuous measurement, the measure results are displayed for 8 seconds, then power turns off. If you press the POWER
button during power-on (while the internal display is lit), another measrement starts.
Stand-by.
Displays the measured
figure. (Target 2)
Measurement
1. Press the POWER button for power-on.
(Power turns off 8 seconds after the last
operation.)
Immediately after power-on.
Stand-by.
(Initializing)
2. Aim at the target
.
Positionthetargetatthecenterofthereticle
3. Press POWER button once to start single measurement.
4. After measurement, “distance” or “fail to measure” indicator are displayed for 8 seconds, then power turns off. If you press the POWER
button during power-on (while the internal display is lit), another single measurement starts.
unable to measure distance.
3. Keep pressing POWER button to start continuous measurement up to 20 seconds. The internal display shows “distance” and
“fail to measure” indicator alternately.
Note: Laser irradiaton mark is blinking during the measurement.
Note: If you stop pressing the button, the continuous measuremen stops
[Single measurement]
Failure to measure or
unable to measure distance.
[Continuous measurement]
4. After continuous measurement, the measure results are displayed for 8 seconds, then power turns off. If you press the POWER
button during power-on (while the internal display is lit), another measrement starts.
Failure to measure or
Target focusing.
Measuring.
Upward measurement. Downward measurement.
Displays the measured
figure. (Target 1)
Displays the measured figure.
Displays the measured
figure. (Target 2)
Pomiar
【
Pojedynczy pomiar
】
3. Naciśnij raz przycisk
aby rozpocząć pojedynczy pomiar.
【
Funkcja ciągłego pomiaru
】
2. Skieruj na cel.
wewnętrzny ekran jest włączony)
Ustaw cel na środku krzyża
(Automatyczne wyłączanie zasilania
nitek.
po upływie 8 sekund nieużytkowania)
Natychmiast po włączeniu
Tryb czuwania Ustawianie na celu
(Inicjalizacja).
Measurement
1. Press the POWER button for power-on.
(Power turns off 8 seconds after the last
operation.)
Immediately after power-on.
Stand-by.
(Initializing)
2. Aim at the target
.
Positionthetargetatthecenterofthereticle
Target focusing.
[Single measurement]
3. Press POWER button once to start single measurement.
Measuring.
4. After measurement, “distance” or “fail to measure” indicator are displayed for 8 seconds, then power turns off. If you press the POWER
button during power-on (while the internal display is lit), another single measurement starts.
Failure to measure or
Upward measurement. Downward measurement.
unable to measure distance.
Displays the measured figure.
[Continuous measurement]
3. Keep pressing POWER button to start continuous measurement up to 20 seconds. The internal display shows “distance” and
“fail to measure” indicator alternately.
Note: Laser irradiaton mark is blinking during the measurement.
Note: If you stop pressing the button, the continuous measuremen stops
Failure to measure or
unable to measure distance.
4. After continuous measurement, the measure results are displayed for 8 seconds, then power turns off. If you press the POWER
button during power-on (while the internal display is lit), another measrement starts.
Displays the measured
figure. (Target 1)
Displays the measured
figure. (Target 2)
Measurement
1. Press the POWER button for power-on.
(Power turns off 8 seconds after the last
operation.)
Immediately after power-on.
Stand-by.
(Initializing)
2. Aim at the target
.
Positionthetargetatthecenterofthereticle
Target focusing.
[Single measurement]
3. Press POWER button once to start single measurement.
Measuring.
4. After measurement, “distance” or “fail to measure” indicator are displayed for 8 seconds, then power turns off. If you press the POWER
button during power-on (while the internal display is lit), another single measurement starts.
Failure to measure or
Upward measurement. Downward measurement.
unable to measure distance.
Displays the measured figure.
[Continuous measurement]
3. Keep pressing POWER button to start continuous measurement up to 20 seconds. The internal display shows “distance” and
“fail to measure” indicator alternately.
Note: Laser irradiaton mark is blinking during the measurement.
Note: If you stop pressing the button, the continuous measuremen stops
Failure to measure or
unable to measure distance.
Displays the measured
figure. (Target 1)
4. After continuous measurement, the measure results are displayed for 8 seconds, then power turns off. If you press the POWER
button during power-on (while the internal display is lit), another measrement starts.
Displays the measured
figure. (Target 2)
Measurement
1. Press the POWER button for power-on.
(Power turns off 8 seconds after the last
operation.)
Immediately after power-on.
Stand-by.
(Initializing)
2. Aim at the target
.
Positionthetargetatthecenterofthereticle
Target focusing.
[Single measurement]
3. Press POWER button once to start single measurement.
Measuring.
4. After measurement, “distance” or “fail to measure” indicator are displayed for 8 seconds, then power turns off. If you press the POWER
button during power-on (while the internal display is lit), another single measurement starts.
Failure to measure or
unable to measure distance.
3. Keep pressing POWER button to start continuous measurement up to 20 seconds. The internal display shows “distance” and
“fail to measure” indicator alternately.
Note: Laser irradiaton mark is blinking during the measurement.
Note: If you stop pressing the button, the continuous measuremen stops
Failure to measure or
unable to measure distance.
[Continuous measurement]
4. After continuous measurement, the measure results are displayed for 8 seconds, then power turns off. If you press the POWER
button during power-on (while the internal display is lit), another measrement starts.
Upward measurement. Downward measurement.
Displays the measured
figure. (Target 1)
Displays the measured figure.
Displays the measured
figure. (Target 2)
Measurement
1. Press the POWER button for power-on.
(Power turns off 8 seconds after the last
operation.)
Immediately after power-on.
Stand-by.
(Initializing)
2. Aim at the target
.
Positionthetargetatthecenterofthereticle
Target focusing.
[Single measurement]
3. Press POWER button once to start single measurement.
Measuring.
4. After measurement, “distance” or “fail to measure” indicator are displayed for 8 seconds, then power turns off. If you press the POWER
button during power-on (while the internal display is lit), another single measurement starts.
unable to measure distance.
3. Keep pressing POWER button to start continuous measurement up to 20 seconds. The internal display shows “distance” and
“fail to measure” indicator alternately.
Note: Laser irradiaton mark is blinking during the measurement.
Note: If you stop pressing the button, the continuous measuremen stops
unable to measure distance.
4. After continuous measurement, the measure results are displayed for 8 seconds, then power turns off. If you press the POWER
button during power-on (while the internal display is lit), another measrement starts.
[Continuous measurement]
Failure to measure or
Failure to measure or
Upward measurement. Downward measurement.
Displays the measured
figure. (Target 1)
Displays the measured figure.
Displays the measured
figure. (Target 2)
Measurement
1. Press the POWER button for power-on.
(Power turns off 8 seconds after the last
operation.)
Immediately after power-on.
Stand-by.
(Initializing)
2. Aim at the target
.
Positionthetargetatthecenterofthereticle
Target focusing.
[Single measurement]
3. Press POWER button once to start single measurement.
4. After measurement, “distance” or “fail to measure” indicator are displayed for 8 seconds, then power turns off. If you press the POWER
button during power-on (while the internal display is lit), another single measurement starts.
unable to measure distance.
3. Keep pressing POWER button to start continuous measurement up to 20 seconds. The internal display shows “distance” and
“fail to measure” indicator alternately.
Note: Laser irradiaton mark is blinking during the measurement.
Note: If you stop pressing the button, the continuous measuremen stops
unable to measure distance.
4. After continuous measurement, the measure results are displayed for 8 seconds, then power turns off. If you press the POWER
button during power-on (while the internal display is lit), another measrement starts.
[Continuous measurement]
Failure to measure or
Failure to measure or
Measuring.
Upward measurement. Downward measurement.
Displays the measured
figure. (Target 1)
Displays the measured figure.
Displays the measured
figure. (Target 2)
Measurement
1. Press the POWER button for power-on.
(Power turns off 8 seconds after the last
operation.)
Immediately after power-on.
Stand-by.
(Initializing)
2. Aim at the target
.
Positionthetargetatthecenterofthereticle
Target focusing.
[Single measurement]
3. Press POWER button once to start single measurement.
Measuring.
4. After measurement, “distance” or “fail to measure” indicator are displayed for 8 seconds, then power turns off. If you press the POWER
button during power-on (while the internal display is lit), another single measurement starts.
unable to measure distance.
3. Keep pressing POWER button to start continuous measurement up to 20 seconds. The internal display shows “distance” and
“fail to measure” indicator alternately.
Note: Laser irradiaton mark is blinking during the measurement.
Note: If you stop pressing the button, the continuous measuremen stops
unable to measure distance.
4. After continuous measurement, the measure results are displayed for 8 seconds, then power turns off. If you press the POWER
button during power-on (while the internal display is lit), another measrement starts.
[Continuous measurement]
Failure to measure or
Failure to measure or
Upward measurement. Downward measurement.
Displays the measured
figure. (Target 1)
Displays the measured figure.
Displays the measured
figure. (Target 2)
Measurement
1. Press the POWER button for power-on.
(Power turns off 8 seconds after the last
operation.)
Immediately after power-on.
Stand-by.
(Initializing)
2. Aim at the target
.
Positionthetargetatthecenterofthereticle
Target focusing.
[Single measurement]
3. Press POWER button once to start single measurement.
Measuring.
4. After measurement, “distance” or “fail to measure” indicator are displayed for 8 seconds, then power turns off. If you press the POWER
button during power-on (while the internal display is lit), another single measurement starts.
Failure to measure or
unable to measure distance.
Displays the measured
figure. (Target 1)
3. Keep pressing POWER button to start continuous measurement up to 20 seconds. The internal display shows “distance” and
“fail to measure” indicator alternately.
Note: Laser irradiaton mark is blinking during the measurement.
Note: If you stop pressing the button, the continuous measuremen stops
Failure to measure or
unable to measure distance.
Upward measurement. Downward measurement.
Displays the measured figure.
[Continuous measurement]
4. After continuous measurement, the measure results are displayed for 8 seconds, then power turns off. If you press the POWER
button during power-on (while the internal display is lit), another measrement starts.
Displays the measured
figure. (Target 2)
Measurement
1. Press the POWER button for power-on.
(Power turns off 8 seconds after the last
operation.)
Immediately after power-on.
Stand-by.
(Initializing)
2. Aim at the target
.
Positionthetargetatthecenterofthereticle
Target focusing.
[Single measurement]
3. Press POWER button once to start single measurement.
Measuring.
4. After measurement, “distance” or “fail to measure” indicator are displayed for 8 seconds, then power turns off. If you press the POWER
button during power-on (while the internal display is lit), another single measurement starts.
Failure to measure or
unable to measure distance.
3. Keep pressing POWER button to start continuous measurement up to 20 seconds. The internal display shows “distance” and
“fail to measure” indicator alternately.
Note: Laser irradiaton mark is blinking during the measurement.
Note: If you stop pressing the button, the continuous measuremen stops
Failure to measure or
unable to measure distance.
[Continuous measurement]
4. After continuous measurement, the measure results are displayed for 8 seconds, then power turns off. If you press the POWER
button during power-on (while the internal display is lit), another measrement starts.
Upward measurement. Downward measurement.
Displays the measured
figure. (Target 1)
Displays the measured figure.
Displays the measured
figure. (Target 2)
Uwaga — korzystanie z elementów sterowania lub regulacji, czy też wykonywanie
procedur w sposób inny, niż określony w niniejszym podręczniku, może spowodować narażenie na
wskaźnik
niebezpieczne promieniowanie.
1. Przygotowanie
wyświetlacz jest aktywny) rozpoczyna się kolejny pomiar pojedynczy.
2. Gumowa muszla oczna
3. Regulacja dioptrii
Najpierw obróć do końca pierścień regulacji dioptrii w kierunku przeciwnym do ruchu
niepowodzeniem” lub brak
możliwości dokonania
okular, obróć pierścień regulacji dioptrii w prawo, do momentu gdy obraz na ekranie LCD
pomiaru”
będzieostry.
3. Naciśnij i przytrzymaj przycisk
nie być możliwe.
(pomierzona odległość) będzie wyświetlany przez 8 sekund, a
4. Pomiar
następnie zasilanie jest wyłączane.
*
Oznaczenie promienia lasera miga podczas pomiaru.
wewnętrzny wyświetlacz jest aktywny) rozpoczyna się kolejny
*
Informacje na temat ustawiania poszczególnych trybów znajdują się w odpowiednich sekcjach.
*
pomiar pojedynczy.
golfa, skorzystaj z trybu priorytetu pierwszego planu. Aby dokonać
niepowodzeniem”
pomierzonej
pomierzonej
łatwego pomiaru, przeskanuj chorągiewkę z użyciem funkcji
lub brak możliwości
wartości (Cel 1).
wartości (Cel 2).
dokonania pomiaru”
nie ma innych obiektów, najniższa wartość będzie rzeczywistą
odległością od chorągiewki.
Dane techniczne
Jp
System pomiaru
Korpus: wodoodporny (maksymalna głębokość zanurzenia: 1 metr, przez 10 minut)*
Jp
Budowa
(Komora baterii: wodoodporna**)
En
En
Es
Laserowy K
Es
Rzeczywista odległość (górny, 4-cyfrowy): co 0,5 m
Bezpieczeństwo
Laserowy K
Fr
Rzeczywista odległość (dolny, 3-cyfrowy): co 1 m
Fr
De
De
(przyrost)
co 0,2 m
Środowisko
It
It
Laser
Se
Se
Układ optyczny
Klasa
Nl
Nl
6
Długość fali (nm) 905
Ru
Ru
ø21
Czas trwania impulsu (ns) 12
Pt
Pt
7,5
15
Pl
Pl
Oddalenie źrenicy wyjściowej (mm) 18,3
Rozbieżność wiązki (mrad)
Fi
Fi
Źrenica wyjściowa (mm) ø3,5
80 lub mniej (bez kondensacji)
No
No
-
1
Regulacja dioptrii ±4 m
Dk
Dk
* Modele wodoszczelne
Inne
Cz
Cz
Temperatura pracy (˚C) -10 —
10minut, system optyczny ani obserwacyjny nie ulegną uszkodzeniu.
Ro
Ro
Dalmierz laserowy Nikon oferuje następujące zalety:
Hu
1x bateria litowa CR2 (DC 3V)
Hu
Źródło zasilania
Automatyczne wyłączanie zasilania (po upływie 8 sekund nieużytkowania)
113 x 70 x 39
Podczas korzystania z dalmierza laserowego Nikon należy stosować się do następujących zaleceń:
Masa (g) Około 175 (bez baterii)
** Komora baterii jest uszczelniona. Mimo to woda może dostać się do środka, jeśli dalmierz laserowy zostanie zanurzony w wodzie.
196 197
Inne
Rozwiązywanie problemów/Naprawa
Jp
Jp
En
Urządzenie jest zgodne z częścią 15 zasad FCC. Działanie musi odbywać się z uwzględnieniem dwóch warunków:
En
Es
(1) Urządzenie nie może powodować szkodliwych zakłóceń, a także
Es
Problem Wykonaj czynności
(2) Urządzenie musi być odporne na zakłócenia, włącznie z zakłóceniami mogącymi spowodować niepożądane
Fr
Fr
operacje.
●
De
Urządzenie nie włącza się
(bliższa strona, górna część korpusu)
De
(ekran LCD nie podświetla się)
● Sprawdź, czy poprawnie włożono baterię
It
It
●
Se
Niniejsze urządzenie zostało przetestowane i jest zgodne z ograniczeniami przewidzianymi dla urządzeń
Se
● Upewnij się, że żaden obiekt, taki jak palec lub pasek, nie blokuje emitera
Nl
Nl
w celu zapewnienia właściwej ochrony przeciwko szkodliwemu wpływowi urządzenia na terenach mieszkalnych.
promienia laserowego ani detektora promienia laserowego po stronie
Ru
Urządzenie generuje, korzysta z, a także emituje energię w postaci fal radiowych. Instalacja i korzystanie w sposób
soczewek obiektywu.
Ru
● Upewnij się, że emiter promienia laserowego i detektor promienia laserowego
Pt
Nie można pomierzyć odległości
Pt
Pl
● Upewnij się, że kształt i stan celu jest odpowiedni do tego, aby odbić promień
Pl
szkodliwych zakłóceń w odbiorze sygnału radiowego lub telewizyjnego, co można sprawdzić poprzez wyłączenie i
lasera.
Fi
włączenie urządzenia, sugeruje się, aby użytkownik wykonał próbę skorygowania zakłóceń, wykonując przynajmniej
Fi
●
jedną z poniższych czynności:
No
No
● Upewnij się, że urządzenie jest w stabilnej pozycji podczas pomiaru.
Dk
Dk
● Upewnij się, że cel znajduje się w zakresie pomiaru
Cz
Cz
Niniejsze urządzenie cyfrowe klasy B spełnia wszystkie wymogi kanadyjskich przepisów dotyczących urządzeń
Ro
Bliższy cel, zlokalizowany w
Ro
● Upewnij się, że między dalmierzem laserowym Nikon a celem nie znajdują się
ramach zakresu pomiaru, nie
Hu
żadne obiekty, takie jak liście czy trawa.
Hu
może być pomierzone
● Upewnij się, że między dalmierzem laserowym Nikon a celem nie znajdują się
obiektów, których odległość
żadne obiekty, takie jak liście czy trawa.
w charakterze oficjalnego dowodu.
przekracza możliwości urządzenia
●
● Upewnij się, że kształt i stan celu jest odpowiedni do tego, aby odbić promień
lasera.
● Upewnij się, że urządzenie jest w stabilnej pozycji podczas pomiaru.
● Upewnij się, że między dalmierzem laserowym Nikon a celem nie znajdują się
żadne obiekty, takie jak liście czy trawa.
198 199
Rozwiązywanie problemów/Naprawa
Jp
Jp
En
En
Es
Es
Problem Wykonaj czynności
Fr
Fr
Suomi
De
●
De
● Upewnij się, że kształt i stan celu jest odpowiedni do tego, aby odbić promień
It
It
lasera.
SISÄLTÖ
Se
● Upewnij się, że między dalmierzem laserowym Nikon a celem nie znajdują się
Se
żadne obiekty, takie jak liście czy trawa.
Nl
Nl
........................... 202-205
Ru
Ru
RNaprawy błąd nadal występuje, skontaktuj się z lokalnym
....................................................... 206
Pt
sprzedawcą celem sprawdzenia lub naprawy urządzenia, ponieważ mogła wystąpić awaria. Czynność sprawdzenia lub naprawy
Pt
Kokoonpano ......................................... 207
Pl
Pl
mogą wystąpić obrażenia lub uszkodzenia produktu.
........................................................... 208
Fi
Fi
................................................... 209
No
No
Dk
Dk
............................................................... 210
Cz
Cz
........................................................ 211
Ro
Ro
Mittaus .................................................................. 212-213
Hu
Hu
Tekniset tiedot ................................................... 214-215
Muuta ............................................................................ 216
Korjaus ......................................... 217-218
200 201
Huomautukset ennen käyttöä
Jp
Noudata tarkasti seuraavia
TURVALLISUUSHUOMAUTUKSET
Jp
ohjeita, jotta voisit käyttää
poissa lasten ulottuvilta.
En
(Laser)
En
etäisyysmittaria oikein ja ilman
Es
Ohjainten, säätimien tai toimintojen käyttäminen muuhun tarkoitukseen tai muulla kuin
kotelo vahingoittuu tai jos
Es
ongelmia. Ennen kuin käytät tätä
Huomioi
tässä esitetyllä tavalla voi aiheuttaa altistumisen säteilylle.
Fr
tuotetta, lue huolellisesti
seuraavat seikat:
Fr
esimerkiksi maahan putoamisen
"käyttöä edeltävät
Varoitus
De
De
〇
huomautukset" ja ohjeet
It
It
tuotteen oikeaa käyttöä varten.
-painiketta silloin, kun katsot optisiin
Se
Se
〇
Pidä ohjeet aina saatavilla
ohjeen laiminlyönti voi aiheuttaa
Nl
tietojen tarkistamista varten.
Nl
〇
vahinkoa silmillesi.
Ru
Valmistajan takuu ei koske osiin purettua tai itse korjattua laitetta.
Ru
Pt
VAROITUS
Pt
Pl
●
Pl
optisella instrumentilla kuten
●
Fi
laiminlyöden voi aiheuttaa vakavan
Fi
loukkaantumisen tai kuoleman.
No
No
-yhtiön antamaa kirjallista lupaa.
HUOMAUTUS
Dk
Dk
●
vamma.
Cz
Cz
tahansa ilman ennakkoilmoitusta.
voi aiheuttaa vakavia vammoja tai
-
Ro
Ro
aineellista vahinkoa.
Hu
Hu
poista paristo laitteesta.
terveydelle. Valmistajan takuu ei
korjattua tuotetta.
202 203
Huomautukset ennen käyttöä
Jp
TURVALLISUUSHUOMAUTUKSET
lasten ulottuville.
TURVALLISUUSHUOMAUTUKSET
TURVALLISUUSHUOMAUTUKSET
HOITO JA KUNNOSSAPITO
Säilytys
Jp
En
(Monokulaari)
(Litiumparisto)
Huomautus
Lenssit
En
Es
Es
hometta. Siksi Nikon Laser
ne voivat vahingoittua tai vuotaa,
Fr
Rangefinder
Fr
Huomioi
aiheuttaa laitteen ruostumista ja tahria
De
De
seuraavat seikat:
vaatteita.
hoitoon.
mutatahrat on poistettava
paikassa.
It
Varoitus
Huomioi seuraavat seikat:
It
varovasti kuivalla, puhtaalla
paristo
Se
Se
voimakkaaseen valoon tai laser-
kangaspyyhkeen avulla.
tai iltana, kuivaa se huolellisesti
Nl
on poistettava, kun ne ovat
Nl
Ru
Ru
autoon kuumana tai aurinkoisena
denaturoitua) pinttyneiden
Pt
Huomautus
Pt
samettikangasta tai tavallista
Pl
Pl
Se voi vahingoittaa laitetta tai
tuotetta avaimien tai
Fi
-painiketta.
naarmuttaa linssin pintaa. Kun
Fi
kolikoiden kanssa samassa taskussa
No
rungon
No
tai pussissa, se voi oikosulkeutua ja
suoraan auringonpaisteeseen.
Dk
aiheuttaa ylikuumenemisen.
Dk
linssin pintaa.
Cz
saadaksesi ohjeet korjattavaksi
Cz
Päärunko
paikkaan, kaadut tai aiheutat muun
Ro
Ro
onnettomuuden tai loukkaantumisen.
puhaltimen* avulla puhdista pinta
Hu
Hu
Se voi osua johonkin ja aiheuttaa
muutoksille, linssin pintaan saattaa
loukkaantumisen.
muuta orgaanista liuotinta
tuotetta, ennen kuin kosteus on
haihtunut.
aiheuttaa kaatumisen tai putoamisen
joka puhaltaa ilman pois
ja loukkaantumisen tai vikatoiminnan.
suuttimesta.
mukaisesti.
204 205
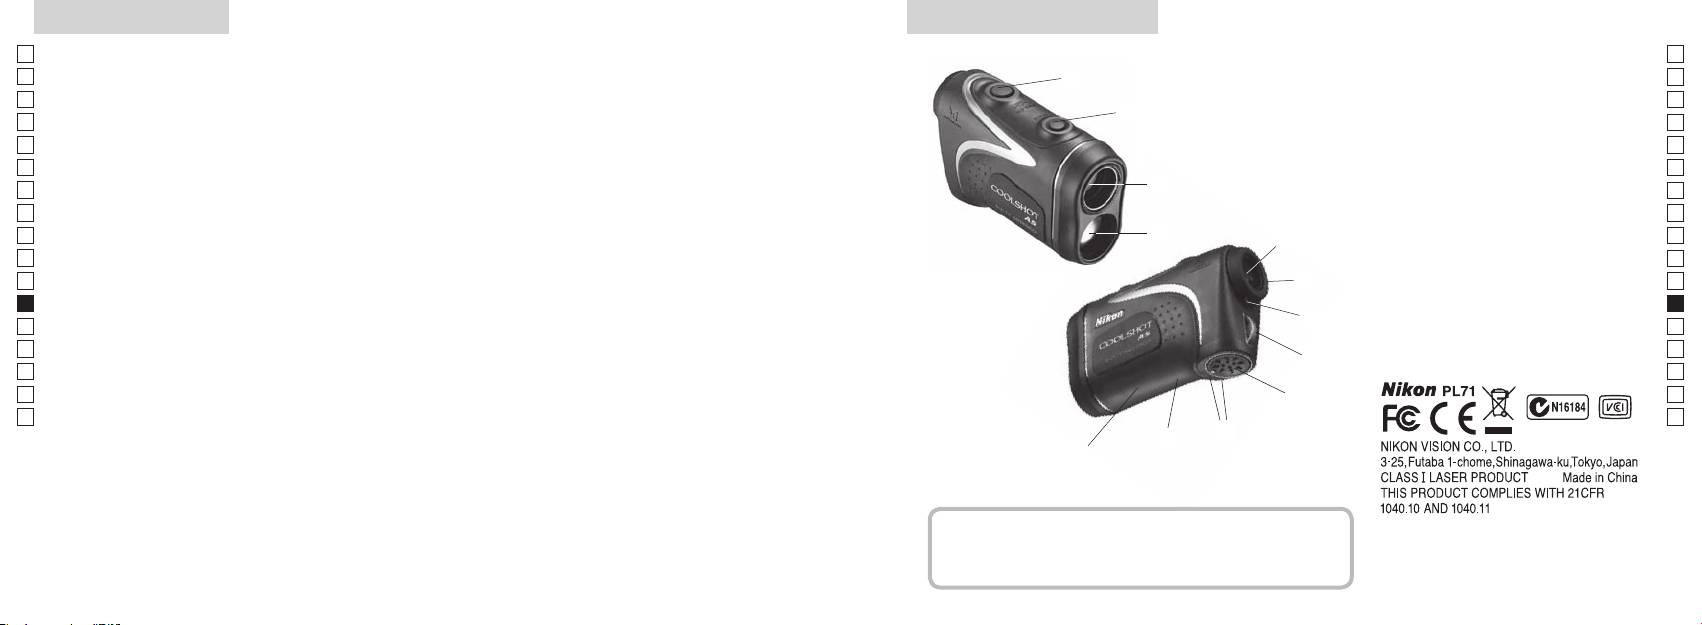
Pääominaisuudet Nimikkeet/Kokoonpano
Jp
Seuraavat olosuhteet helpottavat mittaamista:
Jp
1
En
4
En
Es
Es
3
2 Lasertunnistimen aukko
Fr
Fr
3
De
De
4
It
vaihdettavissa
Mittaustulos voi olla epätarkka tai virheellinen
It
56-kertaisella suurennuksella
seuraavissa tapauksissa:
1
Se
Se
valita kohteen mukaan
varustettu okulaari
Nl
Nl
6 D
Ru
painaminen mahdollistaa jatkuvan mittaustoiminnon
2
5
Ru
7 Diopterin indeksi
Pt
8
Pt
8sekuntia)
Pl
6
9
Pl
Fi
!p AKiinni"-
Fi
7
No
No
!q Tyyppitarra
Dk
Dk
Nikon Laser -etäisyysmittarissa käytetään mittaukseen
8
!w
Cz
Cz
näkymätöntä lasersädettä. Se mittaa ajan, jonka lasersäde
Ro
tarvitsee kulkiessaan etäisyysmittarilta kohteelle ja
9
Ro
takaisin. Laserheijastuksen laatu ja mittaustulokset
Hu
Hu
vaihtelevat ilmaston ja ympäristöolosuhteiden sekä
!p
kohteen värin, pinnanlaadun, koon, muodon ja muiden
!q
ominaisuuksien mukaan.
!w
Kokoonpano
.................................. x1
......................... x1
................ x1
........ x1
206 207
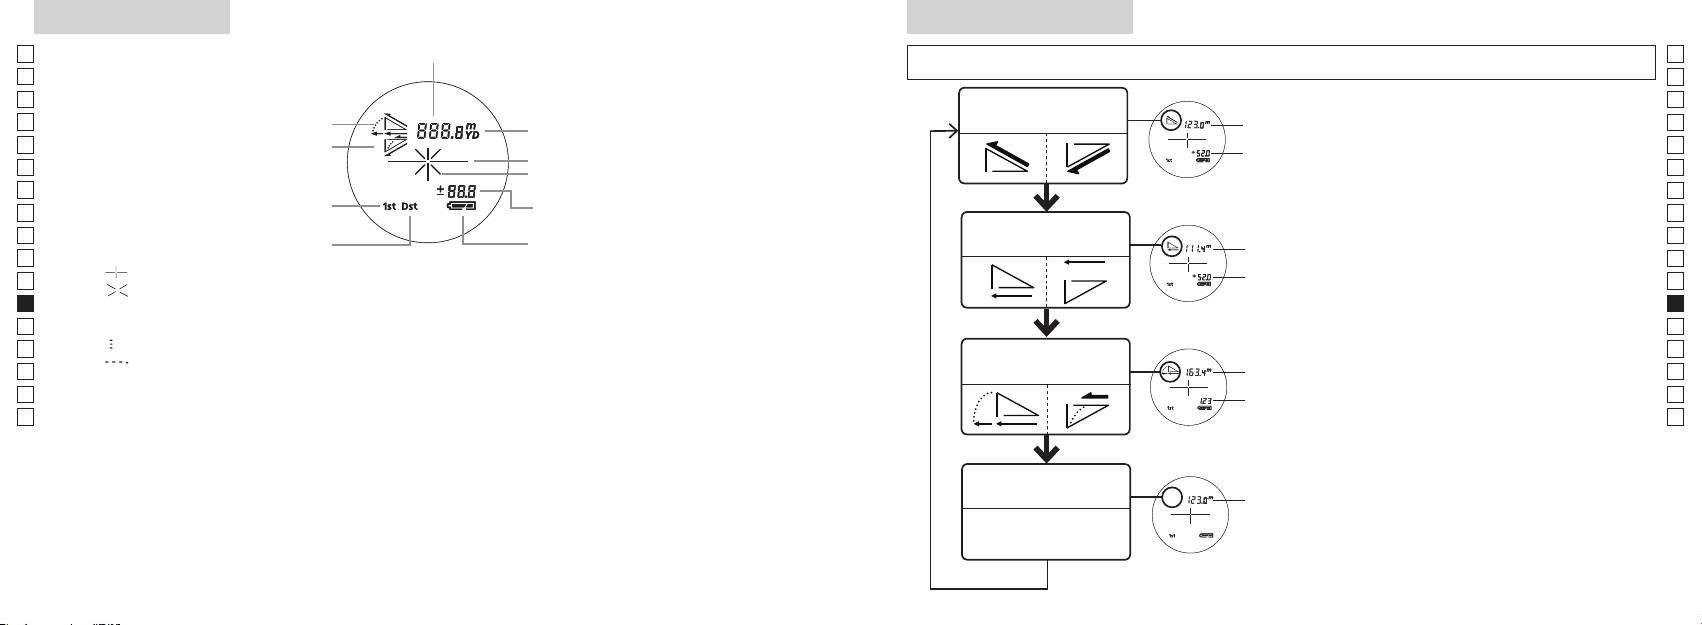
Sisäinen näyttö
Mittaustilan näyttö
Jp
Jp
En
En
Es
Es
Todellisen etäisyyden
Todellinen
Fr
Nouseva
ja korkeuden tila
Fr
De
Laskeva
De
Kohdemerkki
Korkeus
It
It
Se
Se
Nl
Nl
Vaakasuoran etäisyyden
Ru
Vaakasuora
Ru
Kaukaisen kohteen esivalintatila
ja korkeuden tila
Pt
-painiketta.
Pt
『 』
4. Toista vaiheet 2 ja 3, kunnes haluamaasi
Pl
Korkeus
Pl
『 』
Fi
Fi
*
No
No
Dk
『
』
*
Dk
『
』
Golf-tila
Kulmakorjattu
Cz
Cz
mukaan.
Ro
Ro
Todellinen
*
Hu
mittaukset suoritetaan valitsemasi uuden
Hu
Todellisen
Todellinen
etäisyyden tila
208 209
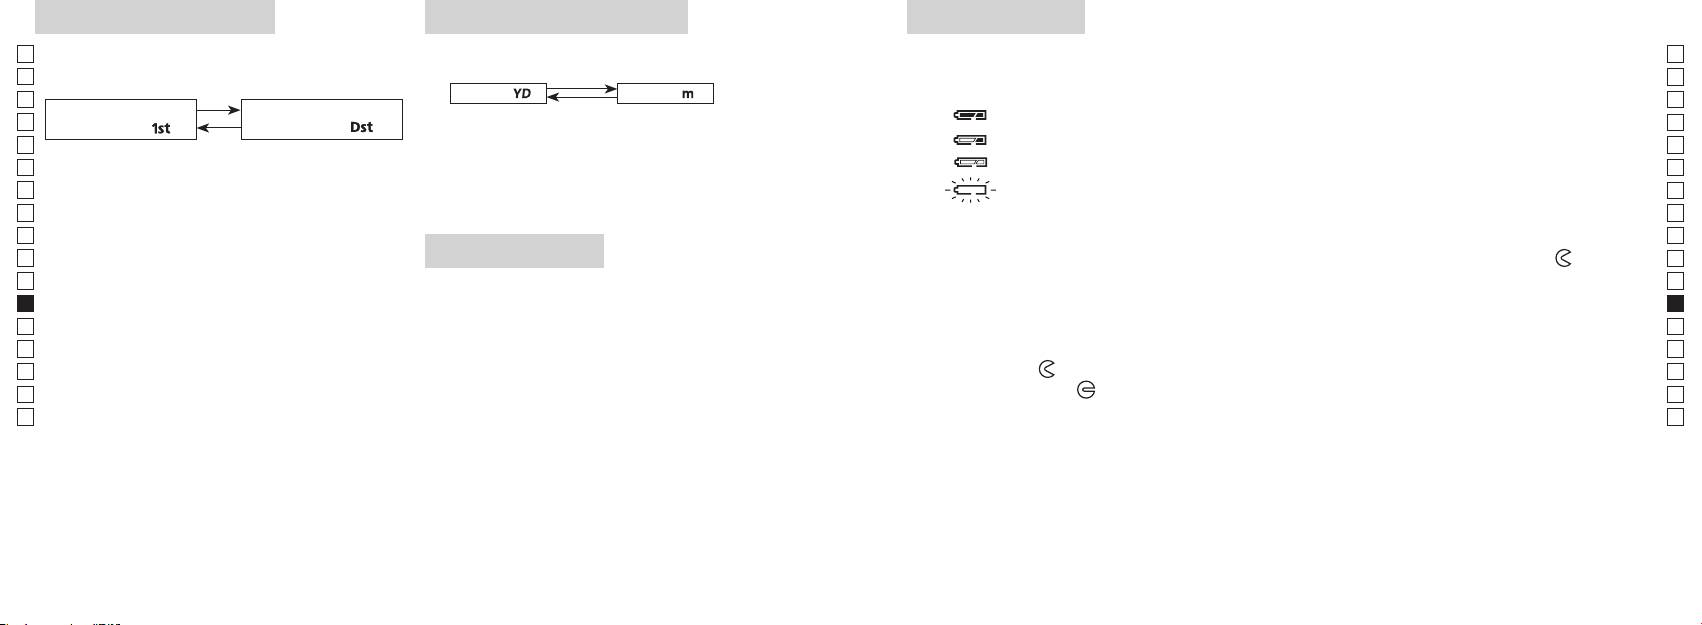
Esivalintatila
Etäisyyden näyttöyksiköt
Pariston vaihto
Jp
Jp
Paristotyyppi: 1 litiumparisto 3V CR2
Tehdasasetus on jaardeina.
En
Pariston jäljellä olevan varauksen merkkivalo
En
aardit
[ ]
Metrit [ ]
Es
Es
Kaukaisen kohteen
Fr
Fr
esivalintatila「
」
esivalintatila
「
」
De
De
It
It
vaihtunut, vapauta painike.
Se
Se
sammuu automaattisesti. Vaihda paristo.
Nl
Nl
Ru
Ru
1. Avaa paristolokeron kansi
Pt
esivalintatila ja kaukaisen kohteen esivalintatila
LED-valaistus
-merkin
Pt
vaihtuvat.
Pl
osoittamaan suuntaan. Avaaminen voi olla hankalaa vesitiiviin sovituksen ja kumitiivisteen vuoksi.
Pl
3. Vapauta molemmat painikkeet, kun tila on
2. Vaihda uusi paristo vanhan tilalle
Fi
Fi
vaihtunut.
No
*
No
vaihtoa ei tapahdu.
Dk
3. Sulje paristolokeron kansi
Dk
*
*
Cz
Kohdista
●
Cz
paneelin katseluun.
Ro
tms. kansi auki
-merkin osoittamaan suuntaan. Kannen kiinnitys voi olla hankalaa vesitiiviin ja
[
*
Ro
esivalintatila]
Hu
Hu
hyvin kiinni.
Pariston kestoaika
Jatkuva käyttö:
kaukaisimpaan kohteeseen.
210 211
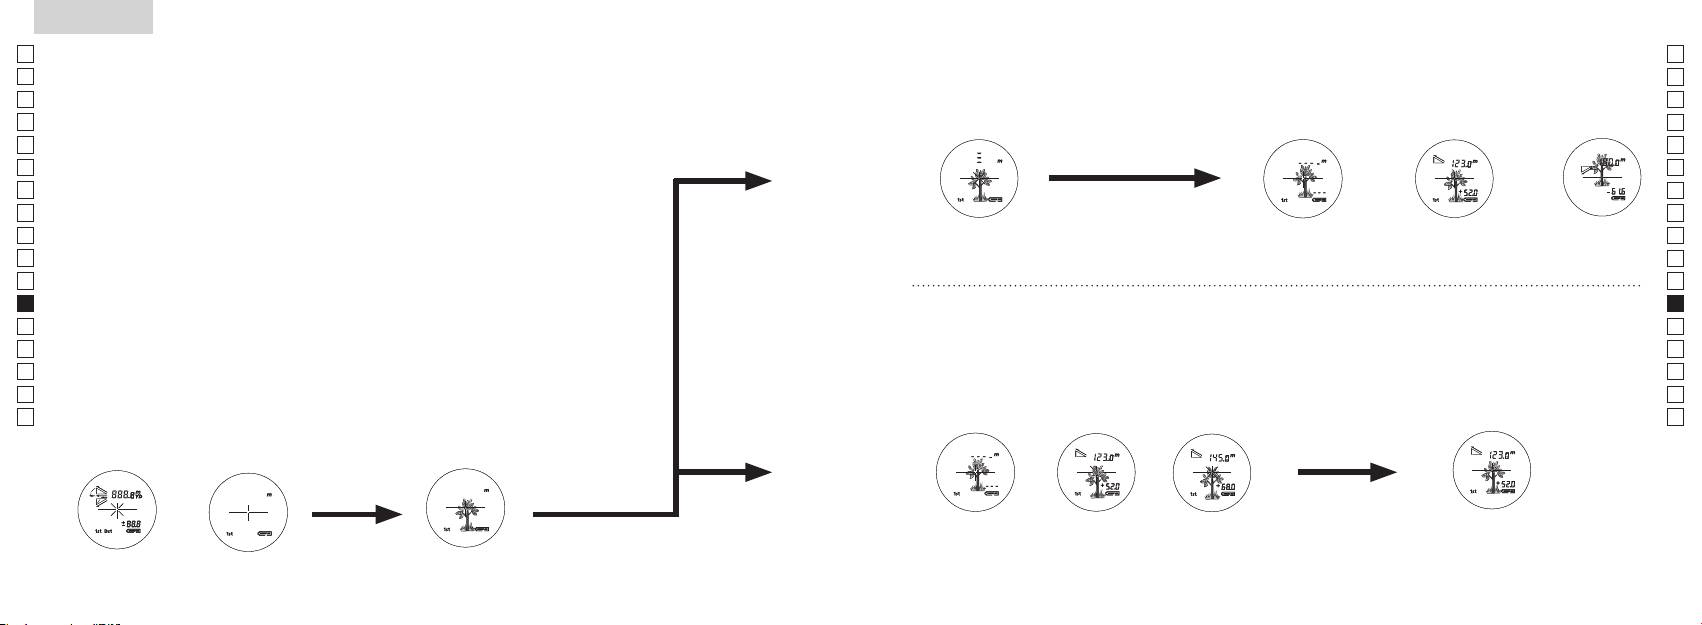
Jp
Jp
En
En
Es
Es
Fr
Fr
De
De
It
It
Se
Se
Nl
Nl
Ru
Ru
Pt
Pt
Pl
Pl
Fi
Fi
No
No
Dk
Dk
Cz
Cz
Ro
Ro
Hu
Hu
212 213
Measurement
1. Press the POWER button for power-on.
(Power turns off 8 seconds after the last
operation.)
Immediately after power-on.
3. Press POWER button once to start single measurement.
4. After measurement, “distance” or “fail to measure” indicator are displayed for 8 seconds, then power turns off. If you press the POWER
button during power-on (while the internal display is lit), another single measurement starts.
unable to measure distance.
3. Keep pressing POWER button to start continuous measurement up to 20 seconds. The internal display shows “distance” and
“fail to measure” indicator alternately.
Note: Laser irradiaton mark is blinking during the measurement.
Note: If you stop pressing the button, the continuous measuremen stops
2. Aim at the target
Positionthetargetatthecenterofthereticle
[Single measurement]
Failure to measure or
unable to measure distance.
[Continuous measurement]
4. After continuous measurement, the measure results are displayed for 8 seconds, then power turns off. If you press the POWER
button during power-on (while the internal display is lit), another measrement starts.
Failure to measure or
Target focusing.
Measuring.
(Initializing)
.
Upward measurement. Downward measurement.
Displays the measured
figure. (Target 1)
Displays the measured figure.
Stand-by.
Displays the measured
figure. (Target 2)
Measurement
1. Press the POWER button for power-on.
(Power turns off 8 seconds after the last
operation.)
Immediately after power-on.
(Initializing)
3. Press POWER button once to start single measurement.
Measuring.
4. After measurement, “distance” or “fail to measure” indicator are displayed for 8 seconds, then power turns off. If you press the POWER
button during power-on (while the internal display is lit), another single measurement starts.
Failure to measure or
unable to measure distance.
Displays the measured
figure. (Target 1)
3. Keep pressing POWER button to start continuous measurement up to 20 seconds. The internal display shows “distance” and
“fail to measure” indicator alternately.
Note: Laser irradiaton mark is blinking during the measurement.
Note: If you stop pressing the button, the continuous measuremen stops
Target focusing.
2. Aim at the target
.
Positionthetargetatthecenterofthereticle
[Single measurement]
Failure to measure or
unable to measure distance.
Upward measurement. Downward measurement.
Displays the measured figure.
[Continuous measurement]
4. After continuous measurement, the measure results are displayed for 8 seconds, then power turns off. If you press the POWER
button during power-on (while the internal display is lit), another measrement starts.
Stand-by.
Displays the measured
figure. (Target 2)
Measurement
1. Press the POWER button for power-on.
(Power turns off 8 seconds after the last
operation.)
Immediately after power-on.
Stand-by.
(Initializing)
2. Aim at the target
.
Positionthetargetatthecenterofthereticle
3. Press POWER button once to start single measurement.
4. After measurement, “distance” or “fail to measure” indicator are displayed for 8 seconds, then power turns off. If you press the POWER
button during power-on (while the internal display is lit), another single measurement starts.
unable to measure distance.
3. Keep pressing POWER button to start continuous measurement up to 20 seconds. The internal display shows “distance” and
“fail to measure” indicator alternately.
Note: Laser irradiaton mark is blinking during the measurement.
Note: If you stop pressing the button, the continuous measuremen stops
[Single measurement]
Failure to measure or
unable to measure distance.
[Continuous measurement]
4. After continuous measurement, the measure results are displayed for 8 seconds, then power turns off. If you press the POWER
button during power-on (while the internal display is lit), another measrement starts.
Failure to measure or
Target focusing.
Measuring.
Upward measurement. Downward measurement.
Displays the measured
figure. (Target 1)
Displays the measured figure.
Displays the measured
figure. (Target 2)
Mittaus
Huomautus — ohjainten, säätimien tai toimintojen käyttäminen muuhun
【
Yksittäinen mittaus
】
tarkoitukseen tai muulla kuin tässä esitetyllä tavalla voi altistaa säteilylle.
1. Valmistelut
2. Kuminen silmäsuppilo
3. Diopterin säätö
【
Jatkuva mittaustoiminto
】
4. Mittaus käynnissä
*
.
Sijoita kohde ristikon keskelle.
(Automaattinen virrankatkaisu
tapahtuu noin 8 sekunnin kuluttua)
Valmiustila
Measurement
1. Press the POWER button for power-on.
(Power turns off 8 seconds after the last
operation.)
Immediately after power-on.
Stand-by.
(Initializing)
2. Aim at the target
.
Positionthetargetatthecenterofthereticle
Target focusing.
[Single measurement]
3. Press POWER button once to start single measurement.
Measuring.
4. After measurement, “distance” or “fail to measure” indicator are displayed for 8 seconds, then power turns off. If you press the POWER
button during power-on (while the internal display is lit), another single measurement starts.
Failure to measure or
Upward measurement. Downward measurement.
unable to measure distance.
Displays the measured figure.
[Continuous measurement]
3. Keep pressing POWER button to start continuous measurement up to 20 seconds. The internal display shows “distance” and
“fail to measure” indicator alternately.
Note: Laser irradiaton mark is blinking during the measurement.
Note: If you stop pressing the button, the continuous measuremen stops
Failure to measure or
unable to measure distance.
4. After continuous measurement, the measure results are displayed for 8 seconds, then power turns off. If you press the POWER
button during power-on (while the internal display is lit), another measrement starts.
Displays the measured
figure. (Target 1)
Displays the measured
figure. (Target 2)
Measurement
1. Press the POWER button for power-on.
(Power turns off 8 seconds after the last
operation.)
Immediately after power-on.
Stand-by.
(Initializing)
2. Aim at the target
.
Positionthetargetatthecenterofthereticle
Target focusing.
[Single measurement]
3. Press POWER button once to start single measurement.
Measuring.
4. After measurement, “distance” or “fail to measure” indicator are displayed for 8 seconds, then power turns off. If you press the POWER
button during power-on (while the internal display is lit), another single measurement starts.
Failure to measure or
Upward measurement. Downward measurement.
unable to measure distance.
Displays the measured figure.
[Continuous measurement]
3. Keep pressing POWER button to start continuous measurement up to 20 seconds. The internal display shows “distance” and
“fail to measure” indicator alternately.
Note: Laser irradiaton mark is blinking during the measurement.
Note: If you stop pressing the button, the continuous measuremen stops
Failure to measure or
unable to measure distance.
Displays the measured
figure. (Target 1)
4. After continuous measurement, the measure results are displayed for 8 seconds, then power turns off. If you press the POWER
button during power-on (while the internal display is lit), another measrement starts.
Displays the measured
figure. (Target 2)
Measurement
1. Press the POWER button for power-on.
(Power turns off 8 seconds after the last
operation.)
Immediately after power-on.
Stand-by.
(Initializing)
2. Aim at the target
.
Positionthetargetatthecenterofthereticle
Target focusing.
[Single measurement]
3. Press POWER button once to start single measurement.
Measuring.
4. After measurement, “distance” or “fail to measure” indicator are displayed for 8 seconds, then power turns off. If you press the POWER
button during power-on (while the internal display is lit), another single measurement starts.
Failure to measure or
unable to measure distance.
3. Keep pressing POWER button to start continuous measurement up to 20 seconds. The internal display shows “distance” and
“fail to measure” indicator alternately.
Note: Laser irradiaton mark is blinking during the measurement.
Note: If you stop pressing the button, the continuous measuremen stops
Failure to measure or
unable to measure distance.
[Continuous measurement]
4. After continuous measurement, the measure results are displayed for 8 seconds, then power turns off. If you press the POWER
button during power-on (while the internal display is lit), another measrement starts.
Upward measurement. Downward measurement.
Displays the measured
figure. (Target 1)
Displays the measured figure.
Displays the measured
figure. (Target 2)
Measurement
1. Press the POWER button for power-on.
(Power turns off 8 seconds after the last
operation.)
Immediately after power-on.
Stand-by.
(Initializing)
2. Aim at the target
.
Positionthetargetatthecenterofthereticle
Target focusing.
[Single measurement]
3. Press POWER button once to start single measurement.
Measuring.
4. After measurement, “distance” or “fail to measure” indicator are displayed for 8 seconds, then power turns off. If you press the POWER
button during power-on (while the internal display is lit), another single measurement starts.
unable to measure distance.
3. Keep pressing POWER button to start continuous measurement up to 20 seconds. The internal display shows “distance” and
“fail to measure” indicator alternately.
Note: Laser irradiaton mark is blinking during the measurement.
Note: If you stop pressing the button, the continuous measuremen stops
unable to measure distance.
4. After continuous measurement, the measure results are displayed for 8 seconds, then power turns off. If you press the POWER
button during power-on (while the internal display is lit), another measrement starts.
[Continuous measurement]
Failure to measure or
Failure to measure or
Upward measurement. Downward measurement.
Displays the measured
figure. (Target 1)
Displays the measured figure.
Displays the measured
figure. (Target 2)
Measurement
1. Press the POWER button for power-on.
(Power turns off 8 seconds after the last
operation.)
Immediately after power-on.
Stand-by.
(Initializing)
2. Aim at the target
.
Positionthetargetatthecenterofthereticle
Target focusing.
[Single measurement]
3. Press POWER button once to start single measurement.
4. After measurement, “distance” or “fail to measure” indicator are displayed for 8 seconds, then power turns off. If you press the POWER
button during power-on (while the internal display is lit), another single measurement starts.
unable to measure distance.
3. Keep pressing POWER button to start continuous measurement up to 20 seconds. The internal display shows “distance” and
“fail to measure” indicator alternately.
Note: Laser irradiaton mark is blinking during the measurement.
Note: If you stop pressing the button, the continuous measuremen stops
unable to measure distance.
4. After continuous measurement, the measure results are displayed for 8 seconds, then power turns off. If you press the POWER
button during power-on (while the internal display is lit), another measrement starts.
[Continuous measurement]
Failure to measure or
Failure to measure or
Measuring.
Upward measurement. Downward measurement.
Displays the measured
figure. (Target 1)
Displays the measured figure.
Displays the measured
figure. (Target 2)
Measurement
1. Press the POWER button for power-on.
(Power turns off 8 seconds after the last
operation.)
Immediately after power-on.
Stand-by.
(Initializing)
2. Aim at the target
.
Positionthetargetatthecenterofthereticle
Target focusing.
[Single measurement]
3. Press POWER button once to start single measurement.
Measuring.
4. After measurement, “distance” or “fail to measure” indicator are displayed for 8 seconds, then power turns off. If you press the POWER
button during power-on (while the internal display is lit), another single measurement starts.
unable to measure distance.
3. Keep pressing POWER button to start continuous measurement up to 20 seconds. The internal display shows “distance” and
“fail to measure” indicator alternately.
Note: Laser irradiaton mark is blinking during the measurement.
Note: If you stop pressing the button, the continuous measuremen stops
unable to measure distance.
4. After continuous measurement, the measure results are displayed for 8 seconds, then power turns off. If you press the POWER
button during power-on (while the internal display is lit), another measrement starts.
[Continuous measurement]
Failure to measure or
Failure to measure or
Upward measurement. Downward measurement.
Displays the measured
figure. (Target 1)
Displays the measured figure.
Displays the measured
figure. (Target 2)
Measurement
1. Press the POWER button for power-on.
(Power turns off 8 seconds after the last
operation.)
Immediately after power-on.
Stand-by.
(Initializing)
2. Aim at the target
.
Positionthetargetatthecenterofthereticle
Target focusing.
[Single measurement]
3. Press POWER button once to start single measurement.
Measuring.
4. After measurement, “distance” or “fail to measure” indicator are displayed for 8 seconds, then power turns off. If you press the POWER
button during power-on (while the internal display is lit), another single measurement starts.
Failure to measure or
unable to measure distance.
Displays the measured
figure. (Target 1)
3. Keep pressing POWER button to start continuous measurement up to 20 seconds. The internal display shows “distance” and
“fail to measure” indicator alternately.
Note: Laser irradiaton mark is blinking during the measurement.
Note: If you stop pressing the button, the continuous measuremen stops
Failure to measure or
unable to measure distance.
Upward measurement. Downward measurement.
Displays the measured figure.
[Continuous measurement]
4. After continuous measurement, the measure results are displayed for 8 seconds, then power turns off. If you press the POWER
button during power-on (while the internal display is lit), another measrement starts.
Displays the measured
figure. (Target 2)
Measurement
1. Press the POWER button for power-on.
(Power turns off 8 seconds after the last
operation.)
Immediately after power-on.
Stand-by.
(Initializing)
2. Aim at the target
.
Positionthetargetatthecenterofthereticle
Target focusing.
[Single measurement]
3. Press POWER button once to start single measurement.
Measuring.
4. After measurement, “distance” or “fail to measure” indicator are displayed for 8 seconds, then power turns off. If you press the POWER
button during power-on (while the internal display is lit), another single measurement starts.
Failure to measure or
unable to measure distance.
3. Keep pressing POWER button to start continuous measurement up to 20 seconds. The internal display shows “distance” and
“fail to measure” indicator alternately.
Note: Laser irradiaton mark is blinking during the measurement.
Note: If you stop pressing the button, the continuous measuremen stops
Failure to measure or
unable to measure distance.
[Continuous measurement]
4. After continuous measurement, the measure results are displayed for 8 seconds, then power turns off. If you press the POWER
button during power-on (while the internal display is lit), another measrement starts.
Upward measurement. Downward measurement.
Displays the measured
figure. (Target 1)
Displays the measured figure.
Displays the measured
figure. (Target 2)
aktiivinen),
mittaus" ja
-painiketta virran ollessa
*
ttauksen ajan.
*
kuvan (kohde 1)
kuvan (kohde 2)
mitata".
Tekniset tiedot
Jp
Jp
Rakenne
En
Mittausalue
En
Es
Luokan 1M L
Es
Turvallisuus
Luokan I L
Fr
Fr
FCC osa15 A
De
De
It
It
Laser
Se
Se
Luokka
Nl
Nl
Aallonpituus (nm) 905
Ru
Ru
Suurennus ( x ) 6
12
Pt
Pt
ø 21
15
Pl
Pl
7,5
Suuntapoikkeama (mrad)
Fi
Fi
18,3
80 tai alle (ei kastekondensaatiota)
No
No
ø 3,5
Dk
Dk
-
1
* Vesitiiviit mallit
±4 m
Cz
Cz
Muuta
Ro
Ro
˚C) -10 ...
Nikon Laser -etäisyysmittari tarjoaa seuraavia etuja:
Hu
Hu
CR2-litiumparisto, 1 kpl (3V DC)
Huomioi seuraavat asiat Nikon Laser-etäisyysmittarin käytössä.
Mitat (pituus x korkeus x leveys) (mm) 113 x 70 x 39
Noin 175 (ilman paristoa)
214 215
Muuta
Vianetsintä/korjaus
Jp
Jp
En
En
Es
Es
Oire Tarkistuskohdat
Fr
Fr
●
De
De
● Tarkasta pariston asento
It
● Vaihda uusi paristo vanhan tilalle
It
Se
Se
●
Nl
ja lasertunnistimen aukkoa objektiivin linssin puolella.
Nl
●
Ru
Ru
linssin puolella ovat puhtaat. Tarvittaessa puhdista ne.
Pt
Pt
●
Pl
varten.
Pl
● Vaihda uusi paristo vanhan tilalle.
Fi
Fi
No
●
No
●
Dk
Dk
Cz
Cz
Ro
Ro
●
Hu
mitata
Hu
●
olevaa kohdetta ei voi mitata.
● Vaihda uusi paristo vanhan tilalle.
●
varten.
Mittaustulos vaihtelee.
●
●
216 217
Vianetsintä/Korjaus
Jp
Jp
En
En
Es
Es
Oire Tarkistuskohdat
Fr
Fr
De
● Vaihda uusi paristo vanhan tilalle.
De
Norsk
●
It
It
varten.
Se
●
Se
INNHOLD
Nl
Nl
Forsiktighetsregler før bruk .......................... 220-223
Ru
Ru
Nøkkelfunksjoner ...................................................... 224
Pt
Pt
Sammensetning ............................ 225
Pl
Pl
Internt display ............................................................. 226
Fi
Fi
Målingsvisningsmodus ........................................... 227
No
No
Dk
Dk
A ........ 228
Cz
Cz
Skifte batteri ................................................................ 229
Ro
Ro
Måling ................................................................... 230-231
Hu
Hu
Spesifikasjoner .................................................. 232-233
Annet ............................................................................. 234
Reparasjon .................................... 235-236
218 219
Forsiktighetsregler før bruk
Jp
Takk for at du har kjøpt en Nikon Laser Rangefinder COOLSHOT AS.
Følg disse retningslinjene nøye
SIKKERHETSTILTAK (Laser)
Jp
slik at du bruker utstyret på
Nikons laseravstandsmåler bruker en
laseravstandsmåleren utenfor
En
En
riktig måte og unngår potensielt
usynlig laserstråle. Følg disse
barns rekkevidde.
Es
Annen bruk av kontrollene eller justeringer eller annen utførelse av prosedyrer enn det
Es
farlige situasjoner. Før du bruker
retningslinjene nøye:
avstandsmålerens
som oppgis her, kan føre til eksponering av farlig stråling.
Fr
dette produktet, ber vi deg lese
Advarsel
deksel er skadet, eller hvis det
Fr
Trykk ikke ned
kommer en rar lyd etter et fall eller
De
grundig Forsiktighetsregler før
De
〇 Før du bruker dette produktet, ber vi deg lese "Forsiktighetsregler før bruk" og instruksjonene
måle-knappen mens du ser inn i
av en annen grunn, må du straks
bruk og instruksjonene for riktig
It
ta ut batteriet og slutte å bruke
It
optikken fra objektivsiden. Hvis du
for riktig bruk som følger med produktet.
bruk som følger med produktet.
Se
gjør det, kan det skade øynene eller
enheten.
Se
〇 Oppbevar disse instruksjonene på et lett tilgjengelig sted for enkel referanse.
Oppbevar disse instruksjonene
påvirke dem på en negativ måte.
Nl
på et lett tilgjengelig sted for
Nl
〇 Du må ikke demontere eller reparere dette produktet selv, det kan føre til et alvorlig problem.
enkel referanse.
Ru
Ru
Pt
Du må ikke se på laseren med
Pt
ADVARSEL
et annet optisk instrument, for
Pl
● Spesifikasjoner og design kan endres uten varsel.
Pl
Dette symbolet advarer deg om
eksempel linser eller kikkerter, og
● Det er ikke tillatt å reprodusere denne manualen helt eller delvis (med unntak for korte sitater i
Fi
Fi
risikoen for at feilaktig bruk som ikke
heller ikke med det blotte øye. Dette
produktartikler eller anmeldelser) uten skriftlig godkjenning fra NIKON VISION CO., LTD.
No
tar hensyn til innholdet som beskrives
kan føre til skade på øynene.
No
● NIKON VISION CO., LTD. forbeholder seg retten til å endre innholdet som beskrives i disse
her, kan forårsake død eller alvorlige
Dk
Dk
instruksjonene når som helst og uten forutgående varsel.
personskader.
fingrene borte fra
Cz
måle-knappen for å unngå at du
Cz
FORSIKTIG
sender ut laserstrålen ved et uhell.
Ro
Dette symbolet advarer deg om
Ro
risikoen for at feilaktig bruk som ikke
Hu
Hu
i en lenger periode, må du ta ut
tar hensyn til innholdet som beskrives
batteriet.
her, kan forårsake personskade eller
materiell skade.
reparere Nikon-laseravstandsmåleren.
Laserstrålen som sendes ut, kan
være skadelig.
demontert, er
ikke garantert av produsenten.
220 221
Forsiktighetsregler før bruk
Jp
SIKKERHETSTILTAK
brukes for innpakning av produktet,
SIKKERHETSTILTAK
SIKKERHETSTILTAK
STELL OG VEDLIKEHOLD
Oppbevaring
Jp
eller andre små deler, ute av
En
(Monokular)
(Litium-batteri)
Forsiktig
Objektiv
En
rekkevidde for barn.
mugg på objektivoverflaten ved høy
Nikon-laseravstandsmåleren
Hvis batteriet behandles på feil måte,
Es
Es
fuktighet. Nikon-
benytter et monokular i det optiske
kan det sprekke og lekke, noe som
laseravstandsmåleren er vannfast, er
objektivets overflate, kan du bruke
Fr
øyemuslinger av gummi eller små
den ikke konstruert for bruk under
en myk, oljefri børste.
laseravstandsmåleren må derfor
systemet for å sikte på målet. Følg
Fr
kan føre til korrosjon på utstyr og
deler osv. i munnen. Hvis et barn
De
disse retningslinjene nøye:
flekker på klær.
vann.
oppbevares på et kjølig, tørt sted.
De
svelger en slik del, må du straks ta
Advarsel
Følg disse retningslinjene nøye:
smuss som f.eks. fingeravtrykk fra
Hvis enheten har vært brukt i
It
kontakt med lege.
It
huset på avstandsmåleren så raskt
batteriet
objektivets overflate, tørker du
regnvær eller om natten, må den
Se
-polene plassert riktig vei.
som mulig med en myk, ren klut.
objektivet svært forsiktig med en
tørkes grundig ved romtemperatur
Se
lys eller mot laserstrålen når du
øyemuslinger av gummi i en
myk, ren bomullsklut eller oljefritt
og oppbevares på et kjølig, tørt sted.
Nl
bruker Nikon Laser Rangefinder.
Batteriet bør tas ut når det er utgått
Nl
lengre periode, kan det oppstå
eller hvis utstyret ikke skal brukes på
laseravstandsmåleren ligge i bilen
linsepapir av høy kvalitet. Bruk litt
Ru
Forsiktig
hudinflammasjon. Hvis det oppstår
Ru
lenge.
på en varm eller solrik dag eller i
ren alkohol (ikke denaturert) for å
symptomer på dette, må du slutte å
Pt
nærheten av utstyr som genererer
tørke bort vanskelige flekker. Bruk
Pt
måle-knappen når Nikon-
bruke den og straks ta kontakt med
kortsluttes.
varme. Dette kan ødelegge eller
ikke fløyelsstoff eller vanlig papir.
Pl
Pl
laseravstandsmåleren ikke er i
en lege.
påvirke den på en negativ måte.
Dette kan lage riper på objektivet.
Fi
bruk.
sammen med nøkler eller mynter
Hvis en klut er brukt til rengjøring
Fi
Du må ikke bruke dette produktet
laseravstandsmåleren med deg, bør
No
i en lomme eller veske. Det kan
laseravstandsmåleren ligge i direkte
av huset, bør den ikke brukes om
No
mens du går. Hvis du gjør det, kan
du ha den i det myke etuiet.
føre til overoppvarming eller til at
sollys. Ultrafiolette stråler og høy
igjen til objektivets overflate.
Dk
det forårsake skade eller feil som
Dk
batteriet kortsluttes.
varme kan påvirke enheten på en
Hus
Cz
et resultat av at du går på noe,
ikke fungerer som den skal, må du
negativ måte eller ødelegge den.
Cz
treffer andre, faller eller andre
straks slutte å bruke den og spør din
Ro
vann eller flammer. Batteriet må
myk, ren klut etter at du har blåst
Ro
uhell.
lokale forhandler om hvor du skal
aldri demonteres.
utsettes for plutselige
Hu
vekk støv forsiktig med en
sende den for reparasjon.
Hu
temperaturendringer, kan
blåsebelg*. Ikke bruk benzen,
bærestroppen. Den kan treffe
det forekomme kondens på
tynner eller andre
noen og forårsake skade.
kommer i kontakt med klær eller
objektivoverflatene. Du må ikke
rengjøringsmidler som inneholder
hud, må du skylle umiddelbart med
bruke produktet før kondensen har
løsningsmidler.
produktet på et ustabilt sted. Hvis
mye vann. Hvis det kommer væske
fordampet.
du gjør det, kan det føre til at
fra et ødelagt batteri inn i øyet, må
rengjøringsutstyr av gummi som
produktet faller ned og blir skadet
du straks skylle med rent vann og
blåser luft gjennom en dyse.
eller ikke fungerer.
deretter ta kontakt med lege.
regelverket på stedet.
222 223

Nøkkelfunksjoner Nomenklatur/Sammensetning
Jp
Følgende forhold gjør målingen enklere:
Jp
1
En
4
En
pning for laserstråle
Es
Es
3
2 Laserdetektoråpning
Fr
Fr
avstand ± høyde), noe som er nyttig hvis du spiller golf
3 MODUS-knapp
De
De
4 Måleknapp
It
skifte
Målingen kan være unøyaktig eller feilaktig i følgende
It
56x monokulært okular
tilfeller:
1
Se
Se
henhold til mål, blir benyttet
6 Diopterjusteringsring
Nl
Nl
7 Diopterindeks
Ru
aktiverer funksjonen for kontinuerlig måling
2
5
8 Hull for stropp
Ru
Pt
9 Deksel for batterirom
Pt
Pl
6
!p Symbol for åpentukket deksel for
Pl
konstruert for bruk under vann)
Fi
batterirom
Fi
7
No
!q
No
Nikon-laseravstandsmåleren bruker en usynlig laserstråle
!w Visning av FDA-informasjon
Dk
Dk
for måling. Den måler hvor lang tid det tar for laserstrålen
8
Cz
Cz
å gå fra avstandsmåleren til målet og tilbake igjen.
Ro
Laserens reflektivitet og måleresultater kan variere etter
9
Ro
klimatiske og miljømessige forhold så vel som farge,
Hu
Hu
overflatebehandling, størrelse, form og andre egenskaper
!p
ved målet.
!q
!w
Sammensetning
...................................... x1
.................... x1
......................... x1
....... x1
224 225

Internt display
Målingsvisningsmodus
Jp
Avstand
Jp
for å endre modus i rekkefølgen som vises nedenfor.
En
En
Es
Es
Modus for faktisk
1. Slå på strømmen (kontroller at det interne
Faktisk
Fr
Helling opp
avstand og høyde
Fr
displayet er på).
avstand
De
Helling ned
2. Trykk på og hold MODUS-knappen nede,
De
Målmerke
Høyde
trykk deretter straks ned (etter mindre enn
It
It
Laserstrålemerke
Se
Se
Høyde (faktisk avstand i
enn 2 sekunder.
Nl
innstilling for golf-modus)
Nl
Modus for horisontal
Ru
å skifte målingsvisningsmodus.
Horisontal
Ru
Batteritilstand
avstand og høyde
avstand
vises.
Pt
Pt
『 』
Pl
Høyde
*
Hvis du ikke trykker på knappene i riktig
Pl
『 』 - Vises når laseren brukes til måling.
rekkefølge, vil det ikke bli skiftet.
Fi
Fi
Til stede hele tiden under enkeltmåling. Blinker under kontinuerlig måling.
*
Hvis du skifter modus etter måling,
No
Se ikke inn i objektivlinsen når dette merket vises.
No
konverteres resultatene til den nye
Dk
『
』 - Måler nå
Hellings-
modusen.
Dk
『
』 - "Mislyktes i å måle" eller "Kan ikke måle"
Golf-modus
justert
Cz
*
Når modusen er angitt, utføres målingene i
Cz
avstand
den nye modusen.
Ro
Ro
Faktisk
Hu
* Vanligvis bruker en LCD samme eller lavere forstørrelse. Men LCD-en i dette produktet forstørres
avstand
Hu
med den høye forstørrelsen til okularet. Selv om denne LCD-en ble produsert ved hjelp av den mest
avanserte teknologien, er det umulig å eliminere støvproblemet fullstendig. Som et resultat av dette
kan det være du ser støv. Det vil imidlertid ikke ha noen betydning for målingens nøyaktighet eller for
sikkerheten.
Modus for faktisk
Faktisk
avstand
avstand
226 227
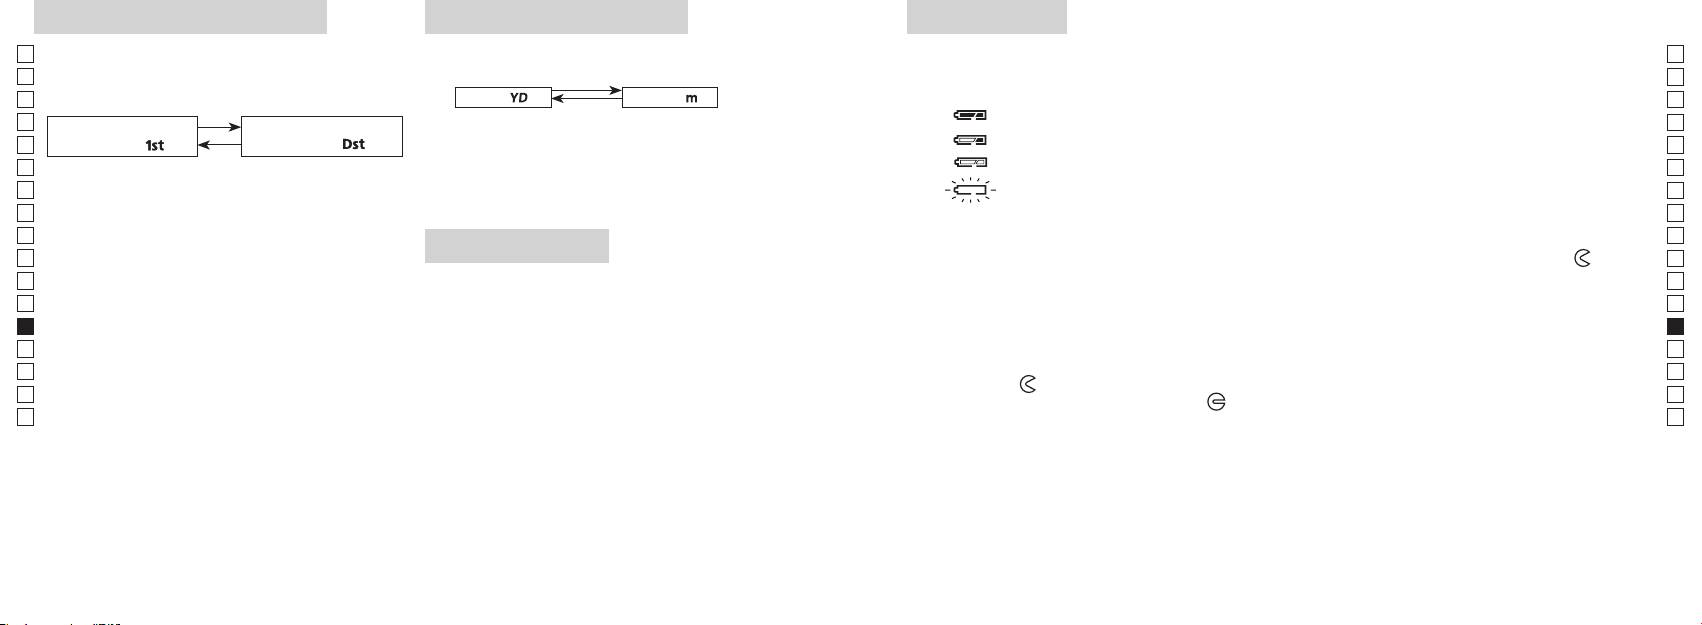
Modus for prioritering av mål
Avstandsvisningsenheter
Skifte batteri
Jp
Denne laseravstandsmåleren bruker modus for
Jp
Batteritype: 3 V CR2 litium-batteri x1
(Standardinnstilling er yard.)
En
Indikatorer for mengde av gjenværende batteri
En
av fjernt mål (standardinnstillingen er modus for
Es
[ ]
Meter [ ]Yard
* Batteritilstandsmerke i internt display varsler når batteriet må skiftes.
Es
prioritering av første mål).
: Batteriet har nok strøm og kan brukes.
Fr
1. Slå på strømmen (kontroller at det interne displayet er på).
Fr
Modus for prioritering av
Modus for prioritering av
2. Trykk på og hold MODUS-knappen nede i mer enn to
: Batteriet begynner å bli svakt. Forbered deg på å skifte batteriet.
De
første mål「
」
fjernt mål
「
」
De
sekunder. Når visningsenheten er skiftet, slipper du
It
: Batteriet er svakt. Batteriet bør skiftes ut med et nytt batteri.
It
1. Slå på strømmen (kontroller at det interne displayet
knappen.
Se
er på).
3. Når enheten er angitt, vil resultatene bli konvertert og
blinker : Batteriet er utladet. Når indikatoren har blinket tre ganger, slår laseravstandsmåleren
Se
2. Trykk på og hold MODUS-knappen nede, trykk
vist i den avstandsvisningsenheten du har valgt.
seg automatisk av. Skift ut batteriet.
Nl
Nl
Ru
Ru
mindre enn 0,5 sekund.
1. Åpne dekselet på batterirommet
Pt
Fortsett å trykke på og holde begge knappene nede
LED-belysning
Bruk tommelen e.l. i innfellingen i dekselet på batterirommet og vri dekselet i retning mot
-merket.
Pt
(mer enn 2 sekunder) til modusen for prioritering
Pl
1. Slå på strømmen (kontroller at det interne displayet er på).
Det kan være litt vanskelig å åpne på grunn av gummipakningen som beskytter mot vann.
Pl
av første mål og modus for prioritering av fjernt mål
2. Ved å trykke på MODUS-knappen i mindre enn
2. Skift ut det gamle batteriet med et nytt
Fi
Fi
skifter.
No
3. Slipp begge knappene når modus er skiftet.
No
*
Dk
*
Hvis du ikke trykker på knappene i riktig rekkefølge,
riktig måte, vil laseravstandsmåleren ikke fungere.
Dk
visning på LCD-panelet.
vil det ikke bli skiftet.
3. Lukk dekselet på batterirommet
Cz
*
Cz
*
Hvis det ikke skjer et skifte, kan du gjenta trinn 2.
laseravstandsmåleren. Hvis du gjør det, vil belysningen
-merket i forhold til indikatoren
●
og sett batteriet inn i batterirommet. Ved hjelp av
Ro
Ro
[
være av når du slår på laseravstandsmåleren igjen.
tommelen e.l. vrir du dekselet mot
-merket. Det kan være litt vanskelig å lukke på grunn av
Hu
prioritering av fjernt mål]
gummipakningen som beskytter mot vann, men fortsett å vri til det stopper. Kontroller at dekselet er
Hu
Når du måler overlappende objekter, viser modus for
helt lukket.
prioritering av første mål avstanden til det nærmeste
Batterilevetid
objektet, og modus for prioritering av fjernt mål viser
Kontinuerlig drift: Ca. 13.000 ganger (ved ca. 20 °C)
avstanden til det fjerneste objektet.
Dette tallet kan variere etter tilstand, temperatur og andre faktorer, f.eks. målets form, farge osv. Brukes bare
som en veiledning.
* Batteriet som følger med denne laseravstandsmåleren er beregnet for driftskontroll. Batteriets levetid vil imidlertid på grunn
av naturlig elektrisk utlading sannsynligvis være kortere enn det som står ovenfor.
* Hvis det kommer vann inn i batterirommet pga. nedsenking, må du tørke batterirommet godt og skifte ut batteriet.
228 229
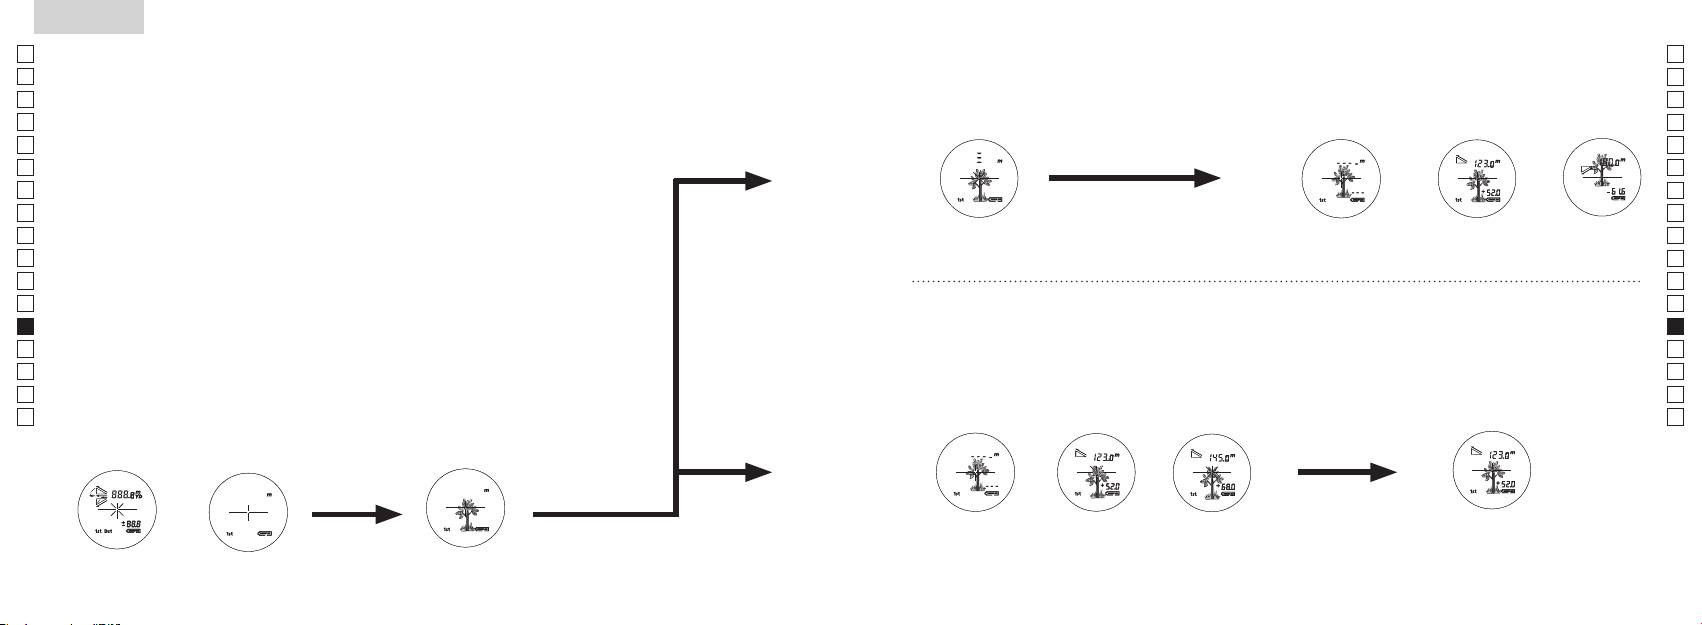
Jp
Jp
En
En
Es
Es
Fr
Fr
De
De
It
It
Se
Se
Nl
Nl
Ru
Ru
Pt
Pt
Pl
Pl
Fi
Fi
No
No
Dk
Dk
Cz
Cz
Ro
Ro
Hu
Hu
230 231
Measurement
1. Press the POWER button for power-on.
(Power turns off 8 seconds after the last
operation.)
Immediately after power-on.
3. Press POWER button once to start single measurement.
4. After measurement, “distance” or “fail to measure” indicator are displayed for 8 seconds, then power turns off. If you press the POWER
button during power-on (while the internal display is lit), another single measurement starts.
unable to measure distance.
3. Keep pressing POWER button to start continuous measurement up to 20 seconds. The internal display shows “distance” and
“fail to measure” indicator alternately.
Note: Laser irradiaton mark is blinking during the measurement.
Note: If you stop pressing the button, the continuous measuremen stops
2. Aim at the target
Positionthetargetatthecenterofthereticle
[Single measurement]
Failure to measure or
unable to measure distance.
[Continuous measurement]
4. After continuous measurement, the measure results are displayed for 8 seconds, then power turns off. If you press the POWER
button during power-on (while the internal display is lit), another measrement starts.
Failure to measure or
Target focusing.
Measuring.
(Initializing)
.
Upward measurement. Downward measurement.
Displays the measured
figure. (Target 1)
Displays the measured figure.
Stand-by.
Displays the measured
figure. (Target 2)
Measurement
1. Press the POWER button for power-on.
(Power turns off 8 seconds after the last
operation.)
Immediately after power-on.
(Initializing)
3. Press POWER button once to start single measurement.
Measuring.
4. After measurement, “distance” or “fail to measure” indicator are displayed for 8 seconds, then power turns off. If you press the POWER
button during power-on (while the internal display is lit), another single measurement starts.
Failure to measure or
unable to measure distance.
Displays the measured
figure. (Target 1)
3. Keep pressing POWER button to start continuous measurement up to 20 seconds. The internal display shows “distance” and
“fail to measure” indicator alternately.
Note: Laser irradiaton mark is blinking during the measurement.
Note: If you stop pressing the button, the continuous measuremen stops
Target focusing.
2. Aim at the target
.
Positionthetargetatthecenterofthereticle
[Single measurement]
Failure to measure or
unable to measure distance.
Upward measurement. Downward measurement.
Displays the measured figure.
[Continuous measurement]
4. After continuous measurement, the measure results are displayed for 8 seconds, then power turns off. If you press the POWER
button during power-on (while the internal display is lit), another measrement starts.
Stand-by.
Displays the measured
figure. (Target 2)
Measurement
1. Press the POWER button for power-on.
(Power turns off 8 seconds after the last
operation.)
Immediately after power-on.
Stand-by.
(Initializing)
2. Aim at the target
.
Positionthetargetatthecenterofthereticle
3. Press POWER button once to start single measurement.
4. After measurement, “distance” or “fail to measure” indicator are displayed for 8 seconds, then power turns off. If you press the POWER
button during power-on (while the internal display is lit), another single measurement starts.
unable to measure distance.
3. Keep pressing POWER button to start continuous measurement up to 20 seconds. The internal display shows “distance” and
“fail to measure” indicator alternately.
Note: Laser irradiaton mark is blinking during the measurement.
Note: If you stop pressing the button, the continuous measuremen stops
[Single measurement]
Failure to measure or
unable to measure distance.
[Continuous measurement]
4. After continuous measurement, the measure results are displayed for 8 seconds, then power turns off. If you press the POWER
button during power-on (while the internal display is lit), another measrement starts.
Failure to measure or
Target focusing.
Measuring.
Upward measurement. Downward measurement.
Displays the measured
figure. (Target 1)
Displays the measured figure.
Displays the measured
figure. (Target 2)
Måling
Forsiktig — Bruk av kontroller, justering eller utførelse av prosedyrer på andre måter enn det som
【
Enkeltmåling
】
beskrives her, kan føre til eksponering av farlig stråling.
3. Trykk på
1. Klargjøring
gang for å starte enkeltmåling.
Sett inn et batteri i batterirommet. (Se "Skifte batterier").
2. Øyemusling av gummi
Både brillebrukere og andre kan bruke denne avstandsmåleren som den er.
3. Diopterjustering
Roter først diopterjusteringsringen mot urviseren til den stopper helt opp. Trykk deretter
Samtidig som du ser gjennom okularet, roterer du diopterjusteringen med urviseren til
LCD-displayet kommer i fokus.
Hvis du roterer ringen for mye, må du rotere den mot urviseren og justere den på nytt.
Hvis diopteret ikke justeres slik at det passer med ditt syn, vil du kanskje ikke kunne sikte
skikkelig på objektet.
【
Funksjon for kontinuerlig måling
】
4. Måle
Før du foretar en måling, må du kontrollere hver modusinnstilling
*
Se de respektive delene om hvordan du angir hver modus.
1. Slå på strømmen (kontroller at
2. Sikt på målet.
det interne displayet er på).
(Automatisk avstenging etter ca.
retikkelen (trådkorset).
8sek. uten betjening)
Umiddelbart etter at strømmen
Standby Målfokusering
er slått på (initialiserer)
Measurement
1. Press the POWER button for power-on.
(Power turns off 8 seconds after the last
operation.)
Immediately after power-on.
Stand-by.
(Initializing)
2. Aim at the target
.
Positionthetargetatthecenterofthereticle
Target focusing.
[Single measurement]
3. Press POWER button once to start single measurement.
Measuring.
4. After measurement, “distance” or “fail to measure” indicator are displayed for 8 seconds, then power turns off. If you press the POWER
button during power-on (while the internal display is lit), another single measurement starts.
Failure to measure or
Upward measurement. Downward measurement.
unable to measure distance.
Displays the measured figure.
[Continuous measurement]
3. Keep pressing POWER button to start continuous measurement up to 20 seconds. The internal display shows “distance” and
“fail to measure” indicator alternately.
Note: Laser irradiaton mark is blinking during the measurement.
Note: If you stop pressing the button, the continuous measuremen stops
Failure to measure or
unable to measure distance.
4. After continuous measurement, the measure results are displayed for 8 seconds, then power turns off. If you press the POWER
button during power-on (while the internal display is lit), another measrement starts.
Displays the measured
figure. (Target 1)
Displays the measured
figure. (Target 2)
Measurement
1. Press the POWER button for power-on.
(Power turns off 8 seconds after the last
operation.)
Immediately after power-on.
Stand-by.
(Initializing)
2. Aim at the target
.
Positionthetargetatthecenterofthereticle
Target focusing.
[Single measurement]
3. Press POWER button once to start single measurement.
Measuring.
4. After measurement, “distance” or “fail to measure” indicator are displayed for 8 seconds, then power turns off. If you press the POWER
button during power-on (while the internal display is lit), another single measurement starts.
Failure to measure or
Upward measurement. Downward measurement.
unable to measure distance.
Displays the measured figure.
[Continuous measurement]
3. Keep pressing POWER button to start continuous measurement up to 20 seconds. The internal display shows “distance” and
“fail to measure” indicator alternately.
Note: Laser irradiaton mark is blinking during the measurement.
Note: If you stop pressing the button, the continuous measuremen stops
Failure to measure or
unable to measure distance.
Displays the measured
figure. (Target 1)
4. After continuous measurement, the measure results are displayed for 8 seconds, then power turns off. If you press the POWER
button during power-on (while the internal display is lit), another measrement starts.
Displays the measured
figure. (Target 2)
Measurement
1. Press the POWER button for power-on.
(Power turns off 8 seconds after the last
operation.)
Immediately after power-on.
Stand-by.
(Initializing)
2. Aim at the target
.
Positionthetargetatthecenterofthereticle
Target focusing.
[Single measurement]
3. Press POWER button once to start single measurement.
Measuring.
4. After measurement, “distance” or “fail to measure” indicator are displayed for 8 seconds, then power turns off. If you press the POWER
button during power-on (while the internal display is lit), another single measurement starts.
Failure to measure or
unable to measure distance.
3. Keep pressing POWER button to start continuous measurement up to 20 seconds. The internal display shows “distance” and
“fail to measure” indicator alternately.
Note: Laser irradiaton mark is blinking during the measurement.
Note: If you stop pressing the button, the continuous measuremen stops
Failure to measure or
unable to measure distance.
[Continuous measurement]
4. After continuous measurement, the measure results are displayed for 8 seconds, then power turns off. If you press the POWER
button during power-on (while the internal display is lit), another measrement starts.
Upward measurement. Downward measurement.
Displays the measured
figure. (Target 1)
Displays the measured figure.
Displays the measured
figure. (Target 2)
Measurement
1. Press the POWER button for power-on.
(Power turns off 8 seconds after the last
operation.)
Immediately after power-on.
Stand-by.
(Initializing)
2. Aim at the target
.
Positionthetargetatthecenterofthereticle
Target focusing.
[Single measurement]
3. Press POWER button once to start single measurement.
Measuring.
4. After measurement, “distance” or “fail to measure” indicator are displayed for 8 seconds, then power turns off. If you press the POWER
button during power-on (while the internal display is lit), another single measurement starts.
unable to measure distance.
3. Keep pressing POWER button to start continuous measurement up to 20 seconds. The internal display shows “distance” and
“fail to measure” indicator alternately.
Note: Laser irradiaton mark is blinking during the measurement.
Note: If you stop pressing the button, the continuous measuremen stops
unable to measure distance.
4. After continuous measurement, the measure results are displayed for 8 seconds, then power turns off. If you press the POWER
button during power-on (while the internal display is lit), another measrement starts.
[Continuous measurement]
Failure to measure or
Failure to measure or
Upward measurement. Downward measurement.
Displays the measured
figure. (Target 1)
Displays the measured figure.
Displays the measured
figure. (Target 2)
Measurement
1. Press the POWER button for power-on.
(Power turns off 8 seconds after the last
operation.)
Immediately after power-on.
Stand-by.
(Initializing)
2. Aim at the target
.
Positionthetargetatthecenterofthereticle
Target focusing.
[Single measurement]
3. Press POWER button once to start single measurement.
4. After measurement, “distance” or “fail to measure” indicator are displayed for 8 seconds, then power turns off. If you press the POWER
button during power-on (while the internal display is lit), another single measurement starts.
unable to measure distance.
3. Keep pressing POWER button to start continuous measurement up to 20 seconds. The internal display shows “distance” and
“fail to measure” indicator alternately.
Note: Laser irradiaton mark is blinking during the measurement.
Note: If you stop pressing the button, the continuous measuremen stops
unable to measure distance.
4. After continuous measurement, the measure results are displayed for 8 seconds, then power turns off. If you press the POWER
button during power-on (while the internal display is lit), another measrement starts.
[Continuous measurement]
Failure to measure or
Failure to measure or
Measuring.
Upward measurement. Downward measurement.
Displays the measured
figure. (Target 1)
Displays the measured figure.
Displays the measured
figure. (Target 2)
Measurement
1. Press the POWER button for power-on.
(Power turns off 8 seconds after the last
operation.)
Immediately after power-on.
Stand-by.
(Initializing)
2. Aim at the target
.
Positionthetargetatthecenterofthereticle
Target focusing.
[Single measurement]
3. Press POWER button once to start single measurement.
Measuring.
4. After measurement, “distance” or “fail to measure” indicator are displayed for 8 seconds, then power turns off. If you press the POWER
button during power-on (while the internal display is lit), another single measurement starts.
unable to measure distance.
3. Keep pressing POWER button to start continuous measurement up to 20 seconds. The internal display shows “distance” and
“fail to measure” indicator alternately.
Note: Laser irradiaton mark is blinking during the measurement.
Note: If you stop pressing the button, the continuous measuremen stops
unable to measure distance.
4. After continuous measurement, the measure results are displayed for 8 seconds, then power turns off. If you press the POWER
button during power-on (while the internal display is lit), another measrement starts.
[Continuous measurement]
Failure to measure or
Failure to measure or
Upward measurement. Downward measurement.
Displays the measured
figure. (Target 1)
Displays the measured figure.
Displays the measured
figure. (Target 2)
Measurement
1. Press the POWER button for power-on.
(Power turns off 8 seconds after the last
operation.)
Immediately after power-on.
Stand-by.
(Initializing)
2. Aim at the target
.
Positionthetargetatthecenterofthereticle
Target focusing.
[Single measurement]
3. Press POWER button once to start single measurement.
Measuring.
4. After measurement, “distance” or “fail to measure” indicator are displayed for 8 seconds, then power turns off. If you press the POWER
button during power-on (while the internal display is lit), another single measurement starts.
Failure to measure or
unable to measure distance.
Displays the measured
figure. (Target 1)
3. Keep pressing POWER button to start continuous measurement up to 20 seconds. The internal display shows “distance” and
“fail to measure” indicator alternately.
Note: Laser irradiaton mark is blinking during the measurement.
Note: If you stop pressing the button, the continuous measuremen stops
Failure to measure or
unable to measure distance.
Upward measurement. Downward measurement.
Displays the measured figure.
[Continuous measurement]
4. After continuous measurement, the measure results are displayed for 8 seconds, then power turns off. If you press the POWER
button during power-on (while the internal display is lit), another measrement starts.
Displays the measured
figure. (Target 2)
Measurement
1. Press the POWER button for power-on.
(Power turns off 8 seconds after the last
operation.)
Immediately after power-on.
Stand-by.
(Initializing)
2. Aim at the target
.
Positionthetargetatthecenterofthereticle
Target focusing.
[Single measurement]
3. Press POWER button once to start single measurement.
Measuring.
4. After measurement, “distance” or “fail to measure” indicator are displayed for 8 seconds, then power turns off. If you press the POWER
button during power-on (while the internal display is lit), another single measurement starts.
Failure to measure or
unable to measure distance.
3. Keep pressing POWER button to start continuous measurement up to 20 seconds. The internal display shows “distance” and
“fail to measure” indicator alternately.
Note: Laser irradiaton mark is blinking during the measurement.
Note: If you stop pressing the button, the continuous measuremen stops
Failure to measure or
unable to measure distance.
[Continuous measurement]
4. After continuous measurement, the measure results are displayed for 8 seconds, then power turns off. If you press the POWER
button during power-on (while the internal display is lit), another measrement starts.
Upward measurement. Downward measurement.
Displays the measured
figure. (Target 1)
Displays the measured figure.
Displays the measured
figure. (Target 2)
indikatoren eller "målt
avstand" vises i 8 sekunder, deretter slås strømmen av. Hvis du
trykker på
knappen når strømmen er på (mens det
interne displayet er på), starter en annen enkeltmåling.
"Mislyktes i å måle" eller
Måling oppover Måling nedover
Måle
"Kan ikke måle" avstand
Viser den målte avstanden
3. Trykk og hold på
måling i ca. 8 sekunder. Det interne displayet viser vekselvis
avstand) i ca. 8 sekunder, deretter slås strømmen av.
indikatoren "mislykket måling" og "målt avstand".
Hvis du trykker på
knappen når strømmen er på
*
Laserstrålingsmerket blinker under målingen.
(mens det interne displayet er på), starter en annen måling.
*
Hvis du slipper fingeren fra knappen, stopper kontinuerlig
måling.
Når du for eksempel måler et hullflagg på en golfbane, må du
"Mislyktes i å måle"
Viser den målte
Viser den målte
bruke modus for prioritering av første mål. Søk etter flagget med
eller "Kan ikke måle"
avstanden (mål 1)
avstanden (mål 2)
funksjonen for kontinuerlig måling for å måle på en enkel måte.
avstand
Hvis det ikke er noen objekter mellom deg og flagget, er det
laveste tallet avstanden til flagget.
Spesifikasjoner
Jp
Målesystem
Hus: Vanntett (maksimumsdybde på 1 meter i opptil 10 minutter)*
Jp
Konstruksjon
(Batterirom: Vannbestandig**)
En
Måleområde
En
Es
Klasse 1M L
Es
Sikkerhet
Klasse I L
Fr
Faktisk avstand (nedre 3 tall):
Fr
De
Avstandsdisplay (trinnvis økning)
De
Miljø
It
Høyde (nedre 3 tall):
It
Laser
Se
Se
Optisk system
Klasse
Nl
Nl
Forstørrelse (x) 6
Bølgelengde (nm) 905
Ru
Ru
ø21
12
Pt
Pt
Vinkel på synsfelt (virkelig) (˚) 7,5
15
Pl
Pl
Øyestykke (mm) 18,3
Strålingsdivergens (mrad)
Fi
Fi
Utgangspupill (mm) ø3,5
Fuktighet ved drift (% RF) 80 eller mindre (uten kondensering)
No
No
-
1
Diopterjustering ± 4 m
Dk
Dk
* Vanntette modeller
Annet
Cz
Denne Nikon-laseravstandsmåleren er vannfast, og det vil ikke bli skader på det optiske systemet hvis den senkes ned eller
Cz
Driftstemperatur (˚C) -10 —
mistes i vann med en maksimal dybde på 1 meter i opptil 10 minutter.
Ro
Ro
Nikon-laseravstandsmåleren har følgende fordeler:
Hu
CR2 litium-batteri x 1 (DC 3 V)
Hu
Strømkilde
Automatisk avstenging (etter ca. 8 sek. uten betjening)
Dimensjoner (L x H x B) (mm) 113 x 70 x 39
Vær oppmerksom på følgende når du bruker Nikon-laseravstandsmåleren:
Vekt (g) Ca. 175 (uten batteri)
** Batterirommet er vannbestandig, ikke vanntett. Det kan komme vann inn i laseravstandsmåleren hvis den senkes ned i vann.
Hvis det kommer vann inn i batteriromet, må all fuktighet tørkes bort og batterirommet må få tid til å tørke.
232 233
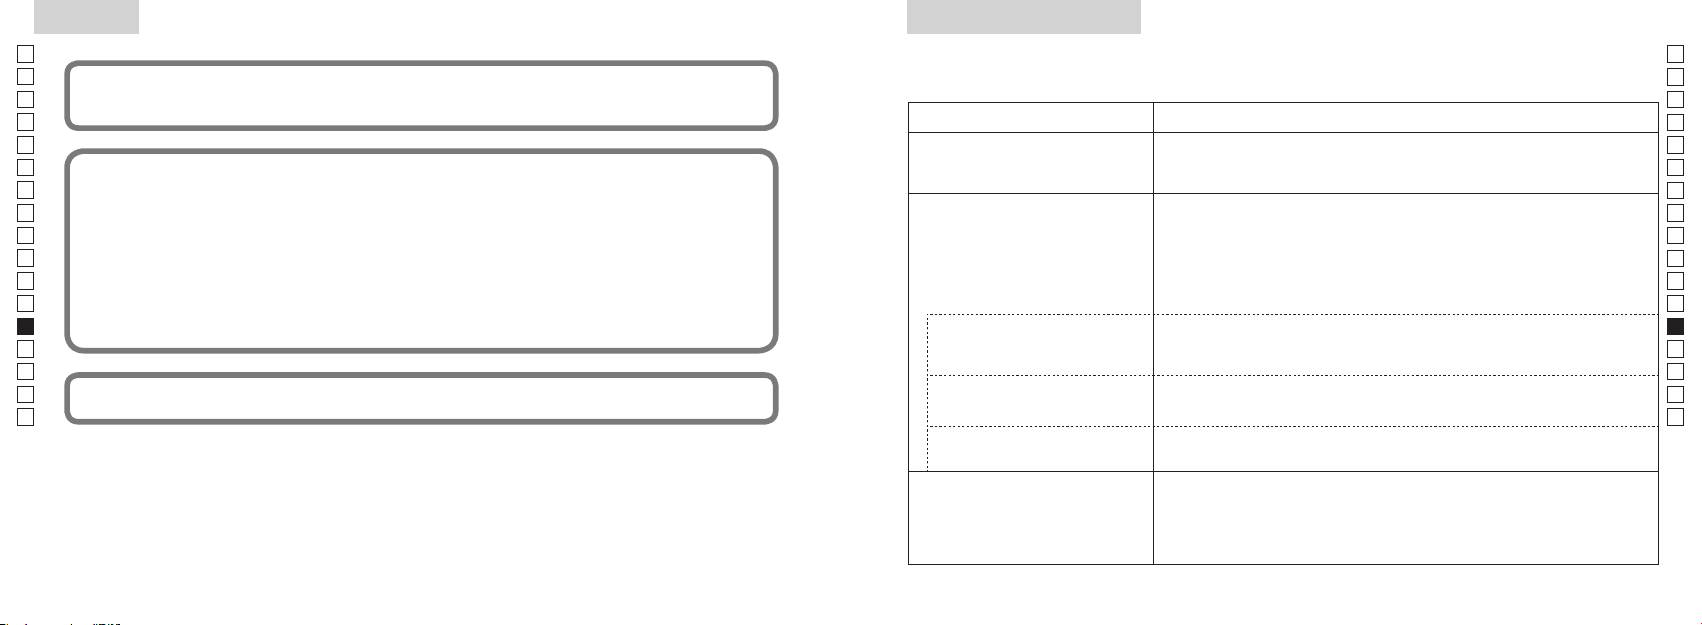
Annet
Feilsøking/Reparasjon
Jp
Hvis din Nikon-laseravstandsmåler må repareres, kan du ta kontakt med din lokale forhandler eller med butikken der du kjøpte
Jp
En
Denne enheten etterkommer kravene i del 15 i FCC-reglene. Bruk av enheten er underlagt følgende to betingelser:
En
Es
1. Denne enheten må ikke forårsake sjenerende interferens, og
Es
2. Denne enheten må tåle alle typer interferens, inkludert interferens som kan føre til uønskede virkninger.
Symptom Sjekkpunkt
Fr
Fr
De
●
De
It
Dette utstyret er testet og funnet å overholde grensene for en digital enhet i klasse B, i henhold til del 15 i FCC-
● Kontroller at batteriet er satt inn riktig
(LCD lyser ikke)
It
● Skift ut det gamle batteriet med et nytt.
Se
Se
fra en installasjon i en bolig. Utstyret genererer, benytter og kan sende ut radiofrekvensenergi og kan, hvis det
Nl
Nl
ikke monteres og brukes i henhold til instruksjonene, føre til skadelig interferens for radiokommunikasjon. Det er
● Kontroller at det ikke er noe, f.eks. en finger eller en stropp, som blokkerer
åpningen for laserstrålen og laserdetektoren på objektivlinsesiden.
Ru
imidlertid ingen garanti for at det ikke vil være interferens i en bestemt installasjon. Hvis dette utstyret gir sjenerende
Ru
● Kontroller at åpningen for laserstrålen og laserdetektoren på objektivlinsesiden
interferens for radio- eller TV-mottak, noe som kan avgjøres ved å slå utstyret av og på igjen, anbefales det at
Kan ikke måle avstanden
Pt
er rene. Rengjør dem hvis det er nødvendig.
Pt
brukeren prøver å korrigere interferensen ved hjelp av ett av disse tiltakene:
Pl
● Kontroller at målets form og tilstand er slik at det reflekterer laserstrålen.
Pl
● Skift ut det gamle batteriet med et nytt.
Fi
Fi
No
●
No
● Kontroller at målet er innenfor måleområdet
Dk
Dk
Cz
Cz
Denne laseravstandsmåleren fra Nikon er en grunnleggende avstandsmåler. Resultater fra den kan ikke brukes som
Ro
Nærmere mål, innenfor
● Sørg for at det ikke er noe, for eksempel blader eller gress, mellom Nikon-
Ro
formelle bevis.
måleområdet, kan ikke måles
laseravstandsmåleren og målet.
Hu
Hu
Mål ut over en bestemt avstand
● Sørg for at det ikke er noe, for eksempel blader eller gress, mellom Nikon-
kan ikke måles
laseravstandsmåleren og målet.
● Skift ut batteriet med et nytt.
● Kontroller at målets form og tilstand er slik at det reflekterer laserstrålen.
Måleresultat er ustabilt
●
● Sørg for at det ikke er noe, for eksempel blader eller gress, mellom Nikon-
laseravstandsmåleren og målet.
234 235
Feilsøking/Reparasjon
Jp
Jp
En
En
Es
Es
Symptom Sjekkpunkt
Fr
Fr
De
De
● Skift ut batteriet med et nytt.
It
● Kontroller at målets form og tilstand er slik at det reflekterer laserstrålen.
It
Feilaktig resultat vises
Dansk
● Sørg for at det ikke er noe, for eksempel blader eller gress, mellom Nikon-
Se
Se
laseravstandsmåleren og målet.
Nl
Nl
INDHOLD
Ru
Ru
Hvis det fremdeles er problemer etter at du har sett i FReparasjonstabellen, må du ta kontakt med din lokale
Forholdsregler før brug .................................. 238-241
Pt
siden det kan ha oppstått en funksjonsfeil. La aldri noen andre enn den offisielle
Pt
representanten for produsenten kontrollere eller reparere Nikon-laseravstandsmåleren. Hvis du ikke følger disse instruksjonene,
Vigtige funktioner ..................................................... 242
Pl
Pl
kan det føre til skade på person eller produkt.
........................ 243
Fi
Fi
Internt display ............................................................. 244
No
No
Funktion for visning af måling .............................. 245
Dk
Dk
Cz
Cz
........................... 246
Ro
Ro
Udskiftning af batteri ............................................... 247
Hu
Hu
Måling ................................................................... 248-249
Specifikationer .................................................. 250-251
Andet ............................................................................. 252
................................... 253-254
236 237
Forholdsregler før brug
Jp
Tak, fordi du har anskaffet en Nikon laser-afstandsmåler COOLSHOT AS.
Overhold følgende retningslinjer
SIKKERHEDSFORHOLDSREGLER
Jp
nøje, så du kan bruge udstyret
afstandsmåleren uden for børns
En
(Laser)
En
korrekt og undgå potentielle
rækkevidde.
Nikon laser-afstandsmåleren bruger en
Es
Anden brug af betjeninger og justeringer eller udførelse af andre procedurer end dem, der er
Es
farlige problemer. Før brugen af
usynlig laserstråle. Sørg for at
specificeret heri, kan resultere i udsættelse for farlig bestråling.
Fr
laser-afstandsmålerens huset er
dette produkt skal du læse
overholde følgende:
Fr
beskadiget, eller hvis den udsender
De
"Forholdsregler før brug" og
Advarsel
De
〇 Før brugen af dette produkt skal du læse alle "Sikkerhedsforholdsregler før brug", og
underlige lyde efter at være tabt
instruktionerne for korrekt brug,
,
It
eller af anden årsag, skal du straks
It
instruktioner om korrekt brug, der følger med produktet.
der følger med produktet.
mens du ser ind i optikken fra
Se
fjerne batteriet og stoppe brugen
frontlinsens side. Hvis dette ikke
Se
〇 Opbevar denne vejledning i nærheden, så du kan slå op i den efter behov.
Opbevar denne vejledning i
af enheden.
Nl
overholdes, kan det skade eller
nærheden, så du kan slå op i den
Nl
〇 Adskil, eller reparer ikke selv dette produkt, da det kan give alvorlige problemer.
ødelægge dit syn.
efter behov.
Ru
Ru
Pt
Pt
● Specifikationer og design kan ændres uden varsel.
ADVARSEL
mennesker.
Pl
Pl
Denne angivelse advarer dig om, at al
● Al gengivelse i nogen som helst form af denne vejledning, i sin helhed eller delvist (bortset fra
Fi
ukorrekt brug, der ikke overholder
Fi
instrumenter, såsom gennem linser
korte citater til anmelderartikler eller tidsskrifter) er forbudt uden skriftlig tilladelse fra NIKON
No
indholdet beskrevet i dette
eller kikkert og heller ikke med det
No
VISION CO., LTD.
dokument, kan resultere i fare for død
blotte øje. Det kan beskadige øjnene.
Dk
Dk
● NIKON VISION CO., LTD. forbeholder sig ret til, når som helst at ændre indholdet i disse
eller alvorlig personskade.
Cz
Cz
vejledninger uden forudgående varsel.
FORSIGTIG
Ro
Denne angivelse advarer dig om, at al
knappen for at undgå utilsigtet
Ro
ukorrekt brug, der ikke overholder
udsendelse af laserstrålen.
Hu
Hu
indholdet beskrevet i dette
dokument, kan resultere i potentiel
ikke skal bruges i en længere periode.
personskade eller tab af materiel.
afstandsmåleren. Den udsendte
laserstråle kan være skadelig for
mere under producentens garanti.
238 239
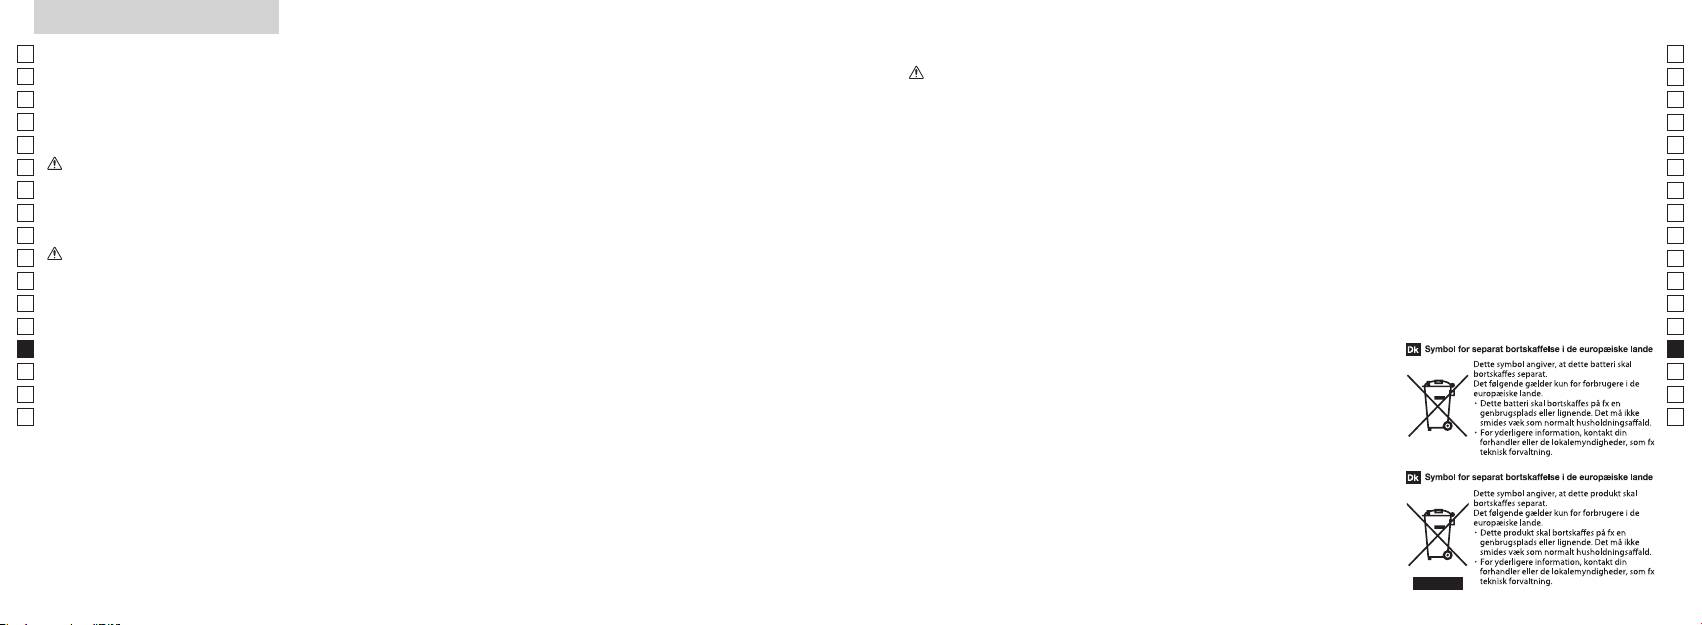
Forholdsregler før brug
Jp
SIKKERHEDSFORHOLDSREGLER
SIKKERHEDSFORHOLDSREGLER
SIKKERHEDSFORHOLDSREGLER
PLEJE OG VEDLIGEHOLDELSE
Opbevaring
Jp
eller andre mindre dele var
En
(Monocular)
(Litium-batteri)
Forsigtig
Linser
En
indpakket i, uden for børns
linserne på grund af høj fugtighed.
Es
Nikon laser-afstandsmåleren
Hvis batteriet behandles ukorrekt
Es
rækkevidde.
er vandfast, er den ikke designet til
børste uden olie.
Derfor skal du opbevare Nikon laser-
anvender en monocular i sit optiske
kan der opstå åbninger i det, og det
Fr
at være under vand.
afstandsmåleren på et køligt, tørt
Fr
system til at sigte mod målet. Sørg
kan lække, og korrodere udstyret og
gummiøjestykker og lign. små dele
fingeraftryk, fra linserne ved at
sted.
De
for at overholde følgende:
plette tøj.
De
i munden. Hvis børn sluger sådanne
skal hurtigst muligt fjernes fra
aftørre disse meget forsigtigt med
It
Advarsel
Sørg for at overholde følgende:
dele, søges straks læge.
It
afstandsmålerens overflade ved
en blød, ren bomuldsklud eller en
nat, skal du lade den tørre grundigt
Se
brug af en blød, ren klud.
speciel oliefri serviet beregnet til
ved stuetemperatur og derefter
Se
et stærkt lys eller laserstrålen,
korrekt placeret.
i længere tid, kan det give
linser. Brug en lille smule ren sprit
lægge den et køligt, tørt sted.
Nl
når du bruger Nikon
Nl
betændelse i huden. Hvis der opstår
afstandsmåleren i bilen på en
(ikke denatureret) til at aftørre
laserafstandsmåleren.
afladet eller under længere
Ru
symptomer på øjenbetændelse, skal
Ru
varm solskinsdag, eller tæt ved
fastsiddende smuds. Brug ikke
perioder, hvor apparatet ikke
Pt
Forsigtig
du straks ophøre med brugen og
varmeudviklende udstyr. Det kan
frottéklude eller almindeligt stof, da
Pt
anvendes.
-
søge læge.
skade eller forringe den.
det kan ridse linsen. Når kluden har
Pl
Pl
afstandsmåleren, skal du ikke
været brugt til rengøring af huset,
slutklemme.
Fi
knappen.
afstandsmåleren i dens bløde etui,
afstandsmåleren i direkte sol.
må den ikke bruges igen til linserne.
Fi
sammen med nøgler
når du bærer den.
No
Ultraviolette stråler og meget varme
Huset
No
eller mønter i en lomme eller taske,
du går. Hvis dette ikke overholdes,
kan påvirke enheden negativt eller
Dk
da det kan kortslutte på grund af
Dk
kan det medføre personskade
ikke fungerer korrekt, skal du straks
ødelægge den.
overophedning.
blød, ren klud efter at have fjernet
Cz
eller fejlfunktion, da man kan gå
standse brugen af den og kontakte
Cz
støvet forsigtigt med en blæser*.
ind i noget, ramme andre, falde
den lokale forhandler for at få
udsættes for pludselige
Ro
åben ild. Skil aldrig batteriet ad.
Brug ikke benzen, fortynder eller
Ro
eller udsætte sig for andre ulykker.
anvisning om, hvor den skal sendes
temperaturændringer, kan der
Hu
andre organiske midler.
hen til reparation.
Hu
opstå vandkondensering på
nakkerem. Det kan ramme nogen
linseoverfladerne. Brug den ikke, før
kommer i kontakt med tøj eller hud,
af gummi. som blæser luft fra en
og forårsage skade.
kondensen er fordampet.
skal man straks skylle i rigeligt vand.
dyse.
Hvis væske fra et beskadiget batteri
ustabilt sted. Det kan falde ned og
kommer i øjet, skal man straks skylle
blive beskadiget eller forårsage
i rent vand og søge læge.
skade.
man følge de lokale bestemmelser
herfor.
240 241
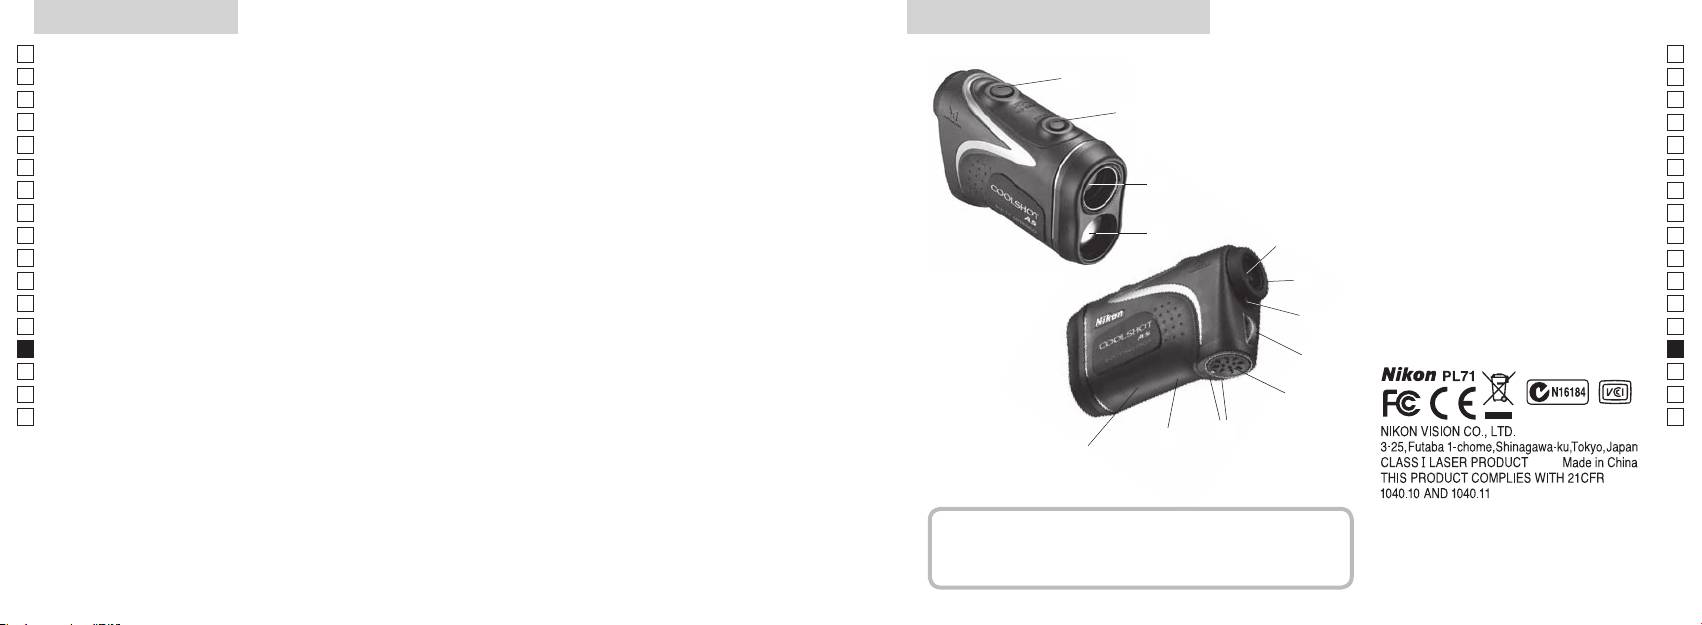
Vigtige funktioner Nomenklatur/Medfølgende dele
Jp
Følgende forhold gør målingen lettere:
Jp
1
En
4
En
Laser udsendelsesblænde
Es
Es
3
2 Laser detektorblænde
Fr
Fr
afstand ± højde), som er nyttig ved golfspil
3
De
De
4
It
skifte mellem
Målingen kan være unøjagtig under følgende forhold:
It
56 x monocular øjestykke
1
Se
Se
vælges efter målet
6
Nl
Nl
7 Diopterindeks
Ru
målingsfunktionen
2
5
8 Øje til nakkerem
Ru
spejl, o.lign)
Pt
9 Batterikammerdæksel
Pt
Pl
6
!p Lukket"-angivelse for
Pl
brug under vand)
Fi
batterikammerdæksel
Fi
7
No
!q Mærkat med produktnummer
No
Nikon laser-afstandsmåleren bruger en usynlig laserstråle
!w Indikation af FDA oplysninger
Dk
Dk
til måling. Den måler tiden laserstrålen bruger til at
8
Cz
Cz
bevæge sig fra afstandsmåleren til målet og tilbage igen.
Ro
Laser reflektivitet og målingsresultater kan variere efter
9
Ro
klimatiske og omgivende forhold, samt efter farven,
Hu
Hu
overfladefinish, størrelse, form og andre egenskaber ved
!p
målet.
!q
!w
Medfølgende dele
......................................x1
.......................... x1
...........................x1
.....x1
242 243
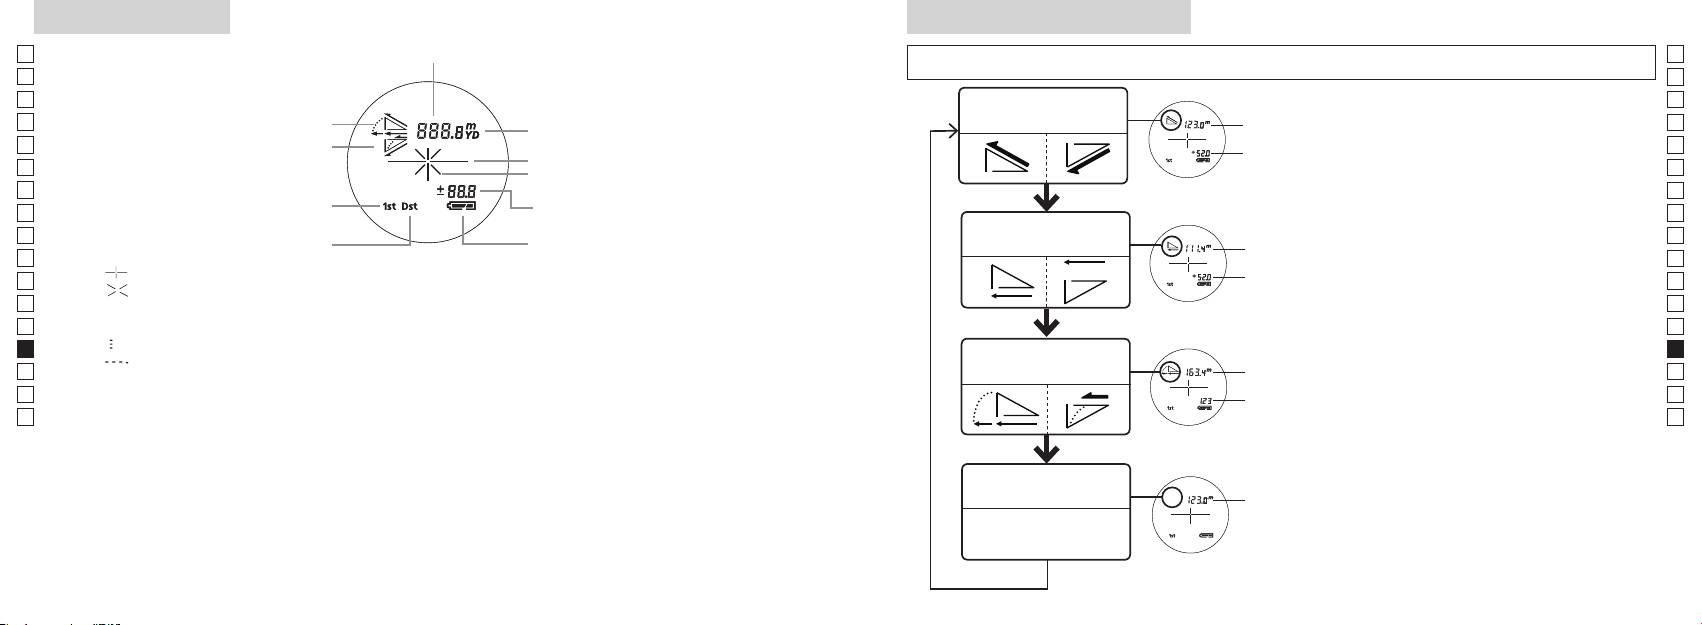
Internt display
Funktion for visning af måling
Jp
Afstand
Jp
sek.), for at skifte funktionen i rækkefølgen, der vises nedenfor.
En
En
Es
Es
Funktion for faktisk
1. Tænd for strømmen (Kontrollér, at det interne
Faktisk
Fr
Opadgående
afstand og højde
Fr
display er tændt).
afstand
De
Nedadgående
De
Målmærke
Højde
tryk derefter straks (mindre end 0,5 sek.) på
It
It
Laserirradiationsmærke
Se
Se
Højde (faktisk afstand ved
i 2 sekunder.
Nl
Nl
indstilling for golffunktion)
Funktion for vandret
Ru
for at skifte visningsmåden for måling.
Vandret
Ru
Batteritilstand
afstand og højde
Pt
afstand
Pt
『 』
funktion vises.
Pl
Højde
Pl
『 』 - Vises, mens laseren udsendes til en måling.
*
Hvis der ikke trykkes på knapperne i den
Fi
Fi
Forbliver vist under enkelt måling. Blinker under fortsatte målinger.
rette rækkefølge, skiftes der ikke.
No
Se ikke ind i frontlinsen, når dette mærke vises.
Skift af funktion efter måling konverterer
No
*
Dk
『
』 - Måler nu
Hældnings-
resultaterne til den nye funktion.
Dk
『
』 - "Måling mislykket" eller "Kunne ikke måle"
Golffunktion
justeret
*
Cz
Cz
afstand
målinger i den nye funktion.
Ro
Ro
Faktisk
Hu
afstand
Hu
produkt bliver forstørret af øjestykkets store forstørrelse. Selv om LCD-displayet er fremstillet med brug
af den mest avancerede teknologi, så er det umuligt at fjerne støv fuldstændigt. Derfor kan der måske
ses støv. Det vil imidlertid ikke påvirke målingens nøjagtighed eller brugssikkerheden.
Funktion for faktisk
Faktisk
afstand
afstand
244 245
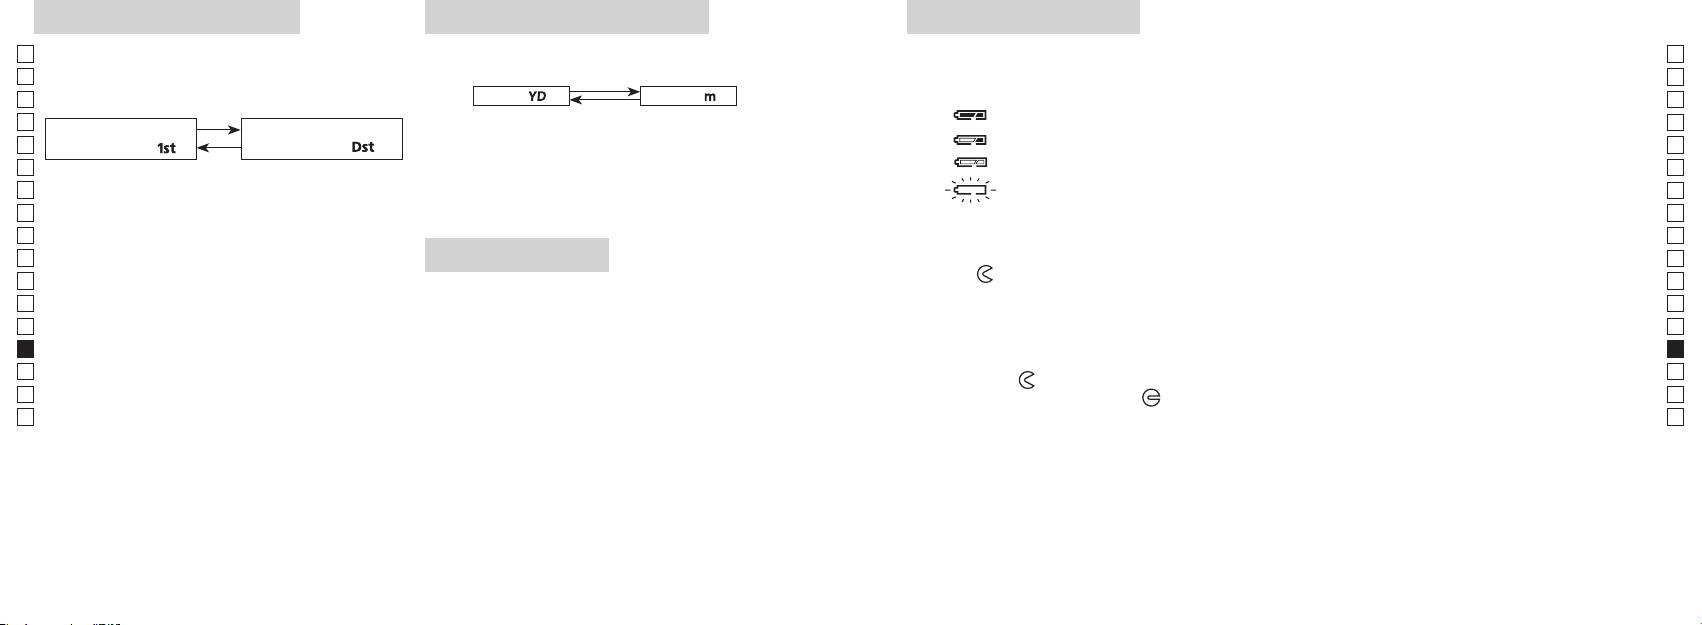
Enheder for afstandsvisning
Udskiftning af batteriFunktion for målprioritet
Jp
Denne laser-afstandsmåler anvender et system der
Jp
Batteritype: 3 V CR2 lithium batteri x1
(Fabriksstandardindstilling er yard.)
En
Indikatorer for batteriniveau
En
Es
[ ]
Meter [ ]Yard
* Mærke for batteristatus i det interne display vil advare, når batteriet skal udskiftes.
Es
nærmeste mål.)
: Batteriet er tilstrækkeligt opladet til brug.
Fr
1. Tænd for strømmen (Kontrollér, at det interne display er
Fr
tændt).
: Batteriet begynder at være afladet. Batteriet skal snart udskiftes.
De
nærmeste mål「
」
fjerneste mål
「
」
De
It
: Batteriniveauet er lavt. Batteriet skal udskiftes med et nyt.
It
1. Tænd for strømmen (Kontrollér, at det interne
sekunder. Når visningsenheden har skiftet, slippes
Se
display er tændt).
knappen.
Se
3. Når enheden er indstillet, bliver resultaterne konverteret
afstandsmåleren automatisk. Udskift batteriet.
Nl
Nl
og vist i den måleenhed, du har valgt for afstand.
Ru
Ru
nede i 0,5 sekund.
1. Åbn batteridækslet
Pt
Fortsæt med at trykke og holde nede på begge
Ved brug af tommelfingeren eller lign. i batteridækslets fordybning drejes dækslet i retning mod
Pt
LED-belysning
knapper (mere end 2 sekunder), indtil funktion for
-mærket. Det er måske ikke let at åbne på grund af den vandtætte gummipakning.
Pl
Pl
1. Tænd for strømmen (Kontrollér, at det interne display er
2. Udskift det gamle batteri med et nyt
Fi
Fi
har skiftet.
tændt).
No
3. Slip begge knapper, når funktionen har skiftet.
No
*
Hvis der ikke trykkes på knapperne i den rette
korrekt, fungerer laser-afstandsmåleren ikke.
Dk
Dk
rækkefølge, skiftes der ikke.
3. Luk batteridækslet
*
Cz
Cz
*
Hvis skiftningen ikke lykkes, gentages trin 2.
LCD-panelet.
Tilpas
-mærket med
●
-indikatoren, og indsæt batteridækslet. Ved brug af tommelfingeren eller
Ro
Ro
*
lign. drejes dækslet mod
-mærket. Den kan være lidt svært at lukke på grund af den vandtætte
[
Hu
afstandsmåleren. Hvis det gøres, vil belysningen være
gummipakning, men fortsæt med at dreje det, så langt det kan komme. Kontroller, at dækslet er
Hu
]
slukket, når laser-afstandsmåleren tændes igen.
korrekt lukket.
Når der måles afstand til mål, der overlapper hinanden,
Batterilevetid
viser funktion for prioritet til nærmeste mål afstanden til
Fortsat drift: Ca. 13.000 gange (ved ca. 20°C)
det nærmeste mål, og funktion for prioritet til fjerneste
Dette tal kan være lidt anderledes alt efter tilstanden, temperatur, og andre faktorer, såsom målets form, farve,
mål viser afstanden til det fjerneste mål.
mv. Det er kun et vejledende tal.
afladning vil levetiden af dette batteri sandsynligvis være kortere, end angivet ovenfor.
* Hvis der kommer vand ind i batterikammeret på grund af neddypning, skal du aftørre al fugt og lade kammeret tørre helt,
før batteriet lægges i igen.
246 247
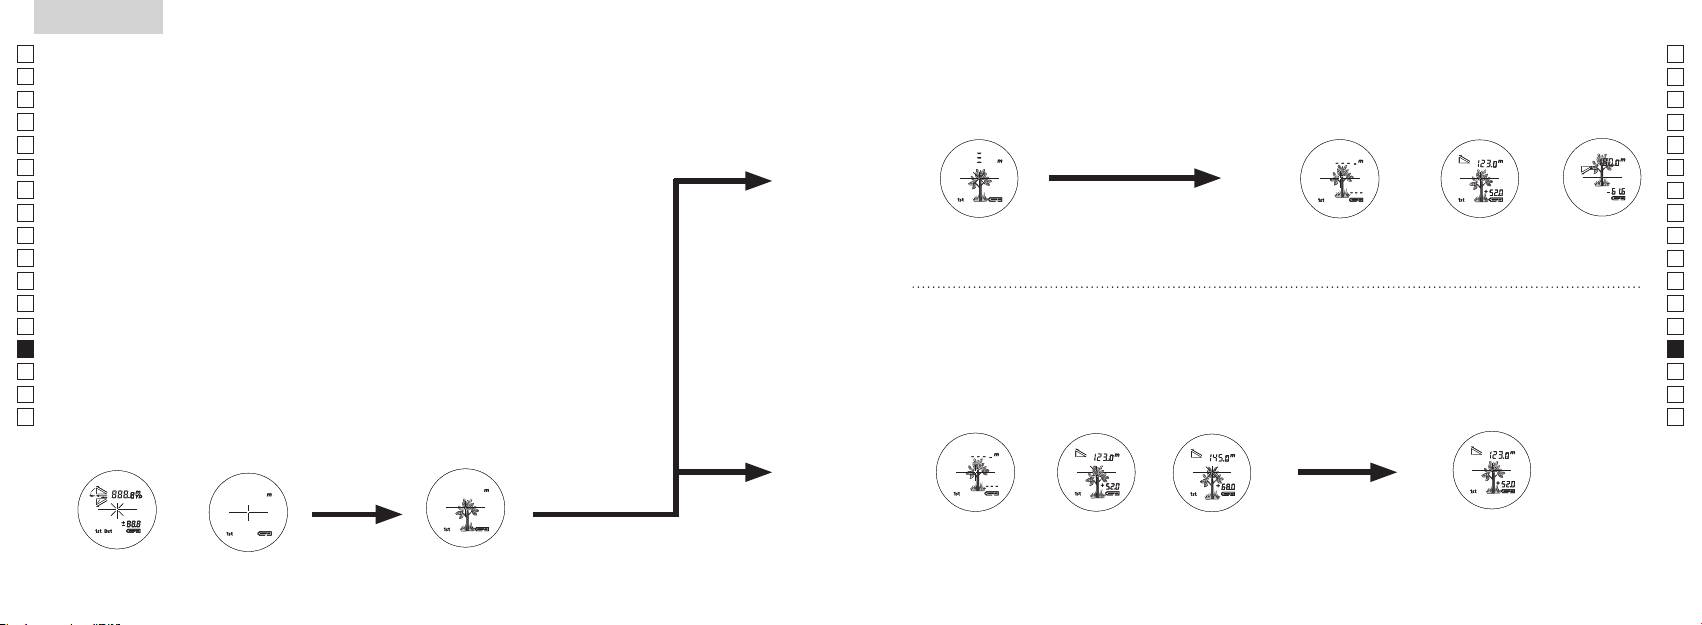
Jp
Jp
En
En
Es
Es
Fr
Fr
De
De
It
It
Se
Se
Nl
Nl
Ru
Ru
Pt
Pt
Pl
Pl
Fi
Fi
No
No
Dk
Dk
Cz
Cz
Ro
Ro
Hu
Hu
248 249
Measurement
1. Press the POWER button for power-on.
(Power turns off 8 seconds after the last
operation.)
Immediately after power-on.
3. Press POWER button once to start single measurement.
4. After measurement, “distance” or “fail to measure” indicator are displayed for 8 seconds, then power turns off. If you press the POWER
button during power-on (while the internal display is lit), another single measurement starts.
unable to measure distance.
3. Keep pressing POWER button to start continuous measurement up to 20 seconds. The internal display shows “distance” and
“fail to measure” indicator alternately.
Note: Laser irradiaton mark is blinking during the measurement.
Note: If you stop pressing the button, the continuous measuremen stops
2. Aim at the target
Positionthetargetatthecenterofthereticle
[Single measurement]
Failure to measure or
unable to measure distance.
[Continuous measurement]
4. After continuous measurement, the measure results are displayed for 8 seconds, then power turns off. If you press the POWER
button during power-on (while the internal display is lit), another measrement starts.
Failure to measure or
Target focusing.
Measuring.
(Initializing)
.
Upward measurement. Downward measurement.
Displays the measured
figure. (Target 1)
Displays the measured figure.
Stand-by.
Displays the measured
figure. (Target 2)
Measurement
1. Press the POWER button for power-on.
(Power turns off 8 seconds after the last
operation.)
Immediately after power-on.
(Initializing)
3. Press POWER button once to start single measurement.
Measuring.
4. After measurement, “distance” or “fail to measure” indicator are displayed for 8 seconds, then power turns off. If you press the POWER
button during power-on (while the internal display is lit), another single measurement starts.
Failure to measure or
unable to measure distance.
Displays the measured
figure. (Target 1)
3. Keep pressing POWER button to start continuous measurement up to 20 seconds. The internal display shows “distance” and
“fail to measure” indicator alternately.
Note: Laser irradiaton mark is blinking during the measurement.
Note: If you stop pressing the button, the continuous measuremen stops
Target focusing.
2. Aim at the target
.
Positionthetargetatthecenterofthereticle
[Single measurement]
Failure to measure or
unable to measure distance.
Upward measurement. Downward measurement.
Displays the measured figure.
[Continuous measurement]
4. After continuous measurement, the measure results are displayed for 8 seconds, then power turns off. If you press the POWER
button during power-on (while the internal display is lit), another measrement starts.
Stand-by.
Displays the measured
figure. (Target 2)
Measurement
1. Press the POWER button for power-on.
(Power turns off 8 seconds after the last
operation.)
Immediately after power-on.
Stand-by.
(Initializing)
2. Aim at the target
.
Positionthetargetatthecenterofthereticle
3. Press POWER button once to start single measurement.
4. After measurement, “distance” or “fail to measure” indicator are displayed for 8 seconds, then power turns off. If you press the POWER
button during power-on (while the internal display is lit), another single measurement starts.
unable to measure distance.
3. Keep pressing POWER button to start continuous measurement up to 20 seconds. The internal display shows “distance” and
“fail to measure” indicator alternately.
Note: Laser irradiaton mark is blinking during the measurement.
Note: If you stop pressing the button, the continuous measuremen stops
[Single measurement]
Failure to measure or
unable to measure distance.
[Continuous measurement]
4. After continuous measurement, the measure results are displayed for 8 seconds, then power turns off. If you press the POWER
button during power-on (while the internal display is lit), another measrement starts.
Failure to measure or
Target focusing.
Measuring.
Upward measurement. Downward measurement.
Displays the measured
figure. (Target 1)
Displays the measured figure.
Displays the measured
figure. (Target 2)
Måling
Advarsel — Brug af betjeninger og justeringer eller udførsel af andre
【
Enkelt måling
】
procedurer end dem, der er specificeret heri, kan resultere i udsættelse for farlig bestråling.
3. Tryk på
1. Forberedelse
én gang for at begynde en enkel
måling.
Læg et batteri i batterikammeret. (Se "Udskiftning af batteri")
2. Gummiøjestykke
Både brillebærere og ikke brillebærere kan bruge denne afstandsmåler, som den er.
3. Justering af diopter
Drej først diopterjusteringshjulet mod uret, indtil det ikke kan komme længere.
at det interne display er tændt). Mens du kigger gennem øjestykket, drejes
diopterjusteringshjulet med uret, indtil LCD-visningen kommer i fokus.
Hvis du drejer hjulet for meget med uret, drejes det meget tilbage mod uret, og
justér derefter igen.
Hvis diopter ikke justeres efter dit syn, kan du ikke fokusere tydeligt på dit motiv.
【
Funktion for fortsat måling
】
4. Måling
*
Se venligst hver afsnit for indstilling af hver funktion.
1. Tænd for strømmen (Kontrollér,
2. Sigt mod målet.
at det interne display er tændt)
(Automatisk slukning efter
trådkorset.
ca. 8. sek. uden betjening)
Straks efter tænding
Stand-by Sigter mod målet
(initialiserer)
Measurement
1. Press the POWER button for power-on.
(Power turns off 8 seconds after the last
operation.)
Immediately after power-on.
Stand-by.
(Initializing)
2. Aim at the target
.
Positionthetargetatthecenterofthereticle
Target focusing.
[Single measurement]
3. Press POWER button once to start single measurement.
Measuring.
4. After measurement, “distance” or “fail to measure” indicator are displayed for 8 seconds, then power turns off. If you press the POWER
button during power-on (while the internal display is lit), another single measurement starts.
Failure to measure or
Upward measurement. Downward measurement.
unable to measure distance.
Displays the measured figure.
[Continuous measurement]
3. Keep pressing POWER button to start continuous measurement up to 20 seconds. The internal display shows “distance” and
“fail to measure” indicator alternately.
Note: Laser irradiaton mark is blinking during the measurement.
Note: If you stop pressing the button, the continuous measuremen stops
Failure to measure or
unable to measure distance.
4. After continuous measurement, the measure results are displayed for 8 seconds, then power turns off. If you press the POWER
button during power-on (while the internal display is lit), another measrement starts.
Displays the measured
figure. (Target 1)
Displays the measured
figure. (Target 2)
Measurement
1. Press the POWER button for power-on.
(Power turns off 8 seconds after the last
operation.)
Immediately after power-on.
Stand-by.
(Initializing)
2. Aim at the target
.
Positionthetargetatthecenterofthereticle
Target focusing.
[Single measurement]
3. Press POWER button once to start single measurement.
Measuring.
4. After measurement, “distance” or “fail to measure” indicator are displayed for 8 seconds, then power turns off. If you press the POWER
button during power-on (while the internal display is lit), another single measurement starts.
Failure to measure or
Upward measurement. Downward measurement.
unable to measure distance.
Displays the measured figure.
[Continuous measurement]
3. Keep pressing POWER button to start continuous measurement up to 20 seconds. The internal display shows “distance” and
“fail to measure” indicator alternately.
Note: Laser irradiaton mark is blinking during the measurement.
Note: If you stop pressing the button, the continuous measuremen stops
Failure to measure or
unable to measure distance.
Displays the measured
figure. (Target 1)
4. After continuous measurement, the measure results are displayed for 8 seconds, then power turns off. If you press the POWER
button during power-on (while the internal display is lit), another measrement starts.
Displays the measured
figure. (Target 2)
Measurement
1. Press the POWER button for power-on.
(Power turns off 8 seconds after the last
operation.)
Immediately after power-on.
Stand-by.
(Initializing)
2. Aim at the target
.
Positionthetargetatthecenterofthereticle
Target focusing.
[Single measurement]
3. Press POWER button once to start single measurement.
Measuring.
4. After measurement, “distance” or “fail to measure” indicator are displayed for 8 seconds, then power turns off. If you press the POWER
button during power-on (while the internal display is lit), another single measurement starts.
Failure to measure or
unable to measure distance.
3. Keep pressing POWER button to start continuous measurement up to 20 seconds. The internal display shows “distance” and
“fail to measure” indicator alternately.
Note: Laser irradiaton mark is blinking during the measurement.
Note: If you stop pressing the button, the continuous measuremen stops
Failure to measure or
unable to measure distance.
[Continuous measurement]
4. After continuous measurement, the measure results are displayed for 8 seconds, then power turns off. If you press the POWER
button during power-on (while the internal display is lit), another measrement starts.
Upward measurement. Downward measurement.
Displays the measured
figure. (Target 1)
Displays the measured figure.
Displays the measured
figure. (Target 2)
Measurement
1. Press the POWER button for power-on.
(Power turns off 8 seconds after the last
operation.)
Immediately after power-on.
Stand-by.
(Initializing)
2. Aim at the target
.
Positionthetargetatthecenterofthereticle
Target focusing.
[Single measurement]
3. Press POWER button once to start single measurement.
Measuring.
4. After measurement, “distance” or “fail to measure” indicator are displayed for 8 seconds, then power turns off. If you press the POWER
button during power-on (while the internal display is lit), another single measurement starts.
unable to measure distance.
3. Keep pressing POWER button to start continuous measurement up to 20 seconds. The internal display shows “distance” and
“fail to measure” indicator alternately.
Note: Laser irradiaton mark is blinking during the measurement.
Note: If you stop pressing the button, the continuous measuremen stops
unable to measure distance.
4. After continuous measurement, the measure results are displayed for 8 seconds, then power turns off. If you press the POWER
button during power-on (while the internal display is lit), another measrement starts.
[Continuous measurement]
Failure to measure or
Failure to measure or
Upward measurement. Downward measurement.
Displays the measured
figure. (Target 1)
Displays the measured figure.
Displays the measured
figure. (Target 2)
Measurement
1. Press the POWER button for power-on.
(Power turns off 8 seconds after the last
operation.)
Immediately after power-on.
Stand-by.
(Initializing)
2. Aim at the target
.
Positionthetargetatthecenterofthereticle
Target focusing.
[Single measurement]
3. Press POWER button once to start single measurement.
4. After measurement, “distance” or “fail to measure” indicator are displayed for 8 seconds, then power turns off. If you press the POWER
button during power-on (while the internal display is lit), another single measurement starts.
unable to measure distance.
3. Keep pressing POWER button to start continuous measurement up to 20 seconds. The internal display shows “distance” and
“fail to measure” indicator alternately.
Note: Laser irradiaton mark is blinking during the measurement.
Note: If you stop pressing the button, the continuous measuremen stops
unable to measure distance.
4. After continuous measurement, the measure results are displayed for 8 seconds, then power turns off. If you press the POWER
button during power-on (while the internal display is lit), another measrement starts.
[Continuous measurement]
Failure to measure or
Failure to measure or
Measuring.
Upward measurement. Downward measurement.
Displays the measured
figure. (Target 1)
Displays the measured figure.
Displays the measured
figure. (Target 2)
Measurement
1. Press the POWER button for power-on.
(Power turns off 8 seconds after the last
operation.)
Immediately after power-on.
Stand-by.
(Initializing)
2. Aim at the target
.
Positionthetargetatthecenterofthereticle
Target focusing.
[Single measurement]
3. Press POWER button once to start single measurement.
Measuring.
4. After measurement, “distance” or “fail to measure” indicator are displayed for 8 seconds, then power turns off. If you press the POWER
button during power-on (while the internal display is lit), another single measurement starts.
unable to measure distance.
3. Keep pressing POWER button to start continuous measurement up to 20 seconds. The internal display shows “distance” and
“fail to measure” indicator alternately.
Note: Laser irradiaton mark is blinking during the measurement.
Note: If you stop pressing the button, the continuous measuremen stops
unable to measure distance.
4. After continuous measurement, the measure results are displayed for 8 seconds, then power turns off. If you press the POWER
button during power-on (while the internal display is lit), another measrement starts.
[Continuous measurement]
Failure to measure or
Failure to measure or
Upward measurement. Downward measurement.
Displays the measured
figure. (Target 1)
Displays the measured figure.
Displays the measured
figure. (Target 2)
Measurement
1. Press the POWER button for power-on.
(Power turns off 8 seconds after the last
operation.)
Immediately after power-on.
Stand-by.
(Initializing)
2. Aim at the target
.
Positionthetargetatthecenterofthereticle
Target focusing.
[Single measurement]
3. Press POWER button once to start single measurement.
Measuring.
4. After measurement, “distance” or “fail to measure” indicator are displayed for 8 seconds, then power turns off. If you press the POWER
button during power-on (while the internal display is lit), another single measurement starts.
Failure to measure or
unable to measure distance.
Displays the measured
figure. (Target 1)
3. Keep pressing POWER button to start continuous measurement up to 20 seconds. The internal display shows “distance” and
“fail to measure” indicator alternately.
Note: Laser irradiaton mark is blinking during the measurement.
Note: If you stop pressing the button, the continuous measuremen stops
Failure to measure or
unable to measure distance.
Upward measurement. Downward measurement.
Displays the measured figure.
[Continuous measurement]
4. After continuous measurement, the measure results are displayed for 8 seconds, then power turns off. If you press the POWER
button during power-on (while the internal display is lit), another measrement starts.
Displays the measured
figure. (Target 2)
Measurement
1. Press the POWER button for power-on.
(Power turns off 8 seconds after the last
operation.)
Immediately after power-on.
Stand-by.
(Initializing)
2. Aim at the target
.
Positionthetargetatthecenterofthereticle
Target focusing.
[Single measurement]
3. Press POWER button once to start single measurement.
Measuring.
4. After measurement, “distance” or “fail to measure” indicator are displayed for 8 seconds, then power turns off. If you press the POWER
button during power-on (while the internal display is lit), another single measurement starts.
Failure to measure or
unable to measure distance.
3. Keep pressing POWER button to start continuous measurement up to 20 seconds. The internal display shows “distance” and
“fail to measure” indicator alternately.
Note: Laser irradiaton mark is blinking during the measurement.
Note: If you stop pressing the button, the continuous measuremen stops
Failure to measure or
unable to measure distance.
[Continuous measurement]
4. After continuous measurement, the measure results are displayed for 8 seconds, then power turns off. If you press the POWER
button during power-on (while the internal display is lit), another measrement starts.
Upward measurement. Downward measurement.
Displays the measured
figure. (Target 1)
Displays the measured figure.
Displays the measured
figure. (Target 2)
indikator for "måling mislykket" eller
"målt afstand" i 8 sekunder, derefter slukkes. Hvis du trykker på
-knappen under opstart (mens det interne display
er aktivt), begynder en anden enkel måling.
Måler
"Måling mislykket"
Måling opad Måling nedad
eller "Kunne ikke
Viser det målte tal
måle" afstand
3. Tryk på
måling i 8 sekunder. Det interne display viser enten indikator for
måling i 8 sekunder, derefter slukkes.
"måling mislykket" eller "målt afstand".
Hvis du trykker på
-knappen under opstart (mens
*
Symbolet for laserudsendelse blinker under målingen.
det interne display er aktivt), begynder en anden måling.
*
Hvis du ophører med at trykke på knappen, stopper den
fortsatte måling.
Når du f.eks. måler en markørpind på en golfbane, skal du bruge
"Måling mislykket"
Viser det målte tal
Viser det målte tal
eller "Kunne ikke
(mål 1)
(mål 2)
markørpinden med funktion for fortsat måling. Hvis der ikke er
måle" afstand
nogen genstande mellem dig og markørpinden, er afstanden til
markørpinden det mindste tal.
Specifikationer
Jp
Målingssystem
Hus: Vandtæt (maksimal dybde på 1 meter i op til 10 minutter)*
Jp
Struktur
(Batterikammer: Vandtæt**)
En
Målingsområde
En
Es
Klasse 1M L
Es
Sikkerhed
Klasse 1 L
Fr
Faktisk afstand (nederste 3-cifrede)
Fr
De
Afstandsvisning (interval)
De
Miljø
It
It
Laser
Se
Se
Optisk system
Klasse
Nl
Nl
Forstørrelse (x) 6
Bølgelængde (nm) 905
Ru
Ru
ø21
12
Pt
Pt
Rektangulært synsfelt (reelt) (°) 7,5
15
Pl
Pl
Øjenafstand (mm) 18,3
Stråledivergens (mrad)
Fi
Fi
Udgangspupil (mm) ø3,5
Fugtighed under betjening (%RH) 80 eller mindre (uden dugdannelse)
No
No
-
1
±4m
Dk
Dk
*Vandtætte modeller
Andet
Cz
Denne Nikon laser-afstandsmåler er vandtæt, og det optiske system eller iagttagelsen vil ikke blive påvirket, hvis enheden
Cz
Betjeningstemperatur (˚C) -10 —
nedsænkes eller falder i vand til en maksimal dybde på 1 meter i op til 10 minutter.
Ro
Ro
Nikon laser-afstandsmåleren har følgende fordele:
Hu
CR2 lithium batteri x 1 (DC 3V)
Hu
Strømkilde
Automatisk slukning (efter ca. 8. sek. uden betjening)
Mål (D x B x H) (mm) 113 x 70 x 39
Bemærk følgende under brug af Nikon laser-afstandsmåler.
Vægt (g) Ca. 175 g (uden batteri)
vand.
** Batterikammeret er vandfast, ikke vandtæt. Der kan trænge vand ind i enheden, hvis Nikon laser-afstandsmåleren nedsænkes i
vand. Hvis der kommer vand ind i batterikammeret, skal du aftørre al fugt og lade kammeret tørre helt.
250 251
Andet
Fejlfinding/Reparation
Jp
Hvis din Nikon laser-afstandsmåler skulle få behov for reparation, bedes du kontakte din lokale forhandler eller butikken, hvor
Jp
En
Denne enhed overholder Del 15 i FCC-bestemmelserne. Brug er underlagt følgende to betingelser:
En
Es
(1) Denne enhed må ikke forårsage skadelig interferens, og
Es
(2) Denne enhed skal acceptere enhver modtaget interferens, inklusive interferens, der kan forårsage uønsket drift.
Symptom Punkter, der skal kontrolleres
Fr
Fr
De
●
De
It
Dette udstyr er blevet testet og fundet i overensstemmelse med grænserne for en Klasse B digital enhed, der
● Kontrollér, at batteriet er korrekt ilagt
(LCD tænder ikke)
It
● Udskift batteriet med et nyt.
Se
Se
beskyttelse mod skadelig interferens i beboelsesinstallationer. Dette udstyr genererer, bruger og kan udsende
Nl
● Kontroller, at der ikke er noget, såsom din hånd eller en rem, der blokerer for
Nl
radiofrekvensenergi og , hvis ikke installeret og brugt i overensstemmelse med instruktionerne, kan det forårsage
laserudsendelsesblænden og laserdetektoren ud for frontlinsen.
Ru
skadelig interferens for radiokommunikationer. Der er imidlertid ingen garanti for, at interferens ikke vil opstå i en
Ru
● Kontroller, at laserudsendelseblænden og laserdetektoren på frontlinsesiden er
bestemt installation. Hvis dette ustyr forårsager skadelig interferens til radio- eller tv-modtagelse, hvilket kan afgøres
Kan ikke måle afstanden
Pt
rene. Rengør dem om nødvendigt.
Pt
ved at slukke og tænde for udstyret, opfordres brugeren til at prøve at korrigere interferensen ved at foretage en eller
Pl
● Kontrollér, at målets form og tilstand er velegnet til at reflektere laserstrålen.
flere af følgende handlinger:
Pl
● Udskift batteriet med et nyt.
Fi
Fi
No
● Hold enheden rolig under målingen.
No
● Kontrollér, at målet er inden for målingsområdet
Dk
Dk
Cz
Cz
Tættere mål, der befinder sig
Ro
● Sørg for, at der ikke er noget, såsom græs eller blade, mellem Nikon laser-
Ro
inden for målingsområdet, kan
Denne Nikon laser-afstandsmåler er er basal afstandsmåler. Dens resultater kan ikke bruges som officielt
Hu
afstandsmåleren og målet.
Hu
ikke måles
bevismateriale.
Mål udover en vis afstand kan
● Sørg for, at der ikke er noget, såsom græs eller blade, mellem Nikon laser-
ikke måles
afstandsmåleren og målet.
● Udskift batteriet med et nyt.
● Kontrollér, at målets form og tilstand er velegnet til at reflektere laserstrålen.
Målingsresultat er ustabilt
● Hold enheden rolig under målingen.
● Sørg for, at der ikke er noget, såsom græs eller blade, mellem Nikon laser-
afstandsmåleren og målet.
252 253
Fejlfinding/Reparation
Jp
Jp
En
En
Es
Es
Symptom Punkter, der skal kontrolleres
Fr
Fr
Česky
De
De
● Udskift batteriet med et nyt.
It
● Kontrollér, at målets form og tilstand er velegnet til at reflektere laserstrålen.
It
Der vises ukorrekt resultat
OBSAH
● Sørg for, at der ikke er noget, såsom græs eller blade, mellem Nikon laser-
Se
Se
afstandsmåleren og målet.
Nl
Nl
Upozornění před použitím ........................... 256-259
Ru
Ru
Hvis problemet vedvarer efter konsultering af FReparationsoversigten, bedes du kontakte din lokale forhandler
Nejdůležitější vlastnosti .......................................... 260
Pt
, da en fejlfunktion må være opstået. Lad aldrig andre end en autoriseret repræsentant for
Pt
Složení ............................................................. 261
producenten kontrollere eller reparere din Nikon laser-afstandsmåler. Hvis denne instruktion ikke overholdes, kan det føre til
Pl
Pl
Vnitřní displej .............................................................. 262
personskade eller skade på produktet.
Fi
Režim zobrazení měření ......................................... 263
Fi
No
No
Dk
............................................................. 264
Dk
Cz
Výměna baterie .......................................................... 265
Cz
Ro
Měření .................................................................. 266-267
Ro
Hu
Specifikace .......................................................... 268-269
Hu
Ostatní ........................................................................... 270
Opravy .............................. 271-272
254 255
Upozornění před použitím
Jp
Děkujeme, že jste si zakoupili laserový dálkoměr Nikon COOLSHOT AS.
Dodržujte prosím důsledně
BEZPEČNOSTNÍ OPATŘENÍ
Jp
následující instrukce, abyste
Nikon mimo dosah dětí.
En
(Laser)
En
mohli správně používat zařízení a
Laserový dálkoměr Nikon používá
Es
Používání ovládacích prvků, provádění nastavení nebo vykonávání postupů jinak, než jak
v důsledku pádu nebo z jiného
Es
zabránili potenciálně
neviditelný laserový paprsek. Důsledně
popisuje tato příručka, může mít za následek vystavení se nebezpečnému záření.
Fr
důvodu poškozené tělo nebo
nebezpečným problémům. Před
dodržujte následující:
Fr
vydává neobvyklý zvuk, ihned
používáním tohoto výrobku si
Varování
De
De
vyjměte baterii a přestaňte jej
〇
pečlivě přečtěte kapitolu
It
používat.
It
ke správnému používání, které jsou k výrobku přiloženy.
„Upozornění před použitím“ a
,
Se
zatímco se díváte do optiky ze
Se
〇
instrukce pro správné užívání,
Nl
které jsou přiloženy k výrobku.
Nl
〇 Výrobek nerozebírejte a neopravujte svépomocí, může to vést k závažným problémům.
Mějte tuto příručku v dosahu pro
to může negativně ovlivnit nebo
Ru
Na výrobek, který byl rozebrán nebo opravován, se nevztahuje záruka výrobce.
Ru
poškodit váš zrak.
snadné nahlédnutí.
Pt
Pt
Pl
● Technické parametry a design mohou být bez oznámení změněny.
Pl
VAROVÁNÍ
Nedívejte se do laseru přes jiný
●
Fi
Tímto symbolem varujeme uživatele,
Fi
No
dalekohled, ani pouhým okem. Mohlo
No
●
by mohlo mít za následek smrt nebo
by to vést k poškození zraku.
Dk
Dk
vážný úraz.
Cz
Cz
POZOR
Ro
Tímto symbolem varujeme uživatele,
,
Ro
že jakékoliv nesprávné užití
abyste zamezili náhodnému vyslání
Hu
Hu
nedodržující zde popsané zásady by
laserového paprsku.
mohlo mít za následek vážný úraz
nebo hmotnou ztrátu.
nepoužíváte, vyjměte z těla baterii.
nerozebírejte ani neprovádějte
technické úpravy a opravy. Vyzařující
laser může škodit vašemu zdraví.
Na produkt, který byl rozebrán,
opravován nebo technicky upraven,
se nevztahuje záruka výrobce.
256 257

Upozornění před použitím
Jp
BEZPEČNOSTNÍ OPATŘENÍ
BEZPEČNOSTNÍ OPATŘENÍ
Jp
BEZPEČNOSTNÍ OPATŘENÍ
OŠETŘOVÁNÍ A ÚDRŽBA
Skladování
tohoto výrobku nebo jiných malých
En
(Monokulární objektiv)
(Lithiová baterie)
Upozornění
Čočky
En
Es
Laserový dálkoměr Nikon je
Es
vodotěsný, není navržen pro
kondenzovaná voda nebo plíseň.
vybaven monokulárním objektivem
může prasknout a vytéci, což vede ke
Fr
používání pod vodou.
dálkoměr
Fr
sloužícím k zaměření cíle. Důsledně
korozi zařízení a zašpinění oděvu.
De
Nikon na chladném a suchém místě.
dodržujte následující:
Důsledně dodržujte následující:
De
být co nejdříve odstraněny z
otisky prstů odstraníte z povrchu
It
Varování
vyhledejte lékaře.
It
povrchu tělesa dálkoměru s pomocí
noci nechte přístroj důkladně
umístěnými.
Se
bavlněnou utěrkou nebo kvalitním
vyschnout za pokojové teploty a
Se
Nikon se nikdy nedívejte přímo do
hadříku.
poté jej uložte na chladné a suché
Nl
slunce, intenzivního světla nebo
vybita nebo se přístroj delší dobu
Nl
místo.
laserového paprsku.
nepoužívá.
Ru
jakýchkoli symptomů přestaňte
Ru
Nikon v blízkosti zdrojů tepla nebo
odolných šmouh použijte malé
Upozornění
přístroj používat a okamžitě
Pt
Pt
vprostoru pro baterii.
vyhledejte lékaře.
vautě. To by ho mohlo poškodit
denaturovaného) lihu. Nepoužívejte
Pl
Pl
nebo negativně ovlivnit.
nebo mincemi v kapse nebo vaku,
Fi
přenášíte, uložte ho do měkkého
Fi
protože by se mohla zkratovat
.
pouzdra.
No
No
azpůsobit přehřátí.
Ultrafialové paprsky a nadměrné
přístroje, byste již neměli znovu
Dk
Dk
chůzi. Nedodržení tohoto pokynu
přestal správně pracovat, ihned
teplo mohou jednotku negativně
nebo plamenu. Nikdy baterii
Cz
může vést ke zranění nebo poruše
jej přestaňte používat a požádejte
Cz
ovlivnit nebo dokonce poškodit.
nerozebírejte.
v důsledku nárazu do předmětů,
svého prodejce o pokyny, kam
Ro
Hlavní tělo
Ro
nárazů do osob, pádu a jiných
zaslat přístroj k opravě.
vystaven náhlým změnám teploty,
Hu
Hu
nehod.
baterie dostane do kontaktu s
kondenzovat voda. Nepoužívejte
řemínek. Může to vést k zasažení
výrobek, dokud se kondenzace
zasažená místa okamžitě velkým
Nepoužívejte benzen, ředidlo nebo
jiných osob a způsobení zranění.
neodpaří.
kapalina z poškozené baterie vnikne
organická rozpouštědla.
nestabilní místo. Nedodržení
* Ofukovací balónek je pryžový
tohoto pokynu může vést kpádu
balónek s tryskou, z níž fouká
nebo upuštění a způsobení
vzduch.
zranění nebo poruchy.
smístními předpisy.
258 259

Nejdůležitější vlastnosti Název/Složení
Jp
Měření je snazší za následujících podmínek:
Jp
1
En
4
En
Výstupní apertura laseru
Es
Es
3
2 Apertura laserového detektoru
Fr
Fr
3
De
De
4
It
snadno přepínat
V následujících případech může být měření nepřesné nebo
It
neproveditelné:
1
Se
Se
56x zvětšující (monokulární) okulár
Nl
měření) se zapne funkce nepřetržitého měření
Nl
6 roužek dioptrické korekce
Ru
2
5
Ru
7 Stupnice dioptrické korekce
Pt
8
Pt
Pl
6
9 Kryt prostoru pro baterii
Pl
Fi
!p avřeného
Fi
7
No
prostoru pro baterii
No
Laserový dálkoměr Nikon měří pomocí neviditelného
!q
Dk
Dk
laserového paprsku. Měří dobu, za kterou laserový
8
!w
Cz
Cz
paprsek doputuje od dálkoměru k cíli a zpět. Odrazivost
Ro
laseru a výsledky měření se mohou měnit podle
9
Ro
klimatických podmínek a okolního prostředí, dále pak v
Hu
Hu
závislosti na barvě, povrchové úpravě, rozměrech, tvaru a
!p
dalších vlastnostech cíle.
!q
!w
Složení
......................................x1
...............x1
...............x1
...x1
260 261
Vnitřní displej
Režim zobrazení měření
Jp
Vzdálenost
Jp
En
En
Es
Es
Režim skutečné
Fr
Náklon nahoru
vzdálenosti a výšky
Fr
vzdálenost
vnitřní displej zapnutý).
De
Sklon dolů
De
Výška
It
It
Se
Se
Výška
dobu kratší než 2 sekundy.
Režim priority prvního cíle
Nl
Nl
Režim horizontální
Ru
Vodorovná
Ru
Režim priority vzdáleného cíle
Stav baterie
vzdálenosti a výšky
přepnutí režimu zobrazení Měření.
Pt
vzdálenost
Pt
『 』
4. Opakujte kroky 2 a 3, dokud se nezobrazí
Pl
Výška
Pl
『 』
požadovaný režim.
Fi
Fi
No
správném pořadí, režim se nepřepne.
No
Dk
『
』
Vzdálenost
Dk
『
』
Režim Golf
upravená
Cz
Cz
o sklon
Ro
Ro
novém režimu.
Hu
* LCD displeje se obvykle používají s jednotkovým nebo menším zvětšením. V tomto výrobku se však
vzdálenost
Hu
technologie, není možné zcela eliminovat prach. V důsledku toho může být prach vidět. Nemá však vliv
Režim skutečné
vzdálenosti
vzdálenost
262 263
Režim priority cíle
Jednotka zobrazení vzdálenosti
Výměna baterie
Jp
Laserový dálkoměr využívá systém přepínání režimu
Výsledky měření se zobrazují v metrech nebo yardech.
Jp
Typ baterie: lithiová baterie CR2 3V x1
priority prvního cíle a režimu priority vzdáleného cíle
(Výchozí tovární nastavení je yard).
En
Indikace zbývající kapacity baterie
En
(výchozí tovární nastavení je režim priority prvního cíle).
Es
[ ]
* Symbol stavu baterie na vnitřním displeji upozorňuje na nutnost výměny baterie.
Metry [ ]Yardy
Es
Režim priority prvního
Režim priority vzdáleného
Fr
Fr
cíle「
」
cíle
「
」
zapnutý).
De
De
It
: Baterie je téměř vybitá. Měli byste baterii vyměnit za novou.
It
zapnutý).
Se
uvolněte.
Se
automaticky vypne. Vyměňte baterii.
Nl
Nl
ve zvolené jednotce vzdálenosti.
Ru
Ru
1. Otevřete kryt prostoru pro baterii
Pt
2sekundy), než se režim priority prvního cíle přepne
Pt
LED přisvícení
na režim priority vzdáleného cíle nebo naopak.
Pl
Pl
2. Starou baterii vyměňte za novou
Fi
Fi
*
zapnutý).
No
režim se nepřepne.
No
Dk
*
dálkoměr nebude pracovat.
Dk
3. Zavřete kryt prostoru pro baterii
Cz
*
Cz
[]
●
údaje na displeji.
Ro
Ro
*
Hu
priority prvního cíle vzdálenost nejbližšího předmětu,
dálkoměru. V tomto případě bude přisvícení při příštím
Hu
a režim priority vzdáleného cíle zobrazuje vzdálenost
zapnutí laserového dálkoměru vypnuto.
Životnost baterie
nejvzdálenějšího předmětu.
Trvalý provoz:
bude životnost této baterie pravděpodobně nižší, než je uvedeno výše.
264 265
Jp
Jp
En
En
Es
Es
Fr
Fr
De
De
It
It
Se
Se
Nl
Nl
Ru
Ru
Pt
Pt
Pl
Pl
Fi
Fi
No
No
Dk
Dk
Cz
Cz
Ro
Ro
Hu
Hu
266 267
Measurement
1. Press the POWER button for power-on.
(Power turns off 8 seconds after the last
operation.)
Immediately after power-on.
3. Press POWER button once to start single measurement.
4. After measurement, “distance” or “fail to measure” indicator are displayed for 8 seconds, then power turns off. If you press the POWER
button during power-on (while the internal display is lit), another single measurement starts.
unable to measure distance.
3. Keep pressing POWER button to start continuous measurement up to 20 seconds. The internal display shows “distance” and
“fail to measure” indicator alternately.
Note: Laser irradiaton mark is blinking during the measurement.
Note: If you stop pressing the button, the continuous measuremen stops
2. Aim at the target
Positionthetargetatthecenterofthereticle
[Single measurement]
Failure to measure or
unable to measure distance.
[Continuous measurement]
4. After continuous measurement, the measure results are displayed for 8 seconds, then power turns off. If you press the POWER
button during power-on (while the internal display is lit), another measrement starts.
Failure to measure or
Target focusing.
Measuring.
(Initializing)
.
Upward measurement. Downward measurement.
Displays the measured
figure. (Target 1)
Displays the measured figure.
Stand-by.
Displays the measured
figure. (Target 2)
Measurement
1. Press the POWER button for power-on.
(Power turns off 8 seconds after the last
operation.)
Immediately after power-on.
(Initializing)
3. Press POWER button once to start single measurement.
Measuring.
4. After measurement, “distance” or “fail to measure” indicator are displayed for 8 seconds, then power turns off. If you press the POWER
button during power-on (while the internal display is lit), another single measurement starts.
Failure to measure or
unable to measure distance.
Displays the measured
figure. (Target 1)
3. Keep pressing POWER button to start continuous measurement up to 20 seconds. The internal display shows “distance” and
“fail to measure” indicator alternately.
Note: Laser irradiaton mark is blinking during the measurement.
Note: If you stop pressing the button, the continuous measuremen stops
Target focusing.
2. Aim at the target
.
Positionthetargetatthecenterofthereticle
[Single measurement]
Failure to measure or
unable to measure distance.
Upward measurement. Downward measurement.
Displays the measured figure.
[Continuous measurement]
4. After continuous measurement, the measure results are displayed for 8 seconds, then power turns off. If you press the POWER
button during power-on (while the internal display is lit), another measrement starts.
Stand-by.
Displays the measured
figure. (Target 2)
Measurement
1. Press the POWER button for power-on.
(Power turns off 8 seconds after the last
operation.)
Immediately after power-on.
Stand-by.
(Initializing)
2. Aim at the target
.
Positionthetargetatthecenterofthereticle
3. Press POWER button once to start single measurement.
4. After measurement, “distance” or “fail to measure” indicator are displayed for 8 seconds, then power turns off. If you press the POWER
button during power-on (while the internal display is lit), another single measurement starts.
unable to measure distance.
3. Keep pressing POWER button to start continuous measurement up to 20 seconds. The internal display shows “distance” and
“fail to measure” indicator alternately.
Note: Laser irradiaton mark is blinking during the measurement.
Note: If you stop pressing the button, the continuous measuremen stops
[Single measurement]
Failure to measure or
unable to measure distance.
[Continuous measurement]
4. After continuous measurement, the measure results are displayed for 8 seconds, then power turns off. If you press the POWER
button during power-on (while the internal display is lit), another measrement starts.
Failure to measure or
Target focusing.
Measuring.
Upward measurement. Downward measurement.
Displays the measured
figure. (Target 1)
Displays the measured figure.
Displays the measured
figure. (Target 2)
Měření
Pozor — Používání ovládacích prvků, provádění nastavení nebo vykonávání postupů jinak, než jak
【
Jedno měření
】
popisuje tato příručka, může mít za následek vystavení se nebezpečnému záření.
1. Příprava
spustíte jedno měření.
2. Gumová očnice
Laserový dálkoměr mohou bez úprav používat lidé s brýlemi i bez brýlí.
3. Dioptrická korekce
dioptrické korekce tak dlouho, až se LCD displej zaostří.
【
Funkce nepřetržitého měření
】
cíl.
4. Měření
jednotka zobrazení vzdálenosti).
*
Nastavení jednotlivých režimů viz příslušné kapitoly.
zda je vnitřní displej zapnutý).
Umístěte cíl do středu nitkového kříže.
(Automatické vypnutí přibližně po
Ihned po zapnutí
Míření na cíl
(inicializace)
Measurement
1. Press the POWER button for power-on.
(Power turns off 8 seconds after the last
operation.)
Immediately after power-on.
Stand-by.
(Initializing)
2. Aim at the target
.
Positionthetargetatthecenterofthereticle
Target focusing.
[Single measurement]
3. Press POWER button once to start single measurement.
Measuring.
4. After measurement, “distance” or “fail to measure” indicator are displayed for 8 seconds, then power turns off. If you press the POWER
button during power-on (while the internal display is lit), another single measurement starts.
Failure to measure or
Upward measurement. Downward measurement.
unable to measure distance.
Displays the measured figure.
[Continuous measurement]
3. Keep pressing POWER button to start continuous measurement up to 20 seconds. The internal display shows “distance” and
“fail to measure” indicator alternately.
Note: Laser irradiaton mark is blinking during the measurement.
Note: If you stop pressing the button, the continuous measuremen stops
Failure to measure or
unable to measure distance.
4. After continuous measurement, the measure results are displayed for 8 seconds, then power turns off. If you press the POWER
button during power-on (while the internal display is lit), another measrement starts.
Displays the measured
figure. (Target 1)
Displays the measured
figure. (Target 2)
Measurement
1. Press the POWER button for power-on.
(Power turns off 8 seconds after the last
operation.)
Immediately after power-on.
Stand-by.
(Initializing)
2. Aim at the target
.
Positionthetargetatthecenterofthereticle
Target focusing.
[Single measurement]
3. Press POWER button once to start single measurement.
Measuring.
4. After measurement, “distance” or “fail to measure” indicator are displayed for 8 seconds, then power turns off. If you press the POWER
button during power-on (while the internal display is lit), another single measurement starts.
Failure to measure or
Upward measurement. Downward measurement.
unable to measure distance.
Displays the measured figure.
[Continuous measurement]
3. Keep pressing POWER button to start continuous measurement up to 20 seconds. The internal display shows “distance” and
“fail to measure” indicator alternately.
Note: Laser irradiaton mark is blinking during the measurement.
Note: If you stop pressing the button, the continuous measuremen stops
Failure to measure or
unable to measure distance.
Displays the measured
figure. (Target 1)
4. After continuous measurement, the measure results are displayed for 8 seconds, then power turns off. If you press the POWER
button during power-on (while the internal display is lit), another measrement starts.
Displays the measured
figure. (Target 2)
Measurement
1. Press the POWER button for power-on.
(Power turns off 8 seconds after the last
operation.)
Immediately after power-on.
Stand-by.
(Initializing)
2. Aim at the target
.
Positionthetargetatthecenterofthereticle
Target focusing.
[Single measurement]
3. Press POWER button once to start single measurement.
Measuring.
4. After measurement, “distance” or “fail to measure” indicator are displayed for 8 seconds, then power turns off. If you press the POWER
button during power-on (while the internal display is lit), another single measurement starts.
Failure to measure or
unable to measure distance.
3. Keep pressing POWER button to start continuous measurement up to 20 seconds. The internal display shows “distance” and
“fail to measure” indicator alternately.
Note: Laser irradiaton mark is blinking during the measurement.
Note: If you stop pressing the button, the continuous measuremen stops
Failure to measure or
unable to measure distance.
[Continuous measurement]
4. After continuous measurement, the measure results are displayed for 8 seconds, then power turns off. If you press the POWER
button during power-on (while the internal display is lit), another measrement starts.
Upward measurement. Downward measurement.
Displays the measured
figure. (Target 1)
Displays the measured figure.
Displays the measured
figure. (Target 2)
Measurement
1. Press the POWER button for power-on.
(Power turns off 8 seconds after the last
operation.)
Immediately after power-on.
Stand-by.
(Initializing)
2. Aim at the target
.
Positionthetargetatthecenterofthereticle
Target focusing.
[Single measurement]
3. Press POWER button once to start single measurement.
Measuring.
4. After measurement, “distance” or “fail to measure” indicator are displayed for 8 seconds, then power turns off. If you press the POWER
button during power-on (while the internal display is lit), another single measurement starts.
unable to measure distance.
3. Keep pressing POWER button to start continuous measurement up to 20 seconds. The internal display shows “distance” and
“fail to measure” indicator alternately.
Note: Laser irradiaton mark is blinking during the measurement.
Note: If you stop pressing the button, the continuous measuremen stops
unable to measure distance.
4. After continuous measurement, the measure results are displayed for 8 seconds, then power turns off. If you press the POWER
button during power-on (while the internal display is lit), another measrement starts.
[Continuous measurement]
Failure to measure or
Failure to measure or
Upward measurement. Downward measurement.
Displays the measured
figure. (Target 1)
Displays the measured figure.
Displays the measured
figure. (Target 2)
Measurement
1. Press the POWER button for power-on.
(Power turns off 8 seconds after the last
operation.)
Immediately after power-on.
Stand-by.
(Initializing)
2. Aim at the target
.
Positionthetargetatthecenterofthereticle
Target focusing.
[Single measurement]
3. Press POWER button once to start single measurement.
4. After measurement, “distance” or “fail to measure” indicator are displayed for 8 seconds, then power turns off. If you press the POWER
button during power-on (while the internal display is lit), another single measurement starts.
unable to measure distance.
3. Keep pressing POWER button to start continuous measurement up to 20 seconds. The internal display shows “distance” and
“fail to measure” indicator alternately.
Note: Laser irradiaton mark is blinking during the measurement.
Note: If you stop pressing the button, the continuous measuremen stops
unable to measure distance.
4. After continuous measurement, the measure results are displayed for 8 seconds, then power turns off. If you press the POWER
button during power-on (while the internal display is lit), another measrement starts.
[Continuous measurement]
Failure to measure or
Failure to measure or
Measuring.
Upward measurement. Downward measurement.
Displays the measured
figure. (Target 1)
Displays the measured figure.
Displays the measured
figure. (Target 2)
Measurement
1. Press the POWER button for power-on.
(Power turns off 8 seconds after the last
operation.)
Immediately after power-on.
Stand-by.
(Initializing)
2. Aim at the target
.
Positionthetargetatthecenterofthereticle
Target focusing.
[Single measurement]
3. Press POWER button once to start single measurement.
Measuring.
4. After measurement, “distance” or “fail to measure” indicator are displayed for 8 seconds, then power turns off. If you press the POWER
button during power-on (while the internal display is lit), another single measurement starts.
unable to measure distance.
3. Keep pressing POWER button to start continuous measurement up to 20 seconds. The internal display shows “distance” and
“fail to measure” indicator alternately.
Note: Laser irradiaton mark is blinking during the measurement.
Note: If you stop pressing the button, the continuous measuremen stops
unable to measure distance.
4. After continuous measurement, the measure results are displayed for 8 seconds, then power turns off. If you press the POWER
button during power-on (while the internal display is lit), another measrement starts.
[Continuous measurement]
Failure to measure or
Failure to measure or
Upward measurement. Downward measurement.
Displays the measured
figure. (Target 1)
Displays the measured figure.
Displays the measured
figure. (Target 2)
Measurement
1. Press the POWER button for power-on.
(Power turns off 8 seconds after the last
operation.)
Immediately after power-on.
Stand-by.
(Initializing)
2. Aim at the target
.
Positionthetargetatthecenterofthereticle
Target focusing.
[Single measurement]
3. Press POWER button once to start single measurement.
Measuring.
4. After measurement, “distance” or “fail to measure” indicator are displayed for 8 seconds, then power turns off. If you press the POWER
button during power-on (while the internal display is lit), another single measurement starts.
Failure to measure or
unable to measure distance.
Displays the measured
figure. (Target 1)
3. Keep pressing POWER button to start continuous measurement up to 20 seconds. The internal display shows “distance” and
“fail to measure” indicator alternately.
Note: Laser irradiaton mark is blinking during the measurement.
Note: If you stop pressing the button, the continuous measuremen stops
Failure to measure or
unable to measure distance.
Upward measurement. Downward measurement.
Displays the measured figure.
[Continuous measurement]
4. After continuous measurement, the measure results are displayed for 8 seconds, then power turns off. If you press the POWER
button during power-on (while the internal display is lit), another measrement starts.
Displays the measured
figure. (Target 2)
Measurement
1. Press the POWER button for power-on.
(Power turns off 8 seconds after the last
operation.)
Immediately after power-on.
Stand-by.
(Initializing)
2. Aim at the target
.
Positionthetargetatthecenterofthereticle
Target focusing.
[Single measurement]
3. Press POWER button once to start single measurement.
Measuring.
4. After measurement, “distance” or “fail to measure” indicator are displayed for 8 seconds, then power turns off. If you press the POWER
button during power-on (while the internal display is lit), another single measurement starts.
Failure to measure or
unable to measure distance.
3. Keep pressing POWER button to start continuous measurement up to 20 seconds. The internal display shows “distance” and
“fail to measure” indicator alternately.
Note: Laser irradiaton mark is blinking during the measurement.
Note: If you stop pressing the button, the continuous measuremen stops
Failure to measure or
unable to measure distance.
[Continuous measurement]
4. After continuous measurement, the measure results are displayed for 8 seconds, then power turns off. If you press the POWER
button during power-on (while the internal display is lit), another measrement starts.
Upward measurement. Downward measurement.
Displays the measured
figure. (Target 1)
Displays the measured figure.
Displays the measured
figure. (Target 2)
indikace
se jedno další měření.
Chyba při měření“
Měření s náklonem
Měření se
nebo měření nelze
nahoru
sklonem dolů
provést
3. Chcete-li spustit nepřetržité měření, přibližně 8 sekund podržte
při měření“.
*
Během měření bliká symbol laserového záření.
spustí se další měření.
*
Chyba při měření“
nebo měření nelze
naměřené
naměřené
provést
hodnoty (cíl 1)
hodnoty (cíl 2)
Specifikace
Jp
Měřicí systém
Tělo: vodotěsné (maximální hloubka 1 metr, nejvýše 10 minut)*
Jp
Konstrukce
En
Rozsah měření
En
Es
Laserový Výrobek T
Es
Laserový Výrobek T
Fr
Fr
O
De
De
It
It
Laser
Se
Se
Optický systém
Třída
Nl
Nl
6
Vlnová délka (nm) 905
Ru
Ru
ø21
Délka pulsu (ns) 12
Pt
Pt
7,5
15
Pl
Pl
18,3
Divergence paprsku (mrad) Horizontální: 0,25
Fi
Fi
Výstupní pupila (mm) ø3,5
80 a méně (bez kondenzace)
No
No
-
1
Dioptrická korekce ±4m
Dk
Dk
* Vodotěsné modely
Ostatní
Cz
Tento laserový dálkoměr Nikon je vodotěsný, jeho optický ani pozorovací systém se nepoškodí, pokud je ponořen nebo upuštěn
Cz
˚C)
do vody do hloubky maximálně 1 m po dobu nejvýše 10 minut.
Ro
Ro
Laserový dálkoměr Nikon nabízí následující výhody:
Hu
1x lithiová baterie CR2 (3V stejnosm.)
Hu
Rozměry (H x Š x V) (mm) 113 x 70 x 39
Při používání laserového dálkoměru Nikon dodržujte následující pokyny:
Hmotnost (g) Cca 175 (bez baterie)
268 269
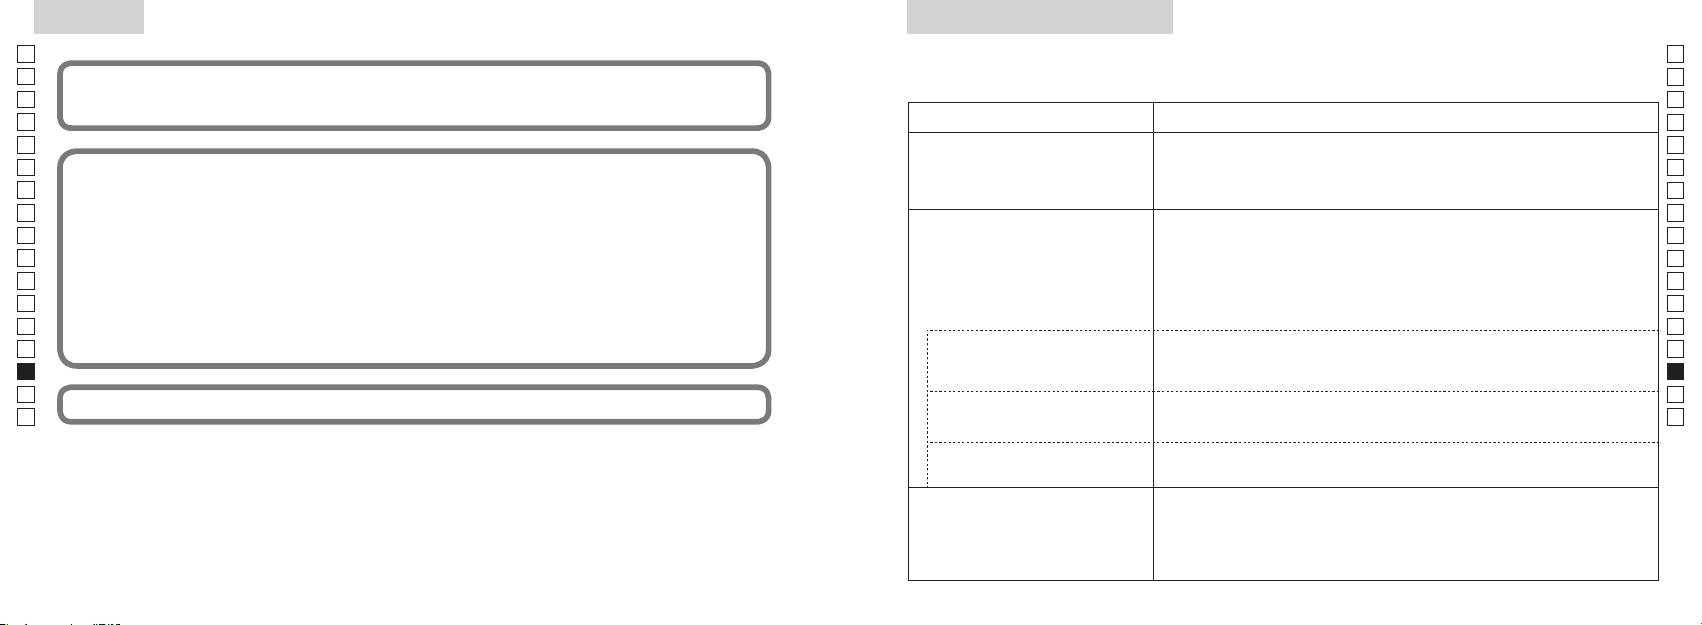
Ostatní
Řešení problémů/Opravy
Jp
Jp
En
En
Es
(1) tento přístroj nesmí působit rušení,
Es
Symptom Zkontrolujte
Fr
Fr
De
●
De
It
strany přístroje.
It
(displej se nerozsvítí)
●
Se
Se
● Vyměňte baterii za novou.
Nl
Nl
● Dbejte, aby nic, například prst nebo řemínek, nezakrývalo výstupní aperturu
Ru
Ru
laseru a aperturu laserového detektoru na straně s objektivem.
Pt
● Dbejte, aby výstupní apertura laseru a apertura laserového detektoru na straně
Pt
následujících opatření:
Nelze měřit vzdálenost
Pl
Pl
● Dbejte, aby tvar a stav cíle byly vhodné pro odraz laserového paprsku.
Fi
Fi
● Vyměňte baterii za novou.
No
No
Tento digitální přístroj třídy B splňuje veškeré požadavky kanadských předpisů pro zařízení způsobující rušení.
●
Dk
Dk
● Dbejte, aby cíl ležel v rámci rozsahu měření.
Cz
Cz
Ro
Ro
Nelze měřit bližší cíl ležící
● Dbejte, aby mezi laserovým dálkoměrem Nikon a cílem nic nepřekáželo,
Hu
Hu
vrozsahu měření
například listí nebo tráva.
● Dbejte, aby mezi laserovým dálkoměrem Nikon a cílem nic nepřekáželo,
vzdáleností
například listí nebo tráva.
● Vyměňte baterii za novou.
● Dbejte, aby tvar a stav cíle byly vhodné pro odraz laserového paprsku.
Výsledek měření je nestabilní
●
● Dbejte, aby mezi laserovým dálkoměrem Nikon a cílem nic nepřekáželo,
například listí nebo tráva.
270 271
Řešení problémů/Opravy
Jp
Jp
En
En
Es
Es
Symptom Zkontrolujte
Fr
Fr
De
De
● Vyměňte baterii za novou.
Română
It
● Dbejte, aby tvar a stav cíle byly vhodné pro odraz laserového paprsku.
It
● Dbejte, aby mezi laserovým dálkoměrem Nikon a cílem nic nepřekáželo,
Se
Se
například listí nebo tráva.
CUPRINS
Nl
Nl
............... 274-277
Ru
Ru
Caracteristici principale ........................................... 278
Pt
a opravy přístroje, protože může být porouchaný. Nikdy nenechte laserový dálkoměr Nikon kontrolovat nebo opravovat někoho
Pt
jiného než oficiálního zástupce výrobce. Nedodržení tohoto pokynu může vést k úrazu nebo k poškození výrobku.
.................................... 279
Pl
Pl
Afișajul intern .............................................................. 280
Fi
Fi
Mod de afișare a măsurării ..................................... 281
No
No
Dk
Dk
I .................................... 282
Cz
Cz
Înlocuirea bateriei ..................................................... 283
Ro
Ro
Măsurare .............................................................. 284-285
Hu
Hu
........................................................... 286-287
Altele .............................................................................. 288
reparare ................................................................ 289-290
272 273
Avertismente înainte de utilizare
Jp
Respectaţi cu stricteţe
MĂSURI DE PROTECŢIE (Laser)
Jp
instrucţiunile ce urmează pentru
En
Telemetrul laser Nikon folosește un
departe de accesul copiilor când
En
o utilizare corectă a
fascicul de raze laser invizibile.
este depozitat.
Es
Folosirea dispozitivelor de comandă și reglare, sau efectuarea de proceduri altele decât cele
Es
echipamentului și pentru a evita
telemetrului
specificate aici, pot duce la expunerea la radiaţii periculoase.
Fr
laser Nikon este deteriorat, sau
eventualele probleme
Avertisment
Fr
dacă emite un sunet ciudat datorită
De
periculoase. Înainte de a utiliza
De
〇
Măsurare
produsul, citiţi în întregime
It
optic din partea obiectivului.
bateriile imediat
It
“Avertismente înainte de
Se
Nerespectarea acesteia vă poate
aparatului.
Se
〇
utilizare” și instrucţiunile pentru
afecta negativ sau vă poate leza ochii.
Nl
utilizare corectă ce însoţesc
Nl
〇
produsul. Păstraţi aceste
Ru
Un produs care a fost demontat sau reparat nu este garantat de către producător.
Ru
instrucţiuni la îndemână pentru
Pt
Pt
consultare ulterioară.
instrument optic, precum lentile sau
Pl
●
Pl
binoclu și nici cu ochiul liber. Acest
●
Fi
lucru poate cauza afectarea ochilor.
Fi
AVERTISMENT
No
No
CO., LTD.
asupra faptului că orice utilizare
Dk
Dk
●
pentru a evita
Cz
oricând și fără notificare prealabilă.
descris aici, poate provoca moartea
emiterea accidentală a fasciculului
Cz
Ro
sau rănirea gravă.
laser.
Ro
Hu
ATENŢIE
Hu
bateriile din corpul acestuia.
asupra faptului că orice utilizare
telemetrul laser Nikon. Laserul radiant
descris aici, poate duce la rănire sau
poate fi dăunător pentru sănătatea
pierderi materiale.
de către producător.
274 275
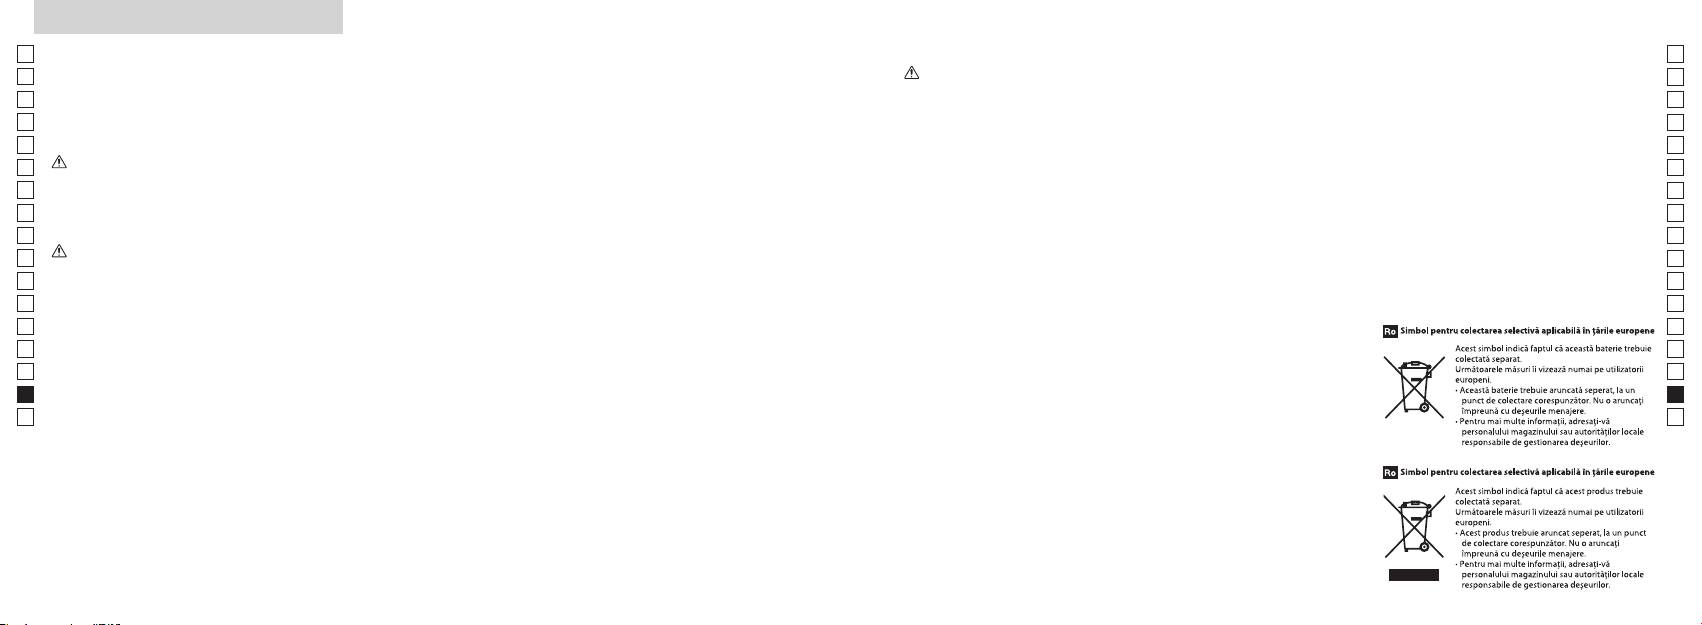
Avertismente înainte de utilizare
Jp
MĂSURI DE PROTECŢIE
MĂSURI DE PROTECŢIE
MĂSURI DE PROTECŢIE
ÎNGRIJIRE ȘI ÎNTREŢINERE
Păstrarea
Jp
vizoarele de cauciuc sau piesele
(Monocular)
(Bateria cu litiu)
Avertismente
Lentilele
En
En
Es
Telemetrul laser Nikon folosește un
Dacă este mânuită incorect, bateria se
Es
este etanș la apă, nu este proiectat
se producă condens sau mucegai.
poate fisura și poate curge, corodând
Fr
pentru folosire subacvatică.
moale fără ulei.
telemetrul laser
Fr
echipamentul și pătând hainele.
cauciucate poate provoca la unele
De
De
persoane inflamarea pielii. Dacă
urme, cum ar fi amprentele, de pe
Avertisment
următoarele:
It
It
corpului telemetrului cât mai
bateria
Se
curând posibil, folosind o cârpă
ușor lentilele cu o cârpă moale de
temperatura camerei, apoi
Se
soare, spre o lumină puternică
moale și curată.
Nl
Bateria trebuie scoasă când este
Nl
speciale pentru lentile, fără ulei.
uscat.
telemetrul laser Nikon.
Ru
Ru
lungi de nefolosire.
Avertismente
Pt
Pt
telemetrul
generează căldură. Aceasta poate
Pl
compartimentul bateriei.
Pl
distribuitorul dvs. local pentru a vă
avea efecte negative asupra lui, ori
Fi
.
obișnuite, deoarece acestea pot
Fi
No
monezi, pot face scurtcircuit și se
No
lumina directă a soarelui. Razele
Dk
poate produce răniri sau
Dk
ultraviolete și căldura excesivă pot
Cz
afecta negativ unitatea sau chiar o
Cz
cineva, lovirii altora, căderii sau
pot avaria.
echipamentului.
Ro
bateria.
Ro
altor accidente.
Corpul principal
Hu
Hu
expus la modificări bruște de
temperatură, este posibil ca pe
cu o cârpă moale și curată după ce
vătămări.
cu multă apă. Dacă lichidul dintr-o
instabil. Nerespectarea acesteia
când condensul nu s-a evaporat.
poate duce la cădere și poate
un medic.
* O suflantă este un echipament de
pentru ambalarea acestui produs
regulile din zona dvs.
aer dintr-o duză.
sau alte piese mici departe de
accesul copiilor.
276 277

Caracteristici principale Nomenclatură/Compoziţie
Jp
Următoarele condiţii fac măsurarea mai ușoară:
Jp
1
En
4
En
Deschidere emisie laser
Es
Es
3
2 Deschidere detector laser
Fr
Fr
3
De
De
aproape de 90 de grade
4
It
modul care poate fi comutat facil
It
56x oculare monoculare
Măsurarea poate duce la inexactităţi sau nereușite în
1
Se
Se
următoarele cazuri:
6
Nl
Nl
7 Index dioptrii
Ru
2
5
8
Ru
Pt
9 Capacul compartimentului bateriei
Pt
inactivitate)
Pl
etc.)
6
!p Închis" pe capacul
Pl
Fi
compartimentului bateriei
Fi
(NU este conceput pentru utilizarea subacvatică)
7
No
!q
No
!w
Dk
Dk
Telemetrul laser Nikon folosește un fascicul de raze laser
8
Cz
Cz
invizibile pentru măsurare. El măsoară timpul necesar
Ro
fasciculului laser să călătorească de la telemetru până
9
Ro
la ţintă și înapoi. Reflectivitatea laserului și rezultatele
Hu
Hu
măsurării pot varia conform condiţiilor climatice și de
!p
mediu, ca și culorii, finisajului suprafeţei, mărimii, formei
!q
și altor caracteristici ale ţintei.
!w
Compoziţie
...............................x1
.....................x1
..........................x1
......x1
278 279
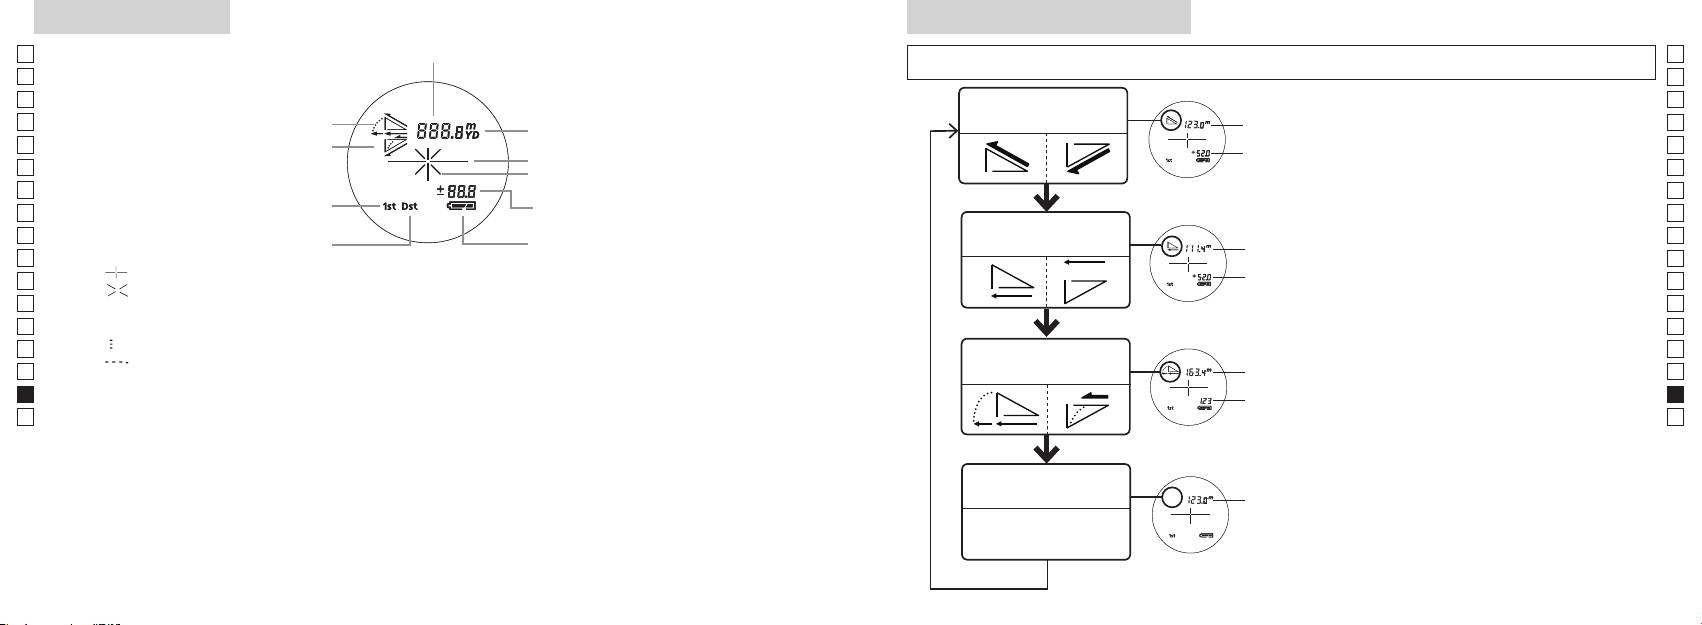
Afișajul intern
Mod de afișare a măsurării
Jp
Jp
En
En
Es
Es
Modul distanţă
Fr
efectivă şi înălţime
Fr
intern este pornit).
efectivă
De
De
It
It
Marcaj iradiere laser
secun
Se
Se
Nl
Nl
modului pentru golf)
Modul distanţă
Ru
Măsurare pentru a comuta modul de
Ru
Starea bateriei
orizontală şi înălţime
Pt
orizontală
afișare a măsurării.
Pt
『 』
până când este
Pl
Pl
『 』 - Apare când laserul este iradiat pentru o măsurare.
afișat modul dorit.
Fi
Fi
*
No
ordinea corectă, comutarea nu va avea
No
Dk
『
』 - Acum se măsoară
loc.
Dk
『
』
Modul golf
*
Comutarea modului după măsurare
Cz
Cz
Ro
Ro
*
După ce modul este fixat, măsurările
Hu
* De obicei, un ecran LCD prezintă o mărire egală sau mai redusă. Totuși, ecranul LCD al acestui produs este
efectivă
Hu
amplificat de nivelul ridicat de mărire a ocularului. Cu toate că acest LCD a fost fabricat folosind cea mai
avansată tehnologie, este imposibil să se elimine complet praful. Ca rezultat, praful poate fi observat.
Modul distanţă
efectivă
efectivă
280 281

Mod de prioritate a ţintei
Unităţi de afișare a distanţei
Înlocuirea bateriei
Jp
Acest telemetru laser utilizează sistemul de comutare la
Jp
Tipul bateriei: Baterie cu litiu 3V CR2 x1
En
Indicatoare privind nivelul remanent al bateriei
En
(Setarea implicită din fabrică este modul de prioritate a
[ ]
Es
Metru [ ]Yard
Es
: Bateria are suficientă tensiune pentru a fi folosită.
Fr
Modul de prioritate
Modul de prioritate
Fr
pornit).
De
De
「
」
「
」
It
mult de două secunde. Când unitatea de afișare a fost
It
Se
pornit).
clipire : Bateria este descărcată. După ce indicatorul clipește de trei ori, telemetrul cu laser se
Se
3. După ce s-a reglat unitatea de măsură, rezultatele vor
Nl
Nl
Ru
Ru
1. Deschideţi capacul compartimentului bateriei
Pt
Pt
butoane (mai mult de 2 secunde), până când modul
Iluminare cu LED
Pl
Pl
Fi
Fi
2. Înlocuiţi bateria veche cu una nouă
No
No
comutat.
Dk
*
*
Dk
comutarea nu va avea loc.
Cz
Cz
*
*
3. Închideţi capacul compartimentului bateriei
Ro
alimentării telemetrului laser. În acest caz, iluminarea cu
Ro
[
cu indicatorul
●
Hu
]
. Acesta ar putea să nu se
Hu
pornită din nou.
La măsurarea obiectelor suprapuse, modul de prioritate
Durata de viaţă a bateriei
Funcţionare continuă: De aprox. 13.000 de ori (la aprox. 20°C)
bateria.
282 283
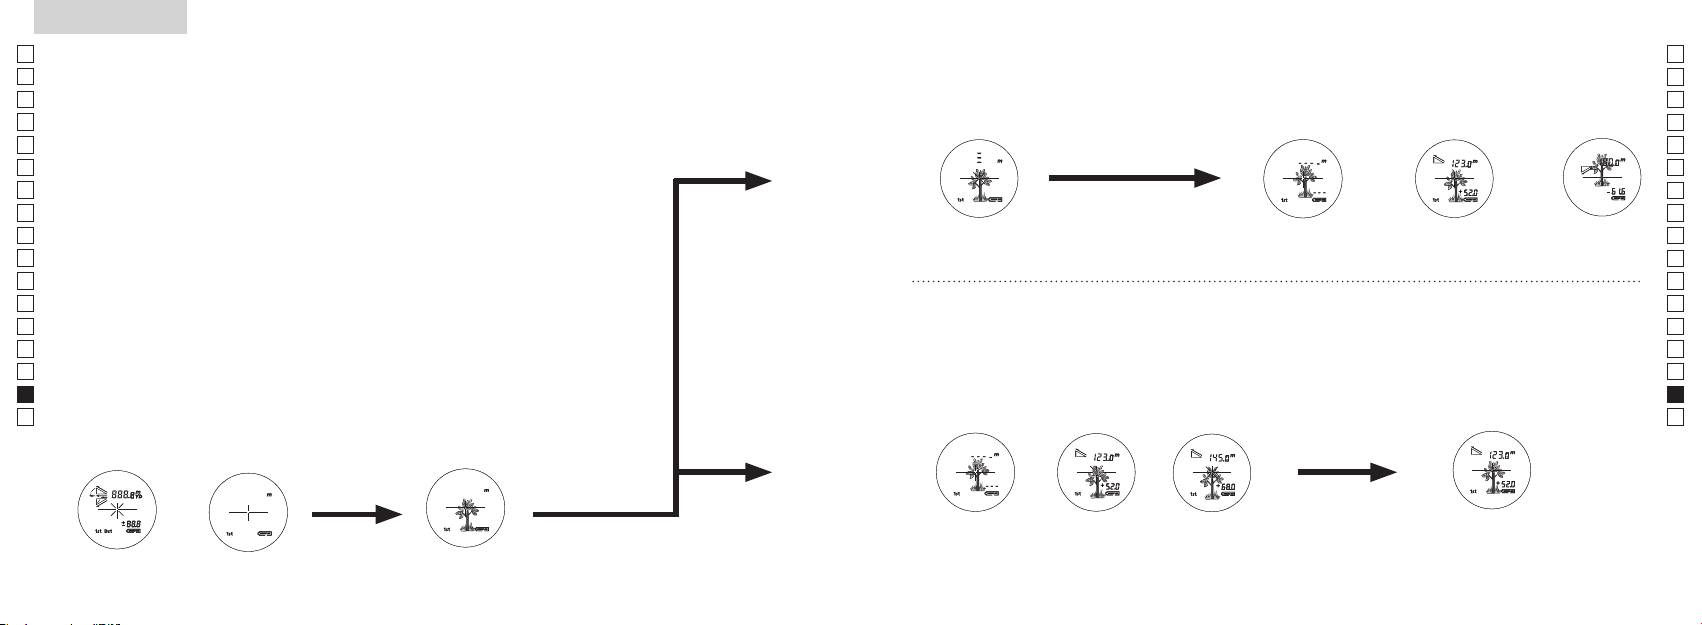
Jp
Jp
En
En
Es
Es
Fr
Fr
De
De
It
It
Se
Se
Nl
Nl
Ru
Ru
Pt
Pt
Pl
Pl
Fi
Fi
No
No
Dk
Dk
Cz
Cz
Ro
Ro
Hu
Hu
284 285
Measurement
1. Press the POWER button for power-on.
(Power turns off 8 seconds after the last
operation.)
Immediately after power-on.
3. Press POWER button once to start single measurement.
4. After measurement, “distance” or “fail to measure” indicator are displayed for 8 seconds, then power turns off. If you press the POWER
button during power-on (while the internal display is lit), another single measurement starts.
unable to measure distance.
3. Keep pressing POWER button to start continuous measurement up to 20 seconds. The internal display shows “distance” and
“fail to measure” indicator alternately.
Note: Laser irradiaton mark is blinking during the measurement.
Note: If you stop pressing the button, the continuous measuremen stops
2. Aim at the target
Positionthetargetatthecenterofthereticle
[Single measurement]
Failure to measure or
unable to measure distance.
[Continuous measurement]
4. After continuous measurement, the measure results are displayed for 8 seconds, then power turns off. If you press the POWER
button during power-on (while the internal display is lit), another measrement starts.
Failure to measure or
Target focusing.
Measuring.
(Initializing)
.
Upward measurement. Downward measurement.
Displays the measured
figure. (Target 1)
Displays the measured figure.
Stand-by.
Displays the measured
figure. (Target 2)
Measurement
1. Press the POWER button for power-on.
(Power turns off 8 seconds after the last
operation.)
Immediately after power-on.
(Initializing)
3. Press POWER button once to start single measurement.
Measuring.
4. After measurement, “distance” or “fail to measure” indicator are displayed for 8 seconds, then power turns off. If you press the POWER
button during power-on (while the internal display is lit), another single measurement starts.
Failure to measure or
unable to measure distance.
Displays the measured
figure. (Target 1)
3. Keep pressing POWER button to start continuous measurement up to 20 seconds. The internal display shows “distance” and
“fail to measure” indicator alternately.
Note: Laser irradiaton mark is blinking during the measurement.
Note: If you stop pressing the button, the continuous measuremen stops
Target focusing.
2. Aim at the target
.
Positionthetargetatthecenterofthereticle
[Single measurement]
Failure to measure or
unable to measure distance.
Upward measurement. Downward measurement.
Displays the measured figure.
[Continuous measurement]
4. After continuous measurement, the measure results are displayed for 8 seconds, then power turns off. If you press the POWER
button during power-on (while the internal display is lit), another measrement starts.
Stand-by.
Displays the measured
figure. (Target 2)
Measurement
1. Press the POWER button for power-on.
(Power turns off 8 seconds after the last
operation.)
Immediately after power-on.
Stand-by.
(Initializing)
2. Aim at the target
.
Positionthetargetatthecenterofthereticle
3. Press POWER button once to start single measurement.
4. After measurement, “distance” or “fail to measure” indicator are displayed for 8 seconds, then power turns off. If you press the POWER
button during power-on (while the internal display is lit), another single measurement starts.
unable to measure distance.
3. Keep pressing POWER button to start continuous measurement up to 20 seconds. The internal display shows “distance” and
“fail to measure” indicator alternately.
Note: Laser irradiaton mark is blinking during the measurement.
Note: If you stop pressing the button, the continuous measuremen stops
[Single measurement]
Failure to measure or
unable to measure distance.
[Continuous measurement]
4. After continuous measurement, the measure results are displayed for 8 seconds, then power turns off. If you press the POWER
button during power-on (while the internal display is lit), another measrement starts.
Failure to measure or
Target focusing.
Measuring.
Upward measurement. Downward measurement.
Displays the measured
figure. (Target 1)
Displays the measured figure.
Displays the measured
figure. (Target 2)
Măsurare
Atenţie — Flosirea dispozitivelor de comandă şi reglare sau efectuarea de proceduri altele decât cele
【
Măsurarea simplă
】
specificate aici pot duce la expunerea la radiaţii periculoase.
Măsurare o singură dată pentru a
1. Pregătire
porni măsurarea simplă.
2. Bonetă de cauciuc
3. Reglajul dioptric
din nou.
【
Funcţie de măsurare contină
】
corect subiectul.
4. Măsurare
*
.
afișajul intern este pornit)
(Oprire automată după aproximativ
vizorului.
8 secunde de inactivitate)
Imediat după pornire
Aşteptare
Measurement
1. Press the POWER button for power-on.
(Power turns off 8 seconds after the last
operation.)
Immediately after power-on.
Stand-by.
(Initializing)
2. Aim at the target
.
Positionthetargetatthecenterofthereticle
Target focusing.
[Single measurement]
3. Press POWER button once to start single measurement.
Measuring.
4. After measurement, “distance” or “fail to measure” indicator are displayed for 8 seconds, then power turns off. If you press the POWER
button during power-on (while the internal display is lit), another single measurement starts.
Failure to measure or
Upward measurement. Downward measurement.
unable to measure distance.
Displays the measured figure.
[Continuous measurement]
3. Keep pressing POWER button to start continuous measurement up to 20 seconds. The internal display shows “distance” and
“fail to measure” indicator alternately.
Note: Laser irradiaton mark is blinking during the measurement.
Note: If you stop pressing the button, the continuous measuremen stops
Failure to measure or
unable to measure distance.
4. After continuous measurement, the measure results are displayed for 8 seconds, then power turns off. If you press the POWER
button during power-on (while the internal display is lit), another measrement starts.
Displays the measured
figure. (Target 1)
Displays the measured
figure. (Target 2)
Measurement
1. Press the POWER button for power-on.
(Power turns off 8 seconds after the last
operation.)
Immediately after power-on.
Stand-by.
(Initializing)
2. Aim at the target
.
Positionthetargetatthecenterofthereticle
Target focusing.
[Single measurement]
3. Press POWER button once to start single measurement.
Measuring.
4. After measurement, “distance” or “fail to measure” indicator are displayed for 8 seconds, then power turns off. If you press the POWER
button during power-on (while the internal display is lit), another single measurement starts.
Failure to measure or
Upward measurement. Downward measurement.
unable to measure distance.
Displays the measured figure.
[Continuous measurement]
3. Keep pressing POWER button to start continuous measurement up to 20 seconds. The internal display shows “distance” and
“fail to measure” indicator alternately.
Note: Laser irradiaton mark is blinking during the measurement.
Note: If you stop pressing the button, the continuous measuremen stops
Failure to measure or
unable to measure distance.
Displays the measured
figure. (Target 1)
4. After continuous measurement, the measure results are displayed for 8 seconds, then power turns off. If you press the POWER
button during power-on (while the internal display is lit), another measrement starts.
Displays the measured
figure. (Target 2)
Measurement
1. Press the POWER button for power-on.
(Power turns off 8 seconds after the last
operation.)
Immediately after power-on.
Stand-by.
(Initializing)
2. Aim at the target
.
Positionthetargetatthecenterofthereticle
Target focusing.
[Single measurement]
3. Press POWER button once to start single measurement.
Measuring.
4. After measurement, “distance” or “fail to measure” indicator are displayed for 8 seconds, then power turns off. If you press the POWER
button during power-on (while the internal display is lit), another single measurement starts.
Failure to measure or
unable to measure distance.
3. Keep pressing POWER button to start continuous measurement up to 20 seconds. The internal display shows “distance” and
“fail to measure” indicator alternately.
Note: Laser irradiaton mark is blinking during the measurement.
Note: If you stop pressing the button, the continuous measuremen stops
Failure to measure or
unable to measure distance.
[Continuous measurement]
4. After continuous measurement, the measure results are displayed for 8 seconds, then power turns off. If you press the POWER
button during power-on (while the internal display is lit), another measrement starts.
Upward measurement. Downward measurement.
Displays the measured
figure. (Target 1)
Displays the measured figure.
Displays the measured
figure. (Target 2)
Measurement
1. Press the POWER button for power-on.
(Power turns off 8 seconds after the last
operation.)
Immediately after power-on.
Stand-by.
(Initializing)
2. Aim at the target
.
Positionthetargetatthecenterofthereticle
Target focusing.
[Single measurement]
3. Press POWER button once to start single measurement.
Measuring.
4. After measurement, “distance” or “fail to measure” indicator are displayed for 8 seconds, then power turns off. If you press the POWER
button during power-on (while the internal display is lit), another single measurement starts.
unable to measure distance.
3. Keep pressing POWER button to start continuous measurement up to 20 seconds. The internal display shows “distance” and
“fail to measure” indicator alternately.
Note: Laser irradiaton mark is blinking during the measurement.
Note: If you stop pressing the button, the continuous measuremen stops
unable to measure distance.
4. After continuous measurement, the measure results are displayed for 8 seconds, then power turns off. If you press the POWER
button during power-on (while the internal display is lit), another measrement starts.
[Continuous measurement]
Failure to measure or
Failure to measure or
Upward measurement. Downward measurement.
Displays the measured
figure. (Target 1)
Displays the measured figure.
Displays the measured
figure. (Target 2)
Measurement
1. Press the POWER button for power-on.
(Power turns off 8 seconds after the last
operation.)
Immediately after power-on.
Stand-by.
(Initializing)
2. Aim at the target
.
Positionthetargetatthecenterofthereticle
Target focusing.
[Single measurement]
3. Press POWER button once to start single measurement.
4. After measurement, “distance” or “fail to measure” indicator are displayed for 8 seconds, then power turns off. If you press the POWER
button during power-on (while the internal display is lit), another single measurement starts.
unable to measure distance.
3. Keep pressing POWER button to start continuous measurement up to 20 seconds. The internal display shows “distance” and
“fail to measure” indicator alternately.
Note: Laser irradiaton mark is blinking during the measurement.
Note: If you stop pressing the button, the continuous measuremen stops
unable to measure distance.
4. After continuous measurement, the measure results are displayed for 8 seconds, then power turns off. If you press the POWER
button during power-on (while the internal display is lit), another measrement starts.
[Continuous measurement]
Failure to measure or
Failure to measure or
Measuring.
Upward measurement. Downward measurement.
Displays the measured
figure. (Target 1)
Displays the measured figure.
Displays the measured
figure. (Target 2)
Measurement
1. Press the POWER button for power-on.
(Power turns off 8 seconds after the last
operation.)
Immediately after power-on.
Stand-by.
(Initializing)
2. Aim at the target
.
Positionthetargetatthecenterofthereticle
Target focusing.
[Single measurement]
3. Press POWER button once to start single measurement.
Measuring.
4. After measurement, “distance” or “fail to measure” indicator are displayed for 8 seconds, then power turns off. If you press the POWER
button during power-on (while the internal display is lit), another single measurement starts.
unable to measure distance.
3. Keep pressing POWER button to start continuous measurement up to 20 seconds. The internal display shows “distance” and
“fail to measure” indicator alternately.
Note: Laser irradiaton mark is blinking during the measurement.
Note: If you stop pressing the button, the continuous measuremen stops
unable to measure distance.
4. After continuous measurement, the measure results are displayed for 8 seconds, then power turns off. If you press the POWER
button during power-on (while the internal display is lit), another measrement starts.
[Continuous measurement]
Failure to measure or
Failure to measure or
Upward measurement. Downward measurement.
Displays the measured
figure. (Target 1)
Displays the measured figure.
Displays the measured
figure. (Target 2)
Measurement
1. Press the POWER button for power-on.
(Power turns off 8 seconds after the last
operation.)
Immediately after power-on.
Stand-by.
(Initializing)
2. Aim at the target
.
Positionthetargetatthecenterofthereticle
Target focusing.
[Single measurement]
3. Press POWER button once to start single measurement.
Measuring.
4. After measurement, “distance” or “fail to measure” indicator are displayed for 8 seconds, then power turns off. If you press the POWER
button during power-on (while the internal display is lit), another single measurement starts.
Failure to measure or
unable to measure distance.
Displays the measured
figure. (Target 1)
3. Keep pressing POWER button to start continuous measurement up to 20 seconds. The internal display shows “distance” and
“fail to measure” indicator alternately.
Note: Laser irradiaton mark is blinking during the measurement.
Note: If you stop pressing the button, the continuous measuremen stops
Failure to measure or
unable to measure distance.
Upward measurement. Downward measurement.
Displays the measured figure.
[Continuous measurement]
4. After continuous measurement, the measure results are displayed for 8 seconds, then power turns off. If you press the POWER
button during power-on (while the internal display is lit), another measrement starts.
Displays the measured
figure. (Target 2)
Measurement
1. Press the POWER button for power-on.
(Power turns off 8 seconds after the last
operation.)
Immediately after power-on.
Stand-by.
(Initializing)
2. Aim at the target
.
Positionthetargetatthecenterofthereticle
Target focusing.
[Single measurement]
3. Press POWER button once to start single measurement.
Measuring.
4. After measurement, “distance” or “fail to measure” indicator are displayed for 8 seconds, then power turns off. If you press the POWER
button during power-on (while the internal display is lit), another single measurement starts.
Failure to measure or
unable to measure distance.
3. Keep pressing POWER button to start continuous measurement up to 20 seconds. The internal display shows “distance” and
“fail to measure” indicator alternately.
Note: Laser irradiaton mark is blinking during the measurement.
Note: If you stop pressing the button, the continuous measuremen stops
Failure to measure or
unable to measure distance.
[Continuous measurement]
4. After continuous measurement, the measure results are displayed for 8 seconds, then power turns off. If you press the POWER
button during power-on (while the internal display is lit), another measrement starts.
Upward measurement. Downward measurement.
Displays the measured
figure. (Target 1)
Displays the measured figure.
Displays the measured
figure. (Target 2)
4. După măsurare este afișată "eroare măsurare"
butonul
afișajul intern este aprins), pornește o altă măsurare simplă.
Măsurare
"Imposibilitate de a măsura"
Afișează figura măsurată
4. După măsurarea continuă sunt afișate rezultatele măsurării finale
măsurarea continuă pentru aproximativ 8 secunde. Afișajul intern
măsurare" și
se oprește.
*
Marcajul de iradiere cu laser
măsurării.
măsurare.
*
oprește.
Afișează figura
Afișează figura
sau "Imposibilitate de
Specificaţii
Jp
Sistem de măsurare
Jp
Structură
(Compartimentul bateriei: Rezistent la apă**)
En
Intervalul de măsurare
En
Es
Es
Fr
Fr
FCC artea 15 Sub-
De
De
Mediu
It
It
Laser
Se
Se
Sistemul optic
Clasa
Nl
Nl
Mărire (x) 6
Lungimea de undă (nm) 905
Ru
Ru
Diametru efectiv al lentilelor obiectivului
Durata impulsului (ns) 12
Pt
ø21
Pt
(mm)
15
Pl
Pl
Câmp angular de vedere (real) (°) 7,5
(mrad)
Fi
Fi
Compensare pentru ochi (mm) 18,3
rouă de condensare)
No
No
ø3,5
Dk
Dk
-
1
Reglajul dioptric ±4m
* Modele rezistente la apă
Cz
Cz
Altele
adâncime maximă de 1 metru timp de până la 10 minute.
Ro
Ro
˚C) -10 —
Telemetrul laser Nikon oferă următoarele avantaje:
Hu
Hu
Baterie cu litiu CR2 x 1 (3V CC)
Sursă de alimentare
Oprire automată (după aproximativ 8 secunde de inactivitate)
Aveţi în vedere următoarele la folosirea telemetrului laser Nikon.
Dimensiuni (L x l x Î) (mm) 113 x 70 x 39
aprox. 175 (fără baterie)
286 287
Altele
Detectare și remediere defecţiuni/Reparare
Jp
Jp
En
En
Es
Es
Simptom Puncte de verificare
Fr
Fr
nedorită.
De
●
De
Aparatul nu pornește
●
It
It
Acest echipament a fost testat și s-a stabilit că el corespunde cu limitele pentru un dispozitiv digital pentru clasa B,
●
Se
Se
●
Nl
Nl
nu blochează orificiul pentru raza laser și orificiul detectorului laser de pe partea
Ru
Ru
lentilei obiectivului.
Pt
●
Pt
Pl
Pl
●
Fi
laser.
Fi
●
No
No
Dk
●
Dk
●
Cz
măsura”)
Cz
Ro
Ro
Hu
●
Hu
Acest telemetru laser Nikon este un telemetru de bază. Rezultatele lui nu pot fi folosite ca dovezi oficiale.
frunze sau iarbă.
nu poate fi măsurată
●
frunze sau iarbă.
●
●
Rezultatul măsurării este instabil
●
●
frunze sau iarbă.
288 289
Detectare și remediere defecţiuni/Reparare
Jp
Jp
En
En
Es
Es
Simptom Puncte de verificare
Fr
Fr
De
●
Magyar
De
●
It
It
laser.
Se
●
TARTALOMJEGYZÉK
Se
frunze sau iarbă.
Nl
Nl
Használat előtti figyelmeztetések ............... 292-295
Ru
Ru
Legfontosabb tulajdonságok ................................. 296
Pt
Pt
Felépítés .............................................. 297
Pl
Pl
Belső kijelző .................................................................. 298
Fi
Fi
Méréskijelző mód ....................................................... 299
No
No
Távolságkijelzés
Dk
Dk
........................ 300
Cz
Cz
.................................................................. 301
Ro
Ro
Mérés ..................................................................... 302-303
Hu
Hu
Specifikációk ...................................................... 304-305
......................................................................... 306
avítás ........................................ 307-308
290 291
Használat előtti figyelmeztetések
Jp
Köszönjük, hogy a Nikon COOLSHOT AS lézeres távolságmérőt vásárolta meg.
A berendezés megfelelő
BIZTONSÁGI ÓVINTÉZKEDÉSEK
Jp
használata és a lehetséges
gyerekek által nem elérhető helyen
En
(Lézer)
En
veszélyt jelentő problémák
tárolja.
A Nikon lézeres távolságmérő
Es
Az itt meghatározottaktól eltérő ellenőrzési, beállítási vagy kivitelezési eljárások
Es
elkerülése érdekében szigorúan
láthatatlan lézersugarat használ.
alkalmazása veszélyes sugárterhelést eredményezhet.
Fr
Mindenképpen tartsa be az alábbi
burkolata megsérül, vagy ha furcsa
tartsa be a következő
Fr
hangot ad ki, mert leejtette vagy
De
irányelveket. A termék
pontokat:
De
〇
más dolog történt vele, akkor
használata előtt alaposan
Figyelmeztetés
It
azonnal vegye ki az elemet és ne
It
figyelmeztetések" c. részt és a helyes használatra vonatkozó utasításokat.
FMérés
olvassa el a termékhez mellékelt
Se
gombot, amikor a tárgylencse felőli
használja tovább a készüléket.
Se
〇 A könnyű tájékozódás érdekében tartsa ezt a kézikönyvet elérhető helyen.
"Használat előtti
oldalról néz bele az optikába. Ha nem
Nl
figyelmeztetések" c.
Nl
〇 Önkényesen ne szerelje szét vagy próbálja megjavítani a terméket, mert ez komoly problémát
így cselekszik, az rossz hatással lehet
dokumentumot és a helyes
Ru
okozhat.
Ru
a szemére vagy károsíthatja azt.
használatra vonatkozó
Pt
Szétszerelt vagy javított termékre a gyártó nem vállal garanciát.
Pt
utasításokat. A könnyű
Pl
tájékozódás érdekében tartsa ezt
Pl
● A műszaki adatok és a kivitel előzetes értesítés nélkül megváltozhatnak.
Fi
a kézikönyvet elérhető helyen.
eszközökön, például lencséken vagy
Fi
●
No
távcsöveken keresztül, valamint
No
egészben és részleteiben sem másolható (kivéve a kritikai cikkekben vagy áttekintésekben
Dk
FIGYELMEZTETÉS
Dk
használt rövid idézeteket).
megsérülhet a szeme.
Cz
Cz
● A NIKON VISION CO., LTD. fenntartja magának a jogot, hogy e kézikönyvekben leírt tartalmakat
itt leírtakat figyelmen kívül hagyva
rakja a FMérés gombra,
Ro
bármikor, előzetes értesítés nélkül megváltoztassa.
bármilyen helytelen használat halált
Ro
vagy súlyos sérülést okozhat.
hogy véletlenül se bocsássa ki a
Hu
Hu
lézersugarat.
VIGYÁZAT
használja, vegye ki belőle az elemet.
itt leírtakat figyelmen kívül hagyva
bármilyen helytelen használat
megjavítani a Nikon lézeres
sérülést vagy anyagi károkat
távolságmérőt. A kibocsátott
eredményezhet.
lézersugár ártalmas lehet az
egészségre. Szétszerelt, átalakított
vagy javítani próbált termékre a
gyártó nem vállal garanciát.
292 293
Használat előtti figyelmeztetések
Jp
BIZTONSÁGI
BIZTONSÁGI ÓVINTÉZKEDÉSEK
BIZTONSÁGI ÓVINTÉZKEDÉSEK
ÁPOLÁS ÉS KARBANTARTÁS
Tárolás
Jp
Ha ezt nem tartja be, leeshet vagy
En
ÓVINTÉZKEDÉSEK
(Lítium elem)
Vigyázat
Lencsék
En
leejtheti, ami sérülést vagy hibás
(Egylencsés kivitel)
felületére lecsapódhat a víz vagy
Es
Az elemet helytelenül kezelve az
működést okozhat.
Es
vízálló, nem víz alatti használatra
felületéről, akkor finom olajmentes
A Nikon lézeres távolságmérő a
megrepedhet és kifolyhat, ezzel
Fr
készült.
kefét használjon.
lézeres távolságmérőt száraz, hűvös
Fr
céltárgy távolságának méréséhez
korrodálják a berendezést és
csomagolásához használt műanyag
helyen tárolja.
De
egylencsés kivitelt használ optikai
beszennyezik a ruházatot.
De
tasakot gyermekek által nem
került esővizet, vizet, homokot és
szennyeződéseket vagy foltokat
Az esős időben vagy éjszaka használt
It
rendszerében. Mindenképpen tartsa
Mindenképpen tartsa be az alábbi
elérhető helyen tartsa.
sarat egyből törölje le puha, tiszta
úgy távolíthat el a lencse
készüléket utána szobahőmérsékleten
It
be az alábbi pontokat:
pontokat:
Se
ruhával.
felületéről, hogy egy puha, tiszta
szárítsa meg, és hűvös, száraz helyen
Se
elemet
Figyelmeztetés
gumi szemkagylókat vagy kis
pamutruhával vagy minőségi
tárolja.
Nl
megfelelő irányba állítva helyezze
Nl
alkatrészeket stb. tegyenek a
távolságmérőt meleg vagy napos
olajmentes lencsetörlő kendővel
be.
Ru
használatakor soha ne nézzen
szájukba. Ha a gyerekek lenyelnek
Ru
időben az autóban, vagy hőforrás
nagyon óvatosan letörli azt. A
közvetlenül a napba, erős
ilyen alkatrészeket, azonnal
Pt
makacs foltokat kis mennyiségű
Pt
huzamosabb ideig nem használja.
fényforrásba vagy a lézersugárba.
forduljon orvoshoz.
negatív hatással lehet rá.
tiszta (nem denaturált) alkohollal
Pl
Pl
törölheti le. Ne használjon bársony
Vigyázat
kivezetését.
Fi
szemkagylót, az bizonyos
hagyja kint közvetlen napsütésben.
vagy közönséges szövet
Fi
F
a zsebében vagy
embereknél bőrgyulladást okozhat.
No
Az ultraibolya sugarak és a túlzott
törlőkendőt, mert ezek
Mérés gombot, amikor nem
táskájában kulcsokkal vagy
No
Ha bármilyen tünet előfordul,
meleg negatív hatással lehetnek az
megkarcolhatják a lencse felületét.
használja a Nikon lézeres
pénzérmékkel együtt, mert ettől
Dk
ne használja tovább és azonnal
Dk
egységre, vagy akár tönkre is tehetik
Amennyiben a törlőruhát már
távolságmérőt.
rövidre záródhat és túlmelegedhet.
Cz
forduljon orvoshoz.
azt.
használta a ház tisztításához, az a
Cz
lencsefelület tisztítására már nem
Ro
közben. Ha ezt nem tartja be, az
hatásának, és soha ne szerelje szét.
Ro
a szállítás közben tartsa a puha
esetén a Nikon lézeres
alkalmas.
sérülést vagy hibás működést
Hu
tokban.
Hu
távolságmérő lencséjének
okozhat, hiszen nekimehet
Géptest
felületeire pára csapódhat le.
bárminek, megüthet másokat,
folyadék hozzáér a ruhájához
nem működne megfelelően,
A lecsapódott folyadék
a készülék leeshet vagy egyéb
vagy a bőréhez, azonnal öblítse le
törlőkendővel tisztítsa meg,
egyáltalán ne használja tovább, és
elpárolgásáig ne használja a
balesetek történhetnek.
bő vízzel. Ha egy sérült elemből
miután egy lefúvóval óvatosan
kérdezze meg a helyi kereskedőjét,
terméket.
folyadék kerül a szemébe, azonnal
lefújta róla a port. Ne használjon
hova kell elküldeni javításra.
fogva. Így ugyanis megüthet
öblítse ki tiszta vízzel, majd
benzint, hígítót vagy más, szerves
másokat és sérülést okozhat.
forduljon orvoshoz.
oldószert tartalmazó tisztítókat.
* A lefúvó egy gumi
kell kezelni, tartsa be a helyi
tisztítóberendezés, ami levegőt
szabályozásokat.
fúj ki egy fúvókából.
294 295

Legfontosabb tulajdonságok Elnevezések/Felépítés
Jp
A következő feltételek egyszerűsítik a mérést:
Jp
1
En
4
En
Lézerkibocsátó nyílás
Es
Es
bevonattal
3
2 Lézerérzékelő nyílás
Fr
Fr
3
De
De
(vízszintes távolság ± magasság), ami hasznos a golfnál
4 Mérés gomb
It
Mérési pontatlanság vagy hiba a következő esetekben
It
56x-os nagyítású egyszemes lencse
választhat
fordulhat elő:
1
Se
Se
6 Dioptriaállító gyűrű
Nl
Céltárgy elsőbbségét átkapcsoló rendszert alkalmaz
Nl
7 Dioptriaindex
Ru
Mérés gombot hosszan megnyomva
2
5
8 Szíj befűzőlyuk
Ru
folyamatos mérés funkciót végezhet
Pt
9
Pt
Pl
6
!p
Pl
Fi
irányának jelölése
Fi
7
No
!q Termékszám címkéje
S
No
!w FDA adat jelzése
Dk
Dk
A Nikon lézeres távolságmérő láthatatlan lézersugarat
8
Cz
Cz
használ a távolság meghatározásához. Megméri azt
Ro
az időt, amely alatt a lézersugár megteszi az utat a
9
Ro
távolságmérőtől a célig és vissza. A lézer visszaverődése
Hu
Hu
és a mérési eredmények változhatnak az időjárási és
!p
környezeti viszonyoktól, valamint a céltárgy színétől,
!q
felületi kikészítésétől, méretétől, formájától és egyéb
!w
jellemzőitől függően.
Felépítés
.................................. 1 db
...................... 1 db
....................... 1 db
..... 1 db
296 297
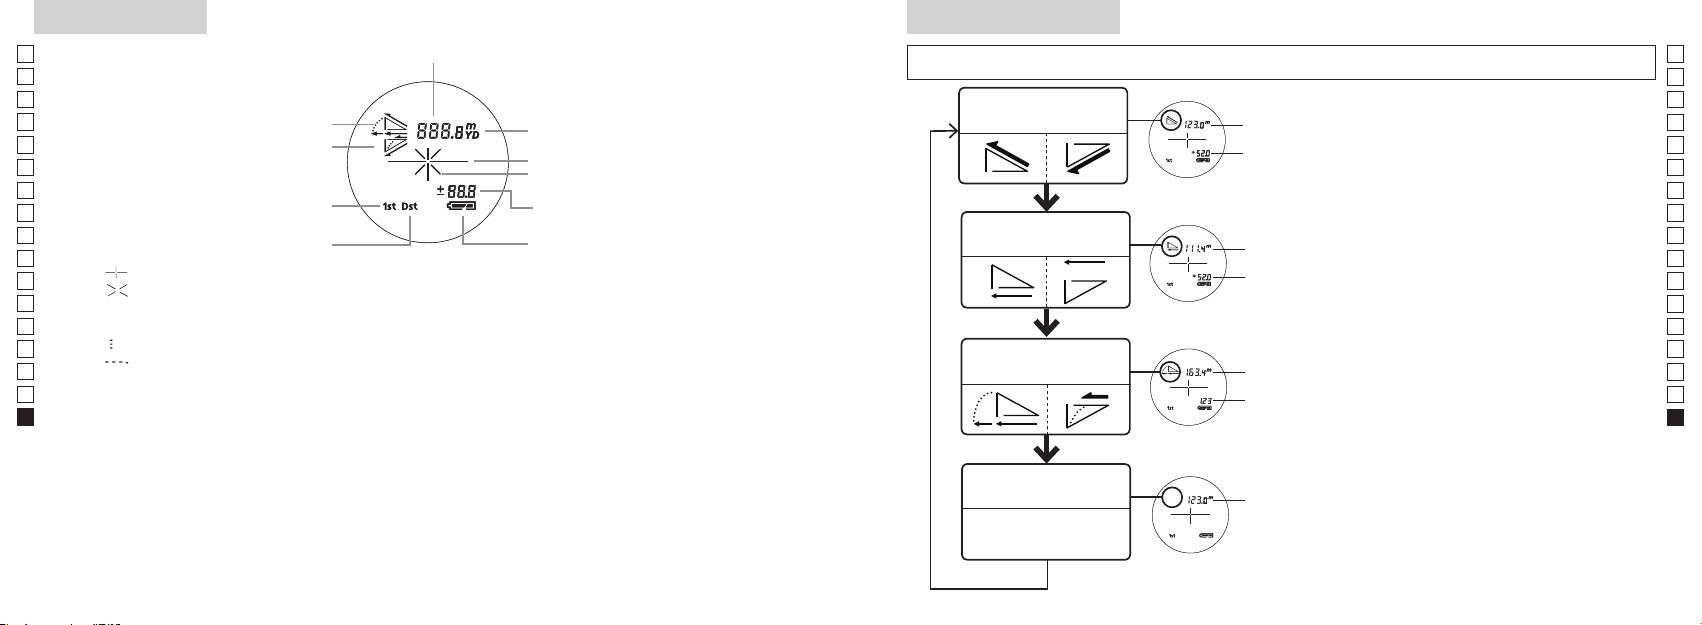
Belső kijelző
Méréskijelző mód
Jp
Távolság
Jp
kevesebb ideig), hogy az üzemmódot az alábbi sorrendben változtassa.
En
En
Es
Es
Tényleges távolság és
1. Kapcsolja be a gépet (ellenőrizze, hogy a
Tényleges
Fr
magasság üzemmód
Fr
belső kijelző bekapcsolt-e).
távolság
De
Lejtés
De
Céltárgy jele
Magasság
gombot, majd azonnal (0,5 másodpercen
It
It
Lézerkibocsátás jele
belül) nyomja
Se
Se
Magasság (aktuális távolság a golf
gombot 2 másodpercnél rövidebb ideig.
Nl
3. A Mérés kijelző üzemmód kapcsolásához
Nl
üzemmód beállításnál)
Vízszintes távolság és
Ru
Vízszintes
Ru
Távoli céltárgy elsőbbsége üzemmód
magasság üzemmód
Pt
távolság
gombról.
Pt
『 』 - Célozza be a mérni kívánt tárgyat. Állítsa be a célt a hajszálkereszt közepére.
4. Ismételgesse a 2. és 3. lépéseket a kívánt
Pl
Magasság
Pl
『 』 - A méréshez a lézersugár kibocsátása közben jelenik meg.
üzemmód megjelenéséig.
Fi
Fi
Az egyszeri mérés időtartama alatt végig látható. Folyamatos mérés közben villog.
*
Ha a gombokat nem a helyes sorrendben
No
Ne nézzen bele az objektívlencsébe, míg ez a jel látható.
nyomja meg, a gép nem kapcsol át.
No
Dk
『
』 - Mérés folyamatban
Lejtéshez
*
Az üzemmódot a mérés után átkapcsolva
Dk
『
』 - "Hibás a mérés" vagy "Nem lehet mérni"
Golf üzemmód
igazított
a gép átalakítja az eredményeket az új
Cz
Cz
távolság
üzemmódhoz.
Ro
Ro
* Az LCD általában azonos vagy kisebb nagyítást alkalmaz. Azonban e termék LCD kijelzőjét felnagyítja
Tényleges
*
Miután beállította az üzemmódot, a gép
Hu
a szemkagyló nagymértékű nagyítása. Bár az LCD előállításához a legkorszerűbb technológiát
távolság
a méréseket az új üzemmódban végzi el.
Hu
Használat közben azonban ez nem befolyásolja a mérés pontosságát vagy biztonságát.
Tényleges távolság
Tényleges
üzemmód
távolság
298 299
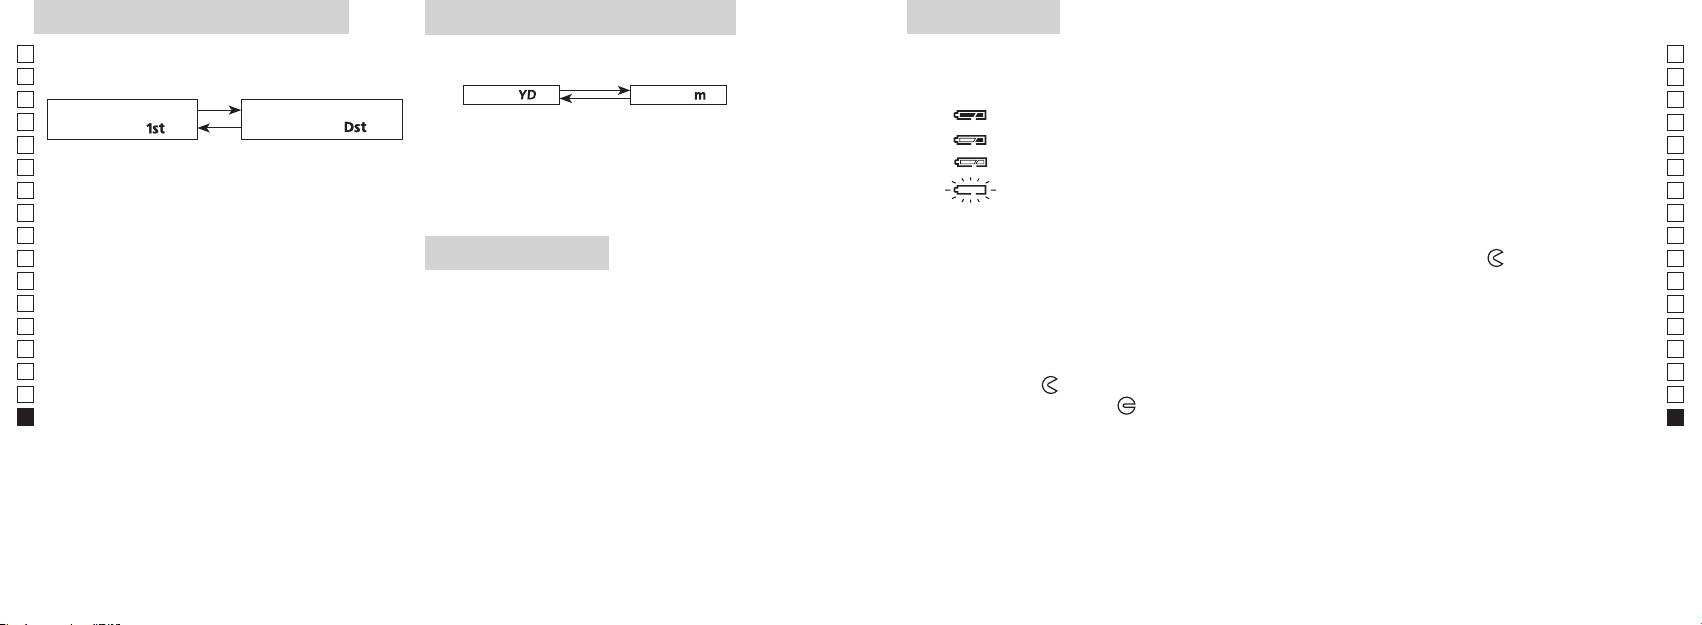
Céltárgy elsőbbsége üzemmód
Távolságkijelzés mértékegysége
Elem cseréje
Jp
A mérési eredmények yardban és méterben jeleníthetők
Jp
Elem típusa: 1 db 3 V-os CR2 lítium elem
elsőbbsége közötti átkapcsoló rendszert alkalmazza (a
meg (a gyári beállítás a yard).
En
Elem maradék töltésének kijelzése
En
gyári alapbeállítás az első céltárgy elsőbbsége).
[ ]
Es
Méter [ ]Yard
* A belső kijelzőn az elemállapot jelzése figyelmeztet, hogy mikor kell az elemet kicserélni.
Es
Távoli céltárgy elsőbbsége
1. Kapcsolja be a gépet (ellenőrizze, hogy a belső kijelző
: Az elem töltése elegendő a működéshez.
Fr
Fr
üzemmód「
」
üzemmód
「
」
bekapcsolt-e).
: Az elem lemerülőben van. Készüljön fel az elemcserére.
De
De
1. Kapcsolja be a gépet (ellenőrizze, hogy a belső
It
: Az elem töltöttségi szintje alacsony. Cserélje le egy újra.
mint két másodpercig. Amikor a kijelző bekapcsolt,
It
kijelző bekapcsolt-e).
engedje el a gombot.
Se
villog : Az elem teljesen lemerült. Miután a jel háromszor villog, a lézeres távolságmérő
Se
3. A mértékegység beállítása után a gép átalakítja az
automatikusan kikapcsol. Cserélje le az elemet.
Nl
Nl
eredményeket és a kiválasztott módon jeleníti meg.
másodpercen belül.
Ru
Ru
Mindkét gombot tartsa folyamatosan (2
1. Nyissa ki az elemrekesz fedelét
Pt
másodpercnél tovább) lenyomva, amíg a gép át
Az elemrekesz-fedél bemélyedő részét pl. a hüvelykujjpárnájával fordítsa el a
jel irányába.
Pt
LED-es világítás
nem kapcsol az első és a távoli céltárgy elsőbbsége
Pl
Avízállóságot biztosító gumitömítése miatt nehezen nyílhat.
Pl
1. Kapcsolja be a gépet (ellenőrizze, hogy a belső kijelző
üzemmódok között.
2. Cserélje le a régi elemet egy újra
Fi
bekapcsolt-e).
Fi
3. Az üzemmód bekapcsolásakor engedje el mindkét
No
gombot.
No
Dk
*
Ha a gombokat nem a helyes sorrendben nyomja
megfelelően helyezi be, a lézeres távolságmérő nem fog működni.
Dk
meg, a gép nem kapcsol át.
*
3. Zárja be az elemrekesz fedelét
Cz
Cz
*
Ha a gép nem kapcsol át, ismételje meg a 2. lépést.
sötét az LCD panel megtekintéséhez.
Igazítsa a
jelet a
●
Ro
*
Ro
fordítsa el a fedelet a
irányba. A vízállóságot biztosító gumitömítése miatt nehezen záródhat, de
[]
Hu
Hu
világítás ki lesz kapcsolva a lézeres távolságmérő újbóli
elsőbbsége üzemmód a legközelebb, a Távoli céltárgy
bekapcsolásakor.
Elem élettartama
elsőbbsége üzemmód pedig a legmesszebb lévő tárgy
Folyamatos üzem: Körülbelül 13.000 alkalom (kb. 20 °C-on)
távolságát mutatja.
színétől stb. függően. Csak útmutatóként használja.
élettartama valószínűleg rövidebb lesz a fentiekben megadottnál.
* Ha a készülék vízbe esik és emiatt elázik az elemkamra, akkor jól szárítsa ki, majd cserélje le az elemet.
300 301
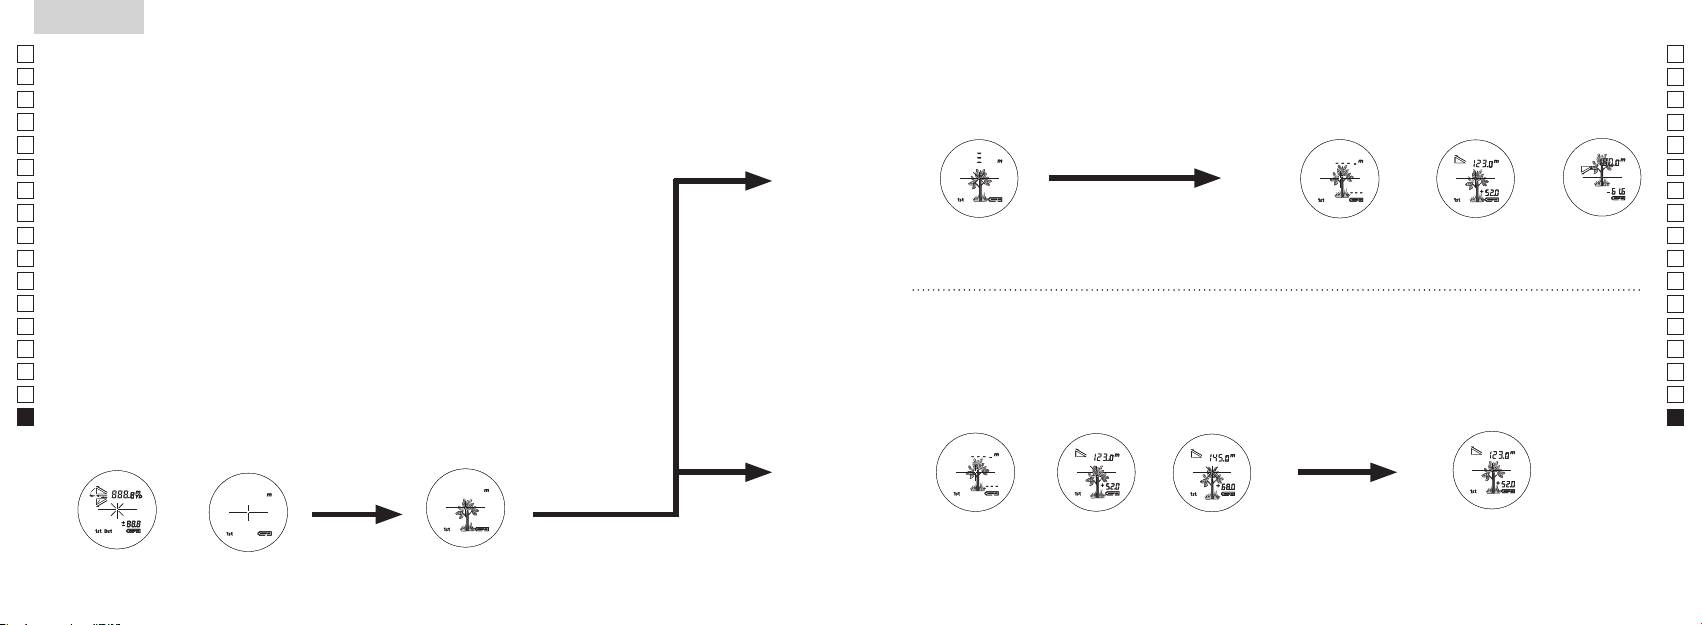
Jp
Jp
En
En
Es
Es
Fr
Fr
De
De
It
It
Se
Se
Nl
Nl
Ru
Ru
Pt
Pt
Pl
Pl
Fi
Fi
No
No
Dk
Dk
Cz
Cz
Ro
Ro
Hu
Hu
302 303
Measurement
1. Press the POWER button for power-on.
(Power turns off 8 seconds after the last
operation.)
Immediately after power-on.
3. Press POWER button once to start single measurement.
4. After measurement, “distance” or “fail to measure” indicator are displayed for 8 seconds, then power turns off. If you press the POWER
button during power-on (while the internal display is lit), another single measurement starts.
unable to measure distance.
3. Keep pressing POWER button to start continuous measurement up to 20 seconds. The internal display shows “distance” and
“fail to measure” indicator alternately.
Note: Laser irradiaton mark is blinking during the measurement.
Note: If you stop pressing the button, the continuous measuremen stops
2. Aim at the target
Positionthetargetatthecenterofthereticle
[Single measurement]
Failure to measure or
unable to measure distance.
[Continuous measurement]
4. After continuous measurement, the measure results are displayed for 8 seconds, then power turns off. If you press the POWER
button during power-on (while the internal display is lit), another measrement starts.
Failure to measure or
Target focusing.
Measuring.
(Initializing)
.
Upward measurement. Downward measurement.
Displays the measured
figure. (Target 1)
Displays the measured figure.
Stand-by.
Displays the measured
figure. (Target 2)
Measurement
1. Press the POWER button for power-on.
(Power turns off 8 seconds after the last
operation.)
Immediately after power-on.
(Initializing)
3. Press POWER button once to start single measurement.
Measuring.
4. After measurement, “distance” or “fail to measure” indicator are displayed for 8 seconds, then power turns off. If you press the POWER
button during power-on (while the internal display is lit), another single measurement starts.
Failure to measure or
unable to measure distance.
Displays the measured
figure. (Target 1)
3. Keep pressing POWER button to start continuous measurement up to 20 seconds. The internal display shows “distance” and
“fail to measure” indicator alternately.
Note: Laser irradiaton mark is blinking during the measurement.
Note: If you stop pressing the button, the continuous measuremen stops
Target focusing.
2. Aim at the target
.
Positionthetargetatthecenterofthereticle
[Single measurement]
Failure to measure or
unable to measure distance.
Upward measurement. Downward measurement.
Displays the measured figure.
[Continuous measurement]
4. After continuous measurement, the measure results are displayed for 8 seconds, then power turns off. If you press the POWER
button during power-on (while the internal display is lit), another measrement starts.
Stand-by.
Displays the measured
figure. (Target 2)
Measurement
1. Press the POWER button for power-on.
(Power turns off 8 seconds after the last
operation.)
Immediately after power-on.
Stand-by.
(Initializing)
2. Aim at the target
.
Positionthetargetatthecenterofthereticle
3. Press POWER button once to start single measurement.
4. After measurement, “distance” or “fail to measure” indicator are displayed for 8 seconds, then power turns off. If you press the POWER
button during power-on (while the internal display is lit), another single measurement starts.
unable to measure distance.
3. Keep pressing POWER button to start continuous measurement up to 20 seconds. The internal display shows “distance” and
“fail to measure” indicator alternately.
Note: Laser irradiaton mark is blinking during the measurement.
Note: If you stop pressing the button, the continuous measuremen stops
[Single measurement]
Failure to measure or
unable to measure distance.
[Continuous measurement]
4. After continuous measurement, the measure results are displayed for 8 seconds, then power turns off. If you press the POWER
button during power-on (while the internal display is lit), another measrement starts.
Failure to measure or
Target focusing.
Measuring.
Upward measurement. Downward measurement.
Displays the measured
figure. (Target 1)
Displays the measured figure.
Displays the measured
figure. (Target 2)
Mérés
Vigyázat — Az itt meghatározottaktól eltérő ellenőrzési, beállítási, kivitelezési eljárások alkalmazása
【
Egyszeri mérés
】
veszélyes sugárterhelést eredményezhet.
egyszer nyomja meg a
1. Előkészítés
2. Gumi szemkagyló
Szemüvegesek és szemüveget nem viselők is használhatják ezt a távolságmérőt módosítás nélkül.
3. Dioptria beállítása
Állítsa be a dioptriát úgy, hogy tiszta képet kapjon az LCD kijelzőn a keresőben.
szemkagylóba belenézve jobbra forgassa el a dioptriabeállító gyűrűt, amíg az LCD kijelző
fókuszba nem kerül.
Ha túlságosan eltekeri a gyűrűt, fordítsa határozottan vissza, majd állítsa be újra.
Ha a dioptriát nem szabályozza be látásának megfelelően, képtelen lesz a céltárgyat
helyesen fókuszba állítani.
【
Folyamatos mérési funkció
】
4. Mérés
*
Az egyes üzemmódok beállításához lásd az adott szakaszokat.
1. Kapcsolja be a gépet (ellenőrizze,
2. Állítsa a keresőt a céltárgyra.
hogy a belső kijelző bekapcsolt-e).
Állítsa be a célt a hajszálkereszt
(A gép automatikusan kikapcsol
közepére.
kb. 8 mp tétlenség után.)
Közvetlenül a bekapcsolás
Készenléti állapot
Tárgy becélzása
után (inicializálás)
Measurement
1. Press the POWER button for power-on.
(Power turns off 8 seconds after the last
operation.)
Immediately after power-on.
Stand-by.
(Initializing)
2. Aim at the target
.
Positionthetargetatthecenterofthereticle
Target focusing.
[Single measurement]
3. Press POWER button once to start single measurement.
Measuring.
4. After measurement, “distance” or “fail to measure” indicator are displayed for 8 seconds, then power turns off. If you press the POWER
button during power-on (while the internal display is lit), another single measurement starts.
Failure to measure or
Upward measurement. Downward measurement.
unable to measure distance.
Displays the measured figure.
[Continuous measurement]
3. Keep pressing POWER button to start continuous measurement up to 20 seconds. The internal display shows “distance” and
“fail to measure” indicator alternately.
Note: Laser irradiaton mark is blinking during the measurement.
Note: If you stop pressing the button, the continuous measuremen stops
Failure to measure or
unable to measure distance.
4. After continuous measurement, the measure results are displayed for 8 seconds, then power turns off. If you press the POWER
button during power-on (while the internal display is lit), another measrement starts.
Displays the measured
figure. (Target 1)
Displays the measured
figure. (Target 2)
Measurement
1. Press the POWER button for power-on.
(Power turns off 8 seconds after the last
operation.)
Immediately after power-on.
Stand-by.
(Initializing)
2. Aim at the target
.
Positionthetargetatthecenterofthereticle
Target focusing.
[Single measurement]
3. Press POWER button once to start single measurement.
Measuring.
4. After measurement, “distance” or “fail to measure” indicator are displayed for 8 seconds, then power turns off. If you press the POWER
button during power-on (while the internal display is lit), another single measurement starts.
Failure to measure or
Upward measurement. Downward measurement.
unable to measure distance.
Displays the measured figure.
[Continuous measurement]
3. Keep pressing POWER button to start continuous measurement up to 20 seconds. The internal display shows “distance” and
“fail to measure” indicator alternately.
Note: Laser irradiaton mark is blinking during the measurement.
Note: If you stop pressing the button, the continuous measuremen stops
Failure to measure or
unable to measure distance.
Displays the measured
figure. (Target 1)
4. After continuous measurement, the measure results are displayed for 8 seconds, then power turns off. If you press the POWER
button during power-on (while the internal display is lit), another measrement starts.
Displays the measured
figure. (Target 2)
Measurement
1. Press the POWER button for power-on.
(Power turns off 8 seconds after the last
operation.)
Immediately after power-on.
Stand-by.
(Initializing)
2. Aim at the target
.
Positionthetargetatthecenterofthereticle
Target focusing.
[Single measurement]
3. Press POWER button once to start single measurement.
Measuring.
4. After measurement, “distance” or “fail to measure” indicator are displayed for 8 seconds, then power turns off. If you press the POWER
button during power-on (while the internal display is lit), another single measurement starts.
Failure to measure or
unable to measure distance.
3. Keep pressing POWER button to start continuous measurement up to 20 seconds. The internal display shows “distance” and
“fail to measure” indicator alternately.
Note: Laser irradiaton mark is blinking during the measurement.
Note: If you stop pressing the button, the continuous measuremen stops
Failure to measure or
unable to measure distance.
[Continuous measurement]
4. After continuous measurement, the measure results are displayed for 8 seconds, then power turns off. If you press the POWER
button during power-on (while the internal display is lit), another measrement starts.
Upward measurement. Downward measurement.
Displays the measured
figure. (Target 1)
Displays the measured figure.
Displays the measured
figure. (Target 2)
Measurement
1. Press the POWER button for power-on.
(Power turns off 8 seconds after the last
operation.)
Immediately after power-on.
Stand-by.
(Initializing)
2. Aim at the target
.
Positionthetargetatthecenterofthereticle
Target focusing.
[Single measurement]
3. Press POWER button once to start single measurement.
Measuring.
4. After measurement, “distance” or “fail to measure” indicator are displayed for 8 seconds, then power turns off. If you press the POWER
button during power-on (while the internal display is lit), another single measurement starts.
unable to measure distance.
3. Keep pressing POWER button to start continuous measurement up to 20 seconds. The internal display shows “distance” and
“fail to measure” indicator alternately.
Note: Laser irradiaton mark is blinking during the measurement.
Note: If you stop pressing the button, the continuous measuremen stops
unable to measure distance.
4. After continuous measurement, the measure results are displayed for 8 seconds, then power turns off. If you press the POWER
button during power-on (while the internal display is lit), another measrement starts.
[Continuous measurement]
Failure to measure or
Failure to measure or
Upward measurement. Downward measurement.
Displays the measured
figure. (Target 1)
Displays the measured figure.
Displays the measured
figure. (Target 2)
Measurement
1. Press the POWER button for power-on.
(Power turns off 8 seconds after the last
operation.)
Immediately after power-on.
Stand-by.
(Initializing)
2. Aim at the target
.
Positionthetargetatthecenterofthereticle
Target focusing.
[Single measurement]
3. Press POWER button once to start single measurement.
4. After measurement, “distance” or “fail to measure” indicator are displayed for 8 seconds, then power turns off. If you press the POWER
button during power-on (while the internal display is lit), another single measurement starts.
unable to measure distance.
3. Keep pressing POWER button to start continuous measurement up to 20 seconds. The internal display shows “distance” and
“fail to measure” indicator alternately.
Note: Laser irradiaton mark is blinking during the measurement.
Note: If you stop pressing the button, the continuous measuremen stops
unable to measure distance.
4. After continuous measurement, the measure results are displayed for 8 seconds, then power turns off. If you press the POWER
button during power-on (while the internal display is lit), another measrement starts.
[Continuous measurement]
Failure to measure or
Failure to measure or
Measuring.
Upward measurement. Downward measurement.
Displays the measured
figure. (Target 1)
Displays the measured figure.
Displays the measured
figure. (Target 2)
Measurement
1. Press the POWER button for power-on.
(Power turns off 8 seconds after the last
operation.)
Immediately after power-on.
Stand-by.
(Initializing)
2. Aim at the target
.
Positionthetargetatthecenterofthereticle
Target focusing.
[Single measurement]
3. Press POWER button once to start single measurement.
Measuring.
4. After measurement, “distance” or “fail to measure” indicator are displayed for 8 seconds, then power turns off. If you press the POWER
button during power-on (while the internal display is lit), another single measurement starts.
unable to measure distance.
3. Keep pressing POWER button to start continuous measurement up to 20 seconds. The internal display shows “distance” and
“fail to measure” indicator alternately.
Note: Laser irradiaton mark is blinking during the measurement.
Note: If you stop pressing the button, the continuous measuremen stops
unable to measure distance.
4. After continuous measurement, the measure results are displayed for 8 seconds, then power turns off. If you press the POWER
button during power-on (while the internal display is lit), another measrement starts.
[Continuous measurement]
Failure to measure or
Failure to measure or
Upward measurement. Downward measurement.
Displays the measured
figure. (Target 1)
Displays the measured figure.
Displays the measured
figure. (Target 2)
Measurement
1. Press the POWER button for power-on.
(Power turns off 8 seconds after the last
operation.)
Immediately after power-on.
Stand-by.
(Initializing)
2. Aim at the target
.
Positionthetargetatthecenterofthereticle
Target focusing.
[Single measurement]
3. Press POWER button once to start single measurement.
Measuring.
4. After measurement, “distance” or “fail to measure” indicator are displayed for 8 seconds, then power turns off. If you press the POWER
button during power-on (while the internal display is lit), another single measurement starts.
Failure to measure or
unable to measure distance.
Displays the measured
figure. (Target 1)
3. Keep pressing POWER button to start continuous measurement up to 20 seconds. The internal display shows “distance” and
“fail to measure” indicator alternately.
Note: Laser irradiaton mark is blinking during the measurement.
Note: If you stop pressing the button, the continuous measuremen stops
Failure to measure or
unable to measure distance.
Upward measurement. Downward measurement.
Displays the measured figure.
[Continuous measurement]
4. After continuous measurement, the measure results are displayed for 8 seconds, then power turns off. If you press the POWER
button during power-on (while the internal display is lit), another measrement starts.
Displays the measured
figure. (Target 2)
Measurement
1. Press the POWER button for power-on.
(Power turns off 8 seconds after the last
operation.)
Immediately after power-on.
Stand-by.
(Initializing)
2. Aim at the target
.
Positionthetargetatthecenterofthereticle
Target focusing.
[Single measurement]
3. Press POWER button once to start single measurement.
Measuring.
4. After measurement, “distance” or “fail to measure” indicator are displayed for 8 seconds, then power turns off. If you press the POWER
button during power-on (while the internal display is lit), another single measurement starts.
Failure to measure or
unable to measure distance.
3. Keep pressing POWER button to start continuous measurement up to 20 seconds. The internal display shows “distance” and
“fail to measure” indicator alternately.
Note: Laser irradiaton mark is blinking during the measurement.
Note: If you stop pressing the button, the continuous measuremen stops
Failure to measure or
unable to measure distance.
[Continuous measurement]
4. After continuous measurement, the measure results are displayed for 8 seconds, then power turns off. If you press the POWER
button during power-on (while the internal display is lit), another measrement starts.
Upward measurement. Downward measurement.
Displays the measured
figure. (Target 1)
Displays the measured figure.
Displays the measured
figure. (Target 2)
4. Mérés után 8 másodpercre megjelenik a "hibás mérés" vagy a
"mért távolság" jelzés, aztán a gép kikapcsol. Ha megnyomja a
gombot a bekapcsolás közben (míg a belső
kijelző világít), egy új egyszeri mérés indul el.
"Hibás a mérés" vagy
Mérés felfelé Mérés lefelé
Mérés
"Nem lehet mérni" a
távolságot
Megjelenik a mért alak
3. Nyomja le és tartsa lenyomva a
4. Folyamatos mérés után kb. 8 másodpercre megjelenik a végső
másodpercig a folyamatos mérés elindításához. A belső kijelző a
mérés (mért távolság), aztán a gép kikapcsol.
"hibás mérés" és a "mért távolság" jelzést mutatja felváltva.
Ha megnyomja a
gombot a bekapcsolás
*
A lézersugárzás jele villog a mérés közben.
közben (míg a belső kijelző világít), elindul egy másik mérés.
*
Ha ujját leveszi a gombról, megáll a folyamatos mérés.
Amikor például egy golfpályán a kitűzőzászló nyelének távolságát
"Hibás a mérés" vagy
Megjelenik a mért
Megjelenik a mért
"Nem lehet mérni" a
alak (1. céltárgy)
alak (2. céltárgy)
zászlónyelet a folyamatos mérés funkcióval letapogatva könnyen
távolságot
megkapja az eredményt. Amennyiben Ön és a kitűzőzászló között
nincsenek tárgyak, a legkisebb szám mutatja a célba vett zászló
távolságát.
Specifikációk
Jp
Mérőrendszer
Ház: Vízhatlan (legnagyobb mélység 1 méter, legfeljebb 10 percig)*
Jp
Szerkezet
En
Mérési távolság
En
Es
Es
Biztonság
Fr
Fr
FCC 15. Rész, B S:
De
Távolság kijelzése (növekedés)
De
Környezet
It
It
Lézer
Se
Se
Optikai rendszer
Osztály
Nl
Nl
Nagyítás ( x ) 6
Hullámhossz (nm) 905
Ru
Ru
Az objektívlencse tényleges átmérője
Impulzushossz (ns) 12
Pt
ø 21
Pt
(mm)
15
Pl
Pl
Valós látószög (˚) 7,5
Sugárdivergencia (mrad)
Fi
Fi
Betekintési távolság (mm) 18,3
Működési páratartalom (%RH) 80 vagy kevesebb (pára kicsapódása nélkül)
No
No
Betekintő lencse (mm) ø 3,5
Dk
Dk
-
1
Dioptria beállítása ±4 m
* Vízhatlan modellek
Cz
A Nikon lézeres távolságmérő vízhatlan, optikai és megfigyelő rendszere nem károsodik, ha akár 10 perc időtartamra legfeljebb
Cz
1méter mély vízbe meríti vagy ejti.
Ro
Ro
Működési hőmérséklet (˚C) -10 —
A Nikon lézeres távolságmérő a következő előnyöket kínálja:
Hu
Hu
1 db CR2 lítium elem (3 V DC)
Áramforrás
Automatikus kikapcsolás (kb. 8 mp tétlenség után)
A Nikon lézeres távolságmérő használata során tartsa be a következőket:
Méretek (H x M x Sz) (mm) 113 x 70 x 39
Tömeg (g) Körülbelül 175 (elem nélkül)
** Az elemrekesz vízálló, nem vízhatlan. Ha a távolságmérőt vízbe meríti, az eszköz beázhat. Ha víz kerül az elemrekeszbe, törölje ki
onnan az összes nedvességet, és hagyjon időt a kiszáradására.
304 305
Egyebek
Hibakeresés/Javítás
Jp
Ha Nikon lézeres távolságmérőjét javítani kell, lépjen kapcsolatba a helyi viszonteladóval vagy azzal szaküzlettel, ahol vásárolta.
Jp
Havító táblázatot.
En
A berendezés eleget tesz az FCC szabályok 15. részében foglaltaknak. Az üzemeltetés a következő két feltétellel
En
Es
lehetséges:
Es
Hibajelenség Megoldási javaslatok
Fr
Fr
De
eredményezhetnek.
●
De
Az egység nem kapcsol be
●
It
(Az LCD nem világít)
It
● Cserélje le az elemet egy újra.
Se
Se
●
Nl
Nl
akadályozza az objektívlencse oldalán lévő lézerkibocsátó és -érzékelő rekeszt.
Ru
Ru
nyújtanak a káros interferenciák ellen, mikor a készüléket lakóövezetben használja. A készülék rádiófrekvenciás
●
Pt
energiát hoz létre, használ, és képes kisugározni. Ha nem az előírásoknak megfelelően szereli össze és használja, az
Nem lehet megmérni a távolságot
-érzékelő rekeszek tiszták. Szükség esetén tisztítsa meg őket.
Pt
● Nézze meg, hogy a céltárgy alakja és állapota alkalmas-e a lézersugár
Pl
Pl
esetben nem fordul elő interferencia. Ha ez a készülék olyan káros zavart okoz a rádiós vagy televíziós vételben,
visszaverésére.
Fi
amely megszüntethető a berendezés ki- és bekapcsolásával, akkor a következő intézkedésekkel próbálja meg
● Cserélje le az elemet egy újra.
Fi
No
megszüntetni a zavart:
No
● Mérés közben biztosan tartsa az egységet.
Dk
● A céltárgy a mérési tartományon belül legyen.
Dk
meg
Cz
Cz
Ro
A mérési tartománynál közelebb
Ro
●
lévő céltárgyak távolságát nem
Hu
céltárgy és a Nikon lézeres távolságmérő között.
Hu
lehet megmérni.
Bizonyos távolságon kívül eső
●
bizonyítékként.
céltárgyak nem mérhetők
céltárgy és a Nikon lézeres távolságmérő között.
● Cserélje le az elemet egy újra.
● Nézze meg, hogy a céltárgy alakja és állapota alkalmas-e a lézersugár
visszaverésére.
A mérési eredmény ingadozik
● Mérés közben biztosan tartsa az egységet.
●
céltárgy és a Nikon lézeres távolságmérő között.
306 307

Hibakeresés/Javítás
Jp
En
Es
Hibajelenség Megoldási javaslatok
Fr
De
● Cserélje le az elemet egy újra.
● Nézze meg, hogy a céltárgy alakja és állapota alkalmas-e a lézersugár
It
Helytelen eredmény jelenik meg
visszaverésére.
Se
●
és a Nikon lézeres távolságmérő között.
Nl
Ru
Pt
mivel valószínűleg hibásan működik.
Nikon lézeres távolságmérőt, csak a gyártó hivatalos képviselőjének. Sérülést vagy kárt okozhat a termékben, ha ezt az utasítást
Pl
nem tartja be.
Fi
No
Dk
Cz
Ro
Hu
308

NIKON VISION CO., LTD.
住所:〒 142-0043 東京都品川区二葉 1 丁目 3 番 25 号
