Zelmer 39Z012 – страница 3
Инструкция к Машинке Для Стрижки Волос Zelmer 39Z012

41
3. Користування машинкою для стрижки і проріджування волосся
ВКАЗІВКА: Стрижіть волосся на потрібну довжину етапами, починаючи від більшої довжини.
Установіть відповідну гребенясту насадку (малу – (IV) або велику (V)).
Малою гребенястою насадкою – (IV) можете підстригати волосся у діапазоні 4–20 мм, натомість великою (V) у діапазоні 24–40 мм (дивись
Установлення/заміна гребенястих насадок).
Уключіть машинку для стрижки волосся, пересуваючи перемикач ON/OFF – (3) у положення 1.
Виконайте стрижку тільки малих зон. –
Пересувайте повільно по волоссі машинкою для стрижки. –
Триайте прилад так, щоб гребеняста насадка була встановлена плоским способом. –
Завжди починайте стрижку від потилиці уверх або від чола і скроні уверх у напрямку середини голови. –
Для проріджування волосся пересуньте золотник для проріджування волосся (2) у положення ; елемент для проріджування інтегрова-
ний з ріжучою головкою (1) висувається уверх.
За допомогою цієї функції, можете зменшити об’єм волосся. Це надає сучасний, змінний вигляд без зміни довжини волосся.
4. Стрижка без насадки
ПОПЕРЕДЖЕННЯ: Ріжуча головка (1) є дуже гострою. Існує небезпека поранення.
Без гребенястої насадки, можлива рівномірна підстрижка волосся на довжину 1–2 мм.
Підстрижка контуру лінії заросту і бакенбардів, гоління волосся на потилиці:
Пересувайте повільно по волоссі машинкою для стрижки. –
Поверніть машинку так, щоб задня частина була направлена уверх. –
Помістіть край ріжучої головки – (1) без гребенястої насадки на потрібну довжину лінії заросту.
Пересувайте працюючу машинку для стрижки униз. –
5. Установлення/заміна гребенястих насадок
Існує можливість вибору між двома гребенястими насадками:
Мала насадка дозволяє підстригти волосся на довжину: 4 мм, 8 мм, 12 мм, 16 мм, 20 мм. ●
Велика насадка дозволяє підстригти волосся на довжину: 24 мм, 28 мм, 32 мм, 36 мм, 40 мм. ●
Уведіть гребенясту насадку у бічні направляючі корпусу машинки для стрижки волосся. –
Унизу гребенястої насадки знаходиться овальна встановлювальна пластинка. Натисніть її великим пальцем у прилад i в цей ж самий мо- –
мент штовхніть насадку у потрібне положення.
Перед початком стрижки волосся, упевніться, що насадка надійно заблокована. –
Замініть насадку шляхом зняття одної і встановлення другої за вищевказаним способом. –
Для подальшої стрижки волосся або бороди, пересуньте насадку униз в інше положення і повторіть процес стрижки. –
Очищення і зберігання
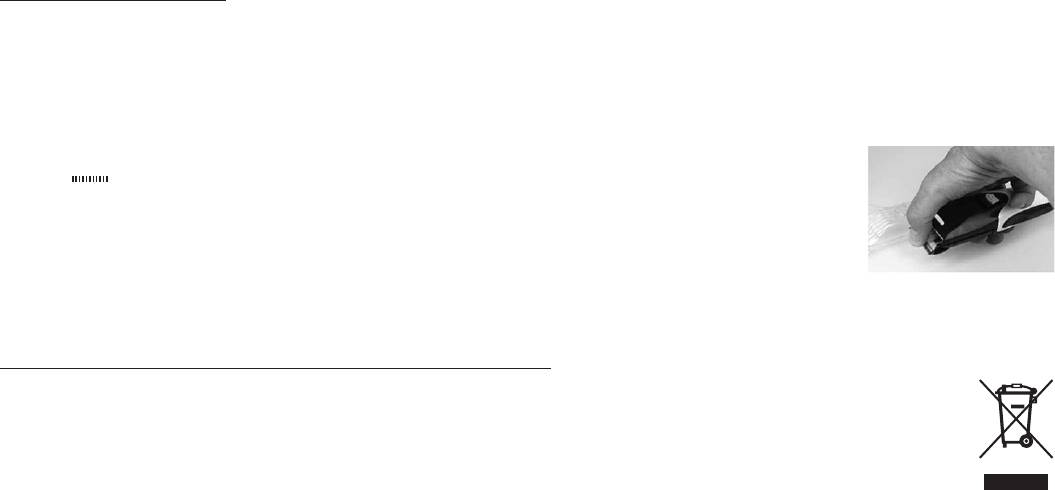
Забороняється під час вставлення і витягування живильника з розетки тримати його мокрими руками. ●
Живильник і приєднувальний кабель повинні бути сухими. ●
Не занурюйте машинку для стрижки волосся у воду чи іншу рідину для очищення, тому що прилад не є водостійким. Це може привести до ●
пошкодження частин під напругою (акумуляторів).
Установіть перемикач ON/OFF – (3) у положення OFF.
Завжди перед очищенням i зберіганням виключайте машинку для стрижки волосся i витягніть вилку живильника з розетки. –
Зніміть з машинки для стрижки волосся гребенясту насадку. –
Для знімання ріжучої головки – (1), поверніть зпочатку вправо у положення регулятор для проріджування во-
лосся (2).
Натисніть уперед великим пальцем лезо ріжучої головки – (1) для звільнення ріжучої головки з патрона.
За необхідністю, промийте пластикові гребенясті насадки під проточною водою, a потім осушіть їх старанно. –
Видаліть залишки волосся з ріжучої головки – (1) за допомогою доданої щітки для очищення (VII).
Повторно установіть виступ ріжучої головки – (1) в блокуючий отвір патрона ріжучої головки.
Легко натисніть ріжучу головку – (1) доки не почуєте характерний звук защемлення.
ВКАЗІВКА: Для зменшення тертя від часу до часу уведіть одну дві краплі масла між леза і розведіть його рівномірно.
Можете застосувати будь-яке масло без вмісту кислоти (тобто масло для швейної машини). Витріть ганчіркою надмір масла.
Екологія – Давайте дбати про навколишнє середовище
Кожен користувач може дбати про охорону навколишнього природного середовища. Це не є трудним, ні надто коштовним.
З цією метою:
Картонне упакування здайте в макулатуру.
Поліетиленові мішки (PE) кинути в контейнер для пластиків.
Батареї містять шкідливі для природного середовища речовини. Не викидайте їх разом з іншими побутовими відходами, здай-
те їх до пункту збору вторинної сировини. Перед тим як викинути або здати обладнання до пункту вторинної сировини, потріб-
но пам’ятати про вийняття батарей зі сховища для батарей
Відпрацьоване обладнання здайте у відповідний пункт складування, тому що небезпечні компоненти, що містяться в обладнанні можуть
складати шкідливу дію для середовища.
Не викидайте пристрій разом з побутовими відходами!!!
Імпортер/виробник не відповідає за можливі збитки, що виникли внаслідок використання обладнання не за його призначенням або його неналежного обслуго-
вування.
Імпортер/виробник застерігає собі право модифікувати виріб у будь-який момент, без попереднього повідомлення, для пристосування до правових положень,
стандартів, директив або у зв’язку з конструкційним, тоговельним, естетичним та іншими причинами.
42

EN
Content
Safety instructions and recommendations ......................................................................................................................................................................43
Specications .................................................................................................................................................................................................................44
Outline and parts of the hair clipper ................................................................................................................................................................................45
Handling and operation of hair clipper ............................................................................................................................................................................45
Cleaning and maintenance .............................................................................................................................................................................................47
Ecology – Environment protection ..................................................................................................................................................................................47
Dear Customers!
The hair clipper with two easy replaceable comb attachments provides possibility of obtaining different lengths of cutting and clipping hairline.
Additionally, the feature of thinning is available.
The cutting set consists of titanium coated ceramic blades. The material provides optimum and exact clipping and is especially gentile for skin.
Please read these instructions carefully. Pay your special attention to important safety instructions. Keep this “Instructions for use” for future
reference.
Safety instructions and recommendations
Herewith information concerns your health and safety. It is obligatory to learn about all instructions for use and safety information before rst usage of
the clipper.
The hair clipper is intended for domestic use. In case it is used for commercial use, the guarantee conditions change. –
Connect the power supply adaptor to AC mains supply 230 V. –
Disconnect the power supply adaptor from the mains supply outlet when not in use or before cleaning. –
Do not unplug pulling by the cord. –
The supplying cord should not hang over the edge of a table or desktop, nor touch hot surface. –
If the non-detachable part of the cord is damaged, it should be replaced by the producer or at a proper service point or by a qualied person
in order to avoid any hazards.
This device is intended for cutting natural hair, only. It is allowed to use it only for human hair; – it can not be used for cutting articial or animal
hair. Using the product for other than intended purposes shall cause nullifying the guarantee.
Do not touch the power supply adaptor with wet hands, especially when plugging or unplugging it from the mains supply outlet. –
For the operation with mains use only the adaptor supplied with the hair clipper. –
Connect only to easily accessible mains supply outlet. –
Do not cover the adaptor; it can lead to dangerous temperature increase. –
Always At rst connect the plug into the socket in the clipper or loading base. When it is done, you can connect it to the mains supply outlet. –
Do not use during bath. –
Never immerse the device and cord in water or other liquids. –
43

44
Do not place the hair clipper on wet surface or cloth during operation. –
Do not place or store the device in the area where it can fall into water. –
Do not use the device with damaged comb attachment. It can cause injuries hazard. –
Never try to remove the foreign bodies out of the clipper using sharp objects (i.e. comb). –
Always clean after using. –
This appliance is not intended for use by persons (including children) with reduced physical, sensory or mental capabilities, or lack of experience –
and knowledge, unless they have been given supervision or instruction concerning use of the appliance by a person responsible for their safety.
Children should be supervised to ensure that they do not play with the appliance. –
Do not apply not recommended attachments. –
The hair clipper can be used both as a mains and cordless device. –
The cut hair should be clean, dry and combed. –
Put the towel around the neck to avoid getting the cut hair under the collar. –
Use the hair clipper only as intended according to the herewith instructions. –
ATTENTION: In order to provide additional protection, it is recommended to install the residual current device (RCD) with nominal residua Power not
exceeding 30 mA. You should contact the professional electrician in this concern.
WARNING: Do not use the device near water, over the bath tube, pool or other water basin.
WARNING: Observe the above mentioned rules in order to avoid burning, electric shock or re hazard.
Make sure you understood the a/m instructions.
Specications
The product technical parameters are included at the name plate.
The device is built in II class isolation, it does not require grounding.
ZELMER hair clippers meet the requirements of effective standards.
The device meets the requirements of the following directives:
Low Voltage Device (LVD) – 2006/95/EC. –
Electro- Magnetic Compatibility (EMC) – 2004/108/EC. –
Noise generated by the appliance: 68 dB/A. –
The product is marked with CE symbol on the name plate.
45
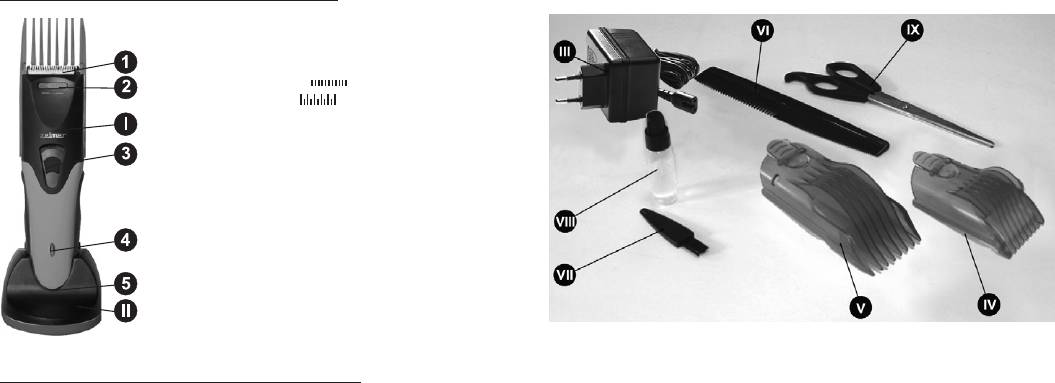
Outline and parts of the hair clipper
I. Hair clipper.
1. Cutting head.
2. Hair thinning knob
(position – OFF,
position – ON).
3. ON/OFF switch.
4. Pilot light.
5. Loading socket.
II. Loading base.
III. Power supply adaptor.
IV. Small comb attachment.
V. Big comb attachment.
VI. Comb.
VII. Cleaning brush.
VIII. Clipper oil.
IX. Scissors.
X. Casing.
Handling and operation of hair clipper
The hair clipper can be used both as a mains supplied or cordless device.
1. Operation with power supply adaptor
At rst insert the adaptor plug into the device and then insert the adapter plug into the mains supply outlet (230 V). In mains supplied mode the device
is ready for use.
2. Loading accumulators and cordless operation
TIP: Load the device minimum 16h before rst usage and when 2–3 next loadings.
In order to load the device move the ON/OFF switch – (3) to OFF position.
Place the device on the loading base – (II).
Connect the loading base – (II) to the adapter cord (III).
Insert the plug of the adapter – (III) into appropriate mains supply outlet (230 V). The loading process is indicated by red pilot light (5) glowing. When
fully loaded the hair clipper can operate approximately sixty minutes.
The hair clipper accumulator obtains optimum power after three cycles of loading and unloading. Ten hours is enough for next loading. In order to –
provide long life of accumulators, they should be completely unloaded before loading.

46
3. Using the clipper for hair cutting and thinning
TIP: Cut the hair for demanded length in stages, start form bigger length.
Insert appropriate comb attachment (small – (IV) or big (V)).
A small comb attachment – (IV) is good for cutting hair from 4–20 mm, whereas the big one (V) from 24–40 mm (see: Comb attachments inserting/
replacing).
Switch the device on moving the ON/OFF switch – (3) to 1 position.
Cut only small areas. –
Move the clipper slowly along hair. –
Hold the device so, that the comb attachment is laid at. –
Always start the cutting from the neck upwards or from the forehead and temples upwards to the top of head. –
In order to thin the hair turn the hair thinning knob (2) to ; position; the thinning attachment integrated with cutting head (1) shall be moved up.
You can reduce the hair volume with this feature. It provides a modern, changed look without the change of hair length.
4. Cutting hair without attachment
WARNING: The cutting head (1) is very sharp. Injury hazard!
You can cut the hair in uniform length of 1–2 mm without comb attachment.
For clipping the hairline of bristle and whiskers, neck shaving:
Move the hair clipper slowly along hair. –
Turn the device so, that the back part was directed upwards. –
Place the edge of the cutting head – (1) without comb attachment on desired length of bristle hairline.
Move down the clipper in operation. –
5. Comb attachments inserting/replacing
It is possible to select one of two comb attachments:
The small attachment can cut hair for the length of: 4 mm, 7 mm, 10 mm, 13 mm, and 16 mm. ●
The big attachment can cut hair for the length of: 18 mm, 21 mm, 24 mm, 27 mm, and 30 mm. ●
Insert an attachment into the side runners of the hair clipper housing. –
At the bottom of the comb attachment there is an oval setting bar. Press it with your thumb and simultaneously push the attachment into desired –
position.
Before you start cutting, make sure that the attachment is rmly blocked. –
Replace one attachment removing it and inserting another as described above. –
In order to shorten hear or beard more, move down the attachment into another position and repeat the cutting process. –
47
Cleaning and maintenance
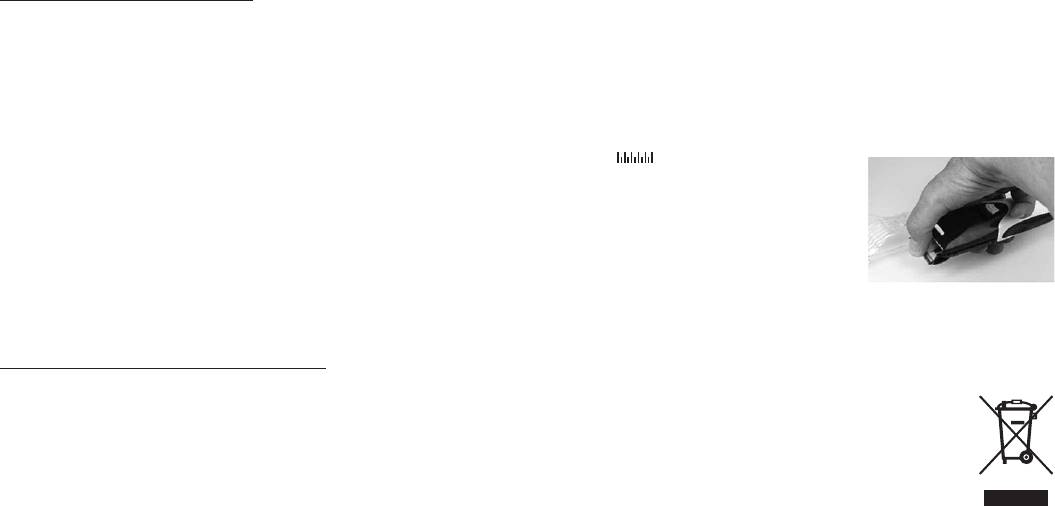
Do not hold the adaptor with wet hands while plugging and unplugging form mains supply outlet. ●
The adaptor and supplying cord should be always dry. ●
It is forbidden to immerse the hair clipper in water or other liquids for cleaning, as the device is not waterproof. It can damage the live parts ●
(accumulators).
Set the ON/OFF switch – (3) to OFF position.
Always switch off the hair clipper and unplug the adaptor from the mains supply outlet before cleaning and maintenance. –
Remove the comb attachment from the hair clipper. –
In order to remove cutting head – (1), at rst move the hair thinning knob (2) right into position.
Press forward cutting head – (1) with your thumb, in order to release the cutting head from the frame.
If necessary, rinse the plastic comb attachments under running water, and then dry them thoroughly. –
Remove the remains of hair from the cutting head – (1) with attached cleaning brush (VII).
Insert the protrusion of cutting head – (1) back into the locking hole in the frame of cutting head.
Press gently the cutting head – (1) in, until you hear a clicking sound of locking.
TIP: In order to reduce friction, from time to time insert one or two drops of oil between the blades and distribute it evenly.
You can use any kind of acidless oil (such as oil for sewing machine). Remove the exceeding oil with cloth.
Ecology – Environment protection
Each user can contribute to protect the environment. It is neither difcult nor expensive. In order to do so:
Return cardboard packages to recycling points.
Throw polyethylene (PE) bags into appropriate containers.
Batteries contain substances harmful to the natural environment. Do not throw them away with other household waste. Return used
batteries to recycling points. Before disposing of or returning the appliance to a recycling point make sure to remove the batteries from
the battery compartment.
Return a worn out appliance to an appropriate collecting point as the components of the appliance may pose a threat to the
environment.
Do not dispose into the domestic waste disposal!!!
The manufacturer/importer does not accept any liability for any damages resulting from unintended use or improper handling.
The manufacturer/importer reserves his rights to modify the product any time in order to adjust it to law regulations, norms, directives, or due to construction, trade,
aesthetic or other reasons, without notifying in advance.
GW 39-003


