GBC AutoUltima Pro Laminator: инструкция
Раздел: Техника
Тип:
Инструкция к GBC AutoUltima Pro Laminator
AutoUltima Pro
Laminator
G
Instruction Manual
F
Manuel d’utilisation
D
Bedienungsanleitung
I
Manuale d’istruzioni
O
Gebruiksaanwijzing
E
Manual de instrucciones
P
Manual de Instruções
S
Bruksanvisning
Q
Instrukcja obsługi
CZ
o
Návod k obsluze
H
Használati útmutató
RUS
o
Руководствo по
зкcплyатации
English 4
Français 16
Deutsch 28
Italiano 40
Nederlands 52
Español 64
Português 76
Svenska 88
Polski 100
Česky 112
Magyar 124
Pyccкий 136

1
7
8
2
9
3
J
K
4
L
5
6
Start Stop
4
Enter
M
N O
4
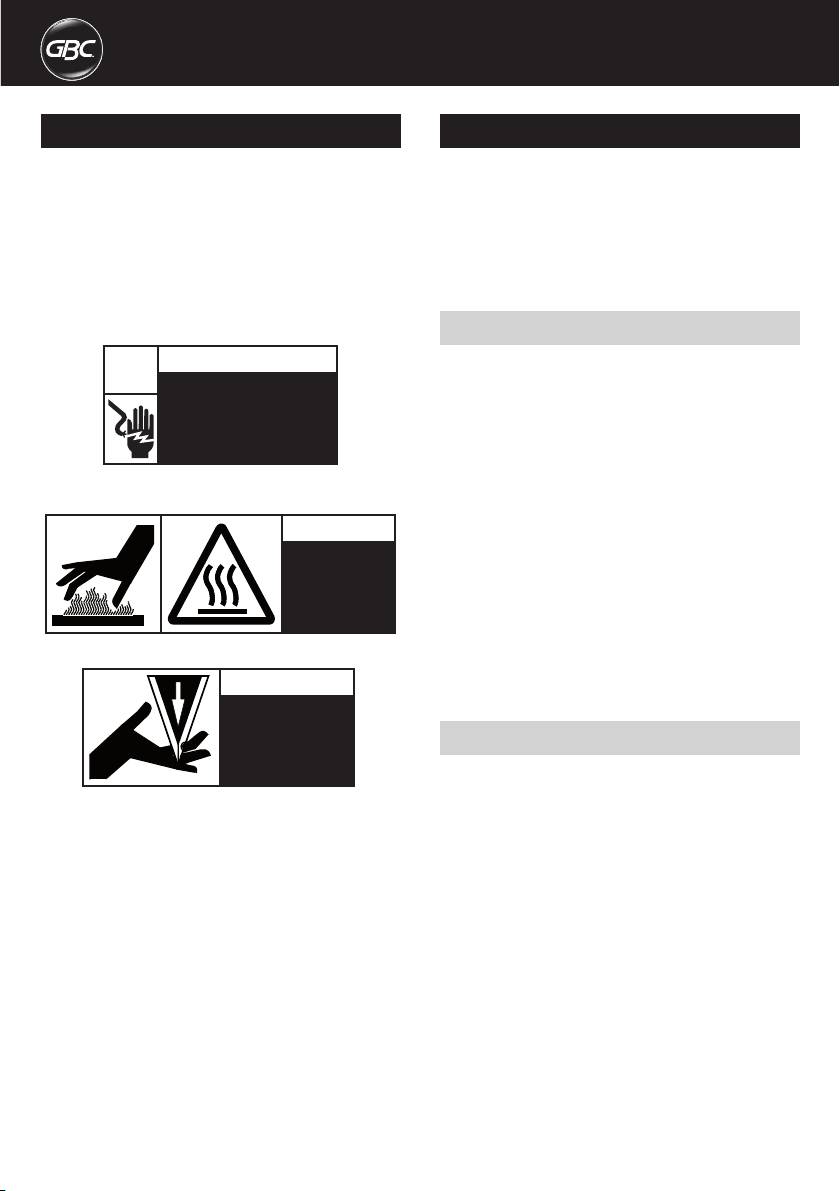
Important safety instructions
Important safeguards
m
m
YOUR SAFETY AS WELL AS THE SAFETY OF OTHERS IS IMPORTANT
WARNING: FOR YOUR PROTECTION, DO NOT CONNECT
TO ACCO BRANDS EUROPE. IN THIS INSTRUCTION MANUAL AND ON
m
THE LAMINATOR TO ELECTRICAL POWER OR ATTEMPT
THE PRODUCT ARE IMPORTANT SAFELY MESSAGES. READ THESE
TO OPERATE UNTIL YOU READ THESE INSTRUCTIONS
MESSAGES CAREFULLY.
COMPLETELY. KEEP OPERATING INSTRUCTIONS IN
A CONVENIENT LOCATION FOR FUTURE REFERENCE.
THE SAFETY ALERT SYMBOL PRECEDES EACH SAFETY
TO GUARD AGAINST INJURY, THE FOLLOWING BASIC
m
MESSAGE IN THIS INSTRUCTION MANUAL.
SAFETY PRECAUTIONS MUST BE OBSERVED IN THE
ON THE PRODUCT YOU WILLFIND IMPORTANT SAFETY
SET·UP AND USE OF THE LAMINATOR.
MESSAGES. READ THESE MESSAGES AND INSTRUCTIONS
CAREFULLY SAVE THESE INSTRUCTIONS FOR LATER USE.
THE FOLLOWING WARNINGS ARE FOUND ON THIS PRODUCT.
General safeguards
WARNING
• Use this laminator only for its intended purposes as according to the
m
specifications outlined in the operating instructions.
c
Electrical shock hazard.
• Keep hands, long hair, loose clothing and articles such as necklaces
Do not open. No user
or ties away from the front of the pull rollers to avoid entanglement
serviceable parts inside.
and entrapment
Refer servicing to qualified
service personnel.
• Avoid contact with the heat shoes during operation or shortly after the
laminator has been turned off, The heat shoes can reach temperatures
This safety message means that you could be seriously hurt or killed if
in excess of 30O"F.
you open the product and expose yourself to hazardous voltage.
• Keep hands and fingers away from the path of the sharp film cutter
blade located at the film exit.
m
CAUTION
• Place the laminator on a stable cart, stand or table capable of
supporting at least 50kg. An unstable surface may cause the laminator
Hot
to fall resulting in serious bodily injury, Avoid quick stops. excessive
surface.
force and uneven floor surfaces when moving the laminator on a cart
or stand.
• Do not defect or remove electrical and mechanical safety equipment
such as interlocks, shields and guards.
Do not touch heat shoes until they have cooled.
• Do not insert objects unsuitable for lamination.
m
CAUTION
• Do not expose laminator to liquids.
SHARP BLADE.
Keep hand and
Electrical safeguards
fingers away.
m
• This laminator must be connected to a supply voltage corresponding
to the electrical rating as indicated on the serial plate located on the
This safety message means that you could cut yourself if you are not
rear of the machine.
careful.
• Unplug the laminator before moving it, or when it is not in use for an
extended period of time.
WARNING: THE SAFETY ALERT SYMBOL PRECEDES
• Do not operate the laminator with a damaged power supply cord or
m
EACH SAFETY MESSAGE IN THIS INSTRUCTION
plug.
MANUAL. THIS SYMBOL INDICATES A POTENTIAL
• Do not overload electrical outlets as this can result in fire or shock.
PERSONAL SAFETY HAZARD THAT COULD HURT YOU
OR OTHERS, AS WELL AS CAUSE PRODUCT DAMAGE OR
• Do not alter the attachment plug, This plug is configured for the
PROPERTY DAMAGE.
appropriate electrical supply.
• The unit is intended for indoor use only.
WARNING: DO NOT ATTEMPT TO SERVICE OR REPAIR
CAUTION: The power source must be located near the
m
THE LAMINATOR.
m
equipment and easily accessible. Do not use an extension cord.
WARNING: DO NOT CONNECT THE LAMINATOR TO AN
• Disconnect the attachment plug from the power source to which it is
m
ELECTRICAL SUPPLY OR ATTEMPT TO OPERATE THE
connected and keep the power supply cord in your possession while
LAMINATOR UNTIL YOU HAVE COMPLETELY READ THESE
moving the laminator.
INSTRUCTIONS. MAINTAIN THESE INSTRUCTIONS IN A
• Do not operate the laminator with a damaged power supply cord or
CONVENIENT LOCATION FOR FUTURE REFERENCE.
attachment plug, upon occurrence of a malfunction, or after laminator
has been damaged. Contact an authorized GBC service representative
for assistance.
4

G
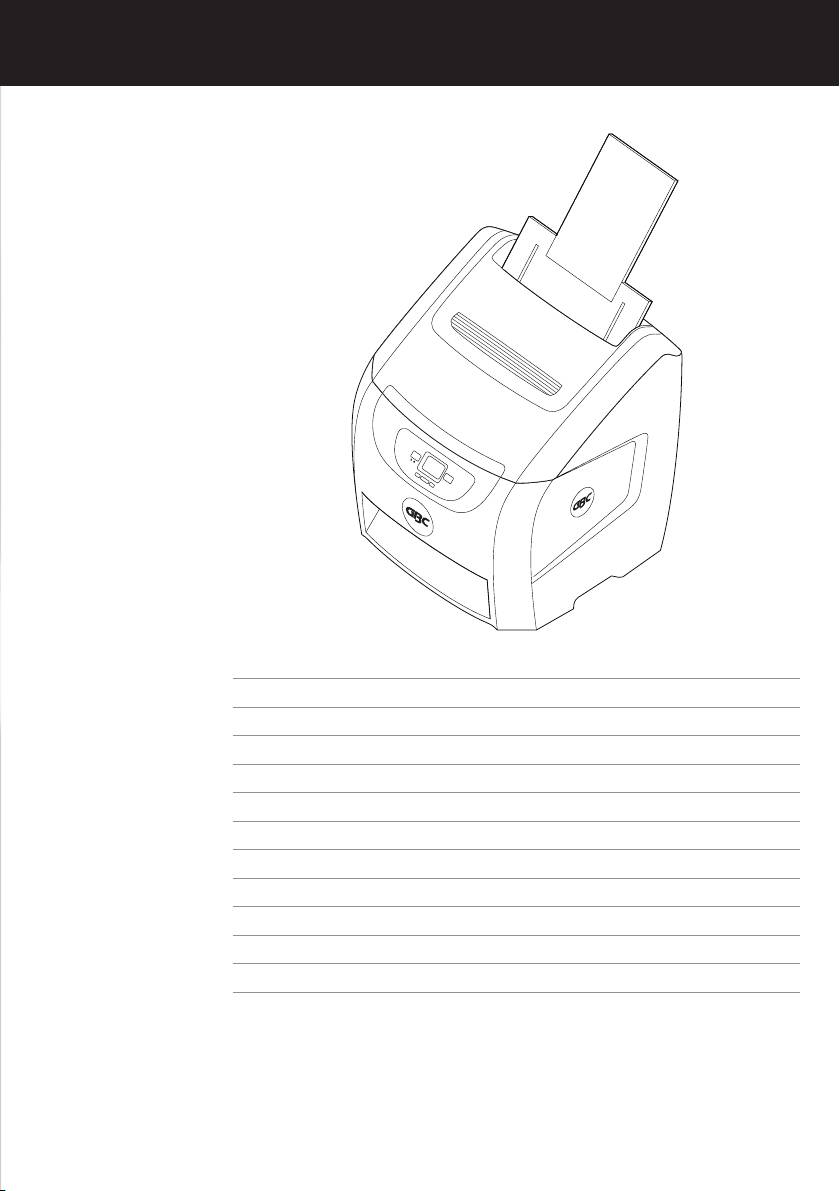
Location of controls
Service
1
Feed Tray
Perform only the routine maintenance procedures referred to in these
instructions.
2
Paper Side Guide
Do not attempt to service or repair the laminator.
3
Top Cover
m
4
Control Panel
Unplug the unit and contact an authorised GBC service representative if
one or more of the following has occurred:
5
Exit Tray
• The power supply cord or attachment plug is damaged.
6
Power Button
• Liquid has been spilled into the laminator.
7
4 EZ Load Levers
• The laminator is malfunctioning after being mishandled.
8
Heat Button
• The laminator does not operate as described in these instructions.
9
Feed Switch
WARNING: THIS IS NOT A TOY - DO NOT ALLOW
J
Idler Bar Assembly
m
CHILDREN TO OPERATE THIS LAMINATOR!
K
Heat Shoe
L
Film Roll
M
Power LED (Red)
N
Ready LED (Green)
O
Scroll Button
Installation
• Shipping damage should be brought to the immediate attention of the
• The laminator should be positioned to allow exiting film to drop freely
delivering carrier.
to the floor. Accumulation of laminate as it exits the laminator may
cause film to wrap around the rollers causing a jammed condition.
• Place the laminator on a stable flat surface capable of supporting
50kg. The surface should be at least 76cm high to assure comfortable
• Avoid placing laminator near sources of heat or cold. Avoid locating the
positioning during operation. All four rubber feet should be on the
laminator in the direct path of forced, heated or cooled air.
supporting surface.
• Connect power cord to an appropriate power source. Avoid connecting
other equipment to the same branch circuit to which the laminator is
connected as this may cause nuisance tripping of the circuit breaker
or blown fuses.
Caring for the AutoUltima Pro Laminator
The only maintenance required by the operator is to periodically dean
1
Preheat the laminator using the heat button.
the heal shoes. This should only be done when changing film rolls,
2
Clean the top and bottom heat shoes with a soft cloth.
please see page 7 steps 1, 2, &3. The following procedure will help keep
3
Follow the procedure on page 7, steps 4, 5, 6 & 7.
the heal shoes free of adhesive that has been deposited along the edge
of the laminating film.
NOTE: Do not use metal scouring pads to clean the heat shoes!
CAUTION: THE FOLLOWING PROCEDURE IS PERFORMED
WARNING: Do not laminate glitter and/or metallic items. Damage to
m
WHILE THE LAMINATOR IS HOT. USE EXTREME CAUTION.
the rollers may result.
WARNING: Do not apply cleaning fluids or solvents to
m
the rollers.
WARNING: Do not attempt to laminate adhesives
m
marked 'flammable'.
5
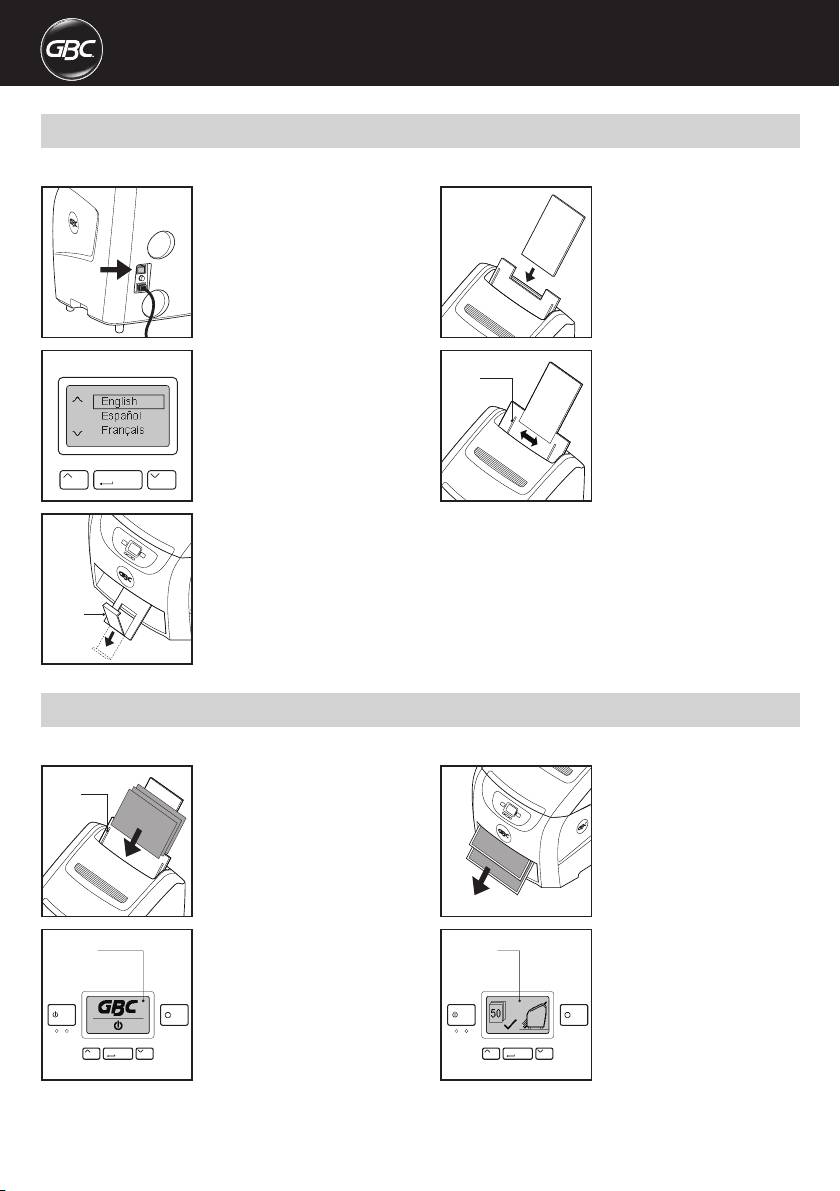
AutoUltima Pro - Setup
Laminator comes pre-Ioaded with 75mic film, Approximately 90 metres.
1
In back of machine turn on power.
4
Insert and secure feed tray into
Power light LED front control panel
position.
lights up.
2
First time only, scroll up or down
5
Adjust "Paper Side Guides" to fit
Side
to select language setting, then
document(s).
Guides
press "Enter". To reset language,
hold down both scroll buttons for
5 seconds, select language then
press enter.
Enter
3
Open tray for normal operation. For
longer paper or banners close tray.
Tra y
AutoUltima Pro - Setup
Laminator comes pre-Ioaded with 75mic film, Approximately 90 metres.
1
Adjust paper side guides and place
3
Laminated document(s) will stack
Side
document(s) in feed tray.
in Exit Tray. Lamination will stop
Guides
when job is complete.
2
Press start and lamination will
4
LCD screen will display number of
Screen
Screen
begin after warm up.
documents being laminated.
Start Stop
Start Stop
Enter
Enter
6
G
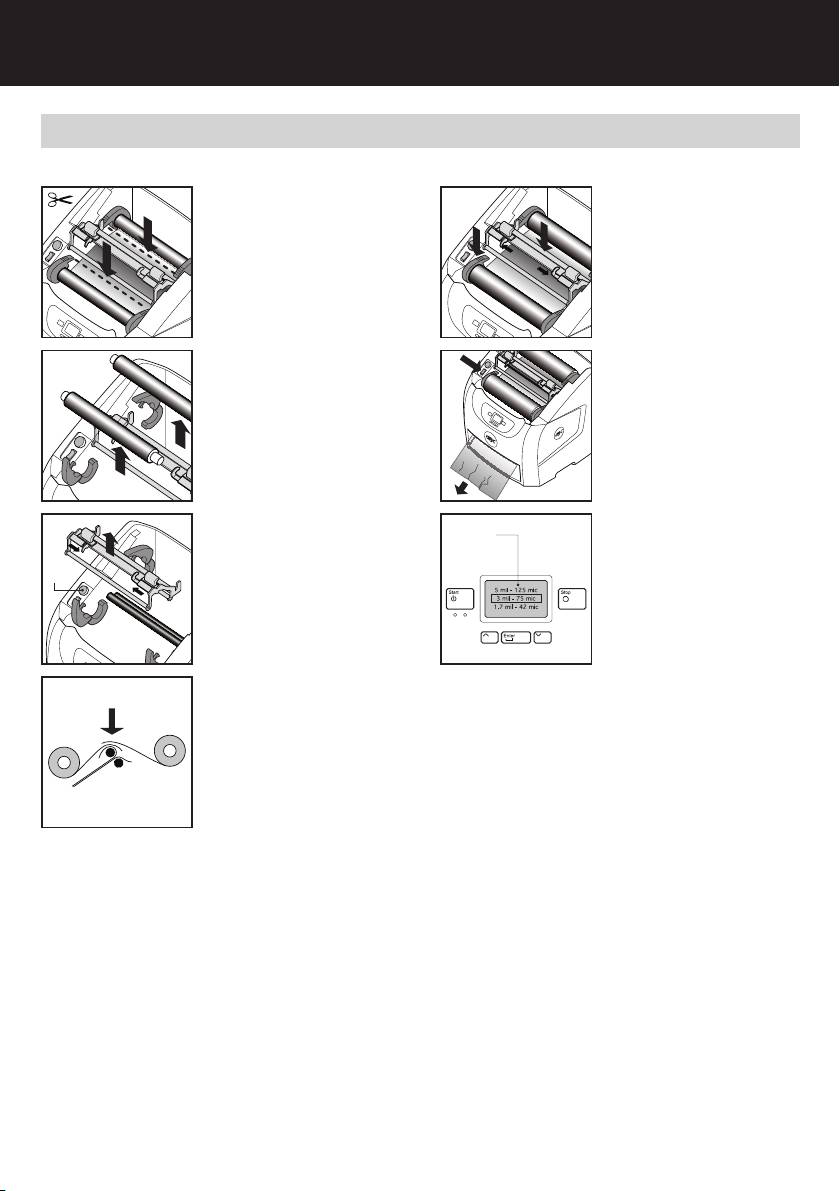
AutoUltima Pro – Load Film
IF POSSIBLE, ALWAYS LOAD FILM BEFORE RUNNING COMPLETELY OUT.
1
Cut laminating film as indicated. If
5
Insert and lock Idler Bar Assembly,
film is not present see next page.
then close 4 EZ Load levers.
2
Open all 4 "EZ" Load levers and
6
Press feed switch (forward) and
remove film.
hold until wrinkle-free lamination.
Close top.
3
Remove Idler Bar Assembly, then
7
Scroll up or down to select film
Screen
press "Heat" button.
thickness. Press "Enter" to
confirm. Press "Start" to resume
Heat
Button
lamination. To reset film thickness,
hold enter button for 5 seconds,
select film thickness then press
"Enter".
4
Insert new film, overlap film on
Heat Shoe.
Note: Match colours of film core
ends to EZ Load Levers.
7
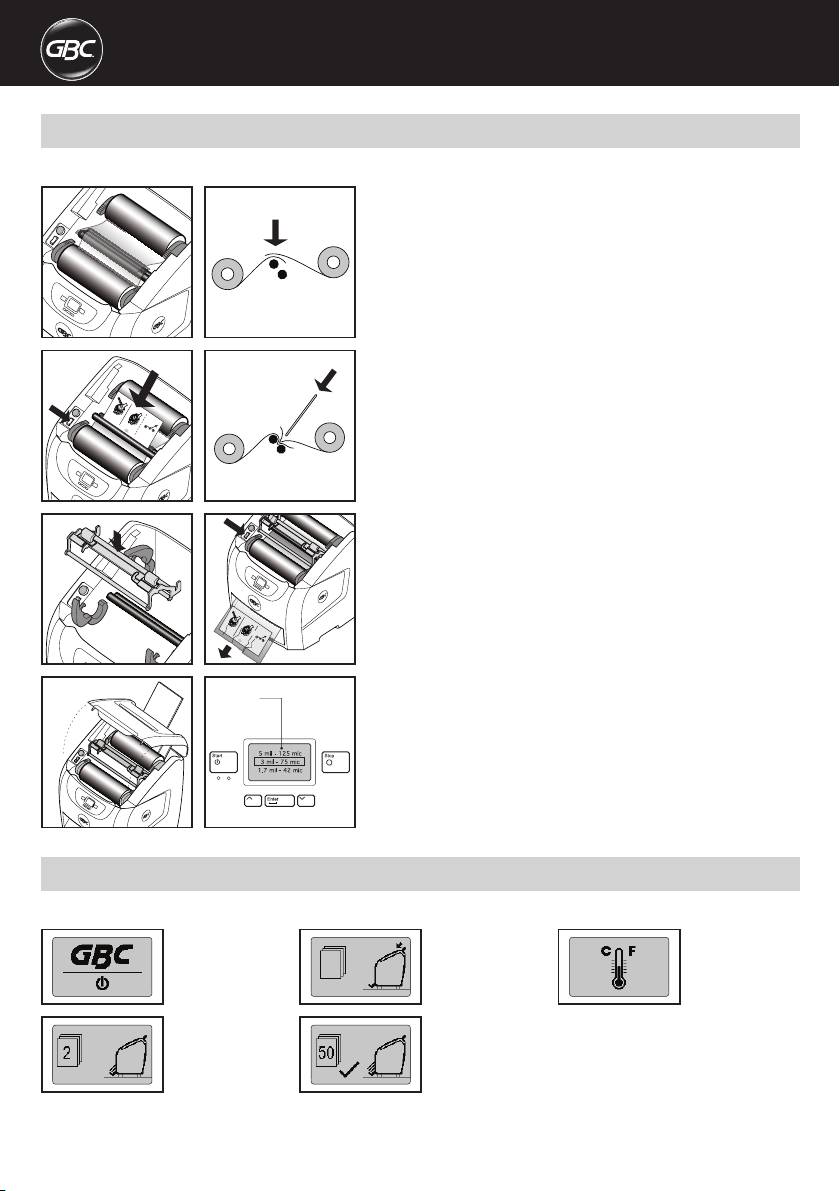
AutoUltima Pro – Load Film
USE INSTRUCTIONS BELOW TO LOAD NEW FILM IF COMPLETELY EMPTY.
1
First, complete steps 2, 3 and 4
from "Load Film" page 7. Close 4
EZ levers.
2
Press "Feed" switch (forward)
and insert "Feed Card" as shown.
Insert card with slight force
through film rollers.
3
Insert Idler Bar Assembly. Continue
pressing feed switch and wait for
clear, wrinkle-free lamination.
4
Close top cover, scroll up or down
Screen
to select film thickness. Press
"Enter" to confirm. Press "Start" to
resume lamination.
AutoUltima Pro – Status Message
Laminator comes pre-Ioaded with 75mic film, Approximately 90 metres.
Standby Screen.
Load document(s) to
Machine is in heat
be laminated.
mode. Machine is
warming to operating
temperature.
Counting screen,
Job complete screen.
showing pages
Total pages laminated.
laminated so far.
8
G
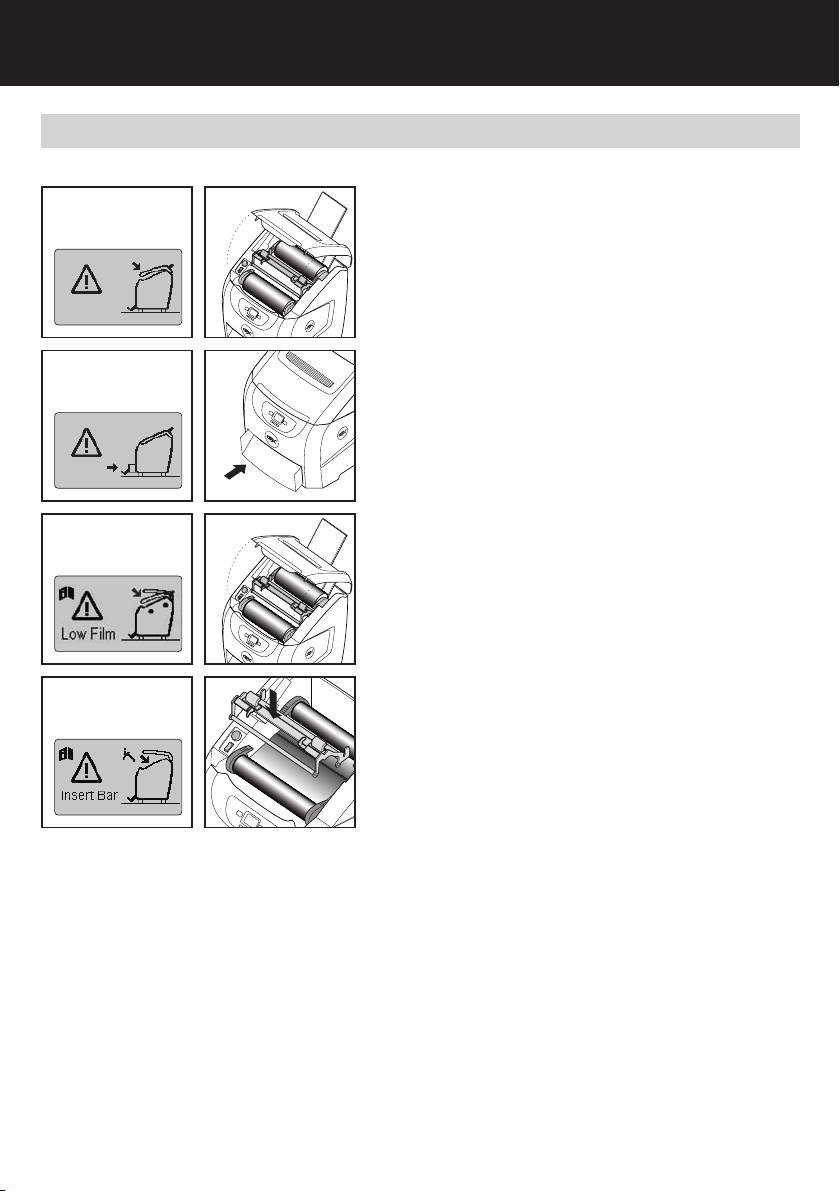
AutoUltima Pro – Alert Messages
Do not attempt to take machine apart - No User Servicable Parts.
TOP COVER ALERT
Top cover is open. Close it and resume
(Alert Message)
lamination.
FRONT DRAWER ALERT
Close front drawer and resume
(Alert Message)
lamination.
LOW FILM ALERT
Open top cover and load new film rolls.
(Alert Message)
Refer to "Load Film", pg. 7 and 8.
IDLER BAR ASSEMBLY ALERT
Insert and lock the Idler Bar assembly.
(Alert Message)
Close top cover and resume
lamination.
9
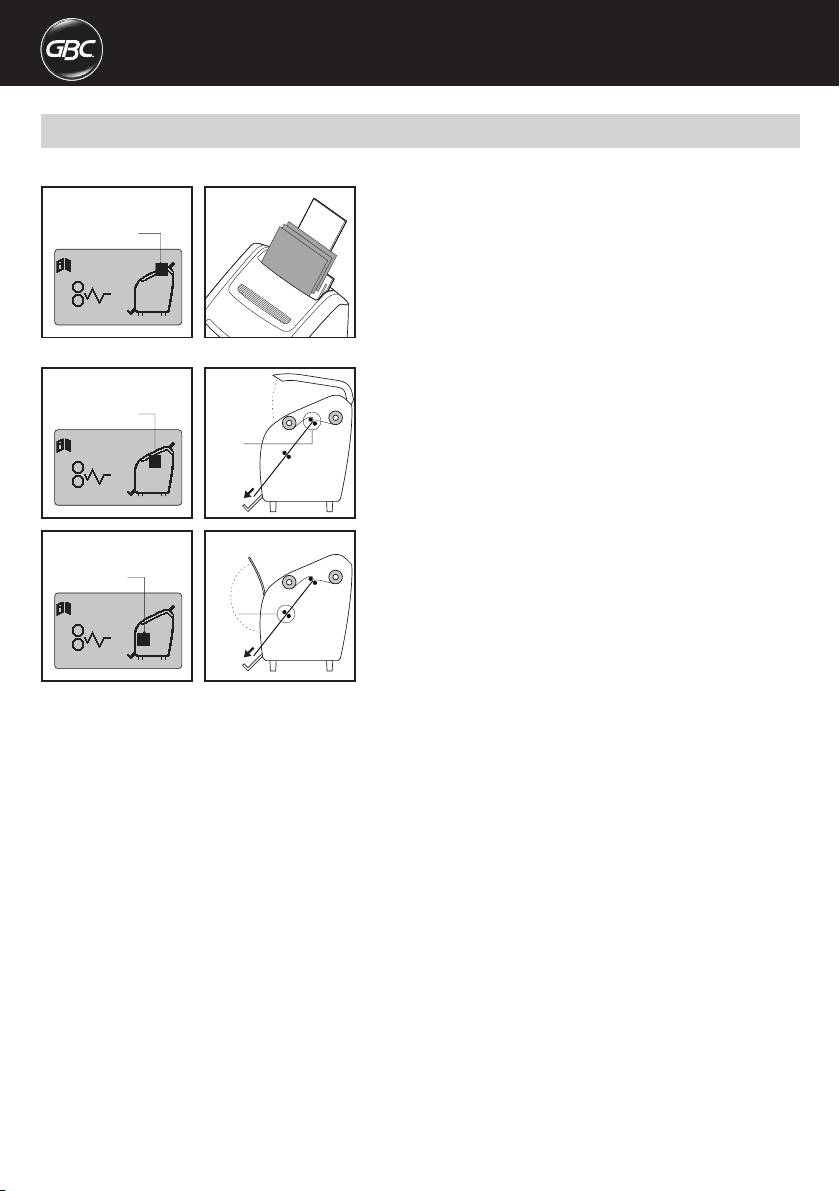
AutoUltima Pro – Error Messages
Do not attempt to take machine apart - No User Serviceable Parts.
FEED JAM ERROR
(Jam Message)
Remove document(s) and any debris
from feed tray, Fan documents and
Jam Location
adjust size guides, Press "Start" to
resume.
JAM ERROR
(Jam Message)
A) Open covers
Jam Location
B) Locate film Jam
C) Press Heat button
Jam
Use Feed switch (forward/reverse) to
clear jam, It may be necessary to cut
and remove film, (Take care not to
damage rollers when cutting film), If
cutting is required, use Feed switch
(forward I reverse) to re-feed film
(Jam Message)
through machine.
Jam Location
Jam
10
G
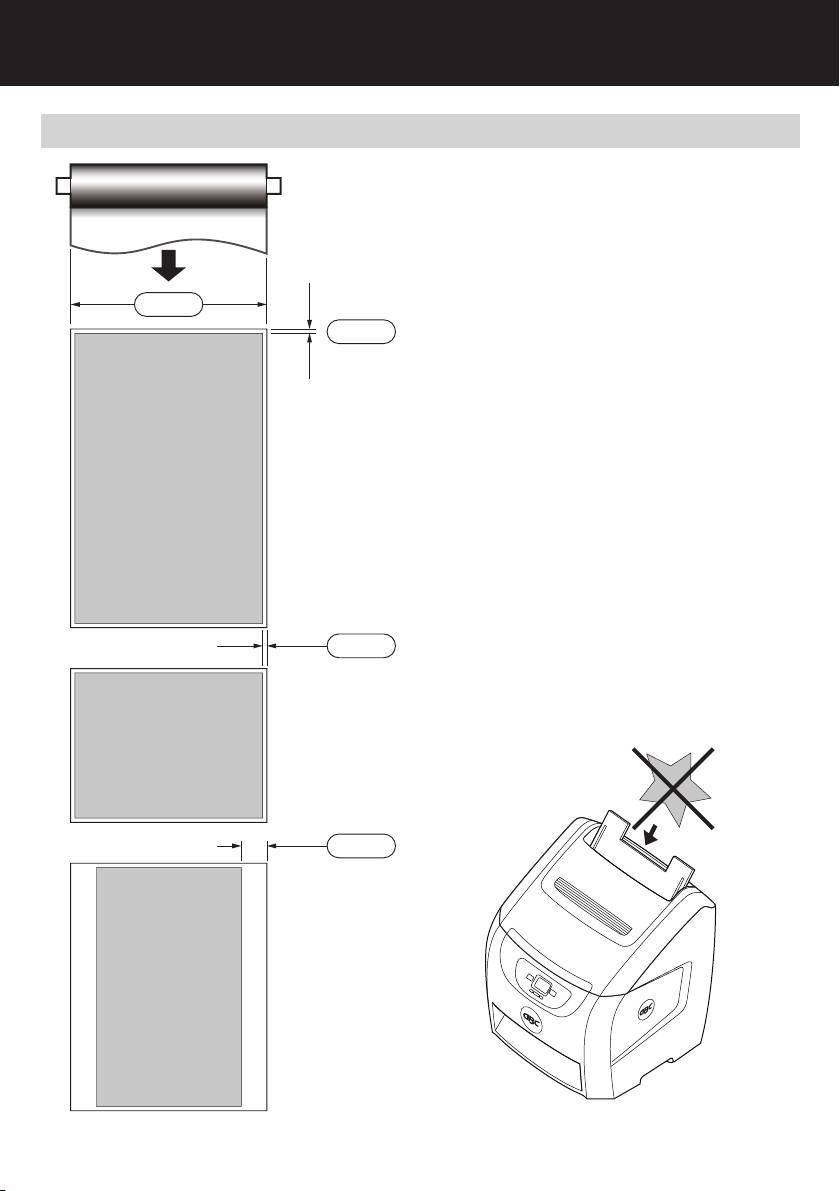
AutoUltima Pro – Document Size
If possible, always load documents in
landscape format. Top and bottom film
Lamination Direction
border is always 6mm, and side film borders
will vary depending on document size.
For recommended max document length,
305mm
see specifications, pg. 14.
5mm
A3
297x420mm
420mm
297mm
4mm
For best lamination results, avoid irregular
shapes as shown below.
A4
297x210mm
210mm
297mm
41.5mm
A4
210x297mm
297mm
210mm
11

AutoUltima Pro – Troubleshooting
Symptoms Possible cause Corrective action
No power switch, does not illuminate when
Power cord is not plugged
Plug into live outlet
in on position
into live power outlet
Circuit breaker has tripped Reset circuit breaker at
rear of machine
Machine does not respond after pressing
Cover is open Close cover
standby button
No paper in feeder Insert paper
Idler bar assembly
Latch idler bar levers
not latched
Document collection tray
Fully insert document
is not fully inserted
into exit tray
Main power switched off Turn on power
Low film Load new film
Faint lines across the document
Machine is not fully warm Allow time to warm up
Incorrect film setting Select correct film setting
Cloudy lamination
Insufficient heat Verify correct film setting
Wavy lamination
Media not compatible Media is not suitable
Unsatisfactory adhesion to media
for thermal lamination
Feeder does not feed document Media not compatible
Manually feed single
with feeder
sheets
Paper is not fully inserted
Fully insert paper to
to feeder
feeder
Document is skewed in film Feeder side guides
Adjust feeder side guides
not set correctly
to paper size
Feeder picks multiple documents Static electricity on media, or
Fan paper and replace
media is stuck together
in feeder
Wrinkles in document EZ Load levers not closed Close EZ Load Levers
12

G
AutoUltima Pro – Specifications
1. WARM-UP TIME
6. FEEDER CAPACITY
Note: If machine is warm, the warm up times are reduced.
A) Maximum of 50 sheets at 75 gsm
1.7 mil - 42 micron Max 2.5 minutes from cold
7. MACHINE WEIGHT
3 mil - 75 micron Max 1minutes from cold
A) In box 36 kg
5 mil - 125 micron Max 1minutes from cold
B) Out of box 32 kg
2. SPEED
8. DIMENSIONS (with tray open)
A) The machine throughput speed is 1000mm per minute
483mm Wide x 787mm High x 686mm Deep
B) Equivalent to 4 letter or A4 documents per minute
C) 50 letter or A4 sheets take approximately 12 minutes
9. ELECTRICAL SPECIFICATIONS
230v, @50Hz, 3.5A
3. PAPER SIZES AND THICKNESS
Max paper thickness 360 gsm
Min paper thickness 75 gsm
Max paper width 12" film, 11.6" - 297 mm
11.5" film, 11" - 280 mm
Min paper width 152mm
Max paper length 1220 mm
4. BORDER SIZES
A4 paper (side border) 305 mm wide film 4mm
A4 paper (top &bottom border) 305 mm wide film 5mm
5. FILM THICKNESS
42 microns Very Flexible
75 microns Flexible
125 microns Semi Rigid
13

AutoUltima Pro – Lamination Tips
• Before laminating important or unique documents, always run a test
document through the laminator using a similar media
• Laminator is only designed to laminate specified paper products
• Do not laminate 'odd' shape documents
• Do not completely run out of film when in Manual mode (loading film)
• NOTE: First sheets will be film only
• Do not use punched paper
• Avoid folded or creased paper
• CLOSE document capture tray if laminating documents longer than
regular
• A4 or letter size documents
• For ease of film loading, stick new film to existing film, see page 7,
step 4 diagram.
Guarantee
Operation of this machine is guaranteed for one year from date of
persons not authorised by ACCO Brands Europe will invalidate the
purchase, subject to normal use. Within the guarantee period, ACCO
guarantee. It is our aim to ensure that our products perform to the
Brands Europe will at its own discretion either repair or replace the
specifications stated. This guarantee does not affect the legal rights
defective machine free of charge. Defects due to misuse or use for
which consumers have under applicable national legislation governing
inappropriate purposes are not covered under the guarantee. Proof
the sale of goods.
of date of purchase will be required. Repairs or alterations made by
Register this product online at www.accoeurope.com
14

G
15
