GBC C20: инструкция
Раздел: Техника
Тип:
Инструкция к GBC C20
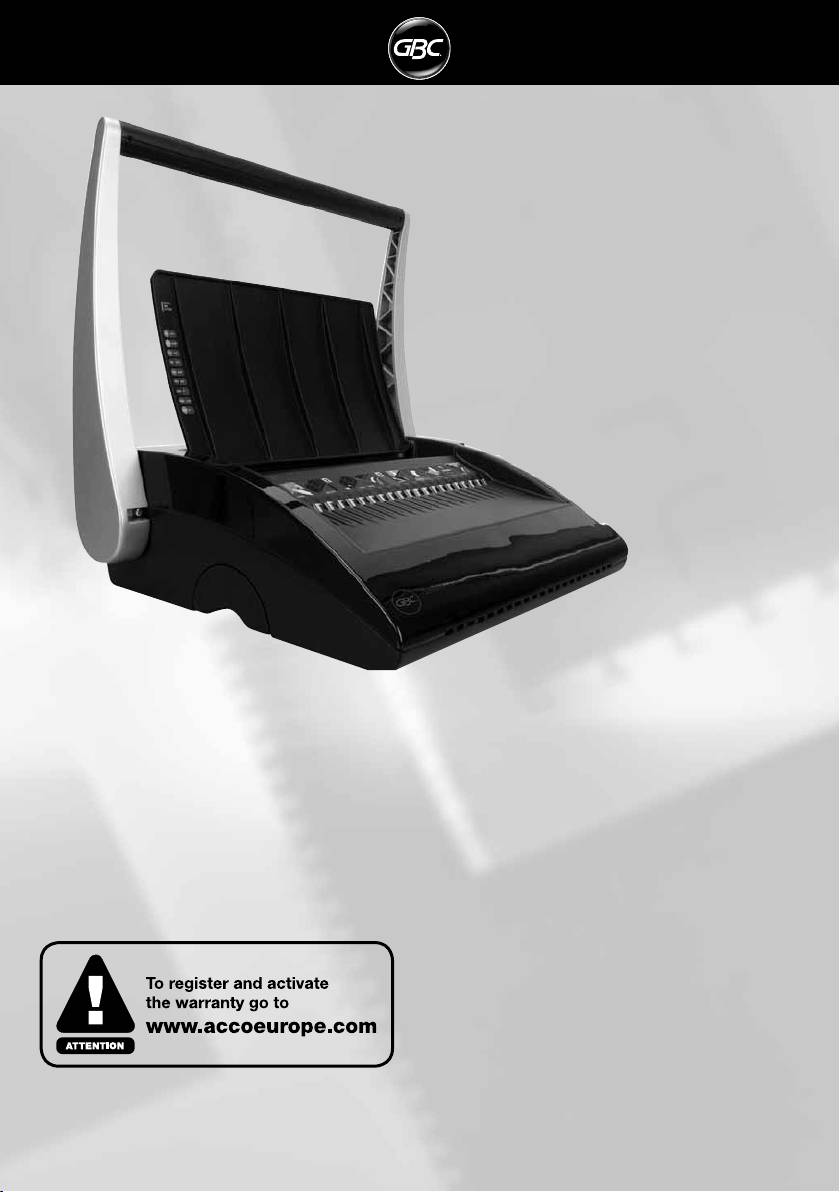
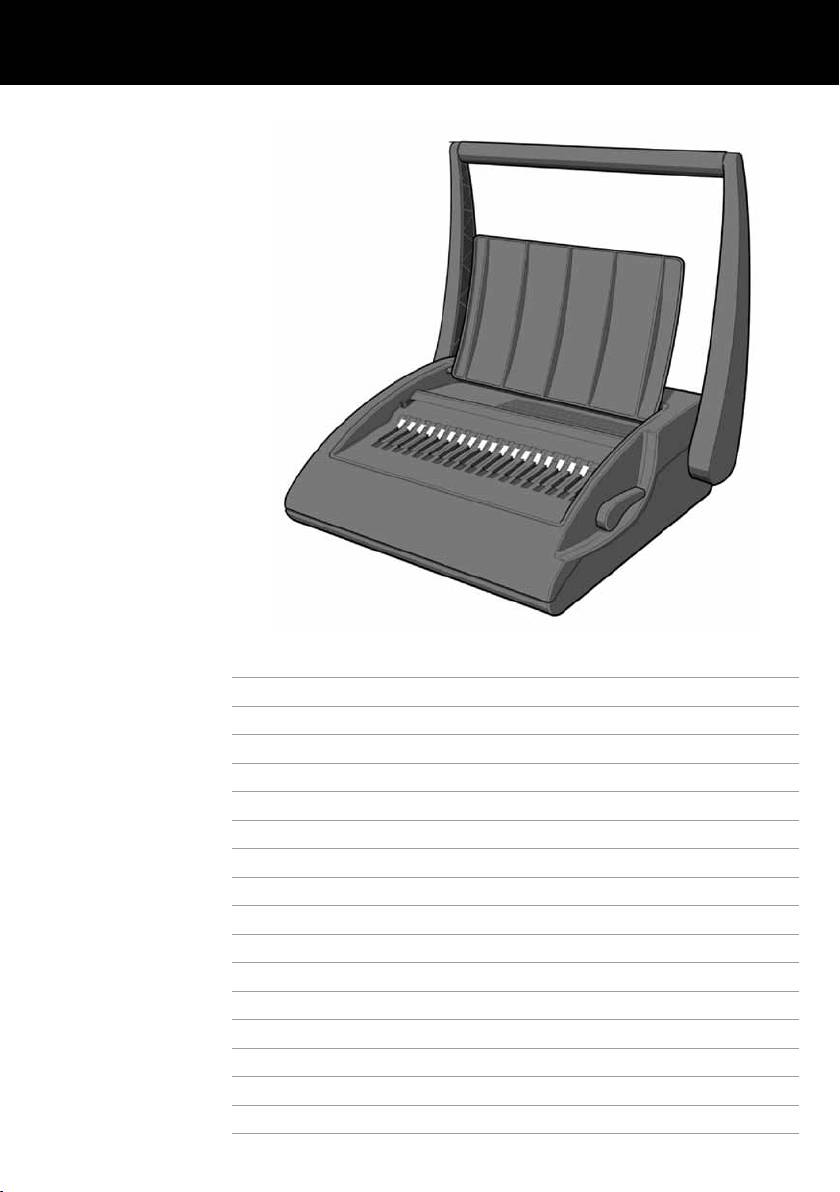
CombBind C20
G
Instruction Manual
F
Manuel d’utilisation
D
Bedienungsanleitung
I
Manuale d’istruzioni
O
Gebruiksaanwijzing
E
Manual de instrucciones
P
Manual de Instruções
T
Kullanım Kılavuzu
K
Οδηγίες
c
Brugsvejledning
FI
o
Käyttöopas
NO
o
Bruksanvisning
S
Bruksanvisning
Q
Instrukcja obsługi
o
CZ
Návod k obsluze
H
Használati útmutató
RUS
o
Руководствo по
зкcплyатации
English 4
Français 6
Deutsch 8
Italiano 10
Nederlands 12
Español 14
Português 16
Türkçe 18
Ελληνικά 20
Dansk 22
Suomi 24
Norsk 26
Svenska 28
Polski 30
Česky 32
Magyar 34
Pyccкий 36
1 32
4 65
7 98

Specifications
GBC CombBind C20
Max. width of paper
Letter, DIN A4 – 297mm
Punching capacity paper
Max. 20 sheets (80gsm)
Punching capacity, plastic covers
Max 2 sheet, 0.2mm each
Net weight
9.8 kg
Dimensions (W x D x H)
465x405x150mm
Subject to technical changes without prior notice.
Special notice
Safety instructions
m
Thank you for choosing a GBC Binding Machine. We aim to
YOUR SAFETY AS WELL AS THE SAFETY OF OTHERS IS
produce quality binding machines at an affordable price, with
IMPORTANT TO ACCO BRANDS EUROPE. IN THIS INSTRUCTION
many advanced features to enable you to create excellent
MANUAL AND ON THE PRODUCT ARE IMPORTANT SAFETY
results every time. Before using your machine for the first time,
MESSAGES. READ THESE MESSAGES CAREFULLY.
please take a few minutes to read through this guide.
Helpful hints
Maintenance
For maximum productivity follow stages 6 to 9 starting with
Please ensure that the clippings tray is emptied on a regular
your front cover, then your paper sheets (20 at a time) and
basis. This will prevent blockage and ensure that the unit is
finishing with the back cover.
always ready to punch. The clippings tray can be accessed
For best results always use GBC brand covers with GBC colour-
from the side of the machine.
coordinated binding combs.
In order to prevent overloading never try and punch more than
The binding comb can be opened and closed again at any time
the maximum numbers of sheets recommended (20 sheets of
to replace or add individual sheets (see step 2).
80gsm). The unit is maintenance free if handled correctly.
Service
Contact an authorised GBC service representative for any
required repairs.
4

G
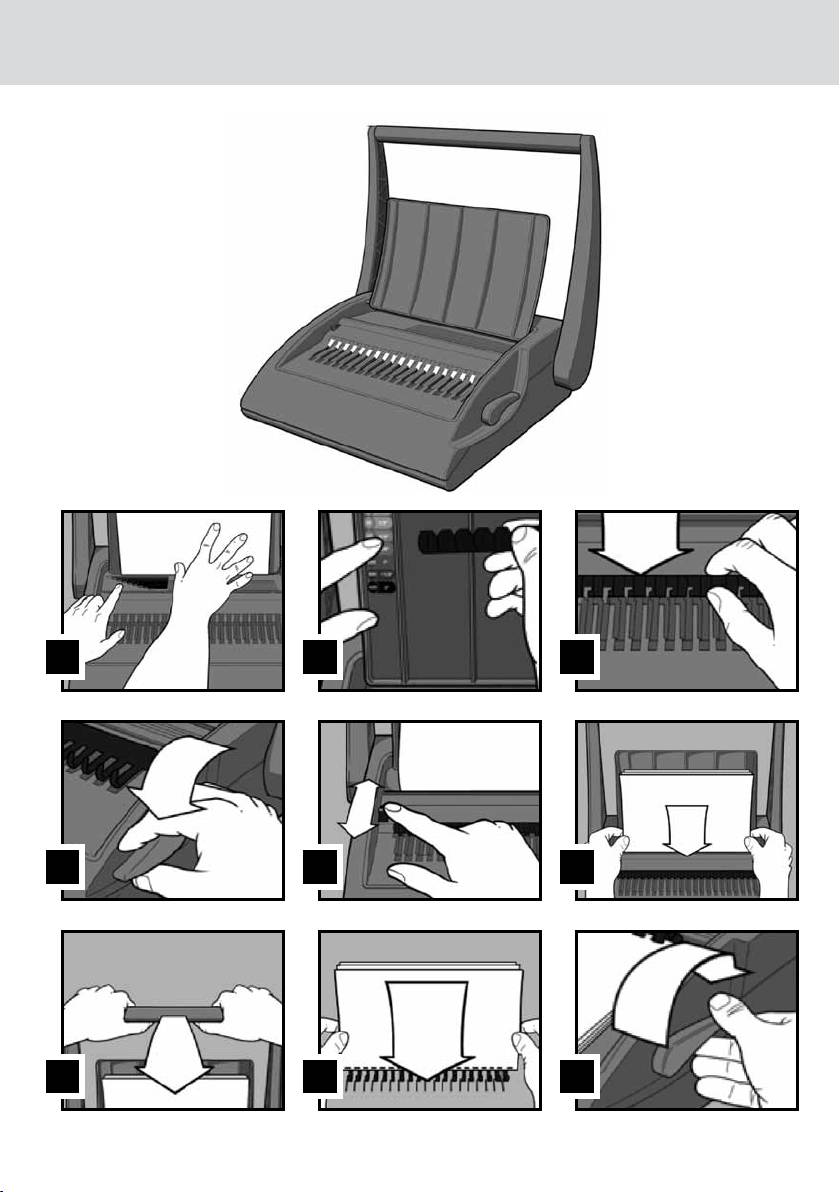
How to bind
1
Measure document using colour coded guide (fig.1)
6
Load pages into slot (fig.6)
Open the lid of the machine and rest your document
You can punch 2 cover sheets (PVC /240gsm Card only
(including any cover sheets you have chosen) against the lid
- other materials x 1 sheet) or up to 20 sheets of paper
on the ‘staging’ area provided. Gently push the document
(80gsm) at a time.
back against the lid and check the document size using the
Using the conventional method: Select the quantity
colour coded guide on the staging area. You can leave your
of sheets to punch and tap the edge of the sheet stack
document on the staging area in readiness to punch.
against the staging area to ensure that all sheets are
2
Select comb which fits your document (fig.2)
aligned. Place the stack to be punched directly into the
Use the comb size guide to select the size of comb that fits
punching slot and slide to the left until it comes to rest
your document i.e. 25 sheet document = 6mm comb.
against the edge guide. Your sheets will now be perfectly
aligned. Let go of the sheets and grasp the punch handle
3
Load comb onto machine (fig.3)
with both hands.
Insert the binding comb next to the white positional arrow
on the machine, behind the metal comb support fingers,
Using the gravity fed paper count method for
with the open side of the comb pointing upwards.
increased productivity: Pull forward your document (or
a stack of sheets from your document) from its resting
Note: If using GBC ProCombs™ the white arrow on your
position against the lid. Continue until it meets the wall in
comb should align to the white arrow on the machine.
front of the punch slot. Relax your grip on the document
4
Open comb by turning lever towards you (fig.4)
or stack and the first 20 sheets will fall directly into the
The coloured arrows adjacent to the opening comb act as
punching slot. Return the sheets not engaged in the punch
a guide as to how far to open in order to allow punched
slot back to a resting position against the lid. Slide the
sheets to be easily inserted.
sheets in the punching slot to the left as far as they will
go. Your sheets will now be perfectly aligned. Let go of the
Note: If using GBC ProCombs™ the coloured line on your
sheets and grasp the punch handle with both hands.
comb should align to the coloured arrows on the machine
for faster binding.
7
Punching the document (fig.7)
Punch pages by pulling handle down, then lift the handle
5
Select document size (fig.5)
back to the vertical position and remove the punched
Adjust the edge guide button to select the paper / cover
sheets. Note: To prevent jams do not attempt to punch more
size you wish to bind; A4 (297mm x 210mm) or Letter
than two cover sheets at a time. (PVC /240gsm Card only,
(215mm x 279mm) When using oversized covers, select the
other materials x 1 sheet)
oversize position, punch the covers for your document and
set aside. Then select either A4 or Letter and proceed.
8
Assemble pages onto open comb (fig.8)
Remove the sheets from the punch slot and insert onto the
fingers of the binding comb.
9
Repeat process as required
Repeat stages 6-8 until your document is fully loaded on
the comb.
J
Close (fig.9)
Close comb and remove document.
Guarantee
Operation of this machine is guaranteed for two years from
required. Repairs or alterations made by persons not authorised
date of purchase, subject to normal use. Within the guarantee
by ACCO Brands Europe will invalidate the guarantee. It is our
period, ACCO Brands Europe will at its own discretion either
aim to ensure that our products perform to the specifications
repair or replace the defective machine free of charge. Defects
stated. This guarantee does not affect the legal rights which
due to misuse or use for inappropriate purposes are not
consumers have under applicable national legislation governing
covered under the guarantee. Proof of date of purchase will be
the sale of goods.
Register this product online at www.gbceurope.com
5

Spécifications
GBC CombBind C20
Largeur papier maxi
Letter, DIN A4 – 297 mm
Capacité de perforation maxi,
20 feuilles (80 g/m²)
papier
Capacité de perforation maxi,
2 feuilles de couverture de 0,2 mm
couvertures plastique
d’épaisseur
Poids net
9,8 kg
Dimensions (l x p x h)
465 x 405 x 150 mm
Données techniques sujettes à modification sans préavis.
Notification spéciale
Consignes de sécurité
m
Merci d’avoir choisi une perforelieuse GBC. Nous visons à
VOTRE SÉCURITÉ AINSI QUE CELLE DES AUTRES EST
produire des machines de qualité à un prix abordable et offrons
IMPORTANTE POUR ACCO BRANDS EUROPE. DANS CE MANUEL
de nombreuses fonctions sophistiquées garantissant d’excellents
D’UTILISATION ET SUR LE PRODUIT, VOUS TROUVEREZ DES
résultats à chaque usage. Avant d’utiliser votre machine pour
MESSAGES DE SÉCURITÉ IMPORTANTS. MERCI DE LES LIRE TRÈS
la première fois, veuillez prendre quelques minutes pour lire
ATTENTIVEMENT.
attentivement ce guide.
Conseils utiles
Maintenance
Pour optimiser la productivité lors des étapes 6 à 9, commencez
Veuillez vider le bac à confettis à intervalles réguliers pour éviter
par la première de couverture, puis ajoutez les feuilles de papier
les blocages et vous assurer que la machine est toujours prête à
(20 à la fois) et terminez par la dernière de couverture.
perforer. Le bac à confettis est accessible à partir du côté de la
Pour optimiser les résultats, utilisez les couvertures de marque
machine.
GBC et les peignes de reliure de couleurs assorties GBC.
Pour éviter toute surcharge, n’essayez jamais de perforer un
Vous pouvez ouvrir et refermer le peigne à tout moment afin de
nombre de feuilles supérieur à la capacité de perforation (20
2
remplacer des feuilles ou d’en ajouter d’autres (voir étape 2).
feuilles de 80 g/m
). La machine ne nécessite aucun entretien en
cas d’utilisation correcte.
Dépannage
Contactez un représentant de dépannage GBC agréé pour toute
réparation requise.
6

F
Comment relier
1
Mesurez le document à l’aide du guide à codage
6
Insérez les feuilles dans la fente de perforation (fig. 6)
couleur (fig. 1)
Vous pouvez perforer 2 feuilles de couverture à la fois
2
Ouvrez le couvercle de l’appareil et placez le document (y
(uniquement PVC/carton de 240 g/m
. Pour les autres
compris les feuilles de couverture que vous avez choisies)
matériaux, perforez une seule feuille de couverture à la fois) ou
2
contre le couvercle sur la partie plate de l’appareil. Repoussez
jusqu’à 20 feuilles de papier (80 g/m
) à la fois.
doucement le document contre le couvercle et vérifiez la
Utilisation de la méthode conventionnelle : Sélectionnez
taille du document par rapport au guide à codage couleur.
la quantité de feuilles à perforer et taquez la pile de feuilles
Vous pouvez laisser le document dans cette position, prêt à la
sur une surface plate de l’appareil devant le couvercle ouvert
perforation.
pour qu’elle soit bien homogène. Placez la pile à perforer
2
Sélectionnez le peigne plastique adapté à votre
directement dans la fente de perforation et faites-la glisser
document (fig. 2)
vers la gauche jusqu’à ce qu’elle soit contre la butée papier.
Utilisez l’indicateur de diamètre de peigne pour sélectionner le
Les feuilles sont maintenant parfaitement alignées. Laissez
peigne de la taille adaptée au document, c.-à-d. document de
les feuilles en place et saisissez la poignée de perforation des
25 feuilles = peigne de 6 mm.
deux mains.
3
Chargez le peigne sur la machine (fig. 3)
Utilisation de la méthode d’alimentation par gravité
Placez le peigne près de la flèche blanche de l’appareil,
pour une productivité accrue : Déplacez vers l’avant le
derrière les doigts métalliques, en faisant en sorte que les
document (ou une partie du document), qui était appuyé
boucles du peigne s’ouvrent vers le haut.
contre le couvercle, jusqu’à ce qu’il touche la paroi située
devant la fente de perforation. Lâchez le document ou
Remarque : Si vous utilisez les peignes GBC ProCombs™, la
la pile de feuilles et les 20 premières feuilles tomberont
flèche blanche du peigne doit s’aligner avec la flèche blanche
directement dans la fente de perforation. Repositionnez contre
de l’appareil.
le couvercle les feuilles qui ne sont pas tombées dans la fente.
4
Ouvrez le peigne en tirant le levier vers vous (fig. 4)
Faites glisser le plus loin possible vers la gauche les feuilles
Les flèches de couleur situées près du peigne ouvert servent
se trouvant dans la fente de perforation. Les feuilles sont
de guides pour savoir jusqu’où ouvrir le peigne afin de faciliter
maintenant parfaitement alignées. Laissez les feuilles en place
l’insertion des feuilles perforées.
et saisissez la poignée de perforation des deux mains.
Remarque : Si vous utilisez les peignes GBC ProCombs™,
7
Perforation du document (fig. 7)
la ligne de couleur du peigne doit s’aligner avec la flèche de
Perforez les feuilles en abaissant la poignée, puis relevez
couleur de l’appareil pour assurer la rapidité de la reliure.
la poignée à la verticale et retirez les feuilles perforées.
5
Sélectionnez le format du document (fig. 5)
Remarque : Pour éviter les bourrages, n’essayez pas
Réglez le sélecteur de butée en fonction du format des feuilles/
de perforer plus de deux feuilles de couverture à la fois
2
couvertures que vous souhaitez utiliser : A4 (297 mm x 210
(uniquement en PVC/carton de 240 g/m
. Pour les autres
mm) ou Letter (215 mm x 279 mm). En cas d’utilisation de
matériaux, perforez une seule feuille de couverture à la fois).
couvertures surdimensionnées, sélectionnez la position «
8
Chargez le document sur le peigne ouvert (fig. 8)
oversize », perforez les couvertures du document et mettez-les
Retirez les feuilles de la fente de perforation et insérez-les
de côté. Sélectionnez ensuite A4 ou Letter et continuez.
dans le peigne ouvert.
9
Répétez les étapes 6-8 autant de fois que nécessaire
Répétez les étapes 6-8 jusqu’au chargement complet du
document sur le peigne.
J
Fermez le peigne (fig. 9)
Fermez le peigne et retirez le document.
Garantie
Le fonctionnement de ce produit est garanti pendant 2 ans à partir
effectués par des personnes non autorisées par ACCO Brands
de la date d’achat, sous réserve d’un usage normal. Pendant la
Europe annuleront la garantie. Notre objectif est d’assurer le bon
période de garantie, ACCO Brands Europe décidera, à son gré,
fonctionnement de nos produits conformément aux spécifications
de réparer ou remplacer gratuitement l’appareil défectueux.
précisées. Cette garantie ne compromet pas les droits légaux
Les défauts dus à un usage abusif ou un usage à des fins non
des consommateurs au titre de la législation nationale en vigueur
appropriées ne sont pas couverts par cette garantie. Une preuve
régissant la vente des biens de consommation.
de la date d’achat sera exigée. Les réparations ou modifications
Enregistrez ce produit en ligne à www.gbceurope.com
7

Technische Daten
GBC CombBind C20
Max. Arbeitsbreite
DIN A4, US-Letter – 297 mm
Stanzkapazität, Papier
max. 20 Blatt (80 g/m²)
Stanzkapazität, PVC-Einbanddeckel
max. 2 Einbanddeckel (je 0,2 mm)
Nettogewicht
9,8 kg
Abmessungen (B x T x H)
465 x 405 x 150 mm
Änderungen ohne vorherige Ankündigung vorbehalten.
Spezieller Begriff
Sicherheits-Instruktionen
m
Wir danken Ihnen, dass Sie sich für ein GBC Bindegerät
ACCO BRANDS EUROPE MÖCHTE IHRE UND DIE
entschieden haben. Es ist unser Ziel, Qualitätsbindegeräte mit
SICHERHEIT ANDERER SICHERSTELLEN. IN DIESEM
vielen modernen Leistungsmerkmalen zu einem günstigen
BEDIENUNGSHANDBUCH UND AM PRODUKT BEFINDEN SICH
Preis anzubieten, damit Sie bei jedem Bindevorgang
WICHTIGE SICHERHEITSHINWEISE. BITTE LESEN SIE DIESE
ausgezeichnete Ergebnisse erzielen können. Vor dem ersten
HINWEISE SORGFÄLTIG DURCH.
Benutzen des Geräts sollten Sie sich bitte einige Minuten Zeit
nehmen, um diese Anweisungen durchzulesen.
Tipps
Gerätepflege
Zum optimalen Betrieb bei Durchführung der Schritte 6 bis
9 stets folgende Reihenfolge beachten: zuerst den vorderen
Stanzabfallbehälter regelmäßig leeren. Dies gewährleistet,
Einbanddeckel, dann die Dokumentblätter (jeweils 20 Blatt) und
dass der Stanzbereich nicht blockiert wird und das Gerät stets
abschließend den hinteren Einbanddeckel stanzen.
betriebsbereit ist. Der Stanzabfallbehälter befindet sich an der
Zur Gewährleistung optimaler Ergebnisse wird die Verwendung
Geräteseite.
von Einbanddeckeln vom Typ GBC sowie von farbig
Zur Vermeidung von Stanzproblemen die empfohlene
abgestimmten Binderücken empfohlen.
Stanzkapazität (20 Blatt à 80 g/m²) nicht überschreiten. Bei
Zum Austausch oder Hinzufügen einzelner Blätter können
korrekter Handhabung ist das Gerät wartungsfrei.
die Binderücken jederzeit wieder geöffnet oder geschlossen
werden (s. Schritt 2).
Kundendienst
Zur Durchführung von Reparaturarbeiten an den autorisierten
GBC-Kundendienst wenden.
8

D
Bindeverfahren
1
Dokumentstärke an der farbigen Dokumentmesshilfe
6
Die Blätter in die Stanzöffnung einführen (fig.6)
messen (fig.1)
Maximal 2 Einbanddeckel (PVC-Deckel oder Deckel à
Hierzu die Geräteabdeckung öffnen und den
240 g/m², ansonsten max. 1 Einbanddeckel) bzw. bis zu
Dokumentstapel (einschließlich aller Einbanddeckel)
20 Blatt Papier à 80 g/m² in einem Durchgang stanzen.
so halten, dass er an der Abdeckung und auf der
Herkömmliche Blattzufuhr: Die zu stanzende Anzahl
Dokumentmesshilfe anliegt. Die Dokumentstärke an der
Blätter auf die flache Oberfläche vor der Geräteabdeckung
Dokumentmesshilfe ablesen. Das Dokument in dieser
aufstoßen, damit alle Blätter bündig sind. Den zu
stanzbereiten Position belassen.
stanzenden Stapel direkt in die Stanzöffnung einführen und
2
Den passenden Binderücken für das Dokument
nach links an die Papierführung heranschieben. Der Stapel
auswählen (fig.2)
ist damit richtig ausgerichtet. Die Blätter loslassen und den
Die für die Dokumentstärke geeignete Binderückengröße
Stanzhebel mit beiden Händen fassen.
anhand der Auswahlhilfe bestimmen (z. B. bei einer
Effizientere Freifallstapelzufuhr: Den gegen die
Dokumentstärke von 25 Blatt die Binderückengröße 6 mm
Abdeckung lehnenden Dokumentstapel (oder Teilstapel)
wählen).
nach vorne gegen den Anschlag der Stanzöffnung
3
Den Binderücken in das Gerät einlegen (fig.3)
ziehen. Den Stapel loslassen, damit die ersten 20 Blätter
Den Binderücken an dem weißen Pfeil am Gerät ausrichten
selbständig in die Stanzöffnung fallen können. Die dabei
und hinter die Metallfinger einsetzen. Dabei muss die offene
nicht in die Stanzöffnung zugeführten Blätter wieder gegen
Seite des Binderückens nach oben weisen.
die Abdeckung lehnen. Den zu stanzenden Stapel ganz
nach links an die Papierführung heranschieben. Der Stapel
Hinweis: Bei Verwendung von Binderücken vom Typ
ist damit richtig ausgerichtet. Die Blätter loslassen und den
GBC ProCombs™ muss der weiße Pfeil des Binderückens
Stanzhebel mit beiden Händen fassen.
mit dem weißen Pfeil am Gerät ausgerichtet sein.
7
Dokument stanzen (fig.7)
4
Den Bindehebel nach vorne ziehen und so den
Stanzhebel nach unten drücken, dann wieder senkrecht
Binderücken öffnen (fig.4)
stellen und die gestanzten Blätter entnehmen. Hinweis:
Anhand der seitlichen Farbmarkierungen lässt sich
Zur Vermeidung von Papierstaus stets jeweils maximal
die für die jeweilige Anzahl Stanzdokumente nötige
zwei Einbanddeckel (PVC-Deckel oder Deckel à 240 g/m²,
Binderückenöffnungsweite ermitteln.
ansonsten max. 1 Einbanddeckel) stanzen.
Hinweis: Zur schnelleren Abwicklung des Bindevorgangs
8
Dokument in den offenen Binderücken einführen
bei Verwendung von Binderücken vom Typ GBC
(fig.8)
ProCombs™ die Farbmarkierung auf dem Binderücken
Die aus der Stanzöffnung entnommenen Blätter in den
mit der Farbmarkierung am Gerät ausrichten.
Binderücken einführen.
5
Dokumentformat einstellen (fig.5)
9
Die Schritte 6 bis 8 gegebenenfalls wiederholen
Die Papierführung am Einstellschalter auf die dem Papier-/
Die Schritte 6 bis 8 wiederholen, bis das gesamte
Einbanddeckelformat entsprechende Größe einstellen:
Dokument im Binderücken eingeführt wurde.
A4 (297 x 210 mm) oder US-Letter (215 x 279 mm).
Bei Verwendung von Einbanddeckeln in Übergröße die
J
Binderücken Schliessen (fig.9)
Übergrößeneinstellung wählen, die Einbanddeckel stanzen
Den Binderücken schließen und das Dokument entnehmen.
und beiseite legen. Anschließend die A4- oder US-Letter-
Einstellung wählen und mit dem Stanzvorgang fortfahren.
Gewährleistung
Der Betrieb des Geräts ist bei normaler Verwendung
Instandsetzungen oder Änderungen, die von nicht durch
für 2 Jahre ab Kaufdatum gewährleistet. Innerhalb des
ACCO Brands Europe autorisierten Personen vorgenommen
Gewährleistungszeitraums wird ACCO Brands Europe nach
werden, setzen die Gewährleistung außer Kraft. Es ist unser
eigenem Ermessen das defekte Gerät entweder kostenlos
Ziel sicherzustellen, dass die Leistung unserer Produkte
instandsetzen oder ersetzen. Die Gewährleistung deckt keine
den angegebenen technischen Daten entspricht. Diese
Mängel ab, die aufgrund missbräuchlicher Verwendung
Gewährleistung stellt keine Einschränkung der nach dem
oder Verwendung für unangemessene Zwecke entstanden
geltenden Kaufvertragsrecht gültigen Rechte des
sind. Ein Nachweis des Kaufdatums muss vorgelegt werden.
Verbrauchers dar.
Registrieren Sie dieses Produkt online bei www.gbceurope.com
9

Specifiche
GBC CombBind C20
Larghezza carta max.
Letter, DIN A4 – 297 mm
Capacità perforazione, carta
Max. 20 fogli (80 g/m²)
Capacità perforazione, copertine
Max. 2 copertine da 0,2 mm
in plastica
Peso netto
9,8 kg
Dimensioni (L x P x A)
465 x 405 x 150 mm
Dati soggetti a variazioni tecniche senza preavviso.
Avviso speciale
Istruzioni di sicurezza
m
Grazie per aver scelto una rilegatrice GBC. La nostra azienda si
ALLA ACCO BRANDS EUROPE STA A CUORE LA SICUREZZA
propone di produrre rilegatrici di qualità ad un prezzo accessibile che
DEGLI UTENTI E DEI TERZI. IN QUESTO MANUALE OPERATIVO E
presentano molte funzioni avanzate per ottenere ogni volta risultati
SUL PRODOTTO SONO RIPORTATI IMPORTANTI INDICAZIONI DI
eccellenti. Prima di usare la macchina per la prima volta, è opportuno
SICUREZZA, CHE VANNO LETTE ATTENTAMENTE.
leggere questa guida.
Consigli e suggerimenti utili
Manutenzione
Per ottenere la massima produttività seguendo le istruzioni riportate
Controllare che il vassoio ritagli sia svuotato periodicamente. Questo
ai punti da 6 a 9, iniziare con la prima di copertina e poi aggiungere i
accorgimento evita che si blocchi la macchina ed assicura che l’unità
fogli di carta (20 alla volta) e finire con l’ultima di copertina.
sia sempre pronta per le operazioni di perforazione. Si può accedere al
Per ottenere la migliore finitura, utilizzare sempre copertine GBC con
vassoio ritagli dal lato della macchina.
anelli di rilegatura GBC di colore abbinato.
Per prevenire eventuali sovraccarichi, non tentare mai di perforare un
Gli anelli di rilegatura possono essere aperti e chiusi di nuovo in
numero di fogli superiore a quello massimo raccomandato (20 fogli da
2
qualsiasi momento per sostituire o aggiungere singoli fogli (vedere le
80gm
). L’unità non richiede manutenzione se usata correttamente.
informazioni riportate al punto 2).
Assistenza
Rivolgersi ad un rivenditore o distributore GBC per eventuali
riparazioni.
10

I
Rilegatura
1
Misurare il documento da rilegare utilizzando la guida
6
Inserire i fogli nel vano di perforazione (fig.6)
2
codificata per colore (fig.1)
Si possono perforare 2 copertine (solo PVC/cartoncino da 240gm
.
Aprire il coperchio della macchina ed appoggiare il documento
Con altri materiali è possibile perforare solo 1 copertina) oppure
2
(comprese eventuali copertine scelte) contro il coperchio sulla
fino a 20 fogli di carta (80gm
) alla volta.
superficie piana della macchina. Spingere delicatamente il
Metodo convenzionale - Selezionare la quantità di fogli da
documento contro il coperchio e controllarne il formato servendosi
perforare e dare un colpetto sul bordo del pacco di fogli contro la
della guida codificata per colore. Si può lasciare il documento in
superficie piana della macchina davanti al coperchio aperto per
questa posizione pronto per la perforazione.
assicurare che tutti i fogli siano allineati. Inserire il pacco di fogli
2
Selezionare gli anelli plastici adatti al documento da
da perforare direttamente nel vano di perforazione e spostarlo a
rilegare (fig.2)
sinistra fino a quando non tocchi la guida di allineamento della
Utilizzare la guida del diametro degli anelli per selezionare il
carta. I fogli saranno ora perfettamente allineati. Lasciare andare
diametro del dorso plastico adatto al documento da rilegare, cioè
i fogli ed afferrare la maniglia di perforazione con entrambe le
documento da 25 fogli = dorso plastico da 6 mm.
mani.
3
Caricare il dorso plastico nella rilegatrice (fig.3)
Metodo di conteggio fogli con alimentazione per gravità
Inserire gli anelli plastici accanto alla freccia bianca situata sulla
per una maggiore produttività - Portare in avanti il documento
macchina, dietro il meccanismo in metallo con il lato aperto rivolto
(oppure un pacco di fogli del documento), allontanandolo dalla
verso l’alto.
posizione di appoggio contro il coperchio fino a quando non
tocca la parete davanti al vano di perforazione. Allentare la presa
Nota - Se si usano gli anelli plastici GBC ProCombs™, la freccia
del documento o del pacco di fogli e i primi 20 fogli cadranno
bianca sugli anelli deve essere allineata alla freccia bianca
direttamente nel vano di perforazione. Riportare i fogli che non
riportata sulla macchina.
sono caduti nel vano di perforazione nella posizione di appoggio
4
Aprire gli anelli plastici portando la leva verso di sé (fig.4)
contro il coperchio. Spostare fino in fondo a sinistra i fogli che si
Le frecce colorate adiacenti agli anelli che si aprono fungono da
trovano nel vano di perforazione. I fogli saranno ora perfettamente
guida per indicare la distanza di apertura degli anelli necessaria a
allineati. Lasciare andare i fogli ed afferrare la maniglia di
consentire un agevole inserimento dei fogli perforati.
perforazione con entrambe le mani.
Nota - Se si usano gli anelli plastici GBC ProCombs™, la linea
7
Perforazione del documento (fig.7)
colorata sugli anelli deve essere allineata alle frecce colorate
Perforare i fogli tirando la maniglia verso il basso e riportare poi la
riportate sulla macchina per consentire una più veloce operazione
maniglia in posizione verticale e rimuovere i fogli perforati. Nota -
di rilegatura.
Per evitare eventuali inceppamenti, non cercare di perforare più di
5
2
Selezionare il formato del documento (fig.5)
due copertine alla volta (solo PVC/cartoncino da 240gm
. Con altri
Regolare il selettore della guida di allineamento della carta per
materiali è possibile perforare solo 1 copertina).
selezionare il formato del foglio/della copertina che si desidera
8
Inserire il documento negli anelli aperti (fig.8)
rilegare: A4 (297 mm x 210 mm) o Letter (215 mm x 279 mm).
Togliere i fogli dal vano di perforazione ed inserirli negli anelli
Quando si usano copertine di formato over-size, selezionare la
aperti.
posizione “oversize”, perforare le copertine del documento e
9
Ripetere le istruzioni riportate ai punti 6-8 a seconda delle
mettere da parte. Selezionare quindi A4 o Letter e procedere.
necessità
Ripetere le istruzioni riportate ai punti 6-8 fino a quando il
documento non è completamento inserito nel dorso plastico.
J
Chiusura degli anelli (fig.9)
Chiudere gli anelli e rimuovere il documento rilegato.
Garanzia
Questo prodotto è garantito per 2 anni dalla data di acquisto, per
acquisto. Riparazioni o modifiche effettuate da persone non autorizzate
quanto ne concerne il funzionamento, subordinatamente ad uso
da GBC invalideranno la garanzia. ACCO Brands Europe si propone
normale. Durante il periodo di garanzia, ACCO Brands Europe
di assicurare che i propri prodotti funzionino in conformità alle
provvederà, a propria discrezione, a riparare o sostituire gratuitamente
caratteristiche tecniche indicate. La presente garanzia non pregiudica
la macchina difettosa. Difetti risultanti dall’uso improprio o dall’uso
alcun diritto riconosciuto ai consumatori dalla normativa nazionale
per scopi diversi da quelli per cui la macchina è stata concepita non
vigente in materia di vendita di prodotti.
sono coperti dalla garanzia. Sarà necessario fornire una prova di
Registrare il prodotto online presso www.gbceurope.com
11

Specificaties
GBC CombBind C20
Maximale papierbreedte
Letter, DIN A4 – 297 mm
Ponscapaciteit, papier
Max. 20 vellen (80 gsm)
Ponscapaciteit, plastic omslagen
Max. 2 omslagen, elk 0,2 mm dik
Netto gewicht
9,8 kg
Afmetingen (B x D x H)
465 x 405 x 150 mm
Deze gegevens kunnen zonder voorafgaande kennisgeving gewijzigd worden.
Speciaal bericht
Veiligheidsvoorschriften
m
U bent nu de gelukkige eigenaar van een GBC inbindmachine.
UW VEILIGHEID EN DIE VAN ANDEREN HEEFT VOOR
Wij hebben ons tot doel gesteld om betaalbare inbindmachines
ACCO BRANDS EUROPE HOOGSTE PRIORITEIT. IN
van uitstekende kwaliteit te produceren, met vele extra functies,
DEZE HANDLEIDING EN OP DE MACHINE ZELF TREFT U
zodat u keer op keer uitstekende resultaten behaalt. Lees deze
VERSCHILLENDE BELANGRIJKE VEILIGHEIDSVOORSCHRIFTEN
instructies goed door, voordat u de machine voor het eerst
AAN. LEES DEZE ZORGVULDIG.
gebruikt.
Handige tips
Onderhoud
Voor maximale productiviteit bij het uitvoeren van stappen 6
Zorg ervoor dat de snipperlade regelmatig wordt geleegd. Dit
t/m 9, begint u met de vooromslag. Voeg daar uw vellen aan
voorkomt een verstopping en zorgt ervoor dat het toestel altijd
toe (telkens een stapel van 20) en eindig met de achteromslag.
gebruiksklaar is. De snipperlade wordt uit de zijkant van het
Voor het beste resultaat gebruikt u altijd omslagen van GBC
toestel getrokken.
samen met de bindruggen van GBC in een bijpassende kleur.
Om overbelasting te voorkomen, mag u nooit meer dan het
U kunt de bindrug op elk moment weer openen en sluiten,
maximumaantal vellen ponsen (20 vellen, 80 gsm). De eenheid
zodat individuele vellen verwijderd of toegevoegd kunnen
behoeft geen onderhoud, zolang hij juist wordt gebruikt.
worden (zie stap 2).
Reparaties
Neem contact op met een erkende GBC-reparateur voor alle
benodigde reparaties.
12

O
Inbinden
1
Meet uw document aan de hand van de
6
Steek de vellen in de ponsopening (fig.6)
kleurgecodeerde documentmeter (fig.1)
U kunt tegelijkertijd 2 omslagen ponsen (alleen omslagen
Open het deksel van de machine en leg het document
van PVC/papier van 240 gsm; indien van ander materiaal,
(compleet met omslagvellen) tegen het deksel aan, op
dan slechts 1 omslag), of maximaal 20 vellen papier (80
het platte deel van de machine. Duw het document
gsm).
voorzichtig tegen het deksel en controleer de afmeting
De conventionele methode: Kies het aantal vellen dat
van het document aan de hand van de kleurgecodeerde
geponst moet worden en tik het stapeltje vellen tegen het
documentmeter. U kunt het document zo laten liggen, klaar
platte oppervlak van de machine vóór het open deksel,
om geponst te worden.
zodat alle vellen goed uitgelijnd zijn. Plaats de stapel vellen
2
Kies de plastic bindrug voor uw document (fig.2)
die geponst moet worden direct in de ponsopening en
Gebruik de schaalverdeling om de juiste bindrug voor het
schuif de stapel naar links, tegen de randgeleider aan. De
document te kiezen (een document van 25 vellen = bindrug
vellen zijn nu perfect uitgelijnd. Laat de vellen los en houd
van 6 mm).
de ponshendel met beide handen vast.
3
Plaats de bindrug in de machine (fig.3)
De zwaartekrachtmethode met getelde vellen voor
Plaats de bindrug naast de witte pijl op de machine, achter
een betere productiviteit: Verplaats het document (of
de metalen vingers, met de open kant naar boven.
een stapel vellen van het document) vooruit, weg van de
rustpositie tegen het deksel, totdat de vellen in aanraking
N.B. Als u ProCombs™ van GBC gebruikt, moet de witte
komen met de wand vóór de ponsopening. Ontspan uw
pijl van de bindrug op één lijn liggen met de witte pijl in de
greep op het document of op de stapel. De eerste 20
machine.
vellen vallen rechtstreeks in de ponsopening. Zet de vellen
4
Open de bindrug door de hendel naar u toe te halen
die niet in de ponsopening zijn gevallen weer terug tegen
(fig.4)
het deksel. Schuif de vellen die zich in de ponsopening
De kleurgecodeerde pijlen, naast de bindrug die wordt
bevinden zo ver mogelijk naar links. De vellen zijn nu
geopend, fungeren als leidraad voor hoe ver de bindrug
perfect uitgelijnd. Laat de vellen los en houd de ponshendel
geopend moet worden, zodat alle geponste vellen
met beide handen vast.
eenvoudig geplaatst kunnen worden.
7
Het document ponsen (fig.7)
N.B. Als u ProCombs™ van GBC gebruikt, moet de
Pons de vellen door de ponshendel naar beneden te halen.
gekleurde lijn van de bindrug op één lijn liggen met
Zet de hendel weer verticaal en verwijder de geponste
de gekleurde pijl in de machine. Zodoende wordt het
vellen. N.B. Om een verstopping te voorkomen wordt
document sneller ingebonden.
aangeraden nooit meer dan twee omslagen per keer te
5
Selecteer de papiermaat (fig.5)
ponsen (alleen omslagen van PVC/papier van 240 gsm;
Verstel de randgeleider om de papier- of omslagmaat te
indien van ander materiaal, dan slechts 1 omslag).
kiezen die u wilt inbinden: A4 (297 mm x 210 mm) of
8
Leg het document op de open bindrug (fig.8)
Letter (215 mm x 279 mm). Wanneer oversized omslagen
Verwijder de vellen uit de ponsopening en leg ze op de open
worden gebruikt, zet u de randgeleider op ‘Oversize’. Pons
bindrug.
de omslagen voor het document en leg ze terzijde. Kies
9
Herhaal stappen 6-8, naar wens.
vervolgens A4 of Letter en ga door.
Herhaal stappen 6-8, totdat het complete document op de
bindrug ligt.
J
Sluit de bindrug (fig.9)
Sluit de bindrug en verwijder het document.
Garantie
Het gebruik van dit product is gegarandeerd voor 2 jaar vanaf
wanneer er reparaties of veranderingen worden uitgevoerd door
de datum van aankoop, uitgaand van normaal gebruik. Binnen
personen die niet door ACCO Brands Europe zijn bevoegd. Het
de garantieperiode zal ACCO Brands Europe naar eigen
is ons doel ervoor te zorgen dat onze producten functioneren
oordeel de defecte machine kosteloos repareren of vervangen.
volgens de vermelde specificaties. Deze garantie maakt geen
Defecten die te wijten zijn aan verkeerd gebruik of gebruik voor
inbreuk op de wettelijke rechten van consumenten onder de
ongeschikte doeleinden, vallen niet onder de garantie. Bewijs
geldende nationale wetgeving met betrekking tot de verkoop
van datum van aankoop wordt vereist. De garantie vervalt
van goederen.
Registreer dit product online op www.gbceurope.com
13

Especificaciones
GBC CombBind C20
Anchura del papel máxima
Carta, DIN A4 (297 mm)
2
Capacidad de perforación, papel
Máximo de 20 hojas (80 g/m
)
Capacidad de perforación, tapas
Máximo de 2 tapas
de plástico
(0,2 mm cada una)
Peso neto
9,8 kg
Dimensiones (A x P x A)
465 x 405 x 150 mm
Sujeto a cambios técnicos sin previo aviso.
Aviso especial
Instrucciones de seguridad
m
Gracias por escoger una máquina encuadernadora GBC. Nuestro
SU SEGURIDAD AL IGUAL QUE LA SEGURIDAD DE LOS DEMÁS ES
objetivo es producir máquinas encuadernadoras de calidad a
IMPORTANTE PARA ACCO BRANDS EUROPE. EN ESTE MANUAL
precios asequibles y con muchas funciones avanzadas que le
DE INSTRUCCIONES Y EN EL PRODUCTO SE ENCUENTRAN
permitan obtener unos resultados excelentes cada vez. Antes de
IMPORTANTES MENSAJES DE SEGURIDAD. LEA ESTOS
utilizar su máquina por primera vez le rogamos pase unos minutos
MENSAJES CON ATENCIÓN.
leyendo esta guía.
Sugerencias
Mantenimiento
Para obtener una productividad óptima, cuando realice los pasos 6
No olvide vaciar la bandeja de residuos con frecuencia. Con esto
a 9, empiece con la tapa delantera, añada sus hojas de papel (20
se evitarán los atascos y se garantizará que la unidad esté siempre
cada vez) y termine con la tapa trasera.
lista para perforar hojas. Puede tener acceso a la bandeja de
Para obtener un resultado óptimo, utilice tapas de la marca GBC,
residuos desde el lateral de la encuadernadora.
con los canutillos para encuadernar de colores de GBC.
Para impedir la sobrecarga, no intente perforar nunca más del
2
El canutillo se puede abrir y cerrar de nuevo en cualquier momento
número máximo recomendado de hojas (20 hojas de 80 g/m
).
para sustituir o añadir hojas específicas (consulte el paso 2).
Si se manipula de forma correcta, la encuadernadora no requiere
ningún mantenimiento.
Servicio
Para cualquier reparación necesaria, póngase en contacto con un
representante de servicio autorizado de GBC.
14

E
Instrucciones para encuadernar
1
Use la guía de colores para medir el documento (fig.1)
6
Inserte las hojas en la ranura de perforación (fig.6)
Abra la tapadera de la máquina y coloque el documento
Se pueden perforar 2 tapas a la vez (solo PVC/cartón de 240
2
(incluyendo las tapas que haya elegido) apoyado sobre la
g/m
; para otros materiales, perfore solo 1 tapa) o hasta 20
2
tapadera en la zona plana de la encuadernadora. Empuje
hojas de papel (80 g/m
) como máximo.
suavemente el documento hacia la tapadera y compruebe su
Método convencional: seleccione la cantidad de hojas que
tamaño mediante la guía de colores. Puede dejar el documento
desea perforar y golpee suavemente la pila de hojas sobre la
en esta posición listo para perforarlo.
superficie plana de la máquina delante de la tapadera abierta
2
Seleccione el canutillo de plástico que se ajuste a su
para asegurarse de que todas las hojas están alineadas.
documento (fig.2)
Coloque la pila que va a perforar directamente en la ranura de
Use la guía del tamaño del canutillo para elegir el tamaño
perforación y deslícela hacia la izquierda hasta que descanse
de canutillo adecuado para su documento, por ejemplo:
sobre el tope de papel. Las hojas estarán ahora perfectamente
documento de 25 hojas = canutillo de 6 mm.
alineadas. Suelte las hojas y sujete el asa de perforación con
las dos manos.
3
Cargue el canutillo en la máquina (fig.3)
Coloque el canutillo junto a la flecha blanca de posición de la
Método de recuento de hojas de papel por gravedad
encuadernadora, detrás de las lengüetas metálicas, con el lado
para una mayor productividad: desplace el documento
abierto orientado hacia arriba.
hacia delante (o la pila de hojas de su documento), alejándolo
de su posición de descanso apoyado sobre la tapadera, hasta
Nota: si utiliza canutillos ProCombs™ de GBC, la flecha
que alcance la pared delante de la ranura de perforación.
blanca del canutillo debe estar alineada con la flecha blanca
Suelte ligeramente el documento o la pila de hojas y las
de la encuadernadora.
primeras 20 hojas caerán directamente sobre la ranura de
4
Gire la palanca hacia usted para abrir el canutillo (fig.4)
perforación. Vuelva a colocar las hojas que no hayan caído en
Las flechas de colores que hay junto al canutillo abierto sirven
la ranura de perforación en su posición de descanso apoyadas
de guía para saber cuánto hay que abrirlo a fin de insertar las
sobre la tapadera. Deslice las hojas que están en la ranura
hojas perforadas fácilmente.
de perforación hacia la izquierda hasta su punto máximo. Las
Nota: si utiliza canutillos ProCombs™ de GBC, conseguirá
hojas estarán ahora perfectamente alineadas. Suelte las hojas
una encuadernación más rápida si alinea la línea de color del
y sujete el asa de perforación con las dos manos.
canutillo con las flechas de colores de la encuadernadora.
7
Perforar el documento (fig.7)
5
Elija el tamaño del documento (fig.5)
Tire del asa hacia abajo para perforar las hojas. Después,
Ajuste el selector del tope de papel para elegir el tamaño
levante el asa hasta la posición vertical y retire las hojas
de papel/tapa que desee encuadernar: A4 (297 mm x 210
perforadas. Nota: para impedir que se produzcan atascos, no
mm) o Letter (215 mm x 279 mm). Si utiliza tapas de tamaño
intente perforar más de dos tapas a la vez (solo PVC/cartón de
2
superior, seleccione la posición “oversize”, perfore las tapas
240 g/m
; para los demás materiales, perfore solo una tapa).
para el documento y déjelas a un lado. A continuación,
8
Cargue el documento en el canutillo abierto (fig.8)
seleccione el tamaño A4 o Letter y continúe.
Extraiga las hojas de la ranura de perforación e insértelas en el
canutillo abierto.
9
Repita los pasos 6-8 según sea necesario
Repita los pasos 6-8 hasta que haya cargado el documento
completamente en el canutillo.
J
Cierre el canutillo (fig.9)
Cierre el canutillo y retire el documento.
Garantía
El funcionamiento de este producto está garantizado durante un
Las reparaciones o modificaciones realizadas por personas no
período de 2 años a partir de la fecha de adquisición, siempre
autorizadas por ACCO Brands Europe anularán la garantía. Nuestro
que su utilización sea normal. Durante el plazo de garantía, ACCO
objetivo es asegurar que nuestros productos funcionan según las
Brands Europe, a su propia discreción, reparará o sustituirá
especificaciones indicadas. Esta garantía no afecta los derechos
el aparato defectuoso gratuitamente. La garantía no cubre los
legales que tienen los consumidores en virtud de la legislación
defectos causados por uso indebido o por su utilización para fines
vigente aplicable que rige la venta de artículos.
inadecuados. Se requerirá un comprobante de la fecha de compra.
Registre este producto en línea en www.gbceurope.com
15

Especificações
GBC CombBind C20
Largura máx. do papel
Letter, DIN A4 – 297 mm
2
Capacidade de furação, papel
Max. 20 folhas (80 g/m
)
Capacidade de furação, capas de
Máx. 2 capas / 0,2 mm de
plástico
espessura cada
Peso líquido
9,8 kg
Dimensões (L x P x A)
465 x 405 x 150 mm
As especificações estão sujeitas a alterações sem aviso prévio.
Observação Especial
Instruções de segurança
m
Agradecemos a sua escolha de uma encadernadora GBC.
A SUA SEGURANÇA, BEM COMO A SEGURANÇA DOS OUTROS,
Empenhamo-nos em produzir encadernadoras de qualidade
É IMPORTANTE PARA A ACCO BRANDS EUROPE. MENSAGENS
a um preço competitivo, com muitas características avançadas
IMPORTANTES SOBRE SEGURANÇA ESTÃO PRESENTES NO SEU
para poder obter sempre resultados excelentes. Antes de utilizar
MANUAL DE OPERADOR E NO PRÓPRIO PRODUTO. LEIA ESSAS
a sua máquina pela primeira vez, dedique uns minutos à leitura
MENSAGENS CUIDADOSAMENTE.
deste guia.
Sugestões práticas
Manutenção
Para conseguir máxima produtividade ao efectuar as etapas 6 a 9,
Certifique-se de que o tabuleiro de aparas de papel é esvaziado
comece com a capa dianteira, adicione em seguida as folhas de
periodicamente. Isto impedirá que a máquina fique obstruída com
papel (20 de cada vez) e termine com a contracapa.
as aparas e assegurará que ela está pronta a ser usada para furar
Para obter os melhores resultados use sempre as capas da GBC
as folhas. O acesso ao tabuleiro de aparas de papel é feito pela
com as lombadas GBC de cor coordenada.
parte lateral da máquina.
A lombada de encadernação pode ser aberta e fechada novamente
Para evitar sobrecarregar a máquina, nunca tente furar mais
em qualquer altura, para poder substituir ou adicionar folhas
do que o número máximo de folhas recomendado (20 folhas de
2
individuais ao documento final (consulte a etapa 2).
80 g/m
). A máquina não necessita de manutenção se for usada
correctamente.
Assistência Técnica
Contacte um representante de manutenção autorizado da GBC
para qualquer tipo de reparação necessária.
16

P
Como encadernar
1
Meça o seu documento usando como guia a escala
6
Introduza as folhas na ranhura de furação (fig.6)
colorida (fig.1)
Pode furar 2 capas de cada vez (apenas capas de PVC ou de
Abra a tampa da máquina e apoie o seu documento (incluindo
cartão com uma gramagem de 240 gsm. Para outros materiais,
2
as capas seleccionadas) contra a tampa na área plana da
fure apenas 1 capa) ou até 20 folhas de papel (80 g/m
) de
máquina. Empurre com cuidado o documento contra a tampa
cada vez.
e verifique o seu tamanho usando a escala colorida como guia.
Usando o método convencional: Seleccione o número
Pode deixar o seu documento nesta posição, já pronto a ser
de folhas que deseja furar e bata com a borda da pilha de
furado.
folhas contra uma superfície plana para assegurar que elas
2
Seleccione a lombada de plástico adequada para o seu
ficam todas alinhadas. Coloque a pilha de folhas que deseja
documento (fig.2)
furar directamente na ranhura de furação e deslize-as para
Use a escala gravada na máquina como guia para seleccionar o
a esquerda até encostarem contra a guia de alinhamento do
diâmetro da lombada adequado para o seu documento, isto é,
papel. As folhas ficam assim perfeitamente alinhadas. Largue
para um documento com 25 folhas é necessário uma lombada
as folhas e segure na barra de furação com ambas as mãos.
de 6 mm de diâmetro.
Usando o método de contagem do número de folhas por
3
Introduza a lombada na máquina (fig.3)
acção da gravidade, para aumentar a sua produtividade:
Introduza a lombada junto à seta branca de posicionamento,
Desloque o seu documento (ou uma pilha de folhas do seu
indicada na máquina, por trás dos dentes de retenção
documento) para a frente, afastando-o do apoio proporcionado
metálicos, com o lado aberto da lombada virado para cima.
pela tampa da encadernadora, até tocar na pequena “parede”
saliente existente em frente da ranhura de furação. Reduza a
Nota: Se usar as lombadas GBC ProCombs™, a seta branca
pressão com que agarra o documento ou a pilha de folhas e as
da lombada deve ficar alinhada com a seta branca da máquina.
primeiras 20 folhas cairão directamente na ranhura de furação.
4
Abra a lombada puxando a alavanca na sua direcção
Coloque as folhas que não entraram na ranhura de furação de
(fig.4)
novo apoiadas contra a tampa. Deslize as folhas introduzidas
As setas coloridas adjacentes à lombada que vai abrir servem
na ranhura de furação para a esquerda o mais possível. As
de guia para determinar quanto deve abrir a lombada para
folhas ficam assim perfeitamente alinhadas. Largue as folhas e
poder introduzir facilmente as folhas furadas.
segure na barra de furação com ambas as mãos.
Nota: Se usar as lombadas GBC ProCombs™, a linha colorida
7
Furação do documento (fig.7)
da sua lombada deve ficar alinhada com as setas coloridas
Fure as folhas puxando para baixo a barra de furação e em
da máquina, para uma encadernação mais rápida do seu
seguida levante a barra para a sua posição vertical e retire as
documento.
folhas furadas. Nota: Para evitar que a máquina encrave, não
5
Seleccione o tamanho do documento (fig.5)
tente furar mais do que duas capa de cada vez (apenas capas
Ajuste o botão de alinhamento do papel para seleccionar o
de PVC ou capas de cartão com uma gramagem de 240 gsm.
tamanho de papel / capa que deseja encadernar: A4 (297 mm
Para outros materiais, fure apenas 1 capa).
x 210 mm) ou Letter (215 mm x 279 mm). Quando usar capas
8
Introduza o documento na lombada aberta (fig.8)
de tamanho superior ao tamanho padrão, seleccione a posição
Retire as folhas da ranhura de furação e introduza-as na
“oversize” (maior que o tamanho padrão), fure as capas do seu
lombada aberta.
documento e ponha-as de lado. Em seguida seleccione A4 ou
9
Repita as etapas 6-8, como for necessário.
Letter e prossiga com a encadernação.
Repita as etapas 6-8 até todo o documento ter sido introduzido
na lombada.
J
Fechar a lombada (fig.9)
Feche a lombada e retire o documento.
Garantia
Este produto está garantido por 2 anos a contar da sua data de
efectuadas por pessoas não autorizadas pela ACCO Brands Europe
compra, em condições de uso normal. No período de garantia
anularão esta garantia. Estamos empenhados em assegurar
a ACCO Brands Europe efectuará a reparação ou substituição
que o desempenho dos nossos produtos está de acordo com as
gratuita de uma máquina defeituosa, segundo o seu critério
especificações indicadas. Esta garantia não afecta os direitos legais
exclusivo. Os defeitos resultantes de má utilização ou utilização
dos consumidores ao abrigo da legislação nacional aplicável que
imprópria não estão abrangidos por esta garantia. É necessária a
regula a venda de mercadorias.
apresentação de prova de compra. As reparações ou alterações
Registe este produto on-line em www.gbceurope.com
17

TeknikBilgiler
GBCCombBindC20
Maksimumkâğıtgenişliği
Letter, DIN A4 – 297mm
Delmekapasitesi,kâğıt
Maksimum 20 yaprak (80gsm)
Delmekapasitesi,plastikkapak
Maksimum 2 kapak/ her biri 0,2mm
Netağırlık
9,8 kg
Boyutlar(ExDxY)
465 x 405 x 150mm
Önceden bildirimde bulunmaksızın teknik değişiklikler yapılabilir.
Özelnot
Güvenliktalimatları
m
GBC Ciltleme Makinesini seçtiğiniz için teşekkür ederiz.
SİZİN VE BAŞKALARININ GÜVENLİĞİ ACCO BRANDS
Amacımız, her defasında mükemmel sonuçlar elde etmenizi
EUROPE İÇİN ÖNEMLİDİR. BU KULLANIM KILAVUZUNDA
sağlayan gelişkin özelliklere sahip, uygun yatlı ve kaliteli
VE ÜRÜNÜN ÜSTÜNDE ÖNEMLİ GÜVENLİK BİLGİLERİ
ciltleme makineleri üretmektir. Makinenizi ilk kez kullanmadan
BULUNMAKTADIR. BU BİLGİLERİ DİKKATLE OKUYUN.
önce, lütfen bu kılavuzu okumak için birkaç dakika ayırın. Bu
sayede standart belgeleri kolayca ciltlemeniz mümkün olacaktır.
Yardımcıipuçları
Bakım
Maksimum verimi elde etmek için 6 adımından 9 adımına
ilerlerken işleme ön kapakla başlayın, ardından kâğıt sayfaları
Lütfen çöp tepsisinin düzenli olarak boşaltılmasını sağlayın.
ekleyin (bir seferde 20 sayfa) ve arka kapakla bitirin.
Böylelikle tıkanmalar önlenecek ve makineniz her zaman delme
En iyi sonucu almak için daima GBC renk koordineli cilt
işlemine hazır olacaktır. Çöp tepsisine makinenin yan tarafından
taraklarıyla GBC marka kapakları kullanın.
ulaşılır.
Sayfaları değiştirmek veya münferit sayfalar eklemek için tarağı
Aşırı yüklenmeyi önlemek için kesinlikle tavsiye edilen
açıp kapatmak her zaman mümkündür (2. adıma bakın).
maksimum sayfa sayısından (80gsm’lik 20 sayfa) fazlasını
delmeye çalışmayın. Makine, doğru kullanıldığı takdirde, bakım
gerektirmez.
Servis
Gereken her türlü onarım için GBC yetkili servis temsilcisine
başvurun.
18

T
Ciltyapımı
1
Renkkodlukılavuzukullanarakbelgeniziölçün(g.1)
6
Sayfalarıdelmeyerineyerleştirin(g.6)
Makinenin kapağını açın ve belgenizi (seçtiğiniz kapaklar
Bir seferde 2 kapak (sadece PVC/240gsm kartondan
da dahil olarak) makinenin düz alanı üstünde tutarak
yapılmış. Diğer malzemeler için yalnızca 1 kapak delin) veya
kapağa yaslayın. Belgeyi kapağa değecek şekilde hafçe
en fazla 20 sayfa kâğıt (80gsm) delebilirsiniz.
geriye itin ve renk kodlu kılavuzu kullanarak belge boyutunu
Olağanyöntemikullanarak: Delinecek sayfa miktarını
kontrol edin. Belgenizi delinmeye hazır olarak bu konumda
seçin ve kâğıt destesinin kenarını makinenin açık kapağın
bırakabilirsiniz.
önündeki düz alanına hafçe vurarak tüm sayfaların aynı
2
Belgenizeuygunolanplastiktarağıseçin(g.2)
hizada olmasını sağlayın. Delinecek desteyi doğrudan delme
Belgenize uygun tarak boyunu seçmek için tarak boyu
yerine yerleştirin ve kenar kılavuzuna dayanana kadar sola
kılavuzunu kullanın, örn. 25 sayfa belge = 6mm tarak.
kaydırın. Artık sayfalarınız mükemmel biçimde hizalanacaktır.
Sayfaları bırakın ve iki elinizle birden delme kolunu kavrayın.
3
Tarağımakineyetakın(g.3)
Verimliliğiartıracakyerçekimibeslemeliyöntemi
Tarağı makinenin üzerindeki beyaz ok işaretinin hemen
kullanarak: Belgenizi (veya belgenizden ayırdığınız bir
yanına, açık tarafı yukarı bakacak şekilde metal parmakların
desteyi) kapağa dayalı konumundan ayırarak, delme yerinin
arkasına yerleştirin.
önündeki sete kadar öne doğru getirin. Belgeyi veya desteyi
Not: GBC ProCombs™ tarak kullanıyorsanız, tarağın
tutuşunuzu gevşetin, ilk 20 sayfa doğrudan delme yerine
üzerindeki beyaz ok işareti makinenin üzerindeki beyaz ok
düşecektir. Delme yerine düşmeyen sayfaları kapağa dayalı
işaretiyle aynı hizada olmalıdır.
konumuna geri getirin. Delme yerindeki sayfaları gidebildiği
kadar sola kaydırın. Artık sayfalarınız mükemmel biçimde
4
Tarakkumandakolunukendinizedoğrugetirerektarağı
hizalanacaktır. Sayfaları bırakın ve iki elinizle birden delme
açın(g.4)
kolunu kavrayın.
Açılan tarağın bitişiğinde bulunan renkli oklar, delinmiş
sayfaların kolayca takılması için tarağın ne kadar açılması
7
Belgenindelinmesi(g.7)
gerektiği konusunda yol gösterir.
Delme kolunu aşağı indirerek sayfaları delin, sonra kolu
tekrar dikey konumuna kaldırın ve delinmiş sayfaları çıkarın.
Not: GBC ProCombs™ tarak kullanıyorsanız, ciltleme
Not: Makinede sıkışma olmasını önlemek için bir seferde
işlemini daha hızlı yapmak için tarağın üzerindeki renkli çizgi
iki taneden fazla kapak delmeye çalışmayın (sadece
makinenin üzerindeki renkli oklarla aynı hizada olmalıdır.
PVC/240gsm kartondan yapılmış. Diğer malzemeler için
5
Belgeboyutunuseçin(g.5)
yalnızca 1 kapak delin).
Ciltlemek istediğiniz kâğıt / kapak boyutunu seçmek için
8
Belgeyiaçıktarağatakın(g.8)
kenar kılavuzu anahtarını ayarlayın: A4 (297mm x 210mm)
Sayfaları delme yerinden çıkarın ve açık tarağa yerleştirin.
veya Letter (215mm x 279mm). Büyük kapaklar kullanırken
“oversize” konumunu seçin, kapakları delin ve bir kenara
9
6-8adımlarınıgerektiğikadartekrarlayın
koyun. Sonra A4 veya Letter seçerek işleme devam edin.
Belgenizin tamamı tarağa takılana kadar 6-8 adımlarını
tekrarlayın.
J
Tarağikapatin(g.9)
Tarağı kapatın ve belgenizi alın.
Garanti
Bu makinenin işleyişi, normal şekilde kullanılması kaydıyla,
kanıtlanması gerekmektedir. ACCO Brands Europe tarafından
satın alındığı tarihten itibaren 2 yıl süreyle garantilidir. Garanti
yetki verilmemiş kişilerce yapılacak onarımlar ya da değişiklikler
süresi içinde ACCO Brands Europe, kendi takdirine göre arızalı
garantiyi geçersiz kılacaktır. Amacımız ürünlerimizin belirtilen
makineyi ücretsiz olarak tamir edecek veya değiştirecektir.
teknik özelliklere göre performans göstermesini sağlamaktır. Bu
Kullanma hatalarından veya makinenin amacı dışında
garanti, tüketicinin satılan mallara ilişkin ulusal mevzuat uyarınca
kullanılmasından kaynaklanan arızalar garanti kapsamında
sahip olduğu yasal hakları etkilemez.
değildir. Garantiden yararlanabilmek için satın alma tarihinin
Bu ürünü www.gbceurope.com adresinde online olarak kaydettirin.
19

Τεχνικάστοιχεία
GBCCombBindC20
Μέγ.πλάτοςχαρτιού
Letter, DIN A4 – 297 mm
2
Αριθμόςφύλλωνγιαδιάτρηση,
Μέγ. 20 φύλλα (80 gs/m
)
χαρτί
Αριθμόςφύλλωνγιαδιάτρηση,
Μέγ. 2 εξώφυλλα/0,2 χλστ (mm)
πλαστικάεξώφυλλα
το καθένα
Καθαρόβάρος
9,8 kg
Διαστάσεις(ΒxΥxΒ)
465 x 405 x 150 mm
Υπόκειται σε αλλαγές των τεχνικών προδιαγραφών, χωρίς προειδοποίηση.
Ειδικήανακοίνωση
Οδηγίεςασφάλειας
m
Σας ευχαριστούμε που επιλέξατε την μηχανή βιβλιοδεσίας GBC.
Η ACCO BRANDS EUROPE ΘΕΩΡΕΙ ΣΗΜΑΝΤΙΚΗ ΤΗ ΔΙΚΗ ΣΑΣ
Στόχος μας είναι να παράγουμε μηχανές βιβλιοδεσίας ποιότητας,
ΑΣΦΑΛΕΙΑ ΚΑΘΩΣ ΚΑΙ ΤΗΝ ΑΣΦΑΛΕΙΑ ΤΡΙΤΩΝ. ΣΤΙΣ ΟΔΗΓΙΕΣ
σε προσιτή τιμή, με πολλά χαρακτηριστικά προχωρημένης
ΑΣΦΑΛΕΙΑΣ ΟΠΩΣ ΚΑΙ ΠΑΝΩ ΣΤΗΝ ΙΔΙΑ ΤΗ ΜΗΧΑΝΗ ΘΑ
τεχνολογίας που να σας βοηθούν να επιτυγχάνετε εξαιρετικά
ΒΡΕΙΤΕ ΣΗΜΑΝΤΙΚΑ ΜΗΝΥΜΑΤΑ ΑΣΦΑΛΕΙΑΣ. ΔΙΑΒΑΖΕΤΕ ΤΑ
αποτελέσματα, κάθε φορά που τις χρησιμοποιείτε. Πριν
ΜΗΝΥΜΑΤΑ ΜΕ ΠΡΟΣΟΧΗ.
χρησιμοποιήσετε την μηχανή σας για πρώτη φορά, παρακαλούμε
να διαβάσετε προσεκτικά τον οδηγό.
Χρήσιμεςσυμβουλές
Συντήρηση
Για μέγιστη παραγωγικότητα όταν ακολουθείτε τα βήματα 6 έως
9, ξεκινήστε με το εξώφυλλό σας και, στη συνέχεια, προσθέστε
Φροντίστε να αδειάζετε τακτικά το δίσκο των αποκομμάτων.
τα φύλλα χαρτιού (20 κάθε φορά ) και τελειώστε με το πίσω
Έτσι θα αποφευχθεί η εμπλοκή και θα διασφαλιστεί ότι η μονάδα
εξώφυλλο.
είναι πάντοτε έτοιμη για διάτρηση. Η πρόσβαση στο δίσκο των
Για καλύτερα αποτελέσματα, να χρησιμοποιείτε πάντοτε
αποκομμάτων γίνεται από το πλάι του μηχανήματος.
καινούργια εξώφυλλα της GBC με πλαστικά σπιράλ GBC, σε
Προκειμένου να αποφευχθεί η υπερβολική φόρτωση, ποτέ να μην
αντίστοιχους συνδυασμούς χρωμάτων.
επιχειρείτε να τρυπήσετε περισσότερες σελίδες από το μέγιστο
2
Το πλαστικό σπιράλ μπορεί να ανοιχθεί και να κλειστεί ξανά
αριθμό που αναφέρεται (20 σελίδες των 80 gs/m
). Η μονάδα δεν
οποιαδήποτε στιγμή, για την αντικατάσταση ή την προσθήκη
χρειάζεται συντήρηση εάν ο χειρισμός έχει γίνει σωστά.
μεμονωμένων φύλλων (βλ. βήμα 2).
Σέρβις
Επικοινωνήστε μια εξουσιοδοτημένη αντιπροσωπία σέρβις της
GBC για τυχόν απαιτούμενες επισκευές.
20
- 1
- 2
