GBC H315 HeatSeal: инструкция
Раздел: Техника
Тип:
Инструкция к GBC H315 HeatSeal

HeatSeal
H215/H315
HighSpeed
G
Instruction Manual
F
Manuel d’utilisation
D
Bedienungsanleitung
I
Manuale d’istruzioni
O
Gebruiksaanwijzing
E
Manual de instrucciones
P
Manual de Instruções
T
Kullanım Kılavuzu
K
Οδηγίες
c
Brugsvejledning
o
FI
Käyttöopas
o
NO
Bruksanvisning
S
Bruksanvisning
Q
Instrukcja obsługi
o
CZ
Návod k obsluze
H
Használati útmutató
RUS
o
Руководствo по
зкcплyатации
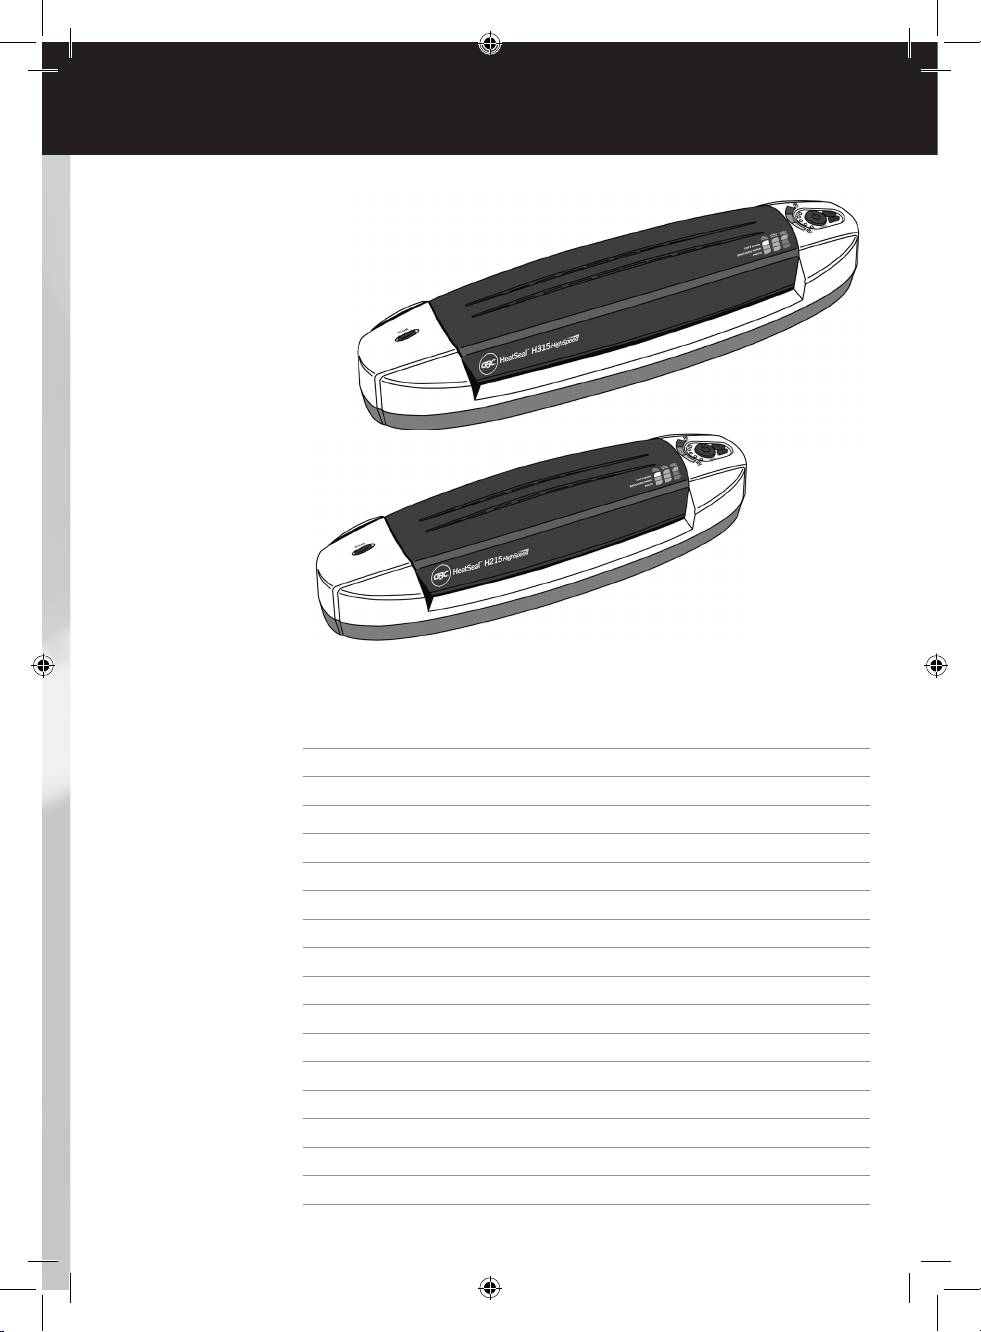
HeatSeal
H215/H315
HighSpeed
English 4
Français 6
Deutsch 8
Italiano 10
Nederlands 12
Español 14
Português 16
Türkçe 18
Ελληνικά 20
Dansk 22
Suomi 24
Norsk 26
Svenska 28
Polski 30
Česky 32
Magyar 34
Pyccкий 36
1
32
4 5 6
7
4
Specifications
GBC HeatSeal H215 HighSpeed
GBC HeatSeal H315 HighSpeed
Electrical
230V / 50Hz / 1.7 Amps / 380W
230V / 50Hz / 1.7 Amps / 380W
Machine Dimensions
455 x 172 x 131 mm
566 x 198 x 138 mm
Machine Weight
2.2 kg
3.00 kg
Maximum Pouch Width
245mm
320mm
Maximum Pouch Thickness
2 x 125 mic (Total 250)
2 x 125 mic (Total 250)
Maximum Thru-put Thickness
0.6mm
0.6mm
Warm-Up Time (2 x 75 mic)
5 minutes
5 minutes
Safety instructions
m
Important safeguards
m
YOUR SAFETY AS WELL AS THE SAFETY OF OTHERS IS IMPORTANT
WARNING: FOR YOUR PROTECTION DO NOT CONNECT
TO ACCO BRANDS EUROPE. IN THIS INSTRUCTION MANUAL AND ON
m
THE POUCH LAMINATOR TO ELECTRICAL POWER UNTIL
THE PRODUCT ARE IMPORTANT SAFETY MESSAGES. READ THESE
YOU READ THESE INSTRUCTIONS COMPLETELY. KEEP
MESSAGES CAREFULLY.
THESE INSTRUCTIONS IN A CONVENIENT LOCATION FOR
FUTURE REFERENCE. TO GUARD AGAINST INJURY, THE
THE SAFETY ALERT SYMBOL PRECEDES EACH SAFETY
FOLLOWING BASIC SAFETY PRECAUTIONS MUST BE
m
MESSAGE IN THIS INSTRUCTION MANUAL.
OBSERVED IN THE SET-UP AND USE OF THIS PRODUCT.
THIS SYMBOL INDICATES A POTENTIAL PERSONAL
SAFETY HAZARD THAT COULD HURT YOU OR OTHERS,
AS WELL AS CAUSE PRODUCT DAMAGE OR PROPERTY
General safeguards
DAMAGE.
• Use the unit only for its intended purposes of laminating documents.
THIS WARNING IS FOUND ON THE PRODUCT.
• Do not place anything in the throat opening of the laminator other than
pouches/documents.
m
WARNING
• Place unit on a secure, stable work area to prevent the unit from
c
Electrical shock hazard.
falling and possibly causing personal injury and damage to the unit.
Do not open. No user
• Follow all warnings and instructions marked on the unit.
servicable parts inside.
Refer servicing to qualified
• The socket outlet shall be installed near the equipment and shall be
service personnel.
easily accessible.
• Do not attempt single side lamination, this will destroy the laminator.
This safety message means that you could be seriously hurt or killed if
you open the product and expose yourself to hazardous voltage.
• Do not block the vent slots, this will cause the laminator to overheat.
The following ISO and IEC symbols appear on this product, and their
meanings are as follows:
Electrical safeguards
On / Off
Heat
• The unit must be connected to a supply voltage corresponding to the
electrical rating shown on the unit.
• Unplug the unit before moving it, or when it is not in use for an
Release
extended period of time.
• Do not operate with a damaged supply cord or plug. Do not alter the
attachment plug. The plug is configured for the appropriate electrical
Special notice
supply.
Thank you, for your recent purchase of a GBC Pouch Laminator. Your
• Do not overload electrical outlets beyond their capacity; fire or
new laminator may emit a slight odour during the initial stage of
electrical shock could result.
operation. It is normal and will diminish after several hours of operation.
• The unit is intended for indoor use only.
• Never push objects through the cabinet slots. Do not spill liquid of any
kind on this product.
Cleaning
• Close supervision is required when this product is used near children.
Caution: Unplug this product before cleaning.
m
• Wipe exterior only with a damp cloth. Do not use detergents
or solvents.
• Do not use aerosol dusters or cleaners.
• Do not spray anything into the machine.
4

G
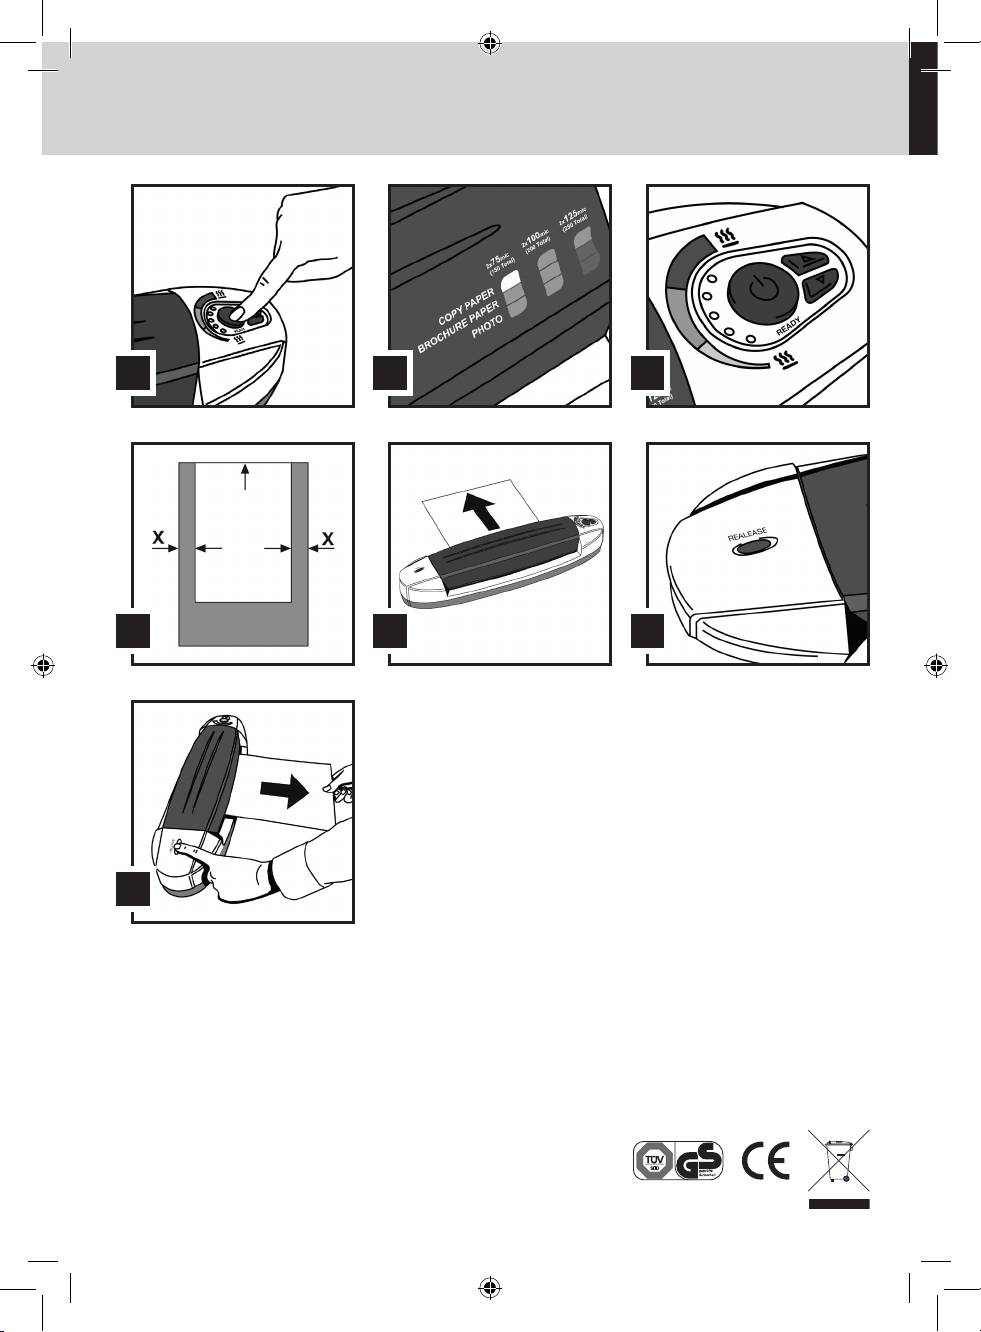
Operation, hot lamination
1
Connect power cord to appropriate power source.
4
A beep will be heard when laminator reaches operating temperature
and the green LED will glow on (first LED on bottom).
2
Push the power button to turn the power “ON” (fig. 1). The LED
for the lowest temperature setting will glow red (second LED from
5
Position the document to be laminated into a GBC laminating pouch,
bottom).
so that the document is aligned to the folded sealed edge and the
right and left borders are equal (fig. 4).
3
Using the lamination guidelines (fig. 2) select the appropriate
temperature setting by the pushbuttons (fig. 3) for the pouch gauge
6
Insert the pouch and its contents straight into the machine, leading
thickness and material you are laminating.
with the folded edge.
• If the laminated item appears to be cloudy, it means that the
7
The laminated item will automatically exit the rear of the machine.
laminator temperature is not hot enough. Allow the laminator to
After the pouch has stopped moving, immediately place it on a flat
heat for a few more minutes then run the pouch through again.
surface to cool for one minute before handling (fig. 5).
• If the laminated item is wavy, the TEMPERATURE is too hot. Verify
8
If you have finished laminating, push the switch to turn “OFF” the
temperature selector is set at the appropriate temperature.
machine.
• Always allow sufficient time for the laminator to adjust to changes
DO NOT LAMINATE AN EMPTY POUCH
in temperature setting.
Release button
How to use the release button.
4
Clean the rollers by running the cleaning sheet supplied with the
laminator through the machine 2 or 3 times in the hot operation
1
If pouch jams or is fed improperly, turn off the laminator immediately.
mode (red zone on temperature dial). If you do not have this sheet,
2
Press the release button down to release the motor from the rollers
use a similar cardboard sheet that fits the width of the laminator.
(fig. 6).
5
Continue laminating.
3
Pull your document back out of the laminator while pressing the
release button down (fig. 7).
Helpful lamination hints
1
Temperature setting Guidelines:
3
Do not attempt to do single sided lamination. This will destroy the
When laminating thin paper with light ink coverage, set the
laminator.
temperature dial at the low end of the range. Thick paper and heavy
4
As soon as the lamination is completed, remove from the rear of the
ink coverage require higher settings. Temperature settings will vary
machine and place on a cool flat surface for cooling to prevent the
due to the finish, chemistry and heat absorption properties of the
pouch from curling.
material being laminated.
5
Do not block the vent slots, this will cause the laminator to overheat.
2
Before laminating important or unique documents always run a test
pouch through the laminator using a similar type document.
Service
• Do not attempt to service or repair the pouch laminator yourself.
Unplug the unit and contact an authorised ACCO Brands Europe
service representative for any required repairs.
Guarantee
Operation of this machine is guaranteed for two years from date of
persons not authorised by ACCO Brands Europe will invalidate the
purchase, subject to normal use. Within the guarantee period, ACCO
guarantee. It is our aim to ensure that our products perform to the
Brands Europe will at its own discretion either repair or replace the
specifications stated. This guarantee does not affect the legal rights
defective machine free of charge. Defects due to misuse or use for
which consumers have under applicable national legislation governing
inappropriate purposes are not covered under the guarantee. Proof
the sale of goods.
of date of purchase will be required. Repairs or alterations made by
Register this product online at www.accoeurope.com
5
