Brother FAX 1570MC – страница 3
Инструкция к Факсимильному Аппарату (Факсу) Brother FAX 1570MC
BASIC FAX OPERATION
33
See
4
When you hear the fax tone, press
Start
.
Speed Dial
5
If you’re using the handset, hang up.
p. 22
Automatic Transmission
This is the easiest way to send a fax.
IMPORTANT: Do not pick up the handset or press
Speaker Phone
.
1
Insert the document face down in the feeder.
2
Enter the fax number using One Touch, Speed Dial, Tel-index or the dial
pad.
3
Press
Start
.
Manual and Automatic Fax Redial
If you’re sending a fax manually and the line is busy, press
Redial/Pause
to retry
the number.
If you’re sending a fax automatically, and if the line is busy, the FAX/MFC will
redial automatically up to three times at 5 minute intervals.
Receiving Faxes
Select Answer Mode
See
Manual—You must answer all calls yourself. If you hear fax tones, press
Start
to
Distinctive
begin receiving the fax, then hang up. You can use this mode with Distinctive Ringing.
Ringing
pp. 51-52
Fax Only—The FAX/MFC automatically answers every call as a fax call. You
cannot receive a voice call, but you can dial out and make a voice call.
See
F/T—The FAX/MFC automatically answers every call. If the call is a fax, it prints
F/T (Fax/Tel)
the fax. If the call is not a fax, it signals you with a double ring (ring-ring),
Mode Only
different from the phone company ringing, to alert you to pick up the call. If you
p. 50
select this setting, you’ll need to set the Ring Delay and F/T Ring Time features
(on the following pages). If you have extension phones on the same line as the
FAX/MFC, set Ring Delay to 4.
CHAPTER FIVE
34
MSG CTR—These FAX/MFCs provide you with a built-in digital message center
for fax and voice. When you set the machine to answer calls, it will record up to
15 minutes (MFC 1870MC) or up to 30 minutes (Fax 1570MC and MFC 1970MC)
of messages, depending on how much memory is available. For more informa-
tion about Message Center (MSG CTR) operation, please see Chapter 8 and
Chapter 9.
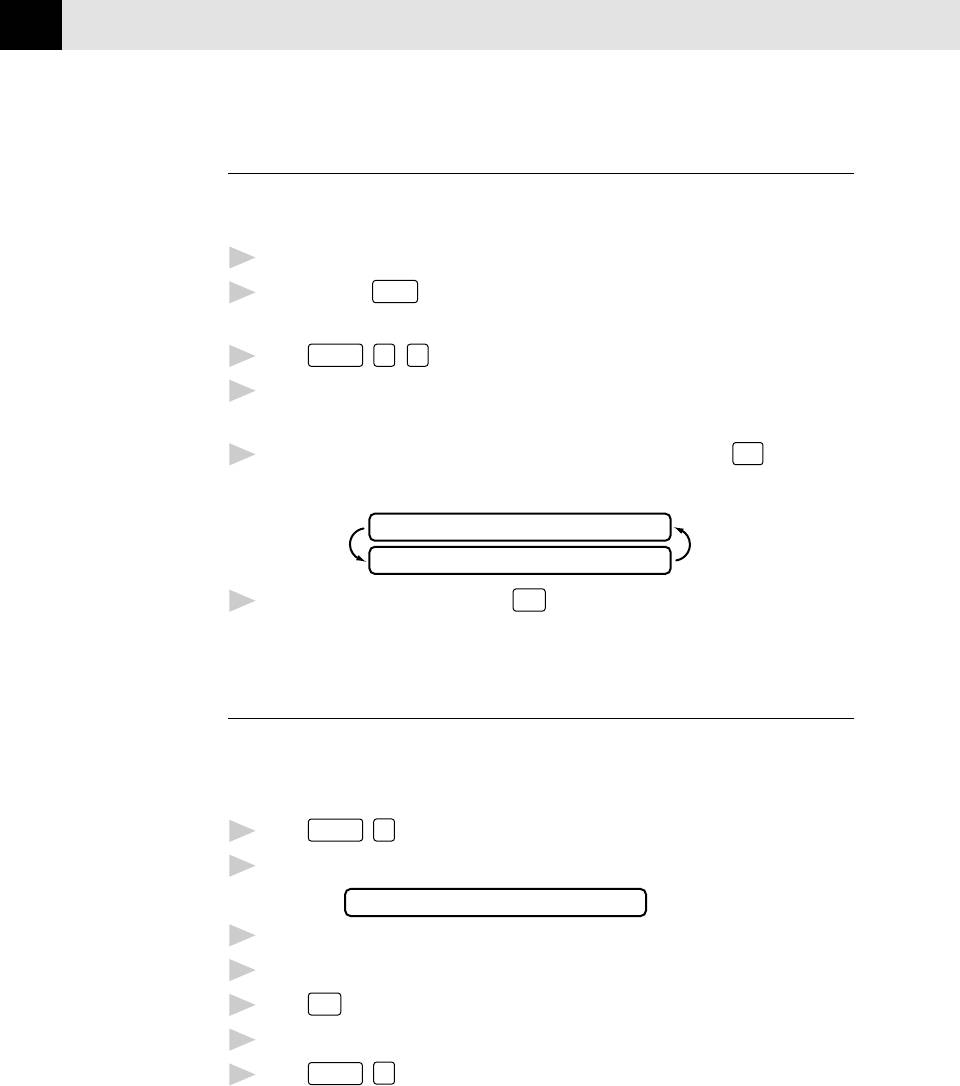
Current
MNL:
Answer Mode
MANUAL
FAX:
FAX ONLY
09/06 15:25 FAX
F/T:
FAX/TEL
MC:
MESSAGE CENTER
ClearSet Function
Resolution
Mode
Record Fax/Tel Outgoing Announcement
(F/T OGM)
This is the announcement played by your FAX/MFC (not an external TAD) when
someone calls and your machine is set to F/T mode. Although callers hear your
announcement, they cannot leave a message. To erase the announcement, follow
the directions on page 62, “Erasing Outgoing Message”.
Press
Function
,
8
,
6
. The screen prompts you to choose F/T OGM or MSG
1
CTR OGM.
Press or to select F/T OGM.
2
Press
Set
.
3
Press
Record
, then pick up the handset to record a message.
4
Replace the handset. Your OGM is played.
5
Press
Stop
to exit.
6
Easy Receive
See
When you use this feature, you don’t have to press
Start
when you answer a fax
Operation
call and hear calling beeps. Just hold the handset and wait a few seconds. When
from
you see “RECEIVE” on the fax screen or when you hear “chirps” through the
Extension
Telephone
handset of an extension phone connected to another wall jack, just replace the
p. 50
handset, and the FAX/MFC does the rest. Selecting ON allows the machine to
and
receive fax calls automatically, even if you lift the handset of an extension phone.
For F/T
Selecting SEMI lets the FAX/MFC receive the call only if you’ve answered it at the
(Fax/Tel)
Mode Only
FAX/MFC. Selecting OFF means you’ll have to activate the FAX/MFC yourself, by
p. 50
pressing
Start
or by pressing
5
1
if you are not at the FAX/MFC.
BASIC FAX OPERATION
35
In case Easy Receive does not work because of a poor phone line connection, just
press
Start
or press the Activation Code
5
1
.
Function
1
Press
,
7
,
6
.
2
Use or to select ON, SEMI, or OFF.
Press
Set
3
when screen displays your selection.
4
Press
Stop
to exit.
If you’ve set the feature to ON, but your FAX/MFC doesn’t automatically connect
a fax call when you lift the extension phone handset, press
5
1
.
At the FAX/MFC, lift the handset and press
Start
.
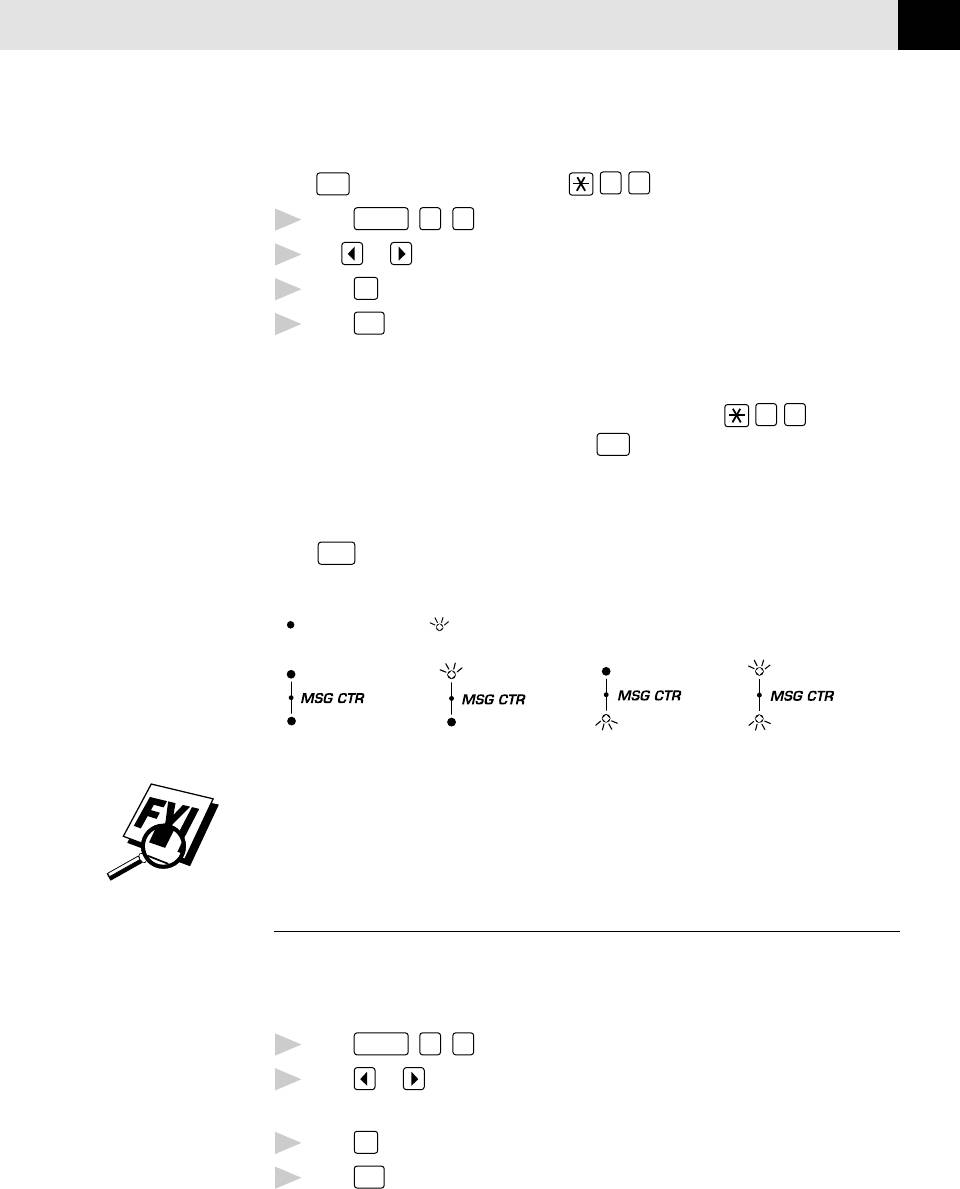
To select or change your Answer Mode
Press
Mode
repeatedly until you find the mode you want.
The indicator lights show your current selection.
( means light off. means light on.)
FAX
FAX
FAX
FAX
F/T
F/T
F/T
F/T
(MANUAL)
(FAX ONLY)
(FAX/TEL)
(MSG CTR)
*You must record an outgoing message (OGM) in order to use the Message Center
Mode. See Message Center Mode P.59.
Setting Ring Delay
The Ring Delay setting determines the number of times the FAX/MFC rings before
it answers. If you have extension phones on the same line as the FAX/MFC, set the
Ring Delay to 4.
1
Press
Function
,
6
,
2
.
See
2
Press or to select how many times the line rings before the FAX/MFC
Operation
answers (00 – 04). If you select 00, the line doesn’t ring at all.
from
Set
Extension
3
Press
when the screen displays your selection.
Telephone
4
Press
Stop
to exit.
p. 50
and
For F/T
(Fax/Tel)
Mode Only
p. 50
CHAPTER FIVE
36
Setting F/T Ring Time
You must determine how long the FAX/MFC will notify you with its special double
ring when you have a voice call. This ringing happens after the initial ringing
from the phone company. Only the FAX/MFC rings, for 20, 30, 40 or 70 seconds;
no other phones on the same line ring the special double ring.
1
Press
Function
,
6
,
5
.
2
Press or to select how long the FAX/MFC will ring to alert you that you
have a voice call.
3
Press
Set
when the screen displays your selection.
RING TIME:XX SEC
4
Press
Stop
to exit.
Now, when a call comes in and the machine is set to F/T Mode, all phones on this
line will ring the number of times you selected in Ring Delay.
You can let the FAX/MFC pick up and detect if it’s a fax or voice call. If it’s a fax
call, the machine prints the fax. If it’s a voice call, the machine signals you with a
double ring for the length of time you selected in F/T Ring Time.
Even if the caller hangs up during the double ringing, the FAX/MFC continues for
the set time.
Speaker Volume
You can set the volume of the FAX/MFC speaker phone.
1
Press
Function
,
6
,
3
.
2
Press or to select your volume setting (OFF, LOW, MEDIUM, or HIGH).
3
Press
Set
when the screen displays your selection.
4
Press
Stop
to exit.
BASIC FAX OPERATION
37
Ring Volume
You can select how loudly, or if, the FAX/MFC rings.
1
Press
Function
,
6
,
6
.
2
Press or to select OFF, LOW, MEDIUM, or HIGH.
3
Press
Set
when the screen displays your selection.
4
Press
Stop
to exit.
Even if you select OFF, the ring volume will remain LOW in F/T ringing (double
ringing), and LOW in Call Reservation.
Smoothing
When activated, this feature enhances the appearance of incoming faxes by
“smoothing” lines. It takes no longer to receive faxes in this setting, which comes
set to ON.
You cannot use “smoothing” for outgoing faxes, or for printing lists and reports.
1
Press
Function
,
5
,
1
.
2
Press or to choose ON or OFF.
3
Press
Set
.
4
Press
Stop
to exit.
Setting Paper Size
You can use three sizes of paper for printing your faxes—letter, legal, and A4.
When you change the kind of paper you have loaded in the FAX/MFC, you will
need to change the setting for paper size, so the FAX/MFC will know how to fit the
incoming fax on the page. You can also select the level of page reduction to fit the
paper in your FAX/MFC.
1
Press
Function
,
5
,
6
. The screen displays:
RCD PAPER:LETTER
2
Use or to select LETTER, LEGAL or A4.
3
Press
Set
when the screen displays your selection.
4
Use or to select AUTO, 100%, 93%, 87% or 75%.
Press
Set
when the screen displays your selection.
5
Press
Stop
to exit.
6
CHAPTER FIVE
38
Printing a Reduced Incoming Document
You can always reduce the size of an incoming fax to a fixed percentage, regard-
less of the size of the paper (up to legal) in your FAX/MFC. If you choose AUTO,
the FAX/MFC chooses the level of reduction for you.
1
Press
Function
,
5
,
5
. The screen displays:
REDUCTION:AUTO
2
Use or to select the reduction ratio you want—AUTO, 93%, 87%,
or 75%. Choose 100% if you don’t want a reduction.
3
Press
Set
when the screen displays your selection.
4
Press
Stop
to exit.
Recommended Reductions
If your paper is letter size (8.5" x 11"), and the incoming fax is
letter size, select 93%
A4, select 87%
legal size, select 75%.
If your paper is A4 (8.2" x 11.6"), and the incoming fax is
letter size, select 100%
A4, select 93%.
If your paper is legal size (8.5" x 14"), and the incoming fax is
letter size, select 100%
A4, select 100%
legal size, select 93%.
39
CHAPTER SIX
Telephone &
Speaker Phone
6
(Voice) Operatio
Making Voice Calls
You can use your FAX/MFC to make voice telephone calls, by dialing manually or
by using One Touch or Speed Dial memory. You can use the handset or the
Speaker Phone to make and receive calls. The Speaker Phone allows you to
operate the phone hands-free, or allows more than one person in the room to
participate in a two-way phone conversation. When using the Speaker Phone,
make sure to speak clearly and close to the microphone.
Manual Dialing
Manual dialing is simply pressing all of the digits of the Phone number.
1
Pick up the handset—OR—Press
Speaker Phone
.
2
When you hear a dial tone, dial the call, using the dial pad.
Speaker Phone
3
You can switch from handset to Speaker Phone by pressing
,
then replacing the handset. You can switch from Speaker Phone to handset
by lifting the handset.
To hang up, replace the handset—OR—Press
Speaker Phone
.
4
Answering Calls with the Speaker Phone
When the phone rings, instead of lifting the handset, press
Speaker Phone
. Speak
clearly, toward the microphone. To end the call, press
Speaker Phone
.
If you have a bad telephone line connection, the other party might hear your
voice echoed during the call. Hang up and try the call again—OR—Pick up the
handset.
n
CHAPTER SIX
40
One Touch Dialing
See
Storing One
1
Pick up the handset—OR—Press
Speaker Phone
.
Touch Dial
Numbers
2
When you hear a dial tone, press the One Touch key of the location you want
pp. 20-21
to call.
If you try to use a One Touch location with no number stored in it, you hear
a warning sound, and the screen displays NOT REGISTERED. The display
returns to normal after 2 seconds.
Speed Dialing
See
Pick up the handset—OR—Press
Speaker Phone
1
.
Storing
When you hear a dial tone, press
Speed Dial
, then press the two-digit
Speed Dial
2
Numbers
Speed Dial number.
p. 22
3
To hang up, replace the handset—OR—Press
Speaker Phone
.
Hold
Press
Hold
1
to put a call on Hold.
2
You can put down the handset without disconnecting the call.
3
Pick up the FAX/MFC handset to release the call from Hold. Picking up an
extension handset will not release the call from Hold.
Pause
Press
Redial/Pause
to insert a 3.5 second pause between numbers.
Tone/Pulse
If you have pulse dialing service, but need to send tone signals (for telephone
banking, for example), follow the directions below. If you have touch tone service,
you do not need this feature to send tone signals.
1
Lift the handset.
2
Press . Any digits dialed after this send tone signals.
3
When you hang up, the FAX/MFC returns to pulse dialing service.
TELEPHONE & SPEAKERPHONE (VOICE) OPERATION
41
Searching Telephone Index
See
You can search for names you have stored in One Touch and Speed Dial
Storing One
memories. Names are stored alphabetically.
Touch Dial
Numbers
1
Press
Tel-index
, then enter the first letter of the name.
pp. 20-21
2
Press or to search the memory.
and
Storing
3
When the screen displays the name you want to call, pick up the handset or
Speed Dial
press
Speaker Phone
.
Numbers
Start
p. 22
4
Press
to begin dialing.
5
When the call is over, hang up, or press
Speaker Phone
to cancel the call.

CHAPTER SIX
42
43
CHAPTER SEVEN
Advanced
Fax Operatio
7
Sending Faxes
Quick Scan Fax Transmission
You can scan a fax into the FAX/MFC’s memory to be sent as soon as the scan is
complete. This way, you don’t have to wait for the entire fax to be transmitted
before you retrieve your original.
If you get a MEMORY FULL message while scanning the first page of a fax, press
Stop
to cancel the scan. If you get a MEMORY FULL message while scanning in a
subsequent page, you’ll have the option to press
Start
to transmit the pages
scanned so far, or to press
Stop
to cancel the Quick Scan operation.
Insert the document in the feeder.
1
Press
Q.Scan
. The screen indicates how much memory is available.
2
Enter the fax number.
3
Press
Start
to begin scanning the document into memory. Once the scan is
4
complete, the FAX/MFC dials the call.
Daily Timer
You can use this function to set a time to send a fax every day. The setting stays
the same until you change it. Then, when you use Delayed Transmission the time
will be displayed automatically.
1
Press
Function
,
7
,
2
.
2
Use the dial pad to enter the time in 24-hour format (for example, enter
19:45 for 7:45 PM).
Wait 2 seconds, then press
Stop
3
to exit.
n
See
Delayed
Transmission
p. 44
and
Delayed
Polling
p. 55
CHAPTER SEVEN
44
Delayed Transmission
You can use this function to send a fax up to 24 hours later. If you have set a time
in Daily Timer, the time will be displayed in Step 4.
See
1
Insert the document in the feeder.
Daily Timer
p. 43
2
You can press
Q.Scan
to use memory transmission, or you can send your fax
normally.
3
Press
Function
,
1
,
1
.
4
Enter the time you want the fax to be sent, in 24-hour format (for example,
enter 19:45 for 7:45 PM).
5
Wait 2 seconds (the screen will display 1. TIMER), then press
Stop
. The
screen prompts you to enter the fax number.
MEMORY 100%
ENTER FAX NO.
6
Enter the fax number, and press
Start
. The FAX/MFC will wait until the time
you have entered to send the fax.
Interrupting Timer and Poll Waiting
You can send a fax (or make a copy) now, even if you have the FAX/MFC set to
send a fax later, or if you have it set for Poll Waiting. However, you cannot use
automatic redial or the function mode.
1
Press
Function
,
0
.
2
Wait 2 seconds, then remove the documents that are waiting in the feeder.
INSERT DOCUMENT
3
Place the document you want to send now in the feeder.
4
Enter the number for the fax you want to send now.
Press
Start
5
.
6
After the transmission is finished, return the first document to the feeder.
7
Press
Function
,
0
to restore the Delayed Transmission timer.

ADVANCED FAX OPERATION
45
Canceling a Delayed Fax
You can cancel tasks you’ve scheduled using the timer.
1
Press
Function
,
2
. Any waiting jobs appear on the display. If no jobs are
waiting, the screen displays NO JOB WAITING.
2.CANCEL JOB
2
If you have more than two jobs waiting, use or to select the job you
want to cancel. Press
Set
when the screen displays your selection.
—OR—
If you have only one job waiting, go to step 3.
3
Press
1
to cancel—OR—Press
2
to exit without canceling.
4
Press
Stop
to exit.
Broadcasting
Using the numbers you have stored in group dialing, One Touch and Speed Dial
See
memory, you can “broadcast” faxes automatically to many different locations in
Setting Up
a few simple steps. (Model MFC 1870MC offers up to 59 locations; FAX 1570MC
Groups for
and MFC 1970MC offer up to 123 locations.)
Broadcasting
pp. 23-24
After the Broadcast is completed, a Broadcast Report will be printed automatically
to let you know the results.
1
Insert the document in the feeder.
2
Press
Q.Scan
. The screen displays how much memory is available.
3
Enter the One Touch and Speed Dial numbers (one after the other) or a
Group number you have stored.
Start
4
Press
. The FAX/MFC stores the document in memory, then transmits it
to all the numbers you entered. If the line is busy, the FAX/MFC will retry.
Press
Stop
during transmission to cancel the current fax broadcast.
Overseas Mode
See
If you have difficulty sending a fax overseas, use the Overseas Mode.
Sending
Faxes
After you send a fax using this feature, the feature turns itself off.
pp. 31-33
1
Insert document.
2
Press
Function
,
1
,
6
.
6.OVERSEAS MODE
3
Press or to select ON (or OFF).
4
Press
Set
when the screen displays your selection.
5
Press
Stop
to exit.
6
Follow basic procedures to send a fax.
CHAPTER SEVEN
46
Error Re-Transmission
Sometimes there is noise or interference on the phone line, which makes it
difficult for your FAX/MFC to transmit a fax. You can set the FAX/MFC to
automatically retransmit (RE-TX).
1
Press
Function
,
5
,
4
.
2
Press or to select ON (or OFF).
Set
3
Press
when the screen displays your selection.
Stop
4
Press
to exit.
Composing Electronic Cover Page
See
Your cover page includes the name/number stored in the One Touch or Speed
One Touch
Dial memory. If you’re dialing manually, the name is left blank.
and
The cover page indicates the fax is from your Station ID, and the number of pages
Speed Dial
pp. 20-22
you’re sending. If you have COVERPG ON/OFF (function 5-3) ON, the number of
pages remains blank.
You can select a comment to include on your cover page.
See
1.COMMENT OFF
Setting
2.PLEASE CALL
Station ID
p. 18
3.URGENT
4.CONFIDENTIAL
Instead of using one of the comments above, you can enter up to two customized
messages, each 27 characters long. Use the chart on page 19 to help enter
characters.
1
Press
Function
,
7
,
7
.
2
Use or to choose position 5 or 6 for your customized comment.
3
Press
Set
.
4
Use the dial pad to enter your customized comment.
Press
Set
5
.
6
Press
Stop
to exit.
ADVANCED FAX OPERATION
47
Always Send Cover Page
Make sure station ID is set up (p. 18). This feature does not work without Station
ID set up.
You can set the FAX/MFC to send a cover page whenever you send a fax. The
number of pages in your fax is not included when you use this setting.
1
Press
Function
,
5
,
3
.
2
Press or to select.
COVERPAGE:OFF
COVERPAGE:ON
3
Press
Set
when the screen displays your selection. (If you select ON, a
coverpage is always sent when you send a fax.)
4
If you selected ON, you must select a comment. Use or to view
possible selections. (You can select a custom comment, instead.)
1.COMMENT OFF
2.PLEASE CALL
3.URGENT
4.CONFIDENTIAL
5.(USER DEFINED)
6.(USER DEFINED)
5
Press
Set
when the screen displays your selection.
6
Press
Stop
to exit. Now, whenever you insert a document in the feeder, the
screen displays COVERPAGE ON before prompting you to dial.
Cover Page (Temporary Setting)
Make sure station ID is set up (p. 18). This feature does not work without Station
ID set up.
You can set the fax to send a cover page with a particular document. This cover
page will include the number of pages in your document.
1
Insert the document in the feeder.
2
Press
Function
,
1
,
7
.
3
Press or to select ON (or OFF).
4
Press
Set
when the screen displays your selection.
CHAPTER SEVEN
48
5
Press or to view comment selections.
1.COMMENT OFF
2.PLEASE CALL
3.URGENT
4.CONFIDENTIAL
5.(USER DEFINED)
6.(USER DEFINED)
6
Press
Set
when the screen displays your selection.
7
Enter two digits to indicate the number of pages you are sending (enter
0
0
to leave number of pages blank).
8
Wait 2 seconds, then press
Stop
.
9
Enter the fax number you’re calling.
10
Press
Start
.
Using a Printed Cover Page
1
Press
Function
,
3
,
4
.
2
Press
Start
. Your FAX/MFC prints a copy of your cover page.
Call Reservation
You can send a fax and let the other party know that you want to have a
conversation after the fax transmission is complete. The other fax machine will
ring as if it were receiving a telephone call; if the other party picks up the handset,
your FAX/MFC will ring. Lift the handset to speak.
If you set Call Reservation and Call Back message to ON, your FAX/MFC leaves a
message if the other party does not answer.
1
Insert the document in the feeder.
2
Press
Function
,
1
,
3
. The screen displays the current setting for Call
Reservation.
CALL RESERVE:ON
CALL RESERVE:OFF
3
Press or to select ON (or OFF).
ADVANCED FAX OPERATION
49
4
If you set Call Reservation to ON, press
Set
when the screen displays your
selection. The screen displays the current setting for Call Back Message.
CALL BACK:OFF
CALL BACK:ON
5
Press or to select ON (or OFF).
Set
6
Press
when the screen displays your selection.
Press
Stop
7
. The screen prompts you to enter the fax number you want to call.
8
Enter the fax number, and press
Start
.
9
If you’ve set Call Reservation to ON, pick up your handset if the FAX/MFC
rings.
You cannot use auto redial with Call Reservation. You cannot use Call
Reservation with Delayed Transmission or with Polling. You must register your
Station ID to set Call Back Message to ON.
Print Call Back Message
1
Press
Function
,
3
,
5
.
2
Press
Start
.
Next-Fax Reservation
Even if your fax is receiving another fax, you can set your FAX/MFC to send your
fax next. This way, you don’t have to wait for it to finish sending or receiving the
other fax. You can dial this fax call manually, or by using Redial, One Touch,
Speed Dial, or Chain dialing. (When you use One Touch and Speed Dial, only the
memory location—not the name of the person you’re calling—is displayed.)
1
Insert the documents in the feeder. If necessary, press
Resolution
to adjust
resolution.
2
Enter the fax number.
3
Press
Start
.
4
Press
Set
. The screen displays:
NEXT-FAX RESERVD
5
To cancel the reservation, remove the documents and press
Stop
.
You can’t use this feature if there is a document waiting in the feeder (possibly for
Delayed Transmission or Poll Waiting), or when the timer has been interrupted.
CHAPTER SEVEN
50
Multiple Resolution Transmission
Use this feature to select separate resolution settings for each page of the fax
you’re sending. This could be useful if you’re sending a fax with photos and
letters, or some pages with small print and others with normal print. Resolution
settings return to STANDARD after the fax is sent.
1
Insert documents in feeder, then press
Function
,
1
,
5
.
2
Use or to select resolution for page 1, then press
Set
.
3
Repeat Step 2 for subsequent pages. Press
Stop
when you’re finished.
4
Enter the fax number you’re calling, and press
Start
.
Receiving Faxes
Operation from Extension Telephone
See
If you answer a fax call on an extension phone, you can make your FAX/MFC take
F/T Ring
over by using the Activation Code. When you press the Activation Code
Time
5
1
, the FAX/MFC starts to receive a fax.
p. 36
If the FAX/MFC answers a voice call and double-rings for you to take over, use the
Deactivation Code
5
1
to take the call at an extension phone.
See
Easy Receive
pp. 34-35
If you answer a call, and no one is on the line, assume you’re receiving a fax. At
the FAX/MFC phone, press
Start
, then hang up. At an extension phone, press
5
1
, wait for fax receiving tones (chirps), then hang up. (Your caller will have
to press
Start
to send the fax.)
For F/T (Fax/Tel) Mode Only
When the FAX/MFC is in F/T mode, it will use the F/T Ring Time (double ringing)
to alert you to a voice call. If you’re at the FAX/MFC, you can lift the handset to
answer.
If you’re at an extension phone, you’ll need to lift the handset during the F/T
Ring Time and press
5
1
between the double rings. If no one is on the
line, or if someone wants to send you a fax, send the call back to the FAX/MFC by
pressing
5
1
.


