Brother FAX 1570MC – страница 2
Инструкция к Факсимильному Аппарату (Факсу) Brother FAX 1570MC
INSTALLATION
13
4
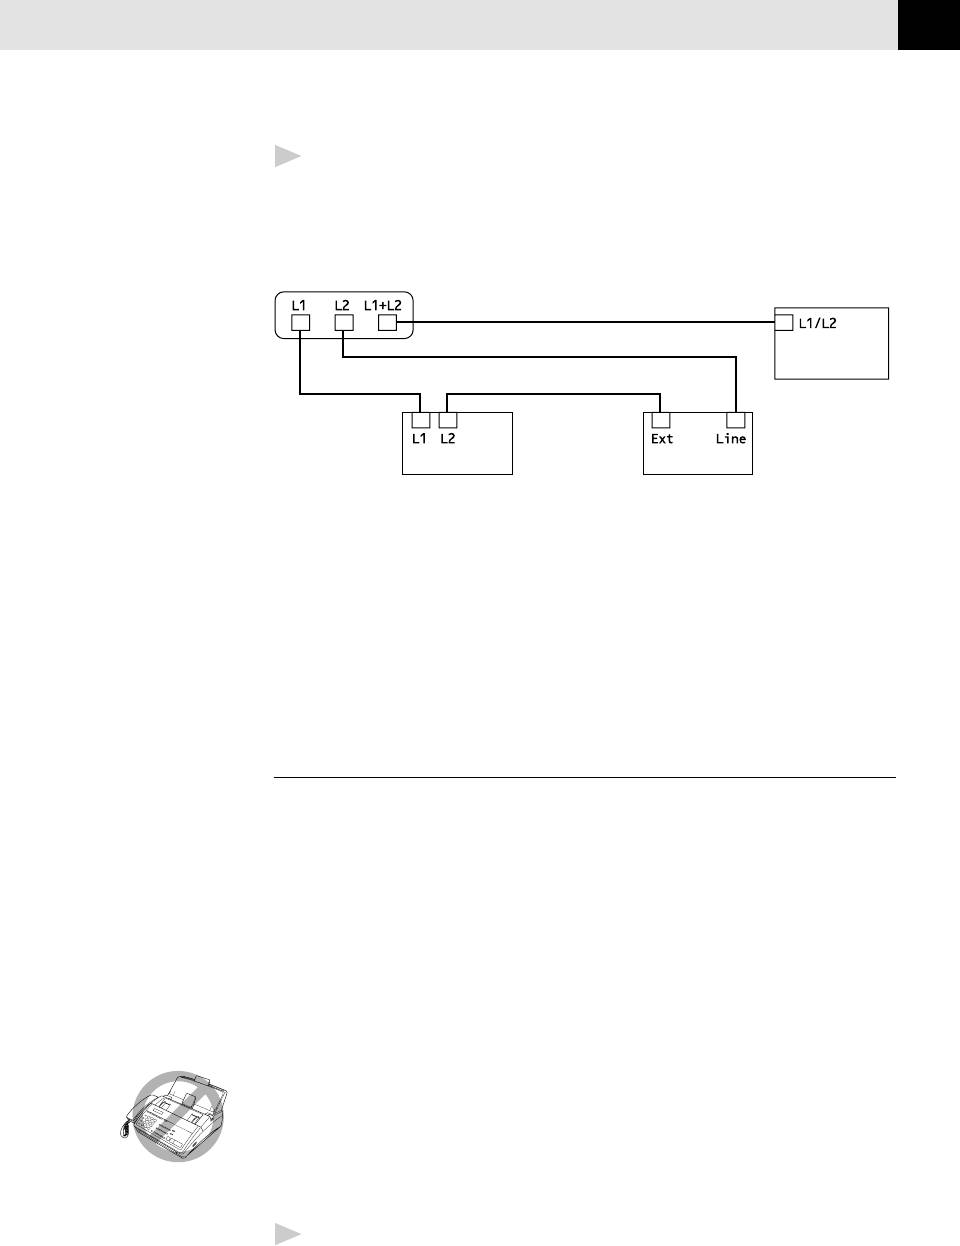
Plug one end of the second telephone line cord for your TAD into the L2 jack
of the two-line TAD. Plug the other end into the EXT. jack on the left side of
the FAX/MFC.
Triplex Adapter
Two Line Phone
.
Two Line External TAD FAX/MFC
You can keep two-line telephones on other wall outlets as always. There are two
ways to add a two-line telephone to the FAX/MFC’s wall outlet. You can plug the
telephone line cord from the two-line telephone into the L1+L2 jack of the
triplex adapter. Or, you can plug the two-line telephone into the TEL jack of the
two-line TAD.
Multi-Line Connections (PBX)
Most offices use a central telephone system. While it is often relatively simple to
connect the FAX/MFC to a key system or a PBX (Private Branch Exchange), we
suggest that you contact the company that installed your telephone system and
ask them to connect the FAX/MFC for you. It is advisable to have a separate line
for the FAX/MFC. You can then leave the machine in FAX ONLY Mode to receive
faxes any time of day or night.
See
If the FAX/MFC is to be connected to a multi-line system, ask your installer to
Easy Receive
connect the unit to the last line on the system. This prevents the unit from being
pp. 34-35
activated each time a telephone call is received.
As with all fax units, this machine must be connected to a two wire system. If your line
has more than two wires, proper connection of the FAX/MFC cannot be made.
If you are installing the FAX/MFC to work with a PBX:
1
It is not guaranteed that the unit will operate correctly under all circum-
stances with a PBX. Any cases of difficulty should be reported first to the
company that handles your PBX.

CHAPTER TWO
14
2
If all incoming calls will be answered by a switchboard operator, it is
recommended that the Answer Mode be set to MANUAL. All incoming calls
should initially be regarded as telephone calls.
3
The unit may be used with either pulse or tone dialing telephone service.
Custom Features on Your Phone Line
If you have Ring Master, Voice Mail, an answering service, alarm system or any
other custom feature on your telephone line, it may create a problem in the
operation of your FAX/MFC.
Connecting an External
Telephone Answering Device (TAD)
Sequence
You might choose to connect an additional answering system. When you have an
external TAD on the same telephone line as the FAX/MFC, the TAD answers all
calls. The FAX/MFC “listens” for fax calling (CNG) tones. If it hears them, the
FAX/MFC takes over the call and receives the fax. If it doesn’t hear CNG tones, the
FAX/MFC lets the TAD continue playing your outgoing message so your caller can
leave you a voice message.
The TAD must answer within 4 rings (the recommended setting is 2 rings). The
FAX/MFC cannot hear CNG tones until the TAD has answered the call, and with 4
rings there are only 8-10 seconds of CNG tones left for the fax “handshake.”
Make sure you carefully follow instructions in this manual for recording your
outgoing message. Do not use a “toll-saver” ring setting on the TAD.
INSTALLATION
15
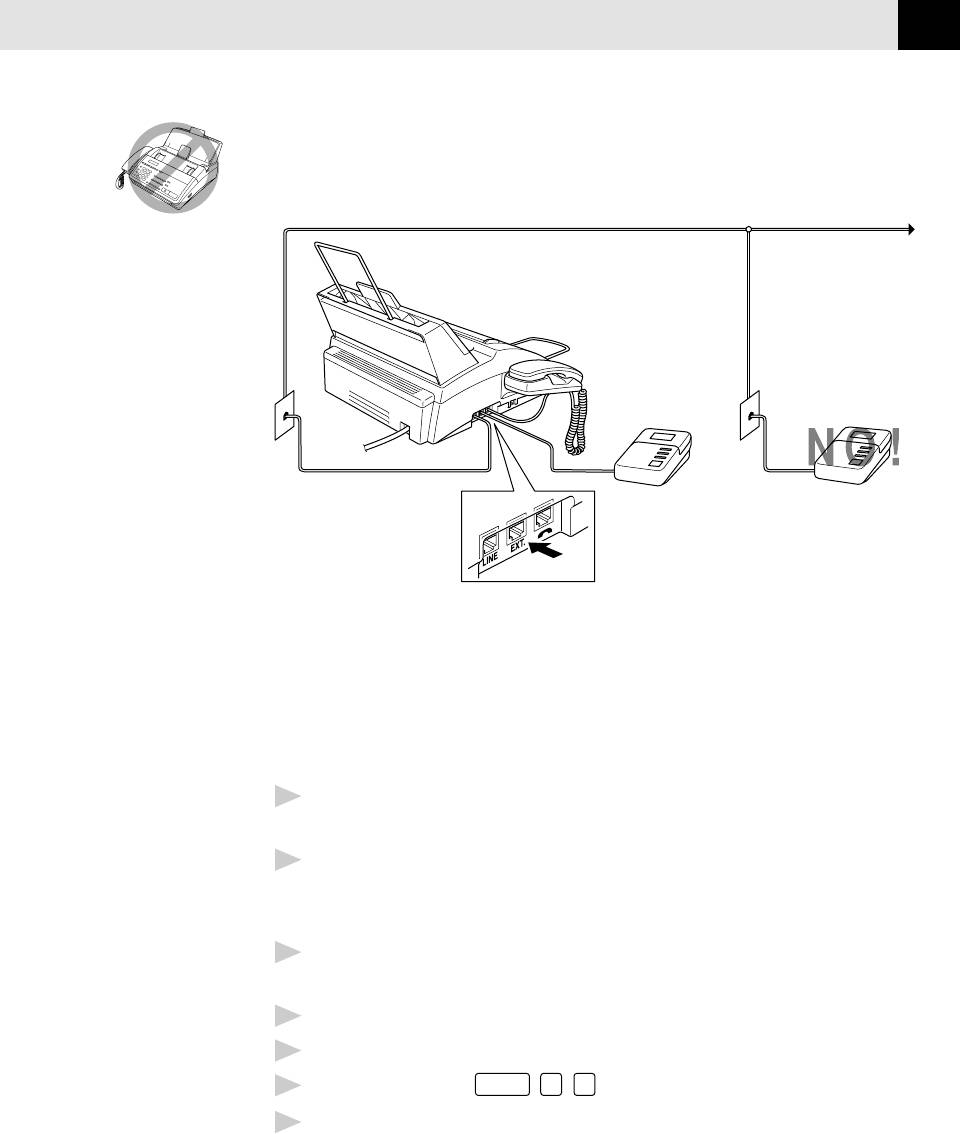
Do not connect a TAD elsewhere on the same phone line—your FAX/MFC and
TAD will both try to control the line.
Connections
The external TAD must be plugged into the left side of the FAX/MFC, into the jack labeled
EXT. Your FAX/MFC cannot work properly if you plug the TAD into a wall jack.
1
Plug the telephone line cord from the wall jack into the left side of the FAX/
MFC, in the jack labeled LINE.
2
Plug the telephone line cord from your TAD into the left side of the FAX/MFC,
in the jack labeled EXT. (Make sure this cord is connected to the TAD at the
TAD’s telephone line jack, and not its telephone set jack.)
3
Set your external TAD to 4 rings or less. (The FAX/MFC’s Ring Delay setting
does not apply).
4
Record the outgoing message (see below).
5
Set the TAD to answer calls.
6
Set Message Storage (
Function
,
8
,
1
) to VOICE:EXT..
Set the Answer Mode to MC:MSG CTR.
7
CHAPTER TWO
16
Outgoing Message (OGM) on External TAD
Timing is important in recording this message. The message sets up the way your
external TAD handles both manual and automatic fax reception.
1
Record 5 seconds of silence at the beginning of your message. (This allows
your FAX/MFC time to listen for the fax CNG tones of automatic
transmissions before they stop.)
2
Limit your speaking to 20 seconds.
3
End your 20-second message by giving your Remote Activation Code for
people sending manual faxes. For example:
“After the beep, leave a message or send a fax by pressing
5 1.”
Connecting an External Telephone
Your FAX/MFC is equipped with a handset that you can use as a regular phone.
However, you can also connect a separate telephone (or telephone answering
device) directly to your FAX/MFC.
Connect the modular plug on the telephone’s line cord to the jack labeled EXT.
on the left side of the FAX/MFC.
Whenever this phone (or TAD) is in use, the screen displays “EXT. TEL IN USE,”
and, if the fax handset is lifted, an alarm sounds. To disconnect the call on the
external phone and switch to the fax, press
Speaker Phone
.
17
CHAPTER THREE
Fax
Settings
3
Fax Settings
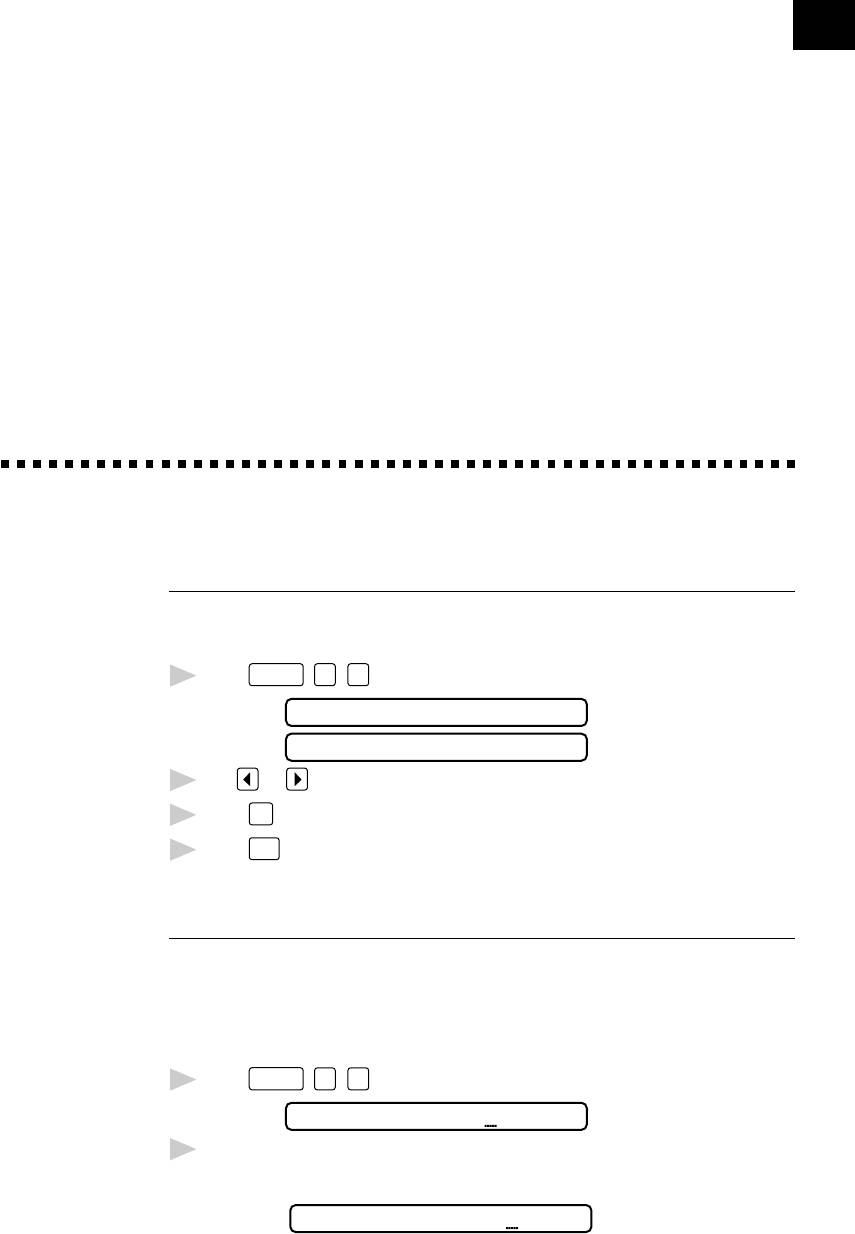
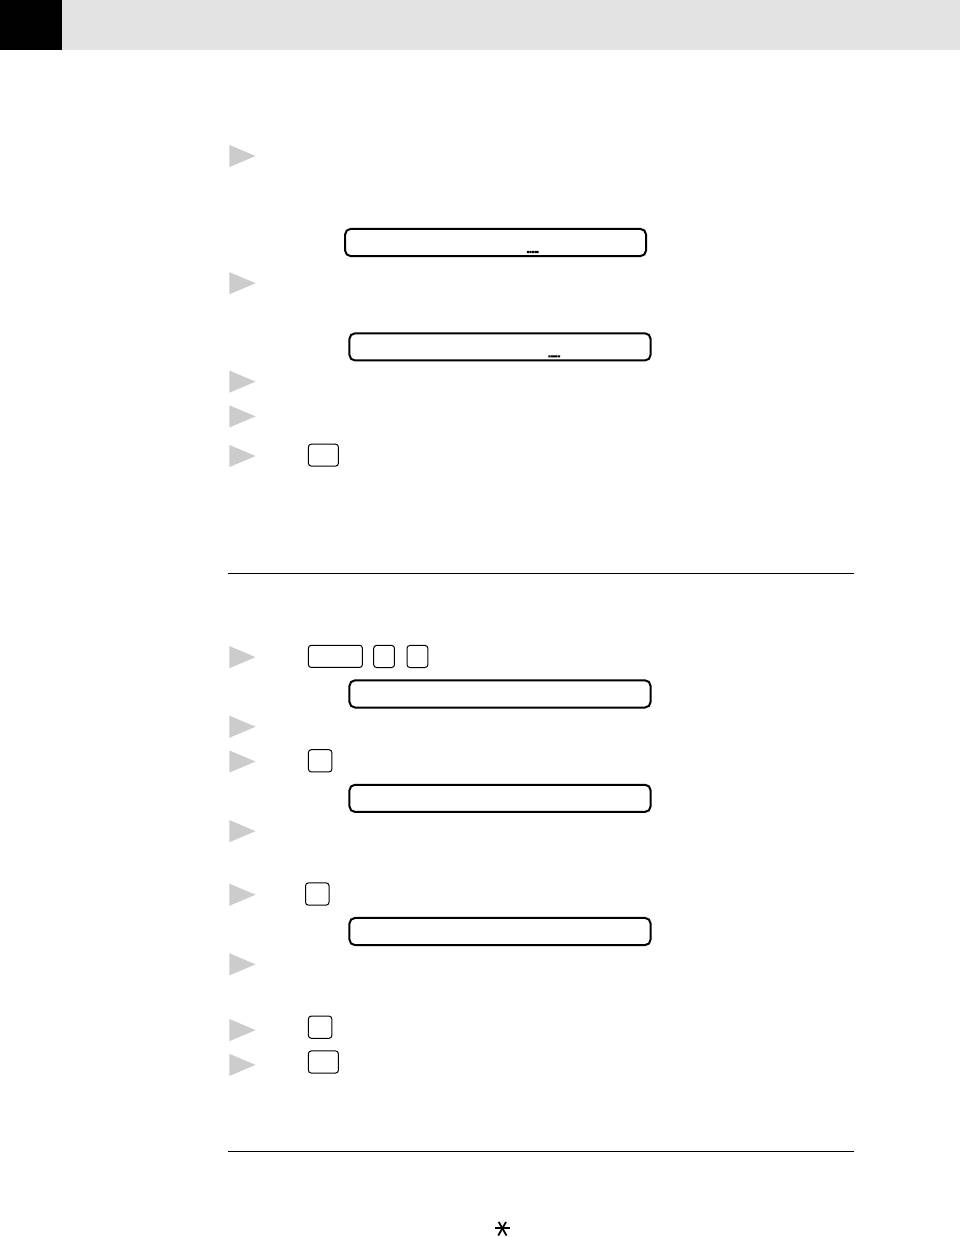
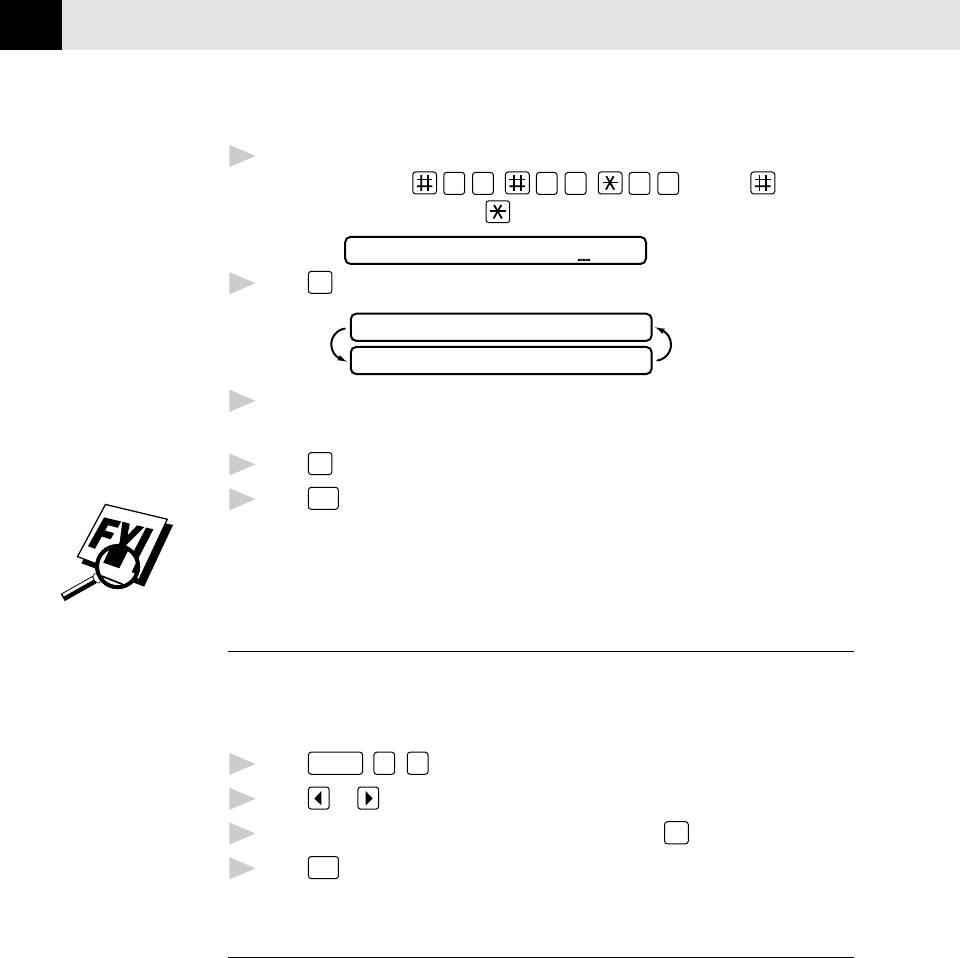
Setting Dialing Mode (Tone/Pulse)
Your FAX/MFC comes set to accommodate tone (multi-frequency) dialing service. If
you have pulse (rotary) dialing service, you need to change the dialing mode.
Function
1
Press
,
6
,
1
. The screen prompts you to select TONE or PULSE.
DIALING:TONE
DIALING:PULSE
2
Use or to select dialing mode.
3
Press
Set
when the screen displays the dialing mode you want.
Press
Stop
4
.
Setting Date and Time
Your FAX/MFC displays the date and time, and prints it on every fax you send.
In the event of a power failure, the FAX/MFC maintains date and time
information for about one hour. All other settings remain unaffected.
1
Press
Function
,
7
,
1
. The screen prompts you to enter the year.
ENTER YEAR:XX
2
Enter the last two digits of the year. The screen displays your entry, then
prompts you to enter the month.
ENTER MONTH:XX
CHAPTER THREE
18
3
Enter two digits for the month (for example, enter 09 for September, or 10 for
October). The screen displays your entry, then prompts you to enter
the day.
ENTER DAY:XX
4
Enter two digits for the day (for example, 06). The screen displays your entry,
then prompts you to set the time.
ENTER TIME:XX:XX
5
Enter the time in 24-hour format (for example, enter 15:25 for 3:25 PM).
6
Wait two seconds.
7
Press
Stop
. The screen now displays the date and time you set, and displays it
whenever the FAX/MFC is standing by.
Setting Station ID
See
You can store your name, fax number, and telephone number to be printed on the
Composing
fax Cover Page, and on all fax pages.
Electronic
Cover Page
1
Press
Function
,
7
,
4
. The screen prompts you to enter your fax number.
p. 46
FAX:
See
2
Enter your fax number (up to 20 digits). The screen displays your entry.
Entering
3
Press
Set
. The screen prompts you to enter your telephone number.
Text
pp. 18-19
TEL:
4
Enter your telephone number (up to 20 digits). If your telephone number
and fax number are the same, enter the same number again.
5
Press
Set
. The screen prompts you to enter your name or your company name.
NAME:
6
Use the dial pad to enter your name (up to 20 characters). (You can use the
chart on page 19 to help you enter letters.)
Press
Set
to confirm.
7
Press
Stop
. The screen returns to the date and time.
8
Entering Text
When you are setting certain functions, such as the Station ID, you may need to
enter text into the FAX/MFC. Most number keys have three or four letters printed
above them. The keys for 0, #, and don’t have printed letters because they are
used for special characters.

FAX SETTINGS
19
By pressing the appropriate number key the correct number of times, you can
access the character you want.
Press Key one time two times three times four times
2
ABC
3
DE F
4
GHI
5
JKL
6
MN O
7
PQRS
8
TUV
9
WX Y Z
Inserting spaces
If you want to enter a blank space, press twice.
Making corrections
If you entered a letter incorrectly and want to change it, press to move the
cursor after the last correct letter. Then press
Clear
; all letters to the right of the
cursor are deleted. Re-enter the correct text and/or digits.
Repeating letters
If you need to enter a character assigned to the same key as the previous
character, press to move the cursor to the right.
Special characters and symbols
Press for (space) ! “ # $ % & ’ ( ) * + , - . /
Press # for : ; < = > ? @ [ ] ^ _
Press Ø for Ä Ë Ö Ü À Ç È É 0

CHAPTER THREE
20
NOTICE: The Telephone Consumer Protection Act of 1991 makes it unlawful for
any person to use a computer or electronic device to send any message via a
telephone fax machine unless such message clearly contains, in a margin at the
top or bottom of each transmitted page, or on the first page of the transmission,
the date and time it is sent and an identification of the business or other entity or
other individual sending the message and the telephone number of the sending
machine or such business, other entity, or individual. In order to program this
information into your FAX/MFC, you should complete the steps described on page
18 and 19.
■ The telephone number you enter is used only for Call Back Message and
Cover Page features.
■ If you do not enter a fax number, no additional information can be entered.
See
■ To enter a space, press once between numbers and twice between
ALL DIAL
Report
characters.
p. 83
■ If your Station ID has already been programmed, the screen prompts “1” to
make a change, or “2” to exit without changing.
Storing One Touch Dial Numbers
You can store 24 fax/phone numbers that you can dial by pressing one key. You
can also store names with these numbers. When you press a One Touch dial
location, the screen displays the name or number as the call is dialed.
One Touch keys are not the dial pad keys. They are the 12 keys (number
01-24) located to the right of the dial pad. One Touch Numbers 13-24 are
accessed by holding down
Shift
when you press the appropriate One Touch
key.
1
Press
Function
,
4
,
1
.
2
Press the One Touch key where you want to store a number. (One Touch key
01
is pre-programmed for Brother Fax-Back System (USA only). You can
override it if you wish.) The screen displays the location you selected.
3
Enter a number (up to 20 digits). If you want to enter a pause in the
dialing sequence (to wait for an “outside line,” for example), press
Redial/Pause
as you’re entering digits. Pressing
Redial/Pause
enters a 3.5-second
pause when the number is dialed, and a dash appears on the screen.
Press
Set
4
. The screen prompts you to enter a name for this number.
NAME:
5
Use the dial pad to enter the name (up to 15 characters). You can use the
chart on page 19 to help you enter letters—OR—Go to Step 6 to store the
number without a name.
FAX SETTINGS
21
6
Press
Set
. The screen prompts you to select the type of number this is. Use
or to select the type you want.
FAX a fax only number
TEL a telephone (voice) number
F/T both a fax and telephone (voice) number
CHAIN a number (usually an access code) for chain dialing.
Set
7
Press
.
8
Return to Step 2 to store another One Touch number—OR—Press
Stop
to
exit.
When you dial an AUTO DIAL number, the screen displays the name you’ve
stored, or, if you haven’t stored a name, the number you’ve stored .
If you need to store a pause longer than 3.5 seconds, please call Brother Customer
Service at 1-800-284-4329 in the USA, or 1-800-853-6660 from within Canada.
You can use chain dialing to store long dialing sequences. For example, to store
9 1 201 555 1234 987 65 4321, divide the number into 2 parts. Store the
first part as a Chain type number (this tells the system that the dialing sequence is
not complete).
CHAIN—9 1 201 555 1234
The last part of the One Touch number must be stored as any of the other
following 3 types.
FAX or F/T or TEL—987 65 4321
Now, when you dial, just press the two keys (one after the other, in order) where
you’ve stored the two parts of the number.
If you are using Chain Dialing with a credit card number, do not send an
electronic cover page. The credit card number will appear on it.
One Touch Dialing
1
Pick up the handset—OR—Press
Speaker Phone
.
2
When you hear a dial tone, press the One Touch key of the location you
want to call.
If you try to use a One Touch location with no number stored in it, you hear a
warning sound, and the screen displays NOT REGISTERED. The display returns
to normal after 2 seconds.
CHAPTER THREE
22
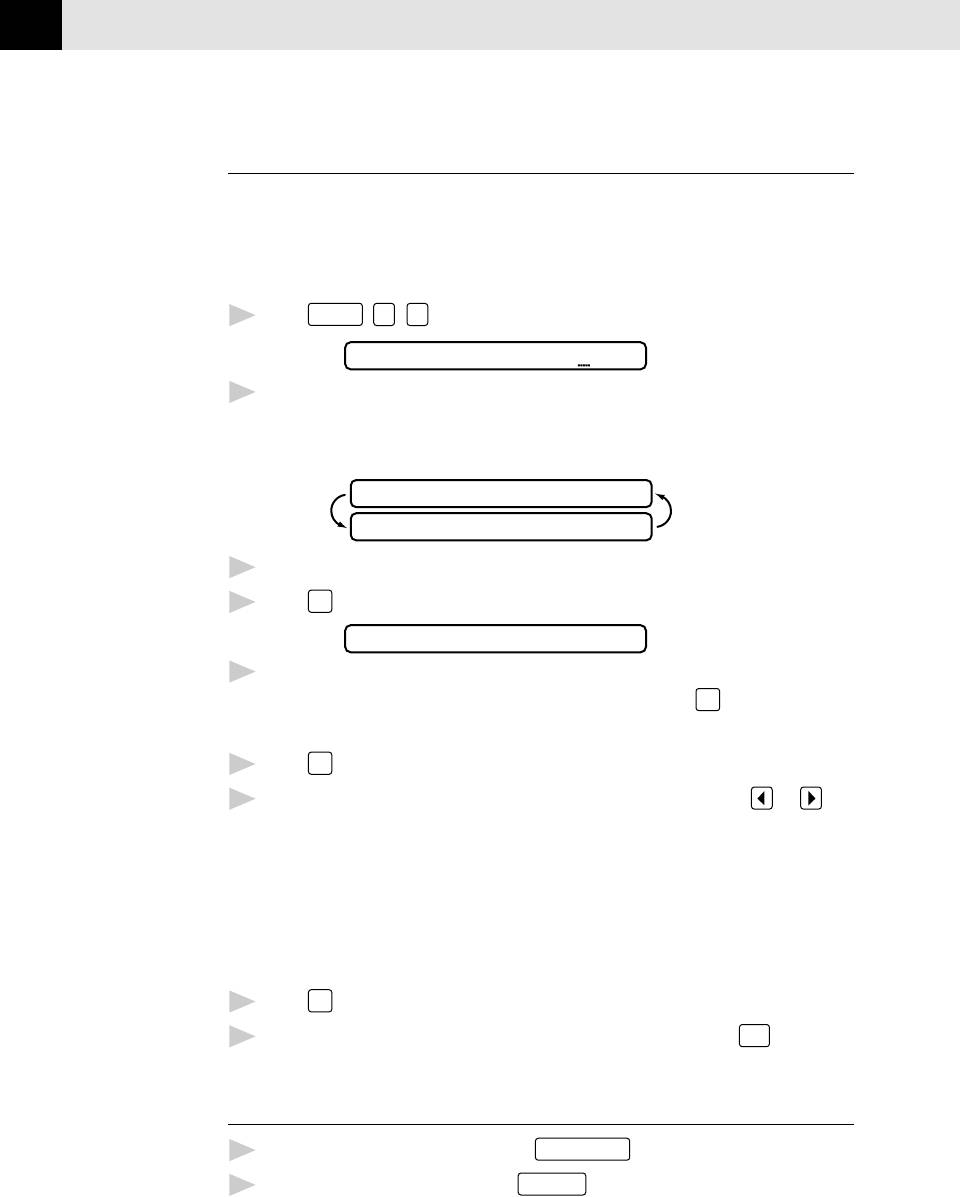
Storing Speed Dial Numbers
You can store Speed Dial numbers, when you dial by pressing only three keys. Model
MFC 1870MC has 36 Speed Dial locations, Models FAX 1570MC and MFC 1970MC
have 100. Even if you lose electrical power, numbers stored in memory will not be
lost.
1
Press
Function
,
4
,
2
. The screen prompts you to enter a location.
SPEED-DIAL? #
2
Use the dial pad to enter a 2-digit location. (For model MFC 1870MC, enter 01
- 36.) (For models FAX 1570MC and MFC 1970MC, enter 00 - 99.)The screen
displays your entry, then prompts you to enter the number you’re storing.
#05
ENTER & SET
3
Enter the number (up to 20 digits).
4
Press
Set
. The screen now prompts you to store a name with this number.
NAME:
5
Use the dial pad to enter the name (up to 15 characters). You can use the
chart on page 19 to help you enter letters—OR—Press
Set
and go to Step 7
to store the number without a name.
6
Press
Set
.
7
The screen prompts you to select the type of number this is. Use or to
select the type you want.
FAX a fax number
TEL a telephone (voice) number
F/T both a fax and telephone number
CHAIN a number (usually an access code) for chain dialing.
8
Press
Set
.
9
Return to Step 2 to store another Speed Dial number—OR—Press
Stop
to exit.
Speed Dialing
1
Pick up the handset—OR—Press
Speaker Phone
.
2
When you hear a dial tone, press
Speed Dial
, then press the two-digit
Speed Dial number.
FAX SETTINGS
23
Changing One Touch and
Speed Dial Numbers
If you try to store a One Touch or Speed Dial number in a location where a
number is already stored, the screen displays the current name stored there, then
prompts you to either
1. CHANGE —OR— 2. EXIT.
1
Press
1
to change the number stored, or press
2
to exit without making a
change.
2
If you want to erase the number, press
Clear
when the cursor is to the far left
of the digits.
3
If you want to change a digit, use or to position the cursor under the
digit you want to change, then press
Clear
.
4
Enter a new number.
5
Follow the directions from Step 4 in Storing One Touch Numbers or Storing
Speed Dial Numbers.
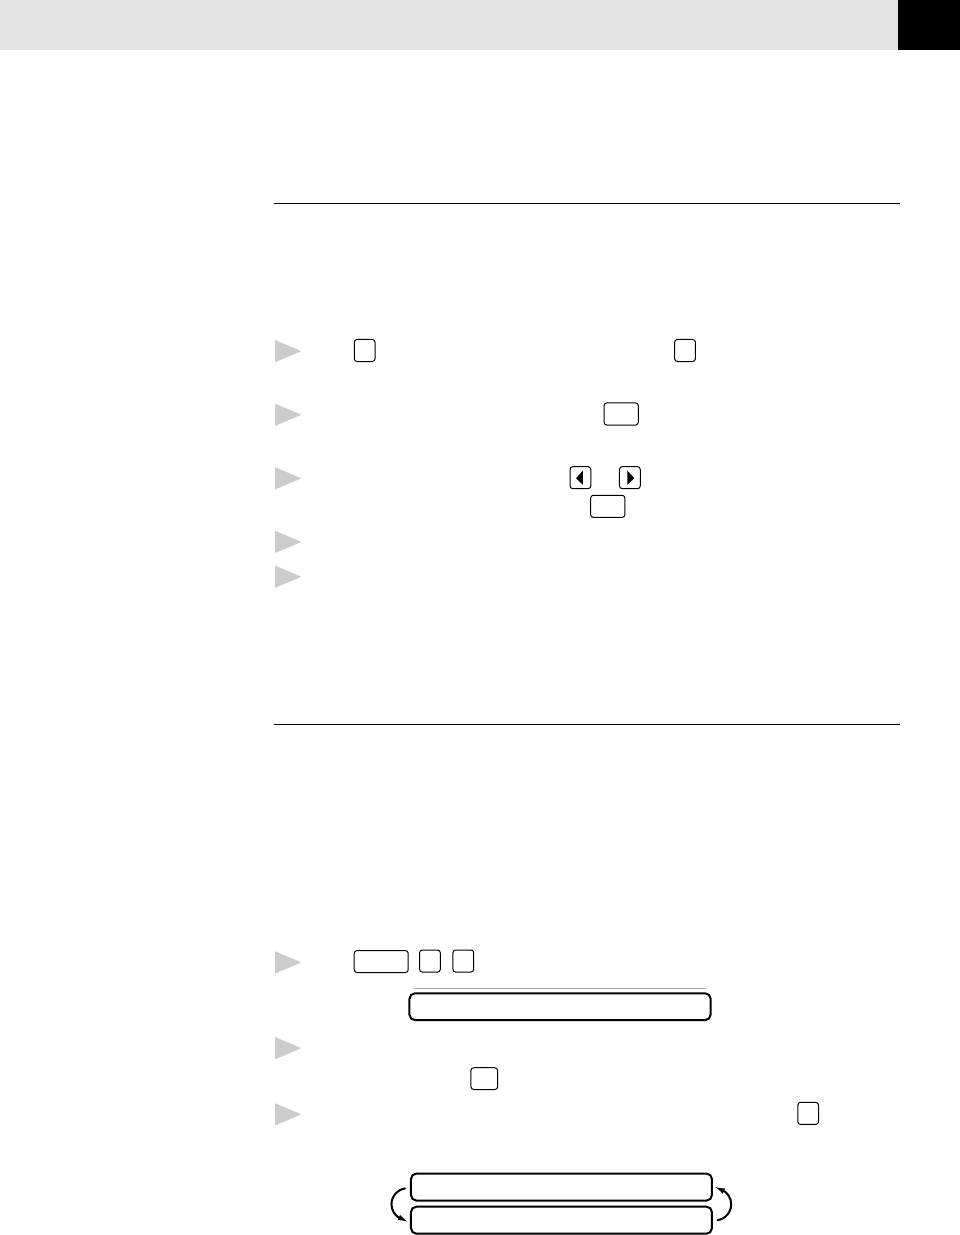
Setting Up Groups
for Broadcasting
See
Groups allow you to send the same fax message to many fax numbers by pressing
Storing
only one One Touch key (Broadcasting). First, you’ll need to store each fax
One Touch
number as a One Touch or Speed Dial number. Then, you can combine them
Dial
Numbers
into a Group. Each Group uses a One Touch key. Finally, you can have up to 6
pp. 20-21
small Groups, or you can assign many numbers to one large group. If you have
and
Model MFC 1870MC you can assign up to 59 numbers to one large group, and for
Storing
Models FAX 1570MC and MFC 1970MC up to 123 numbers to one large group.
Speed Dial
Numbers
1
Press
Function
,
4
,
3
. The screen displays:
p. 22
SELECT ONE-TOUCH
2
Select a One Touch key where you wish to store the number. (For example,
press One Touch key
02
to use as a group.)
3
Use the dial pad to enter the Group number (for example, press
1
for
Group 1).
SETUP GROUP:GO
ENTER & SET
CHAPTER THREE
24
4
Use the dial pad to enter the One Touch or Speed Dial numbers in this group.
For example, enter
0
3
,
0
5
,
0
2
. Enter a before
Speed Dial locations; enter a
before One Touch locations.
G01:#O3#O5*O2
Set
5
Press
. The screen prompts you to enter a name.
NAME:
ENTER & SET
6
Use the dial pad and the chart on pages 18-19 to enter a name for the group
(for example, NEW CLIENTS).
Press
Set
7
.
8
Press
Stop
to exit.
You can print a list of all One Touch and Speed Dial numbers. See Chapter 10,
“Printing Reports and Lists.”
Setting Beeper Level
You can set the beeper to LOW, HIGH or OFF. The FAX/MFC comes set to LOW.
When the beeper is set to LOW or HIGH, the FAX/MFC beeps every time you press
a key or make an error, and at the end of fax sending or receiving.
1
Press
Function
,
5
,
2
.
2
Press or to select your setting.
3
When the screen displays the setting you want, press
Set
.
4
Press
Stop
to exit.
Memory Storage
All settings in the SET AUTO DIAL, USER OPTIONS, TEL OPTIONS, and SETUP
SYSTEM functions are stored permanently and will be retained even in the event
of a power failure.

25
User-Friendly Programming
We have designed your FAX/MFC with on-screen programming and a Help key.
User-friendly programming helps you take full advantage of all the functions
your FAX/MFC has to offer.
Since your fax programming is done on the LCD, we created step-by-step on-
screen prompts to help you program your FAX/MFC. All you need to do is follow
the prompts as they guide you through the function menu selections and
programming options and settings.
Function Mode
You can access the function mode by pressing
Function
. When you enter the
function mode, your FAX/MFC displays a list of Level One Functions from which
you can choose. These function options appear one after the other on the display.
Select an option by pressing
Set
when the option appears on the LCD.
You can “scroll” more quickly through options by pressing . When the screen
displays your selection, press
Set
CHAPTER FOUR
On-Screen
Programming
4
See
Using This
Manual p. 1
. (Use to scroll backward if you passed your
choice or to save key strokes. Both arrow keys show all options, in the opposite
order.)
If you want to exit the Function Mode, press
Stop
.

CHAPTER FOUR
26
Alternating Displays
When you see alternating displays, the LCD sometimes alternates between the
currently selected option, and a help message giving brief instructions about how
to proceed. The display you’ll probably see most often is shown below, showing
you, when you place a document in the feeder, that you can dial a number and
send a fax, or you can make a copy.
FAX: NO. & START
COPY: PRESS COPY
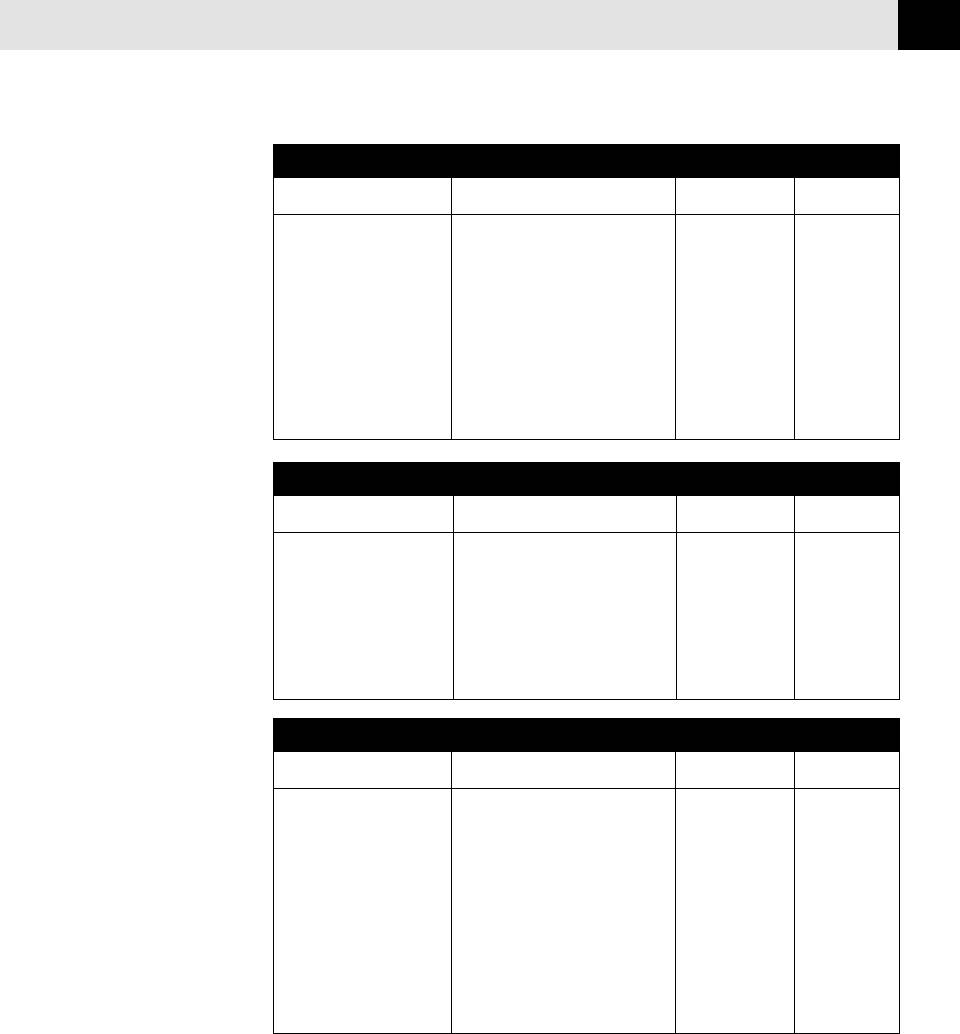
Function Selection Table
If you have a basic understanding of how to program a fax machine, you can
perform most of the programming settings without the Owner’s Manual. To help
you understand the function selections, options, and settings that are found in
your fax and Message Center programs, use the Function Selection Table below.
1. TEMP. SETTINGS
Function Description Factory Set More Info
1. TIMER Send documents later. -- p. 44
2. POLLING Retrieve faxes from another OFF pp. 54–56
machine.
3. CALL RESERVE You can send a fax, then speak. OFF pp. 48–49
4. CONTRAST Change lightness or darkness AUTO p. 32
of fax you’re sending.
5. RESOLUTION Allows you to change resolution STANDARD pp. 32, 50
page by page.
6. OVERSEAS MODE Adjusts for sometimes difficult OFF p. 45
overseas transmissions.
7. COVERPAGE Automatically sends cover page OFF pp. 47–48
you program.
2. CANCEL JOB
Function Description Factory Set More Info
Cancel a timed or polled job. p.45
ON-SCREEN PROGRAMMING
27
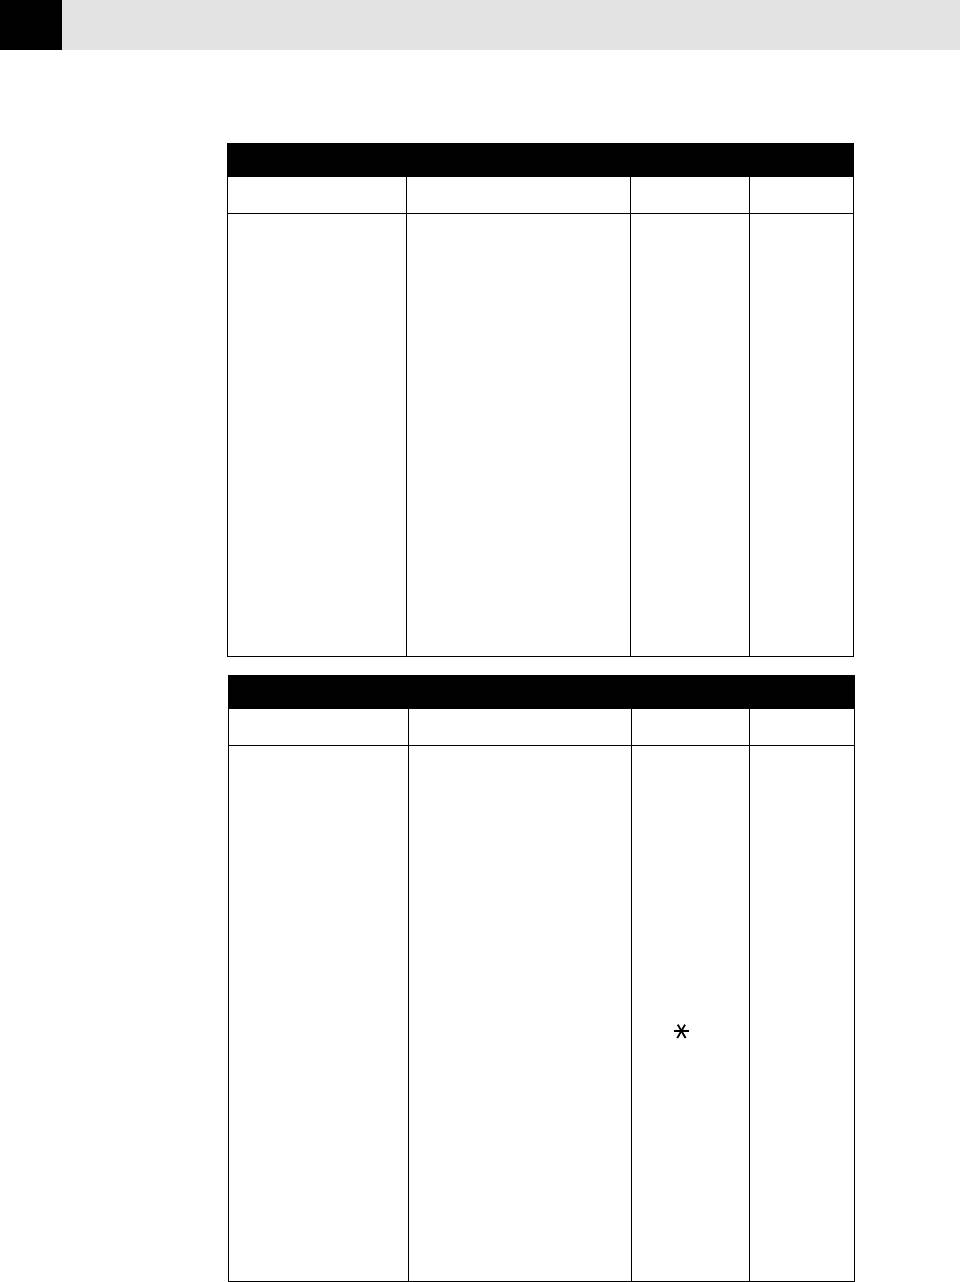
3. PRINT REPORTS
Function Description Factory Set More Info
1. ACT. REPORT pp. 83–84
2. ALL DIAL p. 83
3. TEL. INDEX Print lists and reports of activity. p. 83
4. COVERPAGE (Details in Chapter 10) pp. 48, 83
5. CALL BACK MSG pp. 49, 83
6. USER OPTIONS p. 83
7. XMIT REPORT OFF pp. 83–84
8. MEMORY STATUS p. 83
9. CALLER ID p. 83
4. SET AUTO DIAL
Function Description Factory Set More Info
1. ONE-TOUCH DIAL Dial numbers stored in memory USER DEFINED pp. 20–21
by pressing only one key.
2. SPEED-DIAL Dial numbers stored in memory p. 22
pressing only 3 keys.
3. SETUP GROUPS Set up a group number pp. 23–24
for broadcasting.
5. USER OPTIONS
Function Description Factory Set More Info
1. SMOOTHING Enhance the appearance of ON p. 37
incoming faxes.
2. BEEPER Adjust volume level of beeper. LOW p. 24
3. COVERPG ON/OFF Send automatic cover page OFF p. 47
with comment.
4. ERROR RE-TX Resend a fax if an error occurs. OFF p. 46
5. REDUCTION Reduce size of image. AUTO p. 38
6. RCD PAPER Select size of paper for fax receiving. LETTER p. 37
CHAPTER FOUR
28
6. TEL OPTIONS
Function Description Factory Set More Info
1. TONE/PULSE Select dialing mode. TONE p. 17
2. RING DELAY Number of rings before machine 2 p. 35
answers in F/T, FAX or MC
mode.
3. SPEAKER VOLUME Adjust speaker volume. LOW p. 36
4. ICM REC. MONITR Adjust volume of LOW p. 66
incoming messages.
5. F/T RING TIME Sets the time for “double-ring” 20 p. 36
in F/T mode.
6. RING VOLUME Adjust volume of ringer. MEDIUM p. 37
7. DISTINCTIVE Use with phone company OFF pp. 51–52
distinctive ringing service
to register the ring pattern
with FAX/MFC.
8. CALLER ID View a list of the last 30 pp. 53–54
Caller IDs stored in memory.
7. SETUP SYSTEM
Function Description Factory Set More Info
1. DATE/TIME Enter date and time for LCD 01/01/1999 00:00 pp. 17–18
display and to print on
transmissions.
2. DAILY TIMER Send delayed jobs at the same 00:00 p. 43
time every day.
3. INTERVAL Select the interval of time OFF p. 84
between activity reports.
4. STATION ID Program name, fax number, -- p. 18
and telephone number to
appear on each transmitted page.
5. REMOTE CODE Enter code to activate or ON ( 51, #51) p. 51
deactivate machine from a
remote location.
6. EASY RECEIVE Receive fax messages without ON pp. 34-35
pressing the Start key.
7. SET COVERPAGE Register your own two p. 46
custom comments.
(8.MF LINK) Fax Receive Only/ PC Primary/ PC Primary
Multi-Function
(For MFC 1870MC
PC Receive Only
Link/Missing
and MFC 1970MC only)
Link

ON-SCREEN PROGRAMMING
29
8. SETUP MSG CTR
Function Description Factory Set More Info
1. MSG STORAGE Select if memory will store fax, FAX:OFF/ p. 61
voice or both. VOICE:ON
2. BACKUP PRINT Select if fax prints memory backup. ON p. 64
3. FAX FWD/PAGING Set fax to forward fax/message OFF pp. 66–67
OR to call your pager.
4. REMOTE ACCESS Set code for retrieving messages. 159 p. 68
5. ICM MAX. TIME Set length of incoming messages. 30 seconds p. 65
6. OGM Select/record outgoing message. MSG CTR OGM pp. 61-62
7. TOLL SAVER Set to ring twice when messages OFF p. 65
are waiting.
9. SETUP MC PRO
Function Description Factory Set More Info
1. MSG CTR PRO Select ON or OFF. OFF p. 81
2. OGM Record outgoing announcements pp. 79–80
for 1st Level and 2nd Level.
3. MAIL BOX Select primary (default) p. 76
mailbox.
4. VOICE INFO Store the voice information User Defined pp. 74–75
for each Voice-on-Demand.
0. INTERRUPT
Function Description Factory Set More Info
—— Send a fax now OR make —— p. 44
a copy, even if you have the
FAX/MFC set up to send a fax
later or for Polling.

CHAPTER FOUR
30
31
Sending Faxes
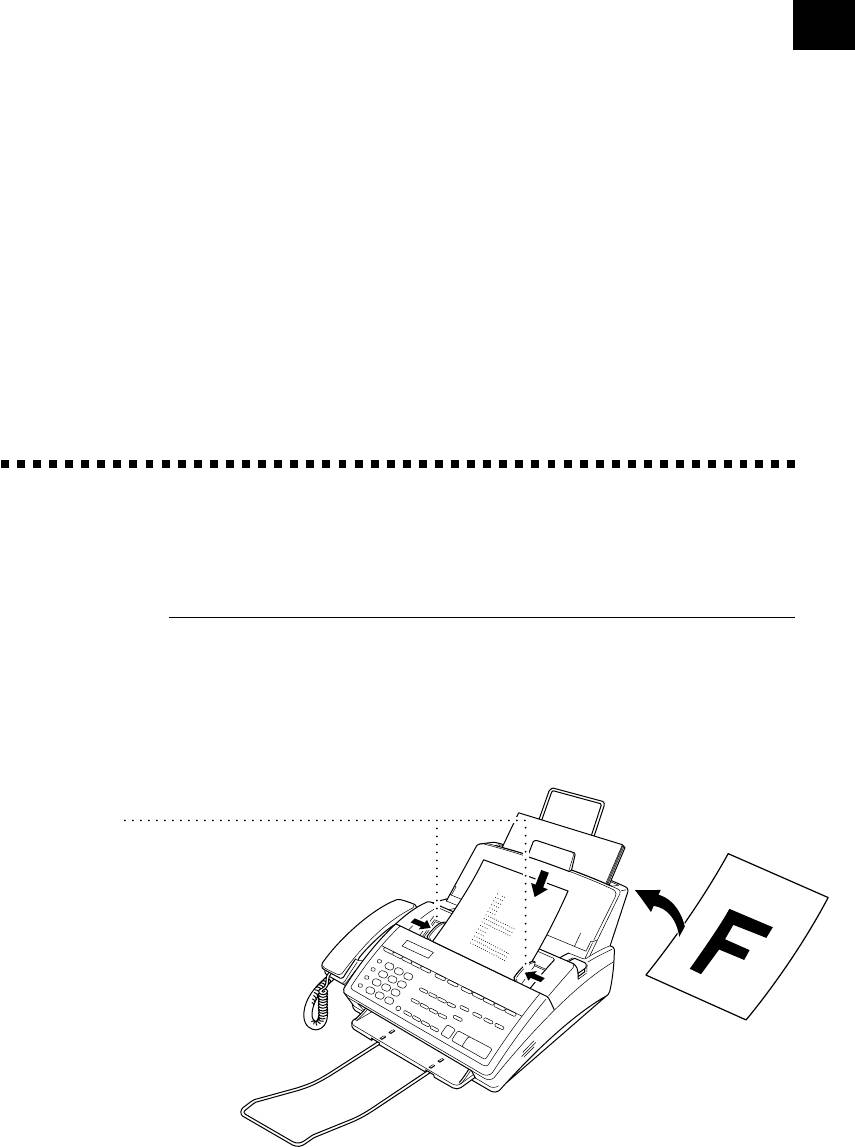
Before you begin:
■ Documents must be between 5.8 and 8.5 inches wide, and 5.9 and 23.7
inches long. Your FAX/MFC can only scan an image 8.2 inches wide,
regardless of how wide the paper is.
■ Make sure you insert documents face down, top edge first.
■ Adjust the paper guides to fit the width of your document.
Paper guides
■ The automatic document feeder (ADF) can hold up to 20 pages, feeding each
one individually through the FAX/MFC. Use standard (20 lb.) paper when
using the ADF; if you’re using heavier paper, feed each sheet individually to
prevent paper jams.
5
CHAPTER FIVE
Basic Fax
Operation
CHAPTER FIVE
32
■ Press
Resolution
(before you send the fax or make a copy)to select the
resolution for the document you’re sending.
Standard ––– Suitable for most typed documents.
Fine ––––––– Good for small print; transmits a little slower than
standard resolution.
Super Fine — Good for small print or artwork; transmits slower than fine
resolution.
Photo –––––– Use when document has varying shades of gray; slowest
transmission time.
■ DO NOT use curled, wrinkled, folded, or ripped paper, or paper with staples,
paper clips, paste or tape attached. DO NOT use cardboard, newspaper, or
fabric.
■ Make sure documents written with ink are completely dry.
Contrast Setting
If your document is very light or very dark, you might want to set the contrast
accordingly. Use S.LIGHT to send a very light document. Use S.DARK to send a
very dark document.
1
Insert the document, face down, in the feeder.
2
Press
Function
,
1
,
4
.
3
Use or to select AUTO, S.LIGHT, or S.DARK.
4
When the screen displays your selection, press
Set
.
5
Press
Stop
to exit.
6
Enter a fax number and press
Start
to send a fax—OR—Press
Copy
to make
a copy.
Manual Transmission
Manual transmission lets you hear the dial tone, ringing, and fax chirps before
sending the fax.
See
1
Insert the document face down in the feeder.
One Touch
2
Pick up the handset and listen for a dial tone
Dialing
p. 21
—OR—press
Speaker Phone
and listen for a dial tone.
3
Enter the fax number you want to call (you can enter the digits using the
dial pad, or you can enter a One Touch or Speed Dial number or you can
call from the Tel-index).


