AEG FT 4919: English
English: AEG FT 4919

70
English
Scan Op-
In Scan mode, the current surface tempera-
eration
ture is displayed. This does not mean the
body temperature. This is useful for checking
the temperature of an object (e.g. a milk
bottle).
Please refer to the chapter “Use of the
Thermometer” to learn how to measure a
surface temperature.
Stop Watch The built-in stop watch assists you with
checking the pulse. The heartbeat is an
important indicator of the vital functions of
the body.
Please refer to the chapter “Use of the
Stop Watch” for measuring the pulse.
Fever Alarm When the thermometer detects a tempera-
ture exceeding 37.5°C in the “Ear” mode, it
will sound an alarm. At rst, you will hear a
long signal tone, then three short tones. This
is to warn the user of potential fever.
Memory There are 9 memories for ear measurement
results. Each memory records the measure-
ment together with date / time / operation
mode/measuring point information.
When the device is on, press the “ON/
MEM” button. The symbol “ ” will be
displayed and you can read the tempera-
ture value.
°C / °F
With the clock set rst (see set clock),
Toggle
the display shows “date, time and room
temperature”. Press and hold the “SCAN”
key. Press and release immediately the
“ON/MEM” button. After 3 seconds, the
display will be switched from “°C” to “°F”.
(The same way, you get back to “°C”.)
71
English
Setting the Clock
1. Press the “ON/MEM” button. You will hear two low signal beeps.
2. Press and hold the “ON/MEM” button for 5 seconds. When the icon Set
ashes, you will see the setting display (see the following picture).
3. Press the “SCAN” button till the “24” icon ashes. You can now change
the 12/24 setting. Press the “SCAN” button to select the 12 hour or the 24
hour display.
4. Press the “ON/MEM” button to move within the display as explained
below.
Hour → Minute → Year → Month → Day → Exit from the Setting display.
5. While the display of “Hour”, “Minute”, “Year”, “Month”, “Day” ashes, press
the “SCAN” key to change the setting.
Use of the Thermometer
If you keep the thermometer in hand
for too long, ambient temperature
can be shown higher than it actually
is. Measurement of body tempera-
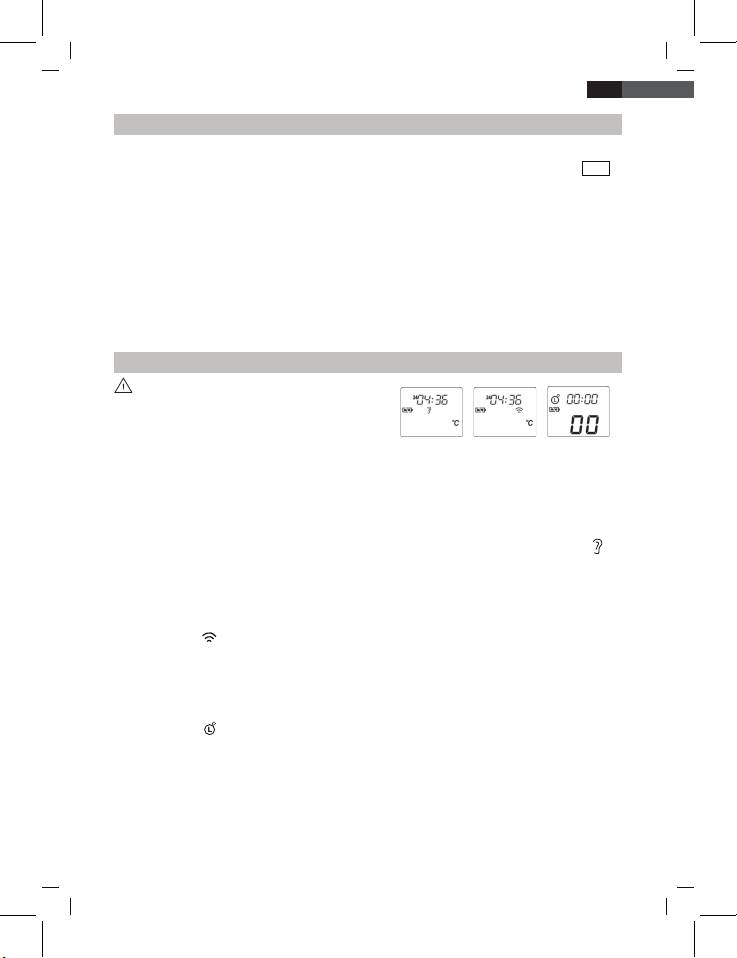
Fig. a Fig. b Fig. c
ture can then be inaccurate as well.
1. Make sure the measuring tip and the lens are clean and undamaged.
2. Press the “ON/MEM” button (see Fig. a).
3.1 Ear temperature: Press the “ON/MEM” button, the ear temperature
measuring mode is set. The thermometer is ready when the symbol
appears on the display and two signal tones sound (Fig. a). In this mode
you can obtain the body temperature by a measurement in the ear.
3.2 Scan Operation: After switching on the device, press and hold the
“ON/MEM” button and press the “SCAN” key once. You’ll see the
symbol “ ” for infrared temperature measurement on your LCD Display
(Fig. b).
In this mode you can determine surface temperatures.
3.3 Stop Watch: After switching on the device, press and hold the
“ON/MEM” button and press the “SCAN” key twice. You’ll see the
symbol “ ” for the stop watch function on the LCD Display (Fig. c). To
start, you press the “SCAN” key once. To stop, you press the “SCAN”
key again. The time will go on running if you press the “SCAN” key once
more. In this mode, the time will run from 0.01 seconds to 3 minutes. A
single pressing of the “ON/MEM” button will set the stop watch back to
“00”. By pressing “ON/MEM” and “SCAN” key simultaneously, you’ll get
back to the standard display of time/date/temperature.
Table of contents
- Übersicht der Bedienelemente
- Deutsch
- Deutsch
- Deutsch
- Deutsch
- Deutsch
- Deutsch
- Deutsch
- Deutsch
- Nederlands
- Nederlands
- Nederlands
- Nederlands
- Nederlands
- Nederlands
- Français
- Français
- Français
- Français
- Français
- Français
- Español
- Español
- Español
- Español
- Español
- Español
- Português
- Português
- Português
- Português
- Português
- Português
- Italiano
- Italiano
- Italiano
- Italiano
- Italiano
- Italiano
- Norsk
- Norsk
- Norsk
- Norsk
- Norsk
- Norsk
- English
- English
- English
- English
- English English
- English
- English
- Język polski
- Język polski
- Język polski
- Język polski
- Język polski
- Język polski
- Język polski
- Česky
- Česky
- Česky
- Česky
- Česky
- Česky
- Česky
- Magyarul
- Magyarul
- Magyarul
- Magyarul
- Magyarul
- Magyarul
- Magyarul
- Русский
- Русский
- Русский
- Русский
- Русский
- Русский
- Русский
- Русский
- Русский
- GARANTIE-KARTE
