AEG MBS 30 Turbo: instruction
Class: Power tools
Type: Circular saw
Manual for AEG MBS 30 Turbo

MBS 30 Turbo
Original instructions
Instrukcją oryginalną
Originalbetriebsanleitung
Eredeti használati utasítás
Notice originale
Izvirna navodila
Istruzioni originali
Originalne pogonske upute
Manual original
Instrukcijām oriģinālvalodā
Manual original
Originali instrukcija
Oorspronkelijke gebruiksaanwijzing
Algupärane kasutusjuhend
Original brugsanvisning
Оригинальное руководство по
эксплуатации
Original bruksanvisning
Оригинално ръководство за
Bruksanvisning i original
експлоатация
Alkuperäiset ohjeet
Instrucţiuni de fol
osire originale
Πρωτότυπο οδηγιών χρήσης
Оригинален прирачник за работа
Orijinal işletme talimatı
Původním návodem k používání
原始的指南
Pôvodný návod na použitie
425_201_MBS30turbo_3-1.indd 1 17.06.13 09:09

425_201_MBS30turbo_3-1.indd 2 17.06.13 09:09

English
19
Deutsch
23
Français
28
Italiano
33
Español
38
Português
43
Nederlands
48
Dansk
53
Norsk
57
Svenska
61
Suomi
65
Ελληνικά
69
Türkçe
74
Česky
78
Slovensky
82
Polski
87
Magyar
92
Slovensko
97
Hrvatski
101
Latviski
105
Lietuviškai
110
Eesti
114
Òåõíè÷åñêèå äàííûå, Ðåêîìåíäàöèè ïî òåõíèêå áåçîïàñíîñòè,
Pусский
Èñïîëüçî- âàíèå, Ïîäêëþ÷åíèå ê ýëåêòðîñåòè, Îáñëóæèâàíèå, Ñèìâîëû
118
Òåõíè÷åñêè äàííè, Ñïåöèàëíè óêàçàíèÿ çà áåçîïàñíîñò, Èçïîëçâàíå ïî ïðåäíàçíà÷åíèå,
български
ÑÅ-Äåêëàðàöèÿ çà ñúîòâåòñòâèå, Ñâúðçâàíå êúì ìðåæàòà, Ïîääðúæêà, Ñèìâîëè
123
Română
128
Òåõíè÷êè Ïîäàòîöè, Óïàòñòâî Çà Óïîòðåáà, Ñïåöèôèöèðàíè Óñëîâè Íà
Мaкeдohcки
Óïîòðåáà, Åó-äåêëàðàöè¼à Çà Ñîîáðàçíîñò, БАТЕРИИ, Îäðæóâàå, Ñèìáîëè
133
技术数据, 特殊安全指示, 正确地使用机器, 电源插头, 蓄电池, 维修, 符号 请详细阅读并妥善保存!
中文
138
425_201_MBS30turbo_3-1.indd 3 17.06.13 09:09

425_201_MBS30turbo_3-1.indd 4 17.06.13 09:09
Aufnahme
aufschrauben
Aufnahme
aufschrauben
IIII
V
VIII
II
íí
IX
Äîïîëíèòåëü
配件
VIIV
VII
425_201_MBS30turbo_3-1.indd 1 17.06.13 09:09

425_201_MBS30turbo_3-1.indd 2 17.06.13 09:09
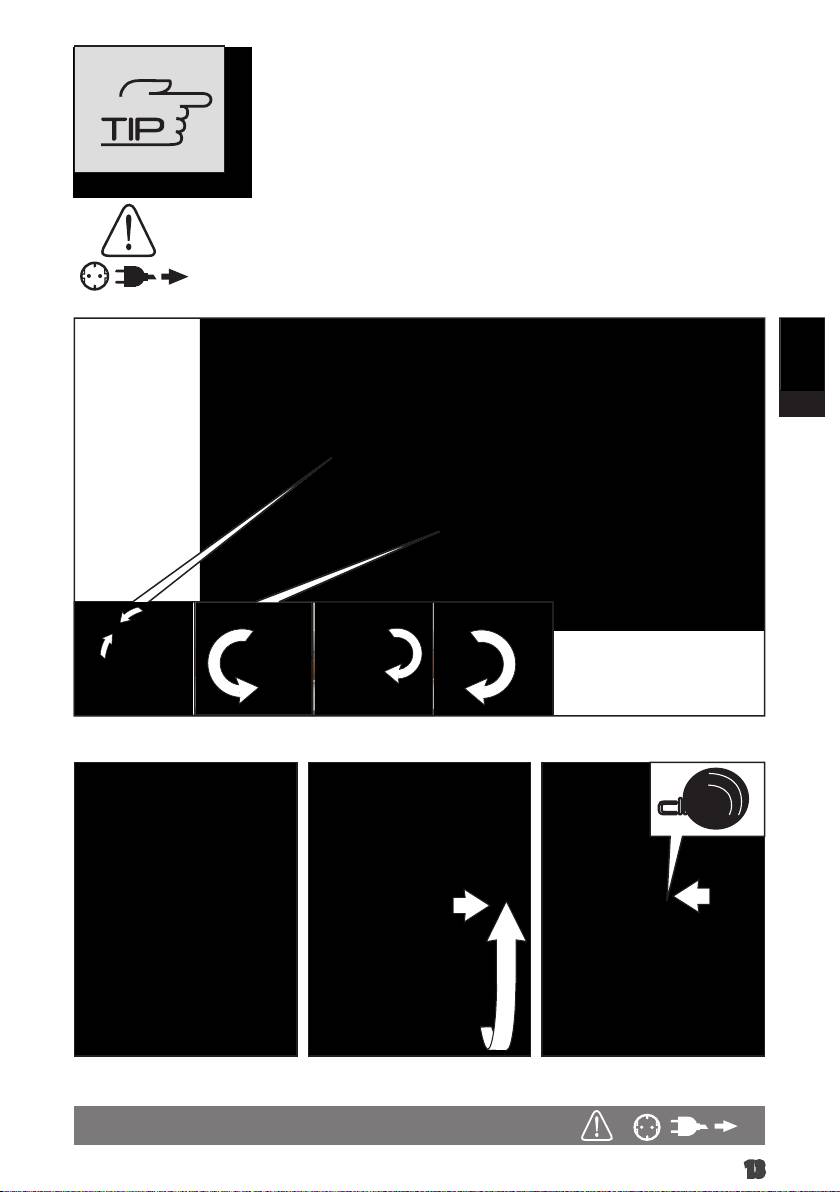
1.
I
lock
2. 3.
1
425_201_MBS30turbo_3-1.indd 1 17.06.13 09:10
4.
I
ø 20,0 mm
ø 22,2 mm
EN 847-1
lock
2
425_201_MBS30turbo_3-1.indd 2 17.06.13 09:10
I
ø 20,0 mm
ø 20,0 mm
ø 22,2 mm
3
425_201_MBS30turbo_3-1.indd 3 17.06.13 09:10
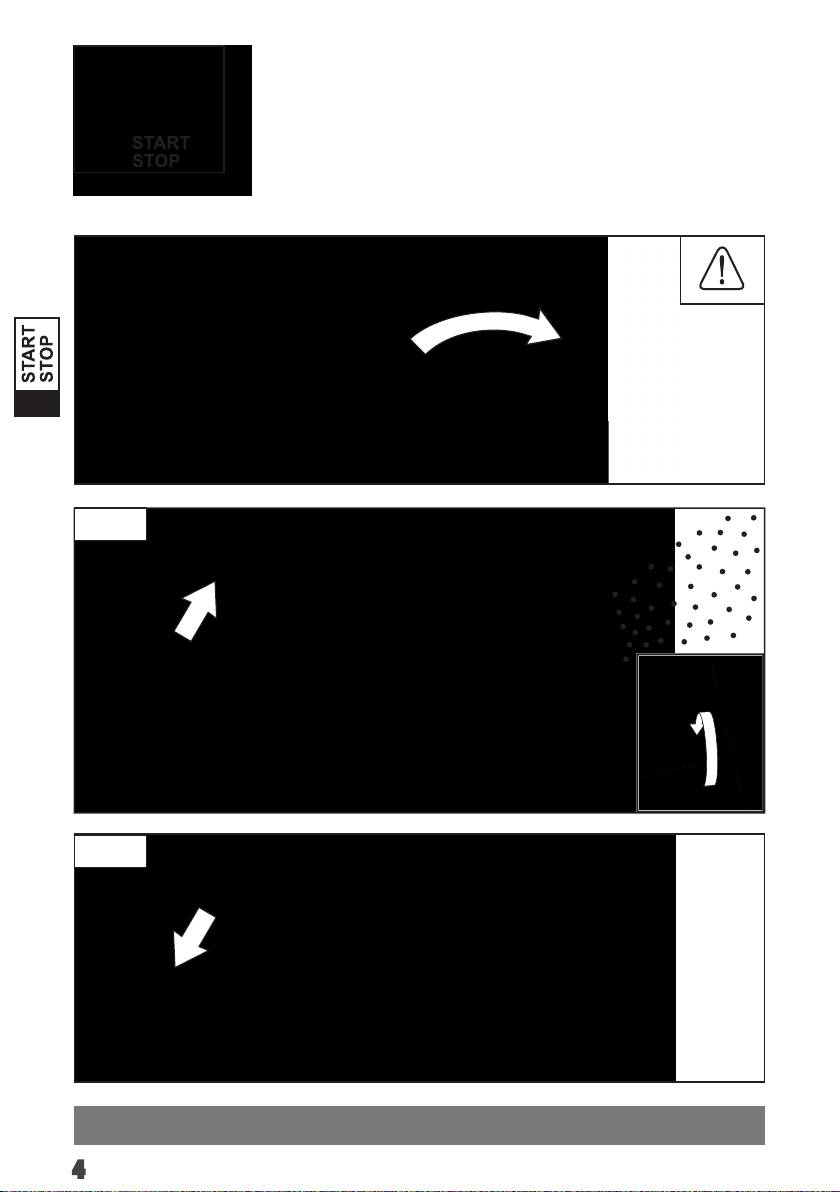
II
Start
Stop
4
425_201_MBS30turbo_3-1.indd 4 17.06.13 09:10
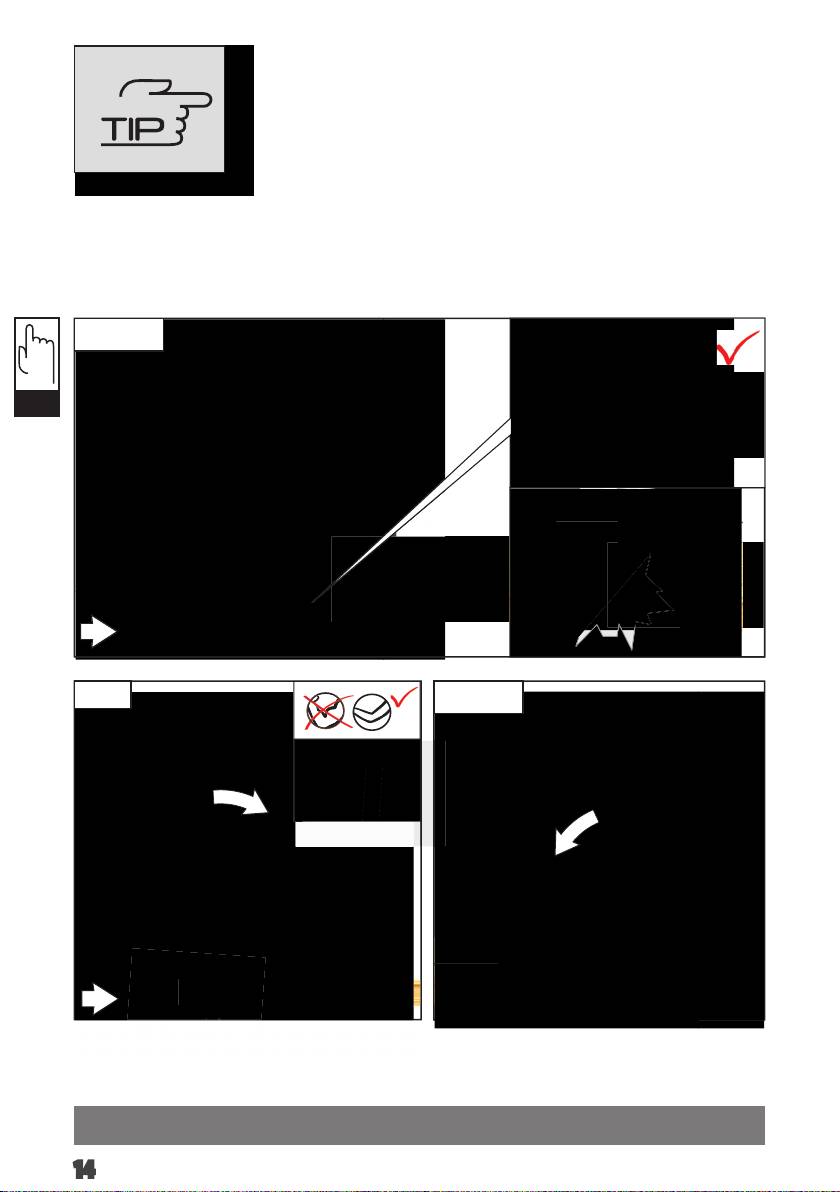
1.
III
5
425_201_MBS30turbo_3-1.indd 5 17.06.13 09:10
III
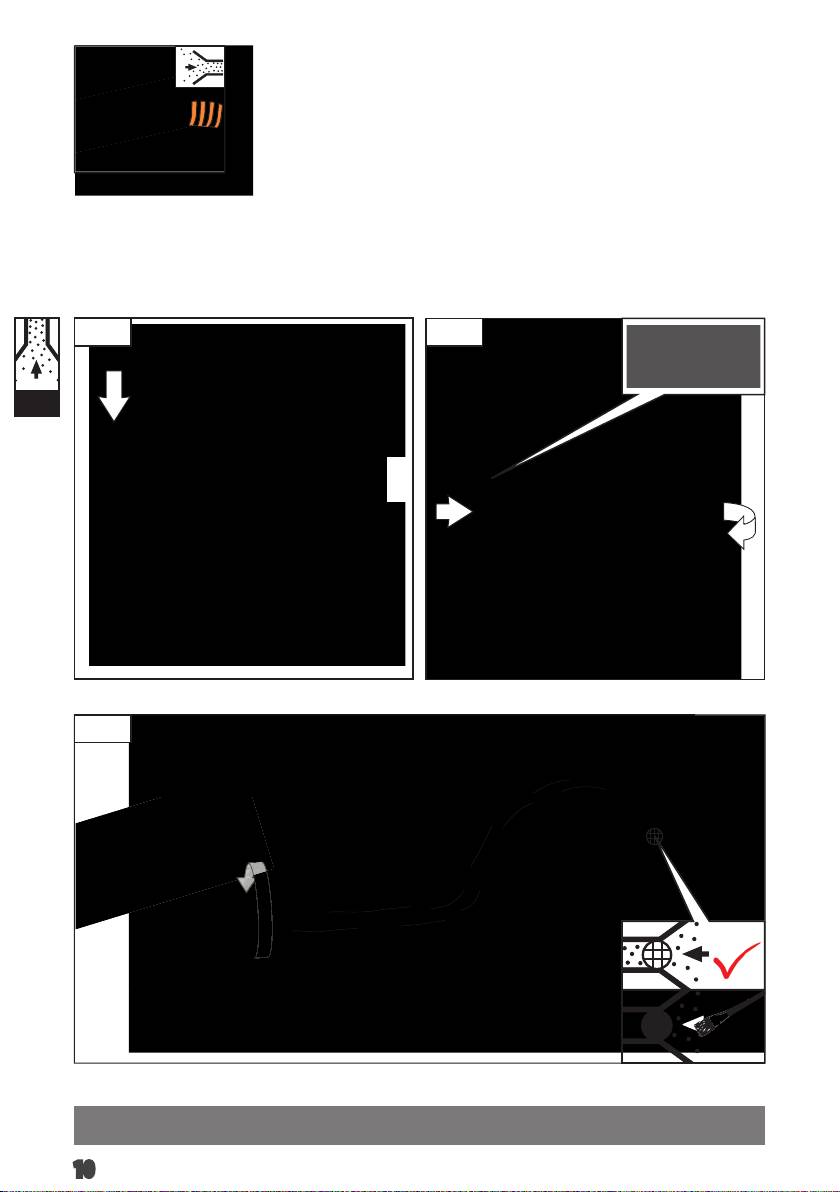
如果必须更改导引板和锯刀片之间的角度(90 度),则要调整
校正螺丝。
1
3
2
90°
6
425_201_MBS30turbo_3-1.indd 6 17.06.13 09:10
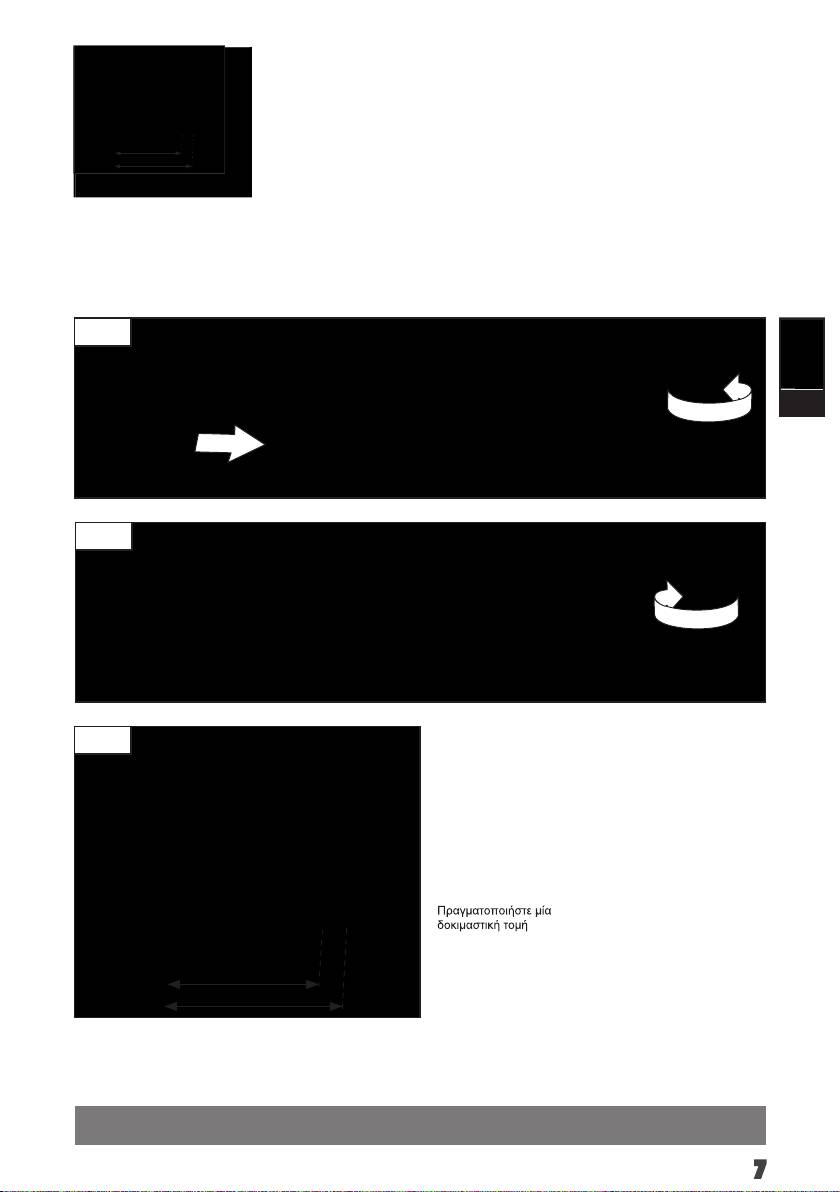
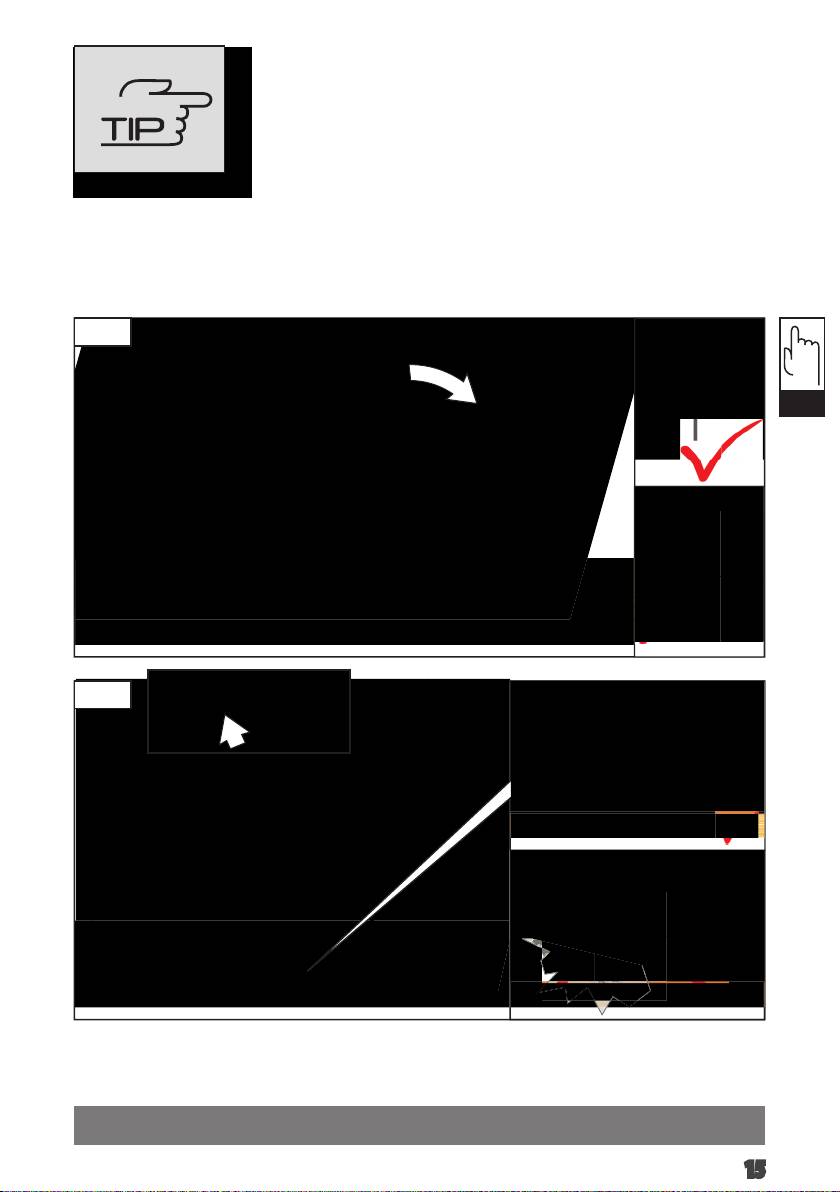
1.
IV
2.
Carry out a test cut
Vykonať skušobný rez.
3.
Probeschnitt durchführen
Wykonac próbę cięcia
Effectuer une coupe d‘essai
Végezzen teszvágást
Effettuare un taglio di prova
Opravite preizkusni rez!
Efectuar corte de prueba
Izvesti probno rezanje
Efectuar experiências de corte
Jāveic izmēģinājuma
griezums!
Proefsnede maken
Atlikite bandomąjį pjūvį!
Foretages et prøvesnit
Teha proovilõige!
Foreta prøvekutt
Выполните пробный проход
Gör ett provsnitt!
Направете пробно рязане!
Efectuaţi un test de tăiere
Deneme kesmesi yapın
Да се направи пробно
сечење
Proveďte zkušební řez.
7
425_201_MBS30turbo_3-1.indd 7 17.06.13 09:10
1.
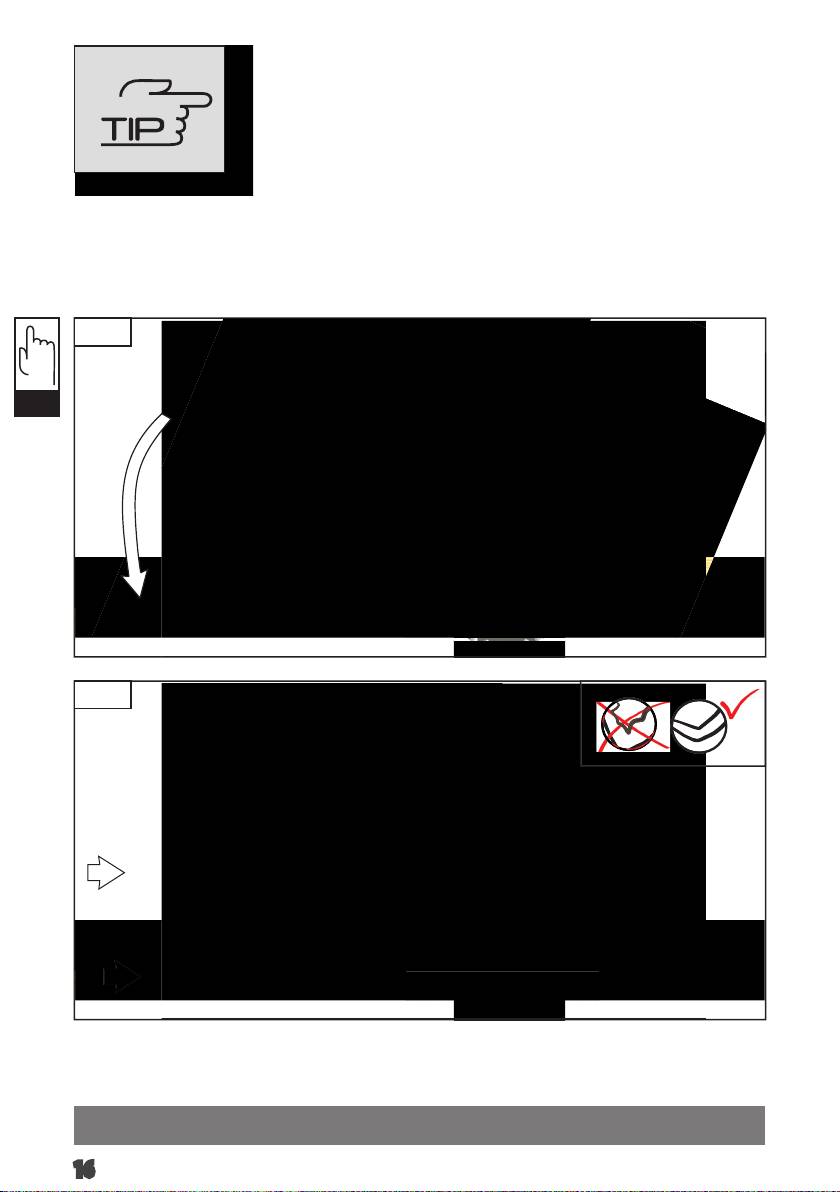
V
2.
0
5
10
15
20
25
30
0 – 32 mm
8
425_201_MBS30turbo_3-1.indd 8 17.06.13 09:10
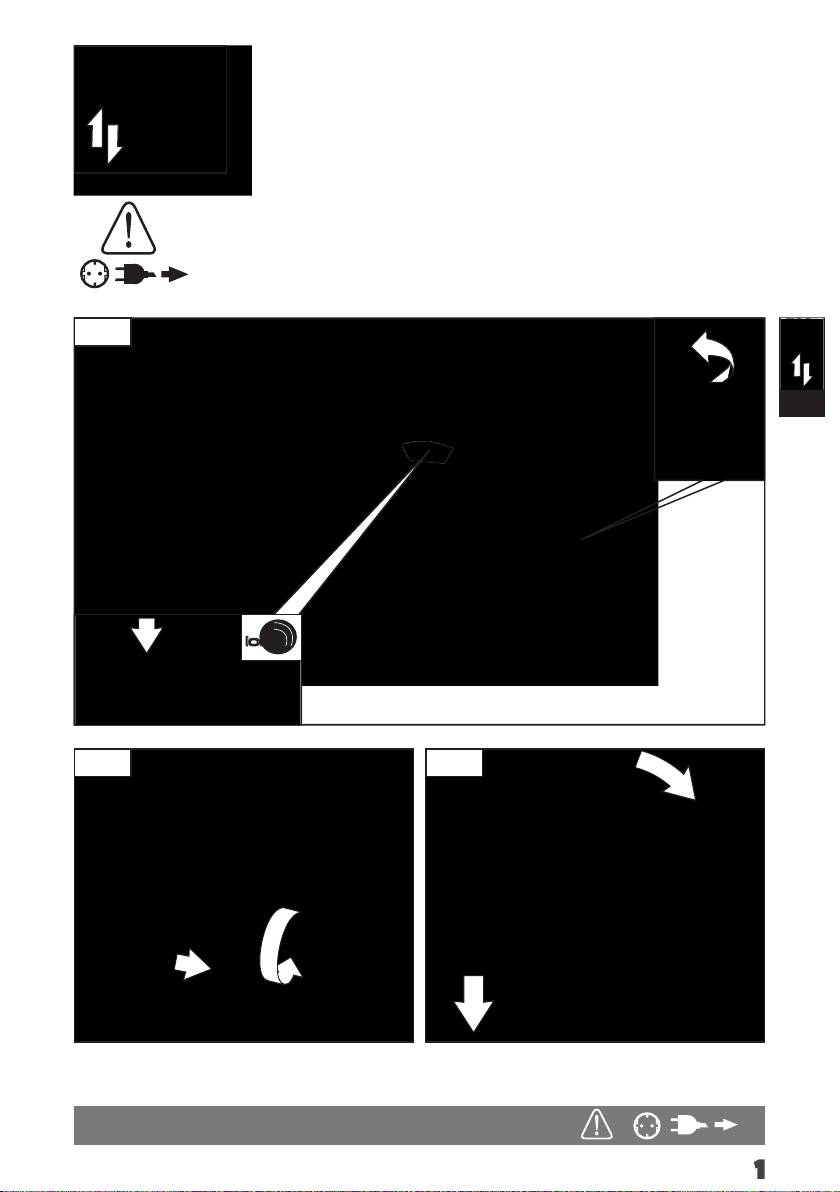
V
Adjust the cutting depth to the thickness of the workpiece. Less
Hrúbku rezu prispôsobte hrúbke obrobka. Pod obrobkom by malo
than a full tooth of the blade teeth should be visible below the
byť vidieť menej pílového listu ako plnú výšku zuba píly.
workpiece.
Głębokość cięcia należy dopasować do grubości obrabianego
Passen Sie die Schnitttiefe an die Dicke des Werkstücks an.
przedmiotu. Powinno być widoczne mniej jak pełna wysokość
Es sollte weniger als eine volle Zahnhöhe unter dem Werkstück
zębów pod obrabianym przedmioten.
sichtbar sein.
A vágási mélységet a munkadarab vastagságának megfelelően
Adapter la profondeur de coupe à l’épaisseur de la pièce. Moins
kell megválasztani. A fűrészlapból a munkadarab alatt kevesebb
d’une dent complète devrait apparaître sous la pièce.
mind egy teljes fogmagasságnyinak kell kilátszania.
Adattare la profondità di taglio allo spessore del pezzo in
Prosimo, da globino reza prilagodite debelini obdelovanca. Znaša
lavorazione. Nella parte inferiore del pezzo in lavorazione
naj manj kot višina zoba, ki je vidna pod obdelovancem.
dovrebbe essere visibile meno della completa altezza del dente.
Prilagodite dubinu rezanja debljini izratka. Ispod izratka treba biti
Adaptar la profundidad de corte al grosor de la pieza de trabajo.
vidljiv manje od jedan puni zub.
La hoja de sierra no deberá sobresalir más de un diente de la
Izvçlieties zâìçðanas dziïumu, kas atbilst zâìçjamâ priekðmeta
pieza de trabajo.
biezumam. Zâìçðanas dziïumam jâbût tik lielam, lai zem zâìçjamâ
Adaptar a profundidade de corte à espessura da peça a ser
priekðmeta redzamâs asmens daïas augstums bûtu mazâks par
trabalhada. Deveria estar visível por aproximadamente menos do
asmens zobu augstumu.
que uma altura de dente abaixo da peça a ser trabalhada.
Pjovimo gylá tinkamai nustatykite pagal ruoðinio storá. Ruoðinio
Pas de zaagdiepte aan de dikte van het werkstuk aan. Er
apaèioje turi matytis ðiek tiek maþiau, nei per visà pjûklo danties
dient minder dan een volledige tandhoogte onder het werkstuk
aukðtá, iðlindusi disko dalis.
zichtbaar te zijn.
Kohandage lõikesügavus tooriku paksusega. Saeketas võib
Tilpas skæredybden efter arbejdsemnets tykkelse. Der må
tooriku alt vähem kui ühe täishamba võrra välja ulatuda.
maksimalt være en hel tandhøjde synlig under emnet.
Устанавливайте глубину реза в соответствии с толщиной
Tilpass skjæredybden til tykkelsen på arbeidsstykket. Det skal
детали. Под деталью пильное полотно не должно
være mindre enn en full tannhøyde synlig under arbeidsstykket.
высовываться более чем на один зуб.
Anpassa sågdjupet till arbetsstyckets tjocklek. Den synliga delen
Винаги настройвайте дълбочината на рязане съобразно
av en tand under arbetsstycket måste vara mindre än en hel tand.
дебелината на стената на обработвания детайл. От
обратната страна на детайла дискът трябва да се подава на
Aseta leikkaussyvyys työkappaleen paksuuden mukaan.
разстояние, по-малко от една височина на зъба.
Työkappaleen alla tulisi terää näkyä korkeintaan täysi
hammaskorkeus.
Adaptaţi adâncimea de tăiere la grosimea piesei de lucru.
Sub piesa de lucru ar trebui să se vadă mai puţin de înălţimea
Προσαρμόστε το βάθος κοπής στο πάχος του υπό κατεργασία
întreagă a unui dinte.
τεμαχίου. Κάτω το υπό κατεργασία τεμάχιο πρέπει να φαίνεται
λιγότερο από ένα ολόκληρο δόντι του πριονόδισκου.
Прилагодете ја длабочината на засекот во зависност од
густината на обработуваното парче. Нешто помалку од цел
Kesme derinliğini iş parçasının kalınlığına göre ayarlayın. İş
забец од сечилото треба да биде видлив под работното
parçası altında tam diş uzunluğunun daha azı görünmelidir.
парче.
Přizpůsobte hloubku řezu tloušťce obrobku. Pod obrobkem by
根 据 工 件 的 厚 度 设 定 锯 深 。 不 可 以 让 锯 齿 完
měla být viditelná méně než celá výška zubu.
全 突 出 於 工 件 之 外 。
9
425_201_MBS30turbo_3-1.indd 9 17.06.13 09:10
1. 2.
VI
3.
10
425_201_MBS30turbo_3-1.indd 10 17.06.13 09:10
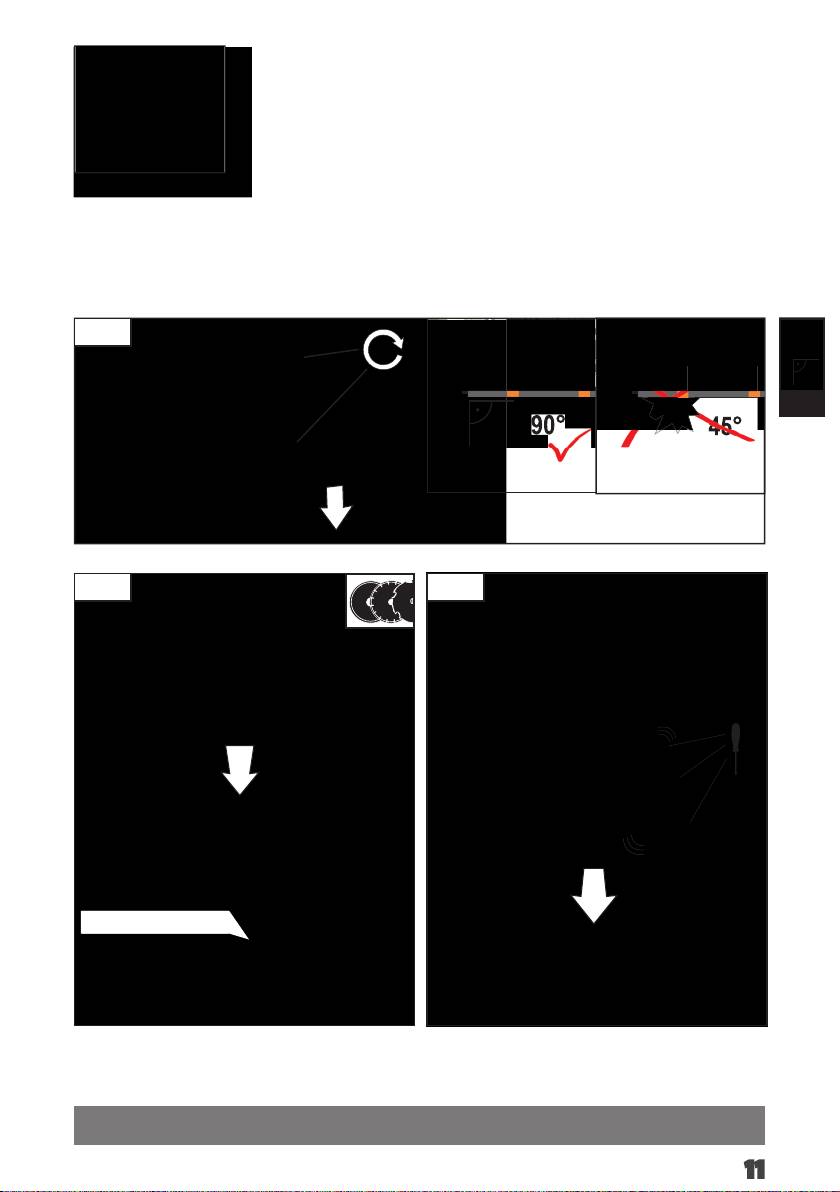
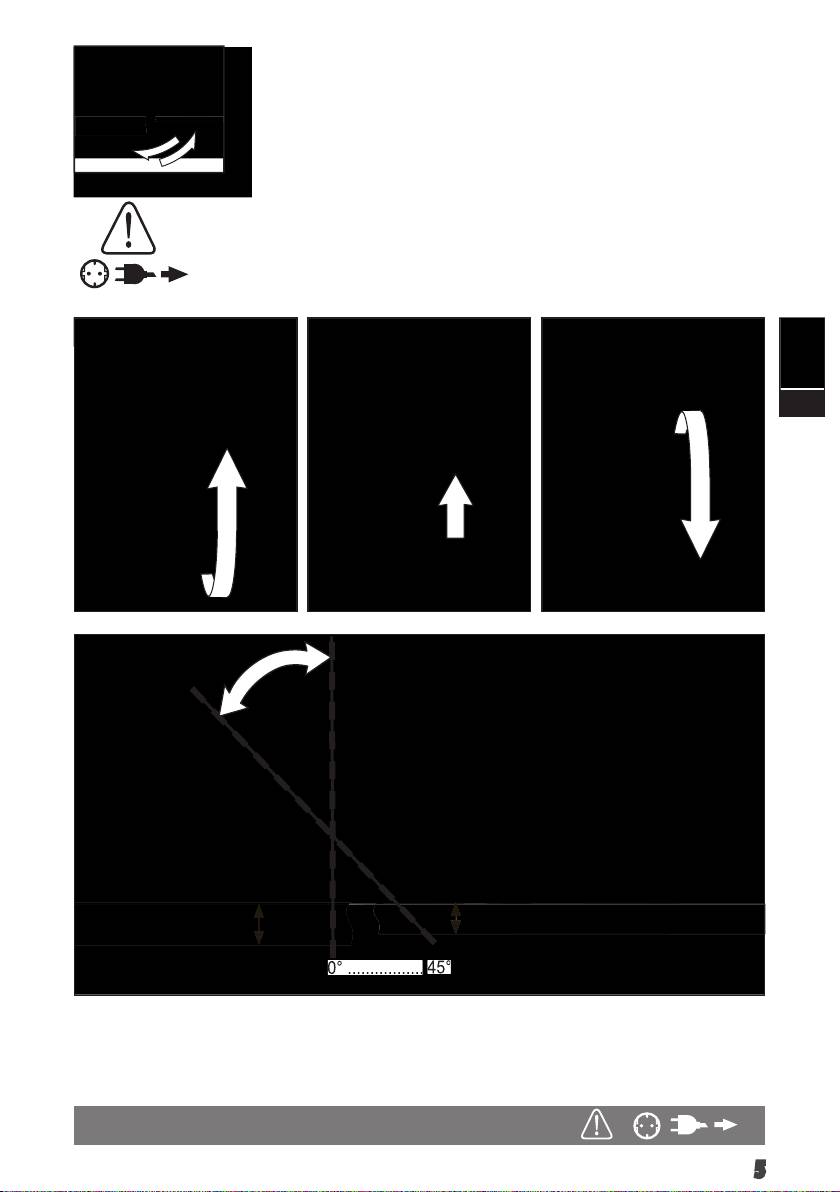
VII
90°
45°
Ident-Nr. 4932 3525 58
11
45°
45°
90°
90°
1.
3.2.
425_201_MBS30turbo_3-1.indd 11 17.06.13 09:10

4.
VII
12
425_201_MBS30turbo_3-1.indd 12 17.06.13 09:10
Aufnahme
aufschrauben
V
click
13
425_201_MBS30turbo_3-1.indd 13 17.06.13 09:10
Aufnahme
aufschrauben
1. Start
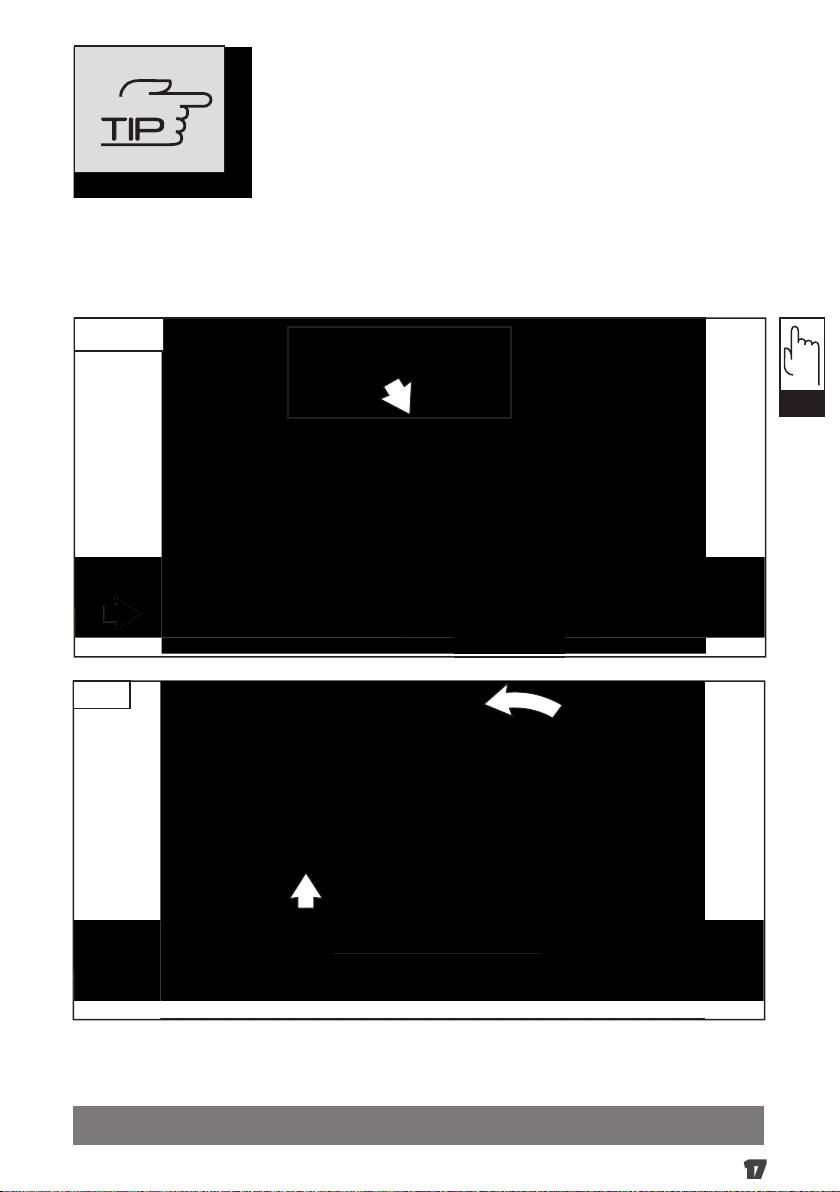
TIP
VI
2.
3. Stop
14
425_201_MBS30turbo_3-1.indd 14 17.06.13 09:11
Aufnahme
aufschrauben
1.
TIP
VI
2.
15
425_201_MBS30turbo_3-1.indd 15 17.06.13 09:11
Aufnahme
aufschrauben
3.
TIP
VI
4.
16
425_201_MBS30turbo_3-1.indd 16 17.06.13 09:11
Aufnahme
aufschrauben
5. Stop
TIP
VI
6.
17
425_201_MBS30turbo_3-1.indd 17 17.06.13 09:11

Aufnahme
aufschrauben
TIP
VI
18
425_201_MBS30turbo_3-1.indd 18 17.06.13 09:12
TECHNICAL DATA
MBS 30 Turbo
Fiber Cement Saw
Production code 4103 96 01...
4118 21 01...
... 000001-999999
Rated input 1010 W
-1
Rated speed 11000 min
Saw blade dia. x hole dia 127 x 20 mm
Diamond cutting wheel-ø x borehole-ø 125 x 22,2 mm
Diamond cutting wheel thickness 2,2 mm
Max. Cutting depth at 90° 32 mm
Max. Cutting depth at 45° 28 mm
Weight according EPTA-Procedure 01/2003 3,3 kg
Noise/Vibration Information
Measured values determined according to EN 60745.
Typically, the A-weighted noise levels of the tool are:
Sound pressure level (K=3dB(A))
93,5 dB(A)
GB
Sound power level (K=3dB(A))
104,5 dB(A)
Wear ear protectors!
Total vibration values (vector sum in the three axes) determined according to EN 60745.
Vibration emission value a
h
2
Sawing of wood :
3,7 m/s
2
Uncertainty K=
1,5 m/s
2
Cutting of stone :
4,5 m/s
2
1,5 m/s
Uncertainty K=
WARNING
The vibration emission level given in this information sheet has been measured in accordance with a standardised test given in EN 60745 and
may be used to compare one tool with another. It may be used for a preliminary assessment of exposure.
The declared vibration emission level represents the main applications of the tool. However if the tool is used for di erent applications, with
di erent accessories or poorly maintained, the vibration emission may di er. This may signi cantly increase the exposure level over the total
working period.
An estimation of the level of exposure to vibration should also take into account the times when the tool is switched o or when it is running
but not actually doing the job. This may signi cantly reduce the exposure level over the total working period.
Identify additional safety measures to protect the operator from the e ects of vibration such as: maintain the tool and the accessories, keep
the hands warm, organisation of work patterns.
WARNING! Read all safety warnings and all
Before doing any work on the machine, pull the plug out of the
instructions, including those given in the accompanying
socket.
brochure.
Only plug-in when machine is switched o .
Failure to follow the warnings and instructions may result in electric
Do not use saw blades not corresponding to the key data given in
shock, re and/or serious injury.
these instructions for use.
Save all warnings and instructions for future reference.
Keep mains lead clear from working range of the machine. Always
lead the cable away behind you.
SAFETY INSTRUCTIONS
Before use check machine, cable, and plug for any damages or
Wear ear protectors. Exposure to noise can cause hearing loss.
material fatigue. Repairs should only be carried out by authorised
The dust produced when using this tool may be harmful to health. Do
Service Agents.
not inhale the dust. Use a dust absorption system and wear a suitable
Do not x the on/o switch in the „on“ position when using the saw
dust protection mask. Remove deposited dust thoroughly, e.g. with
hanheld.
a vacuum cleaner.
Please do not use abrasion disks in this machine!
Appliances used at many di erent locations including open air should
be connected via a residual current device (FI, RCD, PRCD) of 30mA
or less.
English
19
425_201_MBS30turbo_3-1.indd 19 17.06.13 09:12
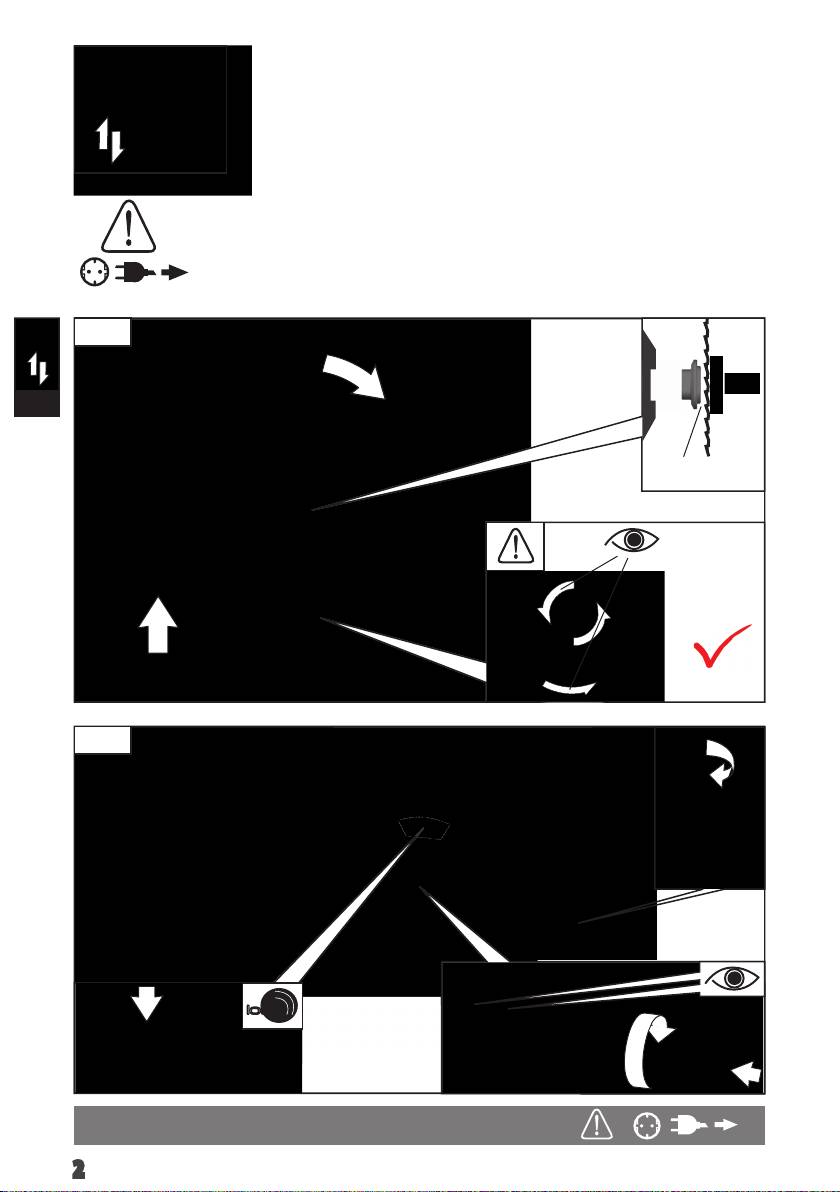
When restarting a saw in the workpiece, centre the saw blade
SPECIAL SAFETY INSTRUCTIONS WHEN USING A SAW
in the kerf and check that saw teeth are not engaged into the
BLADE
material. If saw blade is binding, it may walk up or kickback from the
workpiece as the saw is restarted.
Cutting procedures
Support large panels to minimise the risk of blade pinching
Danger: Keep hands away from cutting area and the
and kickback. Large panels tend to sag under their own weight.
blade. Keep your second hand on auxiliary handle, or motor
Supports must be placed under the panel on both sides, near the line
housing. If both hands are holding the saw, they cannot be cut by
of cut and near the edge of the panel.
the blade.
Do not use dull or damaged blades. Unsharpened or improperly
Do not reach underneath the workpiece. The guard cannot
set blades produce narrow kerf causing excessive friction, blade
protect you from the blade below the workpiece.
binding and kickback.
Adjust the cutting depth to the thickness of the workpiece.
Blade depth and bevel adjusting locking levers must be tight
Less than a full tooth of the blade teeth should be visible below the
and secure before making cut. If blade adjustment shifts while
workpiece.
cutting, it may cause binding and kickback.
Never hold piece being cut in your hands or across your leg.
Use extra caution when sawing into existing walls or other
Secure the workpiece to a stable platform. It is important to
blind areas. The protruding blade may cut objects that can cause
support the work properly to minimize body exposure, blade binding,
kickback.
or loss of control.
Lower guard function
Hold the power tool by insulated gripping surfaces only,
when performing an operation where the cutting tool may
Check lower guard for proper closing before each use. Do
contact hidden wiring or its own cord. Contact with a „live“ wire
not operate the saw if lower guard does not move freely and
GB
will also make exposed metal parts of the power tool „live“ and could
close instantly. Never clamp or tie the lower guard into the
open position. If saw is accidentally dropped, lower guard may be
give the operator an electric shock.
bent. Raise the lower guard with the retracting handle and make sure
When ripping always use a rip fence or straight edge guide.
it moves freely and does not touch the blade or any other part, in all
This improves the accuracy of cut and reduces the chance of blade
angles and depths of cut.
binding.
Check the operation of the lower guard spring. If the guard
Always use blades with correct size and shape (diamond
and the spring are not operating properly, they must be
versus round) of arbour holes. Blades that do not match the
serviced before use. Lower guard may operate sluggishly due to
mounting hardware of the saw will run eccentrically, causing loss of
damaged parts, gummy deposits, or a builup of debris.
control.
Lower guard may be retracted manually only for special cuts
Never use damaged or incorrect blade washers or bolt. The
such as „plunge cuts“ and „compound cuts”. Raise lower guard
blade washers and bolt were specially designed for your saw, for
by retracting handle and as soon as blade enters the material, the
optimum performance and safety of operation.
lower guard must be released. For all other sawing, the lower guard
should operate automatically.
Kickback causes and related warnings
Always observe that the lower guard is covering the blade
- kickback is a sudden reaction to a pinched, bound or misaligned saw
before placing saw down on bench or oor. An unprotected,
blade, causing an uncontrolled saw to lift up and out of the workpiece
coasting blade will cause the saw to walk backwards, cutting
toward the operator;
whatever is in its path. Be aware of the time it takes for the blade to
- when the blade is pinched or bound tightly by the kerf closing
stop after switch is released.
down, the blade stalls and the motor reaction drives the unit rapidly
back toward the operator;
SPECIAL SAFETY INSTRUCTIONS WHEN USING A
- if the blade becomes twisted or misaligned in the cut, the teeth at
DIAMOND CUTTING WHEEL
the back edge of the blade can dig into the top surface of the wood
causing the blade to climb out of the kerf and jump back toward the
Cut-o machine safety warnings
operator.
The guard provided with the tool must be securely attached
Kickback is the result of saw misuse and/or incorrect operating proce-
to the power tool andpositioned for maximum safety, so
dures or conditions and can be avoided by taking proper precautions
the least amount of wheel is exposed towardsthe operator.
as given below.
Position yourself and bystanders away from the plane of the
Maintain a rm grip with both hands on the saw and position
rotatingwheel. The guard helps to protect operator from broken
your arms to resist kickback forces. Position your body to eit-
wheel fragments and accidental contact with wheel.
her side of the blade, but not in line with the blade. Kickback
Use only diamond cut-o wheels for your power tool. Just
could cause the saw to jump backwards, but kickback forces can be
because an accessory can be attached to your power tool, it does not
controlled by the operator, if proper precautions are taken.
assure safe operation.
When blade is binding, or when interrupting a cut for any
The rated speed of the accessory must be at least equal to
reason, release the trigger and hold the saw motionless in
the maximum speed marked on the power tool. Accessories
the material until the blade comes to a complete stop. Never
running faster than their rated speed can break and y apart.
attempt to remove the saw from the work or pull the saw
Wheels must be used only for recommended applications. For
backward while the blade is in motion or kickback may Occur.
example: do not grind with the side of cut-o wheel. Abrasive
Investigate and take corrective actions to eliminate the cause of blade
cut-o wheels are intended for peripheral grinding, side forces
binding.
applied to these wheels may cause them to shatter.
English
20
425_201_MBS30turbo_3-1.indd 20 17.06.13 09:12
Always use undamaged wheel anges that are of correct
Kickback and related Warnings
diameter for your selected wheel. Proper wheel anges support
Kickback is a sudden reaction to a pinched or snagged rotating wheel.
the wheel thus reducing the possibility of wheel breakage.
Pinching or snagging causes rapid stalling of the rotating wheel
Do not use worn down wheels from larger power tools. Wheel
which in turn causes the uncontrolled power tool to be forced in the
intended for larger power tool is not suitable for the higher speed of a
direction opposite of the wheel’s rotation at the point of the binding.
smaller tool and may burst.
For example, if an abrasive wheel is snagged or pinched by the
The outside diameter and the thickness of your accessory
workpiece, the edge of the wheel that is entering into the pinch point
must be within the capacity rating of your power tool.
can dig into the surface of the material causing the wheel to climb
Incorrectly sized accessories cannot be adequately guarded or
out or kick out. The wheel may either jump toward or away from
controlled.
the operator, depending on direction of the wheel’s movement at
the point of pinching. Abrasive wheels may also break under these
The arbour size of wheels and anges must properly t the
conditions.
spindle of the power tool. Wheels and anges with arbour holes
that do not match the mounting hardware of the power tool will run
Kickback is the result of power tool misuse and/or incorrect operating
out of balance, vibrate excessively and may cause loss of control.
procedures or conditions and can be avoided by taking proper
precautions as given below.
Do not use a damaged wheels. Before each use inspect
the wheels for chips and cracks. If power tool or wheel is
Maintain a rm grip on the power tool and position your
dropped, inspect for damage or install an undamaged wheel.
body and arm to allow you to resist kickback forces. Always
After inspecting and installing the wheel, position yourself
use auxiliary handle, if provided, for maximum control over
and bystanders away from the plane of the rotating wheel
kickback or torque reaction during start-up. The operator can
and run the power tool at maximum no load speed for one
control torque reactions or kickback forces, if proper precautions are
minute. Damaged wheels will normally break apart during this test
taken.
time.
GB
Never place your hand near the rotating accessory. Accessory
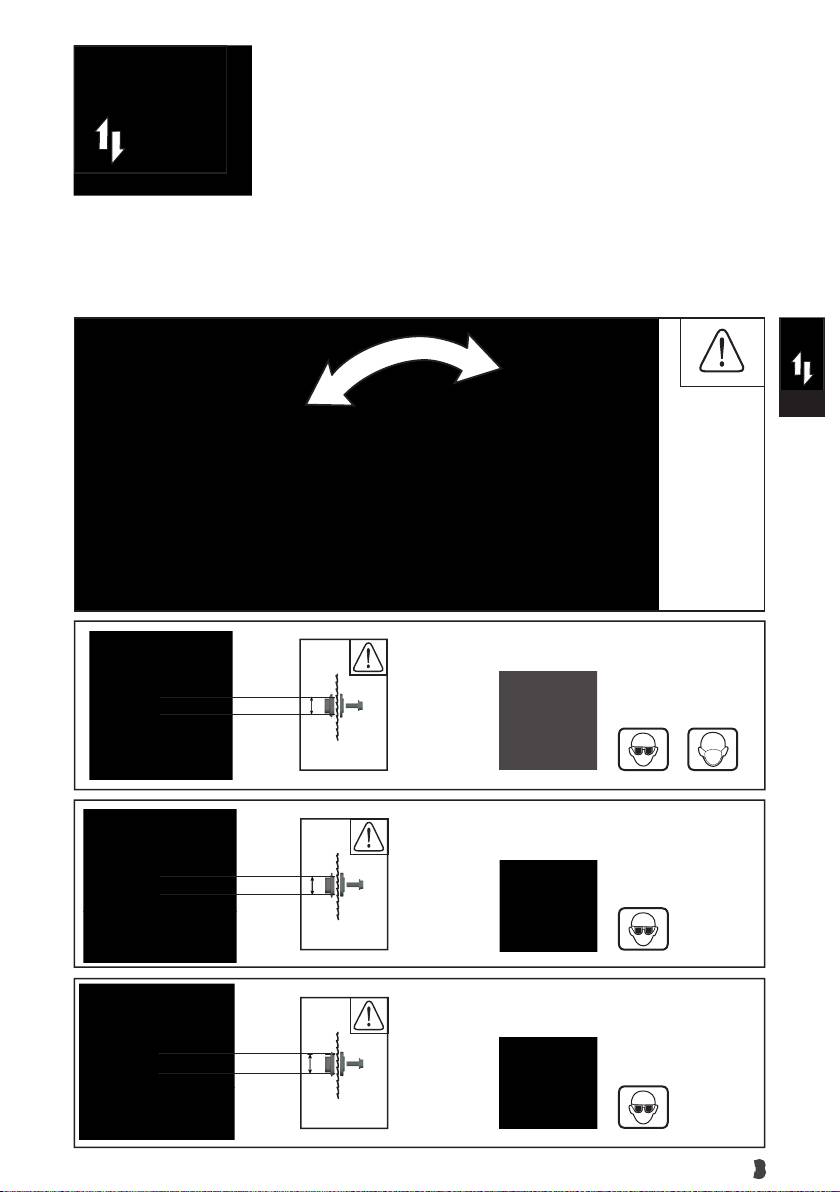
Wear personal protective equipment. Depending on
may kickback over your hand.
application, use face shield, safety goggles or safety glasses.
Do not position your body in the area where power tool will
As appropriate, wear dust mask, hearing protectors, gloves
move if kickback occurs. Kickback will propel the tool in direction
and shop apron capable of stopping small abrasive or
opposite to the wheel’s movement at the point of snagging.
workpiece fragments. The eye protection must be capable of
Use special care when working corners, sharp edges, etc.
stopping ying debris generated by various operations. The dust
Avoid bouncing and snagging the accessory. Corners, sharp
mask or respirator must be capable of ltrating particles generated
edges or bouncing have a tendency to snag the rotating accessory
by your operation. Prolonged exposure to high intensity noise may
and cause loss of control or kickback.
cause hearing loss.
Do not attach a saw chain woodcarving blade or toothed saw
Keep bystanders a safe distance away from work area.
blade. Such blades create frequent kickback and loss of control over
Anyone entering the work area must wear personal
the power tool.
protective equipment. Fragments of workpiece or of a broken
wheel may y away and cause injury beyond immediate area of
Do not “jam” the wheel or apply excessive pressure. Do not
operation.
attempt to make an excessive depth of cut. Overstressing the
wheel increases the loading and susceptibility to twisting or binding
Hold the power tool by insulated gripping surfaces only,
of the wheel in the cut and the possibility of kickback or wheel
when performing an operation where the cutting accessory
breakage.
may contact hidden wiring or its own cord. Cutting accessory
contacting a „live“ wire may make exposed metal parts of the power
When wheel is binding or when interrupting a cut for any
tool „live“ and could give the operator an electric shock.
reason, switch o the power tool and hold the power tool
motionless until the wheel comes to a complete stop. Never
Position the cord clear of the spinning wheel. If you lose
attempt to remove the cut-o wheel from the cut while the
control, the cord may be cut or snagged and your hand or arm may be
wheel is in motion otherwise kickback may occur. Investigate
pulled into the spinning wheel.
and take corrective action to eliminate the cause of wheel binding.
Never lay the power tool down until the wheel has come to
Do not restart the cutting operation in the workpiece. Let
a complete stop. The spinning accessory may grab the surface and
the wheel reach full speed and carefully reenter the cut. The
pull the power tool out of your control.
wheel may bind, walk up or kickback if the power tool is restarted in
Do not run the power tool while carrying it at your side.
the workpiece.
Accidental contact with the spinning accessory could snag your
Support panels or any oversized workpiece to minimize the
clothing, pulling the accessory into your body.
risk of wheel pinching and kickback. Large workpieces tend
Regularly clean the power tool’s air vents. The motor’s fan
to sag under their own weight. Supports must be placed under the
will draw the dust inside the housing and excessive accumulation of
workpiece near the line of cut and near the edge of the workpiece on
powdered metal may cause electrical hazards.
both sides of the wheel.
Do not operate the power tool near ammable materials.
Use extra caution when making a “pocket cut” into existing
Sparks could ignite these materials.
walls or other blind areas. The protruding wheel may cut gas or
Do not use accessories that require liquid coolants. Using
water pipes, electrical wiring or objects that can cause kickback.
water or other liquid coolants may result in electrocution or shock.
English
21
425_201_MBS30turbo_3-1.indd 21 17.06.13 09:12
SPECIFIED CONDITIONS OF USE
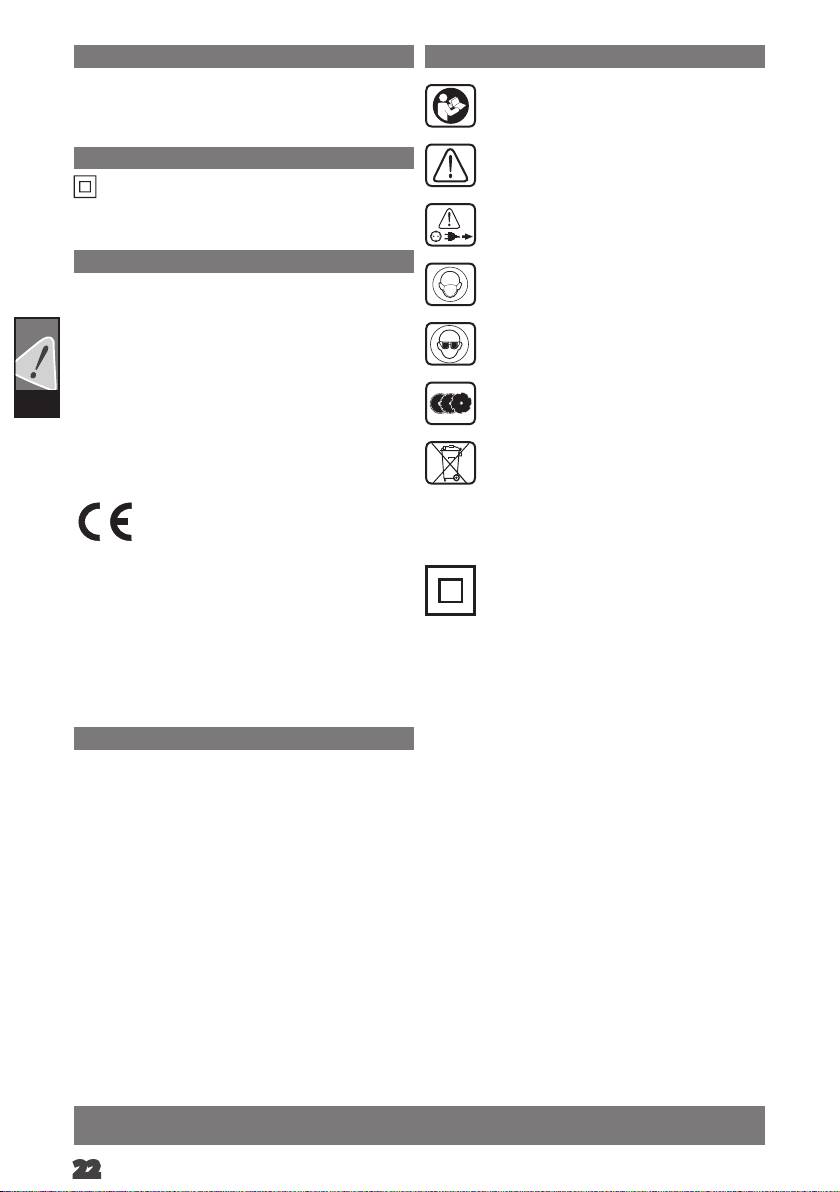
SYMBOLS
This electronic bercement saw can be used to cut wood or bre
cement with a circular saw blade. It can alternatively be used to cut
Please read the instructions carefully before starting the
stone with a diamant cutt-o wheel.
machine.
Do not use this product in any other way as stated for normal use.
MAINS CONNECTION
CAUTION! WARNING! DANGER!
Connect only to single-phase AC current and only to the system
voltage indicated on the rating plate. It is also possible to connect to
Always disconnect the plug from the socket before
sockets without an earthing contact as the design conforms to safety
carrying out any work on the machine.
class II.
ECDECLARATION OF CONFORMITY
We declare under our sole responsibility that the product described
Wear a suitable dust protection mask.
under “Technical Data” fullls all the relevant regulations and the
directives 2011/65/EU (RoHs), 2004/108/ EC, 2006/42/EC and the
following harmonized standards have been used:
Always wear goggles when using the machine.
EN 60745-1:2009 + A11:2010
EN 60745-2-5:2010
EN 60745-2-22:2011
Accessory - Not included in standard equipment,
GB
EN 55014-1:2006 + A1:2009 + A2:2011
available as an accessory.
EN 55014-2:1997 + A2:2008
EN 61000-3-2:2006 + A1:2009 + A2:2009
Do not dispose of electric tools together with household
EN 61000-3-3:2008
waste material! In observance of European Directive
2002/96/EC on waste electrical and electronic equipment
and its implementation in accordance with national
law, electric tools that have reached the end of their
life must be collected separately and returned to an
Winnenden, 2013-03-21
environmentally compatible recycling facility.
Class II construction, tool in which protection against
electric shock does not rely on basic insulation only, but
in which additional safety precautions, such as double
insulation or reinforced insulation, are provided.
Alexander Krug / Managing Director
Authorized to compile the technical le
Techtronic Industries GmbH
Max-Eyth-Straße 10, 71364 Winnenden, Germany
MAINTENANCE
Be sure to disconnect the tool from the power supply before atta-
ching or removing the saw blade.
Clean tool and guarding system with dry cloth.
Certain cleaning agents and solvents are harmful to plastics and other
insulated parts.
Keep the apparatus handle clean, dry and free of spilt oil or grease.
Check the function of guards.
Regular maintenance and cleaning provide for a long service life and
safe handling.
The ventilation slots of the machine must be kept clear at all times.
Use only AEG accessories and AEG spare parts. Should components
need to be replaced which have not been described, please contact
one of our AEG service agents (see our list of guarantee/service
addresses).
If needed, an exploded view of the tool can be ordered. Please state
the machine type printed as well as the six-digit No. on the label
and order the drawing at your local service agents or directly at:
Techtronic Industries GmbH, Max-Eyth-Straße10, 71364Winnenden,
Germany.
English
22
425_201_MBS30turbo_3-1.indd 22 17.06.13 09:12


