Acer ASPIRE 5830G – страница 3
Инструкция к Ноутбуку Acer ASPIRE 5830G

23
English
3 Select the restore point you want, click Next, then Finish. A confirmation
message box will appear.
4 Click Yes. Your system is restored using the restore point you specified. This
process may take several minutes, and may restart your computer.
Returning your system to its factory condition
If your computer experiences problems that are not recoverable by other
methods, you may need to reinstall everything to return your system to its
factory condition. You can reinstall using either your hard drive or the recovery
backup you have created.
Warning: This complete recovery deletes everything on your hard
drive, then reinstalls Windows and all software and drivers that
were pre-installed on your system. If you can access important
files on your hard drive, back them up now.
If you can still run Windows, see "Recovering from within Windows" on page
23.
If you cannot run Windows and your original hard drive is still working, see
"Recovering from the hard drive during startup" on page 24.
If you cannot run Windows and your original hard drive has been completely re-
formatted or you have installed a replacement hard drive, see "Recovering from
your recovery backup" on page 24.
Recovering from within Windows
To reinstall Windows and all pre-installed software and drivers:
Click Start > All Programs > Acer, then click Acer eRecovery Management.
Click the Restore tab, then Restore Operating System to Factory Defaults to
open the Confirm Restoration dialog box.
Click Yes, then Start. A dialog box will display information about the hard drive
that the operating system will be recovered to.
Warning: Continuing the process will erase all files on your hard
drive.
Click OK. The recovery process begins by restarting your computer, then
continues by copying files to your hard drive. This process may take a while, the
Acer eRecovery Management screen displays the progress.
When the recovery has finished, a dialog box prompts you to restart your
computer.

24
English
Click OK to restart your computer.
Follow the onscreen prompts for first-time system setup.
Recovering from the hard drive during startup
To reinstall Windows and all pre-installed software and drivers:
1 Turn on your computer, then press <Alt> + <F10> during startup to open
Acer eRecovery Management.
2 Click Restore Operating System to Factory Defaults.
Warning: Continuing the process will erase all files on your hard
drive.
3 Click Next. Your hard drive’s original, factory-loaded contents will be
recovered. This process will take several minutes.
Recovering from your recovery backup
To reinstall Windows and all pre-installed software and drivers:
1 Plug in the USB flash drive and turn on your computer.
Warning: Continuing the process will erase all files on your hard
drive.
If it is not already enabled, you must enable the F12 Boot Menu:
Press <F2> when starting your computer.
Use the left or right arrow keys to select the Main menu.
Press the down key until F12 Boot Menu is selected, press <F5> to change this
setting to Enabled.
Use the left or right arrow keys to select the Exit menu.
Select Save Changes and Exit and press Enter. Select OK to confirm.
Your computer will restart.
2 During startup, press <F12> to open the boot menu. The boot menu allows
you to select which device to start from, such as a flash drive.
3 Use your arrow keys to select the line USB HDD, then press <Enter>.
Windows will install from the recovery backup on the USB flash drive.
4 Follow the onscreen prompts to complete the recovery.

25
English
Acer clear.fi
Acer clear.fi is a home media database viewer and controller. It allows you to
browse media contents on devices that are on the same subnet.
Media content types
When you launch Acer clear.fi, you can choose the media content type. There
are three types defined: video, music, and photos.
DMS (Digital Media Server) devices
DMS devices include DLNA-compliant personal computers and NAS (Network
Attached Storage) devices. These devices store content and make it available to
DMP (Digital Media Player) and DMR (Digital Media Renderer) devices. Acer
clear.fi will list DMS devices on the main screen, and you can choose ALL
DEVICES or a specific device to browse the media stored.
Display media content
If you want to display media content on your computer, you just need to
double-click the media content. If you want to display the media content on a
remote device, you need to do the following:
1 Choose the media content.
2Select Play to.
3 Select the remote device. Acer clear.fi will open a dialog to display the
status. You can play, pause or stop the media content, and adjust the
volume.

26
English
Send media content
If you want to send media content to a remote device, you need to do the
following:
1 Choose the media content.
2Select Send to.
3 Select the remote device. Acer clear.fi will open a dialog to display the
transmission progress.
Search media
If you want to search your media content, you need to choose the media type
first; then enter a keyword in the search bar. Acer clear.fi will list the media
content that matches the keyword.
Block and unblock devices
If you want to block a device, you can right-click it, and select Block from the
menu. After blocking a device, it will not be able to browse your media, display
content, or send media content to your computer. If you want to unblock a
device, right-click it, and select Unblock from the menu.
Media sharing settings
You can adjust settings according to your requirements.

27
English
Power management
This computer has a built-in power management unit that monitors system
activity. System activity refers to any activity involving one or more of the
following devices: keyboard, mouse, hard disk, peripherals connected to the
computer, and video memory. If no activity is detected for a period of time
(called an inactivity timeout), the computer stops some or all of these devices in
order to conserve energy.
This computer employs a power management scheme that supports the
advanced configuration and power interface (ACPI), which allows for maximum
power conservation and maximum performance at the same time. Windows
handles all power-saving chores for your computer.
Acer PowerSmart key
Note: This feature is only available on certain models.
Acer PowerSmart uses the power-saving features of your computer's graphics
sub-system to reduce overall power consumption. When you press the Acer
PowerSmart key, the screen brightness is reduced and the graphics chip
switched to a lower speed; PCI and WLAN switch to power-saving modes. Press
the Acer PowerSmart key again to return to your previous settings.

28
English
Battery pack
The computer uses a battery pack that gives you long use between charges.
Battery pack characteristics
The battery pack has the following characteristics:
• Employs current battery technology standards.
• Delivers a battery-low warning.
The battery is recharged whenever you connect the computer to the AC
adapter. Your computer supports charge-in-use, enabling you to recharge the
battery while you continue to operate the computer. However, recharging with
the computer turned off results in a significantly faster charge time.
The battery will come in handy when you travel or during a power failure. It is
advisable to have an extra fully charged battery pack available as backup.
Contact your dealer for details on ordering a spare battery pack.
Note: Some models have an embedded battery. If the battery
needs to be replaced, please contact an authorized service center.
Conditioning a new battery pack
Before you use a battery pack for the first time, there is a conditioning process
that you should follow:
1 Insert the new battery without turning the computer on.
2 Connect the AC adapter and fully charge the battery.
3 Disconnect the AC adapter.
4 Turn on the computer and operate using battery power.
5 Fully deplete the battery until the battery-low warning appears.
6 Reconnect the AC adapter and fully charge the battery again.
Follow these steps again until the battery has been charged and discharged
three times.
Use this conditioning process for all new batteries, or if a battery hasn't been
used for a long time. If the computer is to be stored for more than two weeks,
you are advised to remove the battery pack from the unit.
Warning: Do not expose battery packs to temperatures below 0° C
(32° F) or above 45° C (113° F). Extreme temperatures may
adversely affect the battery pack.

29
English
By following the battery conditioning process you condition your battery to
accept the maximum possible charge. Failure to follow this procedure will
prevent you from obtaining the maximum battery charge, and will also shorten
the effective lifespan of the battery.
In addition, the useful lifespan of the battery is adversely affected by the
following usage patterns:
• Using the computer on constant AC power with the battery inserted. If you
want to use constant AC power, you are advised to remove the battery
pack after it is fully charged.
• Not discharging and recharging the battery to its extremes, as described
above.
• Frequent use; the more you use the battery, the faster it will reach the end
of its effective life. A standard computer battery has a life span of about
300 charges.
Charging the battery
To charge the battery, first make sure that it is correctly installed in the battery
bay. Plug the AC adapter into the computer, and connect to a mains power
outlet. You can continue to operate your computer on AC power while your
battery is charging. However, charging the battery with the computer turned
off results in a significantly faster charge time.
Note: You are advised to charge the battery before retiring for
the day. Charging the battery overnight before traveling enables
you to start the next day with a fully charged battery.
Optimizing battery life
Optimizing battery life helps you get the most out of battery operation,
prolonging the charge/recharge cycle and improving recharging efficiency. You
are advised to follow the suggestions set out below:
• Purchase an extra battery pack.
• Use AC power whenever possible, reserving battery for on-the-go use.
• Eject a PC Card if it is not being used, as it will continue to draw power (for
selected models).
• Store the battery pack in a cool, dry place. The recommended temperature
is 10° C (50° F) to 30° C (86° F). Higher temperatures cause the battery to
self-discharge faster.
• Excessive recharging decreases the battery life.
• Look after your AC adapter and battery.
30
English
Checking the battery level
The Windows power meter indicates the current battery level. Rest the cursor
over the battery/power icon on the taskbar to see the battery's present charge
level.
Battery-low warning
When using battery power pay attention to the Windows power meter.
Warning: Connect the AC adapter as soon as possible after the
battery-low warning appears. Data will be lost if the battery to
become fully depleted and the computer shuts down.
When the battery-low warning appears, the recommended course of action
depends on your situation:
Situation Recommended Action
The AC adapter
1. Plug the AC adapter into the computer, and then
and a power
connect to the mains power supply.
outlet are
2. Save all necessary files.
available.
3. Resume work.
Turn off the computer if you want to recharge the
battery rapidly.
An extra fully
1. Save all necessary files.
charged battery
2. Close all applications.
pack is available.
3. Turn off the computer.
4. Replace the battery pack.
5. Turn on the computer and resume work.
The AC adapter or
1. Save all necessary files.
a power outlet is
2. Close all applications.
unavailable. You
3. Turn off the computer.
have no spare
battery pack.

31
English
Installing and removing the battery pack
Note: Some models have an embedded battery. If the battery
needs to be replaced, please contact an authorized service center.
Important! Before removing the battery from the unit, connect
the AC adapter if you want to continue using your computer.
Otherwise, turn off the computer first.
To install a battery pack:
1 Align the battery with the open battery bay; make sure that the end with
the contacts will enter first, and that the top surface of the battery is
facing up.
2 Slide the battery into the battery bay and gently push until the battery
locks in place.
To remove a battery pack:
1 Slide the battery release latch to release the battery.
2 Pull the battery from the battery bay.

32
English
Taking your notebook PC with you
This section gives you tips and hints to consider when moving around or
traveling with your computer.
Disconnecting from the desktop
Follow these steps to disconnect your computer from external accessories:
1 Save any open files.
2 Remove any media, floppy disks or compact disks from the drive(s).
3 Shut down the computer.
4 Close the display cover.
5 Disconnect the cord from the AC adapter.
6 Disconnect the keyboard, pointing device, printer, external monitor and
other external devices.
7 Disconnect the Kensington lock if you are using one to secure the
computer.
Moving around
When you are just moving within short distances, for example, from your office
desk to a meeting room.
Preparing the computer
Before moving the computer, close and latch the display cover to place it in
Sleep mode. You can now safely take the computer anywhere you go within
the building. To bring the computer out of Sleep mode, open the display; then
press and release the power button.
If you are taking the computer to a client's office or a different building, you
may choose to shut down the computer:
Click Start then click Shut Down.
Or:
You can put the computer in Sleep mode by pressing <Fn> + <F4>. Then close
and latch the display.
When you are ready to use the computer again, unlatch and open the display;
then press and release the power button.
Note: If the Sleep indicator is off, the computer has entered
Hibernation mode and is turned off. If the power indicator is off

33
English
but the Sleep indicator is on, the computer has entered Sleep
mode. In both cases, press and release the power button to turn
the computer back on. Note that the computer may enter
Hibernation mode after being in Sleep mode for a period of time.
What to bring to meetings
If your meeting is relatively short, you probably do not need to bring anything
with you other than your computer. If your meeting will be longer, or if your
battery is not fully charged, you may want to bring the AC adapter with you to
plug in your computer in the meeting room.
If the meeting room does not have an electrical outlet, reduce the drain on the
battery by putting the computer in Sleep mode. Press <Fn> + <F4> or close the
display cover whenever you are not actively using the computer. To resume,
open the display (if closed), then press and release the power button.
Taking the computer home
When you are moving from your office to your home or vice versa.
Preparing the computer
After disconnecting the computer from your desktop, follow these steps to
prepare the computer for the trip home:
• Check that you have removed all media and compact discs from the
drive(s). Failure to remove the media can damage the drive head.
• Pack the computer in a protective case that can prevent the computer from
sliding around and cushion it if it should fall.
Caution: Avoid packing items next to the top cover of the
computer. Pressure against the top cover can damage the screen.
What to take with you
Unless you have some items at home, take the following items with you:
• AC adapter and power cord.
• The printed setup poster.
Special considerations
Follow these guidelines to protect your computer while traveling to and
from work:
• Minimize the effects of temperature changes by keeping the computer

34
English
with you.
• If you need to stop for an extended period of time and cannot carry the
computer with you, leave the computer in the trunk of the car to avoid
exposing the computer to excessive heat.
• Changes in temperature and humidity can cause condensation. Allow the
computer to return to room temperature, and inspect the screen for
condensation before turning on the computer. If the temperature change
is greater than 10° C (18° F), allow the computer to come to room
temperature slowly. If possible, leave the computer for 30 minutes in an
environment with a temperature between outside and room temperature.
Setting up a home office
If you frequently work on your computer at home, you may want to purchase a
second AC adapter for use at home. With a second AC adapter, you can avoid
carrying the extra weight to and from home.
If you use your computer at home for significant periods of time, you might also
want to add an external keyboard, monitor or mouse.
Traveling with the computer
When you are moving within a larger distance, for instance, from your office
building to a client's office building or traveling locally.
Preparing the computer
Prepare the computer as if you were taking it home. Make sure that the battery
in the computer is charged. Airport security may require you to turn on your
computer when carrying it into the gate area.
What to take with you
Take the following items with you:
• AC adapter
• Spare, fully-charged battery pack(s)
• Additional printer driver files if you plan to use another printer
Special considerations
In addition to the guidelines for taking the computer home, follow these
guidelines to protect your computer while traveling:
• Always take the computer as carry-on luggage.
• If possible, have the computer inspected by hand. Airport security X-ray
machines are safe, but do not put the computer through a metal detector.

35
English
• Avoid exposing floppy disks to hand-held metal detectors.
Traveling internationally with the computer
When you are moving from country to country.
Preparing the computer
Prepare the computer as you would normally prepare it for traveling.
What to bring with you
Bring the following items with you:
• AC adapter
• Power cords that are appropriate for the country to which you
are traveling
• Spare, fully-charged battery packs
• Additional printer driver files if you plan to use another printer
• Proof of purchase, in case you need to show it to customs officials
• International Travelers Warranty passport
Special considerations
Follow the same special considerations as when traveling with the computer.
In addition, these tips are useful when traveling internationally:
• When traveling in another country, check that the local AC voltage and the
AC adapter power cord specifications are compatible. If not, purchase a
power cord that is compatible with the local AC voltage. Do not use
converter kits sold for appliances to power the computer.
• If you are using the modem, check if the modem and connector are
compatible with the telecommunications system of the country you are
traveling in.

36
English
Securing your computer
Your computer is a valuable investment that you need to take care of. Learn
how to protect and take care of your computer.
Security features include hardware and software locks — a security notch
and passwords.
Using a computer security lock
The notebook comes with a Kensington-compatible security slot for a
security lock.
Wrap a computer security lock cable around an immovable object such as a
table or handle of a locked drawer. Insert the lock into the notch and turn the
key to secure the lock. Some keyless models are also available.
Using passwords
Passwords protect your computer from unauthorized access. Setting these
passwords creates several different levels of protection for your computer
and data:
• Supervisor Password prevents unauthorized entry into the BIOS utility.
Once set, you must enter this password to gain access to the BIOS utility.
See "BIOS utility" on page 47.
• User Password secures your computer against unauthorized use. Combine
the use of this password with password checkpoints on boot-up and
resume from Hibernation for maximum security.
• Password on Boot secures your computer against unauthorized use.
Combine the use of this password with password checkpoints on boot-up
and resume from Hibernation for maximum security.
Important! Do not forget your Supervisor Password! If you forget
your password, please get in touch with your dealer or an
authorized service center.

37
English
Entering passwords
When a password is set, a password prompt appears in the center of the
display screen.
• When the Supervisor Password is set, a prompt appears when you press
<F2> to enter the BIOS utility at boot-up.
• Type the Supervisor Password and press <Enter> to access the BIOS utility.
If you enter the password incorrectly, a warning message appears. Try
again and press <Enter>.
• When the User Password is set and the password on boot parameter is
enabled, a prompt appears at boot-up.
• Type the User Password and press <Enter> to use the computer. If you
enter the password incorrectly, a warning message appears. Try again and
press <Enter>.
Important! You have three chances to enter a password. If you fail
to enter the password correctly after three tries, the system halts.
Press and hold the power button for four seconds to shut down
the computer. Then turn on the computer again, and try again.
Setting passwords
You can set passwords using the BIOS utility.
38
English
Expanding through options
Your notebook PC offers you a complete mobile computing experience.
Connectivity options
Ports allow you to connect peripheral devices to your computer as you would
with a desktop PC. For instructions on how to connect different external devices
to the computer, read the following section.
Fax/data modem (only for certain models)
Your computer has a built-in V.92 56 Kbps fax/data modem
(only for certain models).
Warning! This modem port is not compatible with digital phone
lines. Plugging this modem into a digital phone line will damage
the modem.
To use the fax/data modem port, connect a phone cable from the modem port
to a telephone jack.
Warning! Please make sure that the cable you use is appropriate
for the country in which you are working.
39
English
Built-in network feature
The built-in network feature allows you to connect your computer to an
Ethernet-based network.
To use the network feature, connect an Ethernet cable from the Ethernet
(RJ-45) port on the chassis of the computer to a network jack or hub on
your network.
Consumer Infrared (CIR) (only for certain models)
The computer’s Consumer Infrared (CIR) port is used to receive signals from your
remote control, or other devices with CIR capability.
40
English
Universal Serial Bus (USB)
The USB 2.0 port is a high-speed serial bus which allows you to connect USB
peripherals without taking up precious system resources.
IEEE 1394 port (only for certain models)
The computer's IEEE 1394 port allows you to connect to an IEEE 1394-
compatible device like a video camera or digital camera. See your video or
digital camera's documentation for details.
41
English
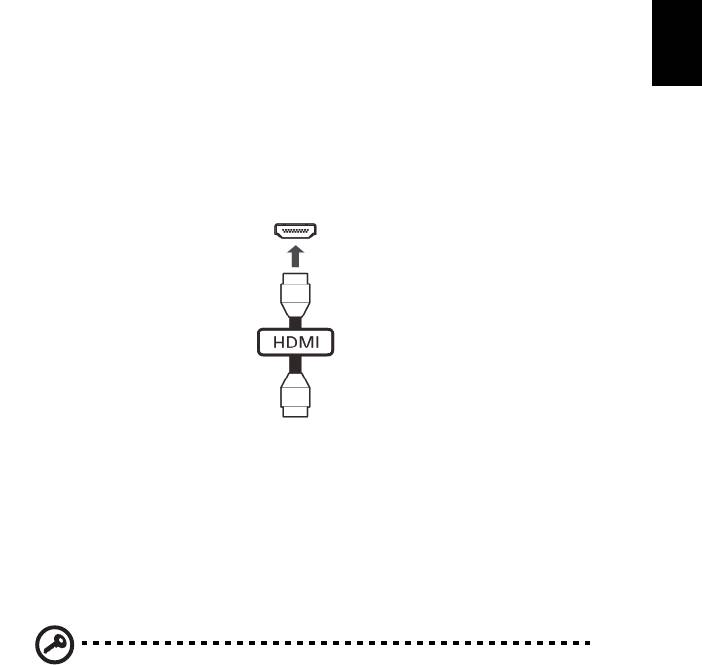
High-Definition Multimedia Interface
(only for certain models)
HDMI (High-Definition Multimedia Interface) is an industry-supported,
uncompressed, all-digital audio/video interface. HDMI provides an interface
between any compatible digital audio/video source, such as a set-top box, DVD
player, and A/V receiver and a compatible digital audio and/or video monitor,
such as a digital television (DTV), over a single cable.
Use the HDMI port on your computer to connect with high-end audio and video
equipment. Single cable implementation allows tidy setup and fast connection.
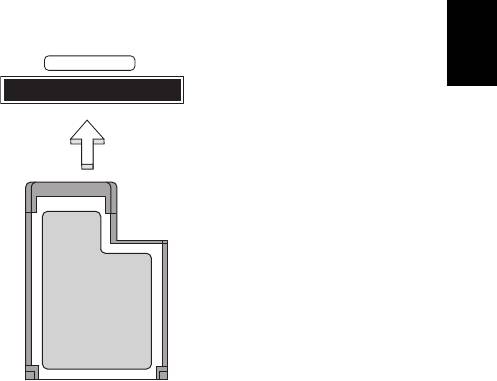
ExpressCard (only for certain models)
The ExpressCard is the newest version of the PC Card. It is a smaller and faster
interface that further enhances the usability and expandability of your
computer.
ExpressCards support a vast number of expansion options, including flash
memory card adapters, TV-tuners, Bluetooth connectivity and IEEE 1394b
adapters. ExpressCards support USB 2.0 and PCI Express applications.
Important! There are two types, ExpressCard/54 and ExpressCard/
34 (54mm and 34mm), each with different functions. Not all
ExpressCard slots will support both types. Please refer to your
card’s manual for details on how to install and use the card, and
its functions.
42
English
Inserting an ExpressCard
Insert the card into the slot and push gently until it clicks into position.
Ejecting an ExpressCard
Before ejecting an ExpressCard:
1 Exit the application using the card.
2 Left-click the remove hardware icon on the taskbar and stop the card
operation.
3 Push the card gently into the slot and release to pop out the card. Then
pull the card free from the slot.
Installing memory (only for certain models)
Follow these steps to install memory:
1 Turn off the computer, unplug the AC adapter (if connected) and remove
the battery pack. Then turn the computer over to access its base.
2 Remove the screws from the memory cover; then lift and remove the
memory cover.
EXPRESS CARD


