Epson L555: Control Panel Overview
Control Panel Overview: Epson L555
Basic Guide
Control Panel Overview
❏ Never disassemble, modify, or attempt to repair the
❏ If the LCD screen is damaged, contact your dealer.
power cord, plug, printer unit, scanner unit, or
If the liquid crystal solution gets on your hands,
options by yourself, except as specifically explained
wash them thoroughly with soap and water. If the
in the product’s guides.
liquid crystal solution gets into your eyes, flush
them immediately with water. If discomfort or
❏ Unplug the product and refer servicing to qualified
vision problems remain after a thorough flushing,
English
service personnel under the following conditions:
see a doctor immediately.
The power cord or plug is damaged; liquid has
entered the product; the product has been dropped
❏ Avoid using a telephone during an electrical storm.
or the casing damaged; the product does not
There may be a remote risk of electric shock from
operate normally or exhibits a distinct change in
lightning.
performance. Do not adjust controls that are not
covered by the operating instructions.
❏ Do not use a telephone to report a gas leak in the
vicinity of the leak.
❏ Place the product near a wall outlet where the plug
can be easily unplugged.
Note:
The following provides safety instructions for ink.
❏ Do not place or store the product outdoors, near
& “Refilling Ink” on page 12
excessive dirt or dust, water, heat sources, or in
locations subject to shocks, vibrations, high
temperature or humidity.
❏ Take care not to spill liquid on the product and not
to handle the product with wet hands.
❏ Keep this product at least 22 cm away from cardiac
pacemakers. Radio waves from this product may
adversely affect the operation of cardiac
pacemakers.
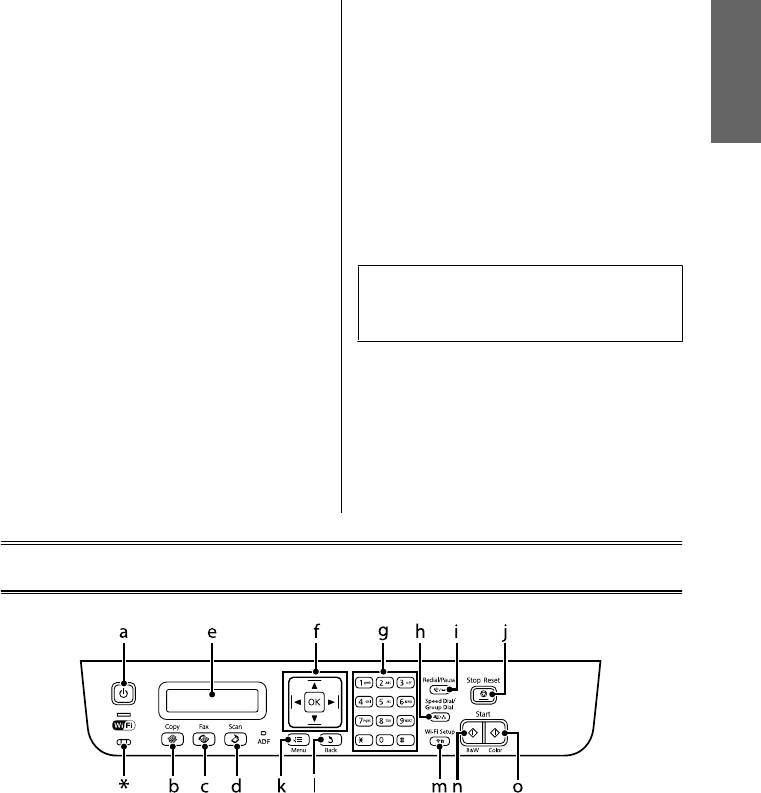
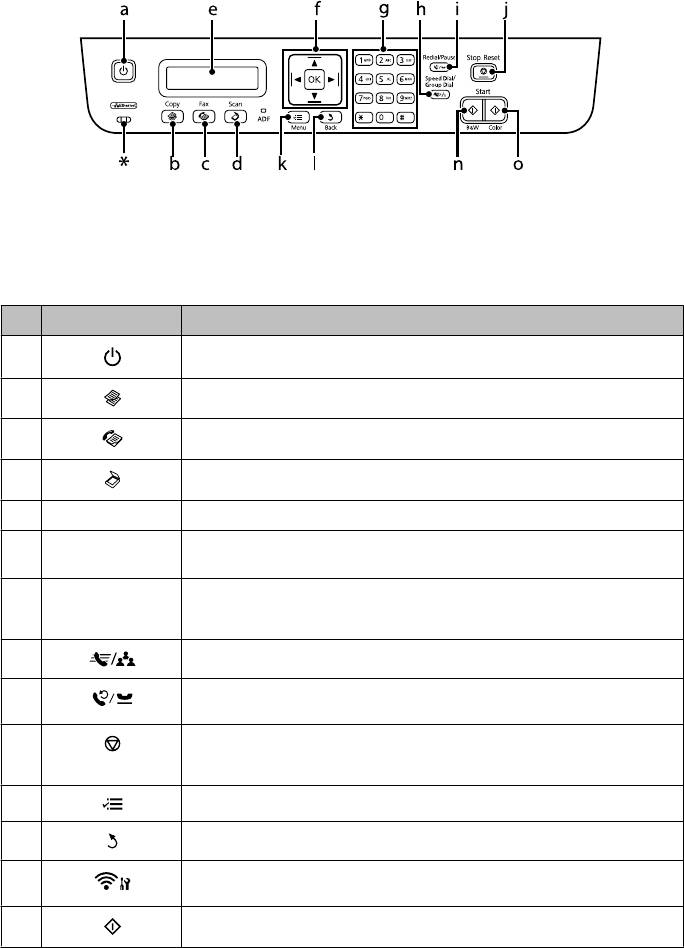
Control Panel Overview
3
Basic Guide
Control Panel Overview
* emits a beep.
Buttons and LCD
Buttons Function
a Turns the product on and off
b
Enters copy mode.
c Enters fax mode.
d
Enters scan mode.
e - LCD screen (monochrome 2-line display)
f
l, u, r, d, OK Press l, u, r, d to select menus. Press OK to confirm the setting you have selected and go to
next screen. When typing a fax number, l acts as a backspace key, and r inserts a space.
g 0-9,*,# Specifies the date/time or the number of copies, as well as fax numbers. Enters alphanumeric
characters and switches between uppercase, lowercase, and numbers each time it is pressed.
Press 1 symb to enter symbols such as the sharp sign (#), plus (+), and apostrophe (’).
h
Displays speed dial/group dial lists. Press again to switch lists.
i Displays the last number dialed. When entering numbers in fax mode, this inserts a pause
symbol (-) that acts as a brief pause during dialing.
j Stops the ongoing operation or initializes the current settings.
If this button is pressed to cancel copying, scanning, or faxing while the ADF is in use, all
originals in the ADF will be fed out.
k Displays detailed settings for each mode.
l Cancels/returns to the previous menu.
m
Provided with Wi-Fi-capable models only. Displays the Wi-Fi Setup menus that allow you to
set up the product wirelessly. For instructions on using the menus, see the Network Guide.
n
Start copying/faxing in black and white.
4
Оглавление
- Introduction
- Control Panel Overview
- A Paper and Media Handling
- C F
- A
- D Copying
- A
- F
- G
- Refilling Ink
- A
- F
- E Transporting the
- H
- !
- A
- E
- Where To Get Help
- ! Введение
- Важные инструкции
- Обзор панели управления
- B Обращение с
- E
- B
- B Сканирование
- Отправление
- A
- C
- A
- C
- F
- C
- Устранение основных неполадок
- !
- C
- G
- Служба поддержки
- ! Вступ
- Опис панелі керування
- Робота з папером та
- B
- F
- Сканування Факсимільний зв'язок
- B
- E
- F
- C
- D
- E
- H
- !
- B
- Джерела довідкової
- ! DzȭȘȭșȗȍ
- ұȈțȭȗșȭȏȌȭȒ
- ǩȈșҲȈȘț ȚȈҲȚȈșȣȕ ҲȈȘȈȗ ȠȣҮț
- B
- F
- D
- F
- ǹȒȈȕȍȘȓȍț ǼȈȒș ȎȭȉȍȘț
- A
- C
- B
- C
- ǹȐȧȕȣ ȚȖȓȚȣȘț
- C
- F
- C
- F
- ǵȍȋȭȏȋȭ ȈҲȈțȓȈȘȌȣ ȎȖȦ
- !
- B
- G
- ǨȕȣҲȚȈȔȈ Ȉȓț ȒӄȏȌȍȘȭ


