Ridgid K-1500 G: инструкция
Раздел: Электроинструменты
Тип:
Инструкция к Ridgid K-1500 G

K-1500 SP
K-1500 G
Drain Cleaning
Machines
GB p. 1
DE p. 5
FR p. 10
NL p. 15
IT p. 20
ES p. 25
PT p. 30
SV p. 35
DA p. 39
NO p. 43
FI p. 47
HR p. 51
PL p. 55
RO p. 60
CZ p. 65
HU p. 69
GR p. 74
RU p. 79
RIDGE TOOL COMPANY

K-1500
GB
K-1500
Operating Instructions
WARNING! Cables may twist or kink.
Fingers, hands or other body parts can
General Safety Information
be crushed or broken.
• Wear Ridgid mittens with rivets.
WARNING! Read these instructions
and the accompanying safety booklet
• Do not use with damaged or worn electrical cords.
carefully before using this equipment.
• Keep guards in place.
If you are uncertain about any aspect of using
• Place machine close to inlet.
this tool, contact your RIDGID distributor for
• Plug cord into grounded plug.
more information.
• Wear safety glasses.
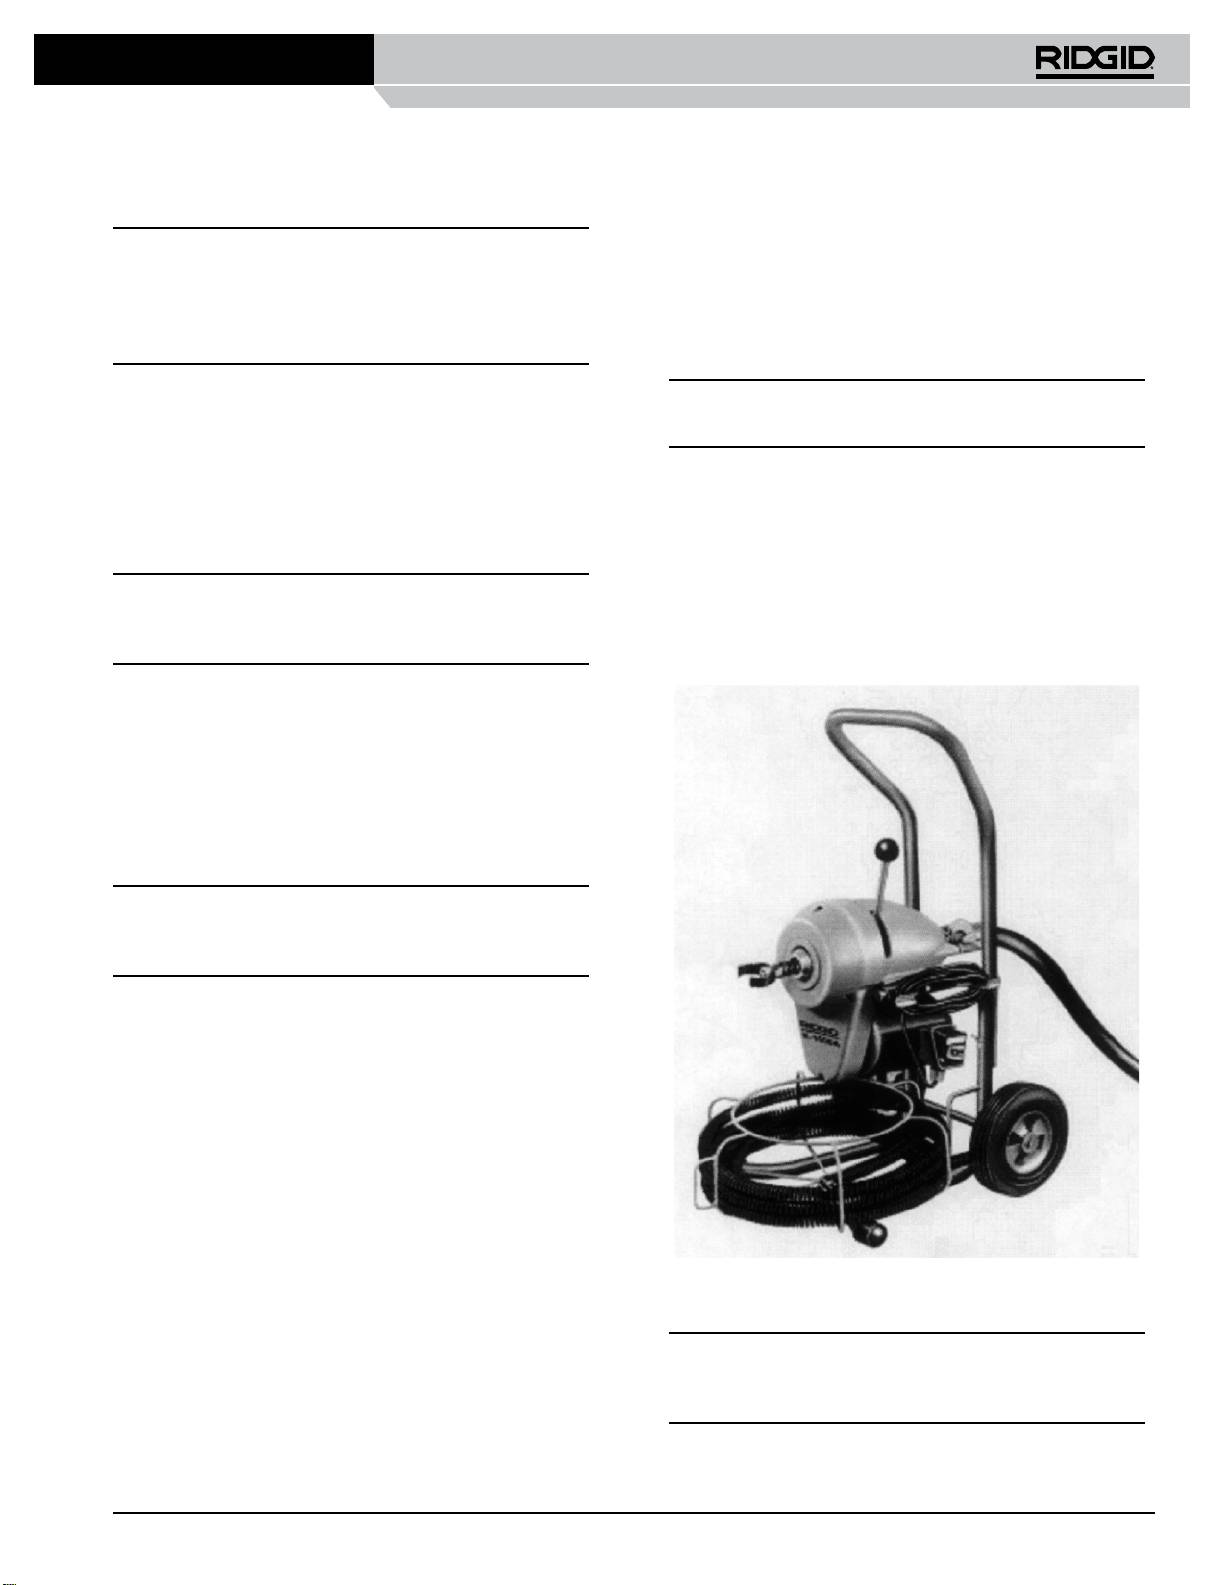
The K-1500 is designed for cleaning drains
• Test the PRCD to insure proper operation.
using RIDGID cables and tools. We strongly
recommend that it NOT be modi ed and/or
Machine Safety
used for any applictation other than which
1. Wear standard equipment glove provided with
it was intended including powering other
the machine. Never grasp a rotating cable with a
equipment.
cloth or loose tting glove. It could get wrapped
around the cable and cause serious injury.
Failure to understand and follow all
2. Do not overstress cables. Keep one hand on the
instructions may result in electric shock, re,
cable for control when the machine is running.
and/or serious personal injury.
3. Do not operate machine in (REV) reverse. Operating
SAVE THESE INSTRUCTIONS!
machine in reverse can result in cable damage and is
used only to back tool out of an obstruction.
4. Operate machine from the side with the FOR/
OFF/REV Switch. Allows for better control of the
machine.
5. Use Rear Guide Hose. Prevents cable from whipping
and picking up debris.
6. Do not use if clutch, ON/OFF Switch, ground plug
or GFCI are broken. Poorly maintained tools can
result in serious injury.
SAVE THESE INSTRUCTIONS!
Ridge Tool Company
1
K-1500
Operating Instructions
Operating Machine
Preparing Machine for Operation
WARNING! Operator should be thoroughly familiar
with safety precautions before attempting to operate this
equipment.
CAUTION: It is very important to know approximate
To reduce risk of electrical shock, keep all electrical
distance from inlet to main sewer or septic tank.
connections dry and o the ground. Do not touch plug with
Overrunning cable too far into main sewer or septic tank
wet hands.
can cause cables to knot up and prevent their return
Whenever running cable through traps and lines, be sure
through small lines. If main is 300 mm or larger and standard
there is water running to prevent cables from heating up.
32 mm cable is being used, do not allow more than 10 to
15 feet of overrun. When working into a septic tank do not
1. Make sure FOR/OFF/REV SWITCH is in OFF position
allow more than 3 to 5 feet overrun.
and plug power cord into a properly grounded
receptacle.Test the PRCD for proper operation before
1. Position machine one or two feet from line opening
using the machine.
and attach guide hose at rear of machine.
2. To start through a 4” “P” trap, push cable by hand as far
2. Insert rst cable into front of machine, (female coupling
as it will go.
rst from front of machine), and push through guide
hose until a foot or so remains out front of machine.
3. Pull enough extra cable through machine to form
almost a half circle between machine and trap.
4. Hold cable loosely in mittened hand (left Hand), put
WARNING! Never couple more than one cable at a time.
FOR/OFF/REV Switch in FOR (forward) position.
3. Snap on cutter or auger, check coupling, make sure it
is secure.
NOTE! The motor will start but cable will remain free and
idle.
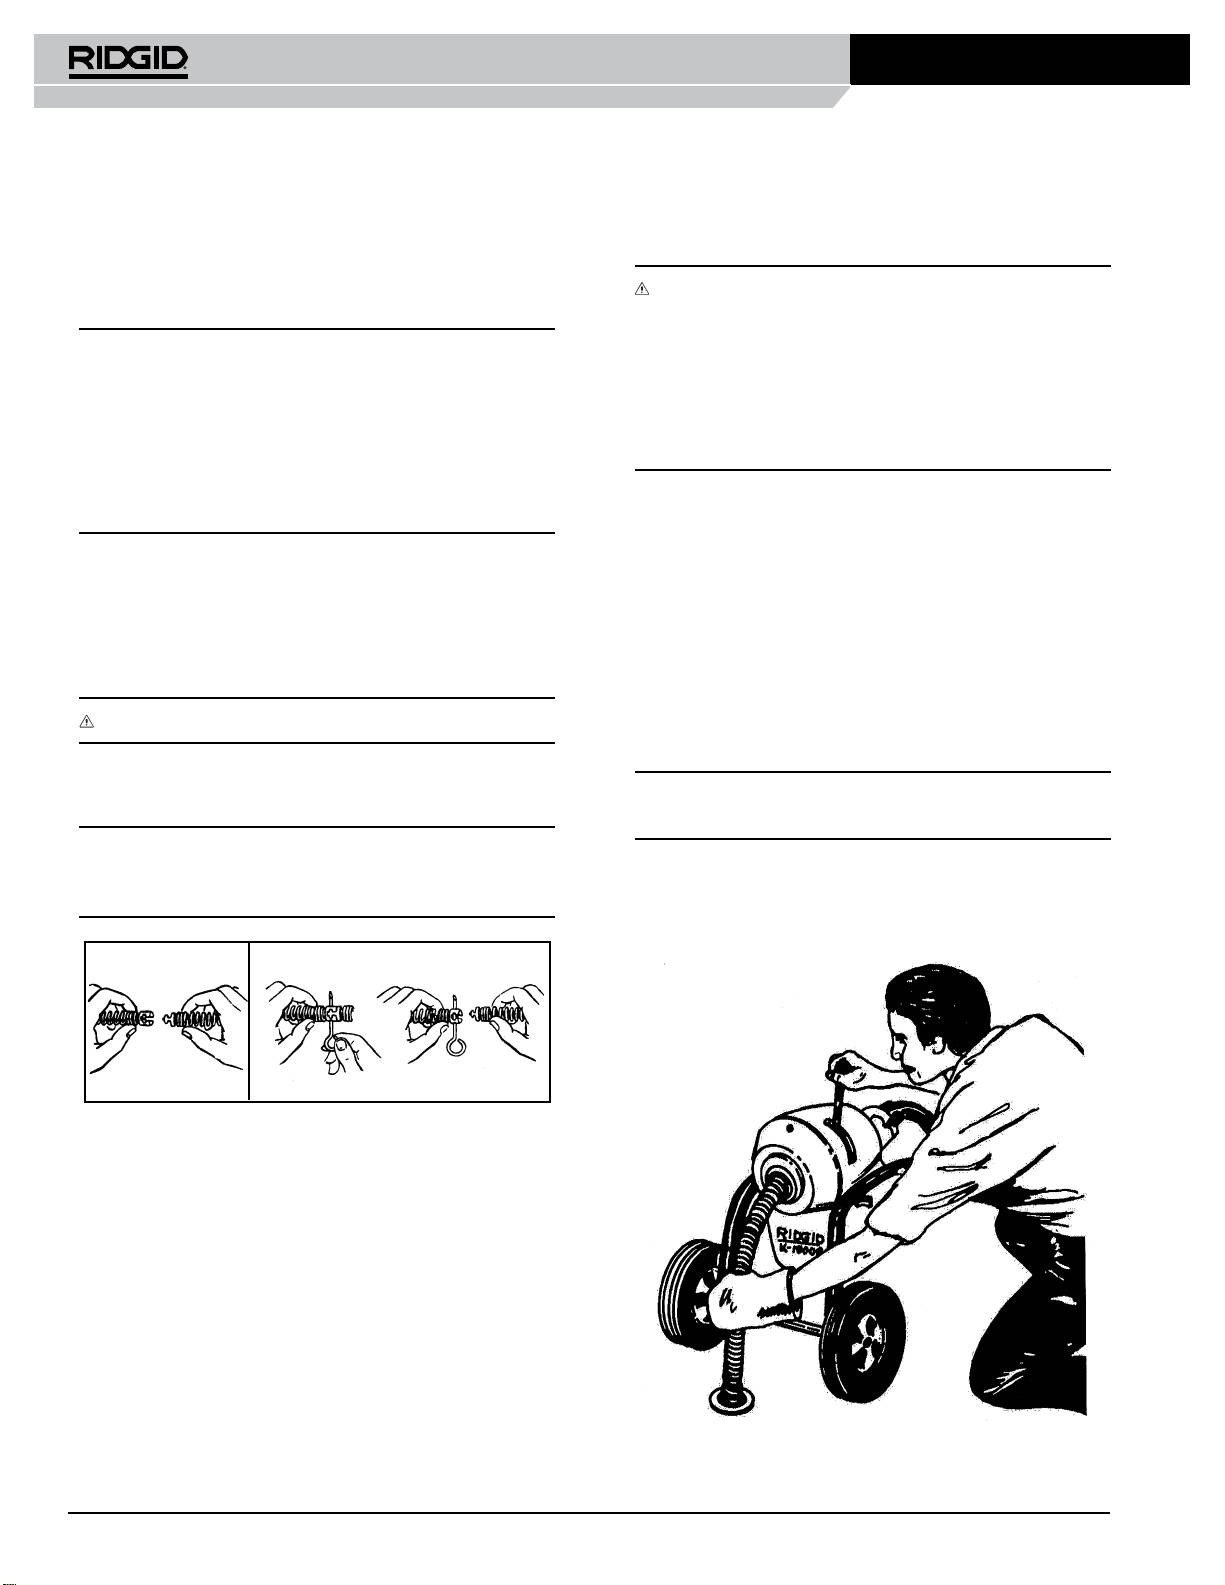
NOTE! The speed coupler (Figure 1) is the easiest method of
5. With mittened hand, push down on top of loop and
changing tools and cables. Speed couplers can be added to
pull clutch handle downward with a de nite snap
all existing tools and cables.
(Figure 2). The tool will easily pass through trap.
To Couple Cable
To Uncouple Cable and Tools
and Tools
Snap Together Insert Pin Slide Apart
Figure 1: Coupling and Uncoupling Cables and Tools
Figure 2: Operating Drain Cleaning Machine
2
Ridge Tool Company
K-1500
Removing Cable from Pipeline
NOTE! A slow or gradual engaging of clutch results in a weak
1. To bring cable out, leave FOR/OFF/REV Switch in
grip of clutch driver jaws and causes excessive wear. The
FOR (forward) position.
clutch is instant acting and returning clutch handle to its
original position frees cable instantly. There is no overrun to
2. Hold cable against edge of inlet with gloved hand
loop or break cable.
and pull down on clutch handle for several seconds.
6. As soon as excess cable has gone into line, release
NOTE! The clockwise rotation will rapidly thread cable out of
clutch handle and pull 12” of cable out of machine
line until a partial loop forms in front of machine.
with left hand, engage clutch and allow cable to feed
into drain.
3. When loop forms, release clutch handle and push
7. Release clutch and repeat process until obstruction
excess cable back through machine. Disconnect each
or cable end is reached. Add additional cable(s) as
cable as it comes out back of machine.
needed one at a time. (Figure 2)
4. Repeat steps 1 through 3 until all cable is out of line.
5. Place FOR/OFF/REV Switch in OFF position.
CAUTION: When obstruction is reached, advance cable
inches at a time. At this point, progress depends upon
6. Unplug power cord.
sharpness of tool and nature of obstruction.
7. Remove cables and guide hose.
8. If tool gets hung up in obstruction, release clutch
handle and let motor come to a complete stop before
reversing.
9. Place FOR/OFF/REV Switch in REV (reverse)
position.
10. Engage clutch handle only until tool is free of
obstruction. Release clutch handle immediately.
CAUTION: Operating machine in REV (reverse) position can
cause cable damage and is used only to back tool out of an
obstruction.
11. As soon as tool is free and motor has stopped, return
FOR/OFF/REV Switch to FOR (forward) position.
12. Continue feeding cable by following steps 6 through
11 until through obstruction.
13. Attach funnel auger or grease cutter and ream out
line insuring a thorough job.
Figure 3: Storing Cables
CAUTION: After using, thoroughly ush and drain cables and
couplings with water due to damaging e ects of some drain
cleaning compounds.
8. Store cables. (Figure 3)
Ridge Tool Company
3

K-1500
Maintenance Instructions
Machine Care
Motor driven equipment must be kept indoors or well
WARNING! Make sure machine is unplugged from electrical
covered in rainy weather. If machine has been exposed to
system before making any adjustment.
freezing weather, unit must be run for ten or twenty minutes
without load to warm up. Failing to do this will result in
frozen bearings. If machine is exposed to weather for a
NOTE! If any maintenance is required other than that listed
period of time, moisture will form across motor windings
below, take Drain Cleaning Machine to a RIDGID Authorized
causing motor to burn out. Such an occurance, due to
Service Center or return it to factory.
neglect, will jeopardize your warranty of equipment.
Cables
Moving Parts Lubrication
Cables should be thoroughly ushed with water to prevent
Grease all exposed moving parts such as rocker arms and
damaging e ects of drain cleaning compounds. Periodically,
main bearing approximately every three months.
lubricate cables and couplings with oil.
Make sure to grease main bearing thru grease tting inside
When not in use, store cables indoors to prevent deterioration
clutch handle slot.
by the elements.
Cables should be replaced when they become severely
Clutch Jaws Lubrication
corroded or worn. A worn cable can be identi ed when
outside coils of cable become at.
Clean and lubricate clutch driver jaws with oil after each use.
Service & Repair
Clutch Jaws Replacement
If any maintenance is required other than that outlined, the
1. Remove Guard 23547.
tool should be sent to a RIDGID Independent Authorized
2. Remove 2 screws and Nose Piece Assembly 59500.
Service Center or returned to the factory. All repairs made
by Ridge service facilities are warranted against defects in
3. Slide out clutch driver jaws and replace with desired
material and workmanship.
size jaws.
Contact your local RIDGID o ce or Ridge Tool Europe at
4. Replace nose piece assembly, screws and guard.
info.europe@ridgid.com
Removing Clutch End Play
1. To remove end play from clutch, loosen screw in lock
and Adjusting Nut 60935.
2. Turn lock and adjusting nut clockwise until snug
against body, then back o one half turn.
3. Tighten screw in lock and adjusting nut.
V-Belt Adjustment
Check V-Belt periodically for loosening. V-Belt should be kept
tight at all times.
1. To tighten V-Belt remove Guard 23547.
2. Loosen locknut, turn adjusting bolt slowly until
V-Belt sti ens, tighten locknut.
4
Ridge Tool Company
