Nokia 6260 silver: 7. Call log
7. Call log: Nokia 6260 silver

Call log
When you receive a business card, select Show > Save
1. Select Menu > Contacts > Speed dials, and scroll to
to save the business card in the phone memory.
a number key.
2. Select Assign, or, if a number has already been
Assign dialling shortcuts
assigned to the key, select Options > Change.
3. Enter a number or search for a contact.
Create shortcuts by assigning phone numbers to the
number keys 3-9.
7. Call log
To view the information on your calls, messages, data, and
synchronisation, select Menu > Log and from the
Note: The actual invoice for calls and services from
available options.
your service provider may vary, depending on network
features, rounding off for billing, taxes, and so forth.
8. Position log
The network may send you a position request (network
accepts or rejects it according to what you have agreed
service). To subscribe and to agree upon the delivery of
with your network operator or service provider.
positioning information, contact your service provider.
To view the information on the 10 most recent privacy
To accept or reject the position request, select Accept or
notifications and requests, select Menu > Log >
Reject. If you miss the request, the phone automatically
Positioning > Position log.
9. Connectivity
Your phone provides several features to connect to other
can also connect the phone to a wireless LAN to access the
devices to transmit and receive data. You can also connect
internet.
the phone to a wireless LAN (WLAN or Wi-Fi) to access the
internet and make phone calls through the internet.You
© 2008 Nokia. All rights reserved.26
Connectivity
WLAN connectivity
Important: Always enable one of the available
You can use a wireless LAN (WLAN) connection to access
encryption methods to increase the security of your
the internet from various applications or for voice calls
wireless LAN connection. Using encryption reduces the
over the internet (VoIP). Your phone supports WLAN
risk of unauthorised access to your data.
according to IEEE 802.11b and IEEE 802.11g.
To connect to one of the available WLANs, select the WLAN
Some places, like France, have restrictions on the use of
and Connect. You are asked to save the WLAN.
wireless LAN. Check with your local authorities for more
information.
To save a WLAN from the list of available WLANs, select
Options > Save.
Features using wireless LAN increase the demand on
battery power and reduce the battery life.
To disconnect from a WLAN, select the WLAN from the list
of available WLANs, and select Discon..
Find WLANs and connect
Hidden networks
Display a list of available wireless local area networks
Hidden WLANs do not broadcast their service set identifier
(WLAN), connect to or save a WLAN, or search for a hidden
(SSID). They are marked as hidden networks in the list of
WLAN.
available WLANs. You can only connect to a hidden
network if you know its SSID.
To view available WLANs, select Menu > Settings >
Connectivity > WLAN > Available WLANs.
1. Select (Hidden network).
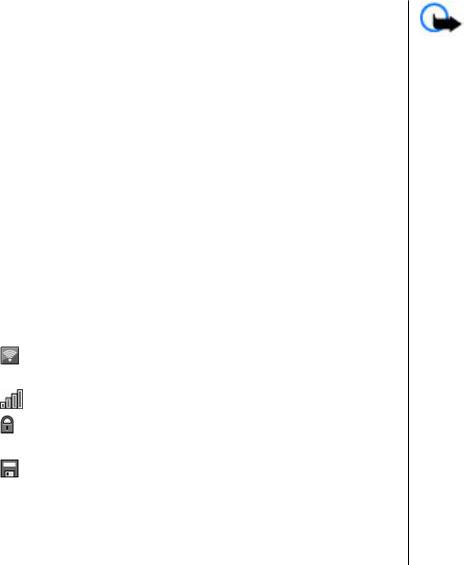
indicates that you are connected to the WLAN (red
2. Enter the SSID of the network, and select OK.
radio wave)
When you save the hidden network, it appears in the list
indicates the signal strength
of available WLANs without searching again.
indicates a secured WLAN. To connect, you need the
Automatic search for WLANs
corresponding access data.
Select Menu > Settings > Connectivity > WLAN >
indicates a saved WLAN
WLAN search.
The phone will periodically search for available saved
To update the list, select Options > Refresh list.
WLANs and open an internet connection, if an application
To view the encryption type and other details of a WLAN ,
needs one. To save the battery, turn off the automatic
select Options > Details.
search when not needed.
© 2008 Nokia. All rights reserved. 27

Connectivity
Saved WLANs
registered with an internet telephony provider. For
availability and costs, please contact your service
Display, manage, connect to, and prioritise your saved
provider.
WLANs.
Set up your internet telephone account
Select Menu > Settings > Connectivity > WLAN >
Saved WLANs The WLAN with the highest priority is listed
The internet telephone wizard helps you to set up your
first. Your device attempts to connect to it.
account. Have your account information from your
internet telephony provider available before you start the
To connect manually, select a WLAN and Connect.
wizard.
Manage your WLANs
Ensure that you have a valid SIM card inserted in the phone
Select Options and from the following:
and that you are connected to a saved wireless LAN
● Organise priority — to change the priorities of saved
(WLAN).
See "WLAN connectivity", p. 27.
WLANs
1. Select Menu > Settings > Connectivity > Internet
● Forward settings — to forward the settings of a saved
telephone > Accounts.
WLAN. Enter the security code, and the phone number,
2. To create an internet telephone account, select Add
and select Send.
See "Security", p. 36.
new. To create an additional account, select
● Add new network — to add a new WLAN and define
Options > Add new.
the access data
3. Select Connect, and follow the instructions on the
Edit WLAN parameters
display.
Scroll to a WLAN, select Edit and from the following:
When the wizard has finished, your account appears in
● Connection method — to select whether to connect
the accounts list.
to a WLAN automatically when it becomes available
If the internet telephone settings do not work, contact
● Network name — to enter a name for the WLAN
your service provider.
● Network settings — to define the WLAN settings
To set an account as default, select the account from the
list.
Internet calls (VoIP)
To view details of your account, select Options >
Voice over internet protocol technology, also known as
Details.
VoIP or voice over IP, allows you to make phone calls over
To delete an account, select Options > Delete.
an IP network, such as the internet. You must be
© 2008 Nokia. All rights reserved.28

Connectivity
Preferred call type
this model. Check with the manufacturers of other devices
to determine their compatibility with this device.
To set the preferred call type, select Menu > Settings >
Call > Call type setting and from the following:
Features using Bluetooth technology increase the
demand on battery power and reduce the battery life.
● Internet call only — Only internet telephony is used
for calls.
Set up a Bluetooth connection
● Prefer internet call — Internet telephony is used for
Select Menu > Settings > Connectivity > Bluetooth,
calls if a WLAN connection is available. If not, the
and do the following:
mobile network is used, if available.
1. Select My phone's name, and enter a name for your
● Voice call only — Only the GSM network is used for
phone.
calls.
● Prefer voice call — The mobile network is used for
2. To activate Bluetooth connectivity, select
calls if available. If not, internet telephony is used, if
Bluetooth > On.
indicates that Bluetooth
available.
connectivity is active.
For emergency calls, only a cellular network is used
3. To connect your phone to an audio accessory, select
regardless of the selected preferred call type.
Conn. to audio access. and the device that you want
to connect to.
Bluetooth wireless technology
4. To pair your phone with any Bluetooth device in range,
select Paired devices > Add new device.
Bluetooth technology allows you to connect your phone,
using radio waves, to a compatible Bluetooth device
Scroll to a found device, and select Add.
within 10 metres (32 feet).
Enter a passcode (up to 16 characters) on your phone
This device is compliant with Bluetooth Specification 2.0
and allow the connection on the other Bluetooth
+ EDR supporting the following profiles: advanced audio
device.
distribution, audio video remote control, dial-up
Operating the device in hidden mode is a safer way to
networking, file transfer, generic access, generic audio/
avoid malicious software. Do not accept Bluetooth
video distribution, generic object exchange, handsfree,
connectivity from sources you do not trust. Alternatively,
headset, object push, phonebook access, serial port,
switch off the Bluetooth function. This does not affect
service discovery application, and SIM access. To ensure
other functions of the device.
interoperability between other devices supporting
Bluetooth technology, use Nokia approved accessories for
© 2008 Nokia. All rights reserved. 29

Connectivity
PC connection to the internet
USB data cable
Use Bluetooth technology to connect your compatible PC
You can use the USB data cable to transfer data between
to the internet without PC Suite software. Your phone
the phone and a compatible PC or a printer supporting
must be able to connect to the internet (network service),
PictBridge.
and your PC must support Bluetooth technology. After
To activate the phone for data transfer or image printing,
connecting to the network access point (NAP) service of
connect the data cable, and select the mode:
the phone, and pairing with your PC, your phone
automatically opens a packet data connection to the
● Ask on conn. — to set your phone to ask whether the
internet.
connection should be established
● PC Suite — to use the cable for PC Suite
● Printing & media — to use the phone with a
Packet data
PictBridge compatible printer or with a compatible PC
General packet radio service (GPRS) is a network service
● Data storage — to connect to a PC that does not have
that allows mobile phones to send and receive data over
Nokia software and use the phone as data storage
an internet protocol (IP)-based network.
To change the USB mode, select Menu > Settings >
To define how to use the service, select Menu >
Connectivity > USB data cable and the desired USB
Settings > Connectivity > Packet data > Packet data
mode.
conn. and from the following options:
● When needed — to set the packet data connection to
Synchronisation and backup
established when required by an application. The
Select Menu > Settings > Sync and backup and from
connection will be cut when the application is closed.
the following:
● Always online — to automatically connect to a packet
data network when you switch the phone on
● Phone switch — Synchronise or copy selected data
between your phone and another phone using
You can use your phone as a modem by connecting it to a
Bluetooth technology.
compatible PC using Bluetooth technology or a USB data
● Create backup — Create a backup of selected data.
cable. For details, see Nokia PC Suite documentation.
See
● Restore backup — Select a stored backup file, and
"Nokia support", p. 10.
restore it to the phone. Select Options > Details for
information about the selected backup file.
© 2008 Nokia. All rights reserved.30


