HP 8270 – страница 2
Инструкция к Сканеру HP 8270
Оглавление
- Работа со сканером
- Кнопки на передней панели
- (продолж.)
- Общие сведения о сканировании
- Выберите тип оригинала (документ или изображение) Сканирование документов Сканирование изображений
- Сканирование нескольких изображений за одну операцию сканирования Сканирование текста для редактирования Сохранение документов на накопитель, жесткий диск или компакт-диск Передача отсканированного документа или изображения по электронной почте
- 4. Выберите Сканировать.
- Копирование Отмена текущей операции сканирования Изменение параметров сканирования Функции кнопки 'Энергосбережение'
- Сканирование из устройства автоматической подачи документов (УАПД)
- Сканирование двусторонних документов из УАПД Копирование из УАПД
- Сканирование из адаптера прозрачных материалов (АПМ)
- 8. Выберите Сканировать позитивы, включая 35-миллиметровые слайды, с помощью АПМ.
- Сканирование негативов
- 7. Выберите Сканировать негативы с помощью адаптера прозрачных материалов (АПМ).
- Уход и обслуживание Чистка стекла экспонирования Чистка адаптера прозрачных материалов (АПМ)
- Чистка и обслуживание автоматического устройства подачи документов (УАПД) Заказ расходных материалов для обслуживания сканера
- Устранение неполадок Неполадки при установке и настройке сканера Удаление и повторная установка программного обеспечения Проверка кабелей
- Тип кабеля Действие Неполадки при запуске сканера и неполадки аппаратного обеспечения Сканер выключен Сброс сканера
- Проверка аппаратного обеспечения сканера Нормальная работа сканера остановлена
- Замятия бумаги Дополнительная информация об устранении неполадок Неполадки при работе сканера Лампа сканера продолжает гореть Сканирование начинается не сразу
- Кнопки не работают Устранение неполадок при сканировании документов и текста (OCR) Нечеткое отсканированное изображение
- Сканирование выполняется слишком медленно Требуется чистка стекла экспонирования Неполадки, связанные со слайдами, негативами и АПМ Невозможно увеличить изображение
- Неверная цветопередачи при печати либо слишком темное или слишком светлое изображение. Точки или полосы на отсканированном изображении Темные отсканированные изображения Адаптер АПМ не работает
- Техническая поддержка Web-узел с информацией о специальных возможностях Web-узел HP Scanjet Техническая поддержка
- Сведения о соответствии стандартам и технические характеристики Технические характеристики сканера
- Характеристика Описание Технические характеристики адаптера прозрачных материалов (АПМ)
- Технические характеристики устройства автоматической подачи документов (УАПД) Условия эксплуатации и хранения сканера, УАПД и АПМ
Troubleshooting
5
English
This section contains solutions for common problems with the scanner and the
transparent materials adapter (TMA).
Scanner installation or setup problems
This section contains solutions for installation and setup problems.
Uninstall and reinstall the software
The problem might have occurred because of an incomplete installation. Try
uninstalling and then reinstalling the HP Scanning software. To reinstall the HP
Scanning software, you must have either the HP Scanning software CD or a copy of
the HP Scanning software downloaded from the HP Web site.
To uninstall the HP software that came with your scanner, follow these steps:
1. On the taskbar, click Start, point to Settings, and then click Control Panel.
Note In Windows XP, click Control Panel on the Start menu.
2. Click Add/Remove Programs.
Note In Windows XP, this is called Add or Remove Programs.
3. Select HP Scanjet Drivers 6.0, and then click Remove.
This removes the HP Scanjet software.
4. Reinstall using the HP Scanning software CD that came with your scanner. When
you insert the CD, an installation interface launches automatically. Choose the
HP Solution Center option to install.
Check the cables
Cable type Action
Power cable The power cable is connected between the scanner and a
power outlet.
● Ensure that the power cable is securely connected
between the scanner and a live electrical outlet or surge
protector.
● If the power cable is connected to a surge protector,
ensure that the surge protector is plugged into an outlet
and turned on.
● Disconnect the power cable from the scanner and turn off
the computer. After 60 seconds, reconnect the power
cable to the scanner, and then turn on the computer, in
that order.
User Guide
19
Chapter 5
(continued)
Cable type Action
USB cable The USB cable is connected between the scanner and the
computer.
● Use the cable that was included with the scanner.
Another USB cable might not be compatible with the
scanner.
● Ensure that the USB cable is securely connected
between the scanner and the computer.
For additional USB troubleshooting information, see
www.hp.com/support, select your country/region, and then
use the search tool to find USB troubleshooting topics.
ADF cable The ADF cable is connected between the ADF in the scanner
lid and the scanner base.
Ensure the cable is securely connected in the back of the
scanner.
Scanner initialization or hardware problems
This section contains solutions for initialization and hardware problems.
Scanner is off
If the power LED is not lit, the scanner is off. To turn the scanner on:
1. Make sure the power cable is plugged into a power source.
2. Press the Power Save button (
).
Reset the scanner
If you receive an error message similar to “Scanner initialization failed” or “Scanner
not found” when trying to use the scanner, follow these steps:
1. Close the HP software, if it is open.
2. Disconnect the cable that connects the scanner to the computer.
3. Unplug the scanner power cable from the power source.
4. Turn the computer off, wait 60 seconds, and then turn the computer on again.
5. Plug the scanner power cable into the power source.
6. Reconnect the cable that connects the computer and the scanner.
– Make sure that the USB cable is connected to the back of the scanner
correctly. The USB symbol on the end of the cable (the connector) should be
facing up. When connected correctly, the USB connector will feel slightly
loose. When connected incorrectly, the USB plug will feel overly tight.
– Try connecting the USB cable to a different USB port on your computer.
Test the scanner hardware
If you think that the scanner has a hardware problem, verify that the cables are firmly
connected to the scanner, the computer, and the power source. If the cables are
20
HP Scanjet 8270 Document Flatbed Scanner

correctly connected, verify that the scanner is turned on, and then test the scanner by
following these steps:
1. Disconnect the USB cable and power cable from the scanner.
English
2. Reconnect the USB cable and power cable to the scanner.
The carriage on the scanner will move forward and backward approximately 25 mm (1
inch), and the lamp will turn on. The front panel display message will change from
Processing to Ready.
If the carriage does not move and the scanner lamp does not turn on, a problem might
exist with the scanner hardware. See Product support on page 26.
Scanner has stopped working properly
If the scanner stops scanning, complete the following steps, in order. After each step,
start a scan to see if the scanner is working. If the problem continues, proceed with
the next step.
1. A cable might be loose. Ensure that both the USB cable and power cable are
securely connected.
2. Unplug the scanner power cable from the power source, wait 60 seconds, and
then plug it back in.
3. Reboot your computer.
4. If the problem persists, you might need to uninstall and reinstall the scanner
software. See Uninstall and reinstall the software on page 19.
If the scanner still does not work, visit www.hp.com/support or contact HP Customer
Support.
Paper jams
If misfeeds are occurring frequently, follow these steps:
1. Clean the feed-roller assembly manually. See Clean and Maintain the ADF in the
Care and maintenance section of the HP Scanjet 8270 Document Flatbed
Scanner onscreen Help for more details.
2. See the onscreen Help for information about resolving other ADF problems.
3. If misfeeds continue, order and install the ADF Roller Replacement kit. The ADF
Roller Replacement kit contains a roller mechanism, a separation pad, new
screws for the separation pad and replacement instructions (see Order
maintenance and scanner supplies on page 18 for more information).
Additional troubleshooting information
To solve other problems with the scanner, see the onscreen help. To gain access to
the help, open HP Solution Center, click the tab for the scanner, and then click
Onscreen Guide.
Scanner operation problems
User Guide
21

Chapter 5
Scanner will not turn on
If the scanner will not turn on when you press the front panel scanner buttons, there
may be one of two reasons:
● The scanner may be turned off. Be sure the power cable is plugged in.
● The scanner may have been unplugged. Check to see that the power cable has
not become disconnected from the scanner or unplugged from the power source.
● Check to see that the ADF cable has not become disconnected from the scanner.
Scanner lamp stays on
The scanner lamp should time out and turn off automatically after a period of inactivity
(about 15 minutes). This is the Power Save mode.
Scanner does not scan right away
Check to be sure the power cord is plugged in.
If the scanner has not been used for a while, the scanner lamp might need to go
through a warm-up period before scanning can begin. If the scanner lamp needs to
warm up, it takes a moment after starting the software or pressing a scanner button
for scanning to begin.
Buttons appear not to work
After each step, start a scan to see if the buttons are working. If not, proceed with the
next step.
● A cable might be loose. Ensure that the USB cable, the ADF cable, and the
power cable are securely connected.
● Unplug the power cable from the power source, and then plug it back in.
● Ensure that the power cord is plugged in.
● Restart your computer.
● The buttons might be disabled. Try the following procedure:
– Open Control Panel, select Scanners and Cameras, and then select your
scanner model from the list.
– Open Properties, and then click the Events tab. From the Scanner events
list, select Scan Document button press.
– Ensure that the HP Scanning software option is selected.
– Windows 98 and Windows 2000: Ensure that the Disable Device Events
option is not selected.
– Windows Me and Windows XP: Ensure the Take No Action option is not
selected.
22
HP Scanjet 8270 Document Flatbed Scanner
Resolve issues with scanning documents or text (OCR)
The scanner uses optical character recognition (OCR) to convert text on a page to
text that you can edit on your computer.
English
● If you scan text but cannot edit it, make sure that you make the following
selections during scanning:
– HP Scanning (Select Document.)
– Scan to (Select a word-processing program or Save to File.)
Note If you select Save to File, select a text file type from the File
Type drop-down list.
● Scanned text might not appear on your computer exactly as it appeared on the
original, especially if the original contains faint or smudged text. For example,
some characters might be incorrect or missing. As you edit the text, compare the
scanned text against the original, and then make corrections as necessary.
●
Note The OCR software is installed automatically when you install the
HP Scanning software during scanner setup.
Scanned image is fuzzy
It is important that the item you scan comes in full contact with the scanner glass. If
the resulting scanned image is not clear, check to see that the item is in full contact
with the scanner glass.
Scanner is scanning items very slowly
● If you are scanning to edit text, the optical character recognition (OCR) software
program causes the scanner to scan more slowly, which is normal. Wait for the
item to scan.
● Some default settings can cause the scanner to scan more slowly. Open HP
Solution Center, click Settings, click Scan Settings and Preferences, and then
click Scan Preferences. On the Quality vs. Speed tab, clear the Scan at
maximum pixel depth check box.
● The resolution might be set too high. Reset the resolution to a lower level. The
scanner software automatically selects the resolution to provide the best balance
between image quality and file size.
To change the resolution, open HP Solution Center, and then click Settings.
Select Scan Settings, and then click Solution Center scan button settings.
Click the tab for Scan Document button or Scan Document To button, and
then click the Scan Document Settings button. The Scan Document Settings
dialog box is displayed. Use the drop-down list to change the resolution.
Scanner glass needs to be cleaned
Clean the scanner glass under the following conditions:
● Ink is on the glass.
● Fingerprints are on the glass.
● Items have excessive amount of dust or dirt on them.
● Smudges or other marks appear on scanned images.
● Haze or dust is on the glass.
User Guide
23

Chapter 5
Allow the glass to dry thoroughly before scanning another image.
For more details, see Care and maintenance on page 17.
Slides, negatives, and TMA issues
Use this section to help resolve issues with 35 mm slides or 35 mm negatives that
have been scanned by using the TMA.
The image cannot be enlarged
You might have used Zoom in, which only changes the view on the screen. Use
Resize to change the size of the final scanned image. For more information, go to the
Index tab in the onscreen help. Type resize in the keyword field and click images in
HP Scanning software in the list.
Incorrect colors print, or the image is too light or dark
● The software might be setting the exposure for the entire area instead of for one
slide or negative. Select and drag the handles around the selection area until you
see the image area you want to scan.
● If a light shield is provided, use the slide-light-shield to cover the remaining area
in the slide holder if you are scanning fewer than the maximum number of slides
with the TMA. This ensures that no extra light leaks into the scan.
● If a light shield is provided, use the negative-light-shield to cover the remaining
area in the in the negative holder if you are scanning fewer than the maximum
number of negative frames with the TMA. This ensures that no extra light leaks
into the scan.
● The settings for transparent materials are reversed. Make sure that you have
selected Scan positives, such as 35 mm slides, using the TMA for slides, or
Scan negatives using the Transparent Materials Adapter (TMA) for negatives.
Dots or streaks appear in the scanned image
● Check the original slide or negative for damage or debris.
● Clean the TMA with a dry, soft, lint-free cloth. If necessary, lightly spray the cloth
with a mild glass cleaner. Allow the glass to dry thoroughly before scanning
another image.
The scanned images are dark
● Check to see if the TMA light is on before you click Scan or Accept.
● The bulb in the TMA light source might be broken or not working. If the bulb is
broken, service is required.
● The selection area might not be made correctly. Make a selection area that only
includes the photo, without borders.
The TMA does not work at all
The cable might not be connected correctly. Ensure that the ADF cable is connected
securely.
24
HP Scanjet 8270 Document Flatbed Scanner

No light or only dim light is visible in the TMA after selecting slides or negatives
in the Scan dialog box
After each step, start a scan to see if the scanner is working. If not, proceed with the
English
next step.
1. Make sure that the TMA is connected to the scanner.
2. Ensure that Scan positives, including 35 mm slides, using the TMA or Scan
negatives using the Transparent Materials Adapter (TMA) is selected in the
HP Scanning dialog box.
3.
The bulb in the TMA might not be working. Click the Scan Picture button (
) and
look for illumination. If the bulb is broken, service is required. See Product
support on page 26.
4. The TMA has a short warm-up mode. Wait a few seconds to see if the light turns
on. For the best scanning quality, let the TMA light warm up for at least 30
seconds.
User Guide
25

Product support
6
Accessibility Web site
Customers with disabilities can get help by visiting www.hp.com/hpinfo/community/
accessibility/prodserv.
HP Scanjet Web site
Visit www.hp.com for a variety of information:
● Learn tips for scanning more effectively and creatively.
● Gain access to HP Scanjet driver updates and software.
● Register your product.
● Subscribe to newsletters, driver and software updates, and support alerts.
● Purchase scanner supplies.
Support process
The HP support process works most effectively if you perform the following steps in
the order specified:
1. Review the onscreen Help for the software and scanner, including the
Troubleshooting section.
Go to the software section or to the scanner-specific Troubleshooting on page 19
section.
2. Go to the HP Consumer Support Web site for support. If you have access to the
Internet, you can obtain a wide range of information about your scanner. Visit the
HP Web site for product help, drivers, and software updates at www.hp.com/
support. The HP Consumer Support Web site is available in the following
languages: Dutch, English, French, German, Italian, Portuguese, Spanish,
Swedish, Traditional Chinese, Simplified Chinese, Japanese, Korean. (Danish,
Finnish, and Norwegian support information is available in English only.)
3. Use HP e-support. If you have access to the Internet, connect with HP via e-mail
by going to www.hp.com/support. You will receive a personal reply from an HP
Product Support technician. E-mail support is available in the languages listed at
that Web site.
4. If you are a customer in the United States, go to step 5. Otherwise, contact your
local HP dealer. If your scanner has a hardware failure, take it to your local HP
dealer for a solution. Service is free during your scanner’s limited warranty period.
After the warranty period, the dealer will quote a service charge.
5. Contact the HP Product Support Center for support by phone. Please consult the
following Web site to check the details and conditions of phone support in your
country/region: www.hp.com/support. As a part of HP’s continuing efforts to
improve phone support information services, we advise you to check the HP Web
site on a regular basis for new information regarding service features and
delivery. If you cannot solve the problem by using the above options, call HP
26
HP Scanjet 8270 Document Flatbed Scanner

while you are in front of your computer and scanner. For faster service, please be
prepared to provide the following information:
– The scanner model number (located on the scanner)
English
– The scanner serial number (located on the scanner)
– The computer operating system
– The version of the scanner software (located on the scanner’s CD label)
– Messages displayed at the time the situation occurred
The applicable conditions for HP phone support are subject to change without
notice.
Telephone support is free from the date of purchase for the period specified
unless otherwise noted.
User Guide
27

Regulatory information and
7
product specifications
This section contains regulatory information and product specifications for the HP
Scanjet 8270 scanner and accessories.
Scanner specifications
Name Description
Scanner type Flatbed
Weight (without
2.79 kg (6.2 lbs)
lid)
Maximum
296 x 494 x 73 mm (11.7 x 19.8 x 2.9 inches)
original size
Scanning element Charged-coupled device
Interface Hi-Speed USB
Optical resolution Scanner: 4800 dpi
ADF: 600 dpi
Selectable
12 dpi to 999,999 dpi at 100 percent scaling
resolution
AC line voltage 100 - 120 V 60 Hz – North America
100 - 240 V 50/60 Hz
Power
For power consumption data, see the
consumption,
regulatory_supplement.htm file on the HP Photosmart Software
Regulatory
CD.
Model
For regulatory identification purposes your product is assigned
Identification
a Regulatory Model Number. The Regulatory Model Number for
Number and
your product is GRLYB-0206. This regulatory number should
regulatory
not be confused with the marketing name (HP ScanJet 8270) or
information
product numbers (L1975A, L1976A). Additional information
about your scanner can be found on the regulatory
supplement.htm file on the HP Photosmart Software CD. The
power supply approved for usage with this scanner is HP Model
Number C9930 - 80004; see the regulatory supplement.htm file
for additional information on the power supply.
28
HP Scanjet 8270 Document Flatbed Scanner
(continued)
Name Description
Your HP scanner is ENERGY STAR® compliant. As an
English
ENERGY STAR® partner, Hewlett-Packard Company has
determined that this product meets the ENERGY STAR®
guidelines for energy efficiency.
Disposal of waste equipment by users in private
households in the European Union
This symbol on the product or on its packaging indicates that
this product must not be disposed of with your other household
waste. Instead, it is your responsibility to dispose of your waste
equipment by handing it over to a designated collection point
for the recycling of waste electrical and electronic equipment.
The separate collection and recycling of your waste equipment
at the time of disposal will help to conserve natural resources
and ensure that it is recycled in a manner that protects human
health and the environment. For more information about where
you can drop off your waste equipment for recycling, please
contact your local city office, your household waste disposal
service or the shop where you purchased the product.
Transparent materials adapter (TMA) specifications
Name Description
Media Types and Capacity Slides: up to 3 slides, 35 mm, mounted on a frame that
is 1.05 x 1.9 mm thick and 49.8 x 50.8 mm square.
Negatives: up to 4 frames of a 35 mm negative strip.
Size 565 x 320 x 64 mm (22.2 x 12.6 x 2.5 inches)
Weight 1.6 kg (3.5 lbs)
Power requirements 16 VDC, 425 mA, 6.8 watts (supplied by scanner)
Automatic document feeder (ADF) specifications
Name Description
Size 584 x 318 x 89 mm (23.0 x 12.5 x 3.5 inches)
Weight (with TMA) 2.7 kg (6.0 lbs)
2
Paper tray capacity
50 pieces of 75 g/m
(20-lb bond)
Maximum paper size 216 x 356 mm (8.5 x 14 inches)
Minimum paper size 89 x 127 mm (3.5 x 5 inches)
User Guide
29

Chapter 7
(continued)
Name Description
2
Maximum paper weight
90 g/m
(24 lbs)
Power requirements 32 VDC, 1200 mA; 16 VDC, 425 mA; 3300 mVDC 3.3
VDC, 300 mA (supplied by scanner)
Environmental specifications for the scanner, ADF, and
TMA
Name Description
Temperature Operating: 10° to 35° C (50° to 95° F)
Storage: -40° to 70° C (-40° to 158° F)
Relative humidity Operating: 15 to 80 percent noncondensing 10° to 35°
C (50° to 95° F)
Storage: up to 90 percent at -40° to 70° C or (-40° to
158° F)
30
HP Scanjet 8270 Document Flatbed Scanner

Οδηγός χρήσης
Ελληνικά

Πνευµατικά δικαιώµατα και
άδεια χρήσης
© 2005 Copyright Hewlett-Packard
Development Company, L.P.
Απαγορεύεται η αναπαραγωγή, η
προσαρµογή ή η µετάφραση χωρίς
πρoηγούµενη γραπτή άδεια, εκτός
εάν επιτρέπεται στο πλαίσιο της
νοµοθεσίας περί πνευµατικών
δικαιωµάτων.
Οι πληροφορίες που περιέχονται στο
παρόν µπορεί να αλλάξουν χωρίς
προειδοποίηση.
Οι µόνες εγγυήσεις για προϊόντα και
υπηρεσίες της HP ορίζονται στις
ρητές δηλώσεις εγγύησης που
συνοδεύουν τα εν λόγω προϊόντα και
υπηρεσίες. Κανένα σηµείο του
παρόντος δεν πρέπει να ερµηνευθεί
ότι συνιστά πρόσθετη εγγύηση. Η HP
δεν φέρει ευθύνη για σφάλµατα ή
παραλείψεις που αφορούν τεχνικά
θέµατα ή τη σύνταξη του παρόντος.
Εµπορικά σήµατα
Το ENERGY STAR είναι σήµα
κατατεθέν της αµερικανικής
Υπηρεσίας Προστασίας
Περιβάλλοντος (EPA) στις ΗΠΑ.
Οι ονοµασίες Microsoft και Windows
είναι σήµατα κατατεθέντα της
Microsoft Corporation.

Περιεχόµενα
1Tρόπος χρήσης του σαρωτή ..............................................................................5
Εγκατάσταση του σαρωτή .....................................................................................5
Περισσότερες πληροφορίες ...................................................................................5
Τρόπος χρήσης του λογισµικού HP Photosmart ....................................................5
Επισκόπηση µπροστινού πίνακα και βοηθητικού εξοπλισµού ...............................6
Επισκόπηση διαδικασίας σάρωσης .......................................................................8
Επιλογή τύπου πρωτοτύπου - έγγραφο ή εικόνα ..................................................8
Σάρωση εγγράφων ................................................................................................9
Σάρωση εικόνων ....................................................................................................9
Σάρωση πολλών εικόνων µε µία σάρωση .............................................................9
Ελληνικά
Σάρωση κειµένου για επεξεργασία ......................................................................10
Αποθήκευση εγγράφου σε µονάδα, δίσκο ή CD ..................................................10
Αποστολή σαρωµένου εγγράφου ή εικόνας µέσω e-mail ....................................10
∆ηµιουργία αντιγράφων .......................................................................................11
Ακύρωση σάρωσης που βρίσκεται σε εξέλιξη ...................................................... 11
Αλλαγή ρυθµίσεων σάρωσης ..............................................................................12
Χρήση του κουµπιού Εξοικονόµηση ισχύος ......................................................... 12
2 Πώς γίνεται σάρωση από τον αυτόµατο τροφοδότη εγγράφων (ADF) ........13
Επιλογή αποδεκτών µέσων για τον αυτόµατο τροφοδότη εγγράφων (ADF) ........13
Τοποθέτηση πρωτοτύπων στον αυτόµατο τροφοδότη εγγράφων (ADF) .............13
Σάρωση εγγράφων διπλής όψης από τον αυτόµατο τροφοδότη εγγράφων
(ADF) ...................................................................................................................14
∆ηµιουργία αντιγράφων από τον αυτόµατο τροφοδότη εγγράφων (ADF) ............14
3 Πώς γίνεται σάρωση από τον προσαρµογέα διαφανών υλικών (TMA) .......15
Συµβουλές για τη σάρωση διαφανών αντικειµένων .............................................15
Σάρωση slide .......................................................................................................15
Σάρωση αρνητικών ..............................................................................................17
4 Φροντίδα και συντήρηση ..................................................................................19
Καθαρισµός της γυάλινης επιφάνειας του σαρωτή ..............................................19
Καθαρισµός του προσαρµογέα διαφανών υλικών (TMA) ....................................19
Καθαρισµός και συντήρηση του αυτόµατου τροφοδότη εγγράφων (ADF) ...........20
Παραγγελία αναλωσίµων συντήρησης και σαρωτή .............................................20
5 Αντιµετώπιση προβληµάτων ...........................................................................21
Προβλήµατα εγκατάστασης ή ρύθµισης σαρωτή .................................................21
Προβλήµατα προετοιµασίας ή υλικού του σαρωτή ..............................................22
Προβλήµατα λειτουργίας σαρωτή ........................................................................24
Προβλήµατα σχετικά µε slide, αρνητικά και τον TMA ...........................................26
6 Υποστήριξη προϊόντων ....................................................................................29
Τοποθεσία web για άτοµα µε ειδικές ανάγκες ......................................................29
Τοποθεσία web HP Scanjet .................................................................................29
∆ιαδικασία υποστήριξης ......................................................................................29
7 Πληροφορίες κανονισµών και προδιαγραφές προϊόντος .............................31
Προδιαγραφές σαρωτή ........................................................................................31
Προδιαγραφές προσαρµογέα διαφανών υλικών (TMA) .......................................32
Προδιαγραφές αυτόµατου τροφοδότη εγγράφων (ADF) ......................................32
Οδηγός χρήσης
3

Προδιαγραφές περιβάλλοντος λειτουργίας για το σαρωτή, τον αυτόµατο
τροφοδότη εγγράφων (ADF), και τον προσαρµογέα διαφανών υλικών
(TMA) ..................................................................................................................33
4
Επίπεδος σαρωτής εγγράφων HP Scanjet 8270
Tρόπος χρήσης του σαρωτή
1
Αυτό το εγχειρίδιο περιγράφει πώς να χρησιµοποιήσετε τον επίπεδο σαρωτή
εγγράφων HP Scanjet 8270 και το βοηθητικό εξοπλισµό του, πώς να επιλύσετε
προβλήµατα εγκατάστασης και πώς µπορείτε να λάβετε υποστήριξη πελατών.
Εγκατάσταση του σαρωτή
Για να εγκαταστήσετε το σαρωτή και το λογισµικό σάρωσης, ανατρέξτε στην αφίσα
εγκατάστασης που συνόδευε το σαρωτή σας.
Περισσότερες πληροφορίες
Περισσότερες πληροφορίες για το σαρωτή και το λογισµικό θα βρείτε στην
Ελληνικά
ηλεκτρονική Βοήθεια. Αν έχετε εγκαταστήσει το λογισµικό HP Photosmart που
συνόδευε το σαρωτή, κάντε διπλό κλικ στο εικονίδιο που αντιστοιχεί στο Κέντρο
λειτουργιών HP στην επιφάνεια εργασίας, και στη συνέχεια, κάντε κλικ στο
Ηλεκτρονικός οδηγός.
Τρόπος χρήσης του λογισµικού HP Photosmart
Όταν εγκαταστήσετε το λογισµικό HP Photosmart, θα υπάρχουν δύο εικονίδια στην
επιφάνεια εργασίας. Αυτά τα εικονίδια ανοίγουν δύο προγράµµατα για σάρωση και
επεξεργασία των σαρώσεών σας.
Για πληροφορίες σχετικά µε το πώς να χρησιµοποιήσετε το Κέντρο λειτουργιών HP
και το λογισµικό HP Photosmart, ανατρέξτε στην ηλεκτρονική Βοήθεια.
Το Κέντρο λειτουργιών HP είναι το πρόγραµµα που σας βοηθά
να ξεκινήσετε τη σάρωση εικόνων και εγγράφων. Από το Κέντρο
λειτουργιών HP µπορείτε να:
● Εκτελέσετε λειτουργίες σάρωσης και αντιγραφής
● Αποκτήσετε πρόσβαση σε πληροφορίες βοήθειας και
αντιµετώπισης προβληµάτων
● Αποκτήσετε πρόσβαση στο λογισµικό HP Photosmart για
να επεξεργαστείτε τις σαρώσεις σας
● Τροποποιήσετε ρυθµίσεις και προτιµήσεις
Το λογισµικό HP Photosmart είναι το πρόγραµµα που
χρησιµοποιείται για το χειρισµό, την εκτύπωση, την
αρχειοθέτηση και το διαµοιρασµό των εικόνων σας µετά τη
σάρωσή τους. Μπορείτε να αποκτήσετε πρόσβαση στο
λογισµικό HP Photosmart από το εικονίδιο στην επιφάνεια
εργασίας ή µέσα από το Κέντρο λειτουργιών HP.
Για να ξεκινήσετε µια σάρωση:
Οδηγός χρήσης
5
Κεφάλαιο 1
Κάντε διπλό κλικ στο εικονίδιο Κέντρο λειτουργιών HP στην επιφάνεια εργασίας,
κάντε κλικ στην καρτέλα που αντιστοιχεί στο σαρωτή και, στη συνέχεια, κάντε κλικ
στην εργασία που θέλετε να εκτελέσετε.
Σηµείωση Αν το εικονίδιο Κέντρο λειτουργιών HP δεν είναι διαθέσιµο στην
επιφάνεια εργασίας, κάντε κλικ στο Έναρξη, τοποθετήστε το δείκτη στην
επιλογή Προγράµµατα ή Όλα τα προγράµµατα, επιλέξτε HP, και στη
συνέχεια, κάντε κλικ στην επιλογή Κέντρο λειτουργιών HP.
Επισκόπηση µπροστινού πίνακα και βοηθητικού
εξοπλισµού
Η ενότητα αυτή παρουσιάζει µια επισκόπηση του µπροστινού πίνακα του σαρωτή, του
προσαρµογέα διαφανών υλικών (TMA) και του αυτόµατου τροφοδότη εγγράφων (ADF).
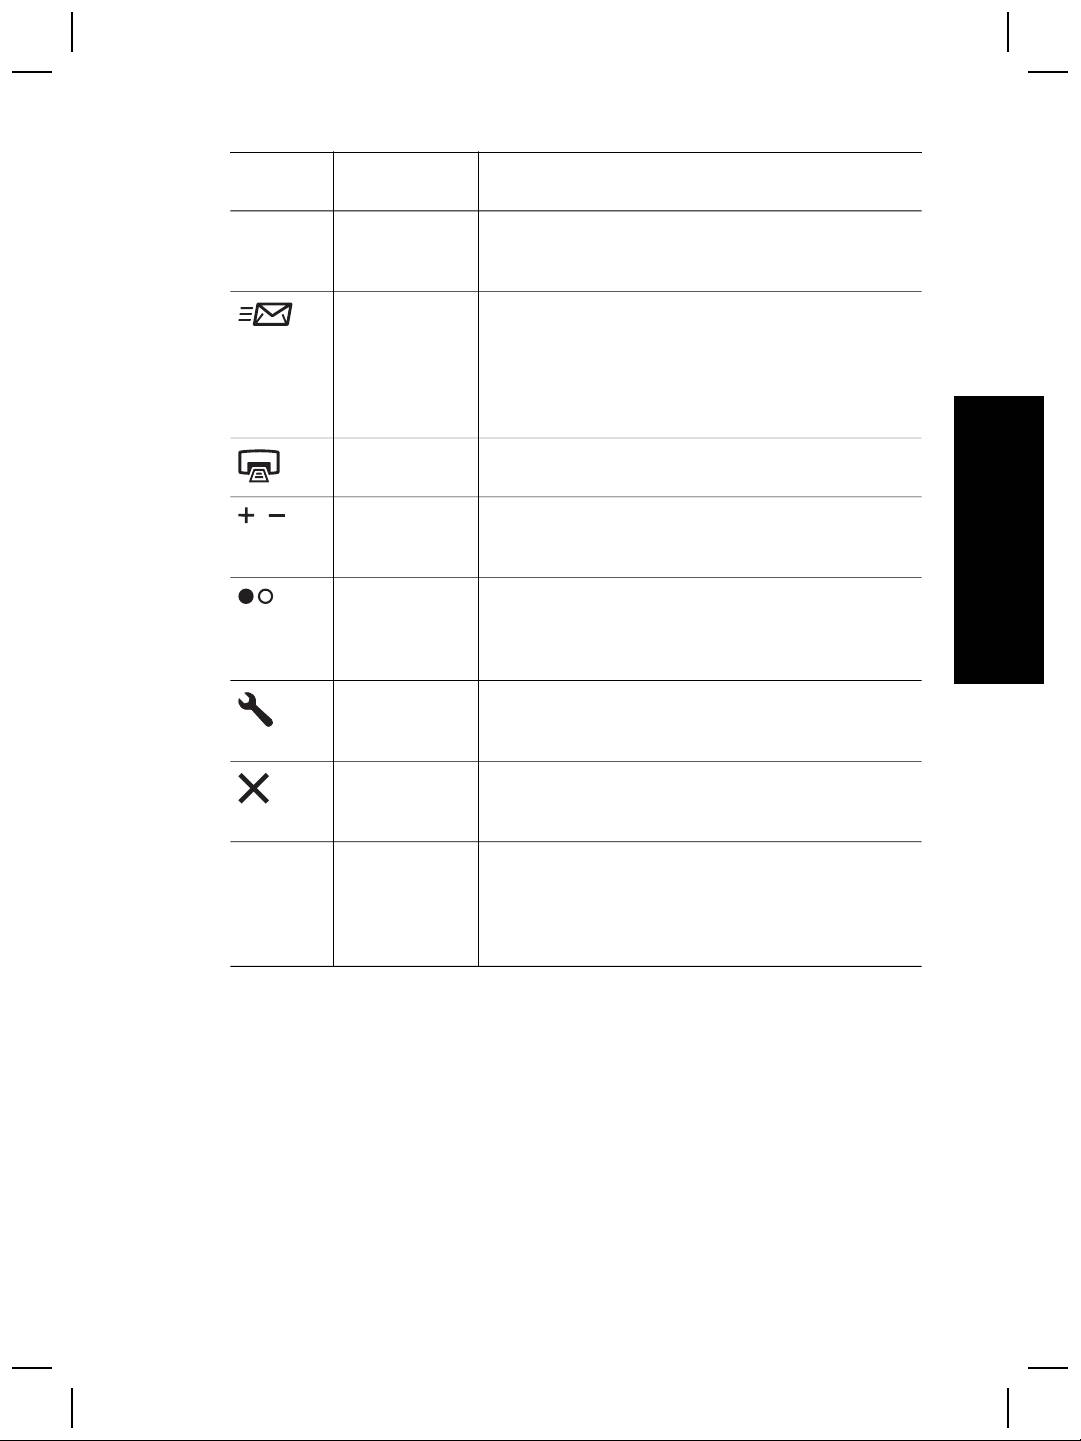
Κουµπιά µπροστινού πίνακα
Εικονίδιο Όνοµα
Περιγραφή
λειτουργίας
Κουµπί
Ενεργοποιεί και απενεργοποιεί τη λειτουργία
Εξοικονόµηση
εξοικονόµησης ισχύος.
ισχύος
Το κουµπί Εξοικονόµηση ισχύος µπορεί επίσης να
χρησιµοποιηθεί για τη διακοπή της τροφοδοσίας αν
κρατηθεί πατηµένο για τουλάχιστον 2 δευτερόλεπτα.
Κουµπί
Επιλέγει τον προορισµό (µια εφαρµογή, π.χ. ένα
Προορισµός
πρόγραµµα επεξεργασίας κειµένου) για ένα
σαρωµένο έγγραφο. Ο προορισµός εµφανίζεται στην
οθόνη ενδείξεων του µπροστινού πίνακα.
Επιλέξτε τον προορισµό προτού πατήσετε το κουµπί
Σάρωση εγγράφου σε.
Κουµπί
Σαρώνει ένα πρωτότυπο έγγραφο στον επιλεγµένο
Σάρωση
προορισµό (µια εφαρµογή, π.χ. ένα πρόγραµµα
εγγράφου σε
επεξεργασίας κειµένου). Χρησιµοποιήστε το κουµπί
Προορισµός για να επιλέξετε τον προορισµό.
Κουµπί
Σαρώνει εικόνες, γραφικά, slide ή αρνητικά στο
Σάρωση
λογισµικό HP Photosmart. Τα slide και τα αρνητικά
εικόνας
πρέπει να σαρωθούν από τον προσαρµογέα
διαφανών υλικών (TMA).
Κουµπί
Σαρώνει το κείµενο και τις εικόνες του εγγράφου και
Επεξεργασία
εµφανίζει το επεξεργάσιµο κείµενο στην
κειµένου
καθορισµένη εφαρµογή επεξεργασίας κειµένου.
(OCR)
Κουµπί
Σαρώνει το πρωτότυπο έγγραφο ή την εικόνα σε
Αρχειοθέτηση
προορισµό αρχείου που εισαγάγετε. Μετά τη
εγγράφων
6
Επίπεδος σαρωτής εγγράφων HP Scanjet 8270
(συνέχεια)
Εικονίδιο Όνοµα
Περιγραφή
λειτουργίας
σάρωση του πρωτοτύπου, εµφανίζεται ένα πλαίσιο
διαλόγου όπου µπορείτε να εισαγάγετε το όνοµα
αρχείου, τον τύπο αρχείου και τη θέση για το αρχείο.
Κουµπί E-mail
Σαρώνει µε χρήση ρυθµίσεων εικόνας σε κλίµακα
του γκρι ώστε να διατηρήσει µικρό το µέγεθος του
αρχείου για το e-mail και αποστέλλει τη σάρωση στο
λογισµικό e-mail (εάν υποστηρίζεται). Υπάρχει
επιλογή σάρωσης έγχρωµων εικόνων, slide ή
αρνητικών.
Κουµπί
Σαρώνει το αντικείµενο και το στέλνει σε εκτυπωτή
Αντιγραφή
για δηµιουργία αντιγράφων.
Ελληνικά
Κουµπί
Επιλέγει τον αριθµό αντιγράφων που θα
Αριθµός
εκτυπωθούν µε το κουµπί Αντιγραφή.
αντιγράφων
Κουµπί
Καθορίζει αν η σάρωση των αντικειµένων θα γίνεται
αντιγραφής
σε χρώµα ή αν θα είναι ασπρόµαυρη όταν πατάτε το
Έγχρωµο/
κουµπί Αντιγραφή.
Ασπρόµαυρο
Κουµπί
Ανοίγει το πλαίσιο διαλόγου "Ρυθµίσεις κουµπιών".
Ρυθµίσεις
Από αυτό το πλαίσιο διαλόγου, µπορείτε να αλλάξετε
κουµπιών
τον τρόπο που λειτουργούν τα κουµπιά του σαρωτή.
Κουµπί Άκυρο
Ακυρώνει µια σάρωση καθώς ο σαρωτής σαρώνει, ή
ακυρώνει µια σειρά σαρώσεων από τον αυτόµατο
τροφοδότη εγγράφων (ADF).
Οθόνη LCD 16
Υποδεικνύει τον αριθµό αντιγράφων που θα
χαρακτήρων
εκτυπωθούν όταν πατήσετε το κουµπί Αντιγραφή.
Επίσης εµφανίζει πληροφορίες κατάστασης και
κωδικούς σφάλµατος που προσδιορίζουν
προβλήµατα του σαρωτή.
Προσαρµογέας διαφανών υλικών (TMA)
Μπορείτε να χρησιµοποιήσετε τον προσαρµογέα διαφανών υλικών (TMA) για να
σαρώσετε slide ή αρνητικά 35 mm. Για περισσότερες πληροφορίες σχετικά µε τον
TMA, δείτε Πώς γίνεται σάρωση από τον προσαρµογέα διαφανών υλικών (TMA)
στη σελίδα 15.
Αυτόµατος τροφοδότης εγγράφων (ADF)
Ο σαρωτής συνοδεύεται από αυτόµατο τροφοδότη εγγράφων (ADF) που µπορείτε να
χρησιµοποιήσετε για σάρωση πολλαπλών εγγράφων γρήγορα και εύκολα. Για
περισσότερες πληροφορίες, δείτε Πώς γίνεται σάρωση από τον αυτόµατο τροφοδότη
εγγράφων (ADF) στη σελίδα 13.
Οδηγός χρήσης
7

Κεφάλαιο 1
Επισκόπηση διαδικασίας σάρωσης
Ξεκινήστε τη σάρωση µε έναν από τους τρεις παρακάτω τρόπους:
● Από τα κουµπιά του µπροστινού πίνακα—για να ξεκινήσετε γρήγορα
χρησιµοποιώντας τις βασικές λειτουργίες
● Από το Κέντρο λειτουργιών HP—για να έχετε περισσότερο έλεγχο κατά τη
διάρκεια της διαδικασίας σάρωσης
● Από άλλα προγράµµατα λογισµικού
Σάρωση από τα κουµπιά του µπροστινού πίνακα του σαρωτή
Χρησιµοποιήστε τα κουµπιά του µπροστινού πίνακα του σαρωτή για βασικές
λειτουργίες σάρωσης, όπως σάρωση εικόνων και εγγράφων. Σε αυτό το εγχειρίδιο θα
βρείτε οδηγίες για τη χρήση των κουµπιών του µπροστινού πίνακα.
Σάρωση από το Κέντρο λειτουργιών HP
Πραγµατοποιήστε σάρωση από το Κέντρο λειτουργιών HP για να έχετε περισσότερο
έλεγχο κατά τη διάρκεια της διαδικασίας σάρωσης, όπως για παράδειγµα όταν θέλετε
να χρησιµοποιήσετε πιο σύνθετες λειτουργίες ή να αλλάξετε τις ρυθµίσεις σάρωσης.
Για εκκίνηση του Κέντρου λειτουργιών HP:
1. Κάντε ένα από τα παρακάτω:
α. Στην επιφάνεια εργασίας των Windows, κάντε διπλό κλικ στο εικονίδιο
Κέντρο λειτουργιών HP.
β. Στη γραµµή εργασιών, κάντε κλικ στο Έναρξη, τοποθετήστε το δείκτη στην
επιλογή Προγράµµατα ή Όλα τα προγράµµατα, επιλέξτε HP και, στη
συνέχεια, κάντε κλικ στην επιλογή Κέντρο λειτουργιών HP.
2. Εάν έχετε εγκαταστήσει περισσότερες από µία συσκευές HP, κάντε κλικ στην
καρτέλα που αντιστοιχεί στο σαρωτή. Το Κέντρο λειτουργιών HP εµφανίζει µόνο
τις λειτουργίες, τις ρυθµίσεις και τις επιλογές υποστήριξης που είναι κατάλληλες
για την επιλεγµένη συσκευή HP.
Σάρωση από άλλα προγράµµατα λογισµικού
Μπορείτε να σαρώσετε µια εικόνα απευθείας σε ένα από τα προγράµµατα λογισµικού
που διαθέτετε, αν το πρόγραµµα είναι συµβατό µε TWAIN. Συνήθως, το πρόγραµµα
είναι συµβατό εάν διαθέτει επιλογή µενού, όπως Λήψη, Σάρωση ή Εισαγωγή νέου
αντικειµένου. Εάν δεν είστε σίγουροι εάν το πρόγραµµα είναι συµβατό ή ποια είναι η
επιλογή, ανατρέξτε στην τεκµηρίωση του προγράµµατος αυτού.
Επιλογή τύπου πρωτοτύπου - έγγραφο ή εικόνα
Για τον τύπο πρωτοτύπου έχετε δύο επιλογές: Έγγραφο ή Εικόνα. Ο σαρωτής
βελτιστοποιεί τις ρυθµίσεις βάσει της επιλογής σας. Χρησιµοποιήστε τις παρακάτω
οδηγίες για να προσδιορίσετε τον καλύτερο τύπο πρωτοτύπου για τις ανάγκες σας.
8
Επίπεδος σαρωτής εγγράφων HP Scanjet 8270
