Melissa 246-016: USING YOUR KITCHEN MACHINE
USING YOUR KITCHEN MACHINE: Melissa 246-016
Table of contents
- INTRODUCTION SAFETY MEASURES KEY PRIOR TO FIRST USE
- USING YOUR KITCHEN MACHINE
- CLEANING ENVIRONMENTAL TIPS GUARANTEE TERMS IMPORTER
USING YOUR KITCHEN MACHINE
•
Fit the required tools, and place the ingredients into
the kitchen machine as described below.
•
To start the kitchen machine, turn the on/off button
(7) to the required position (1-9), and to switch it off,
turn it back to position 0. The speed can be
continuously adjusted between 1 and 9. Experiment
to find the most suitable speed, and apply the
following guidelines:
o Always use high speeds for whisking in the mixing
bowl (4) or chopping in the blender (9).
o Use medium speed for kneading.
o Increase the speed if the machine has difficulty
kneading the ingredients.
o If the contents of the mixing bowl may splatter
(e.g. when whisking cream), you should start at a low
speed and increase the speed, if necessary, once
the contents have stiffened slightly.
•
To use the kitchen machine for brief food
preparation, turn the on/off button to position P
(pulse function). The kitchen machine will run at top
speed as long as you hold the button down in that
position, and will stop when you release the button,
which then automatically returns to position 0.
•
When using the blender, you should stop the
machine at regular intervals and check whether the
food has been adequately blended.
Important! If using the kitchen machine to chop
different types of food (e.g. raw meat followed by
vegetables, or egg followed by fruit), you must wash
the parts that come into contact with the food
between each type of food.
Using the blender
•
Remove the safety cover (6) from the upper section.
This is done by turning the lock knob anti-clockwise
so that the arrow is in line with the open padlock
symbol.
•
Fit the blender onto the blender shaft with the handle
at a forward angle towards the right, and turn it
clockwise until it locks into place, and the black line
at the bottom of the blender is level with the black
line on the upper section.
•
Place the food in the blender.
o Fill the blender with a maximum of 1.2 l liquid, but
only up to 600 ml if the liquid is hot.
o Do not place dry substances in the blender before
starting it; add them little by little through the hole in
the lid while the blender is running.
o Spices such as caraway and cloves should not be
chopped in the blender, as they may damage the
plastic parts.
•
Fit the blender lid (10) onto the blender.
•
Start the kitchen machine. Caution! Never press the
release button for the upper section (1) while the
blender is running!
•
If you want to add more ingredients as you go along,
you can remove the cap (11) from the lid by turning it
clockwise and lifting it off. Stop the machine before
removing the cap to avoid splashes. Fit the cap onto
the lid by placing it over the lid so the pins of the cap
fit into the holes in the lid, and turn the cap
clockwise until it clicks into place.
•
If you need to scrape inside or empty the blender,
wait until the blade has stopped completely before
you remove the lid! Use the spatula (13), never your
fingers.
•
Remove the blender, and fit the safety lid. Then turn
the lock knob clockwise until the arrow is in line with
the closed padlock symbol.
•
Important! We do not recommend using the blender
to crush ice cubes or frozen berries.
Using the mixing bowl
•
The mixing bowl
cannot be used
unless the safety
cover or blender
is fitted over the
blender shaft.
•
Press the release
button for the
upper section.
The upper section
tilts up.
•
Fit the mixing bowl on the base (5). You may need to
turn it slightly before it slots into place.
•
Place the food in the mixing bowl.
•
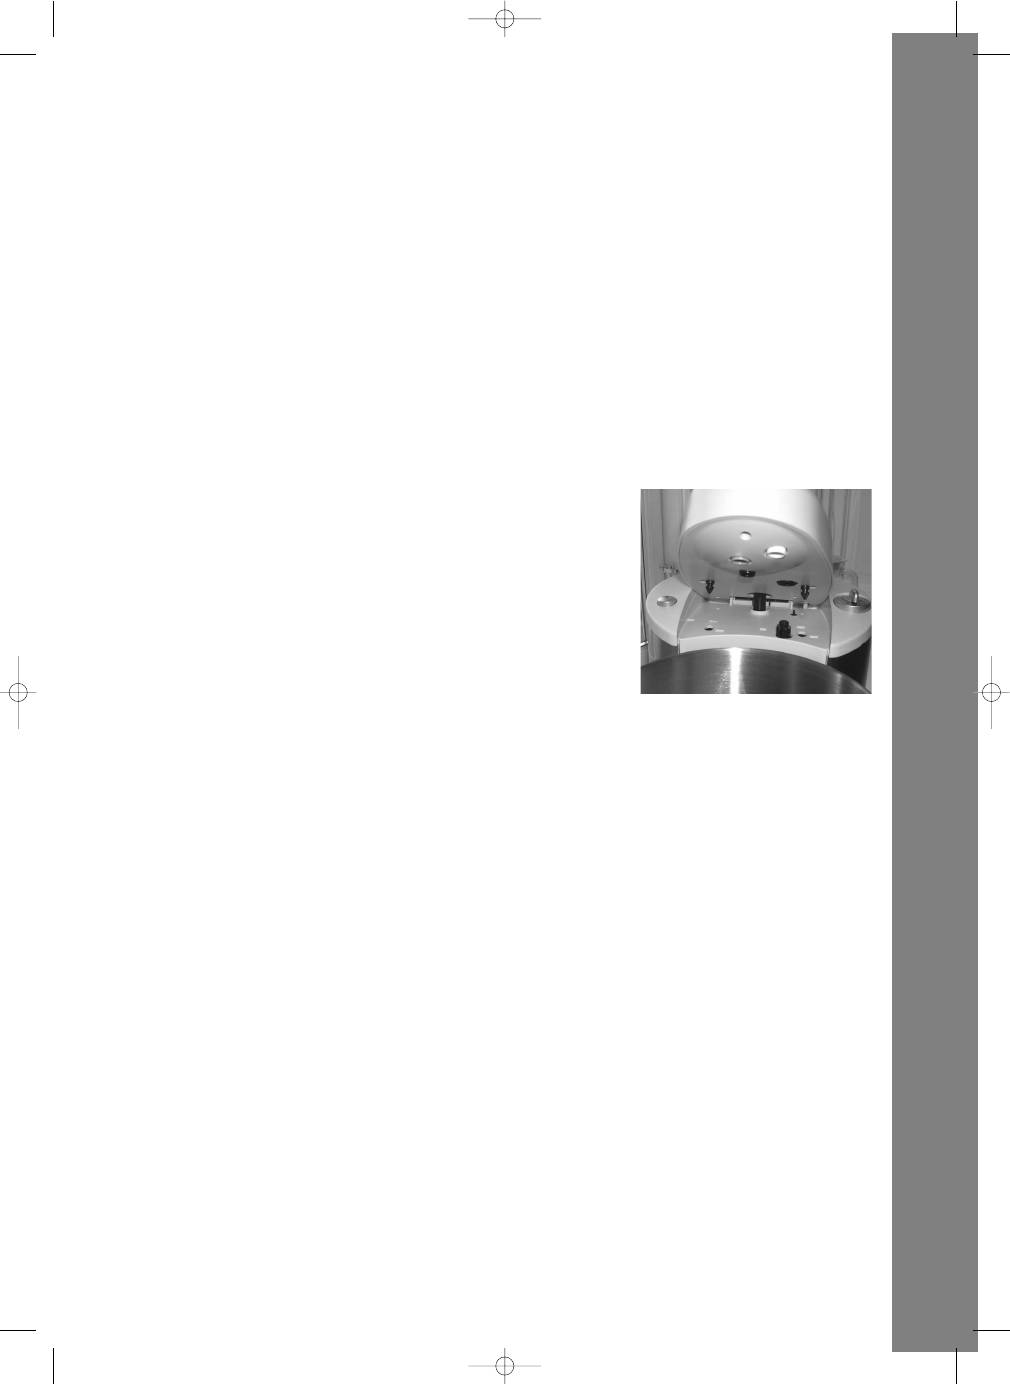
Fit the required whisk (14 or 15) or dough hooks (12)
in the holes on the underside of the upper section.
o The dough hooks are used for heavy dough,
minced meat or other demanding kneading jobs.
o The flat whisk (14) is used to mix lighter types of
dough.
o The round whisk (15) is used for whisking cream,
egg whites, etc.
•
The tools should be fitted into the holes marked with
the same colour as their shafts. The dough hooks,
for example, should be fitted in the black and the
grey hole. Do not fit both whisks at the same time,
and do not fit the dough hooks together with either
of the whisks. You may need to turn the tools slightly
before they slot right into the holes and sit securely.
•
Lower the upper section so it clicks into place.
•
Start the kitchen machine. The tools and mixing
bowl will turn.
•
If you need to scrape inside the mixing bowl, wait
until the tools have stopped completely. Use the
spatula, never your fingers.
15
246016_IM_rev 22/06/05 10:29 Side 15
