Acer P7505: WiFi Display for Windows/Mac OS
WiFi Display for Windows/Mac OS: Acer P7505
29
English
WiFi Display for Windows/Mac OS
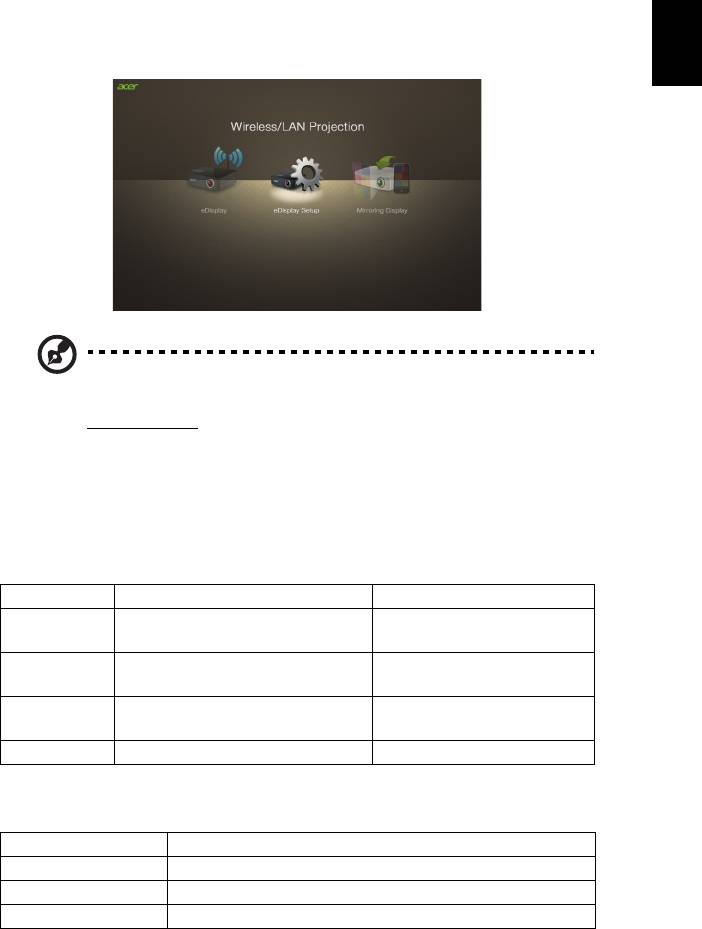
Adjust projector source to LAN/WiFi. Select eDisplay.
NOTE: To utilize the Mirroring Display function (optional), make
sure you have updated the firmware to the latest version from
www.acer.com
, and use the acer USB WiFi adapter, UWA2.
System Requirements:
• Windows
Minimum requirement
Component Requirement Remark
CPU Dual Core Intel Core i 1.6 GHz or
ATOM and Celeron are not
higher
supported
Graphic card Intel, nVIDIA or ATI graphic card
with 64MB VRAM or above
Operating
Windows XP SP3, Vista SP2, Win 7
Not support Starter version
System
SP1 and Win 8
HDD 40MB free space 40MB free space
Recommend system settings
CPU Dual Core Intel Core i5 2.4Ghz
Memory DDR 4GB and above
Graphic card 256MB VRAM or above
Operating System Windows 7 SP1
30
English
• Mac OS
Dual Core Intel Core i 1.4 GHz or higher (PowerPC not
CPU
supported)
Graphic card Intel, nVIDIA or ATI graphic card with 64MB VRAM or above
OS Mac OS X 10.7 and above
WiFi 802.11n
Recommended
Mac Book series and iMac series after E/2011
models
Connect to the projector
Before you begin projecting, you will need to do the following things:
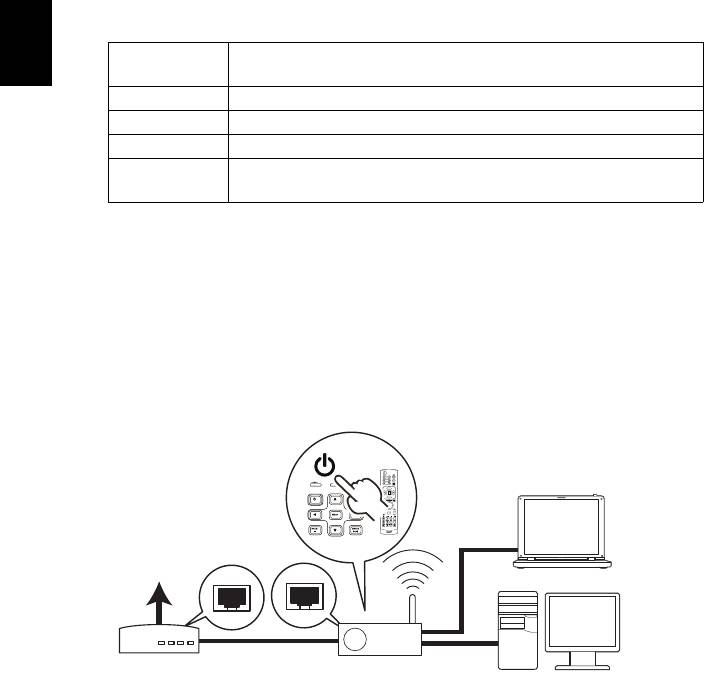
Turn on and connect to the network
Press the Power button on the bundled remote control or the device to turn on
your Acer projector and enable the WLAN. Connecting the projector to the LAN
for a wired connection is also recommended.
Select the source "LAN/WiFi", you will see the WiFi Display welcome screen. You
can set the projector to play 2 kinds of roles: AP Mode (Default) or Client Mode
by going to the Settings > LAN/WiFi menu.
Cable/ADSL
Internet
Modem
APG / AP
DHCP Server
31
English
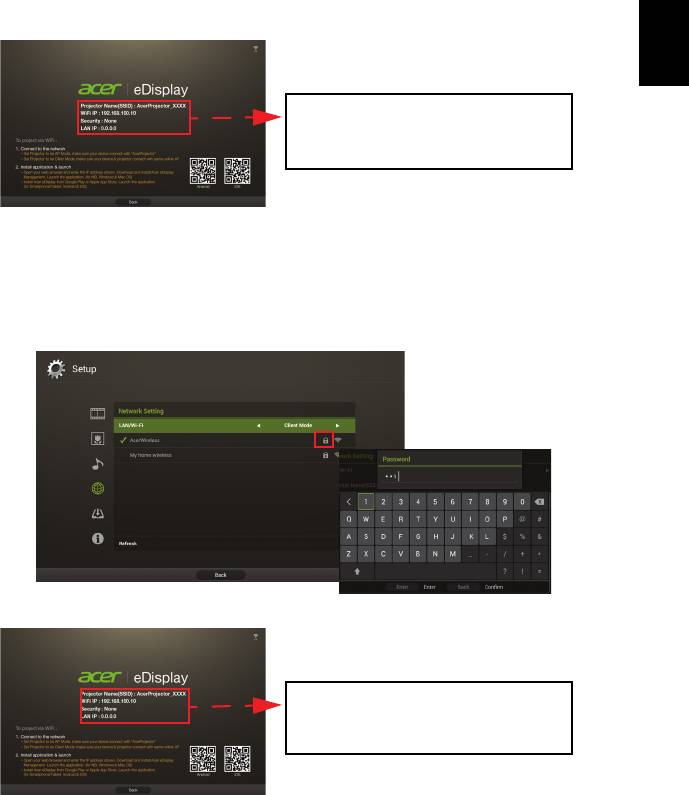
1 Select AP Mode in the LAN/WiFi setting, and the projector plays an AP role.
You can tap "eDisplay" to see below splash screen.
Check Projector ID (if enabled, a 4-digit random number will display on the
upper-left corner of the screen), Projector Name (SSID, default name is
AcerProjector), Server IP (default is 192.168.100.10) and Security (default is
None).
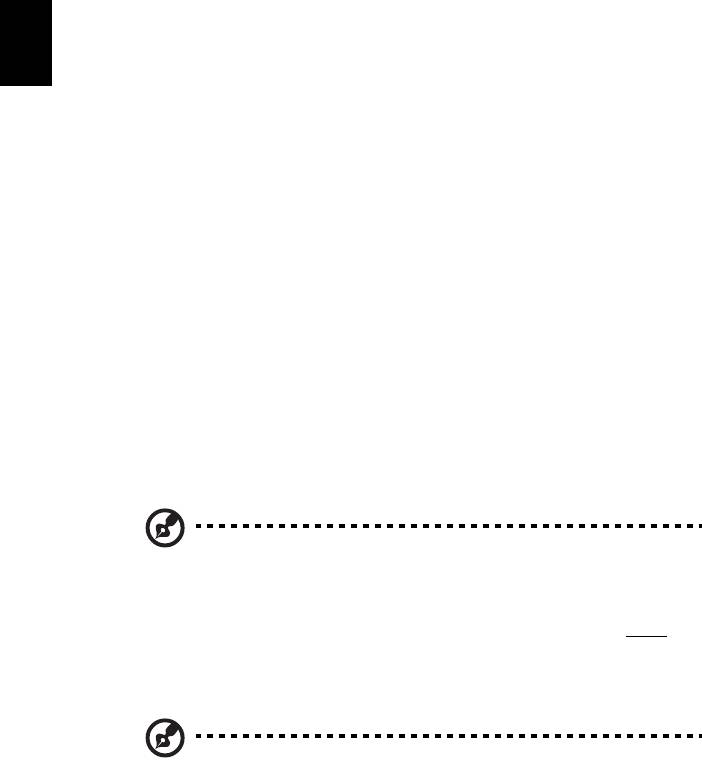
2 Choose Client Mode in the LAN/WiFi setting and you will see below items.
Please connect to an available AP and input password if necessary.
Then splash screen displays with below information.
In Client Mode, you can project the screen from your tablet or smartphone
to the projector by using the application "eDisplay" and access to Internet
as well.
Projector Name(SSID) : AcerProjector001
WiFi IP : 192.168.100.10
Security : None (default)
LAN IP
: 0.0.0.0 (if no LAN cable plugged in)
Connected AP Name(SSID) : Depended
Client IP : Depended
Security : Depended
LAN IP
: 0.0.0.0 (if no LAN cable plugged in)
32
English
Check the information on the splash screen
Take note of the important information on the splash screen. The splash screen
consists of the following items: Projector ID, Acer logo, network information
and instructions.
Projector ID (displayed only when available)
The 4-digit number will not be displayed on the top left of the splash screen
until this option is enabled by the supervisor in the Configure tab under Acer
eDisplay Management. The four digits are given randomly for projector
identification. For more information, please see "Projector ID".
Projector Name (SSID)
The Projector Name and initial Service Set ID (SSID) can be added by the
supervisor on the Configure tab of Acer eDisplay Management. For more
information, please see "Network settings".
Server IP
The Server IP indicates the IP address your projector uses to connect to a wired
or wireless network. It will be 192.168.100.10 for general wireless and wired
connections. The Server IP will be assigned by the wired network with DHCP
enabled. For more information, please see "Network settings".
NOTE: If a RJ-45 cable is not connected, the LAN IP will be 0.0.0.0.
Security: (None, WPA-PSK, WPA2-PSK)
WPA-PSK (WiFi Protected Access - pre-shared key) and WPA2-PSK are other
individual encryption methods with higher level security. The option is enabled
by the supervisor in the Configure tab under Acer eDisplay Management. For
more information, please see "Security settings".
Note: Make sure the LAN/WiFi setting in the projector OSD is On
when using the WiFi Display and DLNA functions.
Follow the instructions on the splash screen to
connect and project
1Check Projector ID, Projector Name (SSID), Server IP and Security option on
the splash screen. Ask your supervisor to set safer key when Security is
enabled.
33
English
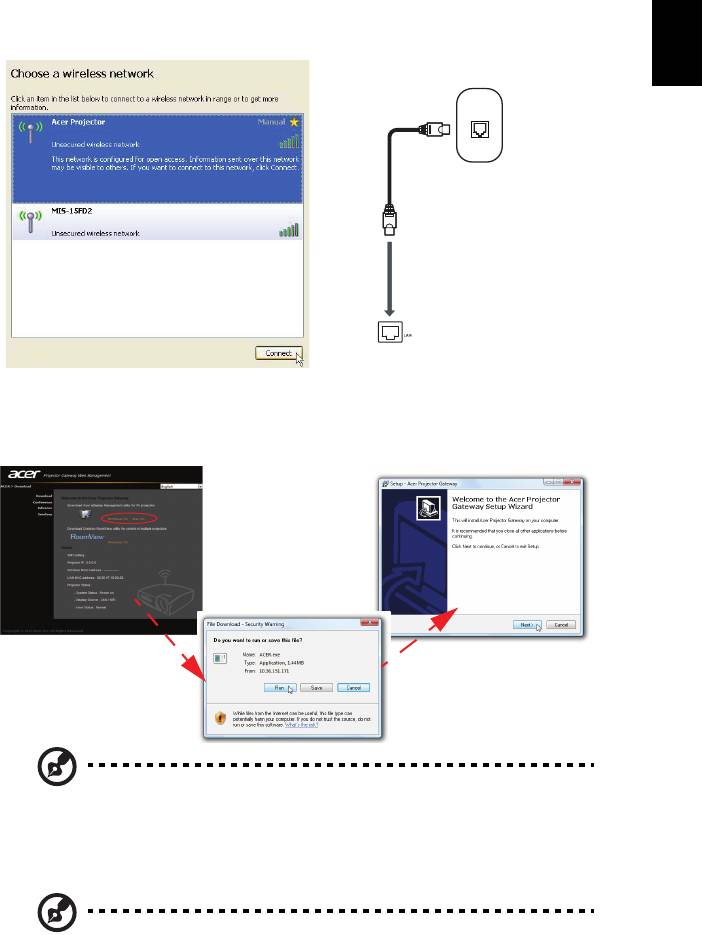
2 Enable your WLAN and select the access point labeled AcerProjector or
AcerProjectorXXXX to connect wirelessly. Connect the projector to your
LAN for a wired connection.
Internet
3 Open the Internet browser (see note). Click on Download Acer eDisplay
Management on the welcome page, and then click Run to launch the
Welcome to the Acer Projector Gateway Setup Wizard. The installation will
proceed automatically. Make sure the installation is complete.
Note: If you do not see the welcome page or cannot connect to
the wired network, please enter the Server IP address (the second
item listed under the Acer logo on the splash screen) into your
browser's address bar.
Note: Ensure that you have administrator-level permission on your
NB/PC so that you can install the software.
34
English
Note: If you receive any security warnings, click OK to proceed
with the installation procedure.
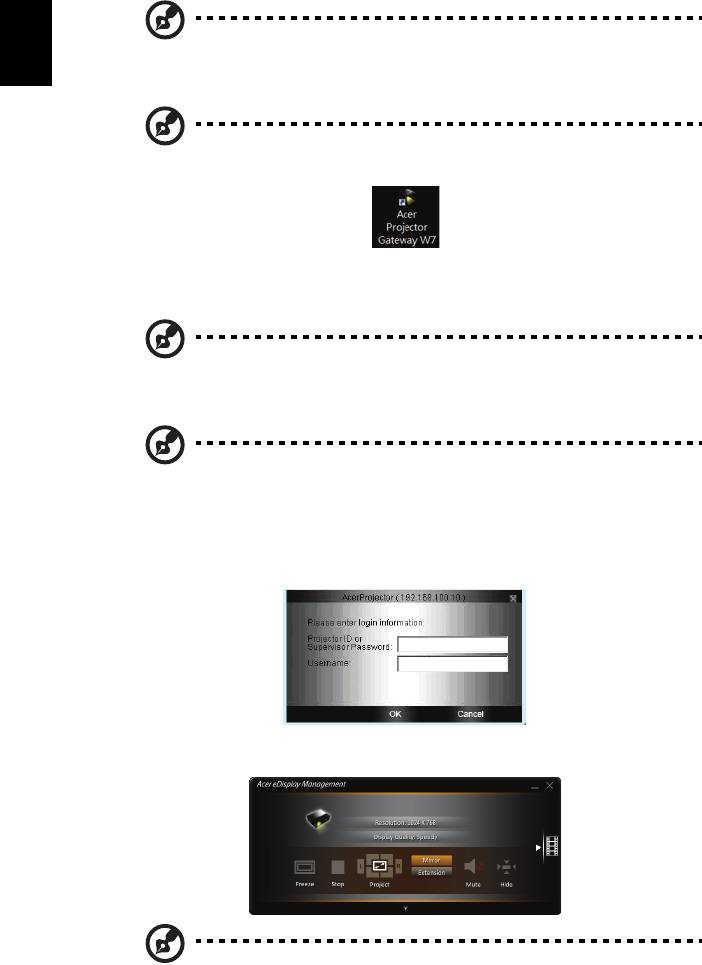
Note: The Acer eDisplay Management shortcut will be created in
desktop when the installation is complete.
4 Acer eDisplay Management will execute automatically and the window
shown below will pop up to search for your Acer projector.
Note: Make sure your personal firewall does not block the Acer
eDisplay Management application.
Note: If your NB/PC cannot allow auto-run function, please
execute AcerProjectorGatewayW7.exe manually.
5 When the search is complete, a login dialog box will pop up to ask you to
enter the User name and Projector ID (if needed) to log in to your acer
Projector.
6 The UI will look as it does below when your source successfully connects
and begins projecting in 1024 x 768 mode.
Note: For the best projection performance, Acer recommends
adjusting your resolution to 1024 x 768.
