Bowers & Wilkins CM Center: инструкция
Раздел: Бытовая, кухонная техника, электроника и оборудование
Тип: Акустика
Инструкция к Акустику Bowers & Wilkins CM Center
4458 CMC OM Cover iss2.qxd 26/9/06 10:14 am Page 3
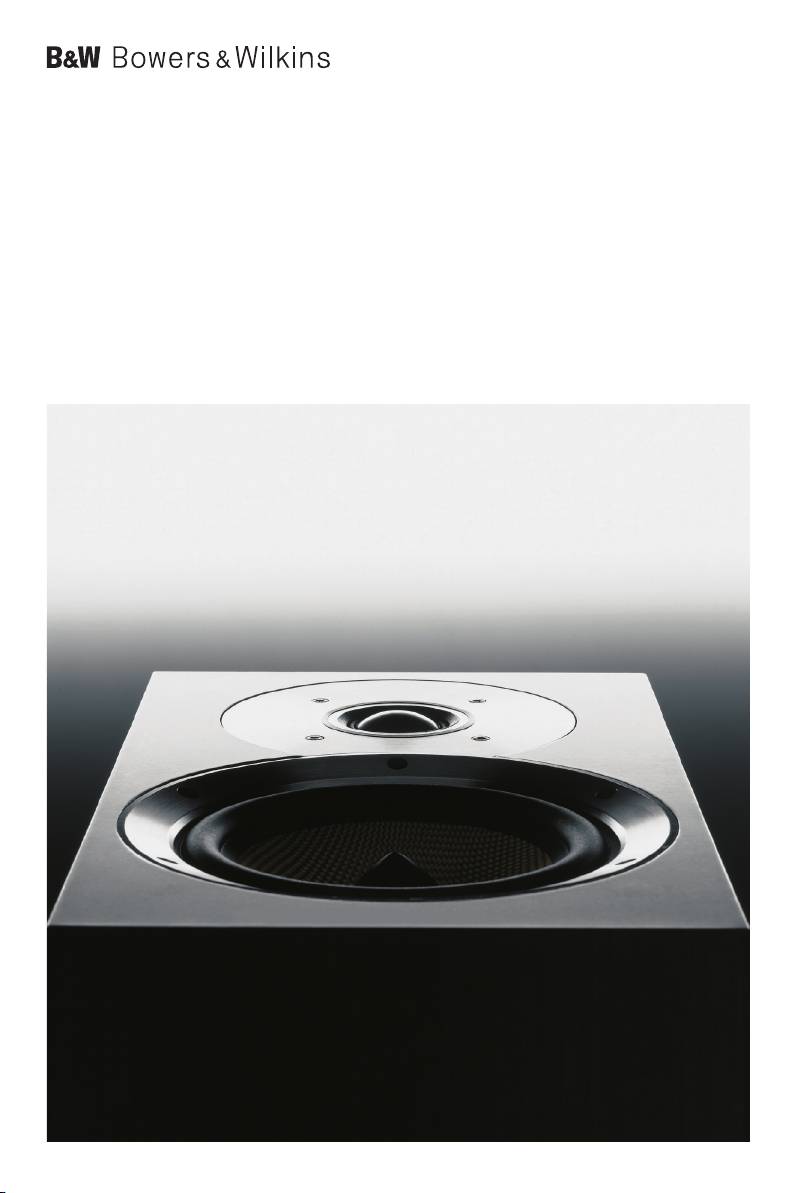
CM Centre
Owner’s Manual
and Warranty
Figur
e 1a
Figure 1b
4458 CMC OM Cover iss2.qxd 26/9/06 10:14 am Page 5
Figure 2
Figure 2
4458 CMC OM Cover iss2.qxd 26/9/06 10:14 am Page 6

Contents
English
Русский
Limited Warranty...........2
Ограниченная
Owner’s Manual............2
гарантия....................24
Руководство по
Français
эксплуатации ............24
Garantie limitée.............4
Manuel d’utilisation.......5
"esky
Záruka .......................27
Deutsch
Návod k pouãití..........27
Garantie .......................7
Bedienungsanleitung.....8
Magyar
Korlátozott garancia ..29
Español
Használati útmutató ...30
Garantía limitada.........10
Manual de
Polski
instrucciones ..............11
Gwarancja .................32
Instrukcja
Português
uÃytkownika ...............32
Garantia limitada.........13
Manual do utilizador....14
.......................34
Italiano
.....................34
Garanzia limitata .........16
Manuale di istruzioni ...16
.......................36
Nederlands
....................37
Garantie .....................18
Handleiding ................19
Ελληνικά
EU Declaration
Περιορισµένη
of conformity ..............39
εγγύηση....................21
Οδηγίεσ Χρήσεωσ ....21
Technical
Specifications .............40

advise where the equipment can be serviced. You
English
can call B&W in the UK or visit our web site to get
the contact details of your local distributor
.
Limited Warranty
To validate your warranty, you will need to produce
this warranty booklet completed and stamped by your
Dear customer
,
dealer on the date of pur
chase. Alternatively, you will
Welcome to B&W.
need the original sales invoice or other proof of
ownership and date of pur
chase.
This pr
oduct has been designed and manufactured to
the highest quality standar
ds. However, if something
does go wrong with this product, B&W Loudspeakers
and its national distributors warrant fr
ee of charge
Owner’s manual
labour (exclusion may apply) and replacement parts in
any country served by an official B&W distributor.
Introduction
This limited warranty is valid for a period of five years
Thank you for choosing B&W. Please read this manual
from the date of purchase or two years for electronics
fully before unpacking and installing the product. It will
including amplified loudspeakers.
help you to optimise its performance. B&W maintains
a network of dedicated distributors in over 60 countries
Terms and Conditions
who will be able to help you should you have any
1 The warranty is limited to the repair of the
problems your dealer cannot resolve.
equipment. Neither transportation, nor any other
costs, nor any risk for removal, transportation and
Environmental Information
installation of products is covered by this warranty.
B&W products are designed to comply with
2 This warranty is only valid for the original owner. It
international directives on the Restriction of
is not transferable.
Hazardous Substances (RoHS) in electrical and
electronic equipment and the disposal of Waste
3 This warranty will not be applicable in cases other
Electrical and Electronic Equipment (WEEE). The
than defects in materials and/or workmanship at
crossed wheelie bin symbol indicates compliance and
the time of purchase and will not be applicable:
that the products must be appropriately recycled or
a. for damages caused by incorrect installation,
processed in accordance with these directives.
connection or packing,
Carton Contents
b. for damages caused by any use other than correct
Check in the carton for:
use described in the user manual, negligence,
modifications, or use of parts that are not made or
1 Foam plug.
authorised by B&W,
4 Self-adhesive rubber pads.
c. for damages caused by faulty or unsuitable
Positioning
ancillary equipment,
If using a projection television with an acoustically
d. for damages caused by accidents, lightning, water,
transparent screen, place the speaker behind the
fire heat, war, public disturbances or any other
centre of the screen. Otherwise position it directly
cause beyond the reasonable control of B&W and
above or below the screen, whichever is closest to ear
its appointed distributors,
level. Align the front of the speaker approximately level
with the screen. The speaker is best used mounted on
e. for products whose serial number has been
a rigid shelf or wall bracket or on a rigid floor stand.
altered, deleted, removed or made illegible,
The B&W FS-700/CM stand is recommended.
f. if repairs or modifications have been executed by
If the speaker is to be placed either directly on top of
an unauthorised person.
a television or in a rack shared with other AV
4 This guarantee complements any national/regional
equipment, fix the 4 self-adhesive pads to the base of
law obligations of dealers or national distributors
the speaker. They provide a degree of vibration
and does not affect your statutory rights as a
isolation. The flat area on top of the television may be
customer.
smaller than the base of the speaker, so position the
feet accordingly.
How to claim repairs under
warranty
Stray Magnetic Fields
Should service be required, please follow the following
The speaker drive units are magnetically shielded such
pr
ocedur
e:
that the stray magnetic field outside the boundaries of
1 If the equipment is being used in the country of
the cabinet, except the front, is too low to cause
purchase, you should contact the B&W authorised
distortion of the television picture in the vast majority
dealer fr
om whom the equipment was pur
chased.
of cases.
2
If the equipment is being used outside the country
Ther
e ar
e, however
, some extr
emely sensitive
of purchase, you should contact the B&W national
televisions – some that even have to be adjusted
distributor in the country of residence, who will
according to their alignment with the earth’s magnetic
field. If you have a problem, first de-magnetise the
2

television set with the speaker in place. Some have a
plug in the port tube as illustrated in Figure 2.
button especially for this purpose. If such featur
e is
If the bass seems uneven with frequency, this will
fitted, switch of
f the set at the mains for 15 minutes
most pr
obably be due to resonance modes in the
and switch on again – again with the speaker in place.
listening room. Even small changes in the position of
Mer
ely putting the set into standby mode will not be
the speakers or the listening position can have a
sufficient.
pr
ofound effect on how these resonances affect the
If you still have a problem, try moving the speaker
sound. Try moving the listening position a little
either forwar
ds or backwards a little to get a more
backwar
ds or forwards. The presence and position of
favourable alignment, or space the speaker further
large pieces of fur
niture can also influence resonant
from the television until the distortion disappears.
modes.
Because of the higher magnetic field in fr
ont of the
If the sound is too bright, incr
easing the amount of
speakers, magnetically sensitive articles (computer
soft furnishing in the room (heavier curtains for
discs, audio and video tapes, swipe cards, etc) should
example) may help balance the sound. Conversely
,
be kept at least 0.2m from the speaker
.
reducing the amount of soft furnishing may help
brighten a dull sound.
Connections
All connections should be made with the equipment
Some rooms suffer from "flutter echoes" – echoes that
switched off.
"bounce" between parallel room boundaries. Flutter
echoes can colour the sound of the speakers in the
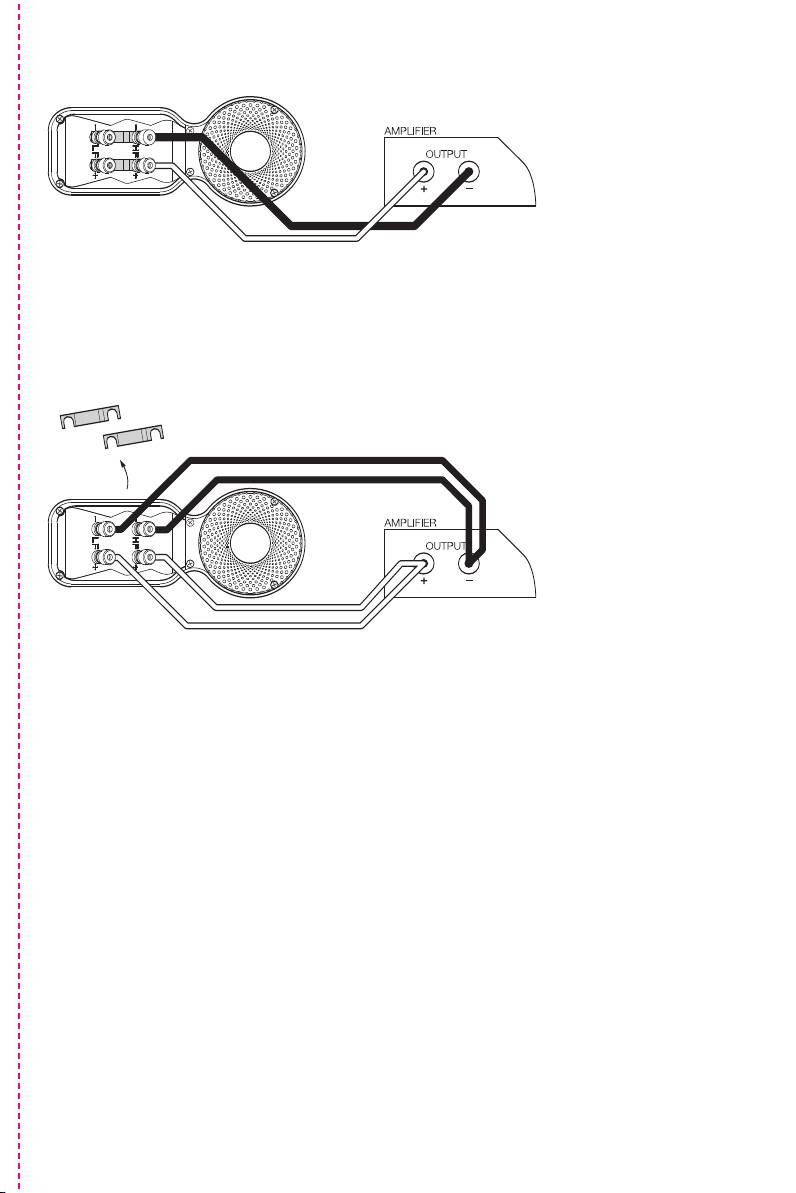
There are 2 linked pairs of terminals on the back of the
room. Test for flutter echoes by standing in the middle
speaker. For conventional connection, the terminal
of the room and clapping your hands. Flutter echoes
links should remain in place (as delivered) and just one
can be reduced by placing irregular shaped items or
pair of terminals connected to the amplifier. For bi-wire
non-reflective surfaces, bookshelves, rugs or pictures
connection, the terminal links should be removed and
for example, on one of the offending walls or floor.
each pair of terminals connected to the amplifier
independently. Bi-wiring can improve the resolution of
Ensure that speaker stands are upright and firm on the
low-level detail. Figures 1a and 1b illustrate
floor. Use carpet piercing spikes if appropriate and
conventional and bi-wire connection.
adjust them to take up any unevenness.
Ensure that the positive terminals on the speaker
Running-in Period
(marked + and coloured red) are connected to the
The performance of the speaker will change subtly
positive output terminal on the amplifier and the
during the initial listening period. If the speaker has
negative terminals on the speaker (marked – and
been stored in a cold environment, the damping
coloured black) are connected to the negative output
compounds and suspension materials of the drive
terminal on the amplifier. Incorrect connection can
units will take some time to recover their correct
result in poor imaging and loss of bass.
mechanical properties. The drive unit suspensions will
Ask your dealer for advice when selecting speaker
also loosen up during the first hours of use. The time
cable. Keep its total impedance below the maximum
taken for the speaker to achieve its intended
recommended in the speaker specification and use a
performance will vary depending on previous storage
low inductance cable to avoid attenuation of high
conditions and how it is used. As a guide, allow up to
frequencies.
a week for the temperature effects to stabilise and
15 hours of average use for the mechanical parts to
Fine Tuning
attain their intended design characteristics.
Before fine tuning, make sure that all the connections
However, longer run-in periods (as long as a month)
in the installation are correct and secure.
have been reported and there is evidence to suggest
For greatest realism in home theatre installations, it is
that this has little to do with the speaker changing and
important to balance the speakers and adjust the
more to do with the listener getting used to the new
acoustic image to match the size of the screen. With
sound. This is especially so with highly revealing
smaller screens, it may be more realistic to have the
speakers such as these, where there may be a
left and right speakers closer together than you might
significant increase in the amount of detail compared
for audio alone.
with what the listener has previously been used to; the
sound may at first appear too "up front" and perhaps
Adjust the levels of the three front speakers to get a
a little hard. After an extended period of time, the
smooth transition of sounds as they pan across the
sound will seem to mellow, but without losing clarity
screen. Adjust the level of the surround speakers so
and detail.
that, except for special effects, your attention is not
unduly attracted to them. Listen from a variety of
Aftercare
probable listening positions when deciding on the
The cabinet surfaces usually only require dusting. If
optimum levels.
you wish to use an aerosol or other cleaner, remove
Moving the speaker further fr
om the wall will generally
the grille first by gently pulling it away from the
r
educe the volume of bass. Conversely, moving the
cabinet. Spray aerosols onto the cleaning cloth, not
speaker closer to the walls will increase the volume of
dir
ectly onto the product. Test a small area first, as
bass. If you want to reduce the volume of bass without
some cleaning products may damage some of the
moving the speaker further fr
om the wall, fit the foam
surfaces. Avoid products that are abrasive, or contain
3
